| Afraid to take off your rear wheel to fix a flat tire (or when taking off both wheels to put a bike in a car trunk)? Worried that you'll mess up the chain or shifting; or that you'll get all greasy? Think you'll never get the rear wheel back on right? We have good news: Anyone can remove and install a rear wheel and it won't affect the shifting or the chain. And if you work carefully, you won't have to touch that greasy drivetrain either. Here's how it's done on any bicycle with derailleurs, from road bikes, to mountain bikes and any 2-wheelers in between. Watch the videos and review the step-by-step photos and text. We're also happy to demonstrate in person, too, so please let us know if you'd like a quick lesson. We've covered all the tips and tricks, so you'll be an expert in no time! |
WHEEL REMOVAL 1, 2, 3!
1. Shift onto the small cog and small chainring.
Shifting the chain down onto the smallest cog on the rear wheel and the smallest chainring on the crankset, creates slack in the chain, which makes rear wheel removal much easier. It also makes wheel installation easier because it gives you an accurate way to line up the wheel (on the smallest cog) so that it slips right into the bicycle frame.
If you're riding and feel the rear tire becoming soft slowly from a puncture, you may have time to make the shifts to the smallest cog and ring as you're slowing to a stop.
If you're not riding, or have already stopped, operate the right shift lever, lift the bike by the seat and pedal by hand and the chain will move down the cogs in the back. Depending on the type of shift lever, you may need to move the lever a couple of times to move the chain onto the smallest cog.
Now, do the same with the left shift lever and pedal by hand and get the chain onto the smallest chainring in front, too.
2. Open the brake
Note: If you're fixing a flat tire, you needn't worry about this step because when the air is all out of the tire it will fit through the brake easily. Also, if your bike has disc brakes, you too can skip this step because you don't need to touch disc brakes to remove wheels.
On most bikes with rim brakes, when you try to remove the wheel, the tire bumps into the brake pads. This is because the brake needs to be adjusted close to the rim, while the fully inflated tire is significantly wider than the rim.
To prevent the tire bumping into the brake pads, you can open sidepull brakes by fully rotating the little lever on the brake upwards (photo a). This little lever is called the brake quick release for the way it lets you quickly release (open) the brake pads. For linear-pulls (also called "direct-pulls," and "V-brakes") lift/pull the end of the "noodle" out of its holder (photo b).
Some sidepulls are opened by pressing a button on the lever. Look for this if there's no lever on the brake.
Open cantilever brakes (these feature a cable that runs over the top of the tire) by lifting the cable end on one side out of its holder.
Workarounds: If you can't find a way to open a brake, you can also let air out of the tire until you can pinch it enough to squeeze it through the brake pads. Another trick - though it requires tools and time - is to remove one brake pad which will often provide sufficient clearance. If not, you can remove both pads. Just be sure to remount them carefully so that they contact the rim squarely and don't touch any part of the tire.
3. Pull the derailleur back and remove the wheel
Now you're ready to remove the wheel. Most bicycle wheels have quick releases holding them in the frame (the red parts in the photo). To open the quick release and loosen the wheel, simply pull and fully open the lever, which is usually on the opposite side of the chain. Don't twist the lever. Just pull it out/away from the frame.
When the quick release is open, the wheel is ready to come out. To remove it, lift the bike by the seat so that gravity will help you. On some bikes the wheel will drop right out at this point (don't let it roll down the road and escape!). Or, if it doesn't fall out on its own, give it a slight blow with your hand and that might knock it right out.
Don't force anything though. If the wheel doesn't come out right away, it's because the derailleur and chain are blocking it. To get them out of the way, keep holding the rear end of your bike off the ground by lifting the bike by the seat. Reach down with your free hand and pull back the derailleur with your hand to get it, and the chain, out of the way.
Now, the wheel should fall out or drop out if you shake the bike. If the chain gets in the way still, just grip the wheel and shake it so that it's free of the chain and fully off the bike (that way you never touch the chain and stay clean).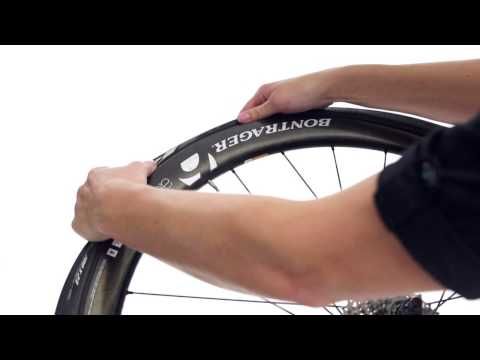 Good job!
Note: To clearly show the desired derailleur position, we locked it in place. You must pull it back by hand when removing wheels because it won't stay in place on its own.
How to put the rear wheel back on
| As you guessed, installing the rear wheel is the same as removal only in the reverse order! You just place the wheel back in the frame being careful to get the chain on the right cog, close the quick release to lock the wheel in, and close the brake so your brakes are working again. The video shows front and rear wheel installation in that order. We go over the step-by-step below and explain some of the things that can go wrong and how to deal with them. It can be frustrating if the wheel won't go in easily. But there's always a mechanical reason. So, look at what you're doing carefully and read our instructions a few times and you should be able to find the problem and address it so that the rear wheels goes right back where it belongs. |
If your wheel won't go in easily, check these things:
Did you get the chain on the cog right? Remember that you shifted the chain onto the smallest rear cog before you removed the wheel. So, you must put the wheel back on by first lining that smallest cog up just right so that the chain is on it. Also, pay attention to how the chain rests on the cog. The chain is a closed loop. The cog should be inside the loop (see the photo in Step 3).
Note: If the wheel has been off the bicycle for some time, it's possible that someone might operate the shift levers. This can move the derailleur so that when you line up the wheel with the smallest cog the wheel won't go into the frame. Instead it bumps into the frame. To remedy this and get the wheel in, simply operate the shift lever as if you're shifting onto the smallest cog.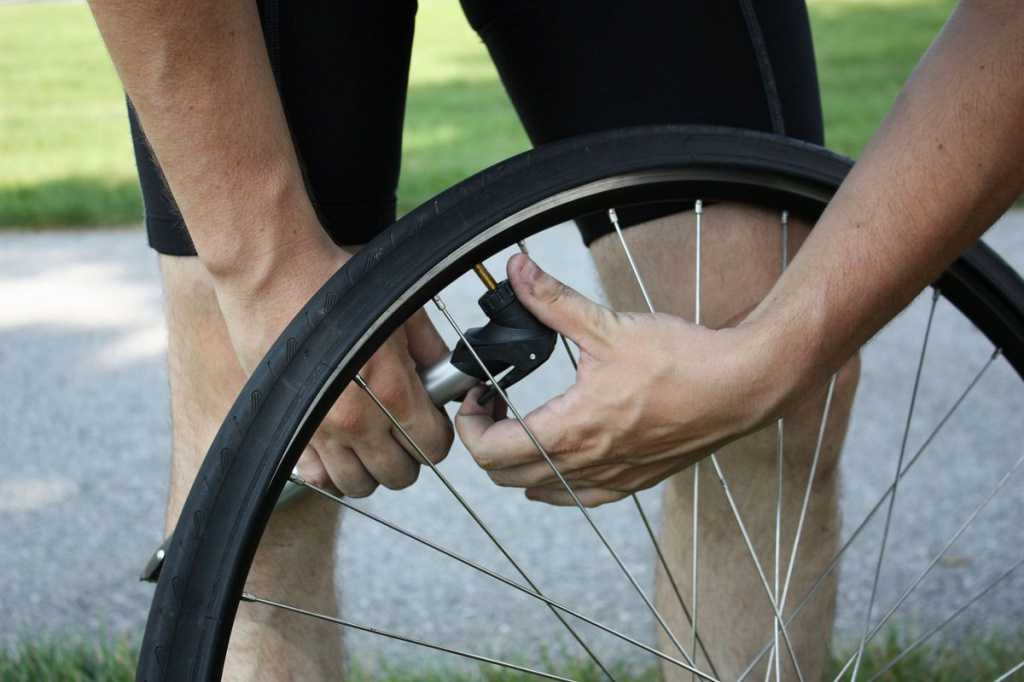 This will move the rear derailleur back where it needs to be so that the wheel will line up right with the frame and go in.
Did the chain come off the derailleur pulley? Another glitch that can prevent the wheel going right into the frame is if the chain happens to come off the top pulley on the derailleur (photo). This is hard to see but it has a similar effect to someone shifting the derailleur into the wrong position and it makes the wheel run into the frame and not want to go in. To fix it, just push the chain back onto the pulley and make sure it stays there as you install the wheel. Tip: Use a stick to push it on or wrap your finger in a rag and you'll stay grease-free.
Is your quick release still open? Sometimes when the wheel is separate from the bike, the quick release lever gets bumped and flipped over and closed. When this happens the wheel won't fit in the frame anymore because the quick release is closed and in the way. Open it and the wheel will fit.
Now that you know how it's done, you may want to practice removing and installing your rear wheel a few times to become expert at it so that when you have to do it, it's a breeze. And, so you can dazzle your friends by helping them remove/install their wheels! Have fun and let us know if you'd like a demo.
Biketoworkday is supported by its audience. When you buy through our links, we may earn an affiliate commission. Learn more
Removing your rear bike wheel is a normal feat for most bikers. However, there are incidents where you need to fix a flat tire, pack it inside your car, or do a regular maintenance check. With a quick-release mechanism, it has become a hassle-free task without any tools required.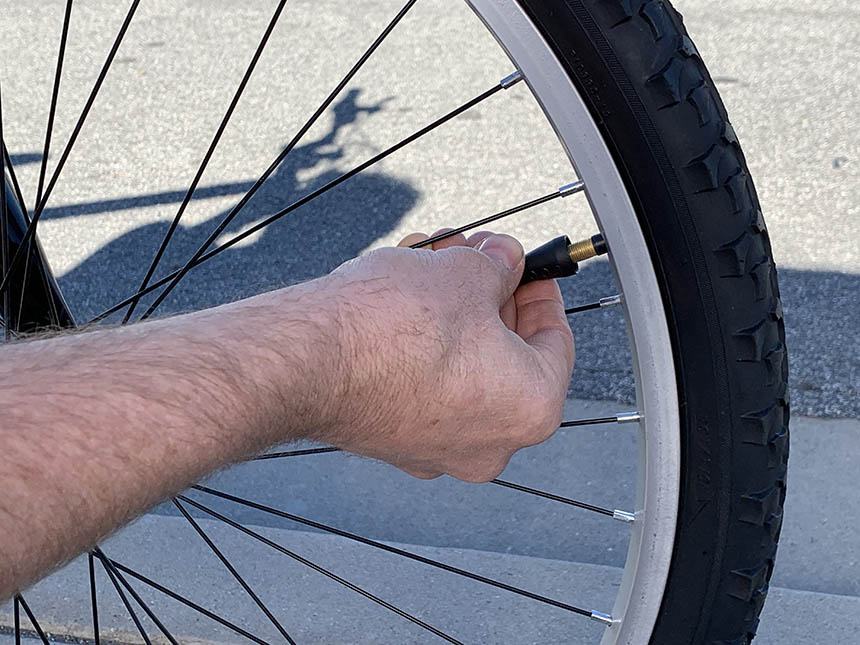
But what if your bike does not come with a quick-release system? Well, here are some ways to learn how to remove rear bike wheel with no quick release. It can be done by properly preparing your bike, disengaging brakes and derailleur gear, and loosening the nuts. Then you can gently remove the bike wheel off the frame. To know better and more clearly how to do those steps, just continue to read our guide.
Table of Contents
First, let’s get to know what a quick-release system is and how it works on a bike.
A quick-release system is a convenient and most effective mechanism to remove a wheel from the bike frame. It utilizes a cam mechanism that allows bike wheels to be removed quickly without requiring any tool. In addition, it is simple to operate and will never give you a hard time removing your wheel.
It has a hub axle with a shaft, a lever that serves as a cam system, and an adjusting nut. The cam mechanism helps to put tension on the shaft and pull the cam and adjust nuts against the dropouts. With this system, you just need to pull the lever to an open position and loosen the nut on the next side. And yes, you can now remove your bike wheel that instant.
But without a quick-release, will removing your bike be more challenging?
Well, removing a rear bike wheel with no quick-release is not next to impossible. It is still feasible to remove a wheel without having to rely on quick-release. You just need to follow these five easy-to-follow steps:
The first but the most important part of achieving an effortless removal of the rear bike wheel with no quick release is preparation. If you have a bike repair stand, you need to put the bike steady on that for convenience when working on the bike. However, if you don’t have a stand, you can lay down your bike.
The position of your bike is required not only to give you convenience but a good angle when removing your rear bike wheel. So, I think it’s better to use a bike repair stand when doing this job.
Second, inspect whether your bike has cantilever brakes (rim brakes) or disc brakes. If your bike has rim brakes, all you need to do is open the breaks. For disc brakes, you need to take extra care so that your bike will not topple over. With this kind of brake, the rear wheel will come out, but it will have the tendency to bend as disc brakes tend to hold your bike wheel more rigidly than rim brakes.
Next, work on the derailleur gear. Most bikes have derailleur gear that you need to disengage when removing a wheel. For this process, you need to select the smallest combination of the ‘sprockets’ and move the pedals while waiting for the chain to drop on the ground.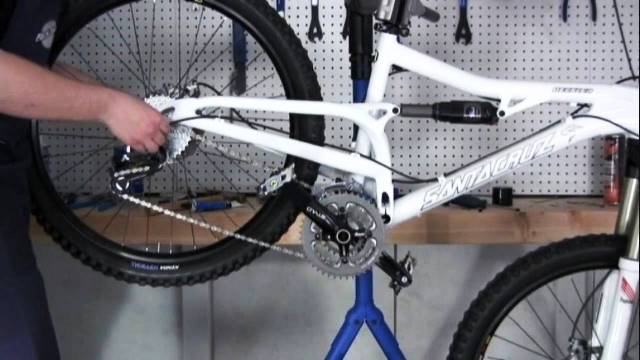 Once the chain dropped, it revealed the nuts holding your rear bike wheel.
This step is important as it will give you a better view of the nuts you need to unscrew. Without loosening the nuts, your rear wheel will keep its hold on the bike frame or body.
Once the nuts are entirely accessible to you, it is now time to loosen them. Your bike wheel usually comes with 15mm nuts on both ends. You need to loosen these nuts to release your wheel from the bike frame.
In this step, you will need a tool to release the nuts. Take note that the tool you need should fit exactly 15mm nuts. Look for a wrench or a spanner that can surround a 15mm nut.
Once you secure a compatible spanner, observe the position of the washers before turning the nuts to their desired degree. Check whether the nut is moving, and slightly move it to a direction where it will be unscrewed. Afterwhich, you can now unscrew the opposing nut, as well.
After the nut is wholly loosened and released, you can now stand behind the bike with your head on its center-line. It will give you a better angle of the wheel before removing it. In this step, the wheel is not entirely removed from the bike.
You need to gradually release the bike frame from the wheel by grabbing the left side of the bike while your right thumb is securing the end of the nut on the other side. Your left hand should give you stability while you are pulling the derailleur body completely from the wheel.
Once the derailleur rotates out from under the rear wheel, you can now lift the body of your bike while the wheel stays on the ground. In this step, you will notice that the wheel is already detached from the bike’s frame, yet the chain is not completely removed. You need to completely unhook the chain with your right hand and lift the bike body with your left.
After lifting, the rear wheel is now fully removed from the bike. Hang your bike after, and inspect the rear wheel that you removed. At this point, you already removed the rear wheel from your bike.
ConclusionNow that you went through the step-by-step process of removing your rear bike wheel without quick release, I hope you find that it is not as challenging as it seems. With this guide, we believe it clearly explains the steps and gives you confidence in doing the job. Furthermore, if you are confused about how much it cost to true a bike wheel, please check out this article for more detailed cost.
Henry Speciale
“Bike commuting should be the trend for the next few years, and it is a convenient and eco-friendly way for us to travel. And we are here to make it a bit less troublesome for people who want to maintain their vehicle for a long time. So, the content I expect to put out here is offering help for bikers who are facing issues with parts of their bikes once in a while. Let’s have fun and protect the environment together!”
Contents
Experienced cyclists welcome self-repair of wheels, and for good reason: it's cheaper, and you'll gain skills.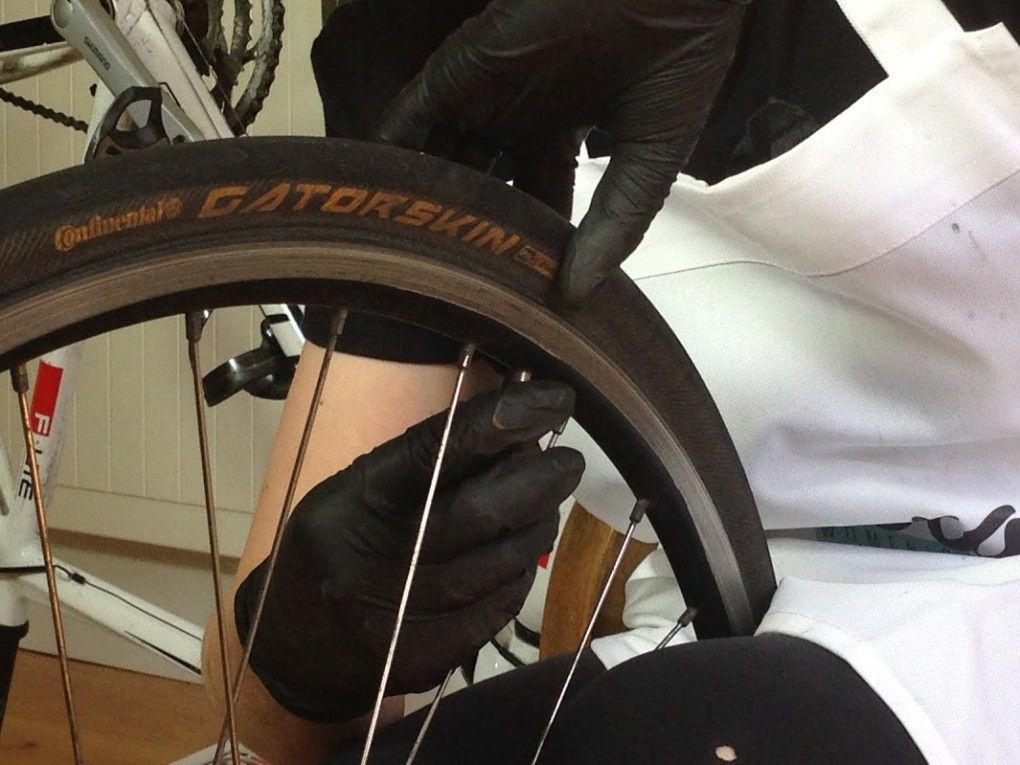 You can also contact a good workshop, where the problem will be solved, perhaps faster, but not free of charge. Moreover, the service is hardly located under the windows of the house, so the bike will have to be dragged, which is not very pleasant. To avoid this, it is better to tinker a little yourself, especially since there is nothing complicated in the wheels of the bike. Today we’ll talk about how to remove the rear wheel from the bike, repair it and assemble it correctly.
It is unlikely that the idea of unscrewing the chassis from the bicycle frame will come to mind, unless, of course, a person specializes in bicycle disassembly. But this is a completely different case. Removal of the rear wheel will be required if the following problems are observed:
This includes the planned replacement of the rear sprockets and chain.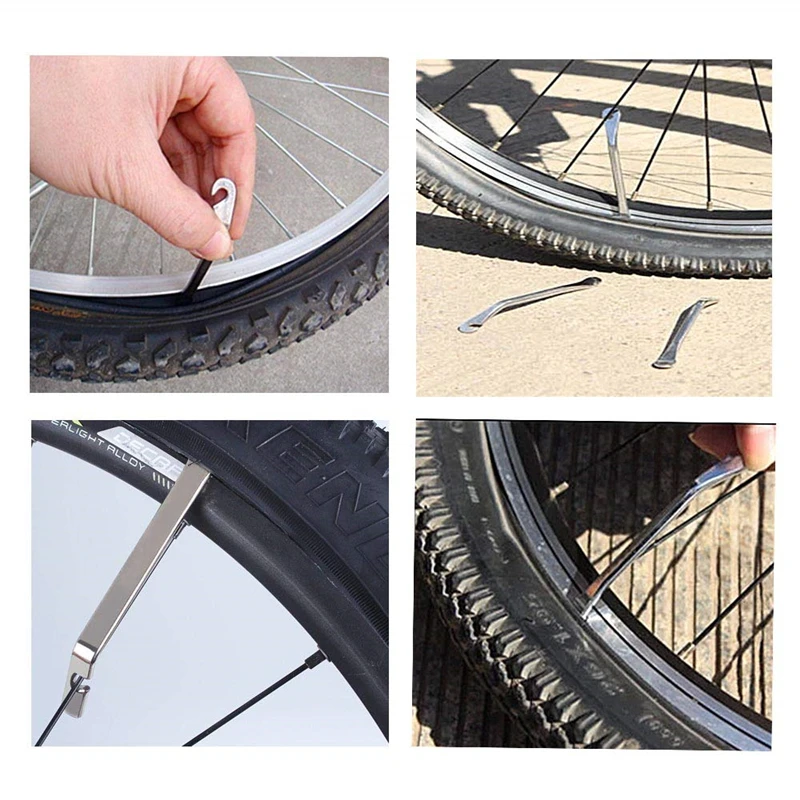
The bike must be turned over and placed on the saddle and handlebars before being removed. Canopies in the form of a mirror, a bell and a lantern are best removed in advance so as not to damage them under the weight of the frame. V-brakes are first released and removed, otherwise they will not allow the wheel to be pulled out freely. With disc models, everything is easier - you can immediately remove the wheel.
It must be said that the removal process itself consists only in turning off the eccentric or unscrewing the fixing nuts from the hub axle, whoever has what. If the mount is an eccentric, simply unscrew the handles and twist the wheel. The nut fastening is loosened with one or two keys.
Usually one wrench of the appropriate size is enough to remove the nuts one by one. If the bushing axle rotates, then the nuts are untwisted simultaneously in different directions. It is recommended to use an open-end wrench or box wrench. The adjustable version is undesirable, since its thick horns “eat up” the corners of the nut due to a loose fit and slip.
To remove the tire and remove the damaged inner tube, the remaining air must be removed: the cap is unscrewed and the wheel is lowered by continuous pressure on the nipple. If there is no air in the tire, which happens more often with punctures, then simply unscrew the cap.
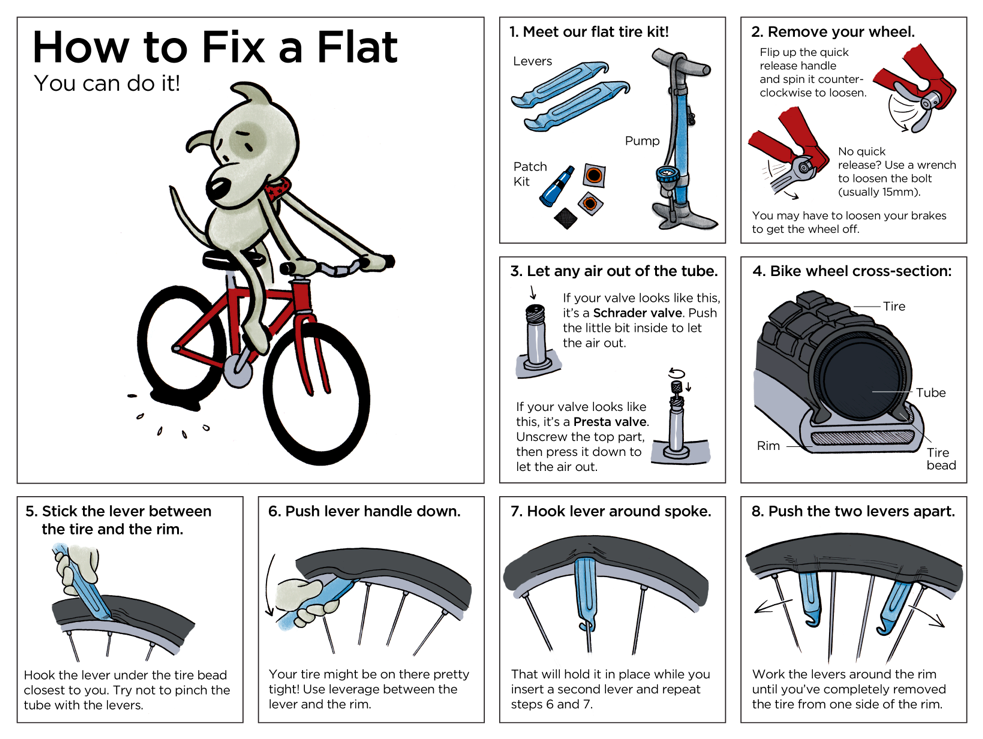
To remove the tire, you will need special pry bars. Of course, the camera can be pry off with an ordinary screwdriver and even with a knife, but it is better to have a professional tool. With the help of fittings, the tire is hooked from the side opposite to the nipple. As soon as it begins to shrink, you need to pry the beads a little further, until there is enough free part of the tire, and it can be safely pulled off the rim.
Removing tires with spatulas
Be very careful not to damage the rim, do not use too much force. When the tire is removed, remove the damaged chamber and install a new one. The nipple is threaded into the hole of the rim, then the chamber is evenly distributed around the circumference.
Attention! The camera must lie flat, without kinks, otherwise you will have to reinstall it. At the bottom of the rim, there must be a flipper that protects from the points of the spokes. If it is torn, you need to install a new one or get by with two layers of thin electrical tape.
From above, the outer part of the tire is put on the rim, this time from the side of the nipple. When installing a tire, the correct direction of the tread pattern must be taken into account. Arrows are usually drawn on the tires, and when the bike is upside down, the direction forward is backwards in the down position. It's easy to go wrong with a speed mountain bike rear wheel, though, thanks to the cassette on the side. After installation, the chamber is inflated.
The hub is one of the parts of a bicycle wheel that requires periodic maintenance. On average, you need to look into it once every 2000 km, in terms of time it is 2-3 months of active driving.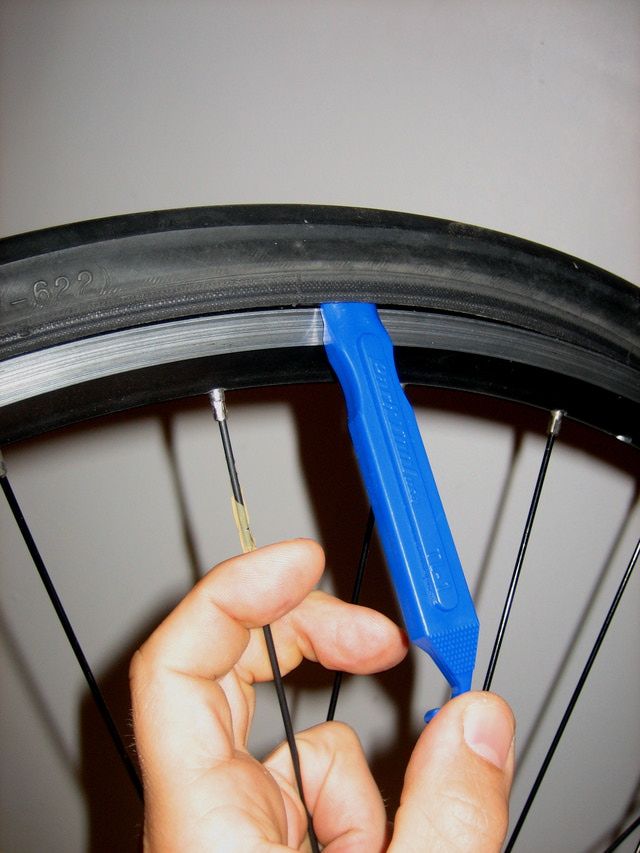 If the wheel is already creaking and there is a decrease in the efficiency of rotation, in other words, the bike rides worse, then it's time to remove it and inspect the hub.
The main problem with the bushing is play and insufficient bearing lubrication. Due to a misfit or increased friction, parts begin to wear out rapidly. If the wheel has not been serviced for a long time, the bearings may even crumble. To gain access to the hub bearings, you will need to temporarily get rid of the rear sprockets.
The reverse gear is removed using a puller and a so-called whip. Removing the cassette is a short process, but it will take a lot of effort to unscrew it from the wheel. Step by step it looks like this:

Removing the sprockets with a puller
Before disassembling the hub, loosen the spoke tension slightly. This can be done using a round key with knocked out holes for different diameters of the spokes. It doesn't need to be loosened much, a quarter of a turn is enough. If the bushing needs to be replaced, then the spokes must be untwisted enough to easily pull it out of gear.
A complete bushing replacement is required if both the axle and the bearings fail. However, often when the bushing is jammed, the axle is in a normal state, it is enough to change the bearings. Often, both will still serve faithfully if they are well lubricated. Proper lubrication will prevent parts from wearing out under dynamic loads.
The bulkhead of the axial part of the wheel is associated with cleaning the axle and bearing balls from dirt. The removed parts must be temporarily placed in a solvent, then allowed to dry, lubricated and reinstalled. Bearings in a skewed position must be adjusted by returning them to a straight position. However, during the backlash, the parts are already faulty, so a replacement would be the best option.
Quality wheel repair is not only disassembly, replacement, lubrication or adjustment. At the last stage, all this chaos must be collected in reverse order. All parts of the sleeve mechanism are placed in the drum and carefully secured with locknuts. The drum is mounted on the spokes, after which they must be tightened by the number of revolutions by which they were loosened.
The spoke nuts are tightened in the opposite direction to the loosening. Here you need to remember the direction of loosening in order to tighten correctly. If the drum dangles, then you need to tighten the spokes harder.
The cassette is put on the hub in the following order:

It remains only to put the rear wheel on the frame. A chain is put on one of the stars, and the wheel is inserted into the grooves of the frame. To top it off, it remains only to tighten the nuts or eccentrics on both sides. After assembly, you need to pedal and see if the chain runs normally on the stars. We turn the bike over and start riding calmly!
Every active cyclist will have to deal with wheel problems in one way or another. Despite the ease of maintenance, the wheel at first can take a lot of time. However, if you remember how important wheels are to a bicycle, it turns out to be not so much. Moreover, with experience, the bulkhead of the wheel will take a few minutes.
Recommended
How to assemble the rear wheel of a speed bike
How to remove sprockets from the rear wheel of a speed bike?
How to change the tube on a bicycle
How to remove the rear wheel and sprockets from a speed bike with disc brakes?
Bicycle is the most popular and convenient means of transportation.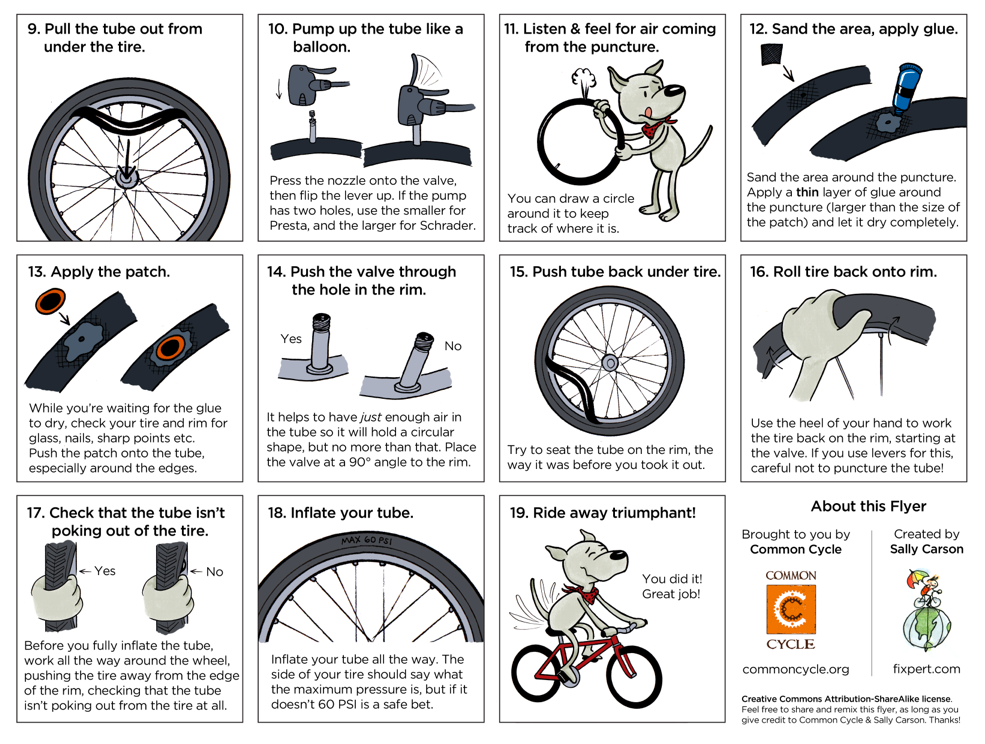 It is convenient and comfortable to move both in the city and off-road. Speed bikes provide a lot of opportunities to feel comfortable even on a rather problematic road. But in order for your pet to continue to please you, he needs appropriate care, and the owner's skills to cope with unforeseen circumstances will also come in handy.
It may be necessary to remove a wheel from a bicycle in various cases. For example, you have a puncture, or tires need to be replaced due to high levels of wear. Yes, there is little that can happen. Someone will say that some kind of puncture does not require large-scale work. There may not be large-scale ones, but they can be performed with skill. The quality of your work will determine how well you can continue to ride. And there is something to think about. Modern high-speed bicycles are produced by various companies and often with their own characteristics. It is on them that you need to pay attention.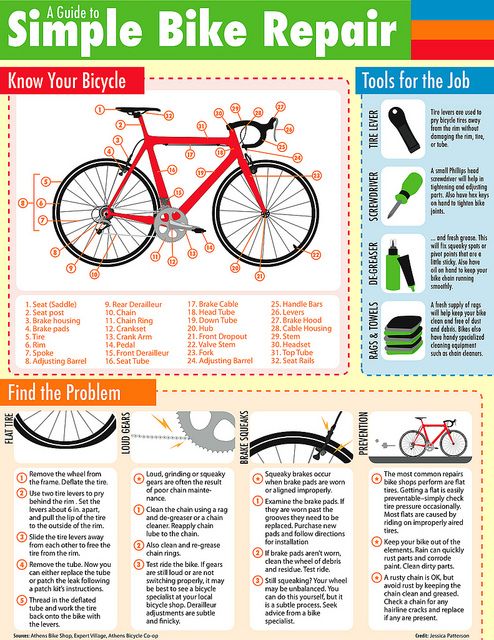
For example, first you need to understand what brake system is on the rear wheel of your bike. This is where all your work will begin. If you own a disc brake, then you should not have any problems. If the rim, then your actions will require a little more effort. If you forget about this kind of brake and do not release it, then you will never be able to remove the wheel, no matter how hard you try. So, we decided on the brake, now we proceed directly to the process of removing the wheel.
First, make your work environment comfortable: turn the bike over on the handlebars and place it so that you have free access to the wheels from different sides. And here we also remember the brakes. If your brake is hydraulic, then such models absolutely do not like to be held upside down. And in the case of replacing the rear wheel, you should pump the brake so that air does not get into it. Do not ignore this point, despite its laboriousness, if you want your brakes to remain as reliable.
Various types of wheel-to-axle attachments. If it is on nuts, then your actions are not complicated and understandable. If the option is an eccentric, then you should not be afraid of complex names. The process is pretty simple. Change chain to smaller sprocket. On the left side of the hub is a lever that controls the eccentric clamp. Unscrew this lever by turning it counterclockwise 180 degrees, but do not turn it around the hub axis. On the right side of the bushing is a special nut, which should be unscrewed a few turns.
Do not release the lever and slowly remove the wheel itself from the fork tip. That's all. Removing the bike wheel was not too difficult.
The wheel has been removed, but the puncture site is not yet accessible. To do this, you need to lower the wheel and disassemble it. If you do everything right, after a short time the camera, which is damaged, will be in your hands. The puncture site should be cleaned and sealed with a special pad that will securely close the damaged area and prevent air from escaping the wheel.