| Afraid to take off your rear wheel to fix a flat tire (or when taking off both wheels to put a bike in a car trunk)? Worried that you'll mess up the chain or shifting; or that you'll get all greasy? Think you'll never get the rear wheel back on right? We have good news: Anyone can remove and install a rear wheel and it won't affect the shifting or the chain. And if you work carefully, you won't have to touch that greasy drivetrain either. Here's how it's done on any bicycle with derailleurs, from road bikes, to mountain bikes and any 2-wheelers in between. Watch the videos and review the step-by-step photos and text. We're also happy to demonstrate in person, too, so please let us know if you'd like a quick lesson. We've covered all the tips and tricks, so you'll be an expert in no time! |
WHEEL REMOVAL 1, 2, 3!
1. Shift onto the small cog and small chainring.
Shifting the chain down onto the smallest cog on the rear wheel and the smallest chainring on the crankset, creates slack in the chain, which makes rear wheel removal much easier. It also makes wheel installation easier because it gives you an accurate way to line up the wheel (on the smallest cog) so that it slips right into the bicycle frame.
If you're riding and feel the rear tire becoming soft slowly from a puncture, you may have time to make the shifts to the smallest cog and ring as you're slowing to a stop.
If you're not riding, or have already stopped, operate the right shift lever, lift the bike by the seat and pedal by hand and the chain will move down the cogs in the back. Depending on the type of shift lever, you may need to move the lever a couple of times to move the chain onto the smallest cog.
Now, do the same with the left shift lever and pedal by hand and get the chain onto the smallest chainring in front, too.
2. Open the brake
Note: If you're fixing a flat tire, you needn't worry about this step because when the air is all out of the tire it will fit through the brake easily. Also, if your bike has disc brakes, you too can skip this step because you don't need to touch disc brakes to remove wheels.
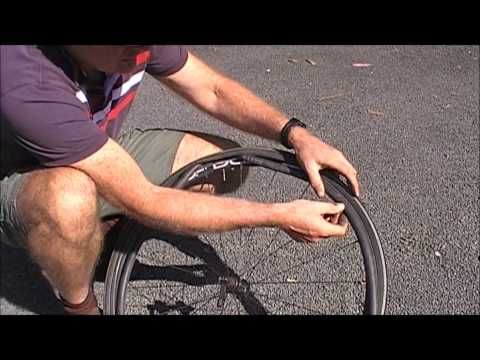
On most bikes with rim brakes, when you try to remove the wheel, the tire bumps into the brake pads. This is because the brake needs to be adjusted close to the rim, while the fully inflated tire is significantly wider than the rim.
To prevent the tire bumping into the brake pads, you can open sidepull brakes by fully rotating the little lever on the brake upwards (photo a). This little lever is called the brake quick release for the way it lets you quickly release (open) the brake pads. For linear-pulls (also called "direct-pulls," and "V-brakes") lift/pull the end of the "noodle" out of its holder (
photo b).
Some sidepulls are opened by pressing a button on the lever. Look for this if there's no lever on the brake.
Open cantilever brakes (these feature a cable that runs over the top of the tire) by lifting the cable end on one side out of its holder.
Workarounds: If you can't find a way to open a brake, you can also let air out of the tire until you can pinch it enough to squeeze it through the brake pads. Another trick - though it requires tools and time - is to remove one brake pad which will often provide sufficient clearance. If not, you can remove both pads. Just be sure to remount them carefully so that they contact the rim squarely and don't touch any part of the tire.
3. Pull the derailleur back and remove the wheel
Now you're ready to remove the wheel. Most bicycle wheels have quick releases holding them in the frame (the red parts in the photo). To open the quick release and loosen the wheel, simply pull and fully open the lever, which is usually on the opposite side of the chain.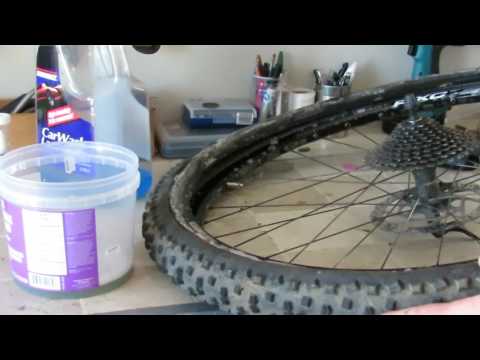 Don't twist the lever. Just pull it out/away from the frame.
When the quick release is open, the wheel is ready to come out. To remove it, lift the bike by the seat so that gravity will help you. On some bikes the wheel will drop right out at this point (don't let it roll down the road and escape!). Or, if it doesn't fall out on its own, give it a slight blow with your hand and that might knock it right out.
Don't force anything though. If the wheel doesn't come out right away, it's because the derailleur and chain are blocking it. To get them out of the way, keep holding the rear end of your bike off the ground by lifting the bike by the seat. Reach down with your free hand and pull back the derailleur with your hand to get it, and the chain, out of the way.
Now, the wheel should fall out or drop out if you shake the bike. If the chain gets in the way still, just grip the wheel and shake it so that it's free of the chain and fully off the bike (that way you never touch the chain and stay clean). Good job!
Note: To clearly show the desired derailleur position, we locked it in place. You must pull it back by hand when removing wheels because it won't stay in place on its own.
How to put the rear wheel back on
| As you guessed, installing the rear wheel is the same as removal only in the reverse order! You just place the wheel back in the frame being careful to get the chain on the right cog, close the quick release to lock the wheel in, and close the brake so your brakes are working again. The video shows front and rear wheel installation in that order. We go over the step-by-step below and explain some of the things that can go wrong and how to deal with them. It can be frustrating if the wheel won't go in easily. But there's always a mechanical reason. So, look at what you're doing carefully and read our instructions a few times and you should be able to find the problem and address it so that the rear wheels goes right back where it belongs. |
If your wheel won't go in easily, check these things:
Did you get the chain on the cog right? Remember that you shifted the chain onto the smallest rear cog before you removed the wheel. So, you must put the wheel back on by first lining that smallest cog up just right so that the chain is on it. Also, pay attention to how the chain rests on the cog. The chain is a closed loop. The cog should be inside the loop (see the photo in Step 3).
Note: If the wheel has been off the bicycle for some time, it's possible that someone might operate the shift levers. This can move the derailleur so that when you line up the wheel with the smallest cog the wheel won't go into the frame. Instead it bumps into the frame. To remedy this and get the wheel in, simply operate the shift lever as if you're shifting onto the smallest cog.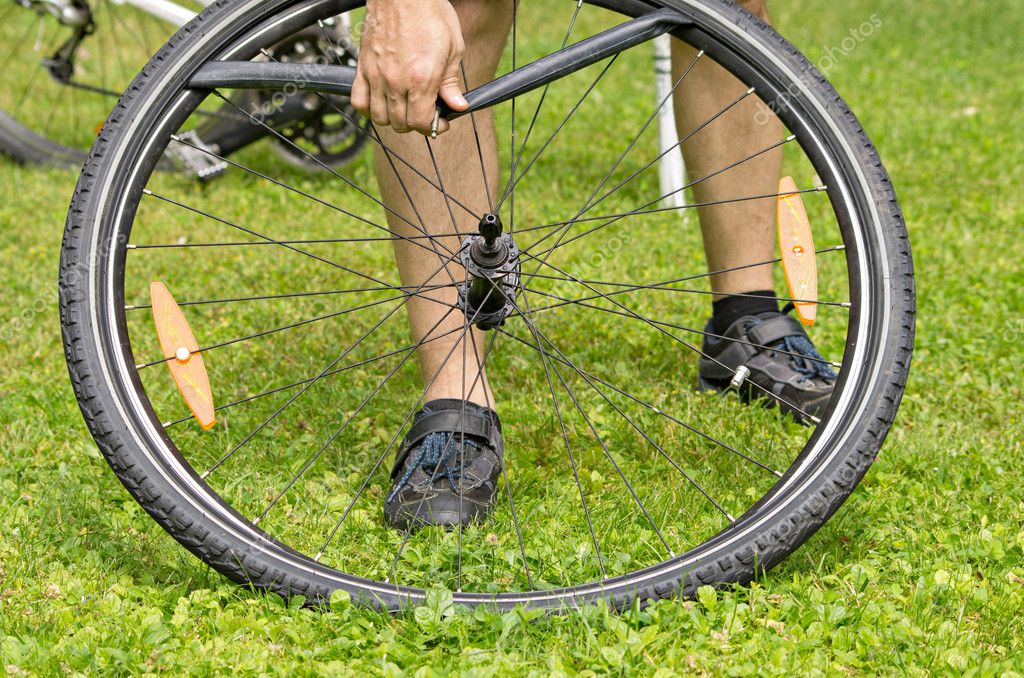 This will move the rear derailleur back where it needs to be so that the wheel will line up right with the frame and go in.
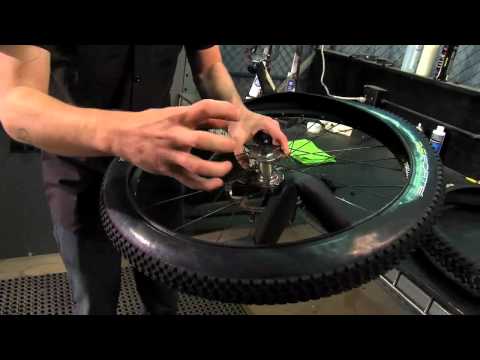
Did the chain come off the derailleur pulley? Another glitch that can prevent the wheel going right into the frame is if the chain happens to come off the top pulley on the derailleur (photo). This is hard to see but it has a similar effect to someone shifting the derailleur into the wrong position and it makes the wheel run into the frame and not want to go in. To fix it, just push the chain back onto the pulley and make sure it stays there as you install the wheel. Tip: Use a stick to push it on or wrap your finger in a rag and you'll stay grease-free.
Is your quick release still open? Sometimes when the wheel is separate from the bike, the quick release lever gets bumped and flipped over and closed. When this happens the wheel won't fit in the frame anymore because the quick release is closed and in the way. Open it and the wheel will fit.
Now that you know how it's done, you may want to practice removing and installing your rear wheel a few times to become expert at it so that when you have to do it, it's a breeze. And, so you can dazzle your friends by helping them remove/install their wheels! Have fun and let us know if you'd like a demo.
Home / Magazine / How to remove your bike's rear wheel
Struggling to remove your rear wheel? Follow these simple steps to remove and reinstall your wheel like a pro!
Written by:Bruce Lin
Published on:
Posted in:Tech
Whether you need to fix a puncture, put your bike on a trainer, or just disassemble your bike, you need to know how to remove your wheels. A lot of riders struggle to remove the rear wheel because it can get caught up in the rear derailleur and chain. Just follow these steps, and you’ll be able to easily remove and reinstall your rear wheel in seconds.
[button]Shop bikes[/button]
Removing the rear wheel while holding the bike up by the saddle.
It's best to remove the rear wheel with your bike in a repair stand. If you don’t have one, it’s still easy to remove the wheel while holding the bike up with one hand. Some people turn the bike upside down, but I find that makes removing rear wheels harder without gravity to assist you.
Shift the rear derailleur into the hardest gear (the smallest cog, outboard on the cassette). This gives you more space and more chain slack to remove the wheel.
If you have a rim brake bike, open the brake caliper’s quick-release lever. This spreads the brake pads so there’s more room for the tire to pass through.
If you have a clutched derailleur (commonly on gravel bikes and mountain bikes with 1x drivetrains), disengage the clutch:
Quick-release axles: Undo the quick release lever and spin the lever counterclockwise, if you need to loosen it further. Typically, just opening the lever will be sufficient.
Thru-axles: Thru-axles are found on newer disc brake bikes. Thru-axles are larger in diameter and thread directly into the frame. Unscrew the thru-axle with an Allen wrench or the integrated handle and remove it completely.
[newsletter}
If your rear wheel doesn't drop out easily, you’ll need to move the rear derailleur out of the way. The rear derailleur is spring-loaded. Once you’ve shifted it into the hardest gear, it’s easy to rotate it backwards so it doesn’t hold the wheel in the dropouts. You can grip the main body of the derailleur and swing the entire derailleur backward.
You want to swing the derailleur back far enough so that the upper pulley wheel is no longer blocking the cassette. Then, the wheel should easily come down and out of the dropouts.
Tip: If you get caught on the chain while removing the wheel, instead of grabbing the chain and getting chain grease on your hands, you can simply push the derailleur cage down and forward to get enough slack to move the chain out of the way.
To reinstall the rear wheel, simply reverse those steps. It should be self-explanatory, but here are a few things to pay attention to:
Once your wheel is in the dropouts, tighten or reinstall the rear axle. If your rear derailleur has a clutch, turn it back on. If you have rim brakes, don’t forget to close the caliper quick-release.
Tip: Confirm your derailleur is still shifted into hardest gear and the chain is sitting on the smallest cog for correct alignment with dropouts.
And you’re done. Practice this procedure a few times, and you’ll be taking your rear wheel on and off like a pro mechanic!
[button]Shop bikes[/button]
Please enable JavaScript to view the comments powered by Disqus.
 .. Okay
 Tech
Tech
Tech
Tech
Tech
Tech
 .. Yep, All of 'Em
 Tech
Tech
Tech
Tech
Tech
Tech
$5,149. 99
99
$2,149.99
Added 2 days ago $5,599.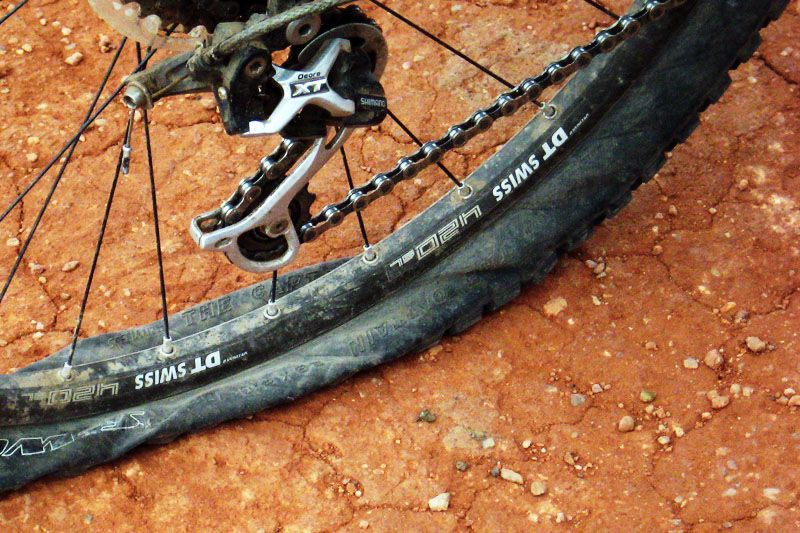 99
99
$2,749.99
Added 3 days ago $3,699.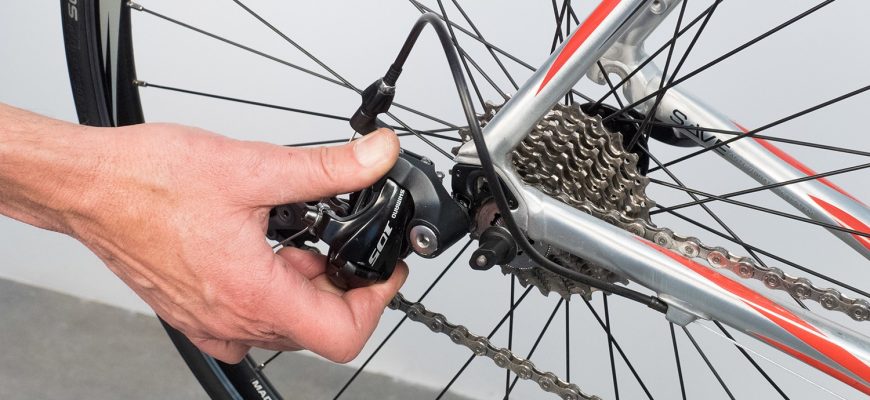 99
99
$4,499.99
Added 4 days ago $4,599. 99
99
$4,999.99
Added 9 days ago Throughout the life of a bicycle, you will need to clean, lubricate and possibly repair various parts. If you ride often and like to diversify the route, then eventually one or both of your tires will wear out, and the chamber will be blown out more than once due to a puncture. Therefore, it is important to be able to repair the cut, as well as replace the tire and tube.
It won't take you long to learn. The main thing is to carefully and consistently follow the steps below. Trust me, changing tires or tubes is easy.
1. Turn bike upside down with wheels .
You can mount the bike in a dedicated repair stand or hang it with the frame securely fixed. The wheels should turn freely without any resistance.
It can be secured with nuts on an axle that needs to be loosened (usually a cheaper version of the bike).
Depending on the make of your bike, the wheel can also be secured with a quick-release lever (eccentric) that needs to be released. Also, there are mounting options directly on the axle, when the axle parts (hex bolts) are directly tightened and thus fix the wheel in the feathers. As a rule, such axles are quite wide, hollow inside and are installed on more expensive models of bicycles (most often mountain bikes).
If you have V-brakes (rim brakes), open the mechanism by releasing the springs. You can also loosen the cable, but you need to remember to fix it after reinstalling the wheel. This is done so that you can remove the wheel, since (when the brakes are working) the pads will hold the tire.
If you have disc brakes, you can remove the wheel without any additional steps.
3. Remove tire from the wheel rim.
Locate the nipple and select a location on the opposite side of the wheel. Using the bead (a tire removal tool that looks like a spoon, spatula), separate the tire from the wheel rim and fix the bead on the spoke. Repeat the procedure with the second bead at a distance of about 2.5 cm from the first. Continue doing this around the wheel until you can completely remove the tire.
Please note that if you need to seal or replace the inner tube, it is not necessary to completely remove the tire. It is enough to disassemble one side to get the camera. This will make the next process easier.
4. Check and clean the inside of the tire for debris.
Look for anything that could cause cuts or punctures. Specifically, spikes, glass shards, and metal shards. After all, often what cut the tire and / or pierced the chamber remains in the tire and can ruin it again.
5. Find holes or cuts in the tire and tube .
To find punctures, you can inflate and submerge the tube in water, watching carefully for air bubbles. You can also do this without water, but only if the puncture is large enough.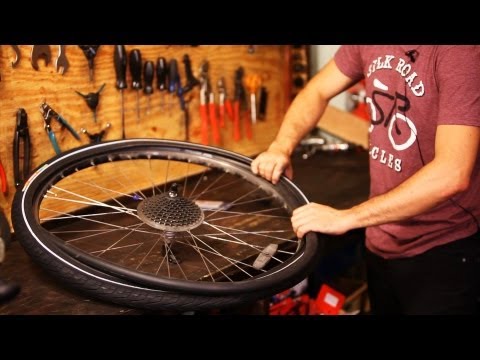 Otherwise, you simply will not hear where the air is leaking from.
If you clearly see a hole or a wide cut on these parts, then you will most likely need to purchase a new tire and tube. It will be possible to glue only with slight damage to the material. During a puncture, the tire does not need to be sealed at all, since it itself tends to shrink and not expand the hole.
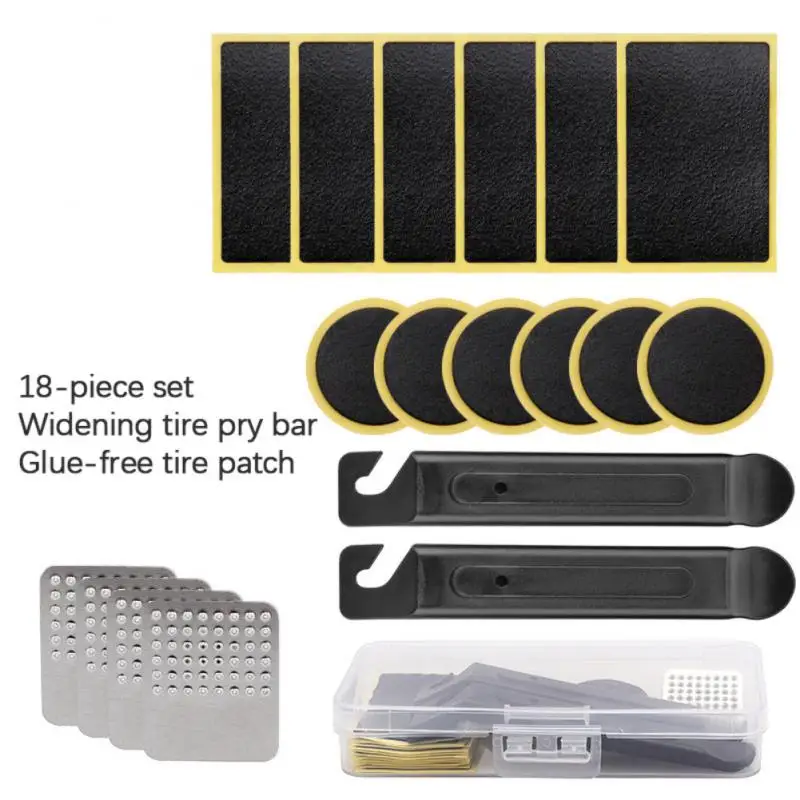
6. For , glue the holes with repair kit .
Take a piece of sandpaper and sand the area around the puncture. It is also desirable to degrease it for better adhesion to the patch. Take a patch and, using glue, patch the puncture. Firmly press the patch and its edges, smooth with your fingers (the back of the screwdriver will work too).
7. Wait a few minutes for the adhesive to set .
Insert the tube into the wheel and inflate to the maximum possible pressure (the value is indicated on the tire). Thus, the tire will press the patch to the chamber, and the patch itself will finally stick to the stretched surface of the chamber, which is what we need. If this is not done, then the patch will dry to the tightened surface of the chamber and may peel off when inflated. When installing the camera, do not forget that it should “lie down” without kinks and twists.
8. W Replace tire if necessary.
If your goal is to replace a tire, then take apart the old one, remove it and take a new one. Insert one side of the new tire into the rim, and bolster the other side with the beads. Often, when installing a new tire, this action can be easily performed with your fingers, without the help of any tools. Make sure your tire fits into the rim, doesn't come out anywhere, and is evenly distributed. Pump up the wheel.
9. Insert the wheel into the slots on the bike fork or stays.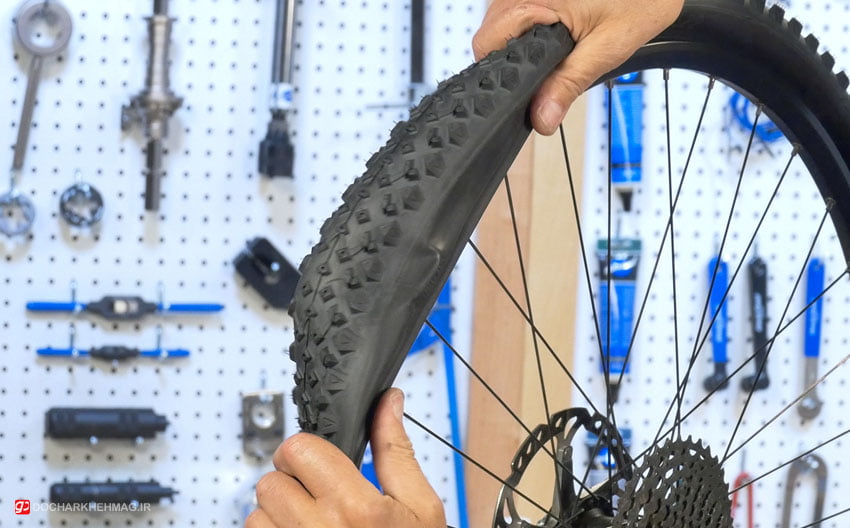
Fasten the axle. Don't forget to fix the brakes!
That's it. We remind you that you can change tubes and tires in the workshop of the Goldenbike store. Stay with us!
Contents
You can remove the tire from your bike yourself. But in order to cope with this matter without problems, you need to know the sequence of actions for dismantling parts. It will also be useful to familiarize yourself with the list of necessary tools and understand in which cases the tire must be removed.
Under certain circumstances it is necessary to remove the tire from the bicycle rim. Sometimes this part needs to be replaced.
There are several reasons:
Removing a tire from a disc has its own algorithm of actions. It will require a few special tools. It is important to remember: it is undesirable to press too hard on the sidewall of the tire when removing. Also, the tool should be free of burrs and sharp edges.
The dismantling steps must be followed strictly, accurately and carefully.
To do this, you will need the following tools:
 Reminds me of plates made of plastic. Equipped with hooks on the sides. Needed to hold the edges of the tire when it is just beginning to be dismantled. Helps to remove the part without much effort.
 Once you have the necessary tools ready, you can move on to removing the tire from the rim.
Work steps:
 You can buy a special "shovel". She looks like a shoe.
 Anyone can pierce the camera while driving. And such an unpleasant situation, requiring the removal of a tire, usually takes you by surprise. Often a cyclist does not have the necessary tools with him. To replace a tire, you need to have at least a spare set.
Procedure:

Comfortable riding requires optimal tire inflation. In case of lack of air in the tires while riding, the cyclist has to exert more effort.
Tire life is reduced. If the amount of air exceeds the optimal threshold, grip becomes worse. And, as a result, a tough ride and an increase in the possibility of a camera puncture.
In order to avoid punctures, abrasions and other problems, experts advise to adhere to the rules for the operation of bicycle tires.
General recommendations: