Learning how to remove a Presta valve core without a tool can be very useful especially when you need to replace the tubeless sealant, or seat an old tyre onto an old rim.
Riding bikes can require quite a few specialized tools, however, and it is quite easy to get caught out. There are a number of shortcuts and tricks of the trade that can be used in order to get around these situations.
So how do you remove a Presta valve core without the correct tool and how easy is it to do?
Table Of Contents
Most people have a pair of pliers kicking around their home somewhere. This solution is not ideal as it can damage the head of the valve, but if you have nothing else it will do the job. Simply hold the head of the valve with the pliers and twist anti-clockwise to loosen and clockwise to tighten.
Most people that ride bikes should own a chain tool, and if you don’t it might be worth considering one. Simply slot the head of the Presta valve core into the end of the chain tool, and twist anti-clockwise to loosen and clockwise to tighten.
What Is A Presta Valve?The Presta valve is a commonly used valve found on bike inner tubes. The valve is the system by which air is pumped into the tire.
The valve is made up of an inner body and an outer stem.
The Presta valve was invented by the Frenchman Etienne Sclaverand and is also known as the Sclaverand valve or the French valve. The name Presta comes from the Latin word for fast or hurry.
The outer valve of the Presta is narrower in diameter than the other most common valve used on tires – the Schrader valve.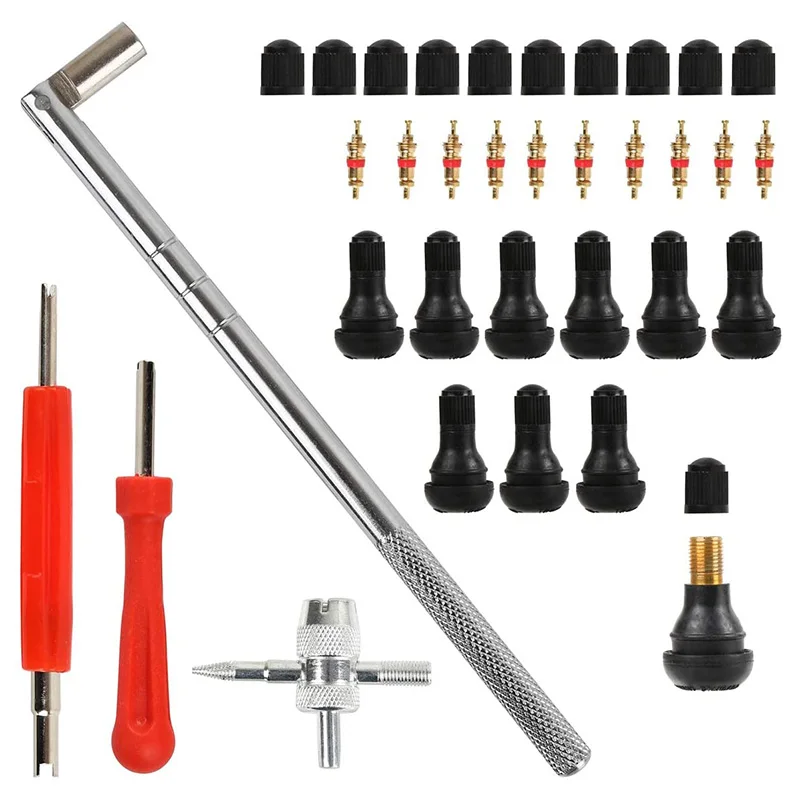 It is 6mm compared with the Schrader valve’s 8mm. The length is variable depending on what they are being used for.
The narrower diameter means that they need smaller holes on the bike rim. This means that they work better with narrow wheels without sacrificing strength. However, the narrower size also means that inner tubes equipped with Presta and Schrader valves are not interchangeable.
Are All Presta Valve Cores Removable?All Schrader valves are removable, but not all Presta valve cores are removable. However most Presta valve cores are removable.
How To Tell If Your Presta Valve Core Is RemovableHave a look at the valve stem. If you see that the valve is made up of two parts then that means it is removable. If the core is removable, that means that it can be used for a tubeless setup. Sealant can be added through the valve.
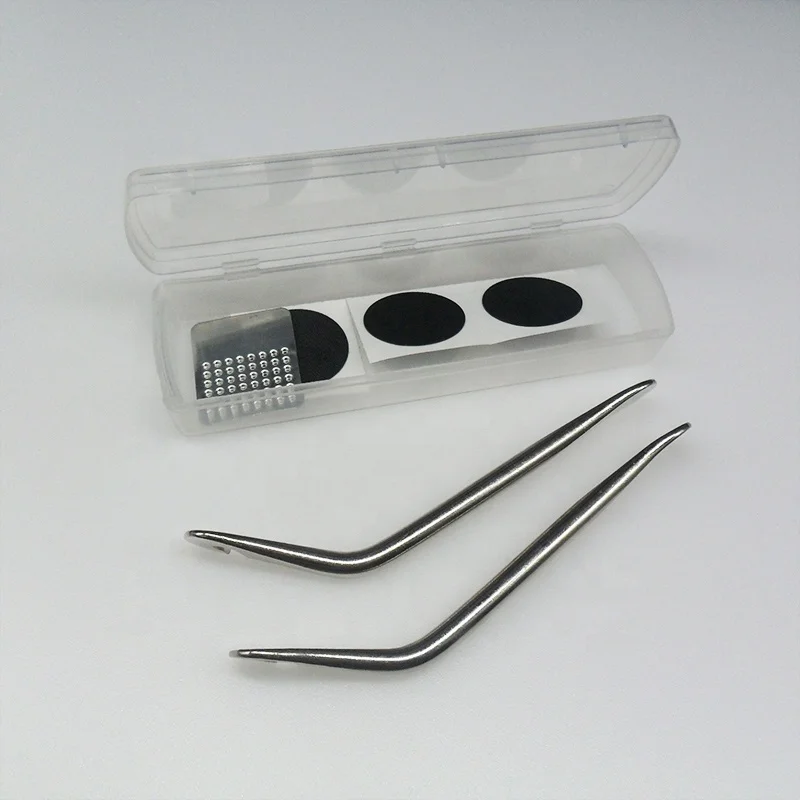
What Is A Presta Valve Tool?A number of different companies make cheap valve tools that work with both Presta and Schrader valves.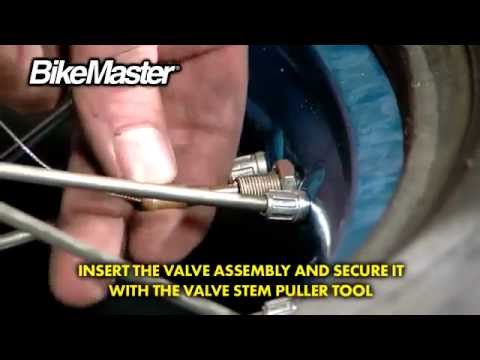 They attach to the valve and allow you to remove the core.
These tools cost about £10. They are easily available and small enough to take with you anywhere.
What Is A Presta Valve Tool? Is Presta Better Than Schrader?There really is no answer about which one of them is better or worse. Both of them have their own advantages and disadvantages. Some people have particular preferences, while other people are more prone to simply use whatever is available.
Schrader valves are more common, and sturdier and their core is much easier to remove.
Presta valves do not have a valve spring, which makes them easier to pump. They are also much better on thinner rims due to their smaller size, which makes them well suited for road bikes.
Presta valves are also lighter, although the benefit of the lower weight is fairly negligible, and they can handle pressure better. They are also better at staying unclogged, which makes them well suited for mountain biking.
Presta valves are fairly robust. As with all things, they can break, but they are not known for being excessively brittle. In fact, if anything, they have a reputation for sturdiness. Just ensure you don’t bend the valve when removing the Presta valve core or it will break!
Can You Put Air Into A Tire That Has A Broken Valve Stem?No, however, It is fairly easy and inexpensive to replace the valve core. Simply remove the broken valve core and screw in a new core, being careful not to strip the thread or damage the rim tape.
Can Presta Valves Be Lengthened?Presta valves can be lengthened if needed using extenders. This might be necessary with deeper rims, such as those on aerodynamic race bikes.
If you are looking to get extenders for your valve, it is worth noting that there are different extenders for valves with removable cores and those without, so make sure that you check which one you need and buy the correct one.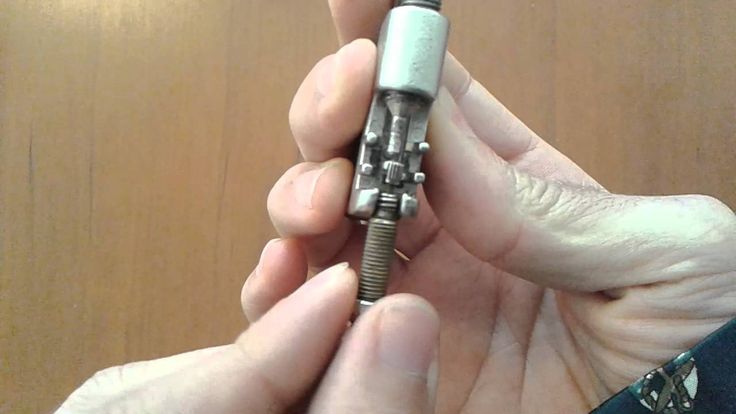
If you find that you need to remove a Presta valve core and you do not have the correct tool to hand then there is no need to worry.
A number of tools that you are likely to have lying around can be used to remove the core.
Pliers, such as needle-nosed pliers, can be used to perform the job. Vice grips will also work. However, the best solution to remove a Presta valve core without the tool is a chain tool or a number 11 spoke key.
If you do not have these to hand, then a little bit of ingenuity with whatever you have to hand can work wonders.
How to Remove a Presta Valve Core and Replace Tubeless Sealant?To start you will need to remove the Presta valve core and then remove the tire. You can see our full tutorial here: How To Fit Tubeless Mountain Bike Tyres | 9 Simple Steps
See our other tutorials here:
Written by Makmudul in Bike Accessories
Sharing is caring!
First, check that the valve core is not already loose. If it is, simply unscrew it by hand. If it’s tight, then you’ll need a valve core removal tool.
To remove the valve core with a tool, first, find the right size tool for your valve. Insert the tool into the valve and turn it counterclockwise. The valve core should come out easily. If it’s stuck, try using a little more force.
Once the valve core is out, you can proceed to remove the tire. Simply unscrew the cap at the top of the valve and pull the tire off.
If you have ever had a slow leak in your car tire, you may have had to remove the valve core in order to get the tire to hold air. Although it may seem like a difficult task, removing a valve core is actually quite simple. This is a step-to-step guide on how can solve it:

Assuming you have the right tools for the job, it’s actually not that difficult to replace a tire valve core. This is a step-to-step guide on how can solve it:
That’s it! Replacing a tire valve core is a pretty simple process. Just make sure you have the right tools and take your time, and you’ll be fine.
If you don’t have a valve core removal tool, there’s no need to worry. You can easily remove the valve core without one.
Start by unscrewing the cap from the valve stem. Then, use a pair of needle nose pliers to grip the valve core and unscrew it from the stem. Once the valve core is removed, you can proceed to inflate or deflate the tire as needed.
When you’re finished, simply screw the valve core back into the stem and screw the cap back on. That’s all there is to it!
How To Lock Bike Rack To Car
Hitch bike racks to cars are great forms of carriers. There is the perfect device to bring three bicycles at once. Using a hitch rack allows you to camping longer distances while tagging a bike rack...
Continue Reading
link to Vortex Rangefinder Reviews 2023Vortex Rangefinder Reviews 2023
I can give you some tips on what to look for when shopping for a Vortex Rangefinder . Consider the intended use of the Vortex Rangefinder. Do you need it for hunting, golfing, or some other...
Continue Reading
Hi! I'm Makmudul Hassan, the founder of Campergoal ® and I have been working in the biking and camping hiking industry for the last few years. I love to share my experiences with people & I hope you are enjoying my information and lessons!
This site is a participant in the Amazon Services LLC Associates Program, an affiliate advertising program designed to provide a means for sites to earn advertising fees by advertising and linking to Amazon.com. We are compensated for referring traffic and business to Amazon and other companies linked to on this site.
Valve repair and maintenance tool in the engine timing system belongs to the special. equipment. Such work is mainly carried out by professionals or motorists with experience, because the valves are located directly in the car engine, in order to get to them you will need to carry out a large front of work. Incorrect or poor-quality repair of the gas distribution mechanism (timing) can lead to even higher costs, re-repair of the engine. Also, some work, in principle, cannot be done without the use of special tools, even on old, structurally simple engines, what can we say about modern cars ?! nine0003
If you pay attention to the list and variety of tools for repairing and servicing engine valves, it becomes clear how difficult and time-consuming work it is, requiring not only an experienced craftsman, but also a professional, high-quality tool. In most cases, such work is carried out during the overhaul of the engine, often when the chains or timing belt breaks (when the valves bend), less often when removing or replacing camshafts or valve stem seals or overhauling the engine. nine0003
The group of such tools includes:
Most of this list is an auxiliary tool, but there is one that is worth paying special attention to, we will talk about it below.
The cracker is a tool for removing or installing the engine valve spring cotter. Drying out is required when repairing or servicing the cylinder head (cylinder head), when replacing valve stem seals. Carry out this procedure without the use of special tool is extremely difficult and time consuming. And it is practically impossible to install the valve in place and dry it without a dryer. The use of a home-made or non-professional tool for such work can result in the loss of crackers, a violation of the geometry of the valve, and even deformation of the valve stem. And it also leads to injuries, long-term repairs and inconvenience at work. That is why it is so important to use a high-quality and professional tool when repairing or servicing the cylinder head. nine0007
The intake and exhaust valves of the engine timing system are located in the head of the block and are responsible for supplying air and fuel to the combustion chamber, as well as for removing exhaust gases.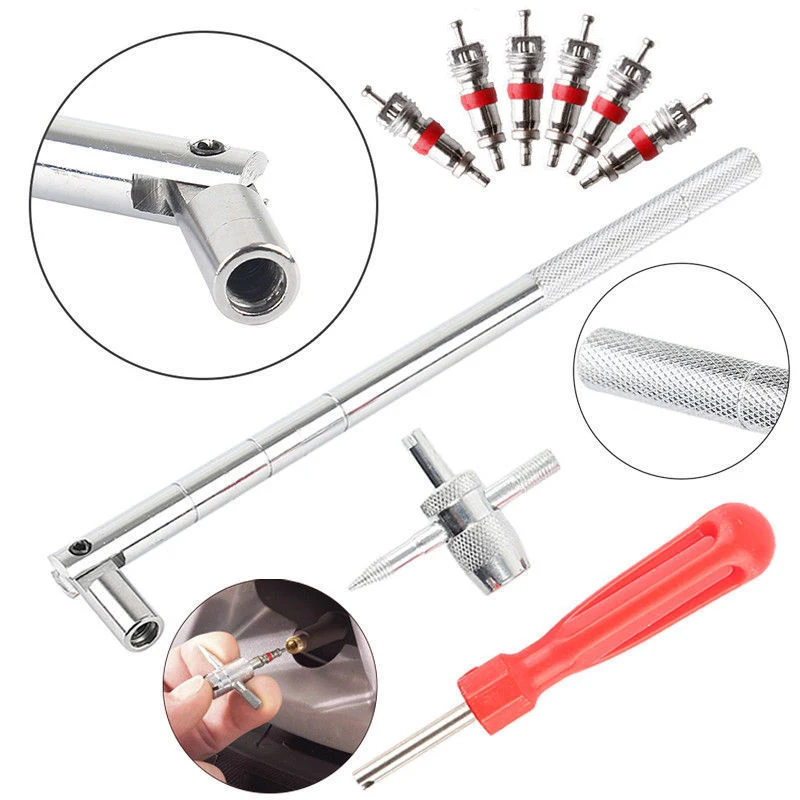 The opening of the valve (in modern engines) is carried out due to the pressure of the camshaft cam on the valve, and its closing due to the spring installed on this valve. Crackers (fastening the valve to its plate) with the help of a plate help to keep the valve inside the spring. To get crackers, it is necessary to press on the valve plate so that they disengage from the rod and make sure that the spring does not "shoot", then small parts will be difficult to find. It is even more difficult to carry out this procedure in reverse order. nine0003
The cracker is essentially a universal tool, with rare exceptions there are crackers designed for specific engine models. This tool can be divided into two groups:
Otherwise, they differ in size, design and complete set. Crackers with the ability to carry out work without removing the cylinder head are usually more expensive than conventional ones (intended for work on the removed cylinder head). This is due to the more complex design. Also often in such kits there is a candle adapter for compressed air, which does not allow the valve to fall into the cylinder. This tool is suitable for most 8, 12, 16 and 24 valve petrol and diesel engines, for V-twin and boxer engines. Despite its versatility, one cracker or even a set may not be suitable for all types of engines. Professional technical centers or workshops use several types and sets of crackers in their arsenal, for different tasks and types of motors. nine0003
Lapping for valves is a tool that allows you to carry out work ensuring a snug fit of the intake and exhaust valves of the engine to their seats (seats). Lapping of valves is carried out in case of engine repair, in particular the cylinder head (cylinder head). If the cylinder head is polished, the valves are replaced with new ones, or for some reason the valves are swapped, this procedure is required. Lapping of valves is a laborious process, removal or installation of valves is possible only with the cylinder head removed, which already implies a large front of work, and also requires experience and skill from the person who does this.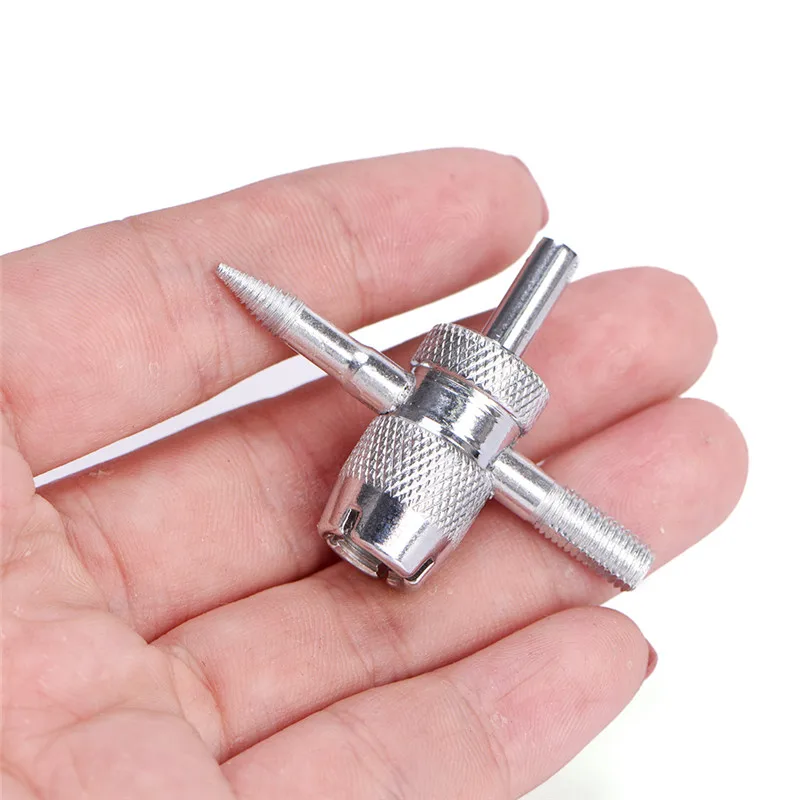 An important role in this process is played by the presence of a professional tool
The lapping of the valves is necessary to ensure that the valve fits as closely as possible to the seat. This is necessary in order to maintain tightness in the combustion chamber of the engine, which in turn affects the compression in the engine, the combustion of the fuel mixture, and the removal of exhaust gases. Violations in the operation of the gas distribution system lead to uneven operation of the engine, loss of power, increased fuel consumption, as well as failure of other components and assemblies. Lapping is carried out using special tools and lapping abrasive paste. The essence of the process is to remove small risks in the places where the valve fits on the seat
There are two methods for lapping valves:
Manual method is labor intensive and time consuming. With this method, the quality of grinding is much lower than with mechanical.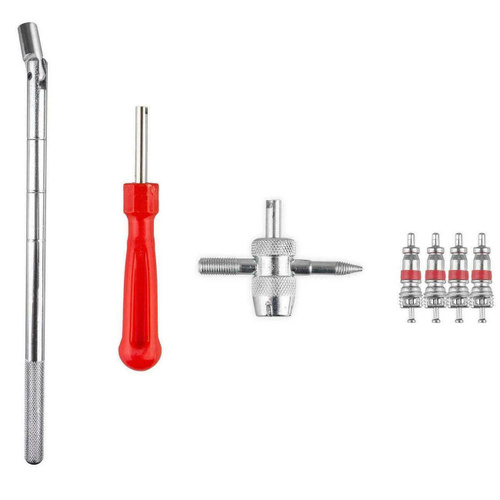 It is suitable for those cases when the repair budget is very limited and there is no way to buy a more expensive tool. For this method, ordinary devices are suitable - sticks with suction cups at the end. The valve is put on a suction cup matched to its size and lapping is performed with the help of reciprocating movements of the palms. Devices for manual lapping of valves differ in size and the ability to change suction cups of various sizes
The mechanical method is simpler, takes much less effort and time, the quality of work performed with this method is higher. The process itself is similar to the previous one, only instead of manual devices, special pneumatic machines are used to grind the valves. The use of a drill or screwdriver, when carrying out these works, is not professional, violates the repair technology. Lapping at high speeds (developed by a drill or screwdriver) can lead to uneven lapping, damage to the valve, valve guide or cylinder head. This tool is used mainly in garages or unskilled car services in order to save money.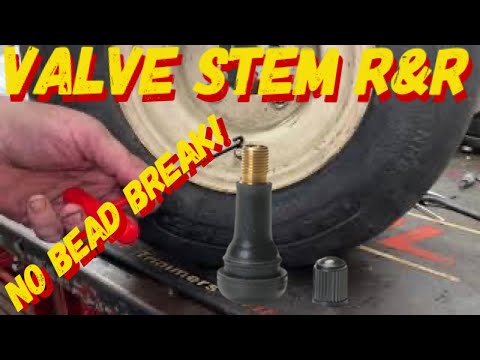 nine0003
Pneumatic valve lapping machines are designed specifically for this work and allow you to save the repair technology. This improves the quality of repair work, reduces the cost of their implementation. As a rule, they come with suction cups of various diameters, for different valve sizes. The machines are equipped with a speed controller. Their operation requires a prepared pneumatic line with a compressor, lubricator and dryer. This tool is used by professional technical centers or workshops
Having the right special tool in your arsenal, you can ensure a quick and high-quality engine repair. A wide range of products allows you to choose tools suitable for the repair of both gasoline and diesel engines, old classic cars and modern high-tech models. For the most part, the tool of this group is presented as universal, but there is also a tool for specific brands and models of cars from Japanese, Korean, German, American and French manufacturers. For this reason, many professional service stations or specialized workshops have various types of crackers, lappers, tongs and other tools in their arsenal. The use of modern professional equipment and tools allows not only to save time and money, but also to take care of the health of the staff. And most importantly, this approach inspires confidence among customers. nine0007
The tire valve is the tip that inflates the tire and ensures that it is sealed. It is attached either directly to the inner tube or to the wheel rim. The tire valve is damaged while driving and must be replaced at the same time as the tires.
La d'un valve tire A car tire is a rubber tip that sits on the tire. The tire valve, fitted with a plastic cap, has two main functions:
The tire valve can be attached to the inner tube or to the rim, as is the case with tubeless tire valves. It comes in two types:
In short, the tire valve prevents air from escaping from the tire, but also prevents dirt from entering the tire. Hence, it also plays a protective role. Finally, it allows, in particular, to make tire pressure and then maintain this pressure by keeping the air inside.
One of the functions of a tire valve is to seal it by keeping air inside the tire.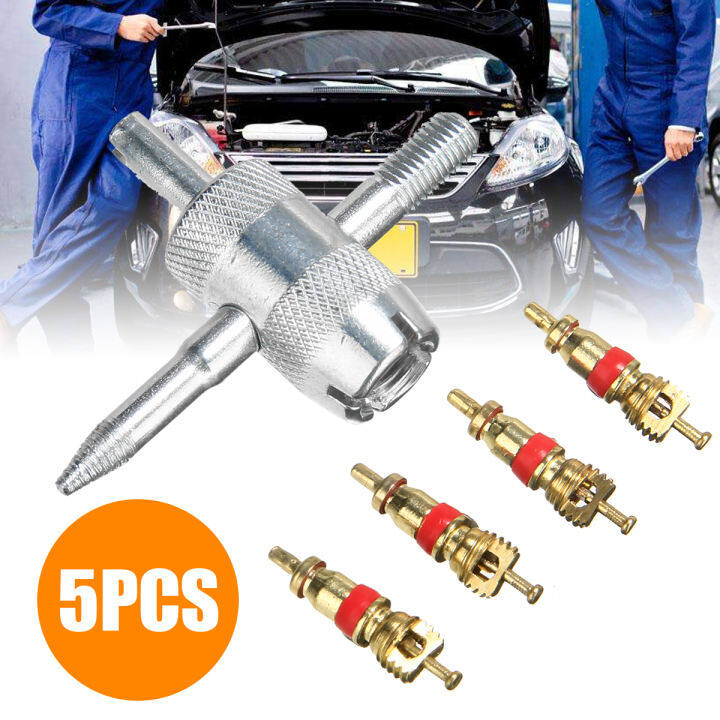 But over time and miles, it can get worse as it is subjected to the pressure and centrifugal force of rolling tires. nine0003
If the tire valve is damaged, it can cause Air leakage and pressure drop tire. The main cause of tire valve leakage is its age, and the mechanism it contains eventually fails.
The risk of tire valve failure is the slow release of air from the tire. No matter how hard you apply pressure and re-inflate it, it will continue to lose air. However, driving with improperly inflated tires is dangerous: loss of traction, increased stopping distance, reduced tire life and risk of bursting. nine0003
Therefore, the valve in the leaking tire must be repaired or replaced. We also recommend replacing tire valves every time you change tires.
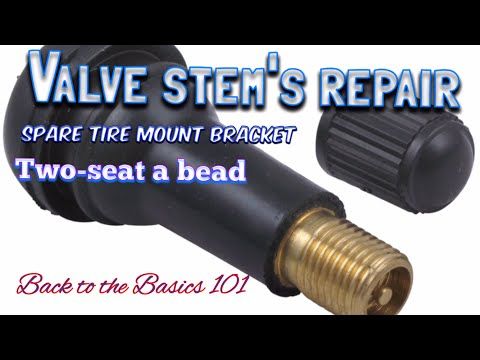
To change the tire valve, you must disassemble the wheel and separate the tire from the rim.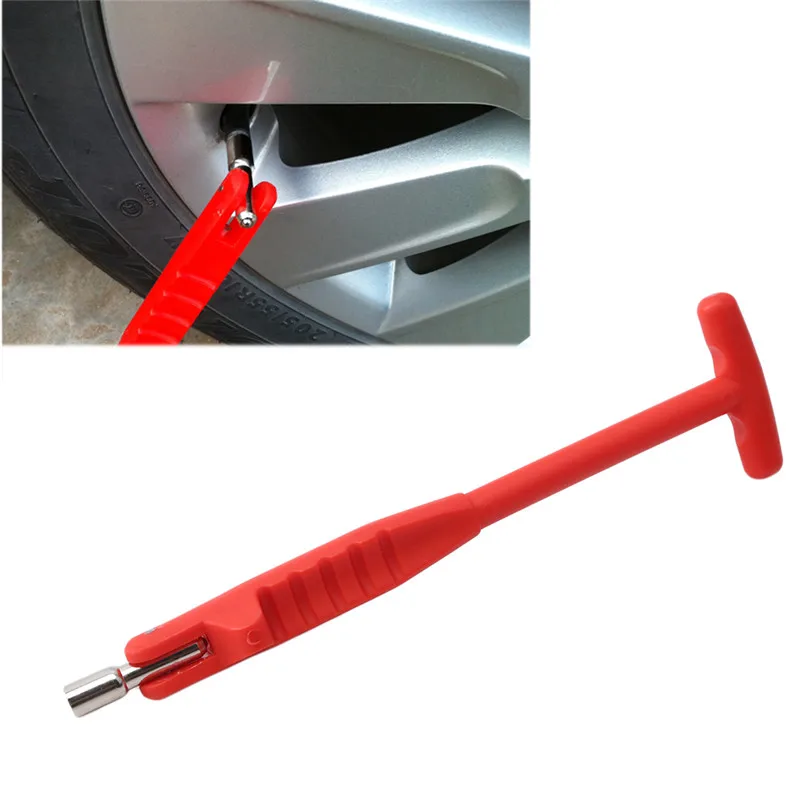 You must use valve stem extractor to replace the latter. However, there are also CIP tire valve replacement tools, but these are often not compatible with electronic valves. nine0003
Finish loosening the wheel nuts and remove it. Lay it on the floor with the outer side up. Remove the tire valve cap, then remove the core with a valve stem remover. Let the tire go down.
After the tire is deflated, you must detach it from the rim. You can use a sledgehammer all over the tire. Then, using an iron, remove the tire from the rim by inserting it between the tire and the edge of the rim.
After separating the tire from the rim, you can remove the stem from the tire valve. Use pliers to remove the old valve and install the new one in its place. You can then put the tire back on the rim and inflate it to the pressure recommended by the manufacturer. Complete the wheel assembly and check the tire valve for leaks.
The price of a tire valve depends on the type of valve, its size and of course where you buy it. You can easily find a new valve at a specialized automotive store or on the Internet. Just make sure you buy the right valve for your tires. nine0003
Calculate the price of just a few euros for a set of tire valves. To have your valves replaced by a professional mechanic, count between 10 and 15 € with a tire change.
Now you know everything about the tire valve! As you already understood, its role is not only to allow you to inflate the tires but also to protect them from water or dust that can penetrate them. The valve of the tire also ensures its tightness, so it must be changed periodically.