*This post may contain affiliate links. As an Amazon Associate we earn from qualifying purchases.
Those treads on your RC car can actually be quite expensive, and seeing as they must have cost you a decent amount of money, you do not want to handle them carelessly. There are a number of ways that you can protect your rims from damage when removing your RC tires so that they stay with you for a long time. You certainly don’t want to have to replace the rims everytime that you replace the tires as that can get expensive quickly.
One way to make sure that your rims last a long time is by making sure to remove your tires correctly. If you’re looking to take off the tires on your RC car, you want to take those tires off without hurting your rims.
There are three ways that most people will use to remove the tires from their RC car’s rims. Those three methods are:
Each of these three methods have their pros and cons but for most people the boiling method is the easiest way to do it. In this article we will go in depth about the boiling method but we will also mention some tips for the other methods as well.
If you want to watch a video going into great detail about the boiling method instead of reading it then you can watch the video below. To see the most popular RC cars just click here.
A good RC car doesn’t have to cost a fortune. This 1/16 scale model is 4WD and can reach a top speed of almost 30 MPH!
With speeds like that and 4WD you can take this RC car almost anywhere!
Click Here To See The Current Price
" frameborder="0" allow="accelerometer; encrypted-media; gyroscope; picture-in-picture" allowfullscreen title="s2cHyYFX3w0" loading="lazy" src="//www.youtube-nocookie.com/embed/s2cHyYFX3w0?feature=oembed&controls=1&autoplay=1&enablejsapi=1&rel=1" >
This is the easiest and one that requires the least amount of work or purchasing extra chemicals or equipment. This method can be done just by using any pot in your house, some water, and your stove. The first thing we will mention is what is required for this method.
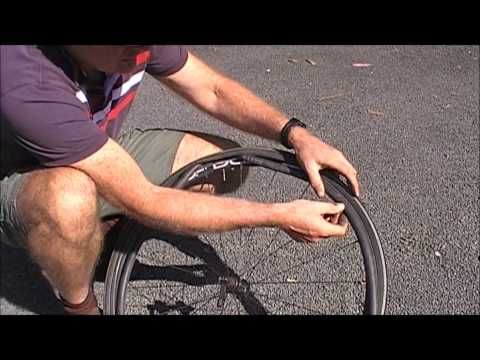
Pick a metal or ceramic pot that is big enough for the tires to fit into without touching the sides or bottom. Fill this pot with water making sure that it is not too full because the tire and wheel will push out some of the water when you put them inside.
Let the water boil. After that, use the tongs (you can use another utensil of your choice) to pick up the tire and then very gently, put the tire and wheel into the boiling water to make sure that you don’t make the water splash out, causing a boil-over. Leave the tire and wheel in the water for about ten to fifteen minutes total. You will want to turn it over for the other side of it to heat at about halfway through the time.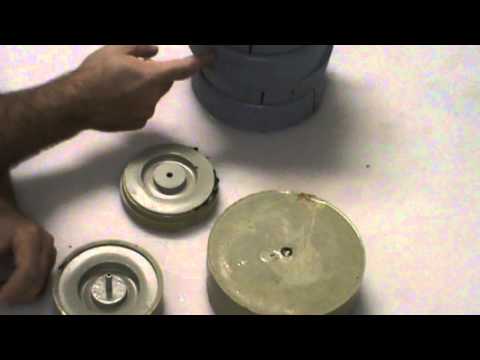 The overall time you would spend on this will vary depending on how perfectly glued the tires were to the rim and quality of the glue that was used.
Keep in mind that tires and rims with lower quality can begin to warp at high temperatures like this, so you would need to pay close attention to make sure that that’s not the case with your set.
After the fifteen minutes of heating, the next thing to do is to remove the tire from the boiling water. Now, of course, it’s hot water and can possibly hurt you, so you need to be careful not to get burned. Use the tongs or any other utensils you have chosen to remove the tire and rim, which, at this point, will still be together.
BE WARNED the tire and rim will be quite hot so make sure to not touch it with your hands.
Place the tire and rim on a sink or ceramic plate. Next, run the tire and rim under cold water to cool them off. [Keep in mind that after doing this, there is still a high chance that there’s hot water left in the tire and rim].
After that wearing gloves, start pulling on the tire to check if the glue has come off or if you still need to soak it some more. Getting the tire off the wheel will, in most cases, be quite tough, but if it turns out to be very difficult, you may need to put it back into the water for a few more minutes. If, the next time you check it, the tire looks as though it is ready to come off, use your fingers to pull them off while working your way around it slowly. Pay special attention to the tire tearing since it has experienced extreme heat. If the softness of the tire looks like a bit of a problem, give it some time to cool off and get back some of its strength before you go on to finish your job.
As soon as you have separated the rim and tire, the whole process is almost done. At this time, you should put the wheel back into the boiling water to dissolve any glue left. This makes it easier for you to use this wheel in the future. Also, inspect the foam inside the tire and rinse if there are any damages as water can sometimes make the foam expand too much, becoming floppy and unbalanced or even breaking. If you’re going to be racing with your RC car, throw away any damaged foam. Also, pour the water out of the pot when it is still hot in order to make sure that the glue in the water does not get hard and stick to the pot.
As mentioned earlier there are many different ways to go about removing the tires from your RC car. Some of the methods will work better than others depending on the type of glue used as well as the type of tire. The other most common methods of removing tires are:
This is a very easy method of removing RC tires from the rims, but the downside of it is that acetone is quite expensive, and it is flammable. However, the acetone method mostly just requires you to bath the tire in acetone so that the glues dissolve, and you can remove your tires.
You can watch the video below for the entire breakdown of how to do this method.
" frameborder="0" allow="accelerometer; encrypted-media; gyroscope; picture-in-picture" allowfullscreen title="9pr3gdkDh0U" loading="lazy" src="//www.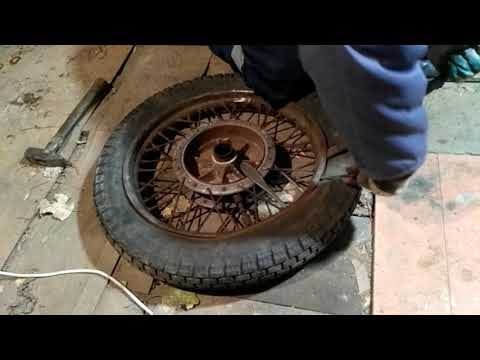 youtube-nocookie.com/embed/9pr3gdkDh0U?feature=oembed&controls=1&autoplay=1&enablejsapi=1&rel=1" >
In this method of tire removal, you would need to place the tires and wheels into an oven and heat them to a very hot temperature (normally more than 400 degrees F) so that the glue can fall/melt off. Now, while this is actually a very easy method of removing tires from rims, the downside is that the fumes it lets off can cause a smell that is not exactly pleasant and which a lot of people do not like. These fumes actually have the potential to be harmful as well if you are not able to air out your kitchen quickly.
You can watch exactly how to use the baking method in the video below.
" frameborder="0" allow="accelerometer; encrypted-media; gyroscope; picture-in-picture" allowfullscreen title="afRDoJfvyhg" loading="lazy" src="//www.youtube-nocookie.com/embed/afRDoJfvyhg?start=3&controls=1&autoplay=1&enablejsapi=1&rel=1" >
#038;feature=oembed" frameborder="0" allow="accelerometer; autoplay; clipboard-write; encrypted-media; gyroscope; picture-in-picture" allowfullscreen>Removing the tires of your RC car isn’t such a herculean task, and any of the above-listed methods of removing tires will give you the desired results. All you need to do to get your desired results is to follow the steps as recommended.
What you need to keep in mind, however, is that it is very important for you to be careful when you’re carrying out any of these processes. Apart from the fact that you do not want to spoil your job and your rims, you also do not want to hurt yourself and no matter which method you use you will either be dealing with high temperatures or harsh chemicals.
It is always a good idea to make sure that you are using eye protection, gloves, and long sleeves before you start any of these methods so that you can make sure that you stay safe.
*This post may contain affiliate links. As an Amazon Associate we earn from qualifying purchases.
If you are thinking of a way to take your worn-out tires off of your RC car rims and not leave a lot of glue and rubber behind, there are quite a number of different methods that you can use. You might also just want to take off your tires simply because you want to put them onto other rims.
Whatever your reason, this article will show you methods that you can use to achieve that.
There are four basic ways to remove your glued RC car tires. Those methods are:
Each of these methods vary in their effectiveness and in how much time and money they cost. Ultimately you will want to find what method works the best for you and then continue to use that method in the future. While some people will swear by one specific method just because it is right for them does not mean it is the best or easiest for you.
We will look at each of the four methods mentioned below in more detail in the rest of this article.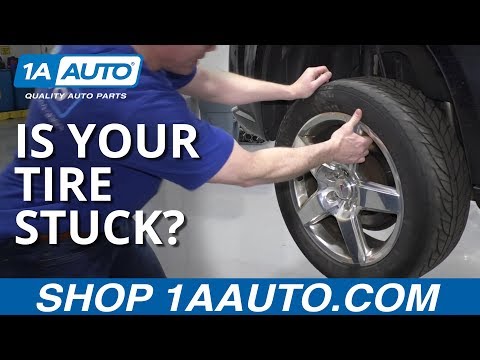
If you prefer to watch a video about these methods instead of reading you can check out the video below.
To see the most popular RC vehicles currently available just click here.
A good RC car doesn’t have to cost a fortune. This 1/16 scale model is 4WD and can reach a top speed of almost 30 MPH!
With speeds like that and 4WD you can take this RC car almost anywhere!
Click Here To See The Current Price
To do this method you will need at least one liter of acetone, an acetone bottle, an empty metal paint tin about 2-4 quarts in size or just big enough for your rims, rubber gloves, and, if possible, an old paintbrush.
Pour your acetone into the empty paint tin, then place the rims flat on the bottom and ensure that they are completely soaked in the acetone.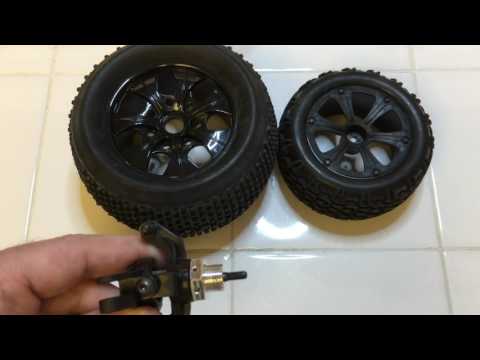 Put the cover back on the paint tin and make sure it is sealed well to stop any acetone from evaporating away.
Ideally, you should leave the tires in the tin of acetone for 48 hours, even though 24 hours can work too. However, with 24 hours, the tires may take some extra effort to remove, so if possible you should do 48 hours. By this time, the acetone will have dissolved the glue so you can easily remove tires from the rims.
You might want to use a new tin, if possible, to prevent the acetone from getting contaminated. You can simply buy empty mixing tins for this purpose.
When you’ve removed the tires, there may still be traces of glue left on the rims. Rub a little acetone over the glue with the paintbrush, and since it’s already been soaked, it should easily dissolve and clean right off.
Remember to always replace the lid of the paint tin, so the acetone doesn’t evaporate when you are using it or even in between uses. When the acetone gets low, you can top it off or completely replace it.
The acetone method is actually the easiest and best method of removing glued RC tires. The only downside is that acetone may be expensive, but you can use it many times over, so make sure that any acetone caught in the foams/tires/ rims goes back into the tin for next time.
Something to keep in mind about the acetone method is that the inner foam may swell up. When this happens, ring them out, let them dry, and soon, they will get back to their normal sizes and can be reused.
You may also choose to cut away the tire and take out the foam so as to speed up the process. This way, the acetone gets into the bead faster. You of course would only want to do this if the tires are trash already.
The acetone will turn a deep yellow or orange color with time as the glue dissolves in it. The wheels will have to stay longer in the acetone, and glue residue will eventually stick to the rims. Replace the acetone with a new batch when this begins to happen.
Be cautious when you’re working with chemicals because they can be flammable and also dangerous to the skin.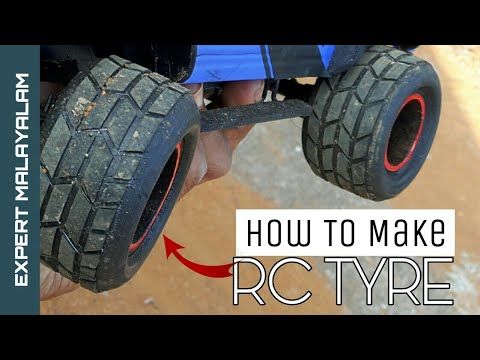 Gloves are always a great option when you are using any chemicals.
You can find acetone at many of your local retailers or even at places online like Amazon by clicking here.
You will need a vegetable steamer pan with a lid or an electric vegetable steamer unit as well as water. Here, you will be using intense heat to make the glue get brittle so that the tires can fall off. If you want, you can reuse the tires and the foam.
Just put the wheels in the vegetable steamer pan. Make sure that the bottom pan is filled with water at boiling point on the hob, and the top pan has the rims inside of it. Cover it with the lid and steam the rims for up to 45 minutes.
As soon as you’re done, the tires should require only a little effort to pull off the rims. If you still find it difficult to get the tires off, you may need to steam the tires for a little bit longer. When using steam and hot water, always make sure to be careful. The good thing about this method is that you can save money on acetone and it is much quicker than the acetone method as well.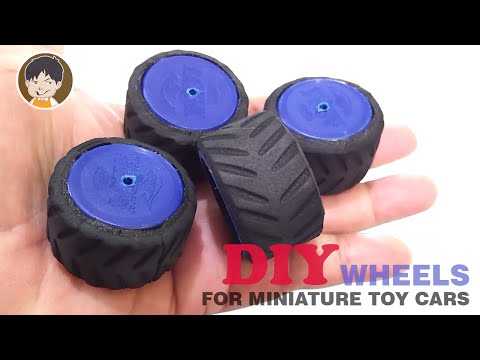
You can use medium heat in an oven to bake your tires for half an hour, and the tires should be easy to take off after they are heated up. Just like the steam method above, the heat will make the glue get brittle so the tires can come off with only a little effort. This is a great option for many typical buggy racing rims, but some cheaper and lower quality plastic rims may get damaged or melt entirely. This method is a quite risky one but one that you might still want to try if you think your rims will be fine.
Of course, your oven and your kitchen will smell of rubber for some time after doing this, so you will want to keep that in mind. That huge downside is one main reason why people prefer other options over the oven one.
This is not the best method out there, but it actually works. When no other methods seem practical to you, you may want to try this. It may take a lot of effort to get the tires off, and there may still be some brittle glue left on the rims when you’re done, but it will eventually get the tires off even though it may take a lot of pulling and prying.
This is easier if you start by cutting off some of the tires to let the hot water get to the bead of glue. Place the wheels carefully in a pan of boiling water on the stove. Leave them fully soaking in the water for at least 30 minutes, and preferably more than that.
This will make the glue brittle so that you can take off the tires by simply pulling on them. This way, the tires can easily come off without leaving behind a lot of glue and rubber. You can use a small flat screwdriver to take off any rubber as well as glue that was left behind.
Also, keep in mind that some of the cheaper or old rims can crack, so this isn’t the best method for every wheel. Always let the water cool before you handle the rims so that way you don’t burn yourself.
These are the four main ways that are used by most RC hobbyists to remove their glued RC car tires. You will have to test and see which method works best for your tires and rims and then just stick to using that same method all of the time.
If acetone works great and you don’t mind the added time or expense then just keep doing it that way. Don’t be tempted to change how you do it just because someone else claims to have a miracle way to remove their glued RC tires.
Do you have a Traxxas Slash 2WD but want a new experience? Are you ready to change Slash and get a whole new experience? Then you will need tires and wheels from monster trucks and a small "lift" of the body. This is a very interesting way to completely "transform" your model. And the “monitoring” process itself takes no more than 30 minutes. And you can just as easily switch back to short-court mode. Sounds tempting? Let's get started! nine0016
One of the easiest tasks in our story. You will need the 2.5mm and 2mm wrenches that are included with the Slash. You remove the old racks and install new ones from the TRA1914R kit.
Don't forget to pay attention to the overhang.
The front wheels are those with the holes for mounting on the hex located deeper. Those. when properly installed, the front wheels will be deeper in the arches than the rears. And don't forget to watch the direction of the tread: if it's not set correctly, the model will move normally, but your friends will laugh if they see it. Definitely ;)
If you don't already have a set of wheels from Stampede models, you have a choice. You can fit Terra tires with the realistic design of real Chevrons that are used on full size monsters. They are pre-installed on Craniac, Skully and Bigfoot models. Or choose tires with Talon tread, which has a "modern" design with a strong "hook". The Terra is fitted with deep concave rims, while the Talon is available with chrome or black chrome All-Star wheels. nine0016
After installing the body on the new struts, there may be problems with the gap between the wheel and the body.
The new wheels and tires are great for off-road adventures, but once installed with the factory body, there may be some problems. Compress the suspension so that you understand how much you need to fit (cut) the arches. Remember: it's better to measure seven times, and only then cut off, so as not to spoil the mood for yourself, and the body for the model :) Use Lexan scissors to carefully remove the excess. After the procedure, install the case again and check your work.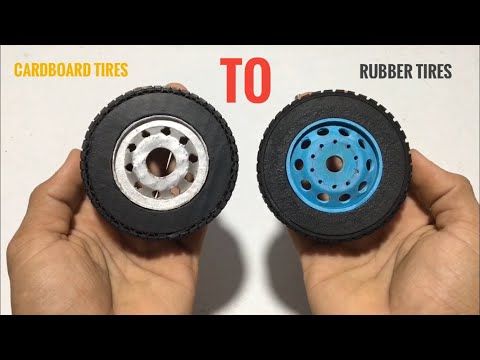 There is nothing to worry about if you need to repeat the procedure again. nine0016
MOSTOST - SHAR wheels, even if you haven't changed the pinion and spur ratio. A standard Slash wheel travels about 13 inches (33.02 cm) with each engine revolution. The larger Terra and Talon tires travel about 15 inches (38.1 cm) with each engine revolution. That extra 2 inches (5.08 cm) translates into an extra 166 feet (50.6 m) for every 1000 engine revolutions! nine0016
To avoid engine overheating, the pinon/spur ratio must be changed to match the new tires.
Well, that's it, the upgrade is finished. Pretty easy, right? If you want your Monster Slash to be even more driving - welcome to the "Tuning" section!
07/02/2020 10:25:45
0 nine0016
777
Overview of the radio-controlled car in 1:12 scale.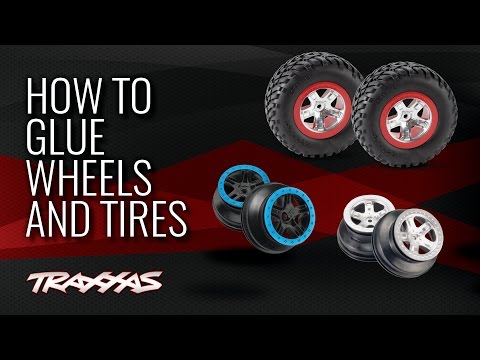 In the presence of four-wheel drive, differentials, proportional control. In short, I really liked the machine for its stability and ease of control, the details are below.
The machine is packed in a fairly large box without transparent inserts.
More photos
Spoiler
The machine comes fully assembled and ready, this state of the model is usually called "RTR" (Ready-To-Run).
In addition to the machine itself, the delivery set includes:
The charger is designed for 7.4V 800mAh.
Equipped with a two-color LED to indicate charging progress.
"Spare parts and tools" kit.
The instruction manual is very well done.
In addition to the manual itself, it contains detailed diagrams for self-assembly / disassembly of the machine, as well as a detailed list of components and mechanisms. The only caveat, in this case, is that the instructions are only in Chinese and English. Given that all the inscriptions are accompanied by illustrations, I think that this should not be a big problem. nine0016
More photos
Spoiler
Pistol type remote control. It does not have a pronounced external antenna, which I personally consider a plus. Yes, of course, this may have a slightly negative effect on the signal reception range, but do not forget that due to the relatively small size of the machine itself, the owner may not need a distance of 100-120 meters, because. it just won't be visible. But as a plus, I think that this antenna cannot be broken, and this has already happened repeatedly with other remotes thanks to playful children's hands))
Another feature of this remote control is that it can be used by both right-handed and left-handed people. Of course, this possibility is not something outstanding and is widely used in most modern consoles of this type. But the point here is how exactly this opportunity is implemented - the wheel is simply squeezed out to the side that the owner needs inside the remote control itself.
Quite original and comfortable.
The wheel has a soft foam tyre. nine0016
The remote control includes a rudder trimmer, steering sensitivity adjustment, a remote control enable slider, and a 50/50 or 30/70 throttle ratio switch slider.
Remote control requires six AA 1.5V batteries or accumulators.
Let's move on to the machine itself.
The appearance of the car resembles the special "Arctic" series Toyota Hilux AT38 (the one on which TopGear conquered the North Pole)
The characteristics of the car are as follows:
 , width - 48 mm.
 Spoiler
To protect against imminent collisions with insurmountable obstacles, a thick plastic kenguryatnik bumper is provided at the front. nine0016
There is a “fifth wheel” or, as it is also called, a “wheel bar” at the back. A device used in high-powered RC models to prevent tipping backwards during a hard start. It goes without saying that in this machine this device is nothing more than a tuning element, because. engine power for such a sharp start will not be enough.
Wheel tires are made of rubber, there is nothing but air inside.
To remove the wheels, use the wrench supplied. nine0016
The car's body, often referred to as the "crust", is held together by four metal studs, two each front and rear.
The slider on / off the machine is accessible without the need to remove the crust, the receiver and the front wheel control servo are also located here.