Biketoworkday is supported by its audience. When you buy through our links, we may earn an affiliate commission. Learn more
Written by Gary Johnson / Fact checked by Henry Speciale
All seasoned cyclists know that bike tires can do wonders in their riding experience. Bike tires not only enhance the entire aesthetics of the bike but also provide a more efficient ride. It can enhance comfort, increase traction, and reduce rolling resistance for a quality ride.
However, eventually, your tires will not be as reliable as before. You will notice that your tires are worn out, which compromises your safety when biking.
Thus, here is our easy-to-follow guide on how to change a road bike tire without needing to go to a bike shop. It includes taking off the old wheels, inflating the tire tube, fitting and installing the bike tire into the rim.
Table of Contents
As mentioned earlier, road bike tires directly impact how efficient your bike riding will be. It allows a smoother ride and ensures safety when you are on the road. Road bike tires can also give you full control when riding.
Here’s how you can tell when a tire needs to be changed or replaced:
Worn out treadWhen you look at a bike tire closely, you will notice a unique pattern of groove cutouts on the rubber. These cutouts are the bike tread. It is useful when you are navigating on any type of road.
If the tread became shallow, your bike tires would start wearing out until it gets smooth or bald. This will result in loss of traction and most likely compromise the quality of your ride. It also indicates that you need road bike tire replacement
Punctures when cyclingWhen your tires wear out, you will start having punctures frequently. It not only poses a danger when riding but will also become a major disturbance for you. A regular puncture will discourage you from taking the road or join group cycling because of the distraction it causes.
If this happens, check on your tires and see if they need to be changed.
Dry-rotWhen your tires are frequently exposed to corrosive chemicals like gasoline or cleaner, they will exhibit dry rot. Having dry rot invites a potentially harmful situation. You might experience a tire failure, especially when riding at increased speed downhill. It is vital to check your tires for dry rot so that you can change a road bike tube and tire immediately.
Materials needed:
After discovering that your road bike tires need a replacement, you can head straight to a local bike shop for new tires. It is important to get the size of your wheels and measure your old tires. You should also consider the tread patterns and type of tire you want to use for replacing bicycle tires.
Step 2: Take off the wheelsThe first step to take in this process is removing the bike wheels. You can flip the bike upside down or use a bike stand for this step. You must loosen the brakes first for the front wheel, then locate the quick-release levers for easy removal.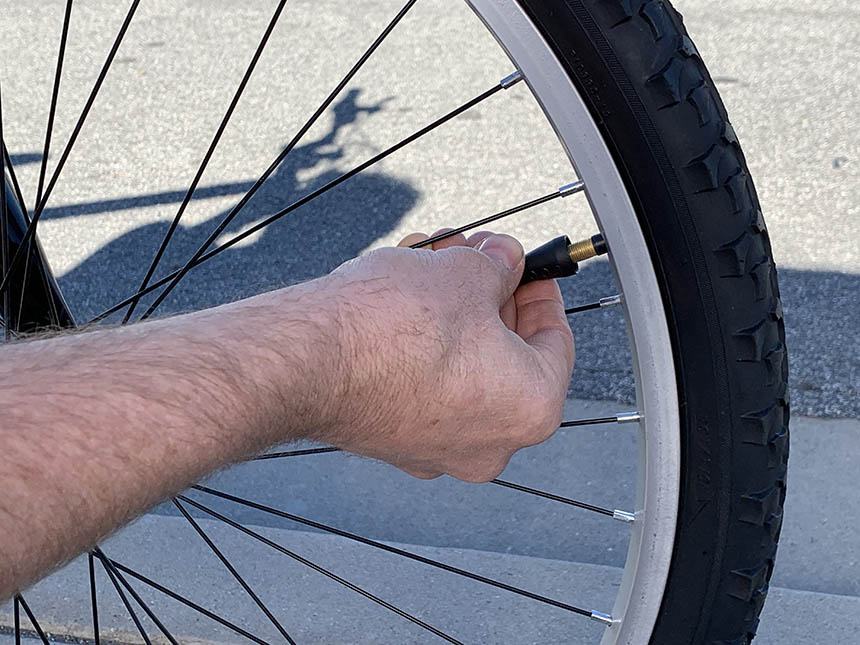
For the rear wheel, you must adjust the gears first up to the smallest ring. Loosen the brakes and locate the quick-release lever. Then, focus on the derailleur on the cassette and pull out the wheel slowly.
Step 3: Deflate the old tires before removingFor the tire and inner tube to be removed quickly, you must completely deflate the tires first. Once deflated, you can push the part of the tire closest to the rim and move away up to the midsection of the wheel. Do this step around the bike until the tire is already loosened.
Step 4: Take the tire away from the rimOnce the tire has loosened its grip from the rim, you can use tire levers to separate the tire and the rim. You can use the hooked end of the tire lever and attach it to the outer edge of the tire. When you secure the attachment, you can now pull the level over the edge of the rim. Do this in a clockwise direction until you finally take the tire off the rim.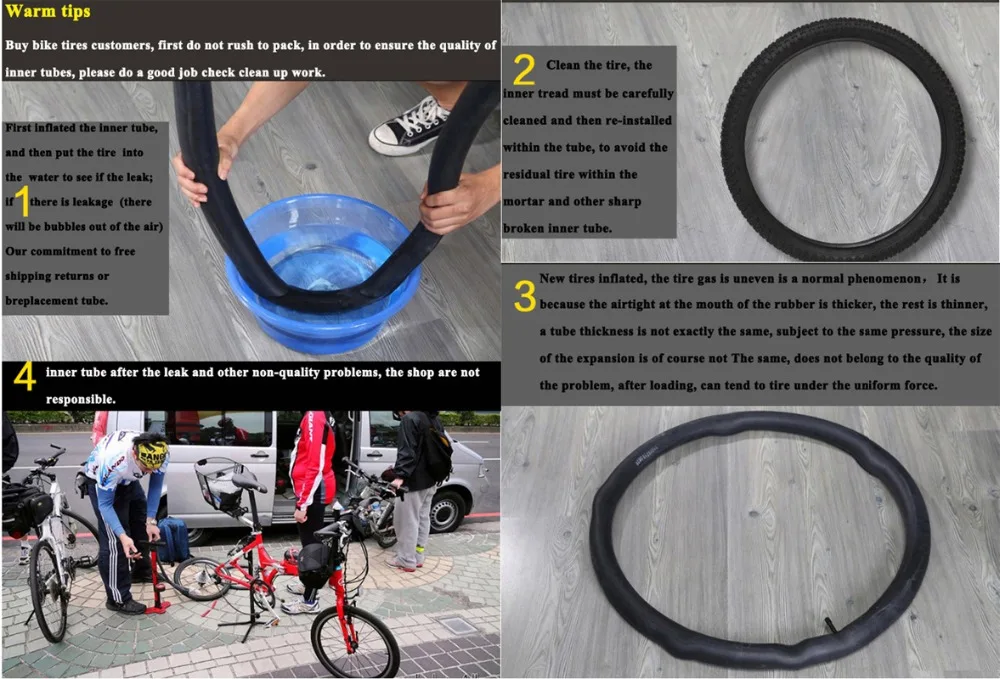
(Pro tip: You must apply consistent pressure when you remove road bike tires from the rim. In this way, the tire will not fall back into its old position)
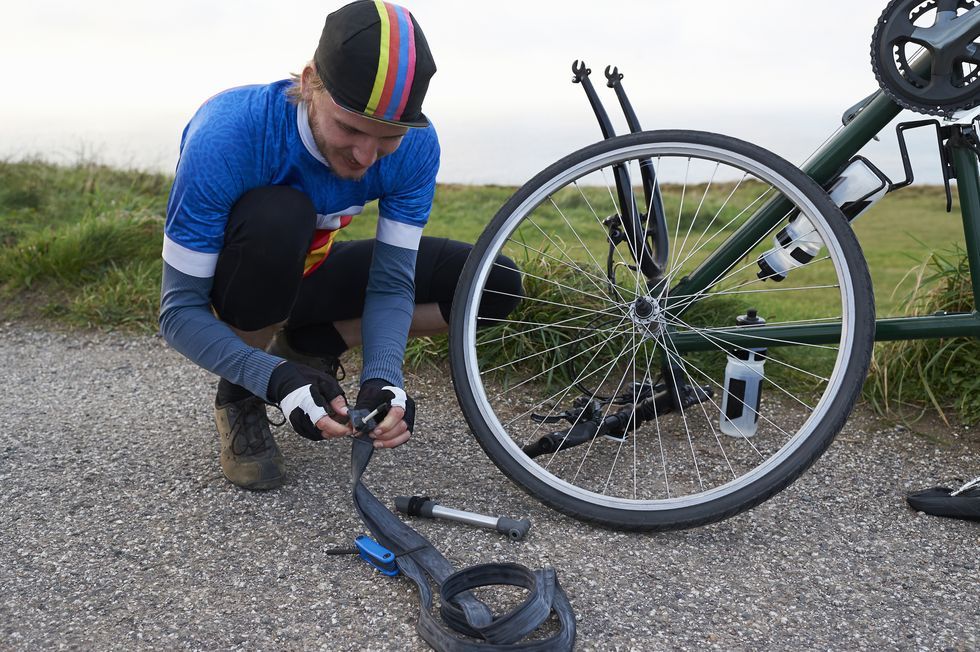
Step 5: Pull out the tube from the inside of the tireLocate the tire tube and slide the tube out. When you touch the air valve, you can push it through the hole of the wheel frame and completely remove it.
Step 6: Fit the new road tireAt this point, you are now ready well-versed in changing a road bike tire.
First, you must lay the new tube flat and inflate the tube moderately with a pump. The tube must start getting in shape but should not be entirely inflated. Then, let the tube slide slowly into the tire and line up the tire tube valve to the rim’s valve hole. Check whether the tire fits perfectly into one side of the rim. You must get the proper fitting of the tire before inflating the tube.
Step 7: Install road bike tire into the rimBy this time, you have installed the half side of the tire and tube into the rim; using the tire lever, you can push the other side of the tire over the edge of the rim. Adjust the position of the tube inside when needed. When you replace road bike tube, ensure that the tube is properly installed between the tire and the wheel. Then, roll the rest of the tire to the rim edge slowly. Make sure that you put the tire in place for this step.
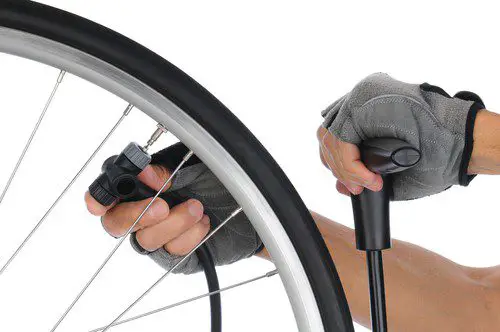
After putting the tires onto the rim, you can re-install the bike wheels to your bike. Next, inflate the tire tube using a bike pump. Then, you are done.
Changing your road bike tire is one of the skills you must learn as a biker. You will constantly encounter worn-out tires, especially when you regularly commute using a road bike. Thus, we have developed a simple guide on how to change a road bike tire so you can follow the entire process. We kept the steps uncomplicated; even a beginner biker can understand.
Gary Johnson
“I ride my bike to work for years, but is that enough? Our carelessness towards our surroundings has taken a toll on the environment. And now, everyone is responsible for changes; even the most minor contribution is counted. With this hope and spirit, I started with my partner to establish Biketoworkday to help more individuals commute to their work sites on their bikes.”
Jim’s Tech Talk
By Jim Langley
For anyone who doesn’t know what it means to “seat” a tire, let’s start with an explanation. To “seat” or “seating” a tire is one of the final steps taken when installing most tires on bicycles and motor vehicles, too.
Seating is important because it ensures that the inflated tire is fully and properly installed. If tires are not properly seated they can have low and/or high spots, twists in the tread and with the worst seating mistakes (high spots), they can blow off the rim.
To tell if a tire is seated properly (even old tires might not be fully seated), you look at the seat line that’s molded into every tire (photo). When a tire is properly seated, that line sits right on top of the rim, equidistant from the rim for 360 degrees around the wheel and on both sides.
The most common seating issue is having the seat line get stuck below the top of the rim (shown in the photo), what’s called a low spot. This can occur at only one spot or in several different spots.
When this happens, if you ride on the wheel, you’ll probably feel the low spot(s) in the tire each time you roll over it. And, because the tire is too low in one spot, it’s possible to damage the rim if you hit something at that spot.
To help, here are seven tricks for seating tires that refuse to. We’re talking about low spots, not high spots (see Tip). And for both standard tubed tires and tubeless.
Tip: High spot seating issues usually only occur with tubed tires and result from getting the tube stuck beneath the tire’s edge. To greatly reduce the chance of this happening, be sure to inflate the tube just enough to let it take shape before installing it in the tire. It’s easy to inflate Presta valve tubes up to the right amount for this by blowing into them like you do with balloons. Just remember, you need to make sure the valve is open first..
Roll the tire out with your hands
CAUTION: Do not put massive lateral force on the wheel when doing this “move” – or you could warp your wheel. Only put force on the tire.
This is the quickest and safest way to seat a tire and it works most of the time once you’re good at it. But, you have to do it a few times to learn how to do it and if you’ve never done it before, to even believe you can do it. Because it can take a few seconds of work before the bead slowly pops out or it might come right out, too.
You do it by holding the wheel between your legs and gripping the tire right at the low section. You want to use your hands however works for you to put maximum pulling force on the tire to try to roll the stuck seat line up and out from under the rim. I use the heels of my hands and rock them in an up-and-over action.
Air pressure
This is the way car guys and gals seat tires and a lot of bike mechanics do it, too. It’s kind of fun because as the tire seats it makes loud snapping or popping noises. But, there’s always a risk of blowing tires off the rim, which can be dangerous and expensive. I wrote about such an incident a while back: https://www.roadbikerider.com/overinflation-explosion-a-cautionary-tale-about-very-wide-tires/.
So, if you want to use this approach, use only your hand pump (air compressors put too much air in too fast) and very gradually increase the pressure. Give the tire a minute or so to see if it seats before adding more air. And, don’t ever inflate a tire way past the maximum pressure (it should be written on the tire sidewall).
Soap
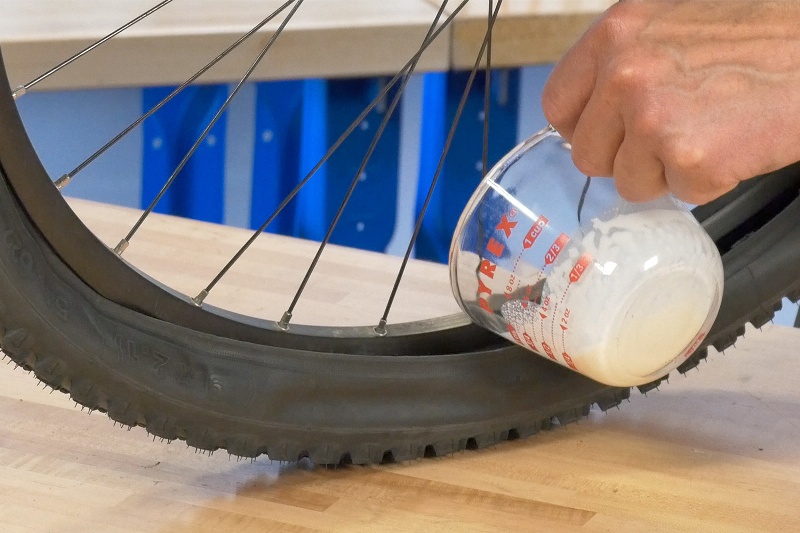
Speaking of motorheads, they typically have a big tub of tire soap next to their tire mounting machines so that they can slather the slippery stuff on before inflating the new rubber. While there are tire soaps made for bikes, like BullSnot https://amzn.to/2nSud9T , common dishsoap works just fine.
To apply it, find the low spot(s) on the tire and keep track of it – because you’re going to deflate the tire next. You could mark the spot(s) with chalk if needed.
Deflate the tire. Then put a little soap on a brush and push the tire out of the way at the low spots enough so that you can get the soap between the tire and rim. Or you could drip it on the tire if you don’t mind risking making a mess and having a lot of clean-up.
When you pump up the tire, the low spots should pop out. If not, clean and dry the tire so that you can grip it and try to pull any remaining low spots by hand. The soap should still be between the tire and rim and with luck, the low spots will come out. If not, repeat the process one more time.
Use the ground
CAUTION: Do not put massive lateral force on the wheel when doing this “move” – or you could warp your wheel. Only put force on the tire.
If you’re on a ride and you have a low spot after fixing a flat (common problem with tubeless tires), hold the wheel in both hands so that the low spot is facing the ground and at 6 o’clock with 12 o’clock at your stomach.
Holding the wheel like this you can tap the tire’s low spot on the ground to put a pulling force (more like a jolt or blow) on the tire. This will sometimes get the tire seat line to come out from under and seat the tire. Just go easy.
Riding and waiting
Sometimes it just takes more time than you expect for the low spot to rise up to make its way to where it belongs. If a tire won’t seat, if you give it a chance, it might be seated the next time you check it. This can happen out on a ride. You just have to be willing to put up with a “funny” feeling of a low tire spot for awhile and baby the wheel and not risk hitting anything.
Tire seating pliers
The photo shows my Park Tool Tire Seating Pliers, which I have made great use of for decades: https://amzn.to/2mpy5Pp . The only thing is that you need to be careful to grip only the tire with this type of tire pliers. But they work well for many seating issues.
Vise
People are always surprised when I use this seating trick so I saved it for last. Don’t use it if you have any concerns.
The trick is to use a vise to grip the tire (tire only!) low spot and rock the wheel to pull the low spot out. Woodworking vises like mine have soft wood jaws that won’t harm tires. You can also use a metalworking vise by putting blocks of wood in place of the jaws.
You tighten the vise just enough to hold onto the tire (never allow the rim to get between the jaws!) and you then gently rock the wheel so that the vice can tug on the tire and get the low spots to pop out.
There you have it. I hope these tricks cure all your tire seating issues.
Jim Langley is RBR’s Technical Editor. He has been a pro mechanic and cycling writer for more than 40 years. He’s the author of Your Home Bicycle Workshop in the RBR eBookstore. Check out his “cycling aficionado” website at http://www.jimlangley.net, his Q&A blog and updates at Twitter. Jim’s cycling streak ended in February 2022 with a total of 10,269 consecutive daily rides (28 years, 1 month and 11 days of never missing a ride). Click to read Jim’s full bio.
The rubber of a modern bicycle wheel in most cases consists of a tube and a tire (tire). The option of one-tubes is not considered. Let's talk about installing tires. More precisely about its correct orientation.
If the tread pattern is symmetrical, it can be installed on either side. But there are also unidirectional tires i.e. with a non-symmetrical tread pattern designed for installation and rotation in one direction. For such tires, installation orientation already matters. nine0003
Some manufacturers clearly and unambiguously draw an arrow according to which the wheel should rotate in the recommended setting.
If installed on the front wheel - see the arrow Front, on the rear - Rear. Sometimes a tire is specifically designed to run on the rear only or only on the front . Then the manufacturer also makes a warning label:
Installing such a tire in the wrong orientation leads to poorer grip, poorer bike handling, less rolling and faster tire wear. nine0003
If an arrow is drawn and it is written in letters on the rubber how to install, then everything is simple. But what to do when the tire is clearly unidirectional according to the tread pattern, and there are no arrows and other indications?
First of all: "clearly unidirectional" means that the tread pattern resembles a "V" when viewed from the front.
The recommended installation is such that the rear wheel leaves " >>>>> " and the front " <<<<< " when driving from left to right.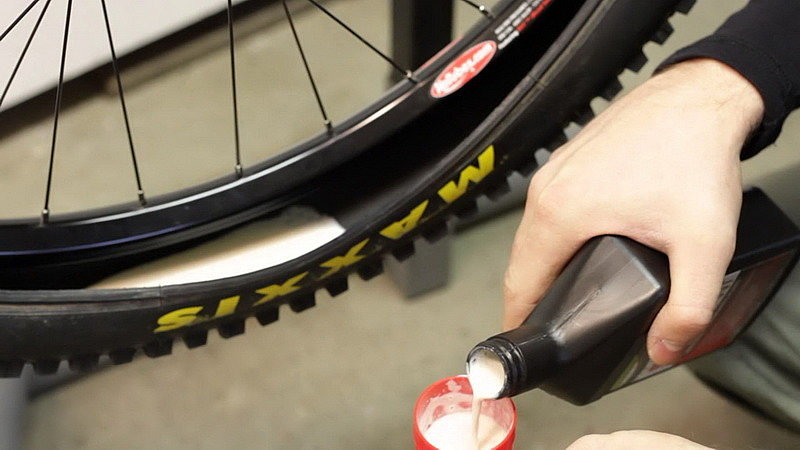
Reason for this recommendation. The rear wheel is responsible for traction and flotation, so the "V" should "rest" with its feet on the surface for better grip (" / \ "). The front wheel plays b o a major role in braking, so the figure is oriented in the opposite direction.
If you need maximum cross-country ability - put both tires ">".0003
The issue of grip/braking in relation to the orientation of the tread pattern is important when driving on dirt, sand. On asphalt, it doesn't matter.
And one more thing. If you look at the "Belarus" tractor or car tires, you will notice that the tires are installed exactly the opposite way: "<". It would seem that the tractor in the field needs maximum cross-country ability, and auto traction will not hurt. But here another factor plays a role - hydroplaning. At high speed, with a sufficient wheel width, water from the road surface can be collected in a "wave" in front of the wheel and the vehicle slides on a water cushion. The "<" oriented pattern allows water to be squeezed out the sides of the wheel and retain traction. In principle, aquaplaning does not threaten a bicycle due to the shape and size of the contact patch of the wheel with the road, high tire pressure and relatively low speed. nine0003
See also
The first time I plunged into the topic of choosing tires when buying a road bike. In accordance with network knowledge, I decided that the “stock” (those that are put on the bike at the time of sale) tires should be replaced as quickly as possible. Before that, we rode MTBs on the highway, so road bike tires were generally feared by a high probability of a puncture. We bought "bulletproof" tires, rolled on them for three seasons. Unfortunately, this medal has a “reverse side”, tires roll poorly and hold poorly. Therefore, in order to participate in any amateur competitions, in addition to brevets, other tires are needed. But what? nine0003
The note was written in 2016. Now the tire models may be different, but the general principles have not changed 🙂
The bike came with Vittoria Zaffiro Slick tires, these are quite heavy and not very puncture resistant tires. By the way, in Italian Vittoria means victory, and Zaffiro means sapphire. I ordered the Continental GatorSkin right away. Gator skin translated from English, German - alligator skin, or as we more commonly call "crocodile skin". nine0006 Why are they like this? Because these tires were immediately brought up by a search on the Internet for maximum puncture resistance (in English “boolet proof”, or “bulletproof”). On Conti (Continental) we rode MTBs and were satisfied with this manufacturer. An additional search inside the Continental for a puncture-resistant road tire resulted in about three more models, but the GatorSkin was well ahead. The model has been on the market since 2010 and is very popular as a tire for the “European winter” (and this is about like our summer 🙂). In three seasons on our two bikes, the GatorSkin tires did not really puncture once, but a chamber on the rim made its way a few times inside (the so-called "snake bite"). From my point of view, this does not characterize the tire in any way, since it occurs due to other processes (a pit with sharp edges, a flat tire, a sharp stone on the road, etc.). Snakebite can happen on any tire and on any bike, including MTBs, so I will not further consider this as an indicator of durability. Tires covered 10.7 thousand kilometers. Judging by the wear indicator, a lot more can pass. There is a “squareness” of the profile, but, as it were, “in moderation”. nine0003 First, they don't roll . This was felt immediately when I put them in place of the stock Vittoria Zaffiro Slick. Secondly, the GatorSkin does not hold well. It's about manoeuvres. Overall I like the GatorSkin very much. It just turns out that they cannot be used in amateur group training races on the track, where you need to go through turns at speed “in the crowd” (you can become the culprit of a blockage). And it’s not very reasonable to participate in amateur races like gran fondo (100+ km for a time on normal, but closed roads), since an additional 1 km / h is not lying on the road 🙂 But there are brevets (marathons for 200+ km), under which in principle, the equipment was selected 🙂 Last season 2016 in the Moscow region there was a good opportunity for regular amateur group training races (“Bunchikha” and “Klenovo”) and for the first time passed the format of the “gran fondo” competition suitable for me. Therefore, I decided to return to “digging” the Internet on the issue of choosing tires for amateur racing. The main idea is this: GatorSkin in my case give excess puncture protection. GatorSkin has a strong and hard rubber. All sorts of pebbles and debris do not stick to it at all, and the tire wears out very slowly. I assume that the rubber will lose its properties (begin to crumble) before it wears down to wear indicators. This is a plus and, moreover, a fundamental concept of engineers. A concomitant minus is that the tire does not “stick” well to the road. This affects rolling, especially noticeable on good, smooth pavement. Coeff. rolling friction is designed so that the grip between the wheel and the surface must be 100%. nine0003 An illustration of the importance of "sticking" a tire to the road from the description of the "Black Chili" compound in the Continental catalog If there is any slip, it is "other" friction that spoils rolling. Of course there are "real" racing tires without puncture protection. In principle, all you need to do is walk with a broom along the track before the race. But in amateur starts and training sessions, an anti-puncture layer is needed, so I only considered such tires. It is difficult to build on the GatorSkin, the anti-puncture layer is, as it were, “old” by the standards of Conti, and the tire itself is light, that is, there is still not enough of it. But apparently the solid compound works well, at least visually the tire remains smooth, that is, any debris does not reach the anti-puncture layer. It is difficult to say what happens on a softer and, most importantly, more sticky compound. I know that it is customary for messengers with experience to periodically clean the tire with a glove on the go after a section with any crumbs on the pavement. Unfortunately, there is nothing elegant here. The GatorSkin, like other Endurance tires (long runs on bad roads), has a reinforced sidewall. This is done because a significant part of the punctures come from the side, mainly from gravel scattered on the highway. That is, when hitting a pebble, it can turn so that it strikes along the side wall. Unfortunately, the rollability of a tire is fundamentally dependent on the elasticity of the sidewalls, since the tire deforms while driving. Energy is expended on deformation, which is taken from the movement. Accordingly, the more energy is spent on tire deformation, the more energy is taken from the movement. An important indicator of the elasticity of the side wall is the so-called. TPI, threads per inch. More precisely, not even the quantity, but the thickness of each thread. In the case of GatorSkin, this indicator is good, by the way, but what's the point if another layer of a special mesh is made on top of this? The strength of the side wall also depends on the compound. Let's get down to specifics. In principle, after digging the Internet and optimizing reviews, there are not very many left. I have only three manufacturers in focus: Continental, Michelin and Vittoria. In each of the manufacturers I will consider a GatorSkin class tire, i.e. with significant sidewall protection against punctures and cuts, and a step higher in speed (and, accordingly, lower in reliability) - for amateur racing. I'll start with the Continental. GatorSkin analogues are “Gator Shell” (differs in a different composition of puncture protection and is heavier) and “4 season” (differs in compound). Amateur Competition Tire - Gran Prix 4000S II (Version 2 now on sale). This tire has a sticky compound called Black Chili (black pepper), an anti-puncture layer and thin elastic walls. Perhaps the most popular tire for amateur competitions on the English Internet. There are quite a few complaints about her in Runet. If we average it out, it looks like this. Firstly, the tire fails long before the compound wears down to the cord due to increased sidewall wear (typical mileage is 2000 km). This is expressed in the incessant punctures of a seemingly enough working tire. Secondly, the width of the tire is 2 mm larger than stated. That is, a tire with a written width of 23 mm actually turns out to be 25 mm, and 25 mm - 27 mm. In my case, this is critical, since my Gator Skin 25mm tire (as it is written on it) is hardly compatible with the existing lightweight rear wing (to squeeze in 25mm I had to slightly change the design of the wing, but this is the limit) . 27 mm will definitely not fit “under the wing”, it may even strike on the feathers (there are quite a few such cases). In addition, there is an opinion that the anti-puncture layer is structurally designed for the nominal width, therefore, a larger “de facto” width leads to the fact that the unprotected side walls seem to climb onto the road. Judging by the reviews, in terms of puncture resistance, the 25 mm tire is dramatically better than the 23 mm. Apparently, the point is just in the width of the anti-puncture layer, which is slightly wider for a tire with a width of 25 mm and therefore protects better. nine0003 The composition of "Black Chili" judging by the reviews is less tenacious compared to the other two of the manufacturers considered. The closest analogue of GatorSkin is Vittoria Rubino (ruby in Russian). In principle, a very popular tire. It's all like a step away from Gator Skin in the direction of rolling. Softer compound (less mileage), less puncture resistance, but more elasticity and rolls better. And the reliability is sufficient for brevets. And sometimes they use it in amateur races, traction allows. Probably, if such a tire would have been on my bike "in stock" instead of Vittoria Zafiro, then I would not have looked for anything else. In 2016 models, “G+” was added to the name of the models, which indicates the addition of graphene to the compound. It is difficult to understand whether this is good or bad. Judging by testing on the Bicycle Rolling Resistance website, rolling has become noticeably worse. But somehow I hardly believe that the manufacturer could “substitute” like that, rather the testing of the compound was in other conditions. It is also interesting to note the difference in design. The Rubino Pro G+ and Rubino Pro Speed G+ models closest to my choice differ, judging by the published design, in different thicknesses of the compound and, perhaps, a little in the number of threads per inch (180 vs. Well, judging by the review on the Bicycle Rolling Resistance website, there is no anti-puncture layer in the Speed version at all, and the tire turned out worse than the Corsa: it rolls worse and is less durable. This falls out of the considered trend, therefore it is alarming ... A feature of the Michelin tires considered below is the compound. It is somehow uniquely sticky and elastic. In general, I met the opinion that the Michelin compound is the best for all sports wheels, not just bicycle wheels. An analogue of GatorSkin is tires with the word Endurance in the title (until 2016), and until 2013 Krylion. The tire outperforms the GatorSkin in terms of traction and rolling, is quite puncture resistant, and runs at least 6,000 km, or half as much as the GatorSkin. In Runet, in the brevet theme, this is a “one-way ticket”, having driven on it, the brevets do not try anything else. The same for training and sometimes for amateur racing. An analogue of the Conti GP4000S II is a model with the word "course" in the name, for example, now there is a sale of tires: Michelin Pro4 Service Course. Why "course"? Because this word in French and in English just means “race”. Why sale? Because Michelin released a new line of "Power" instead of Pro4 with a new compound and more threads per inch with a claim of a 25% reduction in coeff. However, the "old" Endurance in the new line can also be found by the identical design. Now it is called "Protection +", although it may have become a little heavier. Models are new (since spring 2016), prices are "cosmic", there are very few reviews from users. But the ones that do fit the design pretty well. The rollability of the new models has become noticeably better, the strength is noticeably worse. It’s also strange, of course, it’s not clear why it was necessary to “shift” the names in the line? After all, it is not immediately obvious that the new Endurance should be compared with the old Course in terms of rolling and puncture resistance. The three manufacturers examined are certainly not the only ones. Just for the occasion: well (with claims) rolling and at the same time strong enough tires for a road bike, these are the most popular manufacturers, which perhaps divide the entire market. Offhand, everyone else gets 10 percent. The models discussed above are different, but the trend turned out to be smooth, without “wonderful discoveries”. The more reliable the tire, the worse it rolls. Moreover, reliability is, unfortunately, not mileage, but the likelihood of an accidental cut on the side surface when the tire is ejected. Or sudden permanent punctures as the side wall turns into a sieve. That is, you can easily find yourself in the "field" without the ability to return on your own. nine0003 So, if we start from the fact that there is Conti GatorSkin, then Conti GP 4Season and Vittoria Rubino Pro turn out to be near it with a little better rolling and a little less resource.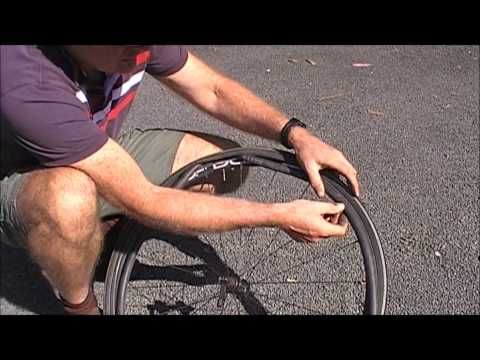 The introduction of new Conti models did not cancel the production of GatorSkin. 3 years have passed since then, but nothing has changed. Continental GatorSkin is still in production and remains the most durable in tests. nine0003
 What's wrong with these tires?
 And this was strange, because on the MTB, when replacing stock tires with any Conti, the feeling of rolling appeared immediately. In addition to sensations, there are also objective indicators. The Bicycle Rolling Resistance website gives the coefficient measured in the laboratory. GatorSkin's rolling friction is pretty big, at the bottom of the list. More about the rollability of the GatorSkin was discussed in the note: "How speed depends on the rollability of tires". I checked this laboratory coefficient in “field measurements” and got the same result (more details here: “Determination of bike rolling parameters from power measurements“). Lab measurements show that the Vittoria Zaffiro Slick does roll better, and top tires can roll even better. This corresponds to an increase of about 1 km/h in speed. Moreover, in practice, it can be more, since the damping of irregularities will improve. nine0003
  When cornering, the roll has to be laid very carefully. Again, it was noticeable compared to stock tires.
  That is, in order to ride without puncturing (and most importantly, to be sure of this), you can do it on weaker tires, but which roll better and hold better in turns. What does it depend on? nine0025 Compound , anti-puncture properties and sidewall softness . If you start from GatorSkin, it turns out something like this.
 Compound (rubber compound)
 Similarly, when maneuvering, sticky wheels will of course hold much better in corners. But such a softer compound will wear off much faster. Typical suitability figures for such a tire are 3000 km, that is, it may not be enough even for a season.
 Anti-puncture layer
 nine0003
 The softness of the side walls
 But in general, alas, a tire with a claim even for an amateur race will not have a side wall that is so strong. Therefore, judging by the reviews, the service life of such a tire in half of the cases is determined not by tread wear, but by hitting a pebble that cuts through the sidewall of the tire. Then ingenuity comes into play, but in general, in such a case, it is better to carry a spare tire (nightmare!). nine0003
 Continental
 Judging by the reviews, these tires do not roll better, and the 4 season is also less durable. This actually confirms that the combination of compound and construction at GatorSkin turned out to be so successful that the tire continues to be produced in parallel with tires of the next generations. nine0003
  nine0003 GatorSkin, the 25mm model is exactly 25mm and is
  That is, it collects crumbs well, but it doesn’t cling to corners very much, compared to Vittoria and Michelin. Nevertheless, the tire is well made, the quality of the compound is stable, and in general, there are a lot of positive reviews. And the total number of reviews goes off scale. This is due to the fact that the 25mm model is often used as an all-purpose tire. And for trips around the city, and for brevets and racing. Therefore, according to the set of parameters for fast driving, it turned out to be a standard, as well as GatorSkin for reliability. nine0003
 Vittoria
 Nevertheless, Vittoria also has a more racing tire, the name of which has featured the word Corsa for many years (in Russian, this is a race), which is thinner, faster, and it is she who is the analogue of the aforementioned Conti GP4000S II. According to reviews, the tire is considered to be faster than Conti, it holds better in corners, so that the pedal is “erased”. But it also ends the operation, as a rule, with an unpredictable side cut. nine0003
  150). nine0003
 Michelin
 There are also disadvantages. They are associated, judging by the reviews, with the unstable quality of the compound. The compound itself may not be very durable. In addition, the tire has beautiful multi-colored stripes that can fall off over time. And the compound itself is not stored for a long time. If you suddenly happen to buy a tire that has been in the warehouse for three years, then the compound may peel off the cord after several trips. And in the heat it is better not to ride them. In general, sometimes the reviews are such that you understand that the quality of Continental is really stable, although the compound is not so fancy 🙂
  rolling friction. It's hard to tell, but it looks like the new Endurance is more similar in design to the old Course. The main difference between the “old” Endurance is that the additional layer of “bead-to-bead” side protection (from side to side) is removed. The new Power Competition is another step in the direction of speed and reliability. Similar in construction to the "old" Course or "new" Endurance, but with thinner, more flexible materials. nine0003
  Moreover, an accurate comparison may not be in favor of the new model ...
  At the same time, the reliability is the same, that is, you can be sure that there will be no accidental cut of the sidewall. Gator Shell can not be considered, from GatorSkin, in my opinion, it differs only in that it is heavier. The rollability of these tires is not nearly as good as the GatorSkin to change from one to the other. Next up is the Michelin Pro4 Endurance (old) or Michelin Power Protection+. Apparently it can still be considered that this is the same tire. Rollability is even better, but the softer, stickier compound can be problematic. It is necessary to wipe the compound after passing through the area with crumbs, and in general, inspect it often. Otherwise, sticking pebbles will greatly reduce the resource. But the side wall is strong, so there should be no accidental cuts. All these tires are still not for racing, even amateur ones. That is, you can, of course, participate, but then you can also use GatorSkin 🙂 Next comes the “borderline model” Continental GP4000S. The compound is less sticky than the Michelin Endurance, but still somehow unique (further in the line, all tires have compound that is a work of art fused with science).
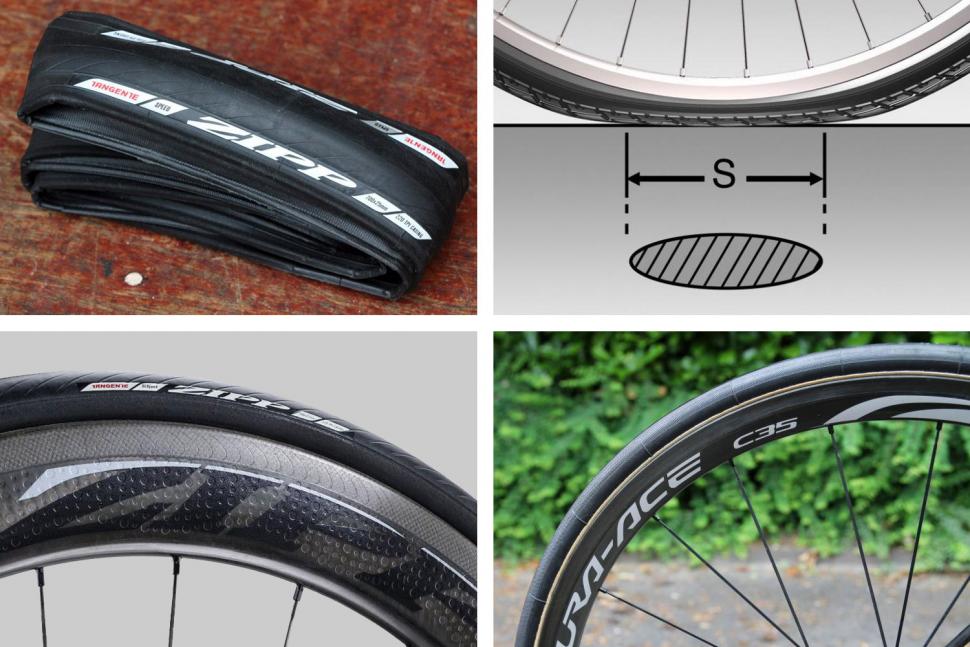 Probably for me this tire would be the most suitable now if it was made in an “honest” size “width 25 mm”. Or 23 mm, but also honestly. In the current size "23", when the dimensions of the anti-puncture layer correspond to 23 mm, and the sidewalls add up to 25 mm, this tire loses its reliability. In principle, there is nothing unusual in this, all tires “on the other side of the border” are just as unreliable, but at least they roll better. On the same border, perhaps, is the Michelin Pro4 Service Course (or the same as the "new" Michelin Power Endurance). That is, you may be lucky and will walk for a long time, or it may break quickly. But still there is hope for a couple of thousand kilometers. These tires roll significantly better than the GatorSkin group, so the risk is worth it. You can carry a spare tire and pull it off to the fullest 🙂 And finally, from the reviewed ones, Michelin Power Competition, I can forget about it. It is more likely to be attributed in terms of reliability to tires without an anti-puncture layer, for which the highway must be swept before the race so that there are no pebbles.
Learn more