Jetting is critical in carbureted dirt bikes and ATVs and it's important to understand how carburetor tuning works to make sure your machine is running optimally. Check out our guide to carburetor jetting adjustments here.
Over the years, two and four-stroke carburetors designed for powersports machines have evolved into technological marvels with numerous features that allow engines to deliver state of the art performance. However, most carburetor designs still require proper tuning to deliver that performance. The difference between a properly jetted carburetor and one that is out of tune can result in consistent race wins or consistently bad performance, or worse yet, engine failures. So, we wanted to cover the basics of jetting, including an overview of why jetting is important, where to find the necessary info to make good jetting decisions, tools required to re-jet, where to buy jets, and tips and tricks to make carburetor adjustments easy.
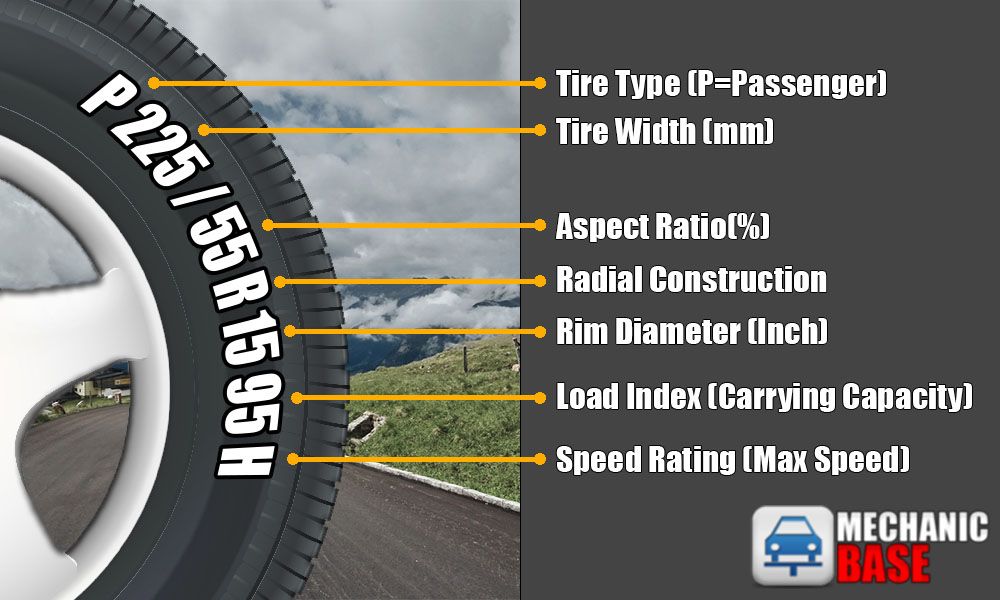
To understand the criticality of jetting, we only have to go so far as to understand the function of the carburetor. The carburetor’s job is to precisely and repeatedly deliver the appropriate amount of fuel to the engine throughout its entire speed and load range. To do this, carburetors utilize several different circuits that control different parts of the speed/load range of the engine. These circuits are metered by small brass inserts called jets and by a needle situated in the slide of the carburetor. Jets come in different orifice sizes so that the amount of fuel being delivered to each circuit can either be increased or decreased. Needles are offered with various profiles but are predominately adjusted by altering their height within the carburetor. This is done by changing the needle’s clip position.
A combination of jets and a needle meter fuel delivery through the carburetor at different levels of throttle. Adjustments to jet and needle sizes and needle clip positioning all play a role in tuning. Read on for more details.
The amount of fuel that must be delivered to the engine is dependent on the atmospheric conditions in which it operates. Specifically, engine performance is dependent on ensuring the air to fuel ratio is optimal. While carburetors are very good at metering precise amounts of fuel, most of them cannot account for changes in air conditions. There are two variables that affect the ambient air conditions: temperature and pressure. Temperature and pressure ultimately affect the density of the incoming air, which has a significant effect on the engine’s air to fuel ratio.
A couple of practical examples that highlight how air density changes include when temperatures or elevation changes from the baseline conditions the carburetor and engine were tuned for. As temperatures increase, air density decreases and when temperatures decrease, air density increases. Similarly, as the operating altitude of the engine increases, air density decreases due to decreasing air pressure.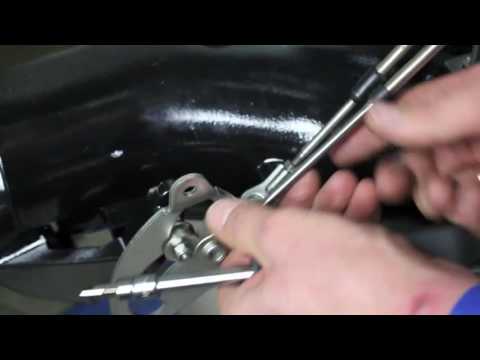 The opposite is true when altitude decreases.
Since the world is a diverse landscape and atmospheric conditions are always changing, it is not possible to set up a carburetor correctly for all conditions. Instead, manufacturers utilize jetting charts which provide the operator guidance on how to configure the carburetor for specific temperatures and elevations. Jetting charts can be found in the operator’s manual that comes with the machine or in the service manual which is usually sold separately. A standard jetting chart for two and four-stroke carburetors provides guidance on the attributes of the pilot screw, slow jet, needle clip position, needle type, and main jet.
Many OEM owner's or service manuals will include jetting charts suggesting what changes to make based on altitude and temperature. This is an example ONLY, do not use this chart to tune your carburetor.
Jetting requirements can also change when engine modifications are carried out. When engine modifications, such as the addition of a performance exhaust system, are incorporated the air flow through the engine changes necessitating carburetor adjustments. Depending on the modifications being made to the engine, fueling adjustments may need to be richened in certain throttle ranges and/or leaned out in others. When adjusting carburetor settings to account for engine modifications, it is always best to start with the setting recommended by the supplier of the aftermarket components, and then test to confirm optimal performance.
Technically, none of the metering circuits found within a carburetor are completely independent of one another, which means that any changes made to one circuit will have a small impact on another circuit. However, from an adjustment standpoint, the circuits and what parts of the speed/load range they primarily effect are shown below:
The tools required to re-jet a carburetor are basic in nature and predominantly consist of the usual tools needed to service your machine such as sockets, wrenches, allen wrenches, and screwdrivers.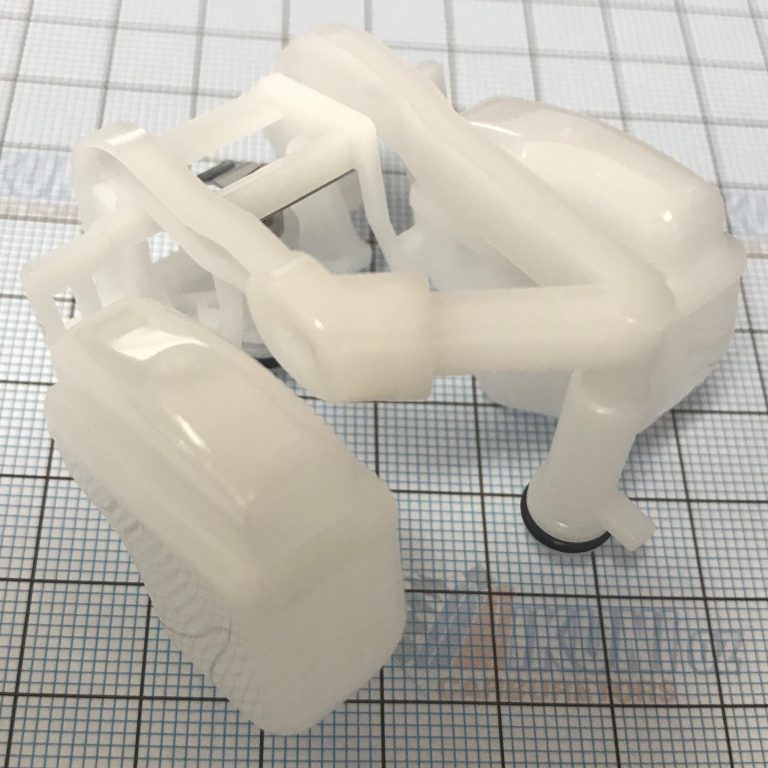 A set of small medium-length flat head screwdrivers is necessary to remove the small jets found within the carburetor. On machines with limited space between the carburetor and engine cases, a low-profile float bowl wrench may be necessary to remove the float bowl plug.
ProX offers jets for Keihin and Mikuni carburetors in a wide range of sizes so that no matter where you ride or what modifications you make you can precisely adjust your carburetor to ensure your engine runs optimally. ProX provides jets for all types of two and four-stroke carburetors which include FCR, PWM, CR roundslide, PJ, PWK, and PWM to name but a few. ProX jets are manufactured in Japan to exact OEM specifications and are available at cost effective prices.
Click here to find available jets and jet kits for your machine.
Before making jetting changes, it is best to ride and warm up the machine. Whether you’re putting in laps or tearing up trail, be overly cognizant of how the engine is running at various throttle positions. Take note of idle quality, transitions, mid-range, and wide-open throttle. Note any areas of concern then compare your notes to the conditions for the day and determine how they compare.
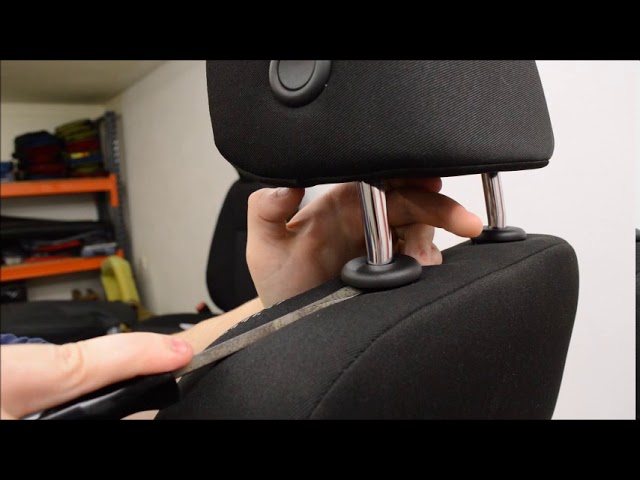
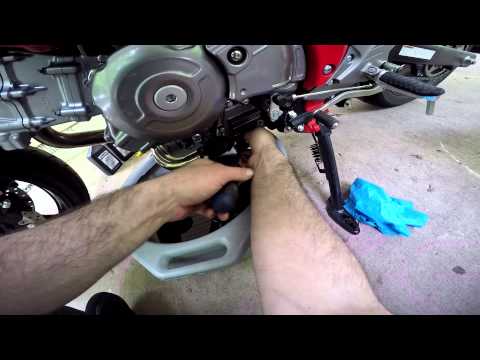
The layout of your machine will greatly influence how much work is required to make jetting changes, however, most machines are designed so that the carburetor jets can be changed without completely removing the carburetor. For specific information on how to service your carburetor to make jetting adjustments, refer to your machine’s factory service manual. The following information is provided as an overview. To gain access to the slow and main jets, the intake clamps are loosened and the carburetor can be rotated to expose the bottom of the float bowl.
To service the needle, the carburetor may be able to be rotated so the slide cover is oriented outside of the frame, otherwise, the seat and fuel tank can be removed to gain access from above. When adjusting the position of the carburetor on models equipped with a throttle position sensor, make certain that the wires are not pinched or strained in any way. Prior to making any adjustments, ensure the fuel supply is turned off. If the carburetor is equipped with a float bowl, it should also be drained.
In some cases, it may be easier to remove the seat and tank to gain access to the slide cover when the carburetor is on the bike. Be sure to turn off the fuel supply before performing any of this work!
Slow (Pilot) Jet
Needle
 Position refers to which slot the clip is inserted on, it's counted from the top down. The needle sits down in the middle of the slide and rests on the clip.
Main Jet
Once jetting changes have been completed, carefully reinstall all components and hardware. Repeat the warm-up and test riding process, then carefully note differences in engine performance from the previous session. If the jetting charts or instructions provided were adhered to, engine performance should notably improve.
The next area for fuel control is the carb float needle.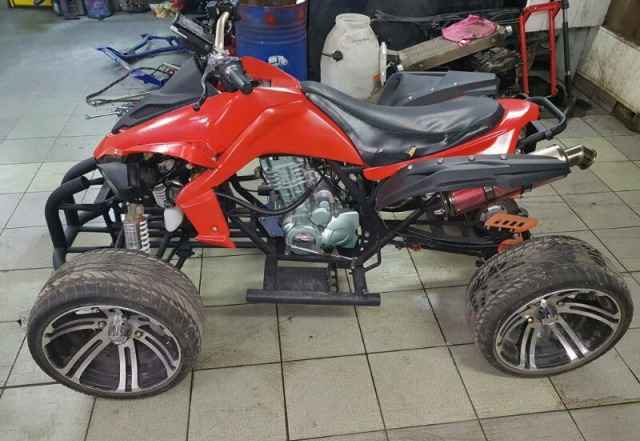 If your gas valve tests good, or has now been repaired or replaced and tests good, we will move on to the carb float needle.
The fuel valve controls fuel when the bike is running or when the lever is in the off position. The carburetor float needle stops excess fuel at the float bowl.
The needle has 2 tabs or ears on the end that enable it to sit securely in a notch on top of a brass or plastic float {see photo below}.
In the absence of gas, the float moves down, allowing the needle to let gas in, filling the bowl to a specific height. The rising float lifts the float needle into the needle seat, sealing off the gas entry point.
When a carburetor float needle gets corroded from old gas, or fails, it can no longer move freely into the needle seat. It can get stuck outside the seat, effectively, in the open position. This allows gasoline to overfill the carb and run down into, and flood, the engine.
See Why is fuel inside your engine bad? on the previous page.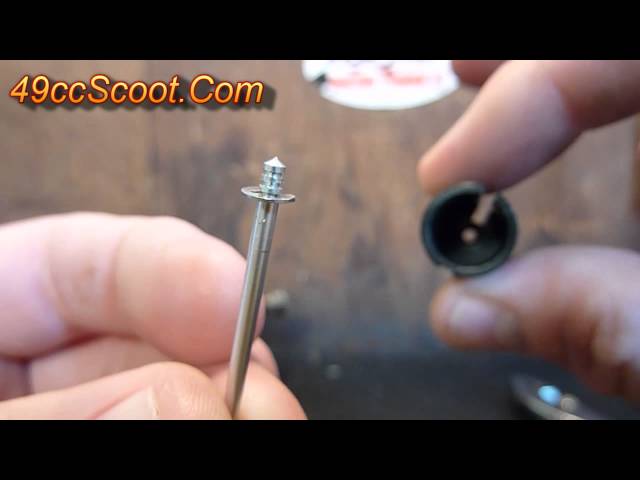
The float may also fail.
Floats can develop pin holes or minuscule cracks that let fuel inside the float. This makes it heavy, no longer buoyant, so that it can no longer “float” up and down. If it can not float up the fuel will continue to enter through the float needle.
The float needle and seat together, are often called a float or needle valve assembly.
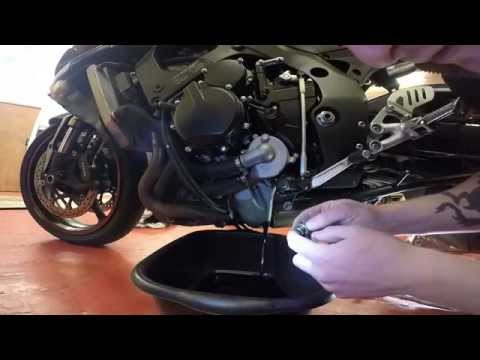
The carb float bowl needs to be removed so that you can check the condition of the float and needle. I did not have a DR200 carb to demonstrate but I had a set of old crusty Honda CB450SC carburetors to work with.
You may try to do this with the carb still on the bike. I took the carbs off & put them on the work bench to make it easier to photograph.
If you do take the carb off the bike, make sure you drain the float bowl before taking it off. Just loosen the drain screw and let the fuel run down the drain hose.
Check the Carb Jetting page section Before You Begin for a list of what you should have on hand.
Got everything? Now you’re ready.
First, remove the screws that hold the float bowl to the carb housing. If the bowl does not come right off, you may need to thunk it with the handle of your screw driver to dislodge it. Now you can see the float.
It is attached to the carb body with a long thin pin on which it pivots or floats up and down {see photo at right}. You need to tap this pin out. Place the tip of a pick or super thin screwdriver on the end of the pin and lightly tap the handle with a small hammer.
If your tool is too large to tap it all the way out, gingerly grab the other side with pliers or vise grip. You want to hold on to it but not grip it so tightly that it becomes deformed in some way. It needs to go back in when you are done. Holding the pin in the plier or vise grip jaws, tap the tool with the hammer to pull the pin the rest of the way out {see photo below}.
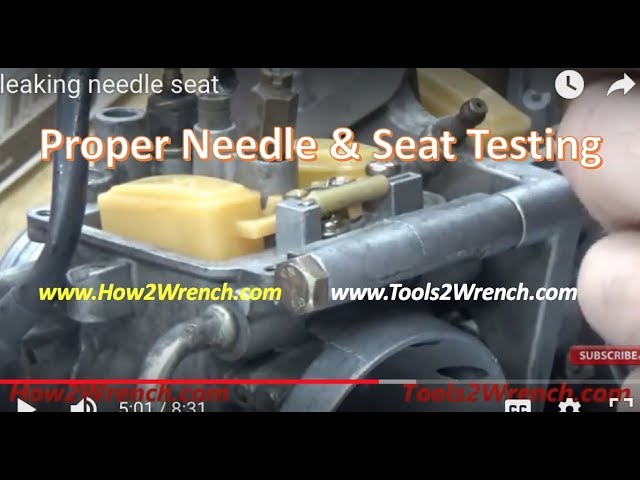
Once the float pin is removed you can lift out the float. The float needle should be in its notch on the float. If it is not there, look in the needle seat.
The seat is in the carb housing, under the float, just in front of when the pin was. The float needle may be stuck in there. Use small pilers to grip the end and pull it out. Don’t worry, it can’t fall all the way in.
The 2 side-by-side photos above show the needle in the seat (left) and an empty seat (right).
If at any point things seem really cemented in there, use a little carb clean or lubricant to loosen them up.
Next, check to see if the needle slides freely in and out of the seat. If it does not, that is most likely the source of your fuel problem.
See cleaning a carb needle & seat for more information and photos of how to clean the float needle & seat and ordering replacements if you need them.
Leave Carb Float Needle and go to Fun Stuff
Weeks Motorcycle Home
In order for the ATV to work like a clock, the rider needs to regularly carry out a complete maintenance of the equipment.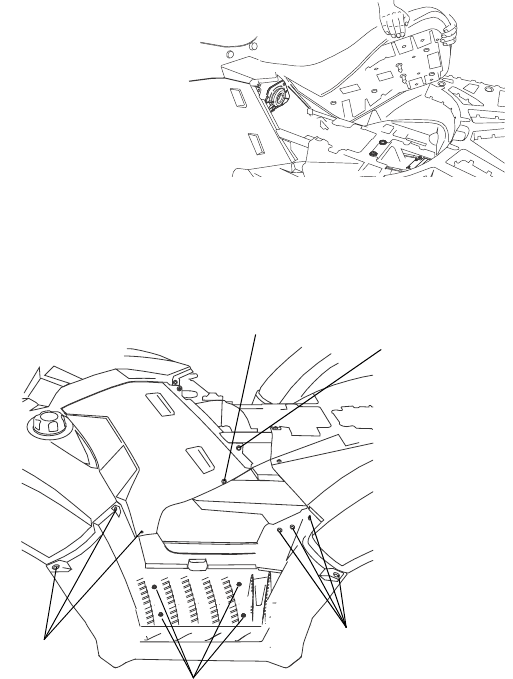 And a key element of maintenance is ATV carburetor adjustment. Over time, the system starts to work incorrectly, which increases fuel consumption, worsens dynamics and other problems appear. So how do you adjust an ATV carburetor? nine0003
The operation and life of the engine directly depends on the quality of the fuel mixture. The carburetor is responsible for the preparation of the composition, but after prolonged use of the equipment, the settings “go astray”. This results in:
Many riders who decide to buy an inexpensive ATV simply do not spare the technique and ignore this procedure. But even if you plan to change your device in 1.5-2 years, adjustment is needed. The reason for this is increased fuel consumption. A quad with an untuned carburetor "eats" 30-40% more gasoline, and these are tangible costs.
So how do you adjust the carburetor on a Chinese ATV? For this you need:

However, it is important to remember that all adjustments are made only with a "clean" carburettor. This means that the rider needs to remove all the dirt from the node and flush the system to remove condensation and sediment from it.
Note: Just before adjusting, the engine must be warmed up to operating temperature.
To set the carburetor idle speed, the float chamber must first be cleared of fuel. To do this, start the ATV, close the fuel cock and wait until the machine stalls (5-10 minutes). To speed up the process, you can take a little ride on the quadric. Of course, gasoline can be drained, but in any case you will have to warm up the device, so the first method of "removing" gasoline is more effective. nine0003
Then:
Read the manual before adjusting the carburetor on a 125cc ATV to be sure. Remember that the location of the bolts is different in different devices, so read the documentation in advance. nine0003
To evaluate the quality of the fuel composition, make a test run. After that, unscrew the candle, and evaluate its condition. If it is:
Also look out for these “symptoms”: damaged tip (electrode failure), oil deposits (damage to rings and caps), chips and inclusions (sign of motor failure).
To adjust the mixture you need to twist the needle cover and pull it out. To get the needle, pull out the cable. After that, move the ring in the required direction (lower - more air, but less fuel and vice versa).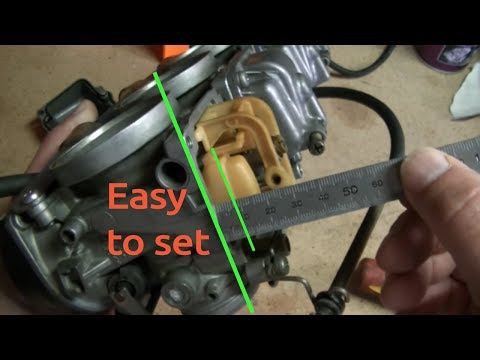 Then start the engine and make sure it doesn't stall. nine0003
The last step in adjusting the 125cc ATV carburetor is adjusting the petrol level. To do this, you need:
The problem of floating idle is constantly present and often quite difficult to solve. Traditionally, the output can be ordinary, for example, in some cases, it is enough to change the candle and the problem is solved, but quite often there are a number of small flaws and shortcomings. In this case, there is a number of factors that, in combination, have every chance of influencing the correct operation of the motor.
Proper idling on the scooter is only possible if:
The spark plug is in good condition and has the correct gap
No carbon deposits, fusion
Although you changed the rings, you could not pay attention to carbon deposits inside the combustion chamber, in particular, on the cylinder windows, on the cylinder head. Excess deposits in the engine, which could have been created as a result of bad oil (if the scooter is two-stroke) will directly affect the correct operation of the engine
Proper idling is impossible in the absence of a working starting enricher
He plays a major role when starting the engine on a cold one. And in this case, the speed must float within this until the engine warms up. At the beginning, immediately after starting, the speed should be higher, and will gradually decrease as the scooter engine warms up. Therefore, it is necessary to adjust the idle speed only on a warm scooter. Exhaust pipe and filter must be clean. The carburetor must be flushed and purged at least every 2 years, especially if you do not operate the scooter in winter. nine0003
Normal idling is not possible, both in one of the above cases and in the complex quite simple design of the carburetor, it is also located in a convenient place, which makes it possible to quickly adjust. And if you are the owner of an Alpha moped and the like, this guide on how to set up a carburetor on an Alpha moped is for you. nine0003
Most mopeds need a carburetor adjustment, because over time the fine settings are lost, and it becomes necessary to improve idling or fuel consumption. This need may arise when the Alpha moped begins to malfunction, giving out a completely different combustible mixture. The standard ratio of gasoline to air should be 1 to 15. Deviation from the norm leads to the fact that the mixture is enriched or depleted.
If the mixture is rich, you will experience the following symptoms:
Signs of a lean mixture include:
If you do not know how to adjust the carburetor on a 50 or 110 cc alpha moped, follow all the steps in sequence, but before doing this, make sure that the engine is normally warmed up. After that, you will have to perform the following steps to fine-tune the carburetor:
Step 1. Setting the quality of the mixture. The Alpha moped has a special screw for this, which must first be fully tightened and unscrewed by a maximum of 1 turn. Next, we find the idle screw and rotate it until the moped starts to work steadily at normal speeds. The next stage is the lean mixture, after idling, you will have to unscrew the mixture quality screw a little until the engine starts to work poorly intermittently. nine0003
Step 2. We made the mixture lean, but we need to fix it, for this we enrich the mixture with the idle screw, twisting it. The adjustment takes place until the motor starts to work normally and without interruption. You can check the fact that the carburetor of the Alpha moped is set by pressing the throttle. If, when it is suddenly opened, the engine immediately stalls or chokes, you will have to enrich the mixture by unscrewing the mixture quality screw a little.
This way we get a properly tuned carburetor. In turn, this affects fuel consumption, engine power and its smooth operation. If the carburetor is stable, the engine will be able to deliver full power. In some cases, setting up the carburetor of the Alpha moped is impossible on its own, but experts do the procedure in 10-20 minutes. nine0003
Mixture quality plays a key role in the operation of the entire scooter, because incorrectly set parameters will cause the scooter to choke, consume a lot of fuel and increase wear on the piston group. That is why the combustible mixture should be in the optimal amount, a lean mixture indicates a loss of power and frequent overheating of the engine, a rich mixture is characterized by high fuel consumption and the presence of heavy carbon deposits in the combustion chamber.
There are two ways to adjust the quality of the mixture - by adjusting the screw or by the level of the needle in the gate. In some cases, the carburetor device assumes the absence of an adjusting screw, so the adjustment is carried out only with a needle. The standard procedure for adjusting the screw is by turning it counterclockwise and clockwise, in the first case the mixture becomes lean, tightening the screw indicates enrichment of the mixture. In the case of a needle, the mixture can be enriched by raising it up, the lean mixture is set on the lowered needle. nine0003
Important: mixture quality adjustment should also be carried out on the engine warmed up for 10-15 minutes. The instructions for most scooters say that there is a standard setting for the quality of the mixture, where the screw should be unscrewed only 1.5-2 turns
Therefore, if it is impossible to fine-tune the mixture, stick to this indicator
setting the quality of the mixture, where the screw should be unscrewed by only 1. 5-2 turns. Therefore, if it is impossible to fine-tune the mixture, stick to this indicator. nine0003
Needle adjustment is carried out by increasing or decreasing it, it has markings and a special retaining ring that sets the current height. Accordingly, having discovered a poor mixture, you will have to raise the level of the ring by 1 mark. Having achieved optimal performance, your scooter will run smoothly and correctly, fuel will consume in a normal amount, and the power will correspond to the characteristics.
The quality of the mixture supplied to the engine cylinder determines the behavior of the scooter in cold weather, as well as how high the wear of the cylinder itself will be. For example, with a rich mixture, the engine starts better, but carbon deposits form, with a poor mixture, the cylinder wears out quickly and traction disappears. nine0003
In order to facilitate the process of starting the engine, you can set the ignition to advance, this will make it easier to start the engine, regardless of the weather outside, slightly increase engine power, and traction will increase significantly.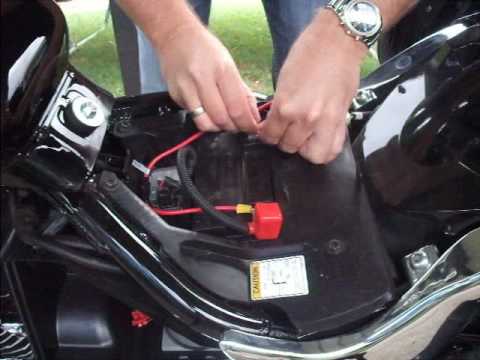 The peculiarities of such settings are that the charge in the candle is formed before the piston is at dead center. Thanks to this, it is easier to start the engine and increase engine power. However, it is worth remembering that cylinder wear may increase. nine0003
The procedure is carried out in much the same way as the normal ignition setting, but has its own nuances. To do this, all the same actions are carried out, only the labels are not completely connected. The gap should be about half a centimeter. This is enough to get the desired effect.
About adjusting the ignition of a 4t scooter
Knowing how to adjust the ignition of a 4t scooter on your own will save you time and money, since you will not need to go to motorcycle repair shops. The procedure is simple, even in the absence of experience it takes a little time, but you will need to be patient. Regardless of the type of ignition, how the marks will be set plays an important role.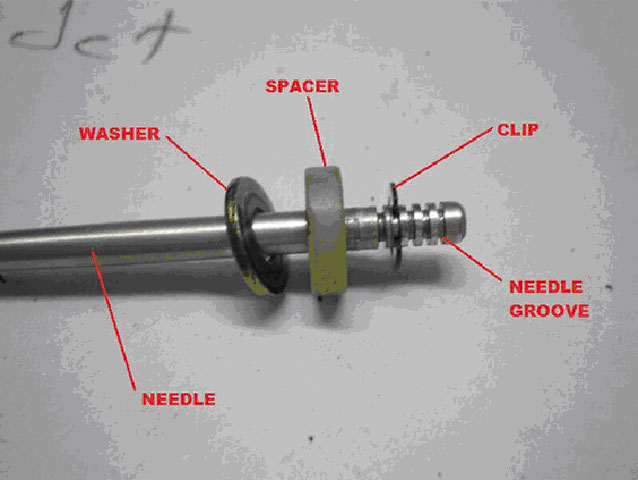 nine0003
Proper adjustment is the guarantee of stable and smooth engine operation even in cold weather conditions. Often, in used vehicles, the ignition is knocked down: this can happen for various reasons, ranging from elementary shaking during movement to improper handling of equipment. In order for the scooter not to let you down and you can start it at any time, you will need to learn how to carry out this procedure yourself. To do this, you will need to have several keys that allow you to remove the valve cover if the engine is a four-stroke. nine0003
If the ignition is knocked down, this may cause the scooter to fail to work. Restoring it is easy if you figure out how it's done.
You need to start the adjustment by setting the timing in the desired position. As a rule, there are marks on it for this, they are put up at the factory. The cylinder must be installed at a dead center. The label may be represented by the letter T or another symbol.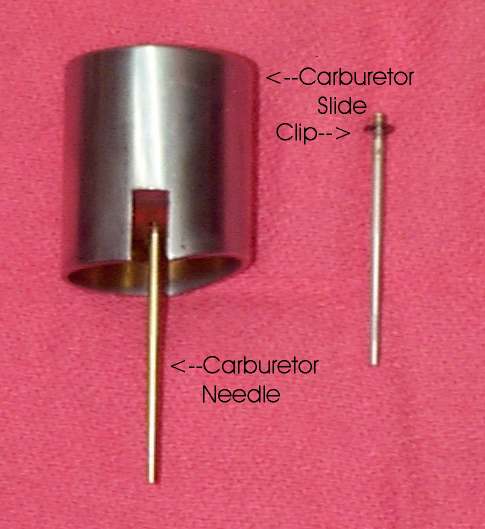 Now make sure that the mark set on the rotor matches the mark found on the magneto. To do this, gently press the kickstarter. The rotor can also be turned by hand, but it is more difficult. nine0003
There are also marks in the form of holes or dots on the timing star, they must be set in such a way that the largest hole is on top and is exactly in the center. The remaining points should be below and located horizontally opposite each other. It makes sense to set the ignition ahead if you want to increase the power of the engine a little and make it start easily. The setting will help make the spark plug spark earlier than the standard time. That is, a spark will appear even before the piston reaches dead center. In the cold, a moped configured in this way will start better. nine0003
In order to configure the scooter in this way, you will need to repeat the procedure described above. However, there is a difference: the marks should not coincide clearly, and not reach each other by about 0. 5 cm. The main difficulty lies in connecting the marks.
At the first stage, unscrew 4 bolts and remove the seatpost, on some models the oil tank cap is also unscrewed. Then the air filter is removed, for which we release the cuff fastening clamp screw and 2 10 bolts fixing the housing. The rubber cuff of the filter housing from the carburetor can be pulled off with a certain force. Now you need to disconnect the gasoline and oil hoses. For this purpose, the loops of the clamps are compressed and the two hoses are pulled together. Using a 10 wrench, unscrew the nearest bolt to the intake pipe. Unscrew the second bolt inside. At the moment, 2 hoses have already been released, 2 mounting bolts have been unscrewed. Now you need to remove the device, unscrew the throttle valve cover and remove the throttle. For the final release of the device, it is necessary to remove the protective cover of the starting enricher from the latches and unscrew 2 screws from the enrichment clamp. nine0003
Look at the connection of gasoline confused air connection with gasoline. How to correctly install the locking needle?
At the moment there is no photo of how to properly install the float shut-off needle, I'll try to explain in words. Most likely you have a plastic float and most likely, of course, two lower support protrusions and one stubborn in the center on top. It is necessary to put a needle in them so that the needle is oared on the 2 lower support ones and rests on the upper stubborn one. My Honda Dio scooter won't start and gasoline is gushing out of the orange hose when starting the scooter. nine0003
First, tighten the screw in front of the hose. This screw is for draining gasoline from the carburetor. And start the scooter, it will not start right away when the carburetor chamber is full, if there are still no circumstances and breakdowns, if it is natural about the hose of which Honda Dio 34 carburetor I moved my brains.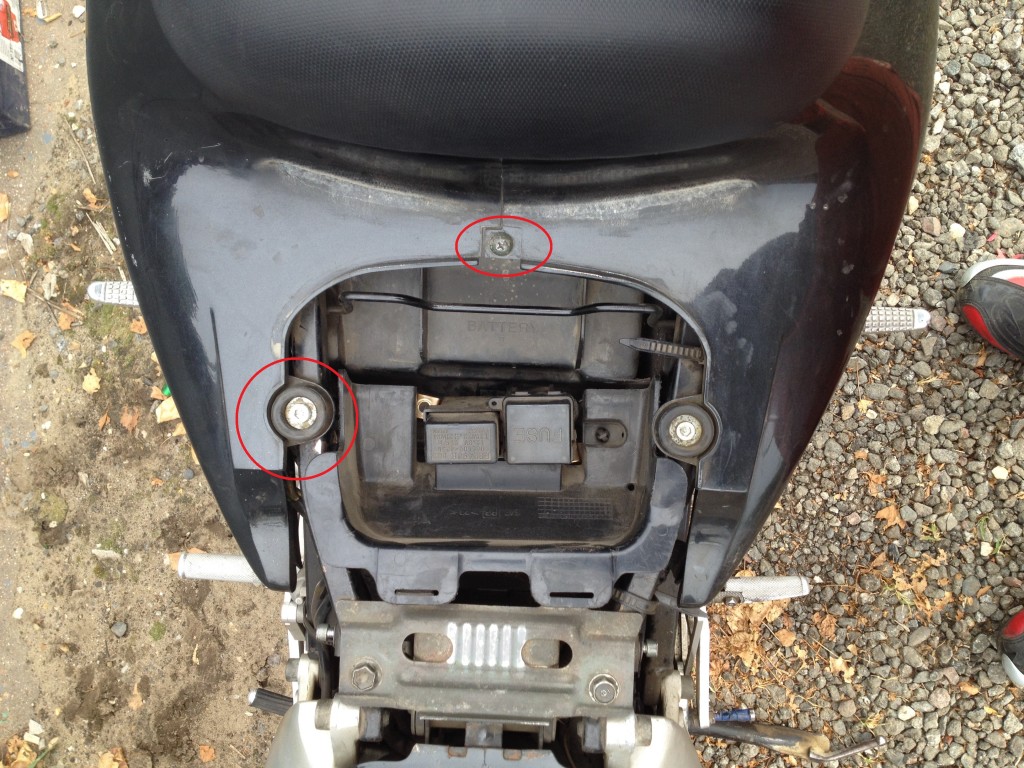
Tell me Honda tact. If you let it go, the moped stalls and the idle screw does not help. An oil change in a Honda Civic Ferio box in most cases is associated with the repair of the Automatic Box itself, or it is replaced with a new one during the period of work to eliminate oil leaks, because it needs to be drained for work. The oil in the automatic gearbox is filled in by the manufacturer once entirely for the life of the car. nine0003
Oil change in Honda Dio 34 carburetor automatic Honda Honda Dio is a compact and maneuverable scooter from the Japanese company Honda. For its working properties, for unpretentious maintenance and the highest potential for tuning, this car has gained immense popularity both in the nearest territory of the Land of the Rising Sun and beyond.
Carburetor adjustment on a 2T scooter
Suzuki Lets 2 carburetor cleaning
The most detailed carburetor setting is X.X. .Scooter.2.A carb adjustment. X
Suzuki Let’s 2: Train Tyr-Tyr-Tyr)
Theory (My Tact 24 Part 7)
OWN HANDS: CLEANING THE CARBURETTOR Suzuki Lets 2
Carburetor SUZUKI LET'S-1, LET'S-2, LET'S-2 NEW
A brief description of the connection of the SUZUKI LETS 2 carburetor power system
The scooter smokes and does not ride well on a cold engine: EK is to blame
. Depending on the condition of the engine, cylinder size, quality of gasoline and other factors specific to each scooter, additional carburetor adjustment may be required. nine0003
Before you get started, it is highly recommended to clean up the fuel system, namely: clean the carburetor and air filter, and adjust the fuel level in the float chamber.
The carburetor should only be adjusted when the engine is well warmed up. That is, before setting up, you need to drive the scooter for 10-15 minutes.
The carburettor usually has two adjusting screws. The smaller one is the mixture quality screw. The larger one is the idle screw. However, there may not be a screw for the quality of the mixture - then the quality is adjusted by manipulating the throttle needle. nine0003
The factory settings are as follows: the quality screw is loosened by 1.5-2 turns, the idle screw by 2.5 turns. What does it mean? This means that the screws must first be screwed in clockwise to the stop, and then unscrewed back by the appropriate number of turns. It is from these initial settings that you should start setting up. And in principle, if at the same time the motor runs stably, and the scooter accelerates without failures and up to maximum speed, you can not really adjust anything. But if this is not the case, then adjustments cannot be avoided. nine0003
So put the scooter on the footboard. The motor must be running (and must be warmed up before tuning).
Loosen the quality screw 2 turns. Now you need to adjust the idle. Turn it slowly (clockwise) - the engine speed will increase. At some point, the clutch will work and the rear wheel will start to spin. Then turn the screw back a quarter of a turn.
Now you need to test how the scooter will behave when driving. Accelerate on a flat road. nine0003
If you turned the mixture quality screw, then you need to adjust the idle speed as described above. nine0003
Ideally tuned, the scooter should accelerate smoothly and steadily, and reach top speed.
Attention: This article and images in it are subject to copyright. Partial or complete reproduction on other resources without agreement is prohibited. Thus, you can quickly and accurately adjust the carburetor on the scooter. A properly tuned carburetor makes it possible to obtain lower fuel consumption, improve dynamic performance and generally give the scooter the ability to start and run normally
Before the procedure itself, it is important to warm up the engine well, also, if possible, clean the entire carburetor from dust and dirt.
Standard carburetor adjustment manipulations include the following steps:
 nine0010
 Before installing the air filter, turn on the ignition and kick the kick starter leg several times until the engine starts.
If it does not start, then the most common cause is a malfunction of the cold start system.
We check it like this: cover the carburetor hole with your fingers to max enrich the mixture with gasoline, and continue to poke the kickstarter.
If the engine starts and the speed does not drop during operation, then look for the cause in the cold start system. nine0003
If the cold start system is working properly, then after starting the engine, the speed will rise and gradually, within 10 minutes, will begin to fall. On a warm engine, slowly loosen the large screw (amount of mixture) until the speed drops to medium confident idle.
Do not splash or drip gasoline from the carburetor.
If gasoline splashes from the air inlet, this indicates a malfunction of the reed valve in the engine. Then the valve must be removed and cleaned or replaced with a new one. nine0003
And if gasoline leaks out, then this indicates a large level of gasoline. Adjust the float level and seal the needle valve.
The scooter carburetor can be located in different places. It depends, first of all, on the brand of the scooter. For example, in the Honda Dio-35, this element is located on the left side, closer to the rear wheel. A gas cable and a fuel hose lead to it. Everything is clearly visible and you won’t have to look for a carburetor for a long time.
Scooter carburetor adjustment is needed in the following cases:
The adjustment must be made when the engine is warm.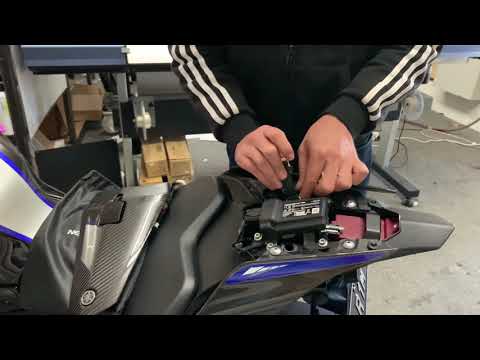 But before it starts, it is recommended to rinse and thoroughly clean the carburetor. First of all, the XX is adjusted, then the quality of the mixture is adjusted and the fuel level is adjusted. nine0003
The idle speed is adjusted by means of a screw. Such an adjustment will come in handy if the scooter has been idle for a long time. After it, the carburetor, as it were, will gain a new life.
We remind you that the adjustment is carried out after the engine has warmed up for at least ten minutes!
Mixture adjustment is also very important. It is recommended that you always set it to the factory proportions. If the mixture is too lean, the scooter will often overheat, lose power and dynamics. On the contrary, if the mixture is too rich, then fuel consumption will increase, soot will accumulate more often in the chamber.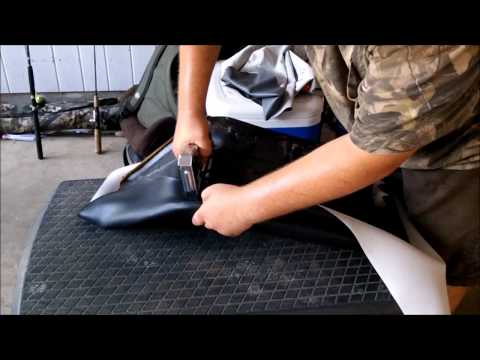 nine0003
This parameter is adjusted using a special screw or by moving the needle in the throttle. Often the adjustment is carried out in the second way, since the screw responsible for this parameter may be damaged or simply absent in this model.
In case of needle:
The best results can be achieved by combining these two adjustment methods.
Again, the scooter engine should be warmed up for a few minutes before making any adjustments, and the inside of the carburetor should be clean.
The mixture quality is correctly adjusted in the following cases:
How to find out the degree of enrichment of the mixture by the candle
Fuel level adjustment is carried out after checking. At the very bottom of the scooter carburetor is a transparent tube, through which you can determine the level.
Once again, the carburetor must be clean during adjustment. It is necessary to fill in only fuel with the manufacturer's recommended octane rating, and the jets and other parts must be regular, and not homemade or removed from the carburetor of another scooter. nine0003
https://youtube.com/watch?v=a0rMb8efxkM
Also in the carburetor there is a jet that is responsible for the amount of air, located under the cover.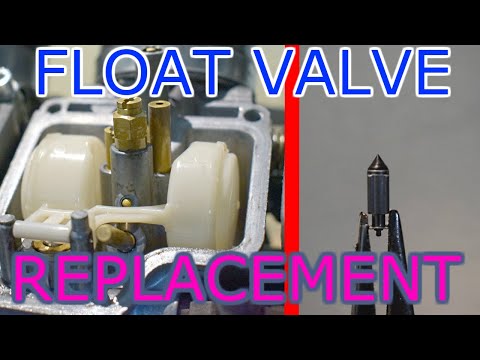 The jet is located in the air channel, so when you turn the screw, the throttle rises and the air flow increases. At the same time, engine speed increases.
Adjustment is carried out as follows:
Check all O-rings for damage. Replace if necessary.
When cleaning the carburetor, remove the vacuum diaphragm (vacuum flap) before using purge air or cleaning solvents. This will prevent damage to the diaphragm. nine0003
carburetor 1. The engine is difficult to start
-there is no spark -a fruit compression
2. There is no fuel in the carburetor
-Closed fuel highway -covered fuel filter -vanity -cut -out -cut -out -cut -out -cut -out -cut -out -cutting -cut -out -cutting line line - Inlet needle clogged - Float level set too high
3. Too much fuel for the engine
- Dirty air filter - Air leak in the manifold - Defective enrichment valve - Blocked air passage in the carburetor
4. Too rich or too lean air/fuel mixture
- Faulty enrichment valve - Tightened idle screw - Float needle stuck or dirty - Float height too high or too low - Blocked air passage in carburetor - Dirty air filter - Air leak in carburetor or manifold
5. Engine does not accelerate
- Bad spark - Air mixture screw too tight - Faulty accelerator pump
6. Almost no throttle response
- Weak spark/poor ignition - Blocked fuel line - Blocked fuel filter - Bad fuel - Water in fuel - Air leak in carburetor or manifold - Faulty enrichment valve - Difficulty moving fuel in the carburetor -Vacuum flap stuck -Damaged vacuum diaphragm -Dirt in the carburetor
1. Remove the seat and container underneath. 2. Remove the right side panel. 3. Disconnect the cable connector from the starting conditioner. 4. Loosen the carburetor drain screw and drain the fuel from the float chamber. 5. Loosen the clamps on the intake tube and intake manifold. 6. Loosen the throttle cable and pull it out of the caliper and out of the throttle control sector. 7. Disconnect the fuel line from the carburetor. 8. Remove the air intake tube and pull the carburetor straight back out of the intake manifold. nine. Remove the starting enricher from the carburetor.
Checking the enrichment valve
1. Check the resistance level. 2. Standard value below 5 if cold. 3. Connect enricher to 12V battery. 4. The plunger should advance 3/8 inch (approximately 10 mm) after 5 minutes.
5. Check the needle and its seat in the carburettor. 6. Replace if necessary. 7. Place the enrichment valve in place and press down. 8. Install the retaining ring and tighten the screws. nine0003
Air shut-off valve
1. Unscrew the two screws of the throttle cable yoke and remove it. 2. Unscrew the two screws on the air shut-off valve. 3. Remove the spring and vacuum diaphragm. 4. Check for diaphragm wear, replace if necessary. 5. Clean channels, remove dirt.
1. Remove two screws and cover 2. Remove spring, diaphragm flap. 3. Remove the fuel needle. Be especially careful not to damage the membrane. Replace if damaged. nine0003
This is interesting: To wash or not to wash the engine in the car?
1. Check the needle for wear and replace if necessary.
1. Remove the three screws and float chamber pan. 2. Remove the pin that holds the float. 3. Remove the main fuel jet, idle jet and idle mixture quality adjustment screw.
Be careful not to break the fuel jets and mixture screw. Count the number of revolutions as the mixture screw is removed. When reinstalling the jets and screw, do not tighten them.