Anyone who has been riding bikes for a while can tell you that sooner or later, you’re going to get a flat. Even with tube sealant that prevents flat tires for up to two years, it’s just an unavoidable occurrence. When flats occur, the best thing you can do is be educated and prepared to patch the tube so that you can quickly get back on the road. Let's get started:
Materials NeededConsider these different flat tire scenarios: The at-home repair scenario where you're walking your bike into the garage and notice that the back wheel is sagging a little bit—you have a flat. Or, the on-the-trail repair scenario where 20 miles into a 50 mile ride, you go down hard on a rock and get a nasty pinch flat.
We’re going to walk you through some of the materials you’ll need for either situation, and then how to use them for both. Here’s a list of some things you will need to repair your tube.

Follow these 4 easy steps to patch your bicycle tube and repair your flat.
Step 1. Remove Your Tire
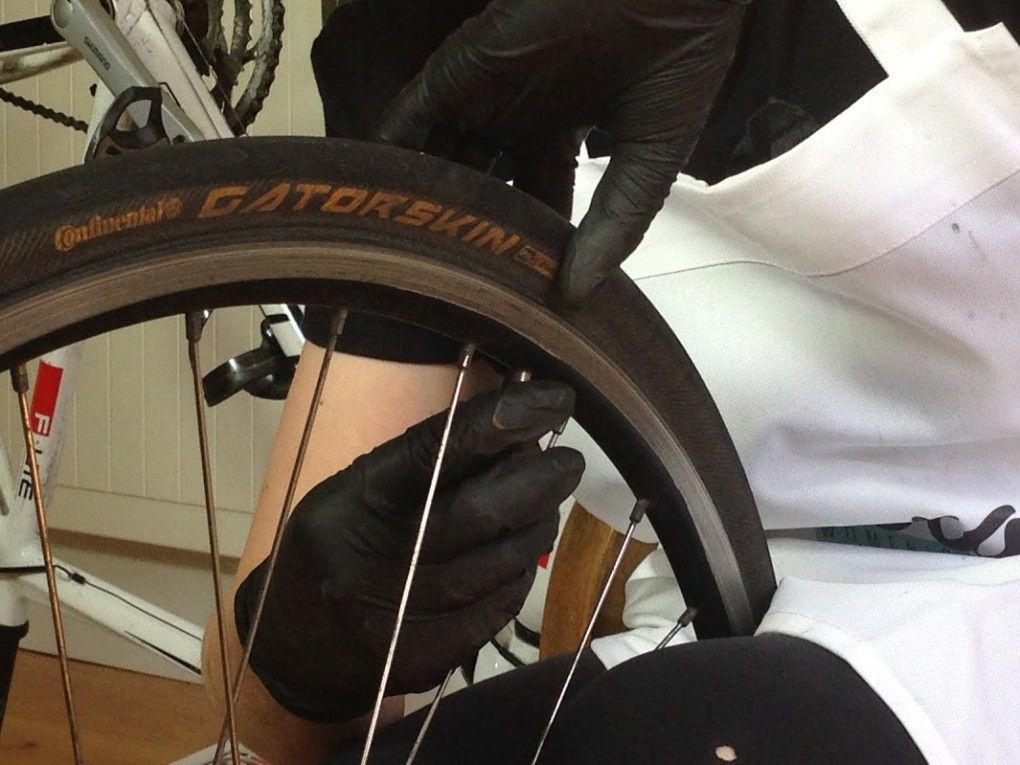
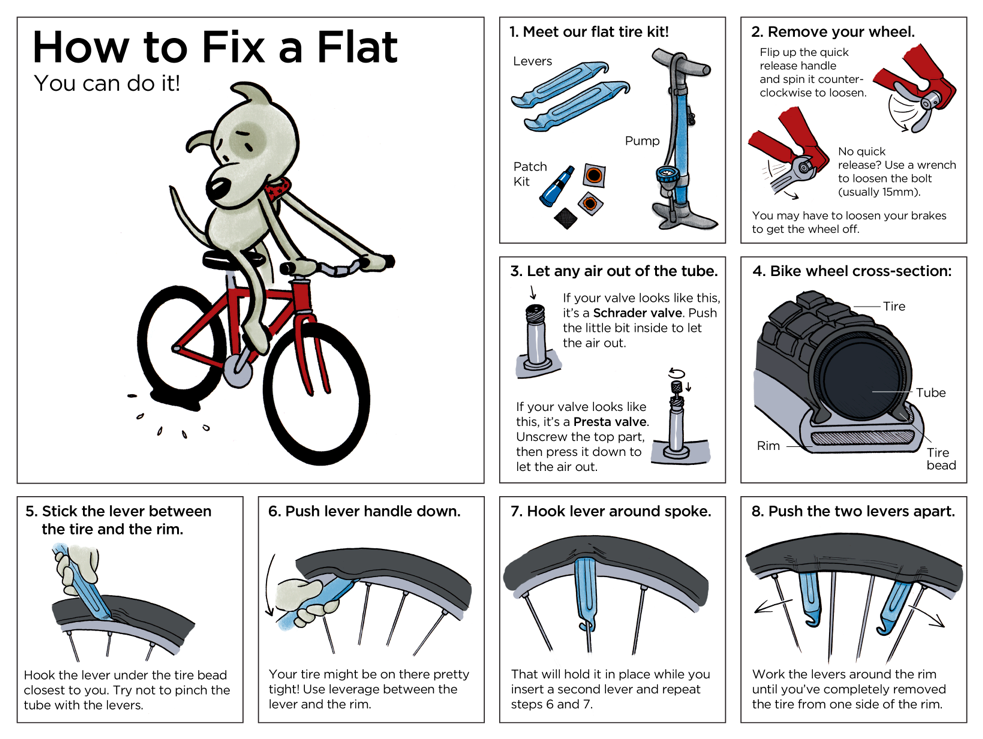
Take your tire lever and hook it around the outer edge of the tire (the bead) to get it off of the rim. Once you have the tire lever under the tire rubber, hook the other end of your tire lever around one of your spokes to keep the tire elevated. With a second tire lever, work your way around the rim, taking the tire out of the bead until one side has been completely removed from the rim.
Step 2. Find the Leak
If the puncture or gash in your tube is not easily apparent, you’re going to need to fill the tube back up to locate where the air is escaping from. There are a couple of different ways to find the leak. The layman’s way would just be to run your hand along the tube and try to feel it out.
The bucket of water method that we mentioned earlier, however, is a more accurate way. If you’re at home, fill your sink or a large bucket full of water and submerge each end of the tube. Watch for air bubbles escaping from your tire to locate your problem area.
Make sure you submerge each side, as there may be more than one puncture. Be sure to check the inside of the tire to make sure that the puncture-causing object has been removed. Once located, mark that spot with your tire marking chalk.
Step 3. Patch the Hole
When patching the hole in your bicycle tube, make sure that the area around the puncture is clean so that the patch will stick. Using the scuffer from your patch kit (sand paper or emery paper will also do the trick), rough up the area around the puncture so that your adhesives have something to grip.
If your patches don’t require glue, simply press them firmly over the hole. For patches that do need glue, add a layer of glue and spread it evenly around the area. Wait for the glue to get a little tacky, and then press on your patch.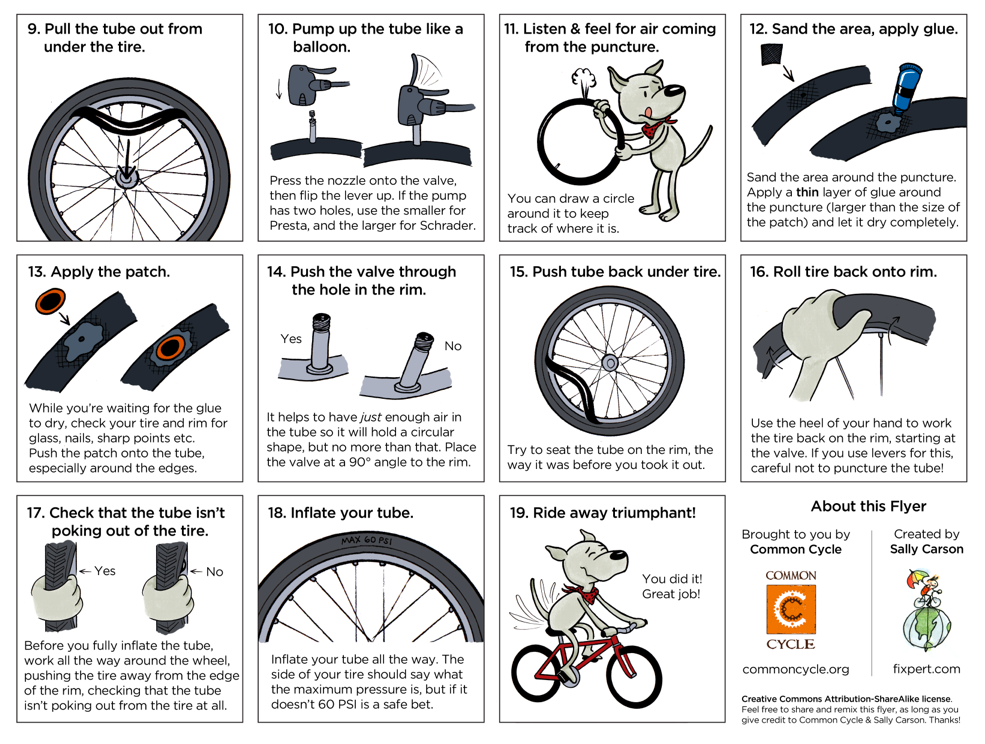 If you have the materials available to you at home, some cyclists will sprinkle talcum powder on top of the patch so that that patch/adhesive doesn’t stick to the inside of the tire.
Step 4. Put It All Back Together
Put a little air into your tube and then put it back in the tire, making sure, again, that there are no foreign objects remaining in the tire. Be sure to insert the tube and tire back into the rim using only your hands, as the tire levers may pinch the tube and cause another flat (we certainly don’t want that after all your hard work).
Once you’ve pushed the tire back in and the valve stem is securely inside the tire, inflate your tube back to maximum pressure, being sure to check the tire one more time to make sure that the bead is installed snugly. Ready to ride!
in: How To, Skills
Brett & Kate McKay • May 26, 2022
The bicycle is one of the greatest tools of self-reliance.
Without any need for electricity or gas, it can carry you far distances.
But bikes only work towards your self-sufficiency if you know how to maintain them. They may have fewer complications than an automobile, but they’re still machines that can break down and need to be repaired.
Several years ago Kate and I bought some bikes for ourselves (our kids already had them) so we could take family rides on Tulsa’s many pleasant bike paths. But I realized that I didn’t know beans about how to maintain our new purchases. If one of us got a flat tire, I wouldn’t know how to patch it. If my brakes were acting wonky, I’d be hosed.
So I set out to learn some basic bike maintenance and repair. It’s been fun. I thought I’d share what I’ve learned with you all in a new series: Bike Maintenance 101.
In today’s inaugural class, we’re kicking things off with how to patch a hole in your inner tube. I remember watching my dad patch a hole on one of my bike tires as a kid. It looked like a huge pain in the butt. But I learned that it’s surprisingly easy. Here’s how to do it.
Let’s get that wheel off so we can get to our flat inner tube.
I like to flip my bike upside down. It makes it easier to work with your wheel. I don’t have one of those fancy bike holders you use to work on your bike.
Getting wheels off a bike is a breeze with today’s quick-release systems. It’s pretty much the same for all bikes. The only difference you’ll encounter is how you’ll disconnect your brakes. That will depend on what type of brakes you have on your bike. Here’s how I removed the wheel on my bike with v-brakes.
It’s really easy to disconnect a v-brake. You squeeze the two brake arms together and unlatch the cradle from the noodle (that’s the thing with the rubber tip on it).
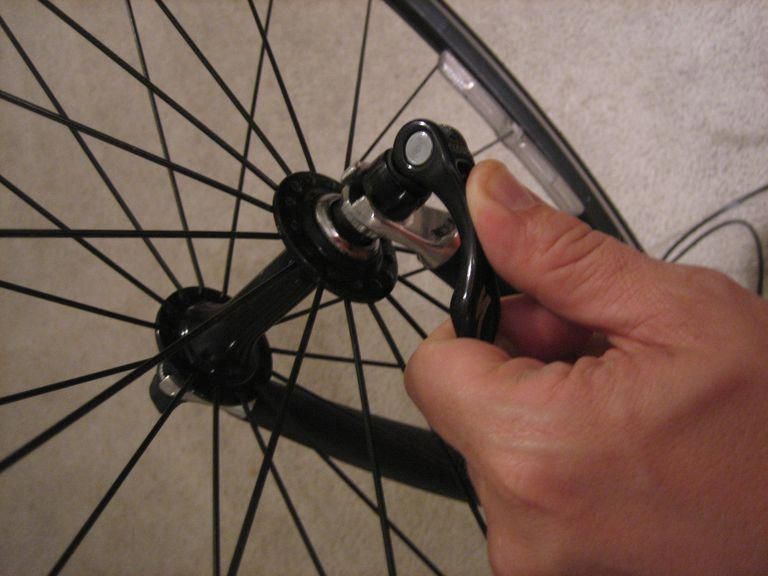
Flip the quick-release lever open and unscrew it until you have enough space to remove the wheel.
You don’t have to take the quick-release rod out of the hub, but if you want to, that’s fine. I think it’s easier to work with the tire without the quick-release rod still in the hub, so I take it out.
Wheel removed!
Time to get the tire off the wheel so we can get to the inner tube. Tire levers will make this job much easier. You can buy them on Amazon. They’re cheap.
Place your first tire lever between the wheel and the tire. You want to get the lever underneath the lip of the tire so you can pry it away from the wheel.
To keep the lip of the tire from going back into the wheel, hook the tire lever into one of the spokes. This will keep your tire and wheel separated, making it much easier to get the rest of the tire off of your wheel.
Place the second tire lever next to your first tire lever. Get it under the lip of the tire. You’ll slide this lever around your wheel to separate the rest of the tire from the wheel.
Here’s what your tire will start looking like as you slide that second tire lever around your wheel. It’s hard at first, but gets easier as you progress. As you can see, more and more of the tire lip is over the rim of the wheel.
Tire successfully removed from wheel. Now it’s time to remove the inner tube from the tire.
Inner tube will be tucked inside your tire. Just pull it out.
There’s the hole.
Get your patch kit.
Inside my patch kit is a metal square that has a bunch of little bumps on it. It’s almost like a cheese grater. Use it to lightly scuff up the area on and around the hole. If you don’t have a little metal cheese grater in your patch kit, you can use sandpaper to prep your patch area. The scuffing will give greater adhesion to the patch.
Use a moderate amount of rubber cement. Spread it evenly around an area 1/2″ around your hole.
Pick an appropriate sized patch for your hole. Since mine is so small, I used the smallest patch. Remove the foil backing and stick patch onto the hole.
Peel away the plastic film on top of the patch. Press edges down firmly. Bam! Hole is patched.
Inner tube back in tire.
Tire back on wheel. Getting the tire back on the wheel can be a bit tricky. You may need to use your tire levers to help you get the lip of the tire inside the wheel’s rim. Just make sure you don’t pinch your inner tube between the tire and the wheel. You’ll risk creating a puncture in your inner tube. Once you get your tire back on the wheel, inflate your inner tube and then put your wheel back on your bike.
You can patch your inner tube a few times and not have a problem. If you have more than three patches, you might start noticing that your tire goes flat overnight and you have to pump it up if you want to use it. After your third patch, chuck your old inner tube and replace it with a new one.
Want to start taking action on the content you read on AoM?
Join the Strenuous Life
Learn More
Sooner or later, every cyclist has such an unpleasant situation as a bicycle inner tube puncture. Finding a flat tire at home is one thing (although it also requires some knowledge of camera repair), but what if you blew it during a multi-kilometer ride, for example, somewhere in a field? How to determine the puncture site in such a situation, correctly change and seal the bicycle chamber, what kind of glue and patches are best suited for this purpose. In addition, in this article we will consider some of the nuances of repair and proper operation of bicycle chambers, for example, we will talk about what pressure they should have and much more. 9Ol000 Related video
During long trips, it is advisable to carry not only a bicycle tool, but also a spare tube, with which you can quickly replace the failed one and go further. After all, this is much faster than waiting for the glue to dry on a freshly sealed one. Therefore, in this section we will consider such a question as how to remove a bicycle tire and replace the camera when it is punctured.

Be careful not to get a tube between the mount and the rim. This may lead to its rupture. If you do not have a magazine spatula, then you can use any non-sharp, preferably plastic object of a similar shape. It is not necessary to use wooden products for these purposes (they may be with burrs) or metal products that damage the paintwork of the bicycle rim. Sharp objects (screwdrivers, knives, etc.) are strictly not recommended for use. They can damage both the tube and the tire.
 At this stage, we have removed one side of the tire.
 It is important not to turn it over to the other side until we find the puncture site and find it on the tire (by attaching a tube to it).
 After that, we lower it completely through the nipple.
 The punctured chamber should then be repaired, for example after you have returned home from a bike ride or during a break.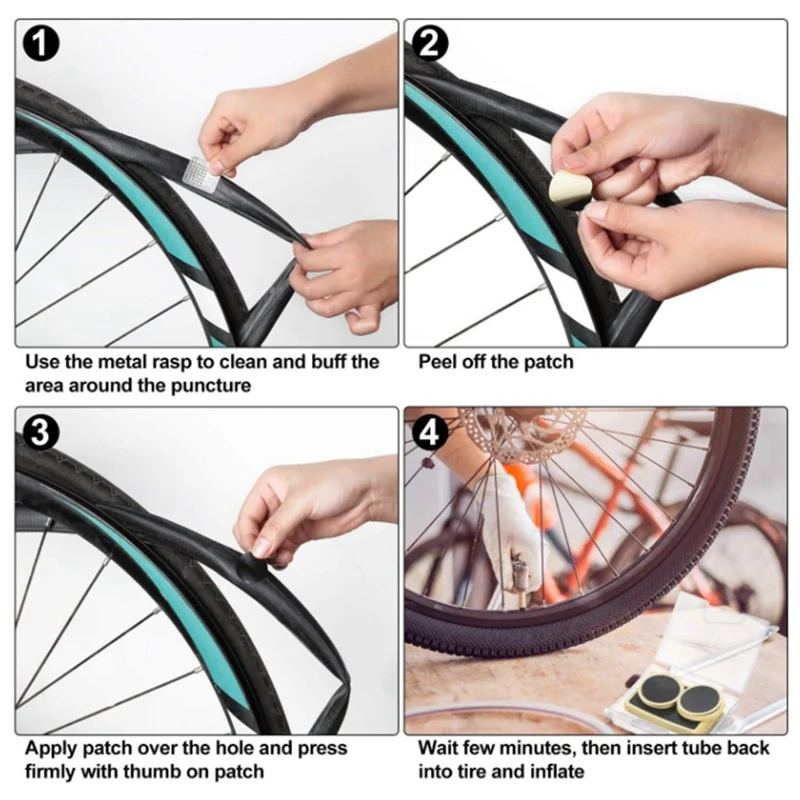
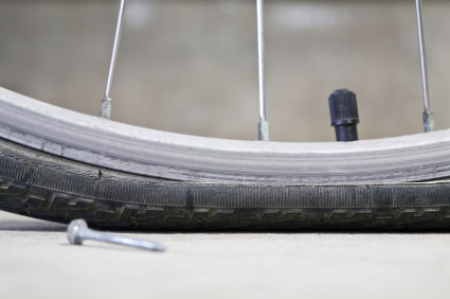
At first glance, a very simple procedure for locating a puncture can become much more complicated depending on where you find a flat tire (at home or during a trip). To simplify the search procedure, it should be taken into account that in 90% of cases it is located on the so-called "contact spot" of the wheel with the road, usually no higher than 2/3 of the chamber height. An exception may be damage from the rim (if the rim tape failed on the latter) or the iron threads of the tire cord that came out. Therefore, we will consider several options for how to find a hole in the bicycle chamber through which air is bled.

Not all adhesives and patches are suitable for repairing a punctured bicycle wheel. Therefore, it is worth dwelling in more detail on the topic of what is possible and what should not be sealed with a bike camera. There are several options, which we will discuss below.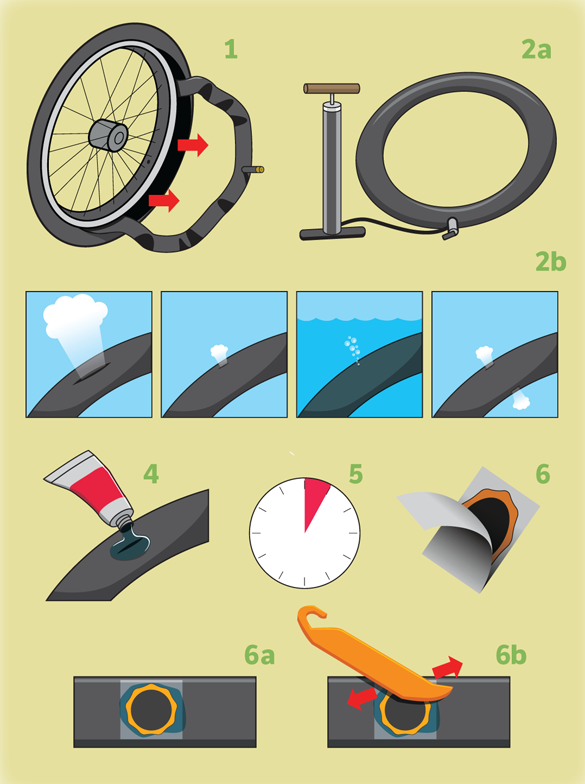
 They are quite common. For several years of use, none of the patches flew off and began to let air through. And the cost of this product is lower than that of famous brands. The disadvantages include that the set contains only glue and patches, and what is most offensive, there are disproportionately more patches than glue. Well, these are already trifles. In general, I advise everyone.
  It is quite difficult to do at home (and impossible in the field) and you can easily screw up the camera.
 After we have found and marked the place of the bicycle inner tube puncture, it is necessary to start its repair, namely, to seal this hole. To do this, you must perform the following operations.
 This information can be found on the adhesive tube. We also pay attention to the exposure time in air and the time of complete solidification indicated there (the last two points may not be indicated).
 If, after you have sealed a puncture on the bike tube, it still deflates over time, you should check: To do this, the place with the patch should be lowered into the water and make sure there are no air bubbles.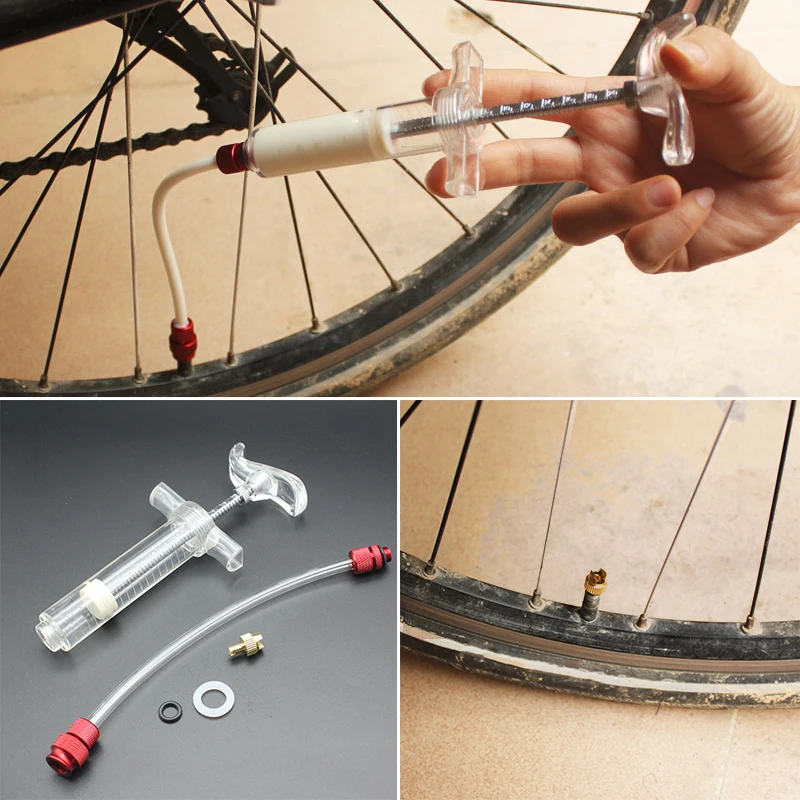 If they are, then you will have to tear off the old and glue a new patch.
If the tube is damaged at the base of the nipple (for example, it was rubbed by the rim), it is better to replace it immediately. As a rule, such defects cannot be repaired.
To reduce the chance of unexpected tire and tube damage while riding, there are a few simple rules to follow.
 Therefore, if you pump up to 3 bar in summer, then in winter you can increase the pressure by about 1 bar (but not higher than the maximum allowable).
 There are two other devices on the bike parts market that are designed to make life easier (at least they position themselves that way) when riding a bike. This is an anti-puncture tape and sealant, which is poured in a small amount into the chamber and is designed to “tighten” punctures while driving.
Anti-puncture tape is a strip of soft, rubberized plastic or, in more expensive products, Kevlar, that can be glued or simply inserted between the tire and the bicycle tube to protect against punctures. But there are pitfalls here. Cheap anti-puncture, firstly, does not always protect against punctures, and secondly, it can fall apart inside the tire and rub the chamber into dust with its fragments, thereby dooming the latter to ejection. Plus, it's extra weight. In general, after sitting on the forums, I agreed that they are more blamed than praised.
As far as the sealant is concerned, things are not so good either. As a temporary solution, when you don’t want to bother with replacing the camera, you can, of course, use it. But the sealant does not seal the puncture completely, but only reduces air leakage. Plus, there were complaints after use, when they wanted to stick a patch on the puncture site.
In general, according to the editors, it is better to use better quality bicycle tires with built-in puncture protection, carry a spare tube with you and not bother with the above accessories.
After reading this article, we can conclude that replacing and repairing a bicycle inner tube is not such a difficult task, and sealing it during a trip is not much more difficult than doing it at home. The most important thing on long trips is to have another spare tube and a puncture repair kit with you. Also, do not forget to pump up the chamber to the required pressure in time and change worn-out bicycle tires in a timely manner.
Hello everyone, it's me! Today I will tell you about a secret way to repair a bicycle inner tube in the field. You cannot know about this method, since I myself invented it. Of course, after reading the material, you will claim that you knew about it before, that "this is not news." Of course, this is always the case. Let me just say that I have not seen a description of such a method on the Internet. And this despite the fact that for some period of time I was very closely interested in the field repair of bicycle chambers. I think if someone had thought of this method before me, he would have blown all the pipes. After all, it is full of all sorts of dubious methods that do not work in practice, but their authors talk about them as if a miracle had happened.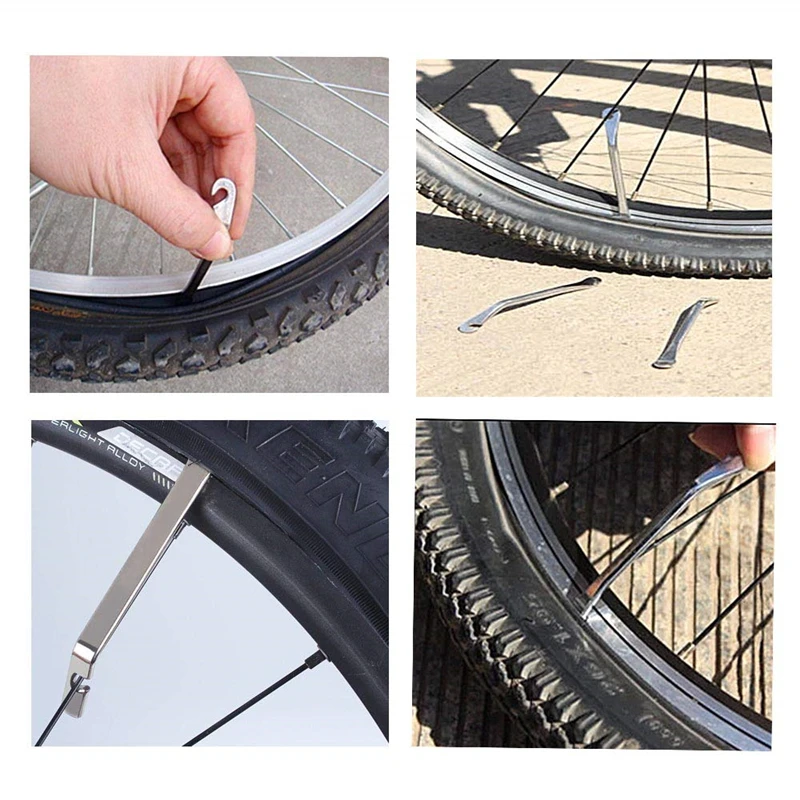 Before proceeding to the description of the method itself, a little background.
I ride a bike a lot and not for the first year. Like anyone who drives long distances (farther than the nearest beer stand), I occasionally run into punctures. For example, here: a puncture with a screw. For any cyclist, a tire puncture is very frustrating, especially when it happens away from home. And especially when there is nothing to repair the puncture, and there is no spare camera. I can't say that lately I've been pierced very often. Not at all. But sometimes there were still cases when I had to walk a long distance home, rolling a bicycle with a punctured wheel.
The easiest way to save yourself from the unpleasant consequences of a puncture is to carry a pump, wrenches to remove the wheel, mounts and a spare tube with you. Realizing this, I ended up buying a compact pump that can be carried under the frame. On the scale of a bicycle, it weighs almost nothing and takes up very little space. Mounts are not a problem either. Two pieces of plastic montages are completely weightless, and their volume is insignificant. The wheels of my bike are attached to the frame and fork with nuts. For those who have wheels on eccentrics, it’s easier, keys are not needed to remove the wheel. I can’t remove the wheel to replace the camera without keys. And I need to carry two wrenches with me at once, one to unscrew the nuts that fasten the wheel directly and one more to remove the bell crank. Who does not know, this is such a crank lever, one of the components of the Shimano Nexus Inter 3 planetary hub gearshift system. And now the language of metal keys cannot be called weightless. Yes, and the dimensions are not very pleasant. And if you can still somehow get out with the keys by buying compact camping counterparts, then here's what you have to bother with, so it's with a spare camera. At a minimum, you need to carry one piece with you, and preferably two. Where to put the spare camera is an open question for me.
 Yes, there are a lot of options. You can attach it somewhere on the bike. But then, after a few weeks of driving under the scorching summer sun, it will probably become unusable from exposure to ultraviolet radiation. You can carry the camera in a case or in a purse, this is understandable. In any case, one unresolved problem remains - volume. As the camera does not fold, it will take up not a small amount of space.
The inconvenience of the most obvious way, which consists in transporting keys with a camera in addition to a pump with mounts, made me think about alternatives. And what could be an alternative to the option with a spare camera? That's right - repairing a puncture on the road. Here, too, everything seems to be simple. Buy a bike kit and go. There are countless of them for sale. A camping first aid kit most often includes a patch, glue, and a piece of sandpaper. All this, and especially the tube of glue, takes up a lot of space. Yes, and the glue can be dried at the most inopportune moment. Yes, there are patches with glue already applied, but as a rule, they are not so cheap. Sometimes their price is comparable to the price of a new camera.
In search of a reliable and inexpensive method for repairing a puncture in the road, I began to study the Internet. The Internet, as you know, is full of various popular ways. Most of them are related to glue in one way or another, but there are also quite extraordinary options. For example, I came across a description of a method using a thread. “How can a thread fix a puncture?” - you ask. But like this. A thread is taken and the camera is rewound with it at the puncture site. There are variations: put a rubber patch on the puncture site and wrap it with thread on top. I decided to test this method personally. It turned out like this:
Then I put the tube in the tire and put the tire on the rim. Started pumping up the wheel. At first everything was fine. Having pumped up the minimum pressure, I listened: “Nothing seems to hiss.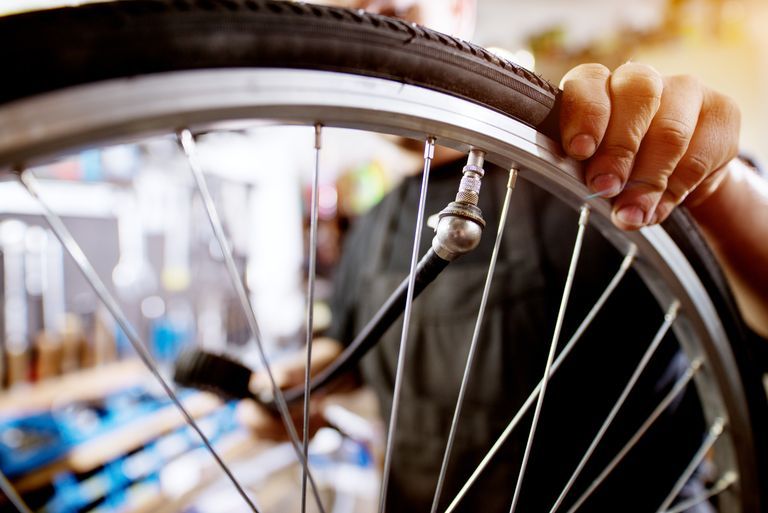 ” I continued pumping and then the camera “puffed”. When I took her out into the light of day, it became clear what had happened to her. She parted along, as if along the seam. In fact, not along the seam, but parallel to it:
This method is not good and I continued to look for options. After reviewing a lot of videos on a popular video hosting, I realized that everything revolves around glue. Super glue methods are especially popular. That is how it will be applied, then that. But I absolutely did not want to carry glue with me. The tube of glue may be damaged and leak out. And if it is not hermetically sealed, then the glue inside can dry out. And in general, messing around with glue on the road is somehow not very pleasant for me.
I was already desperate, but I came across a video where a dude showed a "life hack" - repairing a puncture with chewing gum. I chewed gum, disassembled the wheel, removed the camera, found the puncture site, stuck the gum, and you're done! Well, here it is, the very method that I need. Chewing gum can always be carried in your pocket, it is light and does not take up space, it costs a penny. When I started testing this method personally, it became clear that it did not work. Even after degreasing the puncture site, the gum does not stick to the camera, even if you crack. No matter how I tried to stick it on the puncture site, it immediately fell off. It is absolutely impossible to manage to shove the camera into the tire so that the chewing gum does not fall off or move relative to the puncture site.
Desperate, I gave up looking for new methods. He lived somehow before without repairing the camera in the field. But in my head, I still continued to think about how to repair a puncture on the road quickly and easily. At some point it dawned on me. It turned out that only one component was needed for the repair, which was always there. It weighs nothing, takes up almost no space and costs a penny. So my author's method of repairing a bicycle chamber was invented.
I first tested my method at home. I took the punctured chamber, repaired the puncture with a secret ingredient, pumped up the chamber and left it that way. A day later, the camera was practically not blown away at all. Inspired by success, I did the same, but I folded the camera into the tire and mounted it on the wheel. The inflated wheel did not deflate in a day or two. And even after three days it was still possible to ride on it. It works!
I took this method and put together a repair kit that I now carry with me. The repair kit includes: a pump, two plastic mounts, a cloth and a secret component. Once my friend and I were riding and he punctured the front wheel. He was upset, because the path to the house was not close, but I quickly calmed him down. I removed the tire, removed the chamber and repaired the puncture using my author's method. After I pumped up the wheel to working pressure, we continued to ride. It was decided to test. Since my method had not been tested in real-life conditions, I asked a friend to tell me if the tire would flat the next day.
The next day we met again. I looked at the front wheel of my friend's bike and asked, "Have you replaced the tube with a new one?" “No, I didn’t change anything,” he replied. “I see, so you just pumped up the wheel?” I asked. “Yes, I didn’t even pump up,” he replied. My method turned out to be so effective that a day after the repair, the wheel almost did not go down at all. A friend continued to ride with a puncture repaired by my author's method. The wheel did not come off either in a day, or in two, or in three. The first time I had to pump up the wheel was about 5 days later. When I came up with this method, I did not expect such an impressive result at all. My method was originally devised for emergency puncture repair in the field. It was assumed that the repair in my way will only allow you to get home. But it turned out that you can continue to ride and nothing criminal will happen. In the end, a friend left for about a month with my repair, only periodically pumping up the wheel every 5-7 days.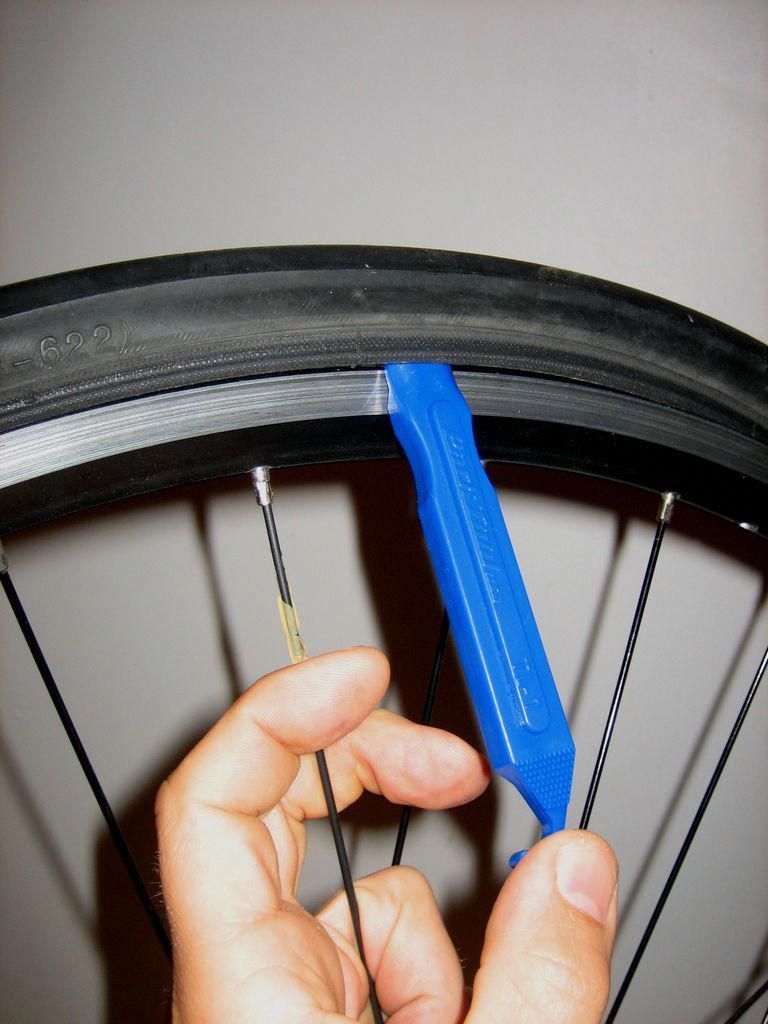
It's time to try the method on yourself. One fine day I did puncture a wheel on the road. Of course, I had a repair kit with me. I repaired the puncture with my author's method and continued to move. Arriving home, I did not change the camera, but simply decided to wait until the tire was flat. It went down so slowly that I did not have to pump it up for another whole week. As a result, I left for 2 weeks, during this period of time I needed to pump up the wheel only 3 times. The verdict is a working method!
So, let me tell you how to repair a puncture in the road using my method. As I already wrote, all you need is a pump, pliers, a rag and my secret ingredient. A rag is needed in order to wipe the camera from dust, but if there is no rag, you can do it with the edge of a T-shirt or sleeve. Crowbars are also not a necessary component. You may have tires that can be removed with bare hands. If not, then you can use improvised means. But it's still better if you have a montage with you. If there is no pump, this is also not a disaster. You can walk to the nearest gas station, there will most likely be something to pump up the tire. Well, or you can stop a passing car and ask the driver to pump up.
Let's assume that you have the pump one way or another. When faced with a puncture, the first thing you need to do is remove the tire from the rim on one side. With only one! It is not necessary to remove the cover completely. Then remove the bladder and start pumping:
The puncture site will hiss immediately, making it easy to find. Here, I found the puncture site:
Next, take a cloth, moisten it with water and carefully wipe the puncture site. If there is no water, you can spit on the camera and grind. The puncture site does not need to be degreased or sanded at all. It is enough just to wipe off the dust and a wet cloth for these purposes is enough. Next, we need to take the secret component. So what is it? The secret ingredient is double sided tape:
Double-sided tape is sold almost everywhere.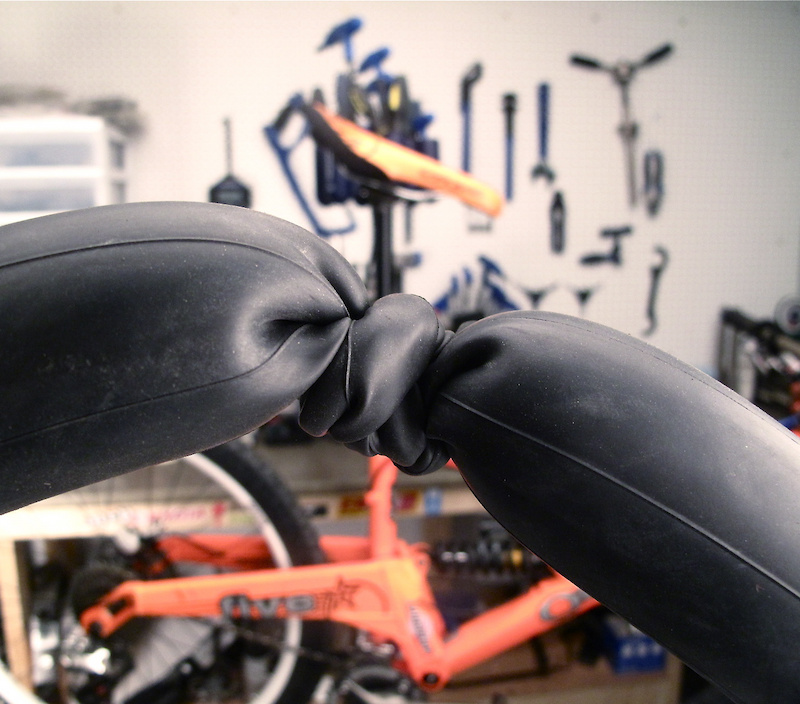 I bought it from the Fix Price store. At the time of writing, the package costs 51 rubles. The package contains scotch tape in a skein and already cut plates measuring 1.5 cm by 1 cm. We take one of these plates, remove the protective film from one side, exactly from one! On the other hand, do not touch. And now we just stick adhesive tape on the puncture site so that the puncture is in the center of the patch. It is important that before sculpting the adhesive tape, wait for the surface of the chamber to dry from moisture.
We press the adhesive tape and voila, the puncture is repaired:
We fill the tube into the tire, pump it up to working pressure and you can go. That's it, it's that simple! I know the very first question you'll have is, "How reliable is it?" Very reliable! The camera, repaired in this way, almost does not descend. After leaving for 2 weeks with a patch of double-sided tape, I decided to check if the camera bubbles under water. He took out the camera, began to inspect the patch. The adhesive tape was compressed from a lot of pressure:
I pumped up the chamber, put the puncture site under water and nothing. I didn't see any bubbles. Of course, if you keep the camera under water for a long time, then the tape will get wet and begin to siphon. But it is still not intended for use under water. In addition, when you inflate the chamber without anything, the adhesive tape on its surface stretches, tears and cracks form in it, which only contributes to its siphoning. When the chamber is inside the tire under pressure, the patch of adhesive tape is clamped between the chamber and the tire, and this, on the contrary, contributes to clogging the puncture.
Any chamber puncture can be repaired in this way. It doesn't matter if you have high pressure road tires or a fatbike with wide tractors. The method is suitable for any cameras. Its convenience over other methods is obvious. A package of double-sided tape costs a penny, and one package will last you for many years.
In addition, adhesive tape is sold already in the form of ready-made patches. You do not need to carry anything with you, except for the pump and mounting kits (well, even rags). The tape itself weighs nothing and does not take up space. You can have these patches in every pocket. Unlike glue, patches cannot dry out, and the gluing process itself is as fast as possible. You just need to press the tape to the puncture site. At the same time, the pressing force or its duration, unlike glue, is completely unimportant. When you fill the tube in the tire and pump it up, the patch will still press down with pressure. When you want to tear off the tape, you will be surprised how strongly it sticks to the camera. You will need sandpaper to remove it.
My method has been tested in practice. Unlike other methods, it is really: 1. Simple, 2. Convenient, 3. Effective, 4. Reliable, 5. Cheap
puncture. In this video, I showed everything that was described in the article:
“If everything is so easy and simple, why did you dash off such a long article?” - you ask. I answer. As a real cyclist, I know how frustrating it can be to get a flat tire on the road and I really want to share my method with others because it really works. If I wrote about this method in one sentence: "Use double-sided tape", you would most likely pass by without paying attention.
The Internet is full of skeptics and trolls, so people will inevitably try to catch me for something I didn't do. They will write: “Yes, this has all been known for a long time”, “There is nothing new in this method, I always knew this”, “It does not work”, “I came up with another crap”. You will see, someone will definitely write something like this either here or in the comments on YouTube. Especially for the sake of skeptics, I took a few minutes of my time and shot another video. In this video, I show whether the camera will bubble under water if I repair not an ordinary puncture, but a real tear using my method:
As I already wrote, my method is unique. Perhaps the only situation in which it will not help is if your camera comes apart at the seam. It happened to me once. True, the camera at that time did not crawl quite along the seam, but next to it, parallel to it. In such a situation, my method will definitely not help you:
By the way. In this video, I mentioned that if the gap wasn't so big, I could just tie the camera in a knot. Is it possible to fix the camera by tying it in a knot at the place of the break/puncture? I also tested this method myself. As it turned out, he is working, but very unreliable. I had a camera with a gap that could not be repaired. I tied it in a knot in this place, like this:
Filled the tire, flared, pumped up and drove off. I managed to drive with a tube tied in a knot for 40 kilometers, and then the tire went flat.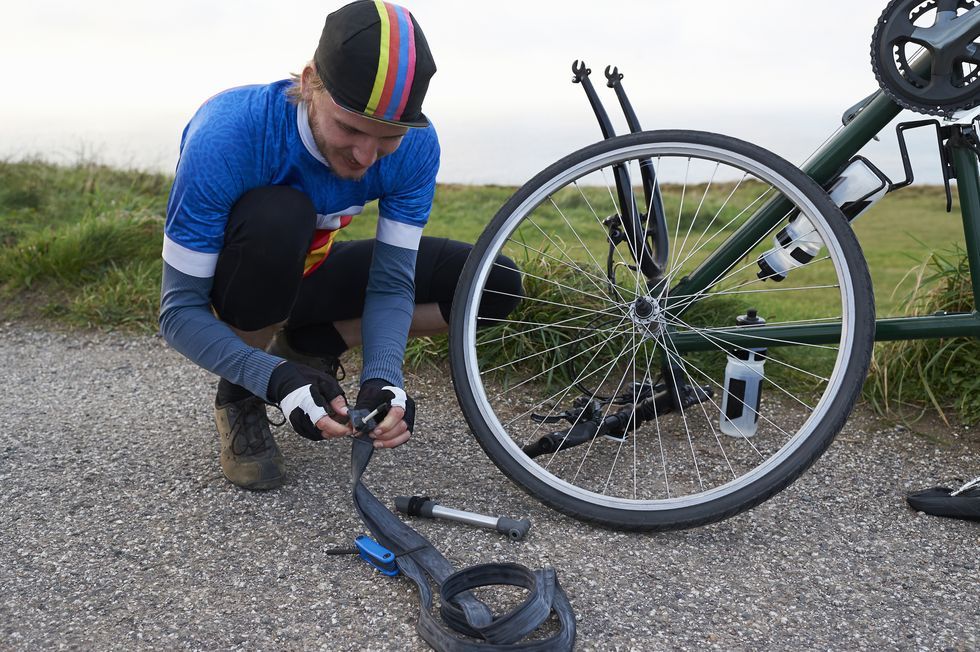 As it turned out, the camera made a hole next to the node. A place of increased tension formed there and the wall of the chamber could not stand it. In principle, if you are within 40 kilometers from home, the camera is torn and there are no other methods, you can try to tie it in a knot and drive home. Perhaps if I had pumped up the pressure a little less, then the chamber would have lasted longer than 40 kilometers. I pumped straight from the heart, not sparing, to working pressure.
Important! This camera repair method is positioned exclusively as an emergency, for use in the field when there is no spare camera at hand. It is assumed that my technique will be used exclusively for temporary repairs, so that you can get home. The misuse of the method and the subsequent bombing in the comments remains solely on your conscience.
I conclude with this. If you like my method, write comments. Well, if you don’t like it, then also write something, only without nasty things. Well, if you really didn’t like it, then please bomb and arrange a buhurt.