Cracks and scratches on your ATV plastics are bound to happen sooner or later. You could maintain and clean your ATV after every use, and still, you’ll end up with faded or scratched up plastic eventually.
To some people, scuffed up plastic on their quad is not a big deal. I mean, it’s not like it affects performance, handling, or anything important anyways. But there’s just something about the way it makes the machine look that I don’t like. So I went ahead and found the best ways to fix some of the most common ATV plastic damage you’ll encounter.
It’s a good idea to know why plastic fades to help you understand why the methods here work for restoring faded plastic. Basically, plastic starts to look faded because the oils in the plastic evaporate over time. The evaporation of oils in the plastic is sped up when the plastic sits in the sun for long periods of time.
Plastic is made from refined oil, and as the oil in the top layer of the plastic evaporates, the plastic is weakened and looks faded. Your plastics become more prone to cracks too the more you let it fade and weaken.
You could simply sand down the top layer of plastic, until you get to the part where the oil hasn’t evaporated yet. Then buff it out until it looks nice and new. But with this approach, you’re still weakening the plastic because you are actually removing layers of the plastic each time you do this.
Another method I’ve tried, is using a heat gun to help bring the oil in the plastic to the surface. This does work pretty good and makes the plastic look nice. But again, you’re not actually restoring oil to the plastic so over time, the plastic is getting weaker and weaker.
My preferred method, and what I recommend you try first. Is to get this Premium Plastic Restorer From Car Guys found here on Amazon. This way you’re not removing plastic, oil, or anything else from your ATV parts. In fact, this stuff is actually adding additives to the plastic to help get them to the condition they were in when they were brand new.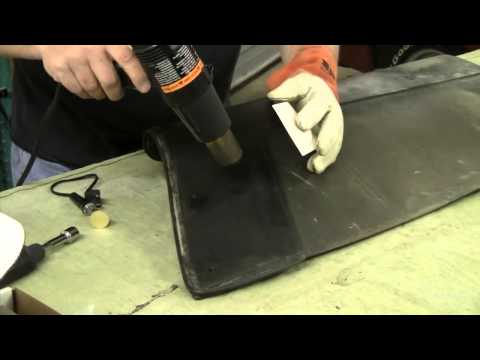 This particular plastic restorer also has some nice UV protection to help keep the plastic from drying out and fading in the future.
Keep in mind, this is not to repair scratches or anything like that. It is specifically to restore dry faded plastic. There are some other brands out there that will do the same thing, I’ve just had the most luck with this one. To be honest, this is way easier than sanding or using a heat gun anyway, and I don’t have to worry about the structural integrity of the plastic being compromised.
There are two types of scratches you’ll encounter most often, light scratches or deep scratches. Light scratches are the ones caused by branches or bushes hitting the plastics and leaving little visible marks. A lot of people don’t even bother with these types of scratches, and just chalk it up to wear and tear. But for someone spending a lot of money on a quad or ATV, I can understand wanting to remove even the littlest of scratches.
The best way I’ve found for removing light scratches is to go with some 1500 Grit Wet Sandpaper. Just use the sand paper over the areas with scratches and buff it out when you’re done. You could finish up with a coat of the plastic restorer I talked about above to make it look brand new.
Using wet sand paper could even work for medium to deep scratches, but I don’t like removing that much plastic from my ATV parts. For the deeper scratches you end up having to start with 400 grit or worse, and work your way up to 1500 grit to get a smooth surface. For me, it’s not worth all the time and energy sanding to just end up compromising the integrity of the plastics. Don’t forget, the more plastic you sand away, the easier they will crack.
So for deeper scratches I’ll use a plastic bonder/filler. My go-to is this JB Weld Plastic Bonder Gap Filler found here on Amazon. I’ll use this to actually just fill the scratches. It’s pretty easy to use, you push out some of the goop from each tube.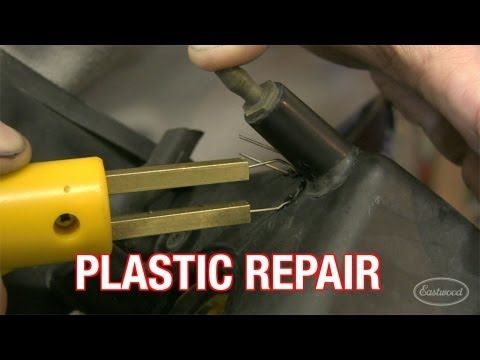 It’s a 1 to 1 ratio and comes out at the same time. Mix it together and fill the deep scratches with it. The stuff sets in about 15 – 20 mins and you can sand it down after a half hour.
If you use a putty knife to clean off the excess after filling the scratch, it makes the sanding after much easier. This does set in a black color, so if you don’t want to have to paint afterwards, don’t use this method. I don’t paint after, and I don’t mind having the black filler here and there on the plastics. It’s better than having deep gouges in your plastics just asking to be cracked.
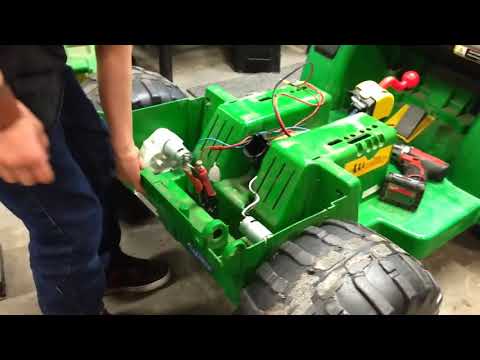
If you haven’t taken care of your ATV plastics, they could dry out over time and eventually crack and break. Or the more likely option, you hit something didn’t you? That’s ok, cracked plastics can usually be fixed without too much trouble. If you don’t want to spend the money buying new plastic parts, you’ll need to do it yourself.
For small little cracks you could try using the JB Weld I talked about above, but that only really works for cracks less than a few inches. But, you probably really messed your toy up bad, and for that, you’re gonna need something better.
I recommend using what’s called a hot staple gun. Like this Astro 7600 Hot Staple Gun Kit found here on Amazon. This thing is amazing and I’ve used it on more than just my ATV. It works by heating up these specially designed staples it comes with. The staples get set into the plastic making a nice strong bond, but still allowing the plastic to be flexible.
You just line up the pieces you want joined, and use the staple gun to staple them together. The staple is heated to it can sink into the plastic a bit, making a super strong bond. I always do the stapling on the underside of the plastic, that way you don’t see the staples. If you use this method, you will still see the crack on the upper side of the plastics. You can then use the JB Weld to fill in the crack, and then sand away any excess making a nice smooth surface.
Sometimes a piece of plastic from an ATV gets bent but doesn’t crack. That’s good, you don’t have to repair any cracked plastics now. But it can leave a discolored looking area on the plastic that doesn’t look right.
For fixes like this, I like to use a heat gun. It’s really kinda cool how well it works, you can watch the plastic change color as you hold the heat gun to it. Be careful though, too much heat can melt the plastics and there’s no coming back from that. Hold the heat gun a few inches away from the plastic and keep it moving side to side the whole time.
Any old heat gun will work for something like this. Heck, I’ve seen people use a propane torch with success. If you’re unsure what type of heat gun to use, check this Heat Gun from Amazon for starters.
That’s all there is to it. If you want to paint your ATV plastics a new color, check out this article: How To Prep And Paint ATV Plastics.
Sharing is caring!
There’s nothing more frustrating than spending your hard-earned money on a new toy and then having it break after just a few uses.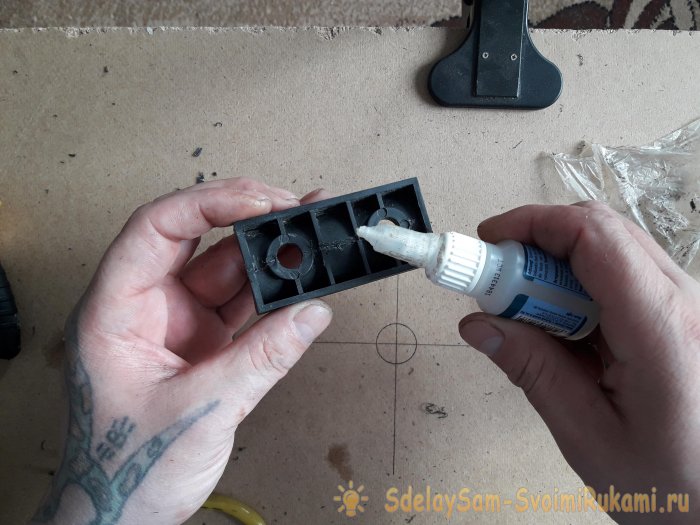 If you’ve got an ATV that’s developed some cracks in the plastic, don’t worry – there are ways to fix them. We’ll show you how to fix atv plastic cracks in this post. Read on to learn more.
There are a few reasons why plastic may crack on an ATV. One reason is that the ATV is being ridden over rough terrain, which can cause the plastic to become brittle and crack. Another reason may be that the ATV is not being properly maintained, and as a result, the plastic is becoming worn and cracked.
Required MaterialsYou will need a few items to fix your cracked plastic ATV. These include a tube of epoxy, a putty knife, and sandpaper.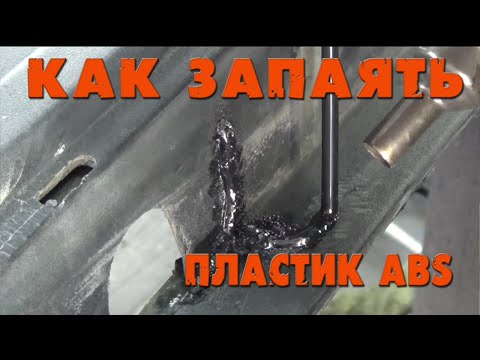 You can also gather more supplies such as a cleaner, primer, and paint to give your ATV a new look.
You can gather those supplies from any home improvement store or simply buy from online.
Step 2: Clean the AreaClean the area around the crack with a cleaner and a rag or some sandpaper to rough up the surface. This will help the epoxy adhere better to the plastic. Inspect your ATV for any other cracks or damage before you begin to fix the plastic.
If you find any damage, it is best to repair that before moving on to the plastic. You can use a putty knife and epoxy to fix small cracks. If the crack is bigger, you can use a fiberglass patch kit.
Step 3: Apply EpoxyEpoxy is a strong adhesive that can fix plastic cracks. Apply a small amount of epoxy to the crack and let it dry. The epoxy will hold the crack together and prevent it from getting worse. Repeat this process until the crack is repaired.
If you are not comfortable using epoxy, you can take your ATV to a repair shop to have the crack repaired.
Once the epoxy has cured, apply a second coat to help fill any cracks and provide extra strength. Let the epoxy cure fully before using your ATV again.
If there are any cracks in the plastic of your ATV, it is important to fix them right away. If you don’t, the cracks can get worse and cause more damage. Luckily, it is easy to fix cracks in the plastic, as long as you follow the right steps.
Step 5: Sand EpoxyAfter you mix and apply the epoxy, you need to sand it. This makes the surface of the plastic smooth and even. Use fine-grit sandpaper and go slowly so you don’t damage the plastic.
Step 6: Paint EpoxyOnce the epoxy has been sanded, it’s time to paint it. This will help protect the plastic from damage further and keep it looking nice and shiny. Again, choose a color that will match your ATV, and be sure to use quality paint that will withstand outdoor conditions.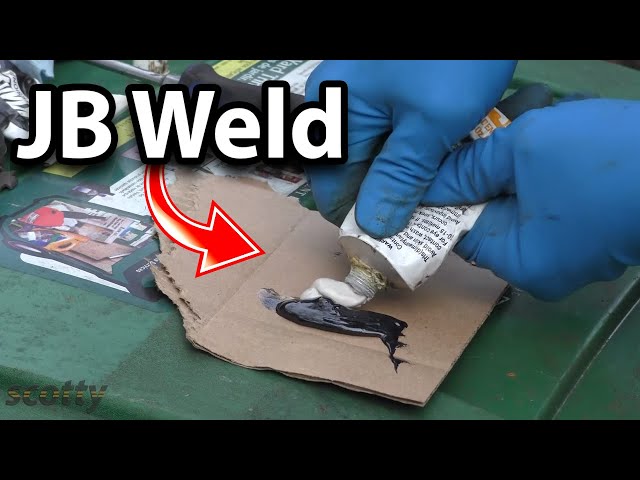
Now, it is time to let the paint dry. Depending on how much paint you applied, this could take a few minutes to a few hours. Once the paint is fully dry, your ATV will be looking good as new!
Step 8: Apply a Second Coat of Paint(Optional)If the crack is still visible after the first coat of paint, you will need to apply a second coat. Be sure to allow the first coat to dry completely before applying the second coat.
Step 9: Allow the Paint to CureIt is important to allow the paint to cure completely before using the ATV. Depending on the type of paint you use, this could take 24 hours to a week. Refer to the manufacturer’s instructions for specific details.
By following these simple steps, you can fix cracks in your ATV’s plastic quickly and easily. First, use caution when working with any paint and avoid getting the paint on your clothes or skin. Then, have fun riding your ATV, knowing it is in perfect condition! Keep reading for more information about how to fix ATV plastic cracks.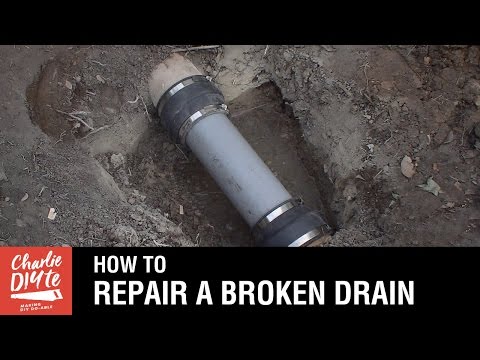
If the plastic on your ATV is faded or cracked, you can restore it to its original condition by using a few simple methods.
1. Linseed OilOne of the simplest methods for restoring faded or cracked plastic is to apply a coat of linseed oil. Linseed oil is available at most hardware stores, and it can be applied with a brush or cloth. Be sure to allow the oil to dry completely before using your ATV.
2. Store-bought Plastic RestorerIf you don’t want to use linseed oil, you can also buy a store-bought plastic restorer. These products are available at most auto parts stores, and they come in various colors. Be sure to follow the instructions on the bottle carefully, and apply the restorer in a well-ventilated area.
3. Heat GunIf the plastic on your ATV is severely cracked or damaged, you may need a heat gun to restore it. Heat guns are available at most hardware stores, and they can be used to melt the plastic and make it pliable again. Be very careful when using a heat gun, as it can easily cause burns.
If you don’t want to use any of the methods listed above, you can always paint the plastic on your ATV. This is a good option if you want to change the color of your ATV or if the plastic is severely damaged. Be sure to use high-quality paint that will withstand outdoor conditions.
No matter which method you choose, test it on a small area first to make sure the plastic doesn’t melt or become brittle. Also, read the instructions carefully before attempting any of these methods. If you want to know more about how to fix ATV plastic cracks, keep reading.
How to Fix Cracks on Plastic and Windshield?There are a few ways to fix cracks on plastic and windshield:
First, Use a Sealant: A sealant can be used to fill in the cracks and then will need to be trimmed off.
Use Glue: Glue can also fill in the cracks, but it must be the correct type of glue for the plastic material.
Use a Patch: If the crack is small, a patch may be the best option.
Use a Heat Gun: If the crack is large, using a heat gun can help make the plastic more pliable and easier to fix.
Frequently Asked QuestionDoes Gorilla Glue Work on Plastics?The answer to this question is yes, Gorilla glue will work on plastics. However, it is important to note that Gorilla glue can cause the plastic to become brittle over time, so it is best to test it out a small amount before using it on a larger area.
Does Super Glue Work on Plastic?There is no definitive answer to this question, as the adhesive properties of superglue will vary depending on the type of plastic. In general, superglue is an effective adhesive for most plastics, but it is always best to test a small area first to ensure that the adhesive will not damage the plastic.
What Is the Strongest Glue to Use on Plastic?There are a few different types of glue that can be used to fix ATV plastic cracks. The strongest type of glue is epoxy, which can be found at most hardware stores. If epoxy is not available, a strong adhesive like crazy glue or gorilla glue can also be used.
Loctite Plastic Bonder is a two-part adhesive that you use to fix plastic cracks. It is a clear, fast-drying adhesive that can be used on various plastics.
To fix plastic cracks with Loctite Plastic Bonder, you will need:
Atv plastic is notoriously difficult to weld, but JB Weld may work in a pinch. However, if you’re looking for a more permanent fix, fiberglass may be the better option.
Can I Melt Plastic Back Together?In a word, no. Melting plastic back together will only create a weaker bond that will likely fail again. If you’re looking for a more permanent fix, fiberglass may be better.
You Can Check It Out To Repair Damaged Plastic Pipe Threads
ConclusionATVs are a fun way to explore the outdoors, but they can quickly turn into a headache with plastic cracks if you have an ATV. However, fixing ATV plastic cracks is not as hard as you may think and can be done in just a few simple steps. With these instructions, you will be able to fix your ATV’s plastic cracks and get back out on the trails in no time! Thanks for reading our post about how to fix ATV plastic cracks.
Many modern motorcycles are replete with plastic panels, they are needed to create a complete look of the bike, improve aerodynamics and protect important components. In order to protect these parts from damage, modern polymers are made flexible and impact resistant, but even this does not save the motorcycle from falls and accidents. In such cases, the manufacturer offers to replace the part with a new one, which costs a lot of money. We have prepared several affordable options for how to make plastic on a motorcycle with your own hands.
First of all, it is necessary to determine the degree of damage. With the proper approach, it is possible to restore a completely broken part, but sometimes it will cost at the level of buying a new one. If the damage is relatively minor and relates to a structure that does not carry a critical load, such as part of the body of a motorcycle (maxi scooters), then cosmetic repair methods are suitable.
Cracks, chips and gluing together several pieces of plastic can be done using hot air soldering or a soldering iron. Responsible, load-bearing structures, as well as parts with a high degree of damage, are best repaired using methods that involve restoring the mass of a plastic part and its characteristics (stiffness, elasticity, etc. ). In cases where plastic can no longer be repaired with a patch or gluing, there is an option to detail from scratch. To do this, you will need to carefully study the entire modeling process, have a lot of summary time and nerves. Often, in such cases, it is easier to purchase a used spare part and repair or even buy new plastic.
To repair the plastic of a motorcycle with heated air, you will need a building hair dryer, but not any, but with a temperature controller. You can use the cheapest device, but then there is a risk of overheating the plastic, which will lead to the loss of its basic properties. Overheated material will be brittle and may break under the vibrations from driving on normal roads. You will also need a special nozzle with a thin nozzle, about 5-8 mm.
In addition to the hair dryer, you will need a large piece of plastic identical to the one being welded. To do this, you should pay attention to the marks of the part, most likely you will have a product of the PP, RA or ABS brands in front of you. Polypropylene PP, for example, melts at 300 degrees, and starts to burn at 350, so it should be welded at a temperature of 300 - 340 degrees. Polyamide or PA should be welded at 410 - 460 degrees, ABS at 360 - 400.
Soldering process:
Advice. If the plastic twists a lot initially, then for ease of working with it, you can fasten it with brackets.
 8 - 1.5 cm thick, this will be our solder.
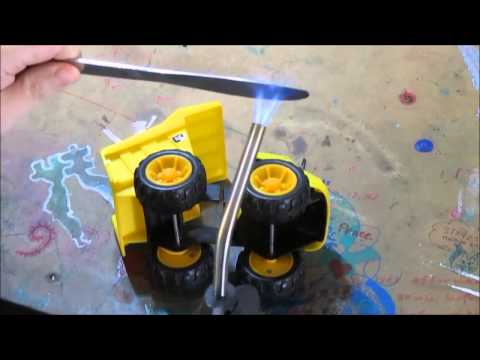
Such a repair of motorcycle plastic with your own hands is practically no different from the previous one. The main difference will be the tool used. You will need a high power soldering iron that you don't mind getting dirty. The type of material to be welded and the appropriate solder are also important here. The latter can be found in the form of special tapes in stores.
Welding process:
 While the plastic is still liquid, level it with a stinger to get an even layer.
 Advice. With proper skill, you can simultaneously make a hollow and fill it with solder.
So the process will take much longer and require more concentration, but the layers of plastic will hold on better, which means that the connection will be more durable. If you did everything right, then in the end you will get a strong seam that looks rough on the inside, but with the outer one is almost perfectly even. This can be achieved due to the deep penetration of the mass during the formation of the recess.
Note! Some advise using reinforced metal mesh to strengthen. This option only makes sense if you are working with fragile low quality material that is not able to bend.
Motorcycle plastic repair can be done by gluing parts together.
For this we need:
Bonding process: First of all, we remove the defective part, thoroughly wash it with hot water, then clean the areas around the cracks and the ends of the chips, and finally degrease the treated parts. Next, we dilute the resin with a hardener, keep in mind that the material will keep in a plastic state for 2-4 hours, so it is better to cook it in small parts. If you add a little castor oil to the mixture, it will turn out to be more ductile, which is especially important for flexible plastics. The finished resin, on the inside of the part, is applied with a brush in one layer. Next, we put a layer of fiberglass with a width of not more than 5 cm and cover it with another layer of glue. In total, 3-5 layers of mesh should be obtained, and the final layer is glue. Remember! All work with epoxy resin should be carried out with gloves and goggles. Upon completion of work, the part is left to dry for a day, at room temperature. A sign of the hardening of the material is the absence of adhesion and the strength of the structure. You can press lightly on the seam to test its strength and to make sure the material has set. If everything suits, the repair is completed, otherwise we completely remove the layer and apply a new one. There is still the outer part, but it should be treated with putty to prevent damage and then painted over. Gluing is needed to create a strong base, and the final work is best done with more workable materials.
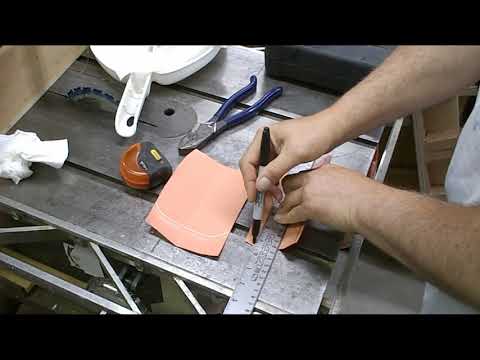
Speaking of motorcycle plastic restoration, do not forget about the complete replacement of missing or damaged parts. Here we divide the process into making the panel from scratch and making the missing piece. The hardest part is making the part yourself. It is possible to completely repeat the factory forms only from fiberglass. The process is very long, not the cheapest and suitable only for enthusiasts. Initially, you should make a matrix that repeats the shape of the future part. A layer of fiberglass and resin is gradually applied to the matrix, thereby forming the part.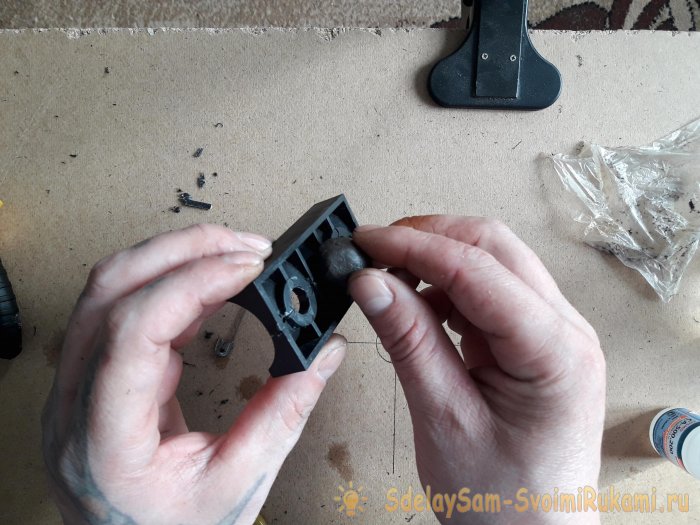 Then the product is sanded, primed and painted. Such a detail will last exactly until the next incident, because fiberglass is very fragile, and its repair does not make sense due to the loss of rigidity of the entire structure. Finally, plastic repair can be done with a piece of plastic of suitable composition and size. From the workpiece, you should cut out a shape that repeats the missing part. The method is suitable for straight sections and with a slight spherical bend. A bend can be obtained by heating the part, shaping it and fixing it until it cools.
Diagnostics and repair of ATVs are important areas in the maintenance of motorcycles and all-terrain vehicles. It is important. So that the vehicle constantly remains on the move, does not have problems with movement and safety for the driver and passengers. Therefore, it is necessary to undergo technical inspection constantly, in time to change broken or failed spare parts and assemblies, to undergo an inspection of the condition of the machine, technical fluids.
We offer repair of ATVs in Nizhny Novgorod on favorable terms. There are low prices, promotions and discounts are constantly held. It is possible to order spare parts and accessories for tuning for any brands of all-terrain vehicles, snowmobiles and motorcycles. The employees of our workshop have extensive experience in servicing Yamaha, BRP, Suzuki, Honda and other brands, they immediately identify breakdowns and their causes. The use of modern computer equipment will allow you to detect problems in time and eliminate them. Departure to the client is possible.
When an ATV arrives at the service station, a complex diagnostic must first be carried out in order to identify all possible problems. It usually includes the following steps:
Every machine needs regular maintenance. Especially for ATVs, which often work in intensive operating conditions, which is called "wear and tear". therefore, attention to the technical side of their work needs a lot. Off-road can lead to frequent breakdowns, even if the car drives well and is not noisy - this does not mean that you can not visit the service. On the contrary, regular inspections will allow the iron horse to serve longer.
This should be especially remembered by beginners who pay more attention to tuning than repair. Unfortunately, all equipment is subject to wear and tear. When contacting a motorcycle service, you must have a service book with you, it also indicates the frequency of visiting the service station. If your equipment is older than 3 years, then it is better to undergo repairs a little more often. And you definitely shouldn't repair an ATV yourself, especially if you don't understand how it works. The risk of harm is much greater, and savings are unlikely to succeed.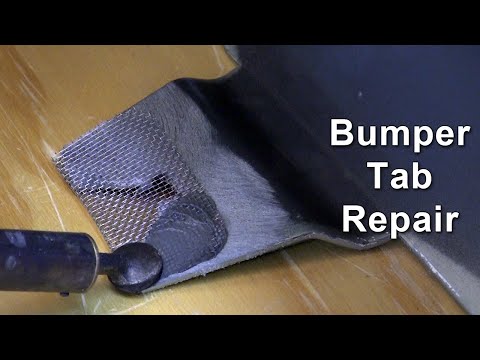 Recommendations of experts: contacting the service at least twice a year - in preparation for the active summer season and winter.
We offer quality service and competitive prices. The standard check includes:
Experienced technicians available for a wide range of repairs. You won't have to wait long - a large warehouse of spare parts and the necessary equipment will allow you to carry out repairs quickly. Qualified masters use modern equipment, including computer programs. Quality repairs are guaranteed - you can contact us with any problems and brands of ATVs and motorcycles.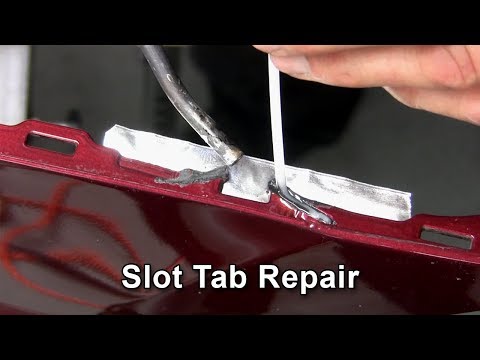
The heart of the machine requires careful attention. To extend its service life, it is better to use fuels and lubricants that have been tested and recommended by the manufacturer, and regularly conduct diagnostics. The main areas of repair:
It is subjected to crazy loads, so it can quickly fail. Breakage is better not to allow, because the equipment can fail at any time. Therefore, the load must be uniform. When repairing, specialists can replace bearings, hubs, levers, shock absorbers, bushings of levers and shock absorbers, ball bases. After that, alignment-adjustment is required.
Also an important part of the machine that needs attention. Among the main works, one can single out the replacement of the variator, its belt and cover, cardan and its cross, drive, CV joint and its anther, gearbox oil seals.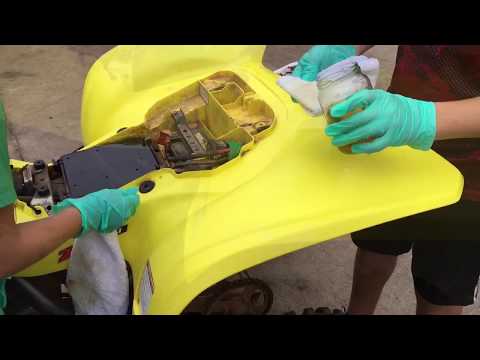
Electronics can fail in any technique. But our experts will quickly carry out maintenance of the battery, replace the ignition locks, starter, alternator and repair the wiring.
Alas, no one is immune from accidents, especially if the ATV is constantly used in extreme conditions. Customers may face problems with damage to the body, plastic, attachments, frame geometry. Therefore, after an accident, it is worth contacting professionals who can carry out serious work, including sawing and overcooking the frame.
Repair begins with a visual inspection, determining the degree of damage, the complexity of the work. Plastic parts and steering gear require the least time to eliminate shortcomings, most of all - the chassis and frame.
In addition to repair, we can carry out ATV tuning. We offer customers a large list of additional accessories and equipment that will help make your vehicle stand out, increase its efficiency and extend its life. You can modify the nodes, install additional devices, tune the engine, or even paste over the entire body with a protective or carbon film. In the basic equipment, not all cars will be able to overcome deep fords, move through fallen trees, move through impenetrable swamps and ruts. But tuning will help to do this. Also among the useful additions is equipping cars with trailers, snow plows, devices for clearing the territory and even plowing the land.
A full range of services for diagnostics, repair, replacement of parts and tuning in the company includes:

Tire fitting is also important for repair, because tires need to be changed constantly, they need to be balanced and changed when changing driving style or type of road. When changing tires, it is important to take into account the pressure, because it is different from a car. Therefore, when choosing any repair work, contact the professionals in their field. Recently, for the repair and tuning of ATVs, the service of pasting with a film - carbon, vinyl or ordinary protective film - has become popular. It can be glued to the entire body, individual parts, imitate textures and airbrushing, give a metallic sheen or camouflage vehicles. The transparent film will protect the surface from fading. Headlights can be glued with armored film so that they do not break or chip. For those who like to stand out, there is the option of pasting the body with matte carbon - it looks stylish, makes it easier to wash and clean.
To prolong machine life, keep rubber and plastic parts clean, change consumables and oil regularly, and lubricate suspension arms regularly.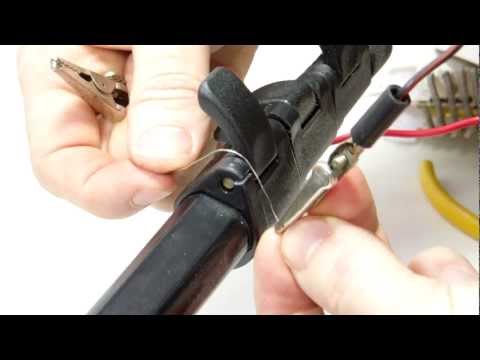 According to reviews, this will help to operate all-terrain vehicles longer.
| No. | WORKS | BRP |
| 1 | Rewind winch | 500 |
| 2 | Winch repair with removal and rewind | from 3000 |
| 3 | Installing tracks on an ATV | 10000 |
| 4 | Installing the backrest | 100 |
| 5 | Installing the windshield | 3000 |
| 6 | Arm and footpeg bottom protection installation | 3500 |
| 7 | Case installation | 600 |
| 8 | Installation of a wardrobe trunk with additional electrical elements | 1500 |
| 9 | Installation of the winch in a regular place + wiring layout | 1500 |
| 10 | Installation of a non-standard winch + wiring layout | 3500 |
| 11 | Front/rear kengurin installation | 1000 |
| 12 | Installing heated handles | 2000 |
| 13 | Installing Heated Handles with Trigger | 2500 |
| 14 | Power body kit installation | from 2000 |
| 15 | Snow plow installation | from 2000 |
| 16 | Radiator extension installation | from 3500 |
| 17 | Installation of additional lighting | from 1500 |
| 18 | Handlebar guard installation | 300 |
| 19 | Installation of arch extensions | 1000 |
| 20 | Installing snorkels | from 4000 |
| 21 | Alarm setting | 3000 |
| 22 | Installation, activation of GPS/GSM tags | 500 |
| 23 | Seat heating installation | 2000 |
| 24 | Installing footrests for a second passenger | 2000 |
| 25 | ATV wash | 300 |
| 26 | Frame geometry restoration | from 20000 |
| 27 | Locksmith work | 500 |
| 28 | Cylinder head cover replacement | 500 |
| 29 | Oil change in internal combustion engine | 600 |
| 30 | Replacing the Recoil Starter | |
| 31 | Replacing the oil seal from the right crankcase cover | |
| 32 | Replacing the CPG without removing the engine | 10000 |
| 33 | Overhaul (ICE) with removal | 40000 |
| 34 | Overhaul (gearbox) with the removal of the internal combustion engine | |
| 35 | Overhaul (checkpoint) with removal | 15000 |
| 36 | ICE valve adjustment | 2500 |
| 37 | Repair work with the removal of the left engine cover | from 1500 |
| 38 | Repair work with the removal of the right cover (semi-crankcase) | from 1500 |
| 39 | ICE diagnostics | 1500 |
| 40 | Diagnostics of the fuel system carburetor, injection | 500 |
| 41 | Chassis and transmission diagnostics | 1000 |
| 42 | Electrical diagnostics | 500 |
| 43 | Rear gear oil change | 300 |
| 44 | Front gear oil change | 300 |
| 45 | Flushing the internal combustion engine when changing the oil | 300 |
| 46 | Grease packing oiler press | 100 |
| 47 | Complex | |
| 48 | Maintenance | 8500 |
| 49 | Plastic replacement 1 element | from 1000 |
| 50 | Plastic repair 1 element | from 1000 |
| 51 | Cooling fan replacement | 3500 |
| 52 | Air filter assembly replacement | 400 |
| 53 | Carburetor replacement + adjustment without add.  |