Whether it be a puncture or riding so much that you wear the tyres out, there will come a time when you need to remove the tyres and inner tubes of your Mi Electric scooter. If its your first time it can be a daunting and complex procedure. In this article we’ve documented the approach we use for removing / replacing the tyres and inner tubes on the scooter.
Disclaimer : as ever anything you do to your scooter is your responsibility. RC Geeks cannot accept liability for any damage caused to you or your scooter as a result of following our methods.
This is a difficult task and we aren’t here to sugar coat it, but here are some tips that might help (if you don’t have time to read this article):
If you really can’t manage it, consider approaching your local bike shop. An experienced bicycle mechanic should be able to help you.
Some specialist tools are required to make this job straightforward:
 5mm hex driver
You potentially have some bicycle tyre levers at home. You might think they will do the job. With enough straining and swearing you might just get away with it. Instead, pick up a set of these foot-long metal ones (designed for fitting motorcycle tyres) from eBay to make your life easier.
In our experience this is the wheel that seems to get more punctures, thankfully it is the ‘easier’ one to work with.
1. Position the scooter so you can work on it comfortably, fold it and place it upside down or on its side (disc side down) on a work-surface.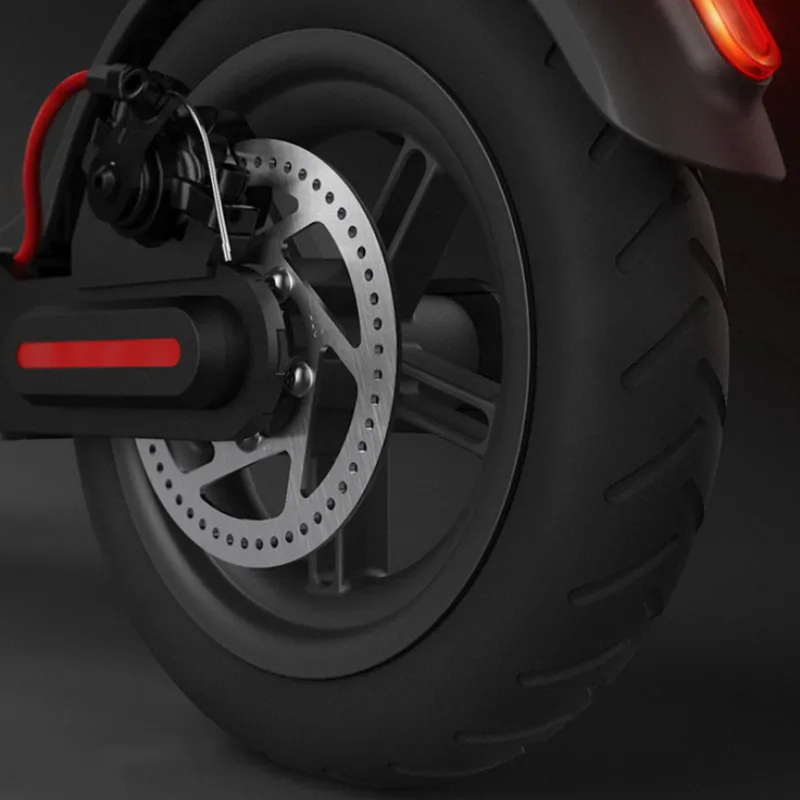 Remove the valve cap and put it safely to the side. Use a tool to deflate the inner tube, squeezing the tyre to try and get as much air out as possible.
2. Take a scalpel or pick and remove the plastic trim strip (the whole piece, not just the top red sticker label) from the rear screw cover.
3. Once clear, use the 2.5mm hex driver to remove the two screws that hold the trim piece on. Pop the trim piece off and put these parts aside.
4. Take the allen/4mm hex driver and unscrew (counter-clockwise) the axle bolt. Keep this, the spring washer and flat washer safe. You should have removed all these pieces so far.
5. With the wheel still attached, squeeze the tyre and slip the tyre lever under the bead.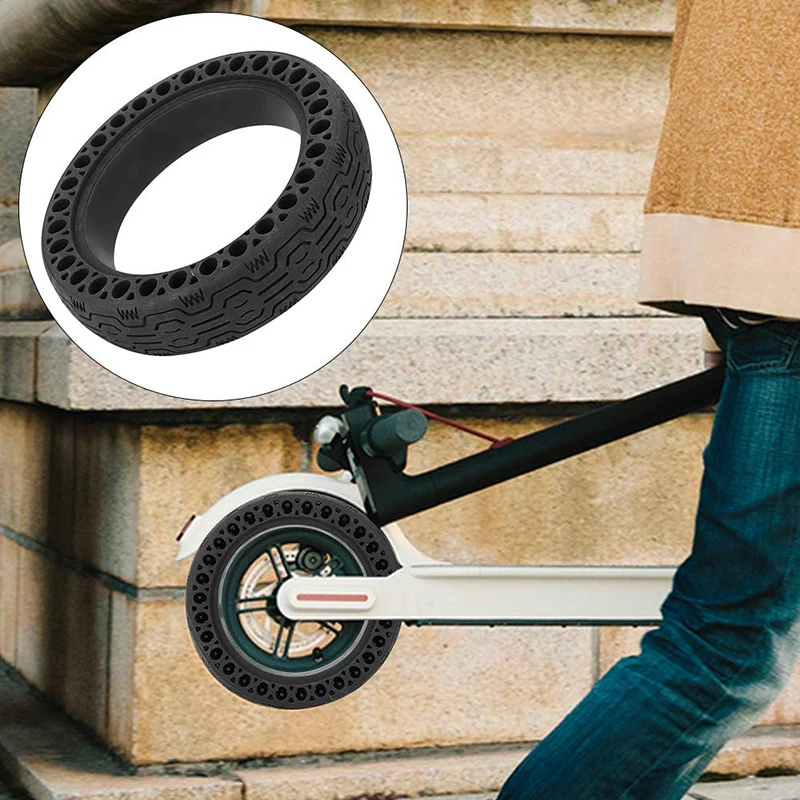
6. Rotate the wheel bracing the lever off of the frame of the scooter to release the bead from the wheel lip, this will take some force.
7. Once it is around a third released you can use your hands to man-handle the tyre all the way off on one side.
8. Flip the scooter over (or move to the other side) and repeat the process to remove the trim piece, the two cap-head 2.5mm bolts and finally the other 4mm axle bolt
9. Slide the wheel straight back out of the scooter. It might need to be wiggled to clear the brake caliper. Note the flats on the axle for locating it, important to remember when refitting later.
10. With the wheel out you can pull the tyre over to one side, allowing you pop the inner-tube free and then the wheel itself. This will take some grip strength, especially if the tyre is cold. Try not to work with the disc-side-down as it is easy to bend the disc, making it rub on the pads as it rotates.
11. Finally wiggle the inner tube valve out of the wheel to free it. Your patience will be rewarded after a few minutes of fiddling. Pushing from the valve side can work if you are struggling.
12. The inner tube valve is designed with a slight offset to match the wheel. Orientate the wheel to match this.
13. Push the valve through the rim and secure it with the valve cap to prevent it from falling out again.
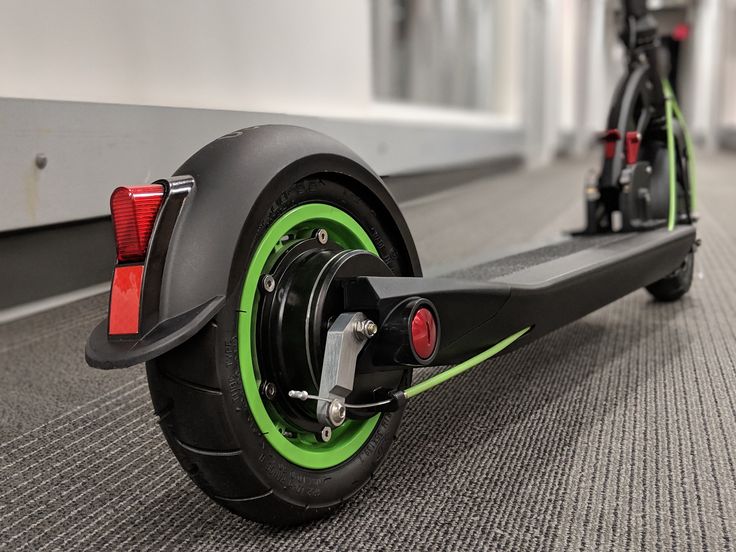
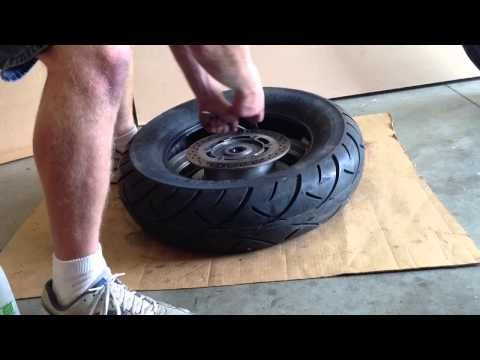
14. if you are replacing the tube due to puncture, take some time to check the inside of the tyre to ensure there is nothing inside that will harm the new inner tube. Next orientate the tyre so the tread is facing the correct direction. With the brake disc ‘up’ the tyre rotates anti-clockwise as denoted by the arrows next to the sizing numbers on the sidewall seen in the photo below:
15. Squash the tyre into an oval shape and insert the wheel and tube into it.
16. Gently tuck any excess inner tube in with your hands. Pull the lip of the tyre back from the wheel body to check the tube is clear of the lips on both sides to avoid a pinch flat. Twist the tyre until you seat the ‘rear’ bead on the disc side. A lever can help here but it is possible with your bare hands.
17. Re-insert the wheel into the frame, taking note of the keying to slide it in. Install the axle bolts top and bottom and screw them tight with just your fingers.
18. Rotate the tyre so the valve is close to the footplate. Insert the lever under the tyre lip and rotate the wheel anti- clockwise to jam the tool up against the frame.
19. Use both hands to continue rotating the wheel anti-clockwise, slipping the bead back under the lip until complete. The resistance will increase as you turn it. If you find the tyre wants to ‘pop off’ the wheel you can use cable ties run around the tyre and between the spokes to secure sectors of the tyre as you work around.
20. Replacement of the screws and trim is the reversal of removal. Tighten but do not over-torque the axle bolts, use hand tools only. Remove the valve cap and inflate to your required pressure.
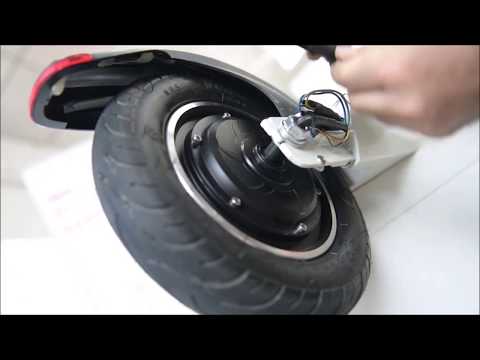
The motor wheel is more difficult to work on. Unless you go to extreme lengths you will be working on it whilst tethered to the frame (via the power cable) and there are no spokes to help grip the wheel.
1. Position the scooter so you can work on it comfortably, fold it and place it upside down or on its side wire-motor-side-up on a work-surface. Using the pick remove the ‘u’ trim (not just the sticker but the whole piece).
02. Next use your wrench to remove the four 2.5mm cap head bolts and remove the plastic axle cover. Remove the valve cap and let down the tyre.
03. Use the same wrench to remove the four short 2.5mm cap head bolts that hold the plastic fork trim to the metal forks.
04. Lifting the plastic trim away from the fork, use the 18mm open end of your spanner to loosen the wheel nut. It un-does in an anti-clockwise, lefty-loosey fashion but we had to use some WD40 (and let it soak for a few minutes) to get ours to move.
05. Slip the nut through the trim and slide it up the wire out of the way.
06. Use the pick to release the cable grommet on the frame, this will allow some more slack in the wire to give you more room to work.
07. Flip the scooter over and use the pick to remove the trim. Use your driver to remove the two 2.5mm cap bolts, the plastic trim and the four 2.5mm short cap bolts underneath.
08. Lifting the fork plastic you can use the ring end of your spanner (if it has one) to remove the 18mm wheel nut. Again rotate anti-clockwise to loosen and use WD40 or a penetration fluid to help.
09. Here is a reminder of what you have taken off this side and the tools required, note the keyed washer is still on the axle in this photo.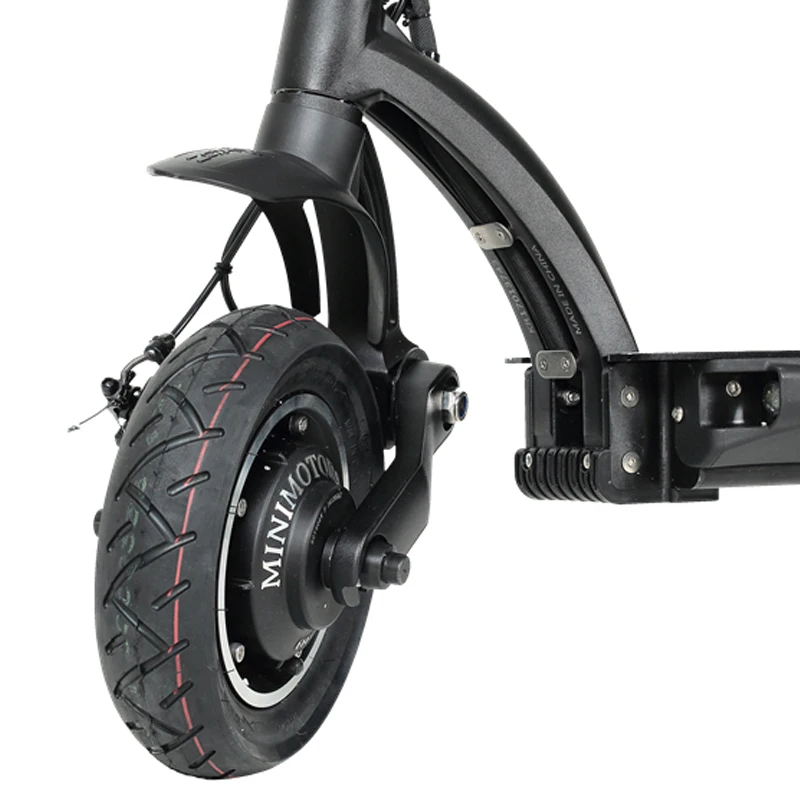
l0. Note the tabbed wheel washer, its orientation must be noted when re-inserting.
11. With the wheel wire-side-up (to avoid stressing it) insert your levers under the top wheel lip and rotate them over to release the bead. Work one of them around the rim lip to completely release one side.
12. Using your hands (or with some help from the levers) pull the tyre off of the rear of the wheel.
13. Take time to wiggle the valve out of the front wheel. This can be harder than you think but your patience will be rewarded. If the inner-tube is already compromised it can be quicker just to cut it away around the valve stem to remove it.
14. Re-inserting the new inner-tube can be a challenge of its own and was the most frustrating part of putting this guide together. Some lubrication can assist. The tolerances of the valve ‘window’ in the wheel can be incredibly tight. Many users have opened up the plastic ‘floating’ portion of this hole using a rotary tool to make life easier but we suggest avoiding such destructive actions if you can. Once the valve is through, cap it and spread the tube around the rim.
15. Working on a tyre that is slightly above room temperature (leave it by a radiator for some time prior) will make this job easier. Ensure you have the tyre orientated correctly when refitting. With the wheel motor-cable facing-up the tread should point ‘clockwise’ around the tyre. To get started, stand the wheel up, squeeze the tyre from the sides into an oval and press it over the top of the wheel passing the wheel through so the tyre is now hooked over the wire.
16. Use the lever to pop the rear (non-cable) side bead onto the lip. Take time to tuck the tube in, making sure it does not get pinched by the tyre bead on the rim lip.
17. A second pair of hands will help with the last part. As you lever the top side bead onto the lip you will find that the tyre tries to resist you, rotating and popping the previously seated rear off. Slip one side of the bead on and ask an assistant to hold the lever in place whilst you work around the wheel. It may take a few attempts but you will get there.
18. Replacement of the screws and trim is the reversal of removal. Tighten but do not over-torque the axle bolts, use hand tools only. Inflate the tyre and install the valve cap.
Watch where you ride! But seriously a common preventative step is to add ‘tyre slime’ tube sealant (before you have a puncture). This will fill out and reseal an inner tube should it get punctured. Beyond this, riding with the correct tyre pressures for passenger weight is important, as listed in our article here. Oh and of course don’t forget to inspect your tyres carefully for any ‘foreign bodies’ before fitting a new tube.
Yes we do. If you need any spares or accessories for your scooter check them out on our webstore. We don’t sell solid tyres as (at time of press) we don’t rate the solutions currently on the market.
Sadly we are currently unable to offer a tyre/puncture service for electric scooters. Your local bike shop may be willing to attempt the work if you show them what is involved with this article.
Interested in buying the ‘original’ electric scooter? Then we do have to ask why you are on this article! Try this one instead.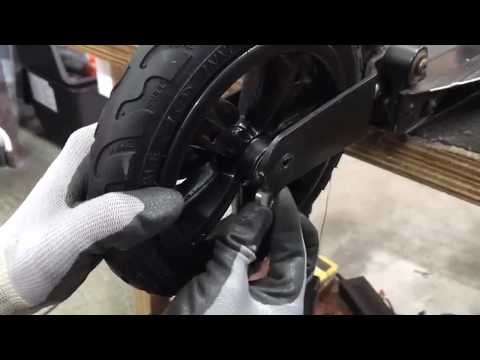 Looking for some accessories for your Electric Scooter? Check our article for some suggestions.
We know this isn’t the only (or perhaps even the best) way of approaching this job. If you have any suggestions for improvements, shortcuts or tricks, let know in the comments section below.
Previous | Next
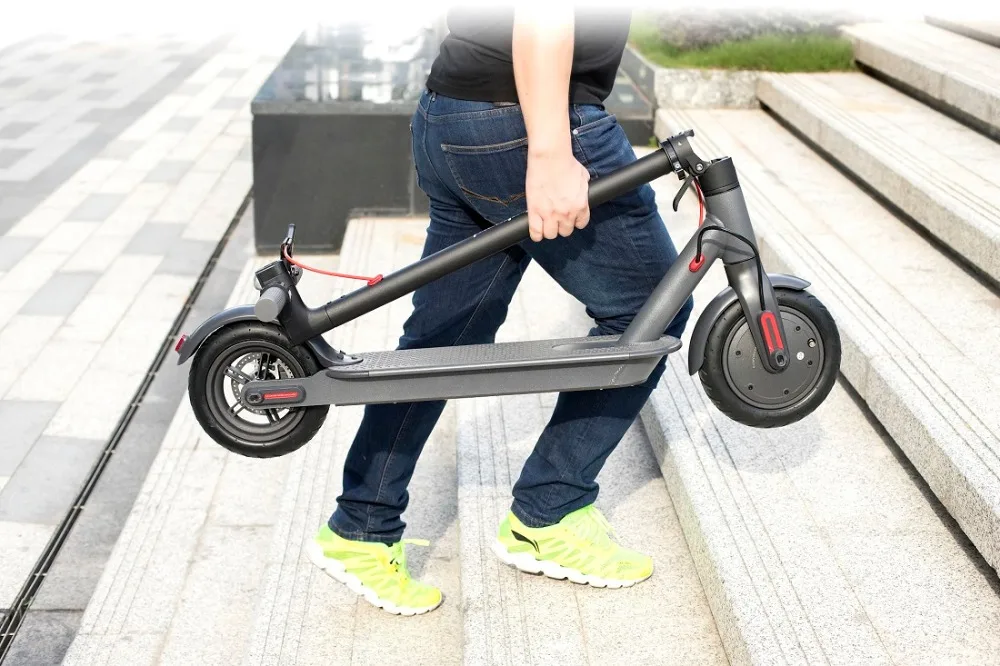
If you live in a place where your Xiaomi electric scooter is likely to get punctures very often, you may want to upgrade the wheels to solid tires. This is especially the case for those who live in rural areas or do not have tarmacked driveways or roads. Upgrading to a solid tire will save you a lot of energy and expensive tubes too.
Pros:
They do not get punctures. This is pretty much the only real advantage of solid tires.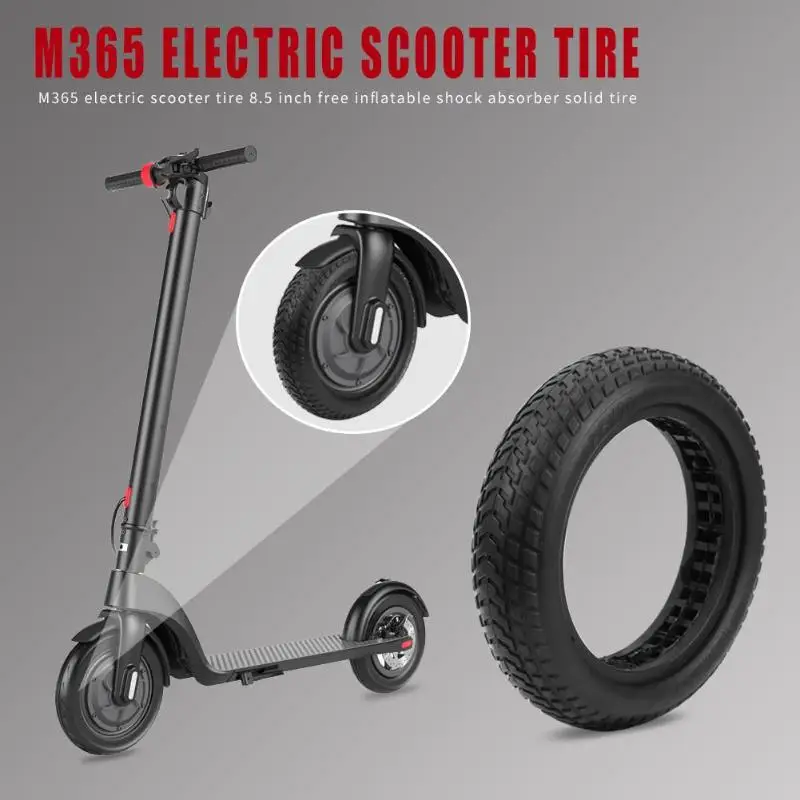
Cons:
Your new solid tire for your electric scooter may have more or less rolling reluctance which means that your scooter will use more energy and battery power. The energy spending or conservation will largely depend on how well you fix the tire, and whether you have the right one for the job.
Solid tires may also be a little difficult to mount on the rim of the wheel since they can be too tight or loose. This, however, can be solved by softening it before fitting (this will be explained further in the fitting instructions). The Xiaomi electric scooter tire size is 8.5 inches in diameter and 2 inches thick.
Additionally, Xiaomi M365 electric scooters do not have shock absorbers. With the lack of its pneumatic tires, this means that the scooter may experience a lot of vibrations during the ride. The movements may loosen bolts and nuts which may cause parts and cables to loosen and fall apart in the future so pay attention and maintain your Xiaomi M365 scooter.
Steps to follow:
 This should manage the amount of friction that will be involved during the fitting.
Make sure that you purchase your Xiaomi electric scooter parts from a trusted distributor. This will minimize the chances of buying counterfeit or low-quality parts, spares, and tools.
Please enable JavaScript to view the comments powered by Disqus.
During the operation of the scooter, tire replacement becomes commonplace. This is inevitable and you can carry out the replacement both independently and in any tire changer in your locality. In fact, doing it yourself is not as difficult as it might seem at first glance.
 8 mm according to traffic regulations, but may vary by country). The tread depth is measured using a caliper or depth gauge in the part most subject to wear.
 All this obliges you to take care of the purchase of new tires, dismantling the old and proper installation of a new tire in a timely manner. Let's see how to do it right.
 Tire changers only. You can buy them at any auto parts and tool store. From the side opposite to the valve, we insert two blades at a distance of 10 cm from each other and bring the tire rim out.
  It is important to supply a large amount of air in a short period of time. If a chamber is used, it can be pumped up with a conventional pump to the required pressure (usually up to 2 atm. for the rear wheel and 1.75 for the front wheel).
 It is important to remember that there are no specific tire pressure standards. It is better to follow the manufacturer's recommendations for each specific scooter model. In the cold season and in the presence of ice on the road, tire pressure should be reduced, but in no case should it be increased above the recommended values.
you punctured or tire is too much worn out of your electric scooter is so you would like to know how to change ? Indeed, sometimes it is necessary to carry out such manipulations. But if you are a little manual and you have some tools , it is quite possible to achieve such a repair By your own means . This way you will avoid paying labor costs. So that's what we're going to show you in this article. However, if you are not very comfortable, we will also inform you about tire repair cost for electric scooter.
Before you start disassembling your scooter, you must first bring vouchers tools. But also coins for replace elements pierced ou damaged .
In addition, we recommend that you check whether your scooter complies with électrique is still under warranty. In this case, it is better to contact after-sales service before performing any operations on your scooter .
It is very important to buy tire that matches model of your electric scooter. So if you don't know Links du tire installed on your device, we can advise you read the manual provided when buying the scooter.
In general, you should look for this type of information. If not, it can also be found online by typing name and article number of your scooter model. For example, for Xiaomi m365, is 8.5 inch tire.
After you have ordered new tire corresponding to the model of your scooter, you will need to bring some tools. In particular, it will be cutter de 3 tire levers, games hex keys and socket wrench or Clé à Molette remove nuts who installed hangman .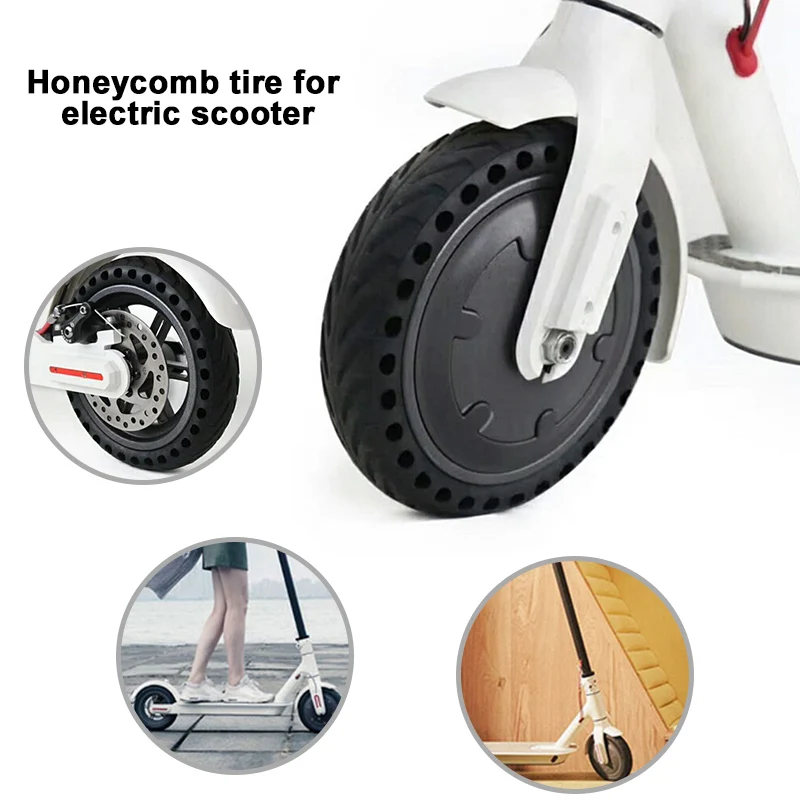 And forever keep nuts which support steering wheel, you can also buy thread locker.
We would like to point out that this is a manipulation that requires some Connaissance in the field. In addition, we do not accept any responsibility for any problème . We just want to help you learn the different steps to perform this kind of manipulation.


Know that you can also call a professional to do this kind of manipulation . For this type of repair labor costs can rise around 20 euros but depending on the brand it can be more. You also need to add the cost of spare parts. However, on average, a tire costs from 15 - 30 euros to even much more. Especially for big scooters like Dualtron . This will indeed depend on model . You will also need to plan for the inner tube.
So, to change a tire with a inner tube, you can price on average from 50 to 100 euros. But it will depend on scooter model but repairman … Feel free to ask the price in advance.