If you’re a regular driver, you may have had the bad luck of experiencing a broken tire bead.
Hitting the curb or pothole, or even a quick sharp turn can result in an unseated tire bead, making the tire impossible to re-inflate.
Reseating the bead by taking it to a workshop might not be the most viable option when you’re left stranded in the middle of a road.
But do not worry because there is a rather quick (albeit dangerous) fix to pop a tire back on the rim.
All you need is some combustible fluid, a source of ignition, and a little faith in science. Just spray a little starter fluid outside the rim, and light it on fire. The expanding gas will push the sidewalls of the tire up and out, causing the tire bead to snap back into place.
You would require the following items to perform this task:
Follow the steps outlined below to properly seat a tire back on the bead:
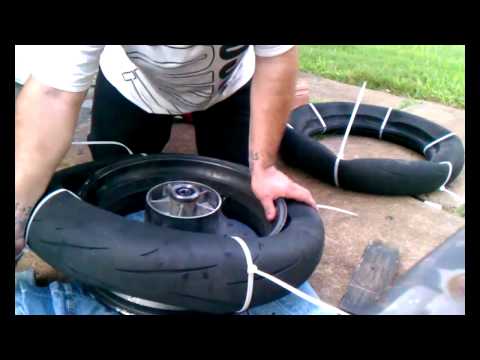
Step 1: Lift the tire up from the groundElevate the wheel off the ground with the help of a jack. If you’ve already disassembled the wheel, place the rim inside the tire and lay it flat on the ground.
Don’t have a jack?
Well, don’t worry you can check out our guide to jacking up a car without a jack!
Carefully spray some starter fluid in the cavity created by the rim and the sidewall of the tire.
Make sure you don’t spray too much of the liquid as that might damage the sidewall of the tire.
Once you’ve sprayed it around the entire bead, spray a little off the edge of the tire and onto the floor in a straight line.
Be extremely cautious with the amount of fluid that you spray onto the wheel.
Starter fluid is highly flammable. Using exorbitant amounts of such combustible liquid can cause a fire that might be difficult to contain.
Due to this reason, always keep a fire extinguisher nearby.
Using a lighter, matchstick, or whatever source of ignition you have, light up the starter fluid starting from the link you previously made on the ground.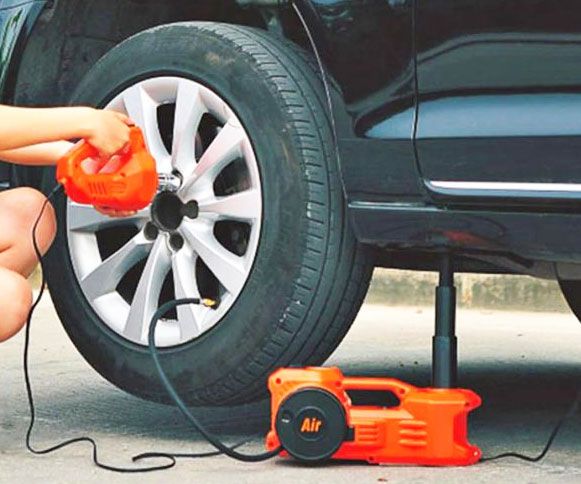
This step must be carried out immediately after spraying the tire bead so that the fluid does not evaporate away.
You might want to step back and distance yourself a bit after this step as it will cause an explosion.
The fire will cause the gases in the wheel to ignite and expand rapidly.
This sudden expansion of gases (an explosion) will cause the tire beads to move along the wheel and catch the grooves, seating them back in place.
As soon as you hear a popping sound, put out the fire as soon as possible.
This indicates that your tire is seated back onto the rim.
Finally, pump air into the tire using an air pump and you’re all set to hit the road again!
There are some disadvantages that come along with this method of popping tires back onto the rim. If not done properly, this can result in Pyrolysis, which is basically the thermal decomposition of the tire.
Pyrolysis can not only cause chemical deterioration of the tire over time but can also lead to a full-blown-out explosion.
The pressure inside may rise up to 7000 kPa and seriously injure anyone in close proximity to the tire.
Watch this video to learn the science behind using fire:
This is why you must always put off the fire as soon as you hear the ‘pop’ sound – usually a couple of seconds after you light up the fire.

Any kind of clicking or popping sound from your car’s tires is a cause for alarm, and something not to be taken lightly.
Sounds coming from a vehicle’s wheels might be due to an underlying problem in one (or more) of the following parts:
In order to find out the exact cause of trouble, you would need to take the car for a road test.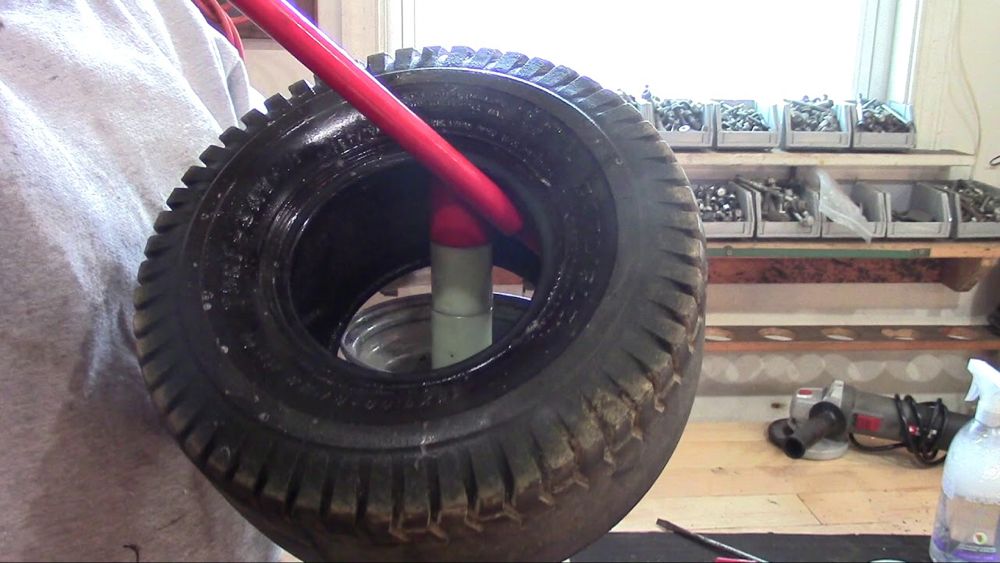
However, before you do that, make sure that there isn’t something dangling off your vehicle or a broken car part causing the noise.
Using fire might be a convenient way to pop your tire back onto the rim, but it surely isn’t the safest. Playing with combustible fluids and fires can be very risky and dangerous if you don’t know what you’re doing exactly.
Always try to seek help from a professional first, and if that isn’t possible, only then should you try pulling off such a feat. Just make sure that you abide by all the necessary safety protocols, and you should probably be fine.
(Visited 5,616 times, 6 visits today)
By
Raphael Orlove
Comments (164)Alerts
Gif: Reddit’s r/WCGW
Was 2021 a great year? Not exactly! But we did have some posts that did good traffic. Take a walk down memory lane with us, as we think back on 2021, a year that will seem much better by this time in 2022.
The internet is awash with people using a spritz or two of brake cleaner or starter fluid to bang set a bead on a tire. As you can see above, there’s a right way and a wrong way.
Getting a tire to mount right on a rim can be a challenge. Hell, I spent a week trying to mount my first tubeless mountain bike tires a few months back and found a lot of the same tips and tricks being used there as you find in the four-wheeled off road and stance car scenes.
The central problem is you want a tire to press right on up to the inside lip of the rim and kind of lock in place. Tires have a kind of raised edge right at the inside lip, and rims have a raised edge, too, on the inside of their outer edge. As you inflate the tire, its bead pushes out to the edge of the rim and forms its airtight seal. This is called “setting the bead,” and usually it’s a pretty easy job both on a bike or a car tire. Pumping up the tire with air is usually enough to set the bead on anything ordinary, and if it’s tough, slightly overfilling the tire with air will get you the pop . .. pop ... ping! of the bead seating. Amazingly, I dug up some fantastically low-res images on government websites that I am free to use to illustrate my point.
Here you can see a fueleconomy.gov diagram of a car tire, with its lipped bead:
Illustration: FuelEconomy.gov
And here is how that bead seats into a rim, as seen in a NHTSA cutaway:
Photo: NHTSA
Sometimes, though, a tough tire on a wide rim will not quite want to work its way to the bead. This is why you see people lubricating the bead with soapy water when mounting a tire.
It’s also why you see some people (particularly those in the off-roading world) use a ratchet strap to help set a bead. The idea in this case is to press the tire down and out towards the lip of the rim, doing some of the work for you before you start trying to blast air into the tire. Here’s an example:
And here’s a more low-tech example on a small tractor tire using a rope:
Both of these methods help you out if you don’t have a giant air compressor to get a huge blast of air in to really pop in a tricky bead. But what else gives you a big blast of air pressure? An explosion! This is the fundamental theory of using fire to set a bead. There really isn’t that much fuel needed to get even a pretty big tire to set its bead, as seen here on a Jeep:
You see the same technique in the world of stance cars fairly often, as people try and mount tires on wider and wider wheels. Even a pretty normal tire will need some help to stretch out and meet the lip of the rim. Here’s Hoonigan doing it with a strong “don’t try this at home” warning a few years back:
Car And Driver also has its own step-by-step guide to using fire to set a bead while out in the field, with similar intonations not to do this. As someone who grew up in California and had to live through many a smoke-filled summer from wildfires, I, too, would not encourage anyone to do this while in a dry field or pine forest they happen to be Jeep’ing through.
As you can see in the videos, not a ton of combustable fluid is at hand.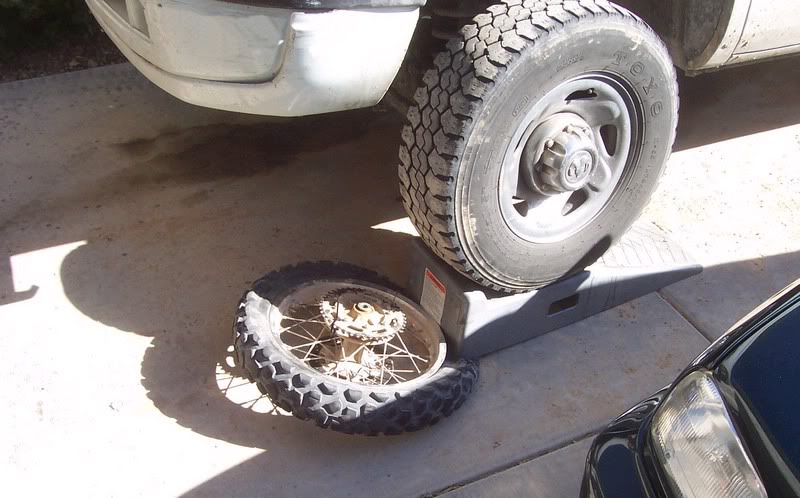 Too much of an explosion and you risk not just inflating the tire enough to set the bead, but enough to blow out the tire altogether.
That’s exactly what happens in this video uploaded to Reddit’s terrifying What Could Go Wrong subreddit. The video itself is overflowing with wonderful Brazilian energy, and every word in Portuguese uttered is dripping with confidence, even as the guy dumps basically a full Mountain Dew’s worth of gas into this tractor tire:
17,655 votes and 571 comments so far on Reddit
Read more
I apologize that I can’t embed the video, as our CMS isn’t quite as friendly to my old hacks that would get anything in here. I do encourage you to click the link above and watch the video.
The best I can do otherwise is give you a frame-by-frame.
Screenshot: Reddit’s r/WCGW
Let us first enjoy the optimism presented here. What could go wrong, indeed!
Screenshot: Reddit’s r/WCGW
A key element of this process is to slap the tire first, patting it as you would a horse.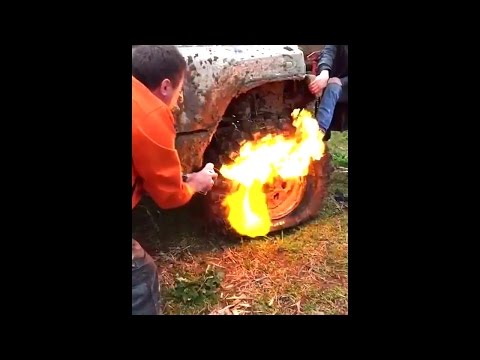
Screenshot: Reddit’s r/WCGW
Here we can see a truly large volume of combustable liquid going into the tire. How much liquid? Too much.
Screenshot: Reddit’s r/WCGW
The guys hook up air to the tire — fire might set the bead, but this air is meant to keep it set and filled with air. Our hero in the blue jeans is making a safety trail of fluid that could have been longer, honestly. A few hundred feet would have been comfortable for me.
Screenshot: Reddit’s r/WCGW
Our second and only other safety measure is to use a lit rag on a stick to set things off. Ear protection? Nah. Eye protection? Nah. Rag on a stick! You’re good, bud.
Screenshot: Reddit’s r/WCGW
Here, for just a moment, we see that this actually worked! The bead, as you can see in this frame, is set. Look at how snug that giant tire is to the bead. Perfection.
Screenshot: Reddit’s r/WCGW
And just one frame later, our failure is more than present. The explosion of the tire blowing out is enough to distort reality. Our protagonist has turned wiggly. I would not want to be an ear drum anywhere near this.
Screenshot: Reddit’s r/WCGW
Here, also, is a good view of the tire itself blowing out. You can have too much of a good thing.
Screenshot: Reddit’s r/WCGW
And here is our aftermath. The bead is not set, the tire is on fire, and the windows on the tractor are trash. We have now entered into a new calculus of wondering — would it have taken less time to set this bead using a non-explosive method than it will take now to fix the broken glass on this John Deere? We may never know.
Author: Evgeniy Balabas
Surprising gadgets met in the trunks of Soviet drivers! Give some of them to a modern car owner, and not everyone will even understand what it is and how to use it. "Wheels" try to regularly dig up unusual artifacts in order to preserve the memory of our automotive history. Today we are testing a rare device for repairing wheels on the road - a vulcanizing briquette.
In general, fire as an assistant to a tire fitter is known to many today. With its help, it is possible in the field (and not only in the field) to pull a large-diameter tubeless tire onto the rim. To do this, it is enough to splash a bit of gasoline under the tire half-mounted on the disk, and after it turns into a state of flammable vapors in a few minutes, bring a stick burning at the end. Flash, pop and the accompanying release of a large amount of gases instantly put the tire on the disk humps.
This “magic” was unfamiliar to our grandfathers due to the lack of tubeless tires in everyday life. However, they also often used burning gasoline to repair the wheel, but in a slightly different way.
A classic of the genre – a chauffeur's trick of the times of the Great Patriotic War, with the help of which the chambers of the wheels of cargo "one and a half" were glued in the field. A patch of so-called “raw rubber” (unvulcanized rubber) was applied to the hole, and on top of it, through several layers of newspaper, an old piston from the engine was placed like a glass. Gasoline was poured into the piston and set on fire. Such a simple device warmed up the place of gluing to 140-150 degrees, due to which the rubber vulcanized, turning into a state of durable and elastic rubber.
In the post-war years, a curious car accessory appeared, designed to replace sealing with a piston on the road. It was called "vulcanization briquette". Actually, in almost any book on the operation of the "victory", "Muscovite", "Zhiguli" or truck in the 50-70s of the twentieth century, one could find a mention of a vulcanization briquette. It was, in fact, a pyro-heater, but it did not require gasoline for operation, and therefore it was much safer to use and more convenient.
From the book "Automotive Tires", Military Publishing House of the Ministry of the Armed Forces of the USSR, 1946:
To ignite the combustible composition in the briquette, it was necessary to slightly loosen it with something sharp (with a knife or a nail), and then set it on fire with a match. If the combustible mass did not ignite well, it was proposed to inflate it slightly. Actually, the hygroscopicity of the composition was the reason for the unpopularity of vulcanization briquettes in the driver's community ... A puncture of a wheel is not such a frequent misfortune, and the briquettes lay for a long time in tool boxes and trunks, where they inevitably got damp, despite the rather dense packaging. And at the right moment, they often turned out to be useless.
From Motorcycle Maintenance and Repair, 1956:
There were several slightly different subspecies of vulcanization briquettes, but in fact they were all a metal "tray" with low sides filled with a combustible composition - usually something like cellulose-wood chips impregnated with saltpeter. On the bottom of the tray (from the outside, of course, side) was stuck a patch of raw rubber. From the rubber, it was necessary to tear off the layer of cellophane film protecting it from drying out, apply a briquette to the previously cleaned and degreased puncture site on the chamber, press it with a clamp and set it on fire. When the burned-out briquette cooled down, the patch was guaranteed to be glued with high quality due to the calculated combustion temperature, the amount of fuel in the briquette and its cooling time of about ten minutes.
Despite the fact that vulcanization briquettes were aimed primarily at motorists (although I even met their mention in the book “Field Repair of Aircraft”, Voenizdat publishing house, 1943), they made the most sense for owners of light motorcycles and mopeds without a generator (with only a magneto), as well as for cyclists who have neither a source of electricity nor a supply of gasoline.
Surprisingly, but not something rare and scarce in the past, today it is almost impossible to find a vulcanization briquette in real life. For some unknown reason, it has become an incredible rarity - there are practically no live photos of this accessory either in Google or Yandex. There are only numerous references in the old automotive literature.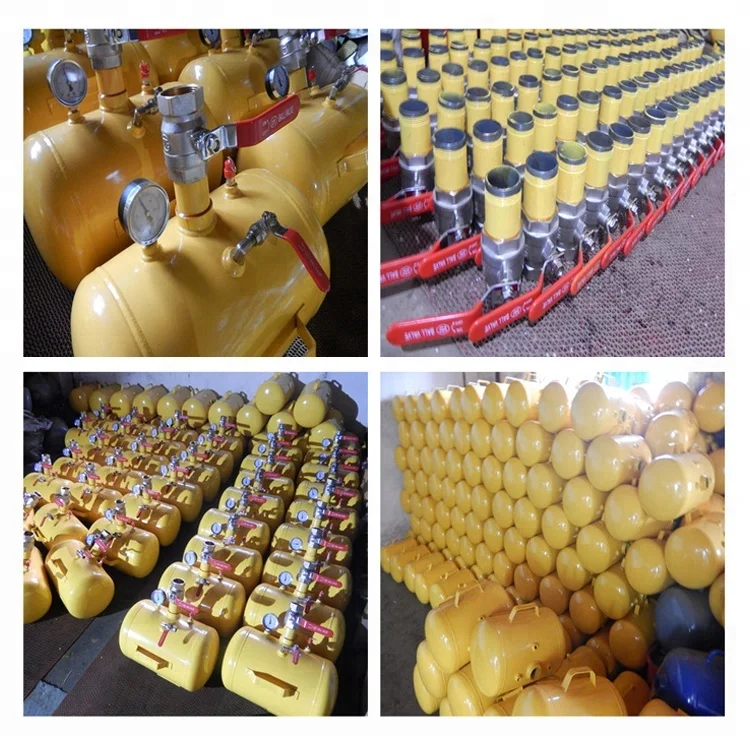 However, nothing is impossible for "Koles" - we, although with great difficulty, got a couple of copies of this really rare driver's device, and conducted an exclusive retro test.
The vulcanization briquettes that fell into our hands were produced by the Barnaul Chemical Plant. It is even strange that this enterprise still exists and is still engaged in the production of materials for repairing tubes and tires.
Our briquettes were made in 1964. Since then, they have been waiting in the wings for 54 years untouched ... And despite the obvious rudiments of the historical and cultural value of these retro accessories, we could not resist trying the aliens from the ancient auto era.
After thorough drying and replacement of a raw rubber patch, which had hardened for half a century, with a fresh one, we tried to seal a car chamber with them.
You can see the result in the photo: the old car "artifact" did not fail, worked exactly according to the instructions and vulcanized the patch on the chamber.
Well, “made in the USSR” sounds proud even half a century later.
compact MPV practice
Articles / Practice Look into the kingpin: what is a kingpin suspension, how to maintain it and why to inject The word "pivot" today seems to someone as archaic as "zipun", "endova" and "batog". In fact, this is not so: the king pins have not left us yet, and it is likely that some will have to ... 407 6 0 07.10.2022
Articles / Used cars Along Route 60: The BMW 325i E36 Ownership Experience Getting a car from the cult road movie "Route 60" is not an easy task in our country.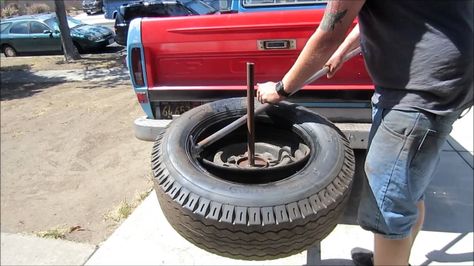 These are lengthy searches, and "parallel imports", and complex logistics, and years of painful waiting... 1443 6 5 06.10.2022
Articles / Used cars Range Rover Evoque I with mileage: stainless body, backward multimedia and weak electrics Range Rover SUVs have traditionally been big, voracious and even a little clunky. The release of the Evoque model broke all stereotypes about what a car of this British brand could be. But... 1975 one 2 05.10.2022
Test drives / Test drive Haval Dargo vs Mitsubishi Outlander: the dog is barking, the stranger is coming In the Haval dealership in the south of Moscow, life is in full swing: buyers look at cars, communicate with managers and sign some papers. While I was waiting for the test Dargo, the same cross... 12734 7 145 13.09.2022
Test drives / Test drive Motor from Mercedes, emblem from Renault, assembly from Dacia: test drive of the European Logan 1.0 It would seem that what's new can be told about the second generation Renault Logan, known to every Russian taxi driver, as they say, up and down? However, this car has... 11166 ten 41 08/13/2022
Test drives / Test drive Geely Coolray vs Haval Jolion: Free Cheese? If! Do you want to buy a car today with a full warranty, on credit at an adequate rate, without wild dealer markups? Now this is still a task, because a full-fledged chain of "representation - s.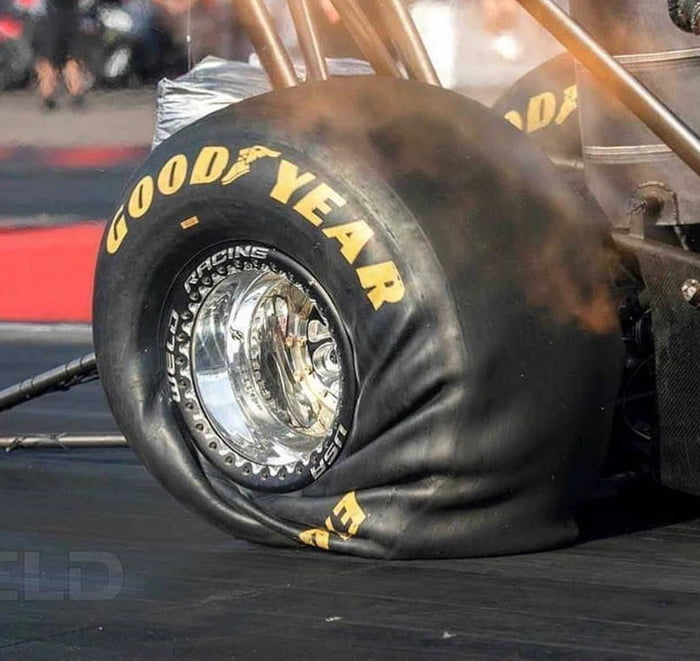 .. 8101 25 thirty 08/10/2022
Author: Kirill Savchenko
“Chief, you've got ten minutes of work to do, the hole is nothing! Well, come up with something ... ”Every tire fitter has probably heard such words. Alas, not all tire damage can be repaired ...
But the situation can be reversed. A wheel pierced by protruding reinforcement may be repairable, while a small cut will write off the tire for scrap.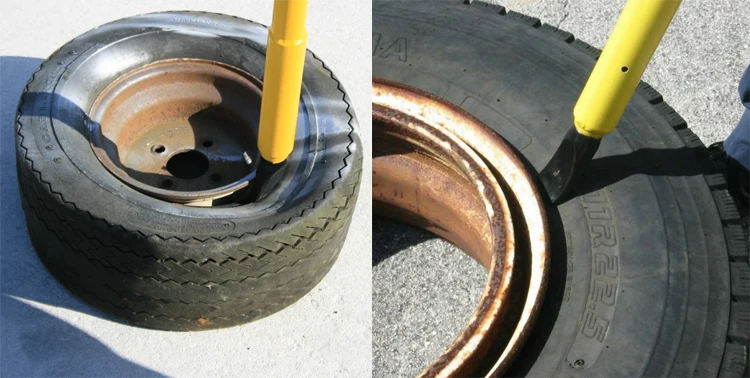 Experienced tire fitters believe that it all depends on the point of damage and the object that caused it.
Most often, drivers encounter punctures in the tread area of a tire. It is not always possible to detect it immediately. If in the days of tires and chambers the wheel lost pressure at the slightest puncture, then tubeless tires are much more reliable in this regard. A nail or self-tapping screw usually closes the puncture site, preventing air from escaping quickly.
With such a "plug" you can sometimes drive for months. The tire can lose pressure minimally without arousing suspicion. At the same time, an attempt to pull out a noticed nail on the way is likely to turn into a problem. In this case, the only recommendation is to pull out a foreign object only in a tire shop and repair the wheel.
In most cases, tread punctures are sealed either with special harnesses (some for temporary use, some for permanent use) or patches from the inside of the tire. Even damage caused by massive pins can be repaired. The main thing is that a piece of the tire along with the cord is not torn out.
In the latter case, the hole is filled with raw rubber, vulcanized, and a special cord patch is placed on the inside. But this will only be a temporary measure. In addition, such repairs are not cheap, and purchasing a new tire can be both more profitable and safer.
In addition to the plaster, cord “fungi” are also used. Lubricated with glue, the “fungus” is inserted into the puncture from the inside of the tire, then the excess part of the “leg” is cut off from the outside.
On the other hand, a cord patch can seriously help with side cuts. And car owners meet with them quite often. But here there are several nuances. In a roadside tire shop, the cut will most likely not heal. You need to contact a company with specialized equipment, primarily vulcanization.
And one vulcanizer is not enough here. Cord patches should be with a certain number of layers, designed for strictly defined damage sites and of a suitable size. And again we are talking about the nuances.
If the cut is in the shoulder area of the tire, then it is often impossible to repair it properly. The tire fitter who offered such a service is at great risk, even if he claims that he will weave a piece of new cord with his hands and vulcanize it. There are no miracles in this situation, but in any case, the last word belongs to an experienced specialist.
Low-profile tires with a tread height of less than 50% of the width are difficult to heal side cuts. That is why, in the case of using a car on roads with a possibility of tire damage, it is better to put those that are higher. They are much easier and cheaper to repair.
By the way, what appears to be a cut at first glance may not be one. If the sidewall of the wheel catches on something sharp, and a tear forms on the tire without damaging the cord, then this is called a pinch. It does not carry momentary danger and does not require any complex repairs.
However, if a piece of rubber remains, then it is glued with ordinary superglue.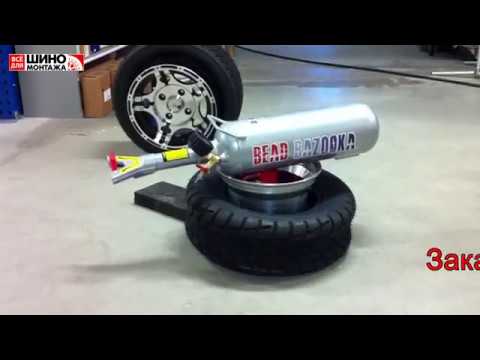 If not, you will need raw rubber and a vulcanizer. It is impossible to leave the cord bare: under the influence of moisture, it can collapse, which will lead to the complete loss of the tire.
One of the most common and fatal tire defects is swelling or simply "herniation". Despite the absence of open damage to the rubber, such a wheel will be scrapped ahead of schedule. The fact is that when the sidewall is hit, the threads of the tire carcass break. Even if the swelling is very small, sooner or later the bump grows in size, and this is already fraught with an explosion of the wheel at speed.
However, some hernias can be repaired, but this is again a temporary measure. Masters can put cord patches even in the tread area. But only on condition that the distance from the sidewall to the swelling is more than 40 mm. If less, the tire is not subject to further operation. By the way, on low-profile tires, hernias, for the most part, are not repairable - both on the tread and on the sidewalls.
One of the major tire problems is caused by unprofessional repairs. Moreover, the owner most often does not know about it. We are talking about damage to the bead ring, as a result of which the tire does not initially hold the specified pressure.
Eventually the bead ring begins to push out of the rim. At high speed or under heavy load, such a wheel can be disassembled, which again threatens the car with a loss of control.
This damage can be repaired provided that the wire ring or base is not damaged. Special technologies for such repairs are not provided, but experienced craftsmen use the so-called "cold" or chemical vulcanization using a two-component sealant. The resulting mass covers places where there is no rubber on the bead ring. The main condition is to wait three days before mounting the tire on the disc.
As for Run Flat tires, according to the instructions of most manufacturers, they are not subject to repair. In extreme cases, you can use a bottle of special pressurized sealant that comes as a repair kit.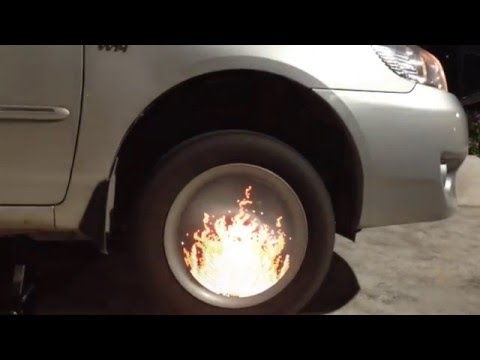
Comment of the expert of the company "SHINSERVICE":
Alexander Golubev
expert "SHINSERVICE"
First of all, we recall that most tire manufacturers do not recognize handicraft tire repair. It is considered a sign of external influence and changes in the design of the tire. Such a tire automatically voids the warranty. This does not happen if tire repairs are carried out in specialized, authorized tire brands services. Note that almost all major tire brands give their own extended warranty, according to which in most cases the repair is free, at a discount, or the product is generally replaced with a similar one, depending on the conditions of the program.
Based on our experience, we can note that in most cases damage in the bead area and in the shoulder area is not repairable.
I would also like to draw attention to the fact that most low-profile tires have high speed indexes (V and above), and even after professional repair they will not be able to be used in the previous modes without restrictions. Therefore, we strongly recommend changing the tire in all cases, except for tread punctures.
practice tires and wheels
Articles / Practice Look into the kingpin: what is a kingpin suspension, how to maintain it and why to inject The word "pivot" today seems to someone as archaic as "zipun", "endova" and "batog". In fact, this is not so: the king pins have not left us yet, and it is likely that some will have to ... 407 6 0 07.10.2022
Articles / Used cars Along Route 60: The BMW 325i E36 Ownership Experience Getting a car from the cult road movie "Route 60" is not an easy task in our country.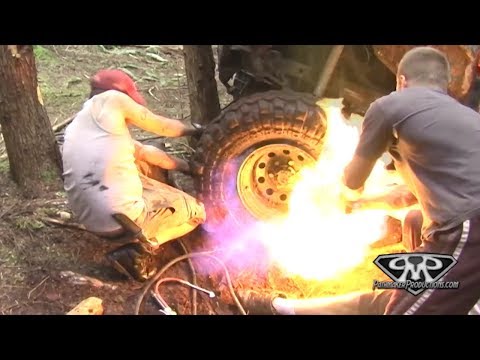 These are lengthy searches, and "parallel imports", and complex logistics, and years of painful waiting... 1443 6 5 06.10.2022
Articles / Used cars Range Rover Evoque I with mileage: stainless body, backward multimedia and weak electrics Range Rover SUVs have traditionally been big, voracious and even a little clunky. The release of the Evoque model broke all stereotypes about what a car of this British brand could be. But... 1975 one 2 05.10.2022
Test drives / Test drive Haval Dargo vs Mitsubishi Outlander: the dog is barking, the stranger is coming In the Haval dealership in the south of Moscow, life is in full swing: buyers look at cars, communicate with managers and sign some papers.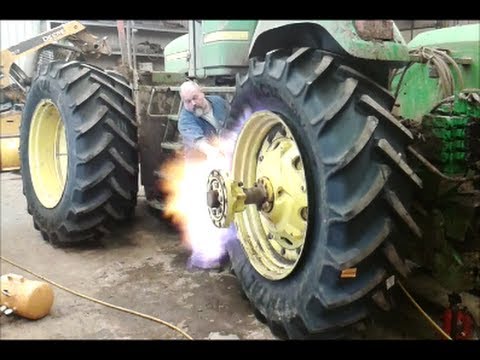 While I was waiting for the test Dargo, the same cross... 12734 7 145 13.09.2022
Test drives / Test drive Motor from Mercedes, emblem from Renault, assembly from Dacia: test drive of the European Logan 1.0 It would seem that what's new can be told about the second generation Renault Logan, known to every Russian taxi driver, as they say, up and down? However, this car has... 11166 ten 41 08/13/2022
Test drives / Test drive Geely Coolray vs Haval Jolion: Free Cheese? If! Do you want to buy a car today with a full warranty, on credit at an adequate rate, without wild dealer markups? Now this is still a task, because a full-fledged chain of "representation - s.