Written By: David Munoz (and 3 other contributors)
Difficulty
Difficult
Steps
5
Time Required
25 minutes - 1 hour
Sections
1
Flags
0
In this guide, we will explain how to replace a valve stem, such that people of all mechanical backgrounds can attempt this repair.
This guide assumes you have removed your wheel from the vehicle. For instructions on removing the wheel, refer to this guide.
Valve Stem
Available for sale on Amazon
Buy
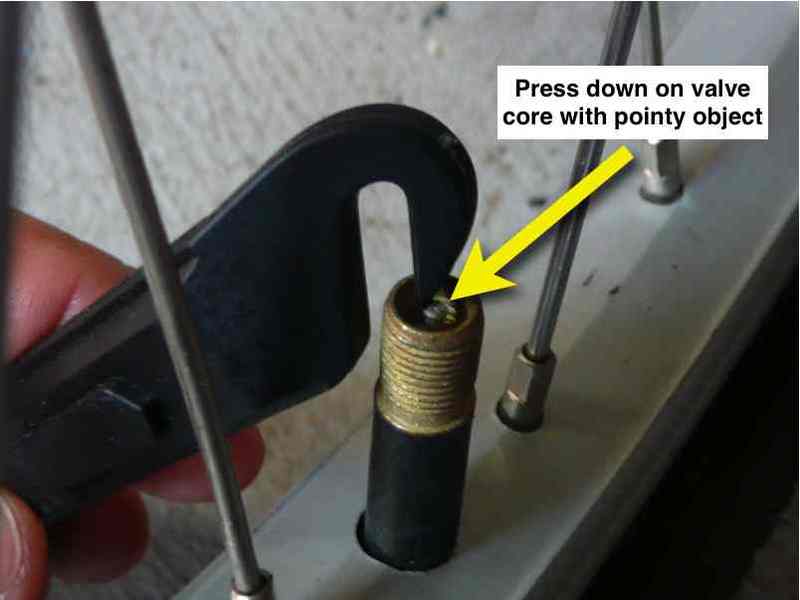
Locate the stem valve and remove the cap.
Using the Schrader valve core bit in your 1/4" driver, unscrew the valve core from the stem.
Allow the tire to fully deflate before proceeding.
Edit
To reach the valve stem, you will need to break the bead on the tire. The bead on a tire is where the rubber meets the rim.
Insert the pry bar in between the rim and the tire. Push the pry bar as far down as possible. This will require a large amount of force.
The bead is broken when the tire is visibly separated from the rim. Use the pry bar to hold the tire down by leveraging it against the small lip inside the rim.
Edit
Locate the stem valve on the inside of the rim. It will be a large piece of rubber underneath the lip.
Use the diagonal cutters to cut off an appropriate amount of rubber from the under-side, as shown.
Remove the stem by pulling it through the face of the rim.
Edit
Insert the new stem up through the rim. Use the diagonal cutters to help pull the stem into its seated position. There will be an audible pop when it is in correctly.
When using the diagonal cutters, take care not to pinch the stem too tight.
If you are having trouble seating the stem, use the rim as leverage.
Edit
The tire must be re-inflated. Simply use your air compressor to inflate the tire. We recommend re-inflating to 32 p.s.i. to check for leaks.
When inflating, the tire will produce a loud pop as the bead returns to its place. If the tire is having trouble inflating, squeeze the tire against the rim to create a seal.
Edit
Almost done!
If all goes well, your tire should be fully resealed and good as new.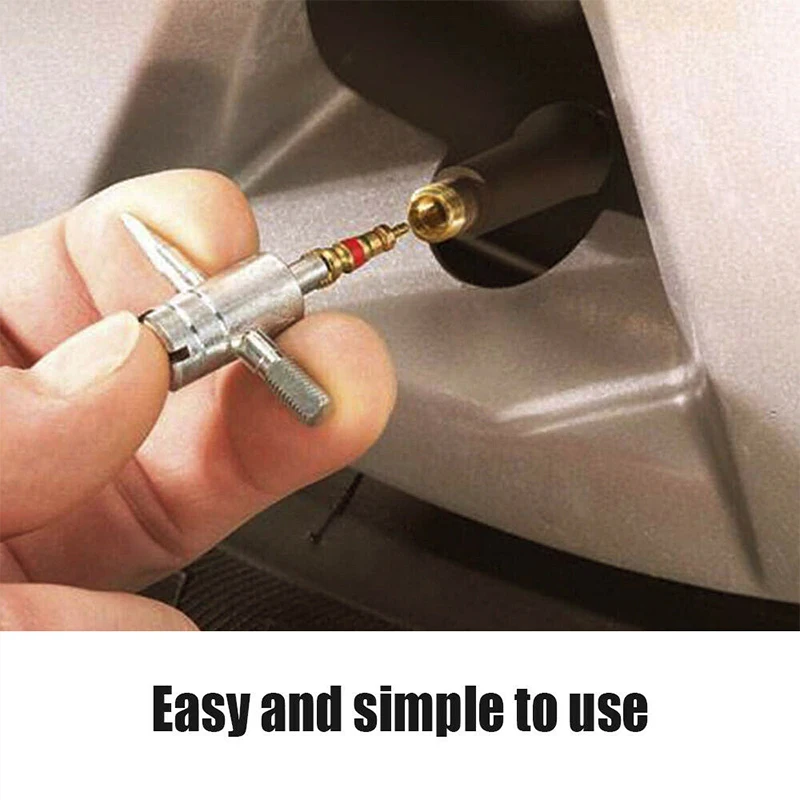
Conclusion
If all goes well, your tire should be fully resealed and good as new.
Cancel: I did not complete this guide.
One other person completed this guide.
with 3 other contributors
Badges: 4
+1 more badge
Ask a question, get an answer ASAP!
☰
×
GET A QUOTE
| Save Big on Auto Repairs | Get a Quote |
Tire valve stems are the valves located in a vehicle’s wheel where the tires are inflated from.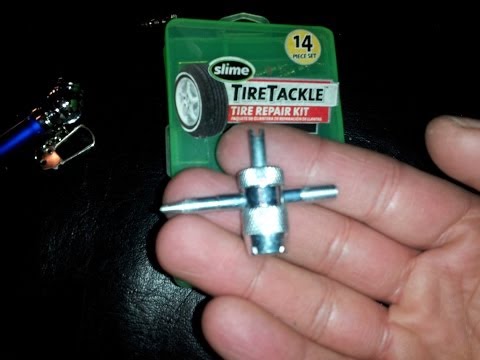 They contain a spring loaded valve core that seals itself using the air pressure inside of the tire. Over time valve stems may get old, crack, become brittle, or begin to leak, causing larger problems with your tire and your driving experience.
When valve stems begin to leak, the tire will no longer hold air. Depending on the severity of the leak, the tire may leak air slowly, or in more sever cases not hold air at all, warranting replacement of the valve stem.
In most cases the the fastest way to replace a valve stem is to take it to a tire shop and have them remove the tire and replace the valve stem using aid of a tire machine. However, for instances where this is not an option, a tire can be removed and the valve stem changed manually. In this step by step guide we will cover how to remove a tire from a wheel manually, using a tire iron, to replace the valve stem.
Materials Needed
Step 1: Loosen the lug nuts. Loosen the lug nuts of the wheel from which the valve stem is going to be replaced.
Step 2: Raise the car on jack stands. Set the parking brake, and then raise the vehicle and secure it on jack stands.
Step 3: Remove the wheel. Once the vehicle is raised, remove the wheel and set it flat on the ground with the outside of the wheel facing up.
Step 4: Deflate the tire. Remove the cap from the valve stem, and then remove the valve stem core using the valve stem removal tool to release the air from the wheel.
Once the valve stem core is removed the tire should deflate on its own.
Step 5: Separate the tire’s bead from the wheel. Next, use the sledgehammer to break the tire’s bead free from the wheel.
Hit the sidewall of the tire using the sledgehammer in the same place until the bead breaks loose.
When the bead breaks loose you may hear a crack or popping sound, and you will see the inside lip of tire visibly separate from the lip of the wheel.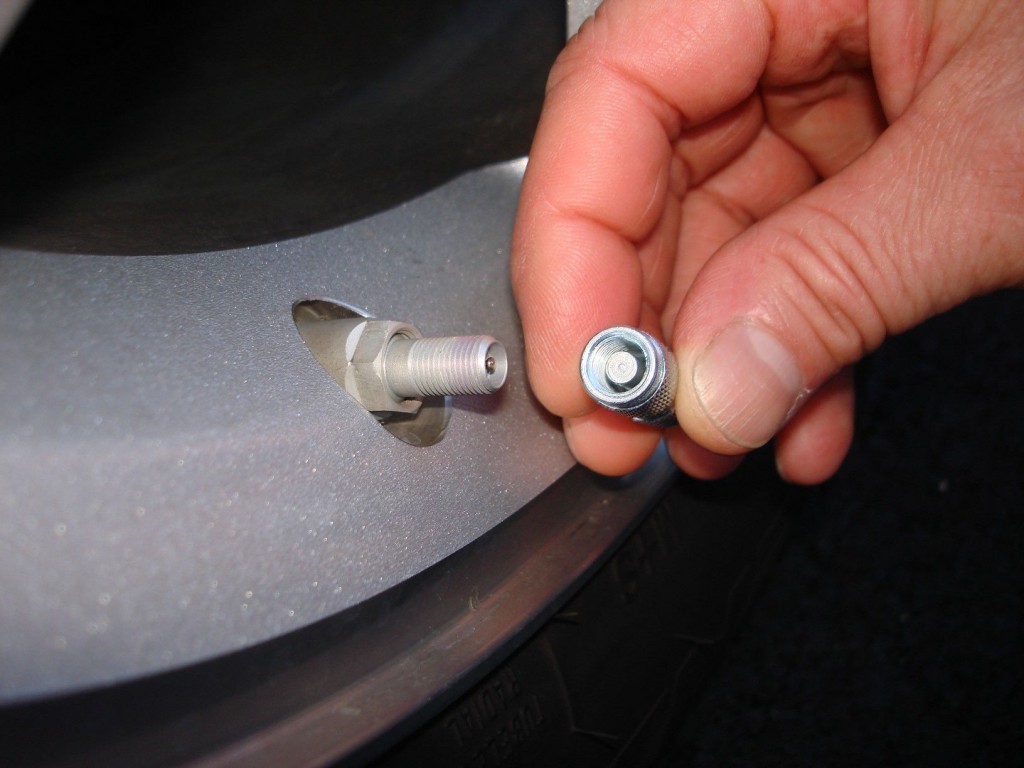
Once the bead has been broken, continue around the tire with the sledgehammer until the bead is completely broken all the way round the tire.
Step 6: Lift the lip of the tire up from the wheel. Once the tire’s bead has been broken, insert your tire iron between the edge of the rim and the inside lip of the tire, and then pry upward to pull the lip of the tire over the edge of the wheel.
Once you have pulled the lip of the tire over the edge of the wheel, work the tire iron around the rim until the entire lip of the tire is off the rim.
Step 7: Remove the tire. Grab the tire by its removed lip and pull it upward so that the opposite lip that was at the bottom of the wheel is now touching the top edge of the rim.
Insert the tire iron in between the the tire’s lip and the edge of the wheel and pry upwards to pull the lip over the edge of the rim.
Once the lip is over the edge of the rim, work the tire iron around the edge of the wheel until the tire is removed from the wheel.
Step 8: Remove the valve stem. Once the tire is removed from the wheel remove the valve stem. Use the needle nose pliers to pull the valve stem free from the wheel.
Step 9: Install the new valve stem. Take your replacement valve stem and install it from the inside of the wheel. Once it is in position use the needle nose pliers to pull it through into place.
Step 10: Reinstall the tire. Reinstall the tire onto the wheel by pressing it down over the the rim until the bottom bead clears the edge of the rim.
Then press the side of the tire down underneath the edge of the wheel, tuck your tire iron in between the lip of wheel and the bead, and then pry the bead over the lip the of the wheel.
Once the bead clears the lip of the wheel, work your way round the entire wheel until the the tire is completely installed on the wheel.
Step 11: Inflate the tire. Once the tire has been re-installed onto the wheel, turn on the air compressor and inflate the tire to the correct specification.
For most tires, the recommended pressure is between 32-35 pounds per square inch (psi).
Step 12: Check for leaks. Once the tire is properly inflated, double check to make sure that there are no leaks of any kind, and then reinstall the tire onto the vehicle and lower it off of the jack stands.
For most cases, the easiest course of action to replace a valve stem would be to simply take it to a tire shop, have the tire removed with a machine, and then have the valve replaced.
However, in the instances where that is not an option, a valve stem, and even a tire, can be removed and replaced manually with the correct tools and the correct procedure. If you find that there is a leak or damage in the tire and not just the valve stem, you may want to replace the tire entirely.
Tires
wheels
The statements expressed above are only for informational purposes and should be independently verified. Please see our terms of service for more details
4.2 Average Rating
Service Hours
7 AM - 9 PM
7 days a week
Phone Number
1 (855) 347-2779
Phone Hours
Mon - Fri / 6 AM - 5 PM PST
Sat - Sun / 7 AM - 4 PM PST
Address
We come to you at no extra charge
Guarantee
12-month/12,000-mile warranty
Our certified mobile mechanics perform over 600 services, including diagnostics, brakes, oil changes, scheduled mileage maintenances, and will come to you with all necessary parts and tools.
Get a fair & transparent quote instantly before booking.
Earn up to
$70/hr
Apply Now
Our certified mobile mechanics make house calls in over 2,000 U.S. cities. Fast, free online quotes for your car repair.
GET A QUOTE
GET A QUOTE
How to Do a Tire Safety Inspection
Car tires are a big part of staying safe on the road. Check tire inflation, tread depth, and sidewalls to make sure they're in good shape.
How to Replace the Rear Hub Bearing on a Ford Explorer
Wheel bearings allow the car's wheels to give you a smooth ride. A howling or grinding noise is a sign that your hub bearing should be replaced.
What are the Best Car Tire Brands to Buy?
Car tires come as all season passenger tires, summer passenger tires, on-road light duty truck and SUV tires, and off-road truck and SUV tires.
Steering wheel vibration over 60 mph
Hello. This vehicle should not shake like this when driving at high speeds. If it only occurs at higher rates of speed then it either has a warped front hub assembly or it may have a problem with the alignment....
Car stalls when stopped, steering wheel locks up
Yes, this is a common problem with CX-9. Carbon deposits can build in the throttle body (https://www.yourmechanic.com/article/symptoms-of-a-bad-or-failing-throttle-body) causing a restriction in airflow and reaction time of the throttle plate causing stalling with no Check Engine Light or no diagnostic trouble...
How can you tell if my tires need to be rotated?
Hi, thanks for writing in. If it has been more than 5000 miles, then it is time. Also, you can take a look at the front and rear tires and move your hand over top of the tires in one...
Services
Estimates
Cities
Maintenance
Our service team is available 7 days a week, Monday - Friday from 6 AM to 5 PM PST, Saturday - Sunday 7 AM - 4 PM PST.
1 (855) 347-2779 · [email protected]
Read FAQ
GET A QUOTE
A tubeless tube can bleed air through a valve, the rubber of which becomes covered with through cracks over time. Usually, having such a problem, you need to go to a tire shop or disassemble the wheel yourself to insert a new valve from the inside of the disk.
In fact, if you make a couple of devices, you can change the nipple in just 20 seconds, and without removing the splint.
The cone tube is made from sheet steel. Its segment is wrapped in a cone so that the smaller diameter corresponds to the hole in the disc for installing the nipple, and the larger diameter slightly exceeds the cross section of the valve base. The outer seam of a cone twisted from a sheet is strengthened from above by welding.
The hook is made from thin steel rod. Outwardly, it resembles an ordinary screwdriver, but with a curved end.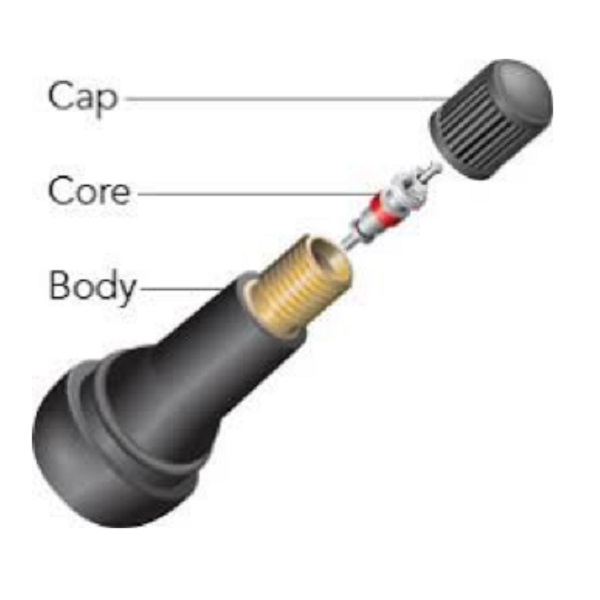 It must be equipped with a handle for convenient and safe operation.
The pusher is made in the same way as the hook, but a metal cap for the valve must be soldered to its end. You can simply take a tube of a suitable diameter and cut an internal thread in it so that it wraps around the nipple. This tool must also have a handle.
Liquid soap is also required. In order not to carry the entire bottle, it can be drawn into a medical syringe.
Start by placing the machine so that the valve is at the bottom. The hook is used first, the end of which must be lubricated with liquid soap.
The tool is inserted into the base of the valve on the disc, and thanks to the lubrication, when pressed, it penetrates the wheel. Having caught on the base of the nipple, it should be removed.
Now you need to remove the cap from the new valve and screw on the plunger instead.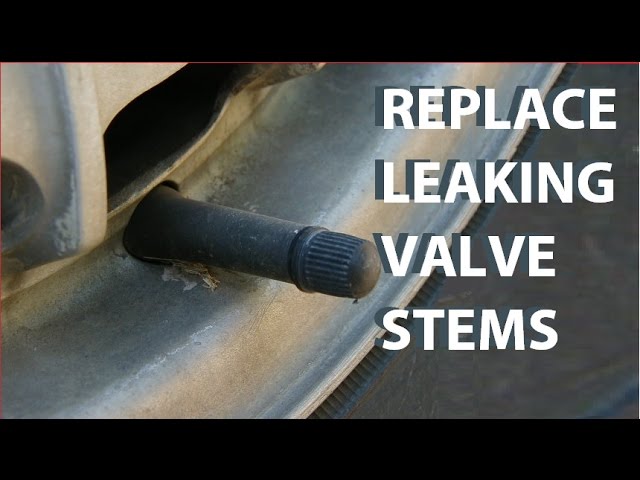 Soap lubricates the hole on the disc, the base of the valve and the inner surface of the cone tube.
Next, you need to place a new valve in the cone, the result is a kind of syringe.
It is better to wrap the pusher handle with a cloth so as not to hurt your hand. The base of the cone is attached to the hole on the disk. By pressing on the pusher, you need to push the nipple, pressing it until it leaves the cone, passing into the disc seat, which will be accompanied by a characteristic click of the straightened rubber.
Next, we pull the nipple back, swinging it from side to side, so that the groove on it clearly fits into the hole.
Installation completed. Now the wheel can be pumped up and continue to operate the car.
This is a very simple and convenient method, of course, forcing you to tinker with making tools a little. If you don’t feel sorry for the money, then all three devices can be bought at a car dealership. When working in winter, it will not be superfluous to hold the valve in warm water for a while to restore softness to the rubber, and while it is warm, replace it.
If a tubeless tire begins to slowly deflate, there may be more than one reason. This is both a puncture and an exit of air along the disk. Also often the reason lies in the wear of the nipple (valve). This little detail quickly fails, wears out, letting air through. Therefore, it must be changed periodically. You can do this without removing the wheel, without a jack, with four simple items in your hands and 20 seconds of time left.
The nipple replacement procedure itself takes very little time.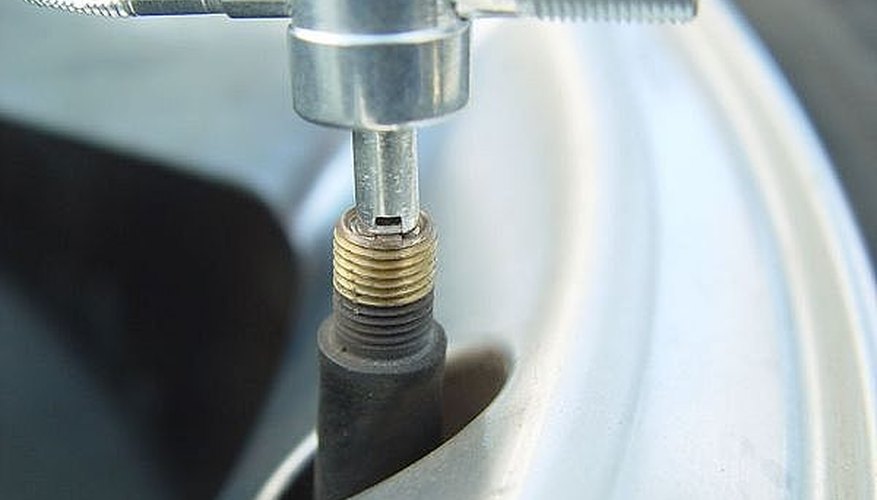 But preparation for it involves the manufacture of suitable tools. Do not regret the time spent on them - they will come in handy more than once!
So, you will need:
The fourth item needed to change the valve in 20 seconds is a simple liquid soap - it will serve as a lubricant.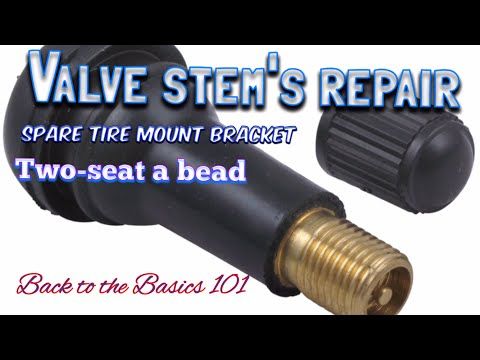
The machine must be parked so that the valve to be replaced is at the bottom.
Replacement steps:
That's it.