SUBJECT VEHICLES: Chevrolet Traverse and GMC Acadia, model years 2007 – 2013.
RELEARN PROCEDURE? Yes.
SPECIAL TOOLS NEEDED? TPMS special tools EL-46079 or EL-50448 may be used.
The tire pressure monitor system (TPMS) of the Chevrolet Traverse and GMC Acadia, model years 2007 – 2013, alerts the driver when a large change in the pressure of one tire exists while the vehicle is being driven.
The system will also display individual tire pressures and their locations on the driver information center (DIC). The TPMS uses the engine control module (ECM), body control module (BCM), instrument panel cluster (IPC), DIC, remote control door lock receiver (RCDLR), a radio frequency (RF) transmitting pressure sensor in each wheel/tire assembly, and the serial data circuit to perform the system functions.
When the vehicle is stationary, the sensors go into stationary mode. In this mode, the sensors transmit once every 60 minutes to minimize sensor battery consumption. As vehicle speed increases, the sensors go into drive mode, in which they transmit once every 60 seconds.
NOTE: The sensor’s pressure accuracy is about 2 psi (14 kPa) at temperatures from 14 degrees Fahrenheit to 158 degrees F (-10 degrees Celsius to 70 degrees C). The RCDLR receives and translates the data contained in each sensor transmission, then sends the tire pressure and tire location data to the DIC. When the TPMS detects a significant loss or gain of tire pressure, a “CHECK TIRE PRESSURE” message will appear on the DIC, and the low tire pressure warning indicator is displayed on the IPC.
The RCDLR has the ability to detect malfunctions within the TPMS. Any malfunctions detected will cause the DIC to display a “SERVICE TIRE MONITOR” warning message.
Tire pressure monitor warning indicators
When the TPMS detects a significant loss of tire pressure, the “CHECK TIRE PRESSURE” message is displayed on the DIC and the low tire pressure indicator is displayed on the instrument panel.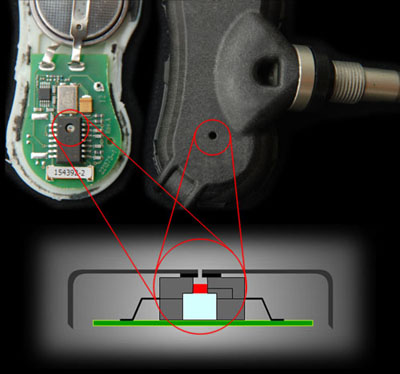 Both the message and indicator can be cleared by adjusting the tires to their recommended pressures and driving the vehicle above 25 mph (40 km/h) for at least two minutes. If the warning indicators are still on or the display shows dashes instead of a value, there is a problem in the TPMS. The RCDLR has the ability to detect malfunctions within the TPMS.
Any malfunctions detected will cause the DIC to display a “SERVICE TIRE MONITOR” warning message. See appropriate manufacturer service information.
Reset procedures
NOTE: If a tire pressure sensor or the RCDLR is replaced, or if the wheels have been rotated, the tire pressure sensor must be retrained. When the tire pressure warning light illuminates and a warning message appears, immediately check air pressure of all tires and adjust to the specified pressure. Drive the vehicle above 25 mph (40 km/h) for a few minutes and ensure the warning indicators go out.
Tire pressure sensor relearn
NOTE: Once the learn mode has been enabled, each of the sensor’s unique identification (ID) codes can be learned into the RCDLR’s memory. When a sensor’s ID has been learned, the RCDLR sends a serial data message to the BCM to sound a horn chirp. This verifies the sensor has transmitted its ID and the RCDLR has received and learned it. The RCDLR must learn the sensor IDs in the proper order to determine the correct sensor location. The first learned ID is assigned to left front, the second to right front, third to right rear and fourth to left rear.
NOTE: Each turn signal will illuminate one at a time indicating which location is to be learned next.
NOTE: Each sensor takes a pressure measurement sample once every 30 seconds while in stationary mode. If the tire pressure increases or decreases by more than 1.2 psi (8.3 kPa) from the last pressure measurement, another measurement will occur immediately to verify the change in pressure. If a pressure change has indeed occurred, the sensor transmits a learn mode. When the RCDLR receives a learn mode transmission while in sensor learn mode, it will assign that sensor’s ID to the location on the vehicle relative to the order in which it was learned.
NOTE: The TPMS will cancel the learn mode if more than two minutes have passed and no sensors have been learned, or if the ignition switch is turned to the OFF position. If the learn mode is canceled before the first ID is learned, the RCDLR will remember all previously stored IDs and their locations. As soon as the first sensor ID is learned, all other IDs are erased from the RCDLR’s memory. If the learn mode is canceled after the first ID is learned, the RCDLR will store the IDs as invalid and the DIC will display dashes instead of tire pressures.
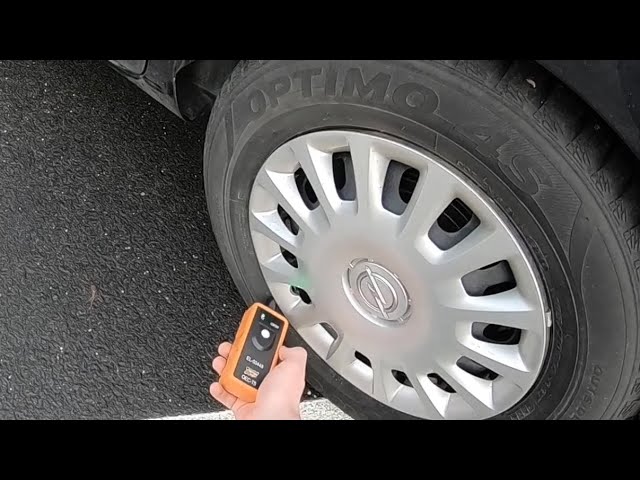
NOTE: In the following procedures, a TPMS special tool (EL-46079 or EL-50448) may be used in place of increasing/decreasing pressures to enable the sensor. To use, place the activator antenna against the tire sidewall close to the wheel rim at the valve stem location, then press and release the ACTIVATE button.
NOTE: If TPMS special tool EL-46079 or EL-50448 is used, and the vehicle is having trouble entering relearn mode, check the batteries in the activation tool.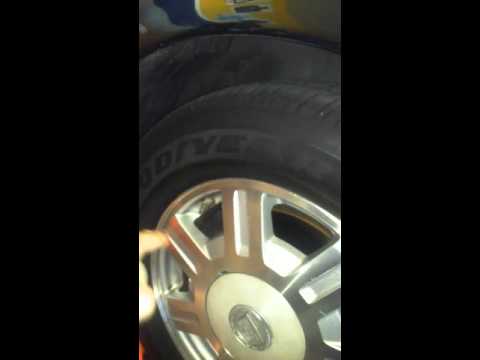 Low batteries may allow some functions to work, but not allow the vehicle to perform the learn function. When the internal battery is fresh (fully charged), the indicator is “full” or all dark. When the battery is depleted, the indicator shows “empty” or all light.
The learn mode can be enabled using any one of the following three methods:
NOTE: Before proceeding with any of the steps below, ensure that no other sensor learn procedure is being performed simultaneously and that no tire pressures are being adjusted on another TPMS-equipped vehicle within close proximity.
Using the keyless entry system
1) Turn the ignition switch to the ACCY position. Apply the parking brake.
NOTE: The left front turn signal will also illuminate to indicate the learn mode has been enabled.
2) Simultaneously press the keyless entry transmitter’s lock and unlock buttons until a double horn chirp sounds, indicating the learn mode has been enabled.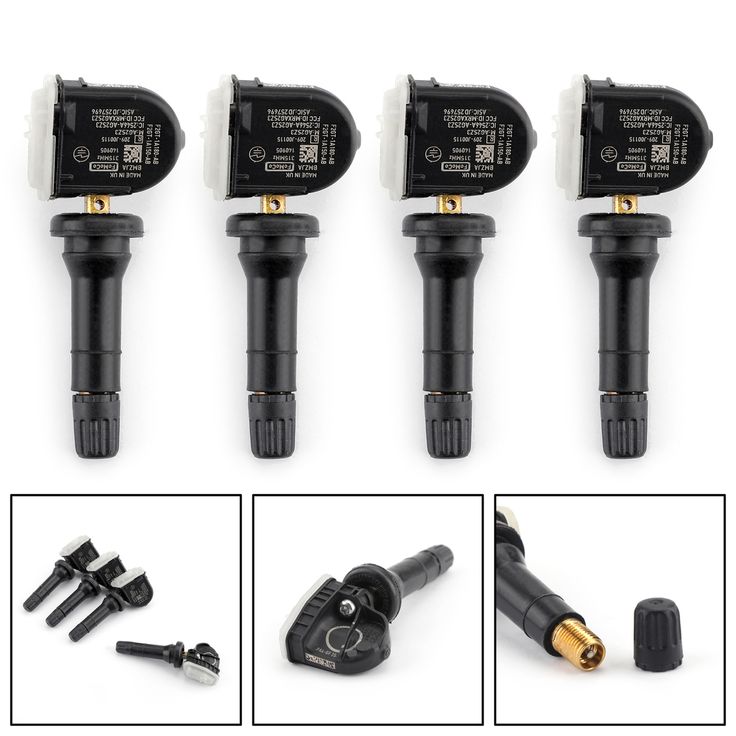
3) Activate the sensors by one of the following methods:
4) After the horn chirp has sounded and the right turn signal has illuminated, repeat the procedure for the next three sensors in the following order: right front, right rear, left rear.
5) After the left rear sensor has been learned, a double horn chirp will sound, indicating all four sensor IDs have been learned.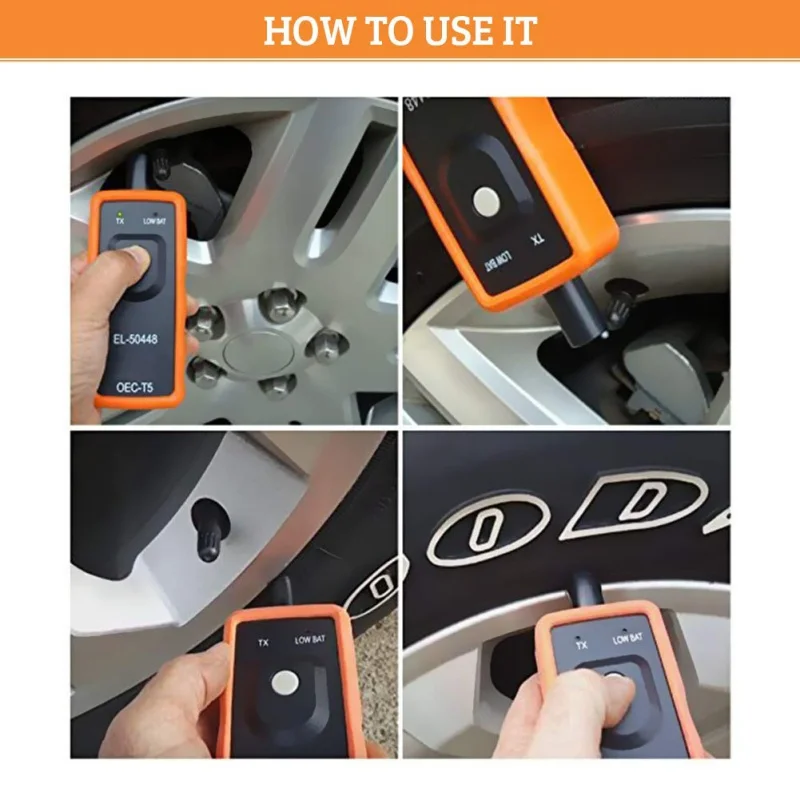 Turn the ignition switch to the OFF position. Adjust all tire pressures to specification.
Using a scan tool
1) Connect the scan tool. Turn the ignition switch to the RUN position. Apply the parking brake.
2) Using a scan tool, select “SPECIAL FUNCTIONS.”
3) Select “SENSOR LEARN MODE ENABLE,” and press the ENTER key.
NOTE: The left front turn signal also will illuminate to indicate the learn mode has been enabled.
4) Press the ON soft key. A double horn chirp will sound, indicating the learn mode has been enabled.
5) Activate the sensors by one of the following methods:
6) After the horn chirp has sounded, repeat the procedure for the next three sensors in the following order: right front, right rear, left rear.
7) After the left rear sensor has been learned, a double horn chirp will sound, indicating all four sensor IDs have been learned. Turn the ignition switch to the OFF position. Adjust all tire pressures to specification.
Using the DIC
1) Turn ignition switch to RUN position. Apply parking brake.
2) Press the “INFO” button on the DIC, until the “RELEARN TIRE POSITIONS” message display on the DIC. Then press the “SET/RESET” button on the DIC, until a double horn chirp will sound, and the DIC displays “TIRE LEARNING ACTIVE”.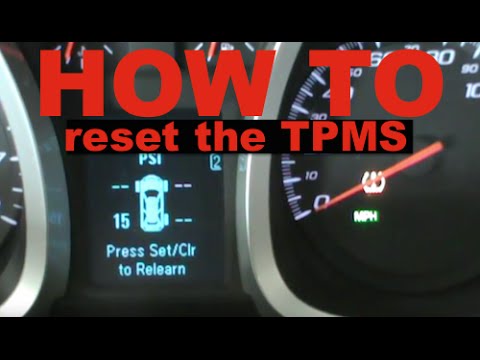 This will indicate the learn mode has been enabled.
3) Activate the sensors by one of the following methods:
4) After a horn chirp has sounded and the right turn signal has illuminated, repeat the procedure for the next three sensors in the following order: right front, right rear, left rear.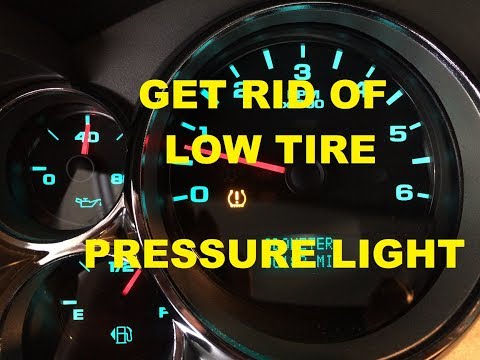
5) After the left rear sensor has been learned, a double horn chirp will sound, indicating all four sensor IDs have been learned. Turn the ignition switch to the OFF position. Adjust all tire pressures to specification.
Demounting/mounting procedures
CAUTION: The tire should be demounted from the wheel using the tire changer manufacturer’s instructions. Use the following information to avoid damage during the demounting/mounting procedures.
NOTE: If vehicle’s tires are replaced with those not having a TPC spec number, the TPMS may give an inaccurate low pressure warning. Non-TPC spec tires may give a low pressure warning that is higher or lower than the proper warning level achieved by TPC spec numbered tires.
NOTE: If a tire pressure sensor or the RCDLR is replaced, or if the wheels have been rotated, the tire pressure sensor must be retrained. See reset procedures.
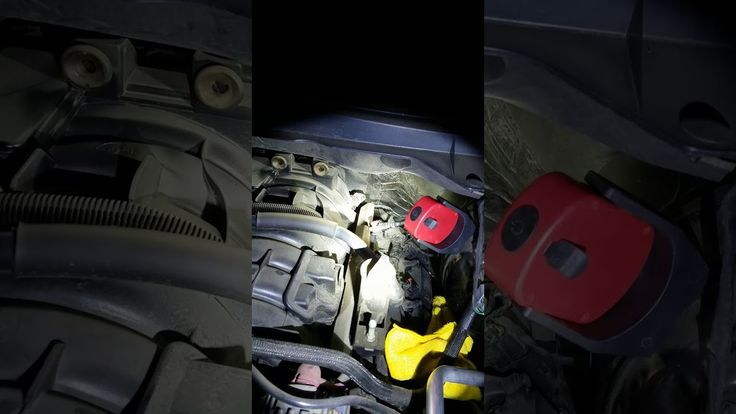
Tire pressure sensor
CAUTION: Do not inject any tire liquid or aerosol tire sealant into tires, as this may cause a malfunction of the tire pressure sensors.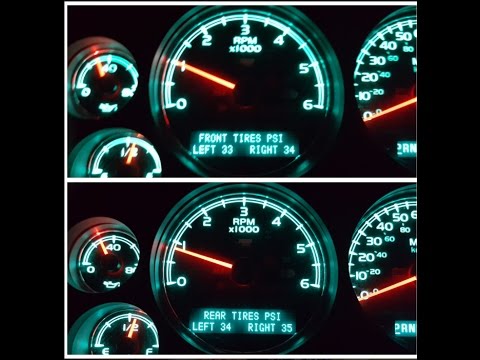
If any tire sealant is noted upon tire demounting, replace the sensor. Also remove all residual liquid sealant from inside the tire and wheel surfaces.
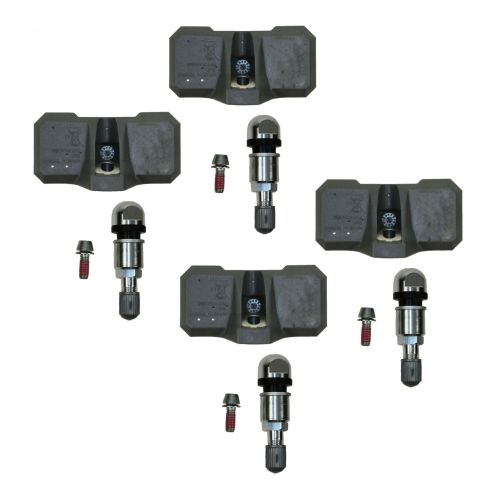
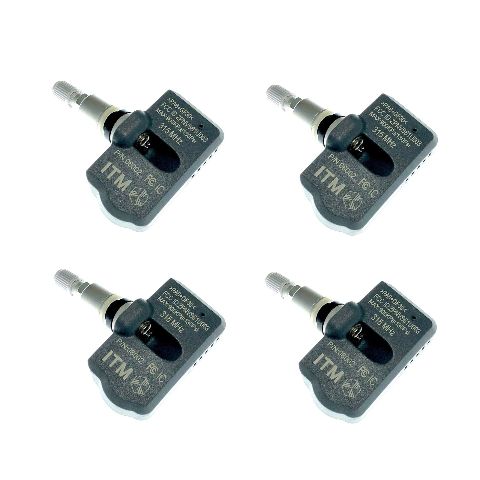
There are currently two different kinds of TPMS sensors in use on the vehicles covered in this article. Identification of which sensor is in use can easily be made after the tire has been removed from the wheel by referring to Figures 1 and 2.
Removal and installation
1) Raise the vehicle on a suitable support. Remove the tire/wheel assembly from the vehicle.
2) Demount the tire from the wheel following the tire changer manufacturer’s instructions while paying special attention to the following to avoid damaging tire pressure sensor:

3) If the TPMS sensor is the clamp-in style (Figure 1), follow clamp-in style removal as follows. If it is a snap-in style (Figure 2), follow the snap-in style removal.
Clamp-in style sensor removal
1) Remove the tire pressure sensor nut (see Figure 1).
2) Remove the sensor from the wheel hole.
3) Remove the sensor grommet from the valve stem.
4) Follow the clamp-in sensor installation steps below, to replace the sensor.
Snap-in style sensor removal
1) Remove the TORX screw (3) from the tire pressure sensor (2) and pull it straight off the tire pressure valve stem (1) (see Figure 2).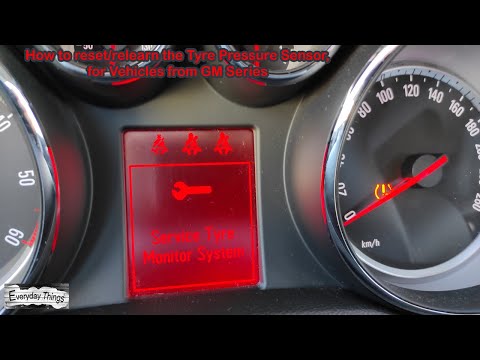
2) Remove the tire pressure valve stem by pulling it through the rim.
3) Follow the snap-in style sensor installation steps below, to replace the sensor.
Clamp-in sensor installation
1) Clean any dirt or debris from the grommet sealing areas. Install the grommet on the sensor valve stem.
2) Insert the sensor in the wheel hole with the air passage facing away from the wheel.
3) Install the sensor nut, and position the sensor body parallel to the inside wheel surface while tightening nut to 62 in.-lbs. (7 N.m).
4) Before installing the tire on the wheel, note the following items to avoid tire pressure sensor damage upon tire mounting:
5) Install the tire on the wheel. Install the tire/wheel assembly on the vehicle. Retrain the tire pressure sensor. See reset procedures.
NOTE: A service replacement tire pressure sensor is shipped in OFF mode. In this mode, the sensor’s unique identification code cannot be learned into the RCDLR’s memory. The sensor must be taken out of OFF mode by spinning the tire/wheel assembly above 25 mph (40 km/h) for at least 10 seconds in order to close the sensor’s internal roll switch.
Snap-in style sensor installation
1) Assemble the tire pressure sensor (2) to the valve stem and install the new Torx screw (3) (see Figure 2).
2) Apply tire soap to the rubber portion of the valve stem.
3) Using a tire valve stem mounting tool, pull the valve stem through in a direction parallel to the valve hole on the rim (see Figure 3).
4) Before installing the tire on the wheel, note the following items to avoid tire pressure sensor damage upon tire mounting:
5) Install the tire on the wheel. Install the tire/wheel assembly on the vehicle. Retrain the tire pressure sensor. See reset procedures.
NOTE: Snap fit TPMS sensors are still shipped in the OFF mode. However, the TPMS no longer needs to be spun to remove it from the OFF mode.
The TPMS sensor will exit its OFF state when the tire is inflated. The technician can then program the vehicle as normal. ?
Torque specifications
Component Ft.-lbs. (N.m)
Wheel Nut 100 (140)
In.-lbs. (N.m)
Clamp-in sensor nut 62 (7)
Snap-in sensor Torx screw 11.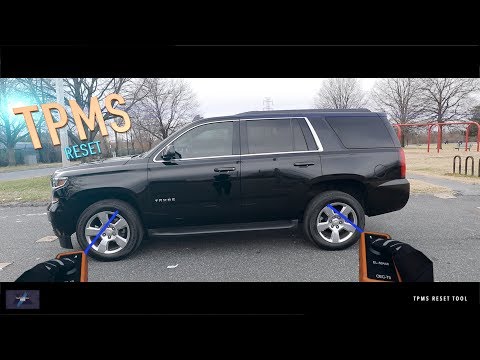 5 (1.3)
Information for this column comes from Mitchell 1’s “Tire Pressure Monitoring Systems Guide” for domestic and import vehicles. Headquartered in Poway, Calif., Mitchell 1 has provided quality repair information solutions to the automotive industry for more than 80 years.
For more information, visit www.mitchell1.com.
To read more TPMS articles, see:
2011-13 Chrysler 200
2008-2010 Hyundai Sonata
2007-13 GMC Sierra and Yukon Series
Having the correct tire pressure in your GMC Acadia ensures safer driving on the road. So, what should you have the tire PSI be at? Luckily, we've done plenty of research and have the answer for you. Let's discuss.
It's important to maintain 35 PSI in all four tires (235/65R18 and 255/65R17) and 36 PSI (235/55R20) on the GMC Acadia for better fuel economy and safety. It is also good to check your tire pressure before driving long distances.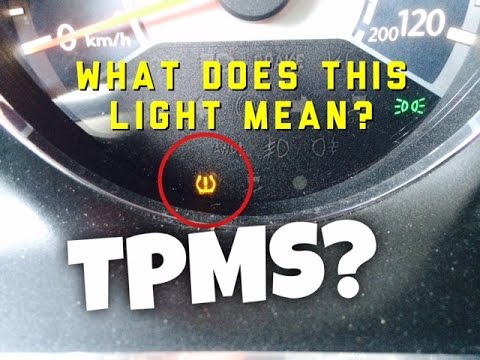 In addition, be sure not to overinflate your tires, as this could damage them.
Maintaining the right tire pressure serves a few key purposes. This article will discuss why you want to stick to the manufacturer's recommended tire pressure for the GMC Acadia. In addition, we will answer other frequently asked questions about the GMC Acadia, so read on!
Before you continue reading, let us say we hope you find the links here useful. If you purchase something through a link on this page, we may get a commission, so thank you!
To have a smooth drive, you must keep the proper tire pressure for your GMC Acadia. All four factory tires on a GMC Acadia should be inflated to 35 PSI for tire sizes 235/65R18 and 255/65R17. If you have the 235/55R20 tires, you should set the PSI at 36.
Vehicle manufacturers have recommended tire PSI for a reason. By following this recommendation, you ensure that your vehicle operates as intended. Not only is it unsafe to drive with incorrect tire pressure, but there are also other adverse effects you may not be aware of.
Let's take a look at the risks of underinflating and overinflating your GMC Acadia tires.
If you overinflate the tires on a GMC Acadia, they can blow out. This can be extremely dangerous while driving and lead to a serious accident.
Blowouts can happen when you contact a pothole, debris, or other road hazards. Since the tire is stiffer, it will be more susceptible to blowouts.
Also, overinflated tires will wear faster and unevenly. This is because the center of the tire will wear faster than the edges.
If you overinflated your tires, you could fix this by releasing air on the valve stem. But, first, check the tire pressure with a gauge until you reach the recommended PSI.
If you underinflate your tires on the GMC Acadia, then you are putting yourself and others in danger.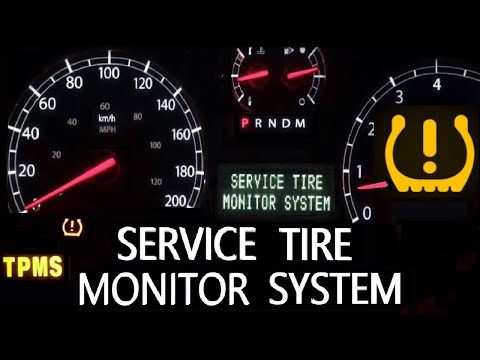 In addition to having a lower fuel economy, driving with low PSI means that you will have reduced traction.
This is because there isn't enough air in the tire to create a solid surface. Unfortunately, this means that you will have a harder time getting the vehicle to grip onto the road, even just slightly.
In addition to having an increased chance of sliding off the road, you also increase your hydroplaning chances. There is not enough water being pushed out from underneath the tires as they spin. Instead, the tires are riding on a layer of water which will cause them to lose grip.
If you drive with low tire pressure for too long, the tires will wear out accelerated. In addition, you may experience longer stopping distances when braking. These are both challenging issues for drivers.
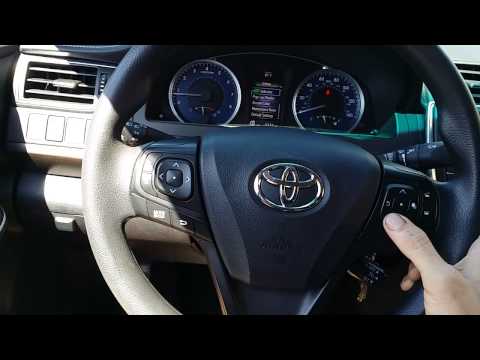
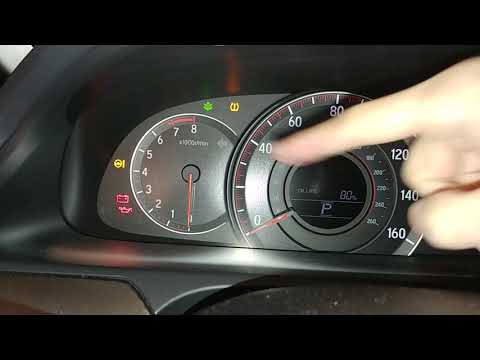
To reset your tire pressure light, follow these steps:
If you still can't get the tire pressure light to turn off, then you may need a GMC dealer to turn it off. It is also possible to have a bad tire pressure sensor to replace it.
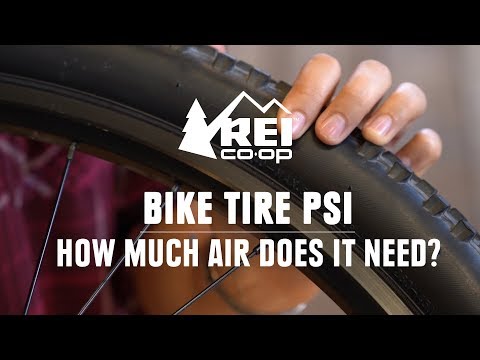
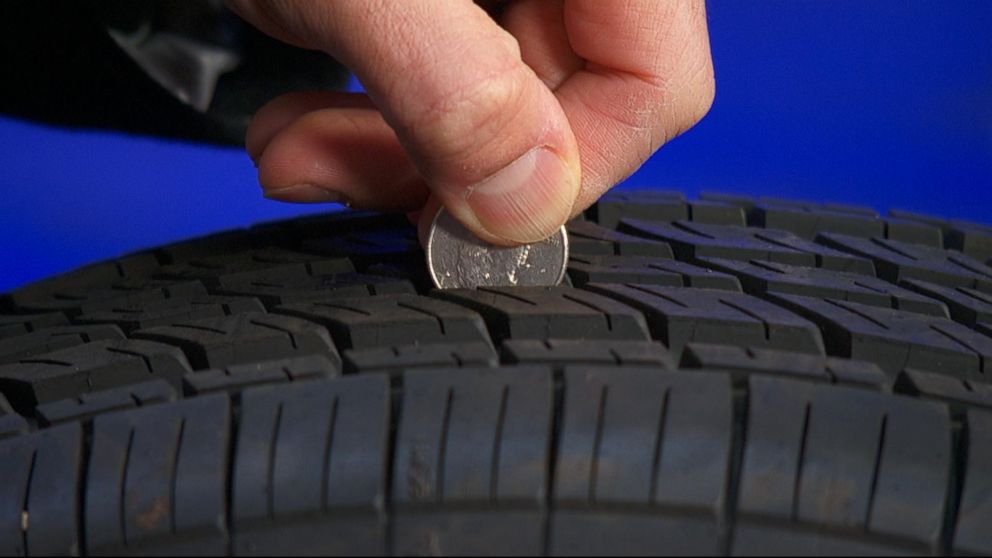
A tire gauge is the best way to check your tire pressure on the GMC Acadia. This is because it will give you an accurate reading of how much air you have in your tires.
While most vehicles have a digital tire pressure indicator on the dash, using a tire gauge will give you a more accurate reading. This is because it will tell you the exact pressure in the tire and not an estimate if the system isn't updating.
On the standard trim package, the GMC Acadia has P245/65R17. In addition, consumers can opt for a bigger rim size if they choose.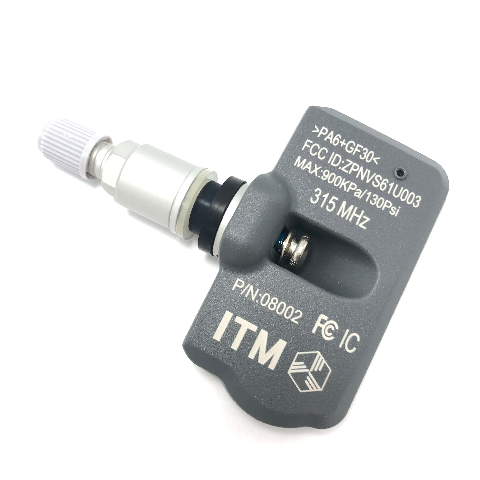
If they choose a larger rim size, they can upgrade to either P235/55R20 or P235/65R18 tires. However, consider that choosing bigger tires and rims will cost more money upfront and time for a replacement.
It can be frustrating when your tire pressure light is on, but the PSI is set to recommended standards. So let's take a look at what could cause this:
One of the most common causes for a tire pressure light coming on with no issues is a faulty TPMS sensor. This can be due to one or more of the sensors failing, and as such, you will need to replace them as soon as possible.
Another common cause of a tire pressure warning light is a faulty wheel valve stem. The seal around the outside of the valve can wear down and become loose, which will let the air out.
If you have this issue, then it needs to be repaired right away so that your tires stay at the proper PSI.
If none of these apply to your situation, you will need to check the ECU. If the sensor is bad, then it needs to be replaced as soon as possible so that you can get a new one before any other tire malfunctions occur.
Another cause for the tire pressure light could be the ABS module. If it has failed, you can get a warning that your tire pressure is low when there isn't anything wrong with them.
If something is wrong with your wheel speed sensor, a tire pressure light may also turn on, so you'll want to get that checked out.
The computer uses this information to determine whether or not there's an issue with the tires, and it believes that there is one when there isn't.
Tires can change pressure depending on the ambient air. For example, if you are driving in cold temperatures, the tires could read low. In comparison, high temperatures could cause the tire sensors to read overinflated PSI.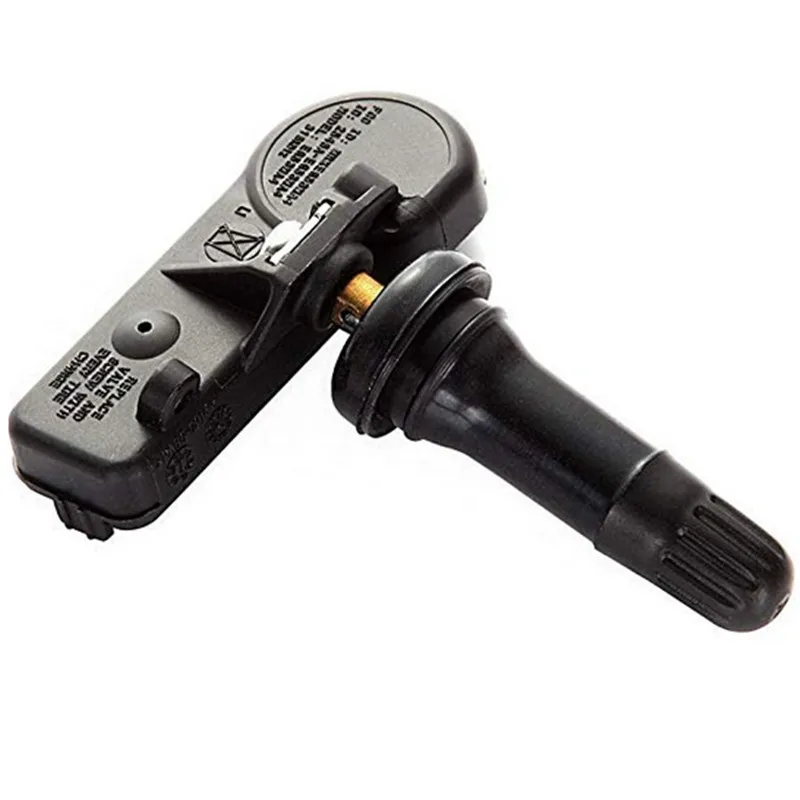
If you have a low spare tire, then this will cause the light to come on. However, it does not mean that your other tires are low. The only solution is to fill up the spare tire as soon as possible to get rid of this issue.
If you just had your tires rotated, then this could cause the light to turn on. Sometimes the tire pressure light will turn off after driving for a while. If it doesn't, you may need to reset the tire pressure light.
If you have a damaged rim, this could cause the tire pressure light to come on. For example, if the rubber is torn and the air is leaking out, this can lead to inaccurate PSI readings.
If you have new tires installed on your car, this can cause the pressure light to turn on in your vehicle. The pressure sensors must be calibrated before the tire pressure light turns off.
Yes, it is safe to drive with the tire pressure light on, provided that the tire pressure is set at recommended standards.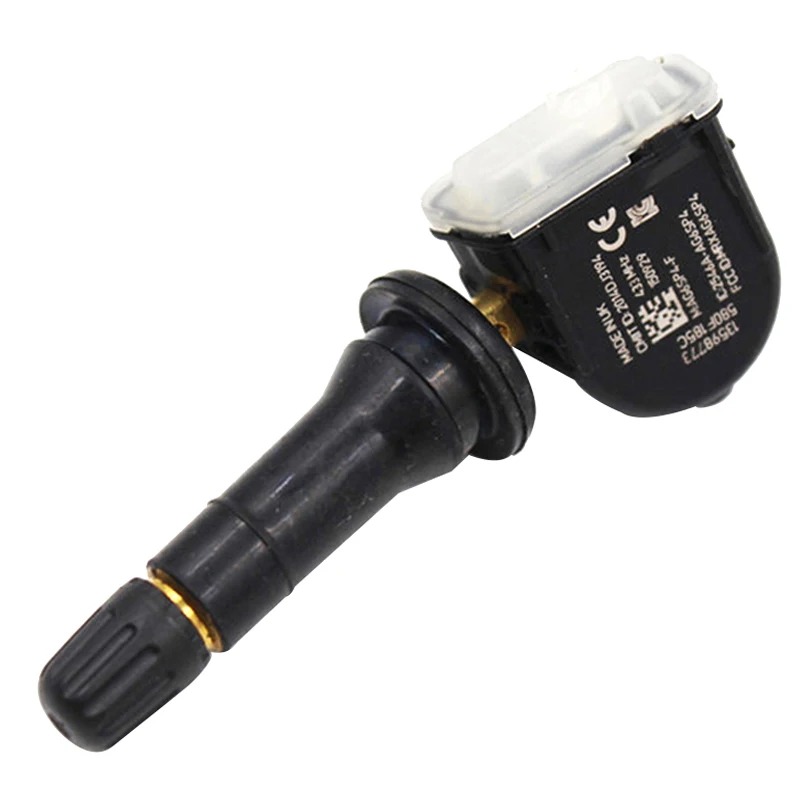 However, it isn't safe to continue driving if the tire pressure light is on due to a low tire. Therefore, you should pull over as soon as possible and inspect it.
If you find that the tire is low, either put on your spare or get to the nearest gas station to put air in it. Driving with a deflated tire can cause severe damage and is incredibly dangerous, so you need to take care of it immediately.
Overall, it is important to inspect your tire pressure regularly to ensure there aren't any issues. Stay up to date with recommended tire pressure standards, and you should never have any problems in the future.
If you suspect there is something wrong with your TPMS sensors, wheel valve stem, or other parts, then you need to take care of it as soon as possible before it becomes a bigger problem.
Made it to the end? Check out these helpful related posts below!
What Are The Best Tires For Mazda 3
Does The Lexus NX Have A Spare Tire?
Does Acura ILX Come With Spare Tire?
You are the proud owner of a recent car, the pleasure of tactile gadgets, the integrated technologies should bring you the ease and comfort of using your GMC Acadia, however noteworthy, which says that the technology speaks of electricity, and, as we all, to Unfortunately, we know that sometimes there are disorders that need to be corrected. Today we will focus on the tire pressure sensor and specifically on the tire pressure sensor. how to reset the GMC Acadia tire pressure sensor so that this indicator is no longer displayed on the dashboard. To do this, we will divide our content into two parts: first we will focus on the classic situation where the tire pressure indicator appears and the operation performed, and then on the situation where the tire pressure indicator remains on despite the tires being inflated. So, how to reset this tire sensor on GMC Acadia.
First, we will focus on the classic tire sensor reset procedure on the GMC Acadia which, if it lights up, here are the basic steps: Tire pressure indicators pop up on your GMC Acadia, get out of the way immediately if you are driving on the highway, keep a firm grip on the steering wheel just in case.

Now that you have used the basic operation to remove the tire pressure sensor on the GMC Acadia, and it didn't work, we'll move on to the second solution, which is to have the tires on my GMC Acadia well inflated and I still want that light to go away. This probably shows that you have Faulty tire pressure sensor.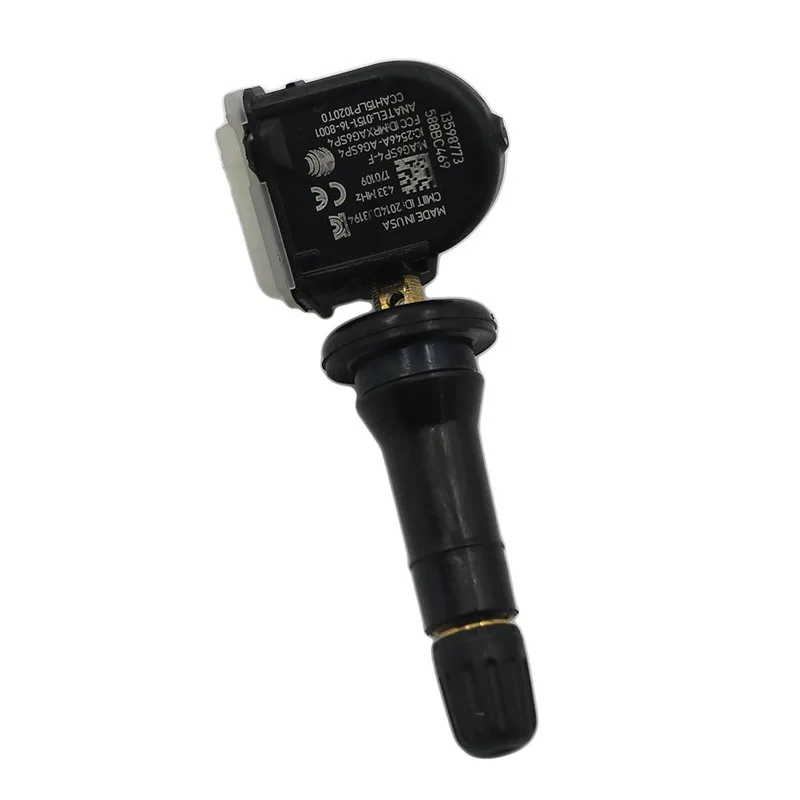 This trouble will require to reset the value on your car's dashboard. However, be careful not to do this while driving, as pressure fluctuations will affect your pressure sensors. Generally speaking, you need to go through the vehicle configurations, then you should find the option to diagnose inflation or "deflate detection". While on this tab, you must hold down the select button or reset button depending on the year of your GMC. Acadia until a message appears on the car console confirming that the reset is taken into account (usually takes a few seconds). You can now turn off the ignition and restart the GMC Acadia to see if the tire pressure indicator has gone out.