If you leave your ATV to hibernate over the winter or to languish unused for months on end, you might have some issues getting your ATV to rouse from its long slumber. In this guide, we'll learn why this happens and what to do to restore your ATV battery.
Image from www.boostatv.com
ATV batteries that are left to discharge completely often won’t take a charge, and even if they do, they’ll not have as long a lifespan as they used to have. Extreme heat and cold are also hazardous to your battery’s well-being.
The way to avoid your battery’s slow death is through the use of a smart charger or trickle charger. Both of these types of charger can be set to monitor your ATV battery and keep it at full charge while you’re not using it for an extended period. This keeps the battery from discharging and maintains its health.
But what if your ATV battery dies completely? Is it possible to restore dead ATV batteries that have been completely discharged? In most cases, yes, you can use a multi-mode smart charger to bring your ATV battery back from the dead.
ATV are the core piece of riding gear for off-road riders
Find out the best look for you
Image from www.atv.com
Let’s say you own a battery charger that you’ve used to charge your ATV battery in the past but this time it isn’t working. This is often because the ATV battery has been completely discharged so the charger doesn’t recognize the battery is connected at all.
It is possible to trick the charger into starting its charging process on your dead battery. Your charger should be capable of outputting amps as low as 1-3, depending on your ATV battery’s specifications. Using a charger that can only output at 10A like a dedicated car charger can cause an ATV battery to overheat.
For this trick, you’ll need another charged battery and a set of jumper cables.
1. Connect up the two batteries with a jumper cable, bridging their positive terminals.
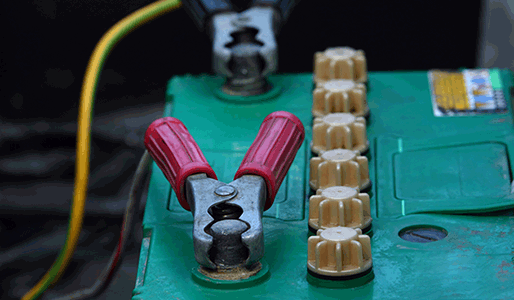
2. Connect another jumper cable to the negative terminal of the good battery and attach the other end to ground or the dead battery’s negative terminal.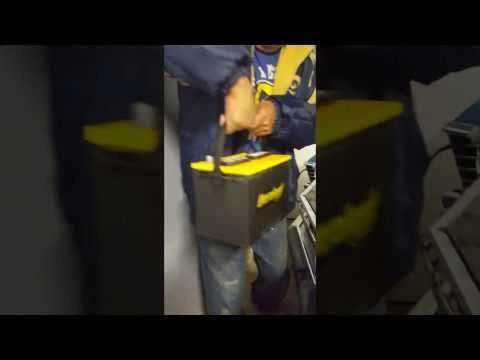
3. Start up the charger.
4. Once the charging process has begun, disconnect the cable from the good battery’s positive terminal.
5. Disconnect the cable from the dead battery’s negative terminal.
6. Disconnect the cable from the good battery’s negative terminal.
7. Wait for your dead battery to fully charge and test it out.
Many smart chargers will detect when the voltage is too low to perform a standard charge. A secondary Soft-Start mode will be used in an attempt to recover the battery.
If the Soft-Start mode is successful, the smart charger will switch to a Constant Current mode and begin charging the ATV battery as normal. If the Soft-Start mode isn’t successful, an error message will show and you’ll need to replace the battery.
ATV are the core piece of riding gear for off-road riders
Find out the best look for you
Image from www. thedrive.com
A chief cause of the early failure of ATV batteries is sulfation. Sulfation is a build-up of lead sulfate crystals that happens over a battery’s lifetime. Every time you charge or discharge a battery, sulfate forms. Overcharge, undercharge, or leave your battery to discharge for several days, and sulfate will form much more quickly.
Smart battery chargers with a desulfating feature work to break down these crystals in the battery plates. They do this by sending a range of high-frequency electronic pulses through the battery that dissolves sulfate quickly.
Desulfating battery chargers either have a specific desulfation mode to recondition a battery or simply perform desulfation during every stage of the charging process. Smart battery charger manufacturers delineate the various stages of the charging process in different ways, but you can typically expect:
1. An Initialization Mode, where the smart charger diagnoses the state the battery is in,
2. A Bulk Charge Mode, where battery voltage is applied at a constant rate until it reaches a predetermined level,
3. An Absorption Charge Mode, where the battery voltage is kept constant while the charge current amplitude drops,
4. And a Maintenance Charge Mode, where the battery is kept at a voltage slightly higher than if the battery were fully charged.
Having charged the desulfated battery completely, the battery will offer better performance and lifetime now that the desulfation has been reduced.
SPORTSMAN
36 EUR
32.40 EUR
-10%
HIT
ENDURO
the most durable
577 EUR
519.30 EUR
AQUAMASTER-ZIP LIGHT
with central zipper
568 EUR
385.50 EUR
-10%
HIT
ENDURO LIGHT
the most durable
378 EUR
340. 20 EUR
AQUAMASTER LIGHT
reliability & comfort
438 EUR
324.50 EUR
NEODRY
16 EUR
11.20 EUR
-10%
HIT
ENDURO
the most durable
229 EUR
206.10 EUR
AQUAMASTER
reliability & comfort
567 EUR
510.30 EUR
-30%
HIT
AQUAMASTER
reliability & comfort
259 EUR
181.30 EUR
BELT
8 EUR
7.20 EUR
ENDURO BF
bootfoot waders
468 EUR
421.20 EUR
ENDURO BF
bootfoot waders
289 EUR
260.10 EUR
ENDURO
29 EUR
26.10 EUR
NEOSENSOR
14 EUR
11. 20 EUR
MUDWAY
179 EUR
143.20 EUR
TARGET 20L
32 EUR
28.80 EUR
MUDRIDER
299 EUR
209.30 EUR
-10%
HIT
WADEMAN
lightweight waders
159 EUR
143.10 EUR
-10%
HIT
MUDWAY NEW
199 EUR
179.10 EUR
URBAN
79 EUR
71.10 EUR
Explore all
Charging Instructions for Motorcycle Battery How do I jump-start my vehicle? 3 Ways To Revive A Dead ATV Battery
← Charging
Having your ATV battery not turn over can be a really terrible time. At home, you can charge it using your battery charger, but if you are out on a trail or at a campsite, it can be scary when it won't start. But all is not lost. There are a few ways you can get your ATV battery going again.
The Compression Start is where you basically trick the ATV into starting. What happens is you get the wheels moving, and that can trick the engine into rolling over. Once it is on, it will charge the Battery as you drive.
Turn on the key or switch and put your ATV into first gear. Sometimes, if you cannot get it rolling fast enough, you may need to put it into second gear. Pull the clutch up and get the ATV rolling to 10 MPH. Then let out the clutch and add gas as your hear the engine try to turn. This should make the engine fire. Make sure to pull in the clutch once it's started to make sure you don't crash
This is a really useful way to jump start your ATV as you will usually be cruising with at least one other ATV. This is a fairly simple way to get your ATV running, it's merely jumping it like when you jump a car.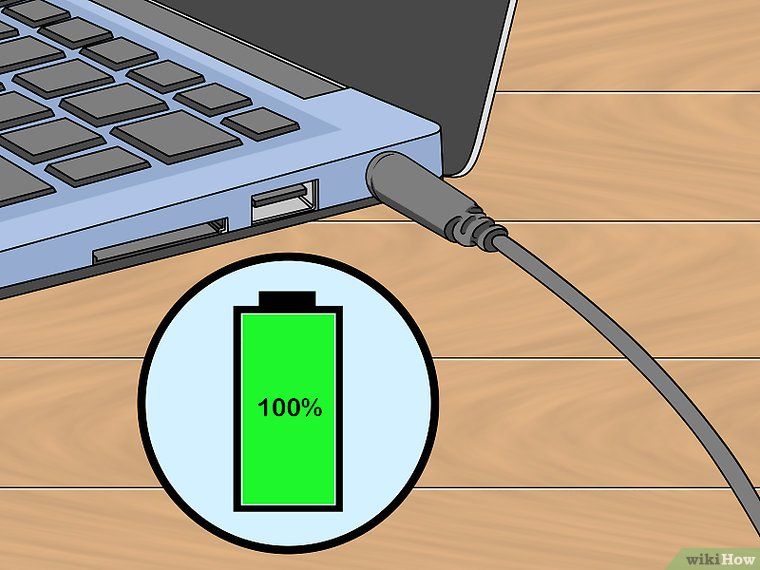
Connect the cables to the good battery first, then connect the bad Battery. When you connect the black wire, or the ground Wire, it is usually better to just attach it to the frame as there is not a lot of room on the battery. Just make sure it is grounded. Start the good battery first and let it idle for a few minutes. Then try starting the bad battery. Once it starts, remove the red wire first, then the black from the newly started ATV, repeat for the other. Let this ATV idle for a while before you turn it off.
You can actually use a car to jump start an ATV. This can be really useful if you just drove for miles and miles to a location and then found out your ATV isn't turning over.
Connect the wires like you would with any other ATV/ATV or car/car set up. Then, do NOT turn on the car. The car battery is much stronger than the ATV battery, and if you turned it on you could cause problems to the ATV Battery. Instead, just try to turn on the ATV. If it was the battery preventing it from starting, then it should turn over.
These three ways to get your ATV battery going can be really useful when you find yourself stranded. Knowing the power of your machine, what it can do, and how to get it going is very important for this. But try to take good care of your battery at all times, and check to make sure it is in working condition before you leave.
Many riders don't know how to properly charge their ATV battery.
In fact, if you don't properly charge your ATV's battery, you can cause extremely significant damage.
If you're puzzled too, then this is your lucky day, because I'll most likely show you in detail how to properly charge an ATV battery.
Contents
The ATV has a built-in engine-powered charging system. But the current it provides is not very high.
You can charge the battery during long trips, but this is not always practical.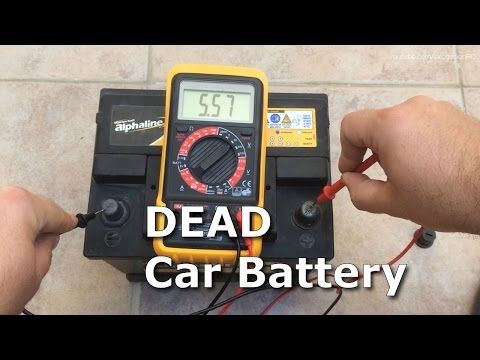 Instead, you can use an external charger.
I will give you 3 easy ways to charge your ATV. By following the 3 steps below, charging your ATV is a breeze.
Before starting all the work, it is necessary to prepare some tools in advance so that you can better charge your ATV. With the right tools, the process is so simple that just about anyone can complete it.
When all the tools are ready, let's get started.
Battery and charger must remain dry during the entire charging process .
In addition, the battery should be somewhere well ventilated to ventilate any gases generated during the charging process.
Recharging or even simply recharging a battery causes a chemical process that releases explosive hydrogen gas. With proper ventilation, you reduce the risk of the gas being agitated by a spark, which could lead to an explosion.
A garage or shed where you can leave the garage door open would be a great place.
If you don't have a completely dry and well ventilated area to hold your entire ATV, consider removing the battery from your bike to charge it.
Game Machine ATV and all accessories must be turned off while charging. to stop the sparks.
Once you have placed your ATV near a power socket, you will definitely need to open the seat of your ATV to make sure you have access to the battery.
To remove the ATV seat you will need to use a screwdriver to remove the screws protecting the seat and then you need to start loosening all the screws that protect the ATV battery.
It is very important to make sure that the screwdriver you are using is suitable for the screws that hold the seat in place to ensure that it does not damage the screws which can be very difficult to remove once they are damaged.
Once you have removed the ATV seat and gained access to the battery, you will need to get rid of the battery covers .
After removing the battery cover, you must determine which battery is in your ATV. This should be clearly classified on the side.
If you can't check the tag or it's missing, here's how to find out which battery you have.
If there is liquid inside and there are removable caps on the front, it is a flooded lead-acid battery. In addition, it will have a partially transparent body, which will allow you to monitor the level of liquid inside.
If there is liquid inside, but there is a flat top without any covers, it is a sealed lead-acid battery. This can also be a VRLA battery.
However, if the battery looks like lead acid, has a high level, and you can't hear liquid inside, it's a gel cell or AGM battery.
If the battery is small and very light, it is a lithium-ion battery.
All ATV batteries, regardless of type, require a 12V charger that provides a low current of 1 to 3 amps. .
Sealed lead-acid, sealed lead-acid, VRLA and AGM batteries can be recharged with a manual charger. However, you need to monitor the charge of the battery with a voltmeter in order not to overcharge it.
This is especially important for sealed lead acid and VRLA batteries, as they cannot be recharged after recharging and may be permanently damaged.
For gel batteries you will need a charger, especially for this type of battery. It's the same with lithium-ion; try to find a lithium-ion compatible charger.
If you want to avoid all these problems, we recommend purchasing an automatic charger . Unlike a manual charger that needs to be unplugged or the current setting changed, once the battery reaches a certain level, you can plug in an automatic charger and walk away as well.
It instantly detects the battery voltage and provides the correct voltage and current. It will automatically stop charging or enter trickle mode when the battery is fully charged. So you never have to worry about damaging your ATV battery.
The ATV battery can be charged while it is in the vehicle or removed. Just make sure you charge in a well ventilated area , the charging process creates flammable gases .
If you are using a manual charger, check battery voltage with a voltmeter . This will tell you how low the battery is, as well as how long it will take to charge it.
Next, connect the red wire of the charger to the positive terminal of the battery and negative wire to the negative terminal of or a piece of steel around the engine.
Set the hand charger to the ideal charging current. To be on the safe side, select an existing one that is no larger than a tenth of an Ah battery . For a 30 Ah battery, set the current on the charger to 3 A or less.
Connect the charger and start the charging process. Constantly check the charge level of the battery . When it reaches 80%, halve the current. This allows the battery to fully charge.
When fully charged, turn off the charger quickly. If you leave the battery for a very long time, you can enable maintenance mode if the charger has it, or purchase a battery tender to keep it charged.
The automatic charger is much easier to use. You don't need to check the battery voltage or monitor the battery.
All you have to do is select the battery type and voltage. Many automatic/smart chargers have special charging modes for AGM, Li-Ion, GEL and other types of batteries.
Connect the charger to the battery and leave it to charge as well. It will safely charge the battery and also keep it charged without overcharging.
The charging system on an ATV is not as efficient as on a car, so it will take longer to charge the battery properly.
Unless you make hour-long rides each time you start your bike, it will probably use even more power to start the bike than it can charge while you start it.
In addition, ATV batteries are small enough in both sizes to support the overall weight of the bike.
Add to that a few energy-hungry accessories like an ATV winch and you'll quickly find that your battery is too low to start your bike. Leaving the battery at a low charge level in time will further damage the battery.
That is why it is recommended to charge it from time to time to save yourself from problems in the future.
ATV batteries should be charged whenever battery voltage drop is below 12.4-- 12.6 volts . Charge the battery every fall and every spring, and use the battery to keep it in good condition when the ATV is left idle for long periods of time without use.
Car battery chargers typically deliver 10 amps of existing ones, which is too much for an ATV battery. It can overheat and also permanently damage the battery.
If the charger is not set to limit current to less than 3 amps, do not use the car or truck charger.
If you can reduce the current to 3 amps, use the same as the manual charger.
Yes, you can charge your ATV battery with your car, but only to give it a boost. This is useful if your ATV won't start because the battery is dead.
Use the jumper cable to connect the car battery to the ATV battery. Do not start cars and trucks . This can give too much power and also damage the ATV's small battery.
Vehicle battery has sufficient charge to revive a dead ATV battery. After a few minutes, disconnect the connecting cable and try to start the ATV again.
To emphasize, this technique is just for starters . Do not use it to fully charge an ATV battery, given that you have no control over how much current and voltage it receives.
Yes, you can recharge your ATV battery. This happens if you are using a charger that provides too much current or voltage. Leaving the hand charger plugged in even after the battery is fully charged can also cause it to overcharge.
Overcharging can damage the battery, usually completely. This is especially true for sealed batteries where you can't open the caps and regenerate the electrolyte.
How long to charge a motorcycle battery (The Unique Guide 2022)
What does the stator do on an ATV? Most Comprehensive Review 2022
Rodney L. Herron
Rodney L. is a technical writer and product consultant with over a decade of experience in the automotive industry. Rodney is a fan of high performance machines that run fast and loud and is an expert in all things custom. His numerous articles and reviews are available in our knowledge base. Whether something is wrong with your bike or you are building a custom bike, you can trust Rodney's experience.
To restore a motorcycle battery, you will need: - a charger with adjustable current;
- aerometer - a device that measures the density of the electrolyte;
— desulphating additive in electrolyte;
- electrolyte with nominal density.

This fault is caused by shorted plates. In these cases, you do not need to charge the battery again, you should rinse the jar with distilled water until the charcoal is no longer washed out of it.
After that, the density is brought to the desired parameter, and the battery is put on charge again. If the procedures did not help, you can, without hesitation, throw away this battery, there is nothing you can do about such a closed battery. In road conditions, you can try to directly close the plates to get to the service.
In such cases, the plates are likely to be sulphated. To eliminate - you should use a desulfating additive.
As usual, the technology for cleaning the plates is described in the instructions for the additive. General points:
- electrolyte (density 1.28 g-cm3) is poured into a jar;
- add an additive to each of the cans;
- we expect 2-3 days for scale dissolution;
- "drive" the battery on charge / discharge cycles
"Acceleration" is performed as follows: charge, and then immediately discharge (preferably with a light bulb) until the voltage drops to 10 V.
The cycle is repeated until the nominal density is set to 1.28 g/cm3.
When a person brings a motorcycle out of hibernation, the very first thing, of course, is to start the engine in this motorcycle. If you did the right thing - removing the battery from.
For every owner of a vehicle, sooner or later there comes a moment when he is faced with the need to sell a vehicle. There may be cases.
Before storing your motorcycle in the garage for the winter, wash it thoroughly and place it on the side stand on a comfortable, stable and flat surface. As for.
The engineers behind the BMW G450X did their best. They managed to create an almost perfect “car”, which behaves both on the pavement and on the road.
Because of the small mirrors and the body and elbows that obscure the visible area, the rider must constantly turn his head in all directions for good control around him.
Well “rocks” a battery that does not want to be charged a method in which the battery is first allowed to charge, and then it is discharged - and so alternately, in short periods. The first charging cycles, specifically of a gel battery, should take place at high voltage - about 30 V, and in subsequent cycles, the charging voltage should be gradually reduced to 14 V. not car-carrying with bulbs of 50, 75 or 100 watts. But, even when unloading the battery with a small light bulb, keep an eye on the voltage on the battery so that it does not sink below 10.5 V.
After you managed to force the "emaciated" battery to swallow the current, continue to restore it until it is fully charged by long-term charging with a small current - equal to 0.05 of the battery capacity.
Here is the recovery of acid batteries follows a completely different algorithm.
Author: Vitaly Petrovich, Ukraine, Lisichansk.
Have you ever heard that batteries are not recyclable? Complete nonsense and nonsense! So, hands do not grow there! I personally restored several dead batteries, and they worked for several more seasons! Do not give money to greedy car dealers, do not buy Chinese crap, it can last less than your old branded battery if it is properly restored! So, let's begin. We have a dead or almost dead battery on our hands.
We will need some materials and tools:
1) Fresh electrolyte (nominal + preferably high density) 2) Distilled water. 3) Electrolyte density meter (hydrometer). Small. On a large one, you do not pump electrolyte from the entire battery. 4) A charger capable of providing small (0.05-0.4A) charging currents. I used the simplest self-propelled gun - a power supply from a tape recorder, a tester as an ampere and voltmeter, plus a block of powerful resistors to adjust the charging current. 5) Desulfating additive to the electrolyte. I used the Russian additive "Dream", produced by "NTK KULON", St. Petersburg, conversion) 6) A small enema (sorry, you must!) And a pipette for liquid purposes.
To begin with, let's determine the possible malfunctions:
1) Sulfated plates - the battery capacity drops to almost zero. 2) Destruction of carbon plates - when charging, the electrolyte turns black. 3) Closing of the plates - the electrolyte in one of the sections of the battery boils away, the section heats up. (Severe case, but sometimes not hopeless) 4) Frozen battery - swollen sides, electrolyte immediately boils when charging (numerous plate short circuits) - there's nothing to help, amen, God rest his soul!
It's not always necessary to rush to throw away an old motorcycle battery. You know that buying an unknown brand battery can last much less than your old branded battery. If you have a desire, then you can try to restore your old one a little.
To restore a motorcycle battery you will need:
- Distilled water - Electrolyte of nominal density - A device for measuring electrolyte density - called a hydrometer, by the way, you are restoring a motorcycle battery, so you need to find a hydrometer not large. – Charger with current regulation – Electrolyte additive – desulphating
Possible causes of battery failure:
1. When charging in one of the sections, the electrolyte immediately boils - there is a high probability of plate short circuit. In this case, do not try to charge the battery, you can try rinsing the jar with distilled water. You need to stay until the coal crumb stops washing out of the can. After that, we bring the desired density in the battery and put it on charge. It won’t help - you can safely throw away the battery, nothing can be done with a closed battery, you can mechanically close the plates, but only in road conditions - in order to get home on a motorcycle.
2. The battery capacity has noticeably dropped (down to zero) - a high probability of sulfation of the battery plates. In this case, a desulphating additive to the electrolyte will help us.
Restoration of a motorcycle battery.
Do you know that buying an unknown brand battery can work much less than your old branded battery that you restored with your own hands?
To restore a motorcycle battery you will need: - Distilled water - Electrolyte of nominal density - A device for measuring electrolyte density - called a hydrometer, by the way, you are restoring a motorcycle battery, so you need to find a hydrometer not large. - Charger with current regulation
- Additive to the electrolyte - desulphating
Possible causes of battery failure:
When charging in one of the sections, the electrolyte immediately boils - there is a high probability of plate short circuit. In this case, do not try to charge the battery, you can try to rinse the jar with distilled water. You need to stay until the coal crumb stops washing out of the can.
After that, we bring the desired density in the battery and put it on charge. It won’t help - you can safely throw away the battery, nothing can be done with a closed battery, you can mechanically close the plates, but only in road conditions - in order to get home on a motorcycle.
The battery capacity has noticeably dropped (down to zero) - a high probability of sulfation of the battery plates. In this case, a desulphating additive to the electrolyte will help us.
Usually, the technology for cleaning battery plates is on the instructions for this additive, the general points from it are as follows: Filling an electrolyte with a nominal density of 1.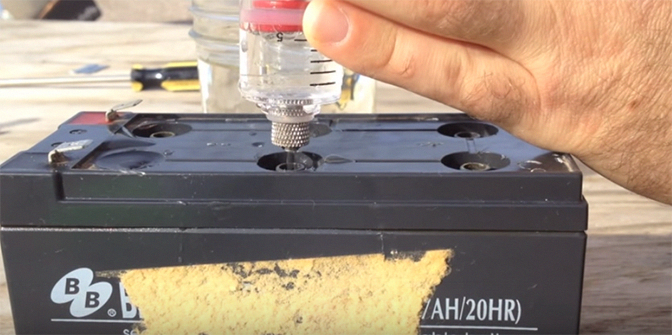 28 g / cc into the battery Add an additive to each jar, some additives can be added to the electrolyte before filling battery. We wait a couple of days until the additive dissolves in the electrolyte And, we drive the battery through the so-called charge-discharge cycle. It consists in the following: we charge, and immediately discharge the battery, we discharge it clearly not with a motorcycle starter, but for example with a brake light bulb. The discharge lasts until the voltage in the battery reaches about ten volts.
The cycle must be repeated until the density of the electrolyte in the battery is equal to the nominal - 1.28 g / cc
General recommendations for motorcycle battery maintenance - Monitor the density and level of electrolyte. - A cold garage is not the best place to store a battery in the off-season.
- If your charger does not have a smooth adjustment of the charging current, this charger is not suitable for a motorcycle battery. The charging current of a motorcycle battery must be 0. 1 of its capacity in amp-hours
www.motolib.info
Did you know that buying an unknown brand battery can last much less than your old branded battery that you restored yourself?
To restore a motorcycle battery you will need:
Possible causes of battery failure:
When charging in one of the sections, the electrolyte boils immediately - there is a high probability of plate short circuit. In this case, do not try to charge the battery, you can try to rinse the jar with distilled water. You need to stay until the coal crumb stops washing out of the can. After that, we bring the desired density in the battery and put it on charge. It won’t help - you can safely throw away the battery, nothing can be done with a closed battery, you can mechanically close the plates, but only in road conditions - in order to get home on a motorcycle.
The battery capacity has noticeably dropped (down to zero) - a high probability of sulfation of the battery plates. In this case, a desulphating additive to the electrolyte will help us.
Usually, the technology for cleaning the battery plates is on the instructions for this additive, the general points from it are as follows: Filling the battery with an electrolyte with a nominal density of 1.28 g / cm 3 Add an additive to each can, some additives can be added to the electrolyte before pouring into battery. We wait a couple of days until the additive dissolves in the electrolyte And, we drive the battery through the so-called charge-discharge cycle. It consists in the following: we charge, and immediately discharge the battery, we discharge it clearly not with a motorcycle starter, but for example with a brake light bulb. The discharge lasts until the voltage in the battery reaches about ten volts. The cycle must be repeated until the density of the electrolyte in the battery is equal to the nominal - 1.28 g / cm 3
General recommendations for motorcycle battery maintenance
After wetting the dried electrolyte, close all battery cells on the valve caps. And also don't forget to cover them with the outer battery cover, and press it down with a load (glue it later). You need to press the cover so that it holds the rubber caps. When loading through the caps, the excess pressure created by the released hydrogen will be released, and the cap will be a stop for them.
Now it's time to connect the affected gel battery to charger . Learn how to charge maintenance-free battery . Having lost capacity due to the drying of the associated electrolyte, the battery will not draw current from the charger, so you do not need to focus on the ammeter first. The voltage during charging must be selected at least 15 V.
It will take a long time to charge - until the hungry battery starts to draw current. But if more than 15 hours have passed and the battery does not consume current, then do not expect a miracle, but increase the voltage to 20 V. Now do not leave the battery charging with high voltage unattended. After all, if the bound electrolyte is restored, then an abnormally high current will flow through the battery, which will be 4 to 6 times higher than it should be. Even 4 times more current than the maximum allowable 0.1 of the capacity will heat the battery, then smoke will come out of it, and then .