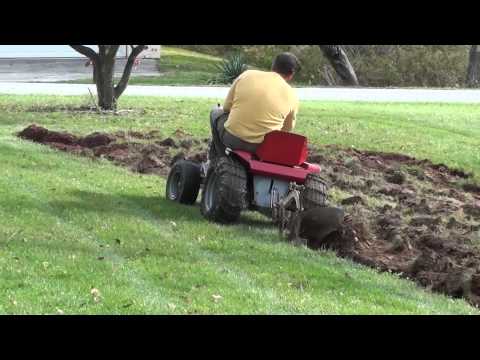
Tires are prone to going flat over time. In most cases, all you have to do is pump the tire with air. however, sometimes the tire bead will come off the rim. To fill up your tire again, you’ll have to seat it on the rim.
A tire bead is the inner edge of the tire that is fitted to the rim when the tire is inflated. When it comes loose, the tire deflates and your tractor becomes a burden. Below, you’ll find out how to seat a tire bead on a regular lawn more or a garden tractor.
There are two main methods for reseating a tire bead. The first one involves the use of fire. I wouldn’t recommend this method for smaller tires or inexperienced individuals. The next method involves increasing the pressure using an air compressor and a rope or string.
I don’t recommend using this method because of how dangerous the outcomes could be. This mainly works for larger tires, try not to take the risk with smaller ones.
All you’ll need to use is starter fluid and a way to set it on fire. You’re going to spray the fluid in the gap between the tire bead and the rim then ignite it. The pressure from the fire will bounce the bead back into place.
After making sure that the fires are out, proceed to fill your tire with air before it deflates. Be careful the air emanating from the tire is really hot! When inflating the tire, don’t exceed the PSI limit. You’ll find the maximum PSI written on the side of the tire.
Should you choose to go through with this method, you should take great care. Keep a fire extinguisher nearby for any emergencies.
This method requires some muscle power. The smaller the tire you’re handling the less power you’ll need to carry out these steps.
https://www.youtube.com/watch?v=5mfJIOkvVRMVideo can’t be loaded because JavaScript is disabled: How To Seat The Beads on a New Riding Lawn Mower Tractor Tire (https://www. youtube.com/watch?v=5mfJIOkvVRM)
You’re going to need something to tie around the length of the tire. It should be elastic enough to be able to tie it and sturdy enough to handle the tire’s pressure. You have several options.
Take your rope, or whatever you chose to use, and run it along the length of the tire, making sure it’s centered. If it’s not centered, the rope could slip off when you’re pumping air into the tire.
You don’t need to tie the rope very tightly, you’ll do that in the next step.
Grab a screwdriver or any metal appliance that resembles it. Wedge it under the knot you just made and twist it. That will make the rope tight over the tire, and increase the pressure inside.
You may struggle a little bit with this step. The first twist is always the hardest one. If you get it done, then the rest of the work will be a walk in the park.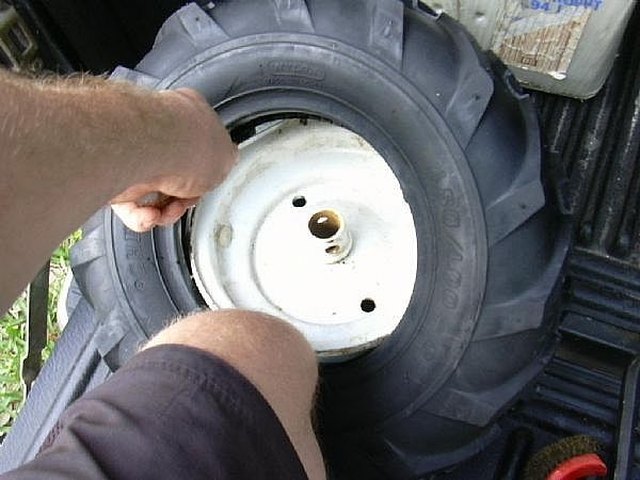
This step is optional but still recommended. Removing the valve stems will allow the air to flow easily with no restrictions.
When you’re not limited by anything when filling the tire with air, it makes it much quicker to do so.
Fill the tire with air until the tire bead is pushed outwards and seated on the rim. Don’t over-inflate it, you’re still applying pressure to the tire.
The valve stem will prevent the pressure from escaping the tire. If pressure does escape, the tire bead will loosen around the rims again. You don’t want to go through all of that again, do you?
Now that there’s no external pressure being applied, you can fill the tire to the maximum PSI level, and you’re done!
Overfilling the tire with pressure could cause it to burst. You should know the maximum PSI of your tire beforehand and fill your tire accordingly.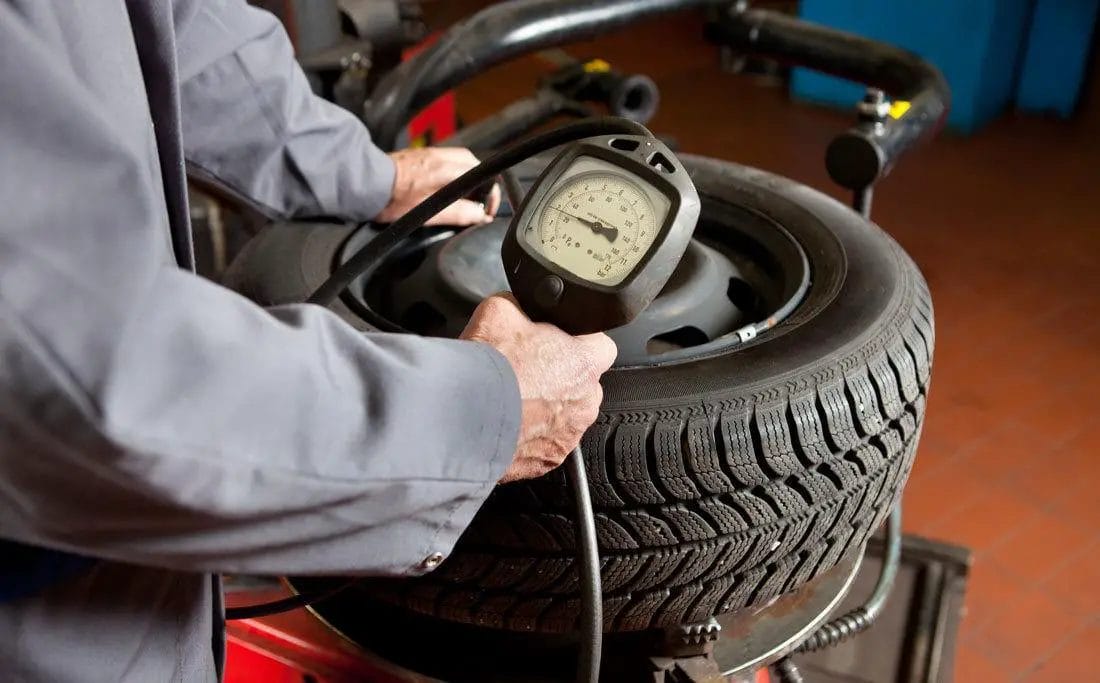 If you’re unlucky enough, you’ll get in the way of the exploding tire which could cause severe injuries and sometimes death.
So be really careful when adding pressure to your tire.
Each method has its time and place. It all just depends on the tire you have and the situation you’re facing.
If you’re dealing with one of the tractor’s bigger tires and can’t easily use the wrap around the circumference method, go for the fire method. With bigger tires, it’ll be hard to tie a rope around it, especially if you’re working alone.
Squashed tires and the explosive method go hand in hand. Because there’s no pressure in the tire, you won’t be able to wrap the rope around the tire. So you’ll have to turn to the other method.
Contrary to the fire method, this method is perfect for small, more manageable tires. Assuming you only have limited space to fix your tire, you should go for this method. It doesn’t require much space and won’t set your garage on fire.
It’s best for cases where the gap between the tire bead and the rim is narrow. This indicates that there’s pressure inside, which you’ll need for this to work.
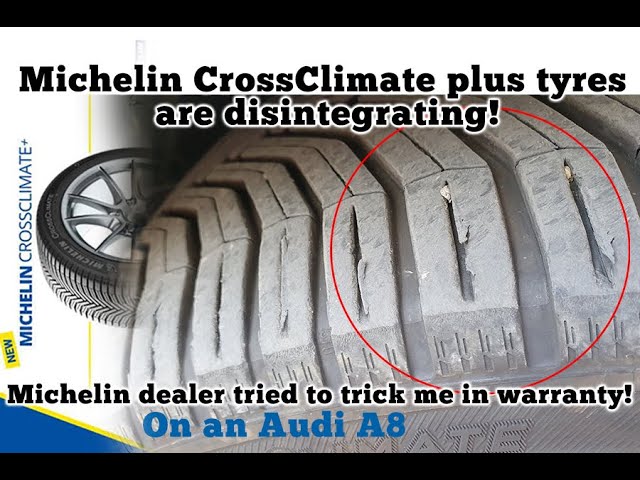
If the tire bead or the related cords are cut or damaged then the wheel is shot and cannot be repaired. In this case, you need to purchase and replace the damaged tire. There is no way to make a damaged tire bead airtight again.
How do you know if your tire is losing air abnormally? A normal tire will lose about 1-3 PSI a month, so if you’re losing more than that you should get it checked.
There are four reasons behind the loss of air.
Air condenses in cool weather and expands in warm weather. You probably know this from your chemistry classes.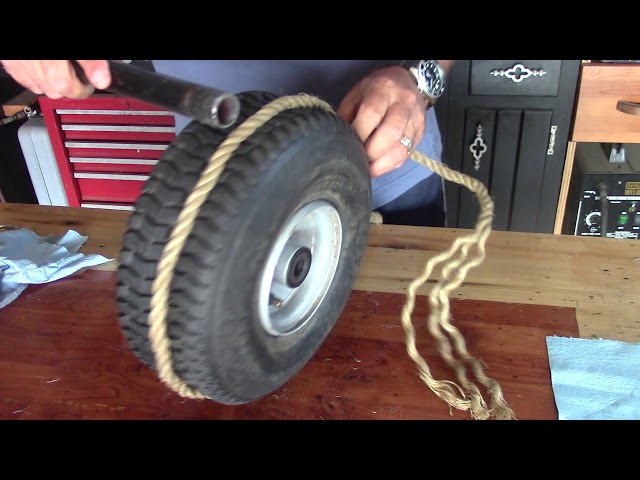 In wintertime, your car will detect lower PSI inside the tire.
When you start driving the PSI will increase as you begin to heat the air particles inside the tire. This will keep happening for about 10 minutes, the air will then stop expanding.
Again, your chemistry class. Naturally, the air wants to escape the tire because of the high concentration there. It wants to be let out into the vast world outside the tire. Thus, any chance the air will get to escape, you’ll find your tire losing its pressure.
There could be a problem with the valves inside the wheels which release more air than they should. These deteriorate through the years due to weather conditions or bumpy roads.
Another problem with the wheels is that they could be bent or damaged. When part of the wheel is bent, the tire won’t be fitted tightly around the wheel, causing pressure to escape through the ill-fitted parts.
We get tire damage because the roads aren’t as clean as we’d like to think they are.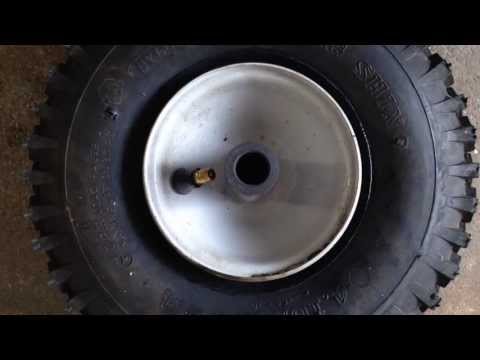 Sometimes, a loose nail or other sharp objects may slash the tires. Small tears will be enough to cause the tire to lose air slowly.
If there is any damage done to the beads, air could escape from the small opening between the bead and the rim.
The bead doesn’t even need to be damaged, it could just loosen around the rim and still cause the tire to lose air. We’ll tell you how to bounce it back in position.
Good luck trying to steer a car with only a steering wheel. Similar to how our body and mind work in sync, the steering wheel, and tires do too.
Tires aren’t in sync only with the steering wheel, but also with the engine. They translate the engine’s power into movement.
The pressure inside them makes them keep the vehicles moving and support their weight. If it wasn’t for its bouncy quality, tires wouldn’t have held up the vehicle or absorbed shocks on the road while driving.
It’s fascinating how one small aspect of a vehicle can make a huge difference to it.
You may be wondering ‘why would I repair the tire myself?’. Well, do you really want to go through the trouble of taking the tire to a mechanic? A small tractor tire could easily be repaired in your own garage.
For larger tires, you should weigh out the advantages and disadvantages of going to a mechanic or using the fire method. If you’re a natural handyman with some experience, fixing your tire may be your best option. It’ll save you some money, and time. After you fix the tire, your garden tractor will be up and running right away.
I can’t stress enough the importance of safety precautions when dealing with the tires yourself, especially if you choose to work with flammable fluid. Don’t work alone, always have someone there with you in case something goes wrong.
By Keith Dooley Updated March 07, 2022
Riding mowers are a matter of convenience for some homeowners and a necessity for others when cutting large areas of grass. The tires on a riding mower are designed to be durable, but due to normal use, there may be times when a tire loses air pressure. When this happens, the tire may separate from the rim. Sealing a mower tire to the rim requires a few basic steps and can be accomplished at home.
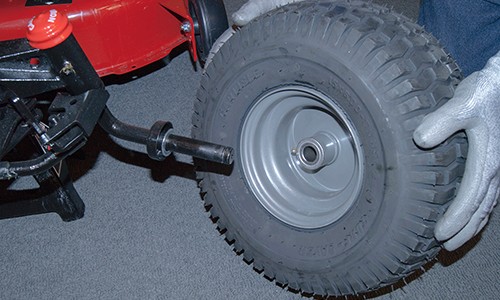
Park the riding mower on a flat and level area, leave the transmission in gear and set the parking brake. Put on gloves to protect your hands while working.
Pull the plastic cap off the axle with the flat tire. Remove the snap ring with snap ring pliers, and then pull the ring and washer off the axle. Place a tire jack under the front of the mower. Home Depot points out that the jack must be under the frame and not the motor. Raise the mower so the flat tire is off the ground and pull the wheel and tire off the axle.
Inspect the tire for damage such as a slit or puncture that could prevent proper inflation.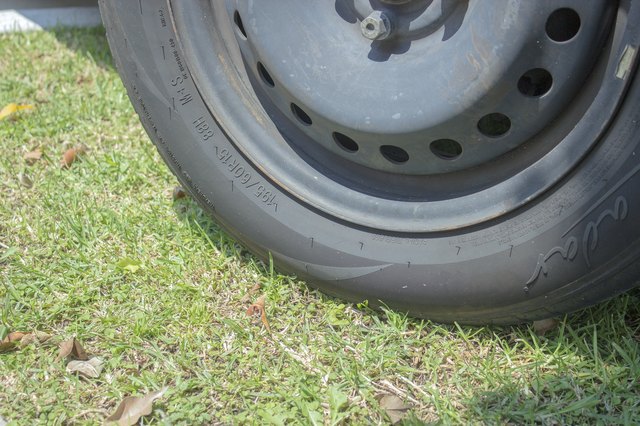 Remove a damaged tire from the rim by prying the tire over the rim with blade screwdrivers. Obtain a suitable replacement tire if necessary from a mower repair shop or hardware store.
Install the replacement tire onto the wheel by working the tire over the rim with the blade screwdrivers. Apply tire seal along the edge of the rim where the tire will seat.
Place a ratchet strap around the tire and pull down until snug, instructs Random Knowledge Guy. Apply enough pressure to the tire with the strap to force the sides of the tire down firmly against the wheel. Use a tire pump to inflate the tire partially and force the sides of the tire to seat against the rim.
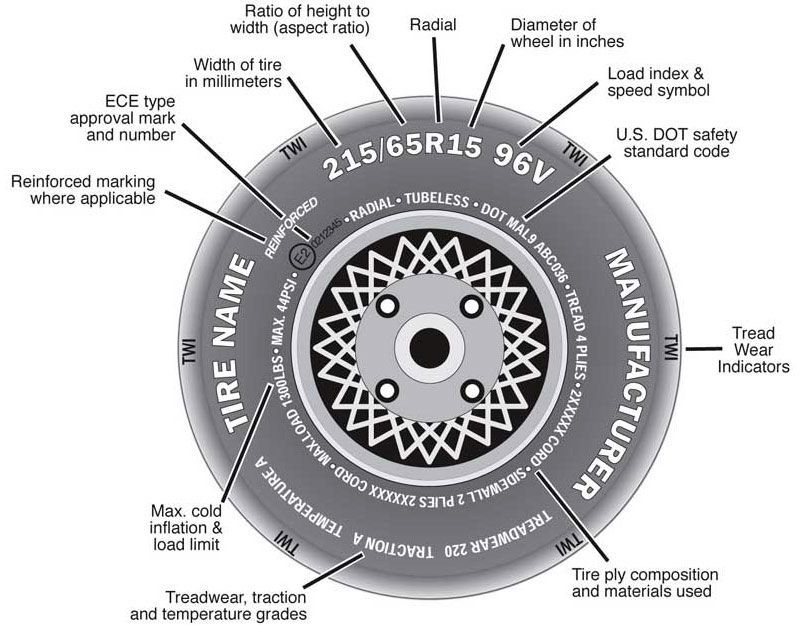
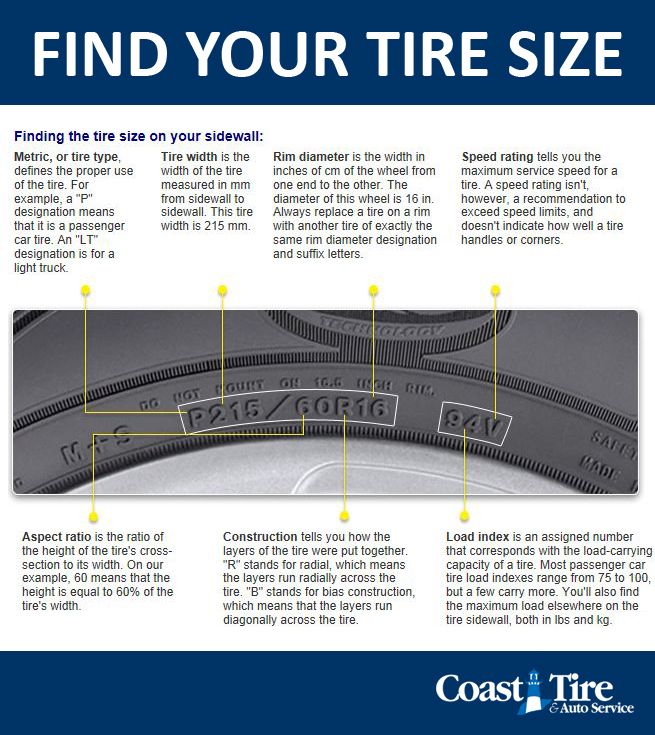
Loosen the ratchet strap a little and add more air. Continue to loosen the strap and add air until you are sure the tire is securely seated on the wheel. Remove the strap, and then fill the tire completely with air. Use a tire pressure gauge to check the pressure.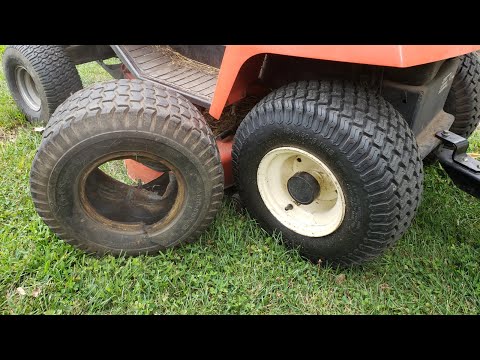 Refer to the manufacturer's recommended tire pressure; it is usually listed on the side of the tire.
Place the wheel and tire assembly back on the mower axle. Install the washer and snap ring, and then replace the plastic cap on the axle. Lower the mower with the jack to use the mower.
Gloves
Tire jack
Snap ring pliers
Blade screwdrivers
Replacement tire
Tire seal
Ratchet strap
Air pump
References
Writer Bio
Keith Dooley has done work in the field of landscaping and design for more than 10 years. He has implemented his own designs, as well as pulled from techniques learned through studies, creating many landscapes for others to enjoy. He has also maintained lawns, athletic fields, town parks, large gardens and game fields.
Modern passenger cars are equipped with tubeless tires. Tires with rubber chambers inside are extremely rare today, only on super-budget vehicle options. Car owners have long appreciated all the convenience and benefits that tubeless tires have. Unlike chambered rubber, they keep air in the wheels by being sealed to the rim. The tightness of tubeless tires is ensured by a two-millimeter layer of rubber applied to the tire from the inside. It is he who prevents the passage of air. The coating of soft rubber layer provides tightness at the junction of the tire with the rim of the rim. The tire bead sits on the so-called rim shelf, which is equipped with a special rounded ledge. Thanks to him, the tire is securely connected to the wheel rim, and complete tightness of the joint is achieved. A tubeless tire is filled with air through a valve installed on the rim, on its rim.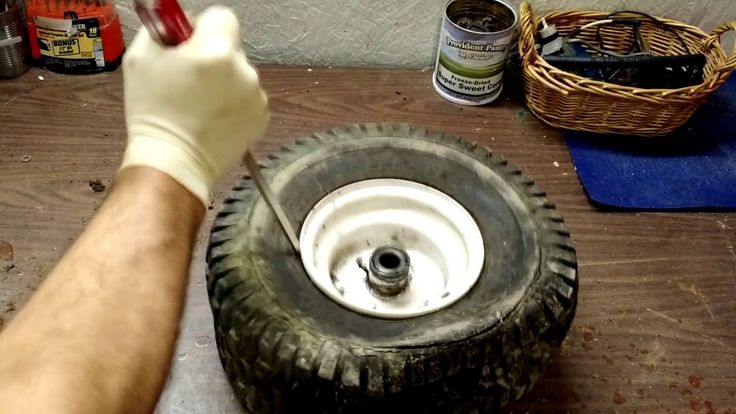 nine0003
Why did tubeless tires become so popular that they gradually replaced tubed tires? First, tubeless tires are much lighter. This is a very important and great advantage, because heavy weight enhances the inertial movement of the wheel when driving on, to put it mildly, imperfect road surfaces, which we still have much more than smooth autobahns. As a result, this affects the condition of the chassis, accelerates its wear. In addition, tubeless tires do not heat up during driving in the same way that chamber rubber heated up, in which the inner cylinder rubbed against the tire while driving. Such friction led to its rapid wear, and also increased the likelihood of tire rupture during movement. When a tube is punctured, the tube tire loses air very quickly, since it escapes not only from the puncture site, but also through leaky tire beads that do not fit snugly against the rim flange. In addition, if such a tire is punctured, you will not be able to stop the car immediately, it will travel more than a dozen meters by inertia until it comes to a complete stop.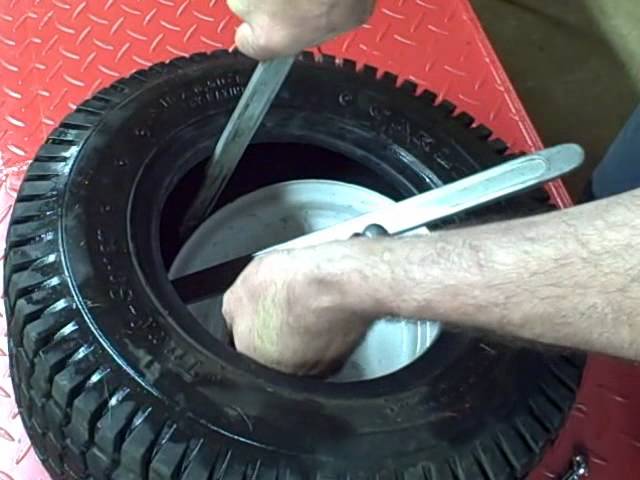 During this time, the tube and the tire can be damaged more thoroughly, the rubber of the inner cylinder will “chew”. With tubeless tires, this option is excluded. Even if a puncture occurs, thanks to the tightness of the chamber and its periodic pumping, you can get to the tire service. nine0003
Tubeless and tube tires also differ in how they are mounted / dismantled. If chambered rubber can be freely disassembled or, conversely, installed at home, then such a number will not work with a tubeless one - the risk of damaging the side flanges is too high, damage to which will lead to depressurization of the tire. Due to the peculiarities of installation and dismantling, many motorists find it impossible to repair a tubeless tire with their own hands, especially on the road, not in a comfortable garage, but on the side of the road. And in vain. Of course, it will not be possible to completely eliminate the problem at a professional level without special equipment. But to make sure that the damaged tire still travels, and sometimes not only reaches the tire fitting center, but goes more than one hundred kilometers after an impromptu repair, is quite realistic. nine0003
To do this, use special tire repair kits, which can be purchased everywhere today by going to any car shop. Better yet, buy everything you need to repair a tubeless wheel yourself separately and always have it ready. By doing this, you will save some money, which is always nice. The fact is that manufacturers of ready-made repair kits, in an effort to make their kits more expensive and solid in appearance, include in them both really useful tools and materials, as well as those that you can easily do without. Using repair kits or separately purchased harnesses and tools, you can repair tubeless tires not only for cars, but also for trucks. This can also be regarded as one of the advantages of tubeless tires over tube tires. It is much more difficult to repair it with a puncture. It is necessary to disassemble the wheel, remove the chamber, find the puncture site, and then degrease the working area, cut out the patch, and seal the rubber balloon. After drying, the camera is installed in place, and the wheel is beaded. With a tubeless tire, everything is much easier. nine0003
RUNWAY Tubeless Tire Repair Kit, 7-Piece
If you find that your car's tubeless tire wheel is damaged, first assess the severity of the situation. If, in your opinion, you can do without repair, having reached a reliable tire service on periodic pumping of the wheel, then it’s better to do so. Tubeless tires were designed to hold air even with foreign objects sticking out of the cord. But do not forget that riding with a nail or other object in the tire causes the puncture to gradually expand and the tire around the damaged area begins to gradually collapse. nine0003
But, if it so happens that the damage to the wheel received on the road is too extensive, the chamber does not hold air and it will not be possible to complete the journey while inflating the tire, you need to choose the best method of temporary repair and start it immediately. A tubeless tire is repaired in the following ways:
When choosing a repair using a tourniquet, you need to decide what type of material will be used. The harness can be cord or rubber. Let's consider both of these options. nine0003
Wheel repair kit, 6 pieces
Cord harness has found wide distribution as a repair material for tubeless tires. With this harness, you can carry out repairs in any conditions: on a city street or on the side of a country road. It is a strip of high-strength nylon, which is richly impregnated with high-quality rubber-based adhesive. Such harnesses are supplied to the domestic market by many manufacturers, they have certain differences in technical characteristics and cost. But all cord harnesses are installed according to the same type of scheme: nine0003
First of all, they find the place of damage and mark it with wax crayon or another marker.
Remove the item that damaged the tire if it is stuck in the cord.
Then you should check the tire pressure, it should not fall below 0.5 atmospheres.
Take a spiral awl and use it to determine at what angle the tire is damaged. nine0003
Apply vulcanizing glue to the awl.
Using the awl inserted into the puncture, coat the puncture site with glue in the most thorough way, for which you need to rotate the tool lubricated with it clockwise. Perform this action three times - lubricate the awl and insert it into the puncture, then leave the tool in the cord for the time being.
Insert the tourniquet into a special needle, focusing on the center.
On both sides, cover the surface of the tourniquet with vulcanizing glue.
Remove the helical awl from the tire where you left it at the puncture site.
Install a pen with a needle and a tourniquet placed inside into the puncture.
By pressing the handle, install the needle with the tourniquet into the puncture, advancing to the stop at a given angle.
Remove the pen with the needle from the puncture site without rotating it.
Carefully cut off the parts of the tourniquet sticking out on the surface. nine0003
Then you need to determine how tight the tire is repaired. This can be done with the help of a special liquid, which is used to determine the puncture site. If, after applying such a liquid, no air bubbles appear, then the tire is temporarily repaired and can be used further. If air bubbles appear, try installing an additional tourniquet in the place of damage to the tire.
This method of temporary repair is inexpensive, but it has proven its effectiveness more than once. A tire repaired in this way without repair will serve you for a long time - up to 6 months. nine0003
A rubber harness costs more than cord, but it is also more reliable. They install it in much the same way as the cord one, but there are still some differences. For example, when installing a rubber band, do not use an awl in the form of a rasp, since it can damage the rubber band during installation. In addition, the rubber band must be mounted on the adhesive specified by the manufacturer in the instructions for the repair kit.
Raw rubber band for repairing RUNWAY tubeless tires, 5 pcs
In this case, an anchor is a special type of bundle, one end of which ends with a small patch. The anchor is installed in the same way as other types of harnesses, but in addition, it glues the puncture site with an internal patch. To do this, the tourniquet is pushed inward, and then pulled a little in the opposite direction. Anchor can only be installed using a special cutter with a diameter of 6 mm. It is purchased separately from the set. But your efforts will surely be crowned with success, because the anchor is considered the most reliable option for repairing a tubeless tire with a harness. But with the help of harnesses, you can not repair side punctures. And in any case, even if the repair is successful, it is necessary in the coming days to choose the time to visit the tire service. Remember that prolonged use of the harness will cause irreversible damage to the tubeless tire. And until the problem is fixed, constantly monitor tire pressure. nine0003
The second option for repairing tubeless tires involves the use of sealant. This option cannot be called optimal, but it has become widespread, since tire repair in this way is carried out very quickly, literally in a matter of minutes. And the result of its implementation is guaranteed to allow you to get to the intended purpose of the trip, without first stopping by the tire service you met along the way.
The sealant is very easy to apply. In this case, it is not necessary to remove a nail or other object from the cord, due to which the tire was damaged. Simply attach a bottle filled with sealant to the valve on the rim of the wheel and see that the contents of the bottle are pumped into the wheel. Keep in mind that repairing a tire with sealant will significantly disrupt the balance, so choose a moderate speed. But on the other hand, repairs with the help of a sealant are easy, simple and very fast. You can use it even while standing in a traffic jam. nine0003
Today, you can easily buy different types of sealants. The most widely used gel, liquid, aerosol formulations. Gel ones are good because they can be used all-season, both in the summer heat and in the cold season. But at the same time, they significantly worsen the balance of the wheel. Liquid sealants are highly reliable, but they are not very convenient to use. Aerosol compositions make it possible to restore the performance of the wheel without a jack and a pump. But in the cold winter period, they will not work. If we compare the restoration of a tubeless tire, carried out with the help of sealants and harnesses, cord or rubber, then the latter are considered the preferred option, since they provide a fairly high quality of the repair performed with their help. nine0003
As you can see, do-it-yourself tubeless tire repair is possible, albeit temporary. You just need to stock up on funds for its implementation, without delaying the purchase of harnesses or sealant, because a lot of trouble awaits us on the roads. Meet them fully armed and quickly solve the problem. For guaranteed success, you must strictly follow the recommendations given by the manufacturer of repair materials in the instructions for use.
Modern lawn mowers are quite expensive machines. Naturally, you want to entrust its maintenance to a reliable service center. We have created the most comfortable conditions for the service repair of electric and gasoline lawn mowers Bosch, Alko, Makita, Champion and other brands on the road:
Lawn mowers and trimmers are popular and indispensable equipment for gardening. It is with its help that you can maintain the lawn in perfect condition or mow the grass on the site. However, a high load on equipment, mechanical damage and lack of timely service lead to premature failure of this type of garden equipment. In this case, it is recommended to contact our company, which guarantees timely repair work, the use of only original spare parts and low prices for all types of services. nine0003
Modern lawn mowers and trimmers require regular maintenance. This applies not only to gasoline, but also to electric models. High-quality and timely maintenance allows you to lubricate all moving mechanisms, clean internal elements from contamination and replace damaged elements. Professional cleaning of dried grass and dirt, cleaning and replacement of filters, candles and other elements of the system is a guarantee of a long service life of the equipment. Services are provided at a convenient time for the client and at the most favorable price. nine0003
Our after-sales service is ready to offer you repair services for lawn mowers and trimmers at home in Novomoskovsk with a master's visit to your home at an affordable price. Many people face the problem of repairing garden tools, but most of them prefer to entrust the work to professionals. Surely, you have witnessed situations or listened to a lot of stories about poor-quality work performed by amateurs. Our service department has earned a reputation by providing services in 52 cities of the country. nine0003
It is much better to have experienced professionals for the repair of petrol and electric garden lawnmowers, who will perform turnkey work, while you can be sure of the result.
The garden lawnmower is a device that makes it possible to provide a beautiful view of the lawn around the house. When planning your purchase, you should pay attention to several key elements, one of which is the type of power supply used in it. The most popular models of garden mowers are equipped with an electric motor or an internal combustion engine. Choosing the right mower for people's needs requires considering the following 4 questions. nine0003
We repair gasoline and electric lawn mowers of brands such as:
| Type of work | Cost |
|---|---|
| Battery replacement | from 520 rub |
| Wheel change | from 690 rub |
| Body repair | from 640 rub |
| Switch replacement | from 640 rub |
| Impeller replacement | from 750 r |
| Deck cover replacement | from 820 rub |
| Tensioner roller replacement | from 940 rub |
| Knife replacement | from 850 rub |
| Shaft replacement | from 480 rub |
| Gearbox replacement | from 730 rub |
| Motor replacement | from 770 rub |
You can find out the exact cost including accessories by calling our number
When using your lawnmower, it is very important to keep an eye on the oil level to keep the machine in perfect working condition.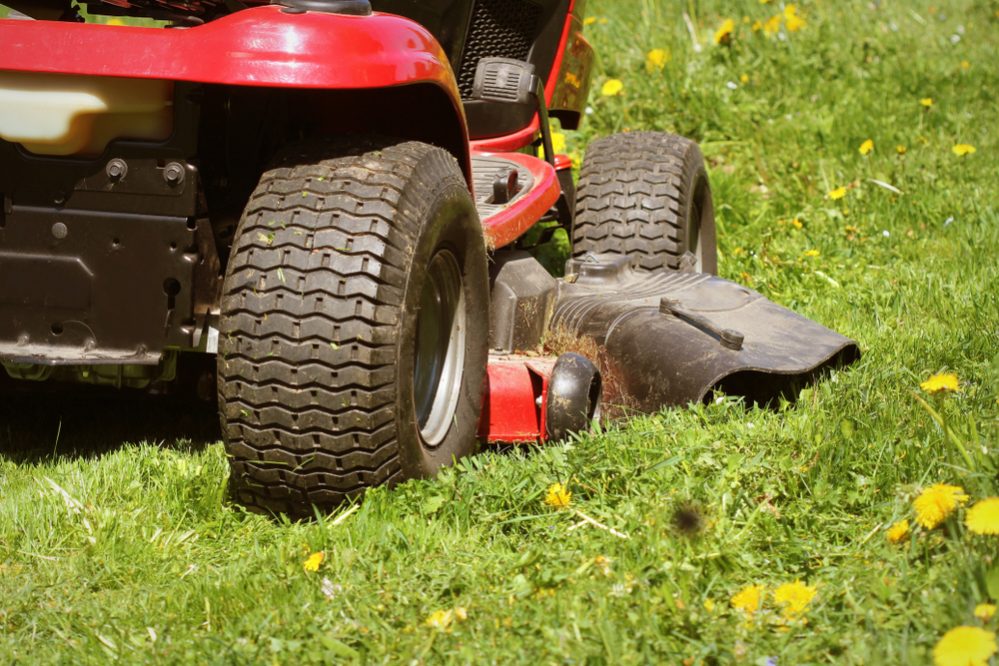 When changing the oil, you first need to remove the old grease, only after that you can fill the oil tank with new fluid. The instruction manual for the lawnmower indicates what type of oil is required for a particular model of equipment, as well as the required amount. To prevent malfunction of the equipment, it is important to fill the reservoir so that there is enough oil, but not in excess. The oil level is checked using a dipstick. You can turn on the lawn mower after a few minutes. nine0003
The cost of rewinding the stator and rotor is very high, so if the lawnmower is electric, the motor cannot be repaired, this assembly must be replaced. In most cases, the failure of the node is due to damage to the starting capacitor, interturn short circuit in the motor windings, which is manifested by a loss of power or hum. When a gasoline engine breaks down, it is required to completely sort out the power plant. Malfunctions can be manifested by vibrations during operation, the impossibility of starting the mower, uneven operation, damage to the shaft for attaching the knife. nine0003
The most common lawn care machine drive belt failure is when the cutting element hits bumps, a hard-to-mower surface. Plant stems, rope or wire are wound onto the coil and the shaft of the cutting element, as a result of which the load on the belt is very high, the product is stretched, and its integrity is violated. The drive belt of this type of equipment cannot be repaired, so it becomes necessary to replace this element. It is better to entrust this work to an experienced specialist who has the necessary skills and professional tools. nine0003
If the engine stops abruptly after starting the lawnmower, the problem may be a piston or engine crankshaft failure. Such malfunctions are usually caused by a low level or complete absence of oil in the crankcase and system. The process of straightening the crankshaft of a lawn mower requires high labor costs, because it requires a complete disassembly of the engine, straightening and subsequent assembly.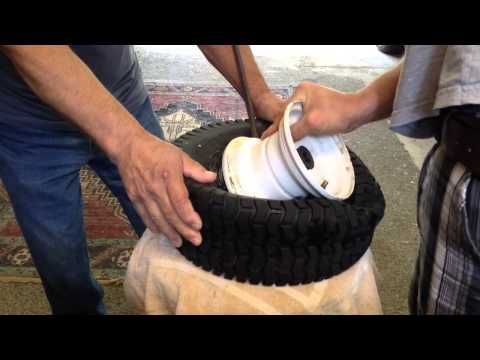 Therefore, in order to restore the efficiency of the lawn mower, as a rule, the crankshaft and piston engine of the equipment are replaced. This work should be done by a professional so as not to completely spoil the equipment. nine0003
If it is necessary to repair the lawn mower gearbox, external cleaning is carried out, the assembly is removed from the equipment and disassembled, for which special tools are used. After that, all elements are thoroughly washed. Parts that are worn out or damaged are replaced with new counterparts. In some cases, the entire gearbox may need to be replaced. At the final stage, the gearbox is installed on the lawn mower, it is lubricated and adjusted. It is better to entrust repair work to an experienced craftsman who knows the design of lawn mowers of different models well, has the necessary tools. nine0003
Lawn mowers have tubeless tires, so if a puncture occurs, the wheels need to be replaced in order to continue using the machine.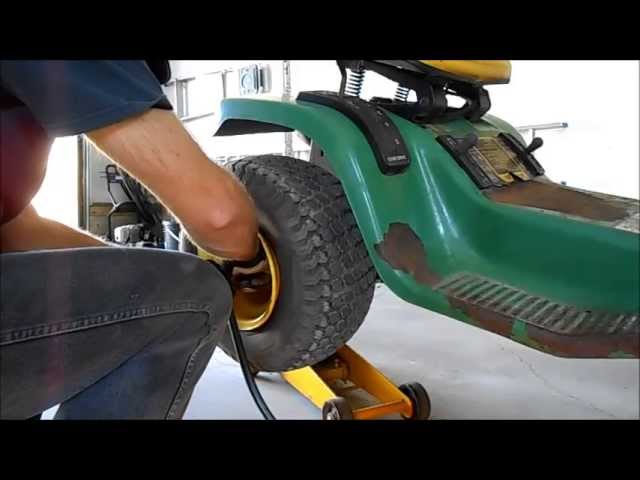 When replacing one or both rear wheels, make sure they are the same diameter, the cutter bar must be parallel to the ground line, otherwise the mowing will be uneven. To replace the wheels, the lawn mower is installed on a flat surface, under the body you need to install a wooden block on the side where you need to change the wheel. Before installing a new wheel, you need to apply grease to the axle, then put on the retaining ring and grease. It is better to entrust the replacement of wheels to specialists so that the task is completed efficiently. nine0003
Bearings transfer the load from the moving part of the lawnmower to other elements. These parts are constantly subjected to high loads, especially if the mower is to be used frequently and for a long time. Therefore, in order to prevent equipment breakdown, it is necessary to replace bearings in a timely manner. The need to replace the bearings as soon as possible is indicated by a malfunction of the motor or a strong vibration of the lawn mower during its operation.