Jeff Chen
I wanted to share some tips for mounting tubeless tires that I've learned from doing 4 tire comparison tests and mounting over 60 tires over the last year and a half:
Warnings:
Installation Process:
Clean the rim bed with alcohol to remove any trace of oil or grease. Tape tubeless-ready rims with tubeless tape and install valves onto the rim. Be as careful as you can to tape rims securely as losing air through improperly installed tape seems to be the most common cause of tubeless setups not being able to maintain tire pressure.
Check the tire for markings that indicate direction of rotation before installing.
Install the tire bead on one side of the tire onto the rim.
Install the other tire bead ending at the valve. (The valve tends to allow less room for a tire bead leading to a tighter fit if you end away from the valve.)
[If you only have a floor pump] Try to inflate the tire. If you can get the tire beads to form some level of seal with the rim bed, you'll be able to get the tire to hold air. From that point keep pumping fast(!) up to 35 psi. You'll generally hear a 'snap' as the tire beads seat at about 35 psi. I don't recommend going above 40 psi to reduce the risk of tire and/or bead blowouts. I've found that about 1/4 to 1/2 of tires install easily with just a floor pump.
See tips and tricks below for ways to help the bead seat with just a floor pump
See below for the tire brand/rim brand combinations that I've found install easier
Warning: Be VERY careful not to exceed 40 psi in the tire to reduce the risk of tire and/or bead blowouts.
[If you have access to a compressor or gas station air hose] The process of installing tubeless tires is a LOT easier with access to a compressor. The high pressure that a compressor can deliver quicker than a hand pump helps force tubeless tire beads against a rim bed from which you can then add air up to the tire pressure at which the tire beads will seat (about 35 psi).
Warning: Be VERY careful not to exceed 40 psi in the tire to reduce the risk of tire and/or bead blowouts.
Congratulations if you are up to this point. Getting the beads seated is the most challenging part of this process. To complete the installation you need to add sealant into the tire & distribute the sealant around the sidewalls of the tire.
Let the air out of the tire. Generally the tire beads will remain seated on the rim.
Remove the tire valve core. Generally tubeless valves will be of the presta variety, not the schraeder valves that are typically used with car tires)This is the top part of the presta valve that screws into the larger diameter base of the valve. You can do this by using a core removal tool such as the Stans NoTubes Core Remover Tool or an adjustable wrench if you don't have a core removal tool.
Inject about 4 oz of tubeless sealant into the tire through the tire valve with the valve core removed
Reinstall the valve core
Pump up the tire to about 35 psi
Shake the wheel/tire laterally to distribute sealant onto the tire sidewalls. Rotate the wheel/tire as you continue to do this around the entire tire.
Rotate the wheel/tire held horizontally to allow sealant to work its way into the junction between tire bead & rim. Set the wheel/tire down horizontally for 5-10 minutes. A cardboard box is a good way to keep the wheel/tire level. Flip the wheel over to the other side and repeat this process. Losing air due to tire beads not being adequately sealed against a rim is another common cause of tubeless setups not being able to hold pressure.
Adjust tire pressure based on your weight. This is a formula from Stans NoTubes that provides a starting point for matching tire pressure to your weight:
Rider weight / 7 = X
Front pressure = X -1 psi
Rear pressure = X -2 psi
Example based on a rider weight (with gear) of 160 lbs
160 lbs / 7 = 22.9
Front pressure = 22.9 - 1 = about 22 psi
Rear pressure = 22.9 + 2 = about 25 psi
Tips & Tricks:
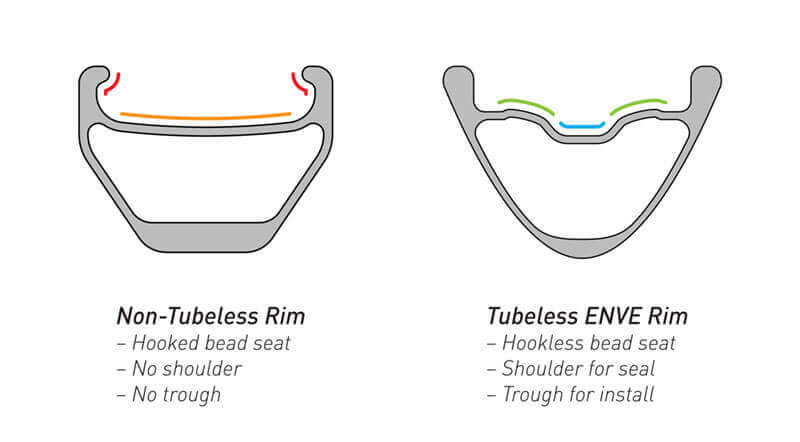
Use rims designed for tubeless use: Tubeless rims have a ridge next to the bead seat that will help to "lock" a tubeless tire's bead onto the rim after it is seated. I personally will not do tubeless "conversions" with non-tubeless rims. Non-tubeless rims that don't have the ridge to help lock in a tubeless tire's bead greatly increase the risk of burping (losing air in hard cornering) or rolling a tire off in corners.
Use tires designed for tubeless use: Tires designed for tubeless mounting have a casing that is more likely to be air tight as well as tighter fitting beads (keep reading for the benefits of tighter fitting beads for ease of tubeless installation).
Seat the tire beads before adding sealant: Trying to seat a tire that already has sealant added just adds potential for messiness. The sealant does not help the initial bead seating process.
Seating the tire beads with just a floor pump: If a tire's bead fit snugly against the rim bed, you have a good chance of being able to just use a floor pump to get enough air pressure to seat the beads. An air tight seal between bead and rim allows you to gradually build up enough air pressure in the tire until the beads seat around 35-40 psi.
Tricks for seating tire beads when a tire doesn't start holding air pressure immediately:
Make sure the tire is covering the valve hole
Try to move the tire so that the beads press against the rim bed
Use an inner tube to strap the tire against the rim
Seating the bead without a compressor: A inexpensive way to get a high volume of air into a tire at high velocity is to use a gas station air compressor. If you have Presta valve, you will need a presta-to-schrader valve adaptor such as the Slime 23042 Presta to Schrader Valve Adapter. The high velocity of air that is delivered by this method or with a compressor pushes the tire beads against the rim allowing pressure to build up to seat the beads.
Add sealant via a tubeless valve that has a removable valve core: Many instructional videos will recommend removing one side of the bead at this time to add sealant. I don't agree with this approach. You've done a lot of work at this point to get both tire beads seated properly. Why would you want to undo part of the work you've done to seat the beads? Adding sealant through the valve core is by far the lowest effort way to add sealant.
For really hard to seat tires, pulling the tire bead on top of the rim could be worth trying: I just learned this new method of getting a better seal between tire and rim to do the initial inflation & seating of the bead if you don’t have access to a compressor or tubeless charger pumps that can deliver a high volume blast of air. The basis of this technique is that you pull the tire bead on top of the rim with a tire lever. When you get to about 40-50% of the tire bead resting on top of the rim. you put your thumb on the tire bead so it doesn’t slip off of the rim and gently pull out the tire lever. Repeat on the other side and pull the bead up on the rim as far as you can go. Proceed to inflate the tire. Once you are able to get some pressure in the tire. There seems to be at least some risk of having the tire bead blow off the rim when you inflate the tire, so be aware of that and try this technique at your own risk. You can see the technique being used at: https://youtu.be/tE3h5nmDdOo.
Easier to install tire brand/rim brand combinations
On Stans rims (Easton & DT rims have a similar diameter. Mavic & WTB have a slightly smaller diameter)
Schwalbe Snakeskin - Easiest
Maxxis Exo - Fairly Easy
Specialized 2Bliss - Fairly Easy
Continental Protection - Difficult to do initial seating of the beads on Stans rims
WTB TCS - CAN work but beads may be tight as the bead diameter is based on the tighter UST bead specification.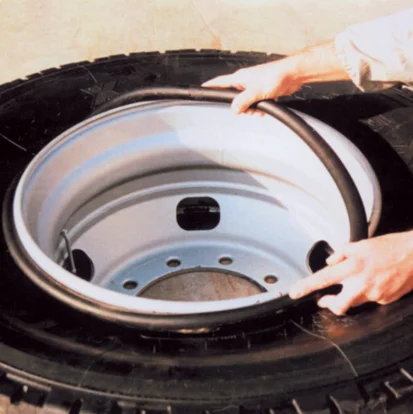 I have mounted 2 WTB tires on Stans rims, but have heard that others have had challenges with this. Works better on WTB and Mavic rims.
Michelin, Hutchinson - I don't have direct experience but I believe these brands will work better on WTB and Mavic rims.
This is a great video on installing difficult-to-mount tubeless tires:
You can help support Dirt Merchant Bikes’ product testing by purchasing through our retail partners.
Orange Seal Tubeless Sealant
Our experience is that Orange Seal seals punctures quickly and consistently. The amount of rain we get in the PNW makes sealants drying out less of an issue, but Orange Seal also resists water absorption well.
Stan’s Tubeless Rim Tape
Stan’s tape has a little stretch that helps in removing air bubbles when taping rims. It sticks well to most alloy rims and some carbon rims. It also removes cleanly unlike Gorilla Tape.
Stan’s Tubeless Valve Stems
Stan’s valves have a solid rubber base that helps reduce air leaks around the valve base. Tightening the locknut helps seal tape against the rim.
Diamondback Steel Core Tire Levers
It can be helpful to use a tire lever to get the last part of a tire bead onto a rim. Plastic tire levers don’t last long with that type of abuse. I like these better than the more expensive Park Tool TL-6.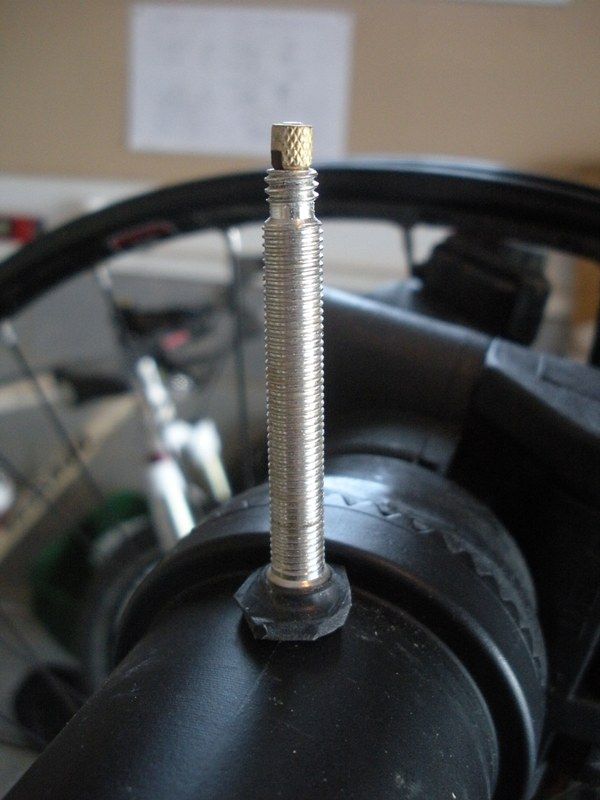 2 Steel Core Tire Levers because the entire tip of the lever is covered in plastic to reduce the chance of scratching a rim.
Orange Seal Sealant - 16 oz Refill bottle
Orange Seal Sealant - 32 oz Refill bottle
Stan’s No Tubes Rim Tape 60 Yards x 30mm
Stan’s No Tubes Rim Tape 60 Yards x 27mm
Stan’s No Tubes Rim Tape 60 Yards x 25mm
InTires TagsTires
$85.00
4 in stock (can be backordered)
4 in stock (can be backordered)
BeadSetR quantity
SKU: BeadSetR Categories: BeadSetR, Tire Repair / Tire Tools
The BeadSetR is a tubeless tire mounting system. It SETS the tire sidewalls against the rim and establishes an initial airtight seal. Once you have the airtight seal you can begin to build air pressure in the tire. Without that initial seal between the rubber and the rim the tire will never expand, inflate, or seat properly against the rim. No seal, no ride.
Here’s a YouTube video showing the BeadSetR in action: BeadSetR
At first glance the BeadSetR may look like a regular ratchet strap…. but it’s not. Instead, it’s a 1″ ratcheting strap WITHIN a 2″ outer strap. This eliminates friction between the rubber tread and the tensioning strap. A plastic slider eliminates friction between the ratchet and the tread. The result is an easy, uniform expansion of the tire sidewalls, without collapsing the tread.
To get an airtight seal you must spread the tire sidewalls outwards so they make contact with the metal rim. Just how do you do that?
High pressure air from a shop compressor will blast the sidewalls outward. It’s a great trick if you happen to be in your shop, but what if you’re in the field? What then?
CO2 cartridges might work, or constricting the tire with a rope or a strap might work. Both systems have a high probability of failure and other problems.
We designed the BeadSetR to work in the field, away from any outside assistance, without a compressor, without high pressure air, without CO2. We designed it to work on stubborn tires that won’t seat against the rim. Plainly stated, we designed it to work. Period. And it does exactly what we claim it will do – spread the sidewalls and make the initial airtight seal between the sidewall and the rim. Everytime. Everywhere.
The BeadSetR uses a specially designed ratchet strap, a pair of special hollow nylon webbings, and a plastic slider. These eliminate friction between the constricting strap and the rubber tread on the tire. The tread of the tire is evenly compressed, and the sidewalls are evenly expanded until they make an airtight seal against the rim. Once that happens you can inflate the tire. Until that happens, you can’t.
This next photo shows a tire being constricted, and the sidewalls being spread. We did not include the rim in these photos because we wanted you to see the inside of the tire and how it spread outward.
At left, the tire is only 2.5″ wide. This is how it would naturally sit inside the rim. Because the sidewalls are not in contact with the rim the tire cannot be inflated. At right we’ve used the BeadSetR to expand the sidewalls to more than 4.5″ wide. The sidewalls were still concentric and the tread had not collapsed like it would when using a rope or regular strap. The wider the spread, the better your chances of starting the initial airtight seal.
The BeadSetR was originally designed for use on tubeless tires, but its also compatible with tubed tires.
The BeadSetR comes with these items:
A black metal ratchet mechanism that easily tightens the straps
A 1″ wide x 15-foot long nylon strap that wraps around the tire
Two 2″ x 3-foot long hollow outer straps that contain the 1″ strap
A plastic insert to fit between the ratchet and the tread
A velcro retention strap to hold the ratchet in place while setting things up
Full instructions for use of the BeadSetR
Additional instructions about tire changing and other tire mounting tips
A naugahyde storage pouch – everything fits in this 2″x5″x5″ pouch
| Weight | 1.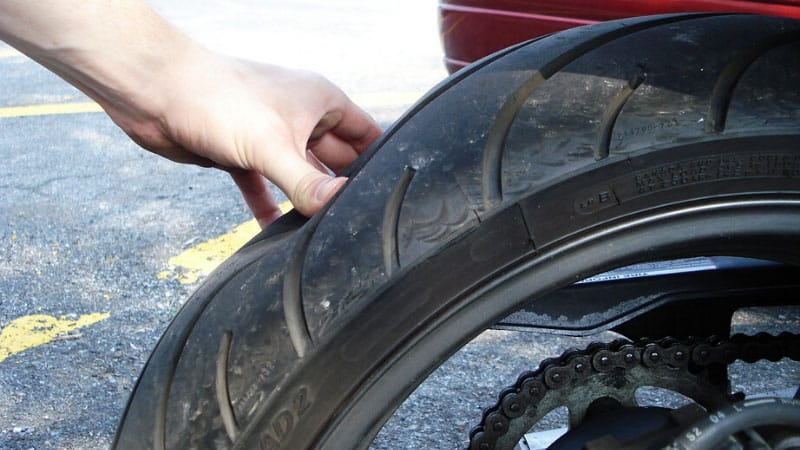 6 lbs 6 lbs |
|---|---|
| Dimensions | 3 × 8 × 10 in |
Hello.
Owners of motorcycles with rims have to go to a tire shop to get new tires on their motorcycle. When replacing tires on such motorcycles with your own hands, the disc may bend and lose its presentation. On the other hand, if you have an enduro or any other bike with spoked wheels, it is quite possible to change the tires yourself. Moreover, any normal endurist simply must be able to change tires in the field with a pair of mounts, since off-road trips are often associated with long hauls on asphalt. In this case, it is advisable to go to the place of drowning in mud on road tires, take a set of "evil" rubber with you and put it on a motorcycle in an open field immediately before off-road. Today we will talk about changing the tires of a motorcycle with spoked wheels on your own.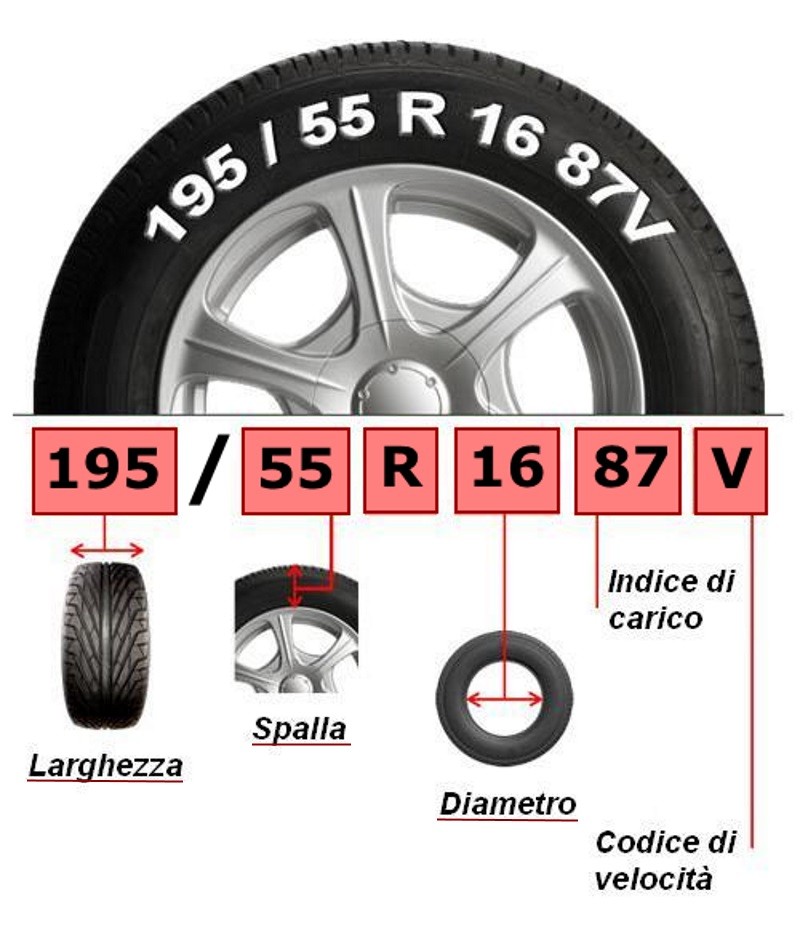
We will talk about the types of motorcycle tires and indices in the names of rubber models, since this topic is worthy of a separate article, and maybe more than one. Today, within the framework of this article, I will give only one of the simplest classifications. Tires for motorcycles are chambered and tubeless. Tubeless tires are convenient, used everywhere on motorcycles with disc wheels. The disk inside is hermetically sealed, so it is enough to put new tires on, smearing the joints with a special sealant, pump up - and you can ride. Spoked wheels are not airtight inside, since the spokes pass through the wheel rim at one end. On spoked wheels, tires with tubes inside are used - it’s clear why.
Is it possible to put tubeless tires on a spoked motorcycle wheel by simply sticking a conventional tube inside? Yes, easily! Now I will just put tubeless tires with cameras on my motorcycle.
What is the difference between tube and tubeless tires? Everything is very simple.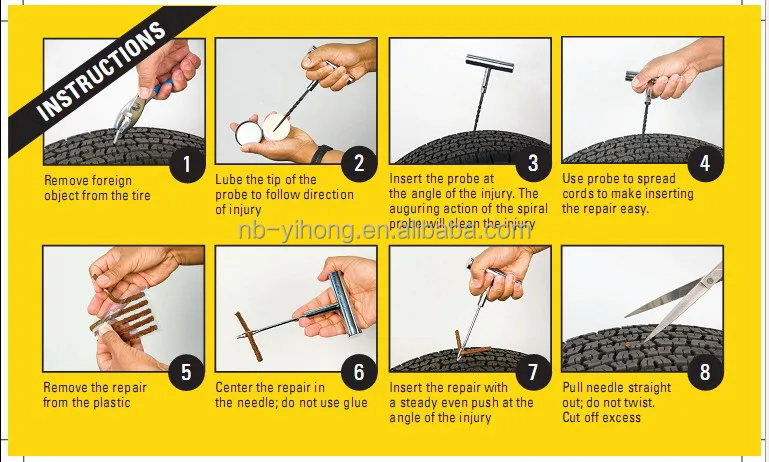 Tubeless tires have a special groove on the inside that acts like a "hook" and increases tightness.
Chamber rubber has no such "hook".
Also, many manufacturers claim that tubeless tires have a reinforced cord. I don’t see anything wrong if we ride a motorcycle with tubes in tires, and even with a reinforced cord 🙂 Especially since there is no difference at all between installing tubed and tubeless tires on a motorcycle 🙂
Let's go!
What you need to change tires on your motorcycle.
To change tires on a motorcycle, we need the following materials and tools:
1) New tires. In my case, the BMW F650GS is the Metzeller Tourance. By default, the Metzeller official website gives the tire sizes specified in the manual for the BMW F650GS motorcycle. Front - 110/90 - R19, rear - 130/80 R17. In principle, there is a lot of space left in front and behind, so I will put 120/9 on the front wheel0 with 19 radius, and I'll leave everything as it should be behind.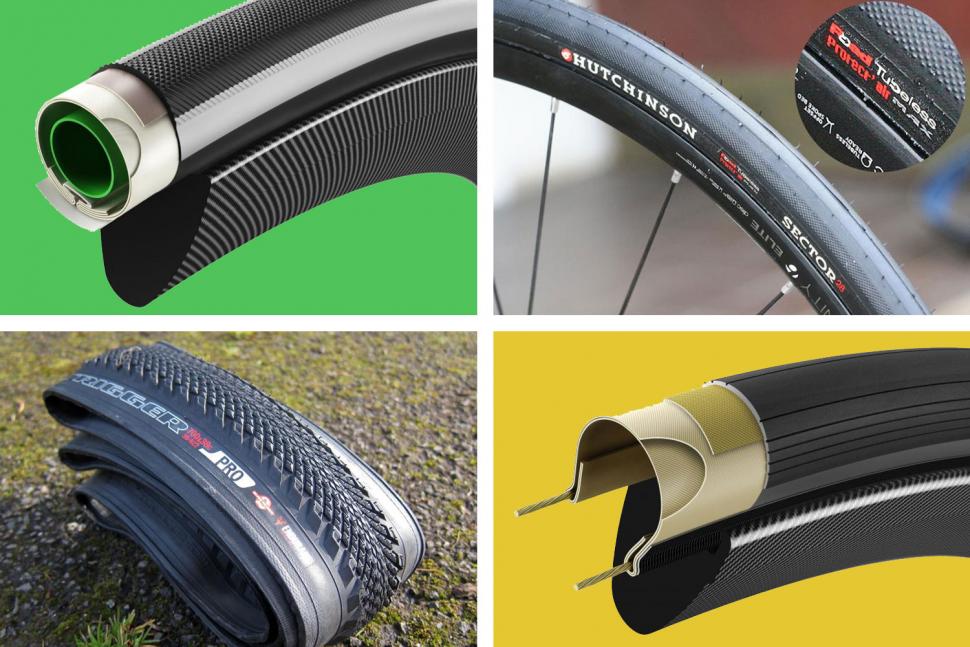
2) Crowbars (or crowbars, whatever they call it). I manage alone, but I have experience since Java. Better to use two.
3) Soap solution. It will be needed when putting on new tires, and when removing the old one, it can also come in handy. Without it, you can accidentally break a tire. I know that many people use Vaseline and other neutral lubricants. I don't even know where to buy Vaseline now, so I use soapy water. Soap in water should ideally not dissolve completely and be similar in consistency to snot 🙂
4) Metal cap on the nipple with hooks for unscrewing the nipple.
5) A set of tools to turn the screw nuts.
Do-it-yourself motorcycle tire replacement.
Front wheel example.
1) Loosen the wheel axle while the bike is firmly on the ground.
2) Hang the motorcycle on a stand or put it on the center stand and remove the wheel.
3) Unscrew the nipple and let the air out of the wheel. Then we need to "separate" the rubber from the wheel rim.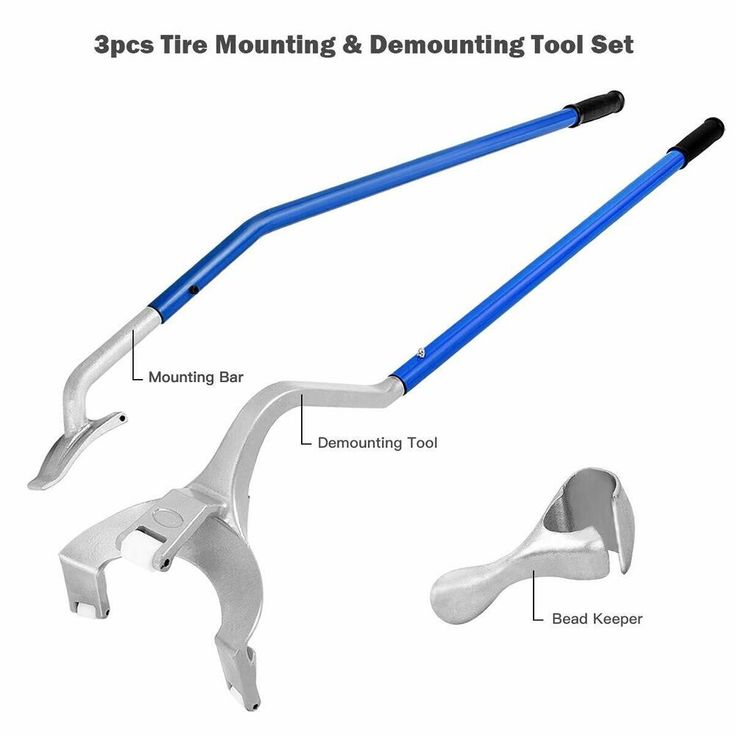 To do this, you need to stomp her feet. You don't need to jump on it, there is a chance to bend the rim.
There is a little trick here. Sometimes the rubber sticks to the rim tightly. In your garage you can dance shamanic dances with a tambourine, jump on a wheel and separate, but what if you have to change tires in an open field, with a limited number of tools and time?
If you are traveling with a group, the easiest way is to use the side stand of the second motorcycle. Just put the wheel on the ground, fold down the side stand of the second motorcycle and put it on the camera near the wheel rim. Jump like a cutie! 🙂
4) Pry the tire on one side with a pry bar. Be careful not to push the crowbar too deep to avoid tearing the camera.
5) Insert the second mount.
And so on in a circle.
6) Pull out the camera.
And finally disassemble the wheel.
7) Check the condition of the rubber that protects the camera from the spokes. If it is worn or frayed, it must be replaced.
8) Now let's take a closer look at the new tires. We are interested in two markers that are indicated on any rubber. This is an arrow indicating the direction of rotation of the wheel.
And the marker against which the nipple should eventually be placed. Either two dots or one bold.
9) Then grease the new tire with soapy water.
10) First we push in one bead, then we push the tube inside, aligning the marker against the nipple, then we fence the second tire bead. The camera must be pushed in so that it is not twisted anywhere, otherwise there is a possibility that it will fray itself after a certain number of kilometers.
11) Done. Put the wheel back on the bike.
With rear wheel by analogy.
How many atmospheres to drive into tires, usually indicated on the pendulum.
Wheel balancing on enduras and choppers is not as important as on sportbikes and other high-speed motorcycles - endurists and choppers usually ride like old grandmas 🙂 But later I will show how to do wheel balancing in handicraft conditions with your own hands.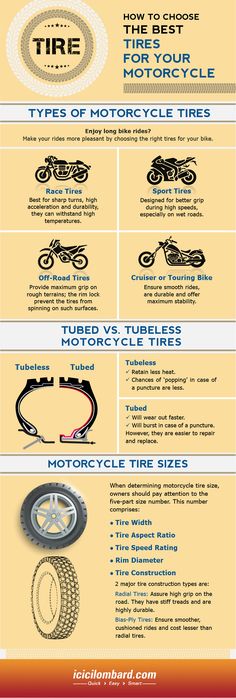 This process is not difficult, and with due patience and experience, you can achieve the same results as with professional equipment.
A couple more moments!
1) Please note that, as in any repair, cleanliness is the key to health! The inside of the tire must be kept clean, because in case any solid particles remain between the tire and the chamber, you have a chance to repeat my Rear Wheel Saga 🙂 I usually blow the inside of the chamber with a compressor and wipe it with a damp cloth.
2) In order not to pinch the camera with the mount, you can pump it up a little. It helps me, and you yourself think.
All.
This entry was posted in repair and maintenance and tagged BMW F 650 GS, motorcycle, report, repair, photo. Bookmark the permalink.
There is not always a way to call a tow truck, and driving on a flat tire, “chewing” the rubber and killing the rim is at least uncomfortable.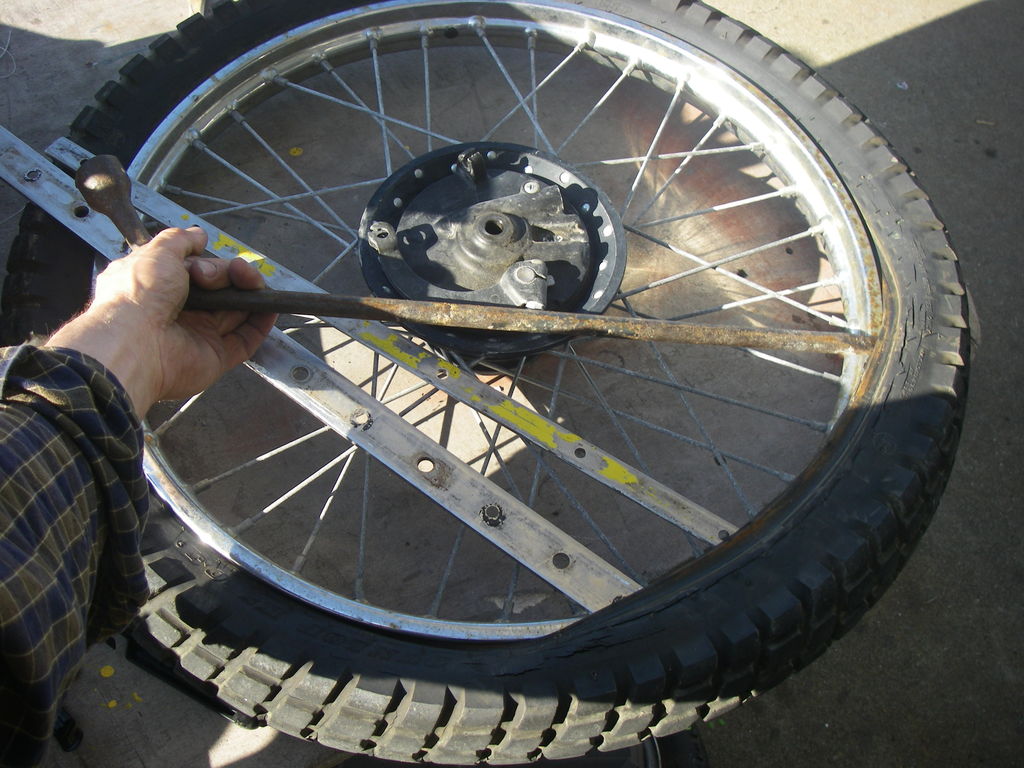
The very first replacement of rubber on a motorcycle or scooter gives reason to think - what is better in terms of quick repairs: tubeless ones that do not require wheel disassembly to eliminate a puncture, but leave the rider helpless if, along with damage, it “led” and flattened the edge of the disc? Or chambers - allowing sealing almost ring breaks (if only there were enough patches), but requiring the removal of rubber from the rim for this? The unequivocal answer is no. Few classics, straights or tourers today remain "loyal" to tube rubber models: tubeless tires are lighter, softer, warm up and cool down faster thanks to simplified heat transfer. In sports, more precisely - enduro and motocross, chamber - on the contrary, prevail: only spoked wheels can "play", withstanding strong alternating loads during landings and impacts.
The nuance is that a tire with a chamber can be put on any spoked or cast disc, and a tubeless one can only be placed on a cast one, because only it can ensure tightness. Tube – can be installed in a tubeless tire as an emergency measure. In case of major damage to the sidewall, cracks or curvature of the edges of the rim, this will make it possible, after pumping up the wheel, to reach the nearest tire service (and there already - straightening, balancing and other maintenance according to the rules). True, for such a focus, it is advisable to take a camera with a face value one less than the diameter of the disk, otherwise it will create folds inside that will rub for a couple of hundred kilometers. The resource of such a “treatment” is large - until the next puncture, like a new one.
It depends on the magnitude of the damage whether it will be possible to eliminate it on your own, or whether you will have to “surrender” to the motorized tow truck. In tubeless - holes up to 5–6 mm are patched, in chambers - as much as there is enough glue and patches, the main thing is the condition of the tire.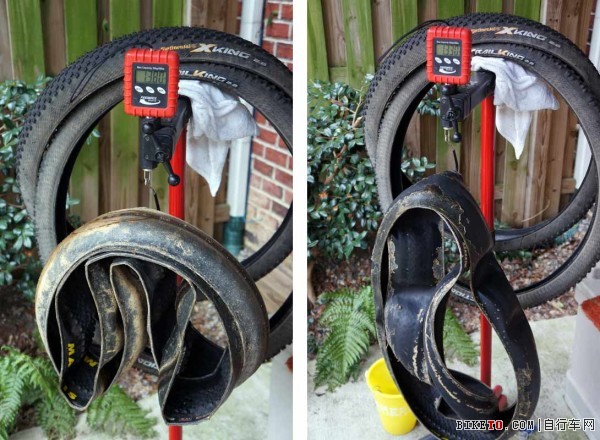 To determine the extent of the disaster - find a place where you can safely stop without violating traffic rules (where it is prohibited - you will have to sacrifice tires and drive on).
If the wheel deflates slowly, and the object that pierced it is still inside, you can try to carefully drive to the tire shop. A completely deflated "pancake" will have to be resuscitated on the spot, or - remove the wheel and take it to the service.
To find a hole in a tubeless tire, if it is very thin and not immediately visible, the wheel must be pumped up, slowly pouring water - bubbles will go. In place, tubeless tubes can be “harnessed”, or filled with sealant inside, without removing from the motorcycle.
With the second type of tires - more difficult. A torn balloon must be removed from the tire to detect a defect and seal. In a good way, the wheel must be removed from the motorcycle and disassembled on a clean, flat, hard base. Suppose such a “patch” can be provided even off-road, but how to remove the wheel on a motorcycle if it does not have a central stand? And shooting is not required. The motor must be carefully laid on its side, after making sure that the faucet is closed, gasoline does not flow out through the tank cap (antifreeze does not flow from the tank if the motor is “dropsy”), and removing the plastic or wardrobe trunk with fragile contents (if any).
You will have to unscrew the wheel from the motorcycle only if you need to replace the tire, or it is decided to patch the tubeless tube with a “fungus”. In the absence of a central stand, this will also have to be done on a lying bike, or - make this stand from improvised materials (bricks, stump, car jack), placing them under the crankcase protection from below, the central tube of the frame, the duplex jumper (but not under the plastic, itself engine crankcase or attachments!), under both footrests - if they are not folding, or - under the pendulum. Before removing the rear wheel on a motorcycle, the front fork must be loaded with something, or an even higher lining is made.
In a motorcycle tire fitting shop, tubeless tubes are repaired by cold vulcanization.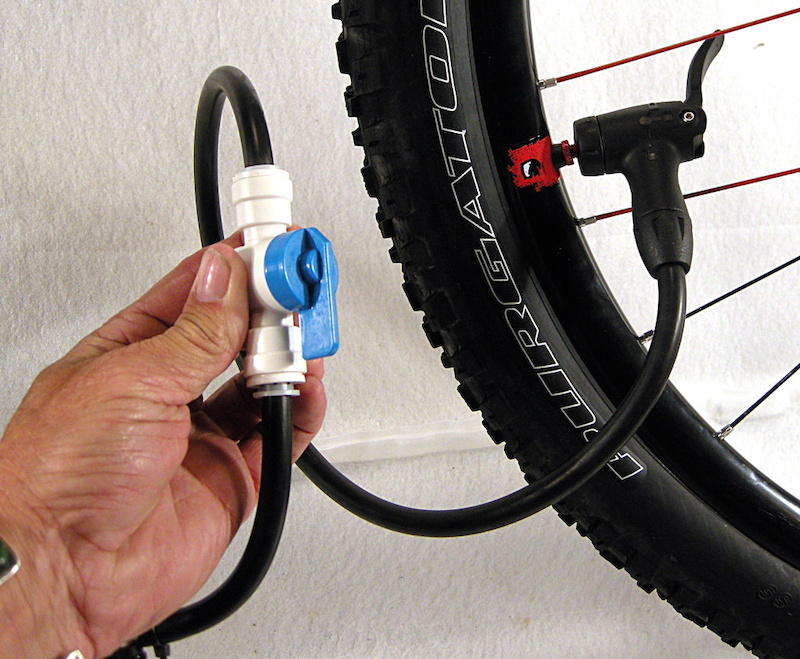 They are removed, disassembled, the puncture site is cleaned from the inside, degreased, lubricated with glue and a calibrated “fungus” patch is inserted into the hole from the inside. The fungus itself is a thin plate of rubber with a “leg” tube in the center. The leg - by the guide wire is dragged through the hole of the damage, and the "hat" seals it.
After half an hour - you can put the tire back. The reliability of such a repair is high, the patch does not cause a significant imbalance, the service life of a sealed tire does not decrease.
This method is also applicable on the road, the main thing is to have the necessary equipment and materials with you:
The fungus repair procedure does not require much experience. The main thing is to keep it clean, fully clean the place where the patch fits, let the glue dry slightly to a dull finish and press (roll) the surface of the fungus with high quality, expelling all the air between the layers. If necessary, you can degrease the place before gluing with gasoline, but without the rest of the above, it will not be possible to fully carry out repairs.
The compressor is sometimes replaced by a small cylinder of compressed air or carbon dioxide. Unlike a mechanical pump, it will immediately create a “throw” of pressure, pressing the tire beads against the rim flanges (in emergency cases, even a fire extinguisher was used to pump flat tubeless wheels). When connecting the compressor, start the bike's engine before you start inflating the tire - let it idle. Otherwise, the motor can "land" the battery, and you will not start.
Manometer - needed for control. It is undesirable to pump over the repaired tire. It is recommended to "inflate" 0. 2 atmospheres less than the nominal value. Inflating too little is also bad: a flat tire has a larger contact patch with the road, so the place of a fresh patch will deform more.
“Burning” a tubeless tube and sealing its internal cavity through a nipple are quick, simple methods that do not require special skills. To repair the damage, you only need the materials themselves, and how to pump up the wheel.
Now in Moscow, and not only, 6-5 varieties of cans with a sealant are sold - a quickly hardening "liquid rubber", with a volume of 800 to 250 ml.
Applying "Anti-Puncture" is simple: put a tube with a fitting on the nipple of the camera, turn the can over, and hold the button according to the instructions. Then - pump up the wheel, cleaning the nipple from the foam, roll it, making a full turn to distribute it.
The sealant is blown out with air into the puncture hole and clogs it, solidifying. After 20 minutes - you can go. Reliability of repair is high. Resource - until the next puncture.
If you have a compressor, start immediately pumping up the wheel, so it will be easier to work with a puncture, insert a patch, and it will swell faster.
Procedure:
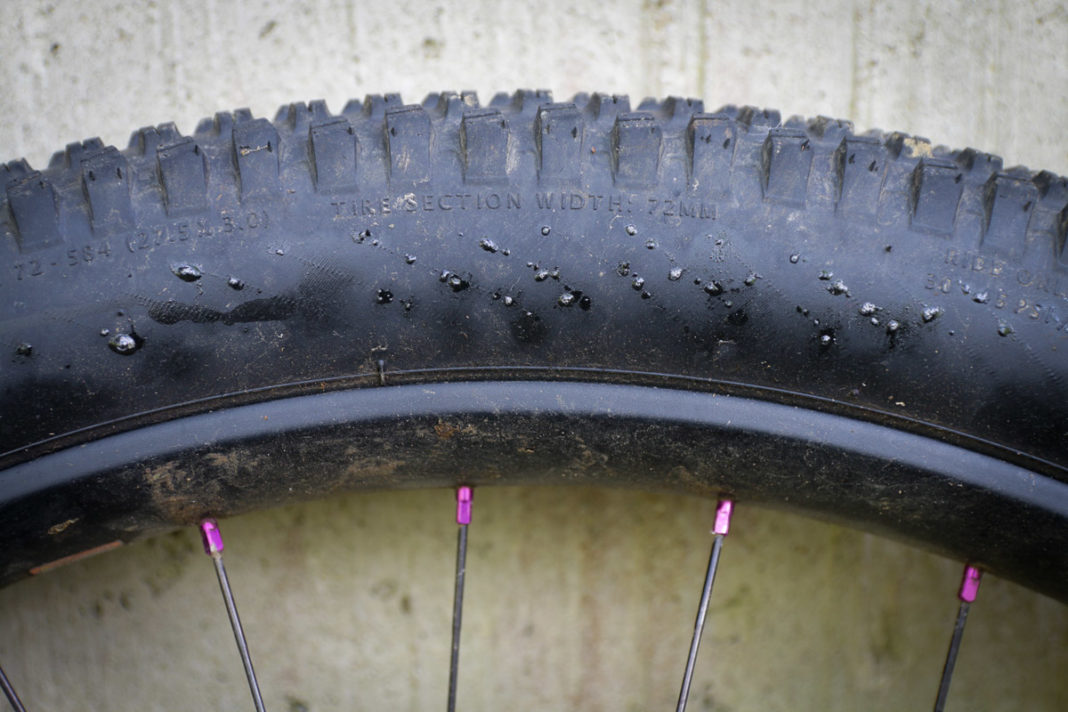
You can go in 5 minutes, you just need to make sure that it doesn’t descend anywhere else.
Outwardly identical, repair kits for harnessing wheels can differ in price by almost half. This variation is explained by different configurations - one will have only three items, the other - six or seven.
A complete tubeless tire repair kit contains:
Regardless of the cost, you need to choose a kit in which the harnesses will be reinforced, and the awl - with a deep spiral winding (notch), and not a “needle file”. Inserting a flagellum is sometimes easier with a regular thin screwdriver. If there is no glue in the kit, or it has dried up, the flagellum is moistened with gasoline.
At motorcycle service stations and car services, holes in the chambers are closed by hot vulcanization: a layer of raw rubber is applied to the cleaned, fat-free puncture site and, after squeezing it well, it is heated with a special “iron”. Iron - burns, layers - are fused into a single whole. Reliability of repair is high. The resource will be almost like a new one.
Cold vulcanization (patching) - used if the workshop is not equipped with a vulcanizer. In this case, the quality of the service and the reliability of the repair will depend on the accuracy of the master. For the convenience of gluing, the camera is completely removed in the service, but, I repeat, this is not necessary. It can be repaired on the spot in the same way (there are no other options except for replacing the camera), but without removing it from the motorcycle.
This can only be done if you have two metal mounting blades. At least one, the second can be replaced with another flat tool. You can still disassemble the wheel with a wide screwdriver and a “family” key wrapped with electrical tape. But this is only as a last resort, otherwise you can damage the cord.
Sequence of work:
 Let the glue dry for a minute.
 The fencing must be carried out twice as carefully and more slowly than dismantling, lubricate the side with water or soap, “help” more with your hands, otherwise there is a risk of picking up the edge of the chamber with a spatula and tearing it.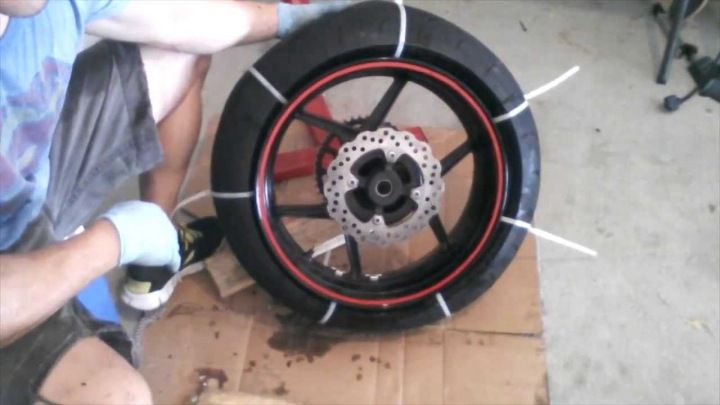
Important! If the wheels of the motorcycle are equipped with tow bars - before pressing the tire bead from the rim, you need to loosen this tow bar! But do not unscrew the nut completely, do not disassemble to the end.
A standard “first aid kit” (a set for repairing classic motor rubber) contains only patches and glue, so it is advisable to supplement it yourself with a piece of “skin” or a needle file. You can degrease with gasoline, or apply a little glue first and wipe off immediately, rolling up the dust with it.
Now there is no shortage of specialized motorcycle workshops not only in Moscow - in all major cities there are motorcycle helpers who help motorcyclists directly on the track, or tow to where you can quickly change the camera, or patch the tubeless correctly, so that there is no trace left. Where there is a guarantee.
Self-replacement of a tire on a motorcycle requires a certain physical condition, and for the first time - a “kilometer of nerves”. At the service station, instead of you, automation will “sweat”, which will not lock up the board and will not scratch the disc coating with a spatula. The main thing is to do it quickly (if you need to go urgently, the price sometimes does not matter).
Repair at the service - may be the only possible one if, due to driving on a flat tire, the tire nipple is turned and torn off. Especially if he flew off and got lost, but there is no spare. In mototiremontazhke - there is always a set of consumables for any wheel diameter. In the same place, in extreme cases, you can buy a new tire, or a used dokatka.
In addition to the patch, for normal operation of the wheel, balancing must be ensured. This is generally a useful procedure during any change of rubber, otherwise if there is a strong imbalance, the wheel bearing will inevitably break due to vibrations, and the hands will quickly get tired and “buzz” after long rides.
The first couple of tens of kilometers - do not drive, go at the speed of the flow.