To stretch a tire, start by slipping the tire into the rim by applying soapy water. Then spray a flammable gas on all the sides of the rim and inner tire. Once done, light it up with fire, and the tire shall pop out to cover the entire rim. Then use the air compressor to get rid of the fire on the rim. Use the same air compressor to fill in the air or take some out according to the required tire pressure.
Working on tire stretching can also be a risky exercise. For one, the tire suddenly pops out, and second, the fire can spread. So, always keep a fire extinguisher nearby.
What is Tire Stretching?The exercise of tire stretching involves fitting small tires into wider wheels or rims. To some, tire stretching is an art form, as it improves performance and enhances the aesthetics of the vehicle. It is a popular practice as car owners want to fit narrow tires into wider rims instead of buying new tires that can originally fit into the rim.
The suspicion surrounding the concept of tire stretching is that it costs the car performance. The performance issues are true, but only to some extent. Because there are a few ways to stretch the tires, and some are right while others, not so good.
Hence, to ensure that you get the best results, follow the right tire stretching practices. The following sections will detail out the steps for stretching and the supplies you will need for the same.
Can I Stretch My Tires at Home?Yes, you can, but only if you are following the right practices. To stretch a tire, you must play with fire, which is quite dangerous. So, while we would not recommend working on it at home, if you can follow the right procedure, there is no need to worry about any damages.
Supplies You’ll Need For Stretching Your TiresEven though tire stretching is mostly a process-based exercise, there are a couple of things essential to the exercise.
 You can take any flammable spray. You can also use deodorants or brake cleaners, as they both are highly flammable and will serve the purpose.
 Start by preparing the tire and the rim that you want to work on. Remember that the tire size must be smaller than the rim for the entire exercise to work. Because the whole purpose of tire stretching is to fit a small tire onto a larger rim.
Not every type is stretchable and can be fitted onto a rim. Hence, make sure to do some research before stretching if you want to do it yourself in your garage or backyard. For better safety, we would recommend that you take the tire and the rim to the backyard.
In the backyard, lay down the rim (preferably of steel) on a flat surface. This is followed by slipping the tire inside the rim. To ensure that the tire slips in smoothly, use soapy water and apply it on the tire beads.
For the other end of the bead to slip in, use a tire spoon or a long flat screwdriver. If you have never done it before, be cautious that while slipping in the other end of the tire bead, the tire spoon can kickback. So, keep it firmly in one place and hold it tight.
Step 3:Use the flammable spray and spread the gas across the inner side of the tire. The most popular choices are deodorants, brake cleaners, or hair sprays.
If you want to spice things up a bit, butane is also an option to use as a flammable spray. Butane is highly flammable, so use it judiciously. As for how much flammable spray you must use, it depends on tire size. Larger tires will require higher volumes of spray as compared to the tires of small size.
In this step, you must have read somewhere or heard that the air compressor must be connected to the tire before firing it up. But this is not the right process. Instead, the air compressor has to be connected afterward. After spraying the tire, fire it up.
Step 4:The tire should automatically pop to fill the extra space on the rim, and it’s beads should be facing inwards. There will be some fire spread across the tire diameter; use the air compressor to blow it off.
Remember that a minimal amount of fire will be there. So don’t be alarmed, and in case things seem to get out of hand, use the fire extinguisher.
Another thing to remember is, when the tire pops out, there will be a sound that can be alarming. Hence, it will be best to keep the kids away, especially if you are working in your backyard.
Step 5:Once the tire has taken the extra space in the rim, use the air compressor to check the tire pressure and, if required, fill in or compress the required volume of air.
That is it. Now you have successfully fitted a small-sized tire on a wide-sized rim.
Frequently Asked Questions Are Stretched Tires Safe?By principle, we are fitting a small tire on a rim that has a size bigger than the tire. So, tire stretching can be safe and unsafe. Having said that, if you are using good quality tires, follow the right process, there is nothing to worry about. In terms of driving, stretched tires can be difficult to handle around tight corners as the tire will have less friction. Also, you won’t be able to use the tires again.
Are Stretched Tires Legal?Until now, we have not seen a law or regulation to dictate the terms and conditions for stretching. It is based on creating tension between the tires and the rim. So, there are side effects of the same. Still, it will be better if you can check out the official websites that explain the laws related to the road and its safety.
Is there any other way to stretch tires besides using fire and flammable spray?Yes, there are a few other methods, but they are not as effective as the fire one. Because driving with stretched tires is a risky thing to do, you should not rely on any method that does not guarantee any results.
tuning blog 1 April 2021 Tips, products, information & Co., Tuning Wiki
If you are interested in a new set of rims and do not necessarily have a typical standard size such as 7,5j x 17 inches in mind, you may already have heard of the term Tire stretch / tire stretching belongs. But what does Tire Stretch / Tire Stretching actually mean? With regard to the topic, the information in advance, many possibilities in this area are only "outside“The STVZO allows. But only as an indication and not as a flat rate! If there is a corresponding tire approval from the tire manufacturer, nothing speaks against one legal use. Mentioned in the release is the corresponding tire size for use on the rim. The exact dimensions are listed there.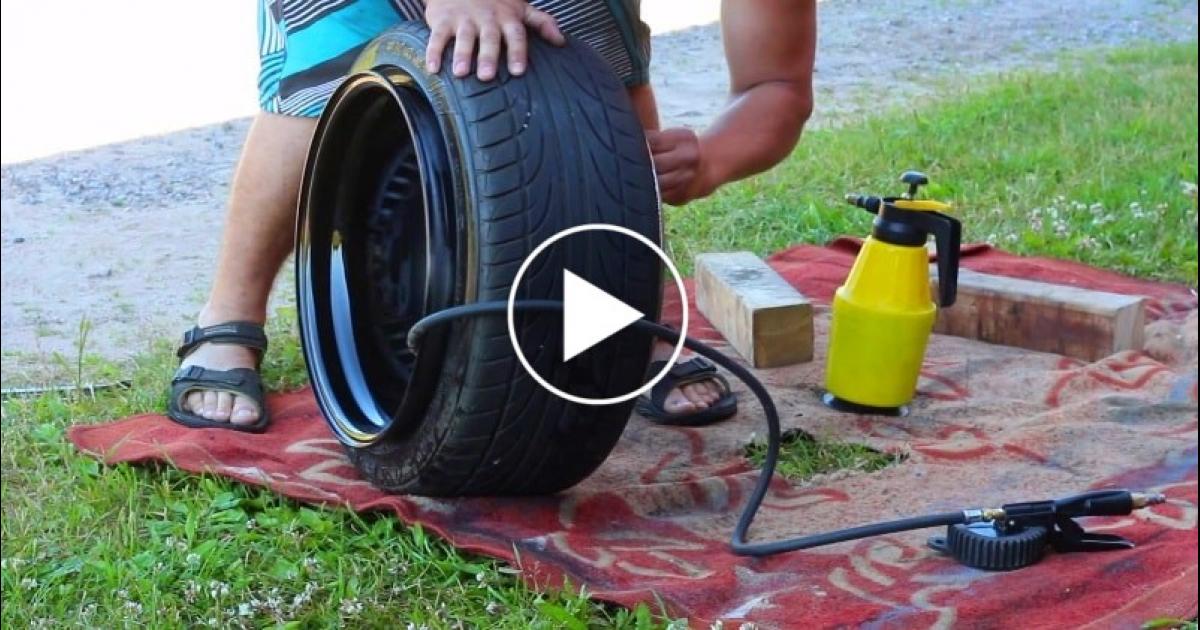 Incidentally, it is not the diameter that is relevant for the tire stretch, but the one Width, the Flank height and the Rim width. How do you get that stretch? Example: the tire has the dimension 255/35 R18 and the rim has the dimensions 10 × 18 inches. So the tire is 255 mm wide and the rim 254 mm. This format is known as level 0! Tire and rim are almost identical and the tire is very straight on the rim.
A seat like youve never seen before...
Please enable JavaScript
A seat like youve never seen before - CUPBucket from the CUPRA Formentor VZ5
To achieve a tire stretch you can use the tire width and the Flank height to a certain extent "play". For example, do you want one Level 1 stretch then you pull a 10/18 R245 tire on the aforementioned 35 × 18 inch rim, or if you want to stay with the 255, then you have to Reduce flank height and put on a 255/30 R18, for example. Both cases allow a stretch of the Level 1. This is a variant that is listed in most reports and therefore can also be used legally and looks good. To any Space problems in the wheel arch perhaps that is one way to fix it.
In principle you can reach that Level 2by taking the dimensions of the tire further down changed. Based on our 10 × 18 inch rim, for example with the tire format 235/35 R18, 245/30 R18 or 255/25 R18. The greater the changes, the greater the changes, of course Rolling circumference. However, this is crucial for the accuracy of the speed display and should must be strictly observed. You should also keep in mind that the tire wall always small becomes and with it the driving comfort and the ground clearance dwindle. Contemporaneous increased also the possibility in terms of Damage on the rim. A possible one flank protection (Rim rib) on the tire then has hardly any effect.
Again and again starting from our 10 × 18 inch rim you reach the Level 3 with even further reduced dimensions from the tire. For example with 225/35 R18, 235/30 R18 or 245/25 R18. Level 3 reduces the tire size of level 0 by three units. At this point at the latest, the issue of permissibility in road traffic must be examined very carefully. Usually level 3 no longer in traffic usable because, apart from the scope, there is also the possibility of Slipping of the tire opens on the rim.
Would you like to go further and get one Level 4 tire stretch reach that is how one speaks of Japanese Sudani style. Here the tire is pulled so far apart that the flank height is barely there and the rim flange partially touches the road. Level 4 is reached with accordingly strong reductions in tire width / sidewall height.
If you attach particular importance to high performance, you should make sure that the tire is on the rim can move. This can be achieved with a "negative tire stretch". This can be achieved by starting from level 0 (Example: 255/35 R18 and 10 × 18 inch rim) the dimensions of the tire are not reduced, but increased. Here it goes into the minus range. For example Step 1: 265/35 R18 or 255/40 R18 on the 10 × 18 inch rim. Step 2 is correspondingly higher but for the racetrack then already no longer suitable. Here the tire becomes unstable and the driving behavior deteriorates significantly. It also looks ugly. And that too Rolling circumference is to be observed here again. The whole topic is well explained again in the following video by West Berlin Customs, from which we also have our information.
PS: Incidentally, you can reach all levels, even if you leave the tire the same, but change the width of the rim accordingly. So 12 × 18, 13 × 18 etc. As mentioned, the diameter plays not matter!Sudani style
We hope that you have received our information report on the topic / term Tire stretch (Other terms / keywords are: negative tire stretch, negative tire stretch, negative tire stretch, negative tire stretch, wheel stretching, wheel stretching, tire stretching, tire pulling, tire stretching, stretch tire, stretched, stretching, level -1 stretch, level -2 stretch , Level 0 Stretch, Level 1 Stretch, Level 2 Stretch, Level 3 Stretch, Level 4 Stretch, Level Principle, Level Principle, Sudani Style, Tire-stretch, Tire Stretching, Tyrestretch) from the Autotuning category. Our goal is to have the largest German-speaking tuning lexicon (Tuning Wikipedia) and to explain tuning technical terms from A to Z easily and understandably. We are therefore expanding this lexicon almost daily and you can see how far we have already come HERE see. And soon the next one will be Tuning scene concept illuminated by us. There's a theme that not can be found in our Wikipedia? Then send us an email at [email protected] and gives us the term. We will write a suitable article as soon as possible. PS. By the way, you will be informed about new topics if you have ours Feed subscriber.
But of course tuningblog has countless other articles on the subject of cars & car tuning in stock. Do you want to see them all? Just click HERE and look around. We would also like to provide you with news aside from the tuning. In our category Tips, products, information & Co we pick up contributions from car or accessory manufacturers. And also our category Test sites, laws, offenses, information has almost daily new information for you.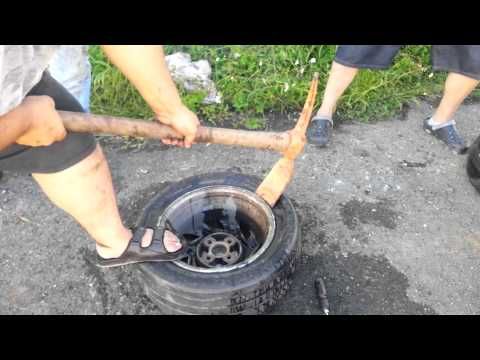 Here are a few topics from our tuning wiki:
"Tuningblog.eu" - we keep you up to date on the subject of car tuning and car styling with our tuning magazine and we present you the latest tuned vehicles from all over the world every day. It's best to subscribe to ours Feed and will automatically be informed as soon as there is something new about this post, and of course also to all other contributions.
Germany.ru → Forums → Board Archives→ Skilled Hands
652
Alexsan patriot 10/28/18 05:53
28.10.18 05:53
Cut a tube out of a bicycle inner tube to put on a vacuum cleaner hose to close the hole. But there is a joint between the metal pipe and the hose with a thickening, and I cannot stretch this piece of the camera through it. I tried heating the camera with hot water and a hair dryer, but it does not help. I don’t want to lubricate with something like oil or silicone grease, because the chamber will then be slippery inside and will slide out of the hole during the kinks of the hoses. What other ways could there be to slightly stretch the rubber to pull it through the thickening?
#1
pschmid native 10/28/18 07:17
NEW 10/28/18 07:17
in reply to Alexsan 10/28/18 05:53
Can't you just wrap and close the hole in the hose with electrical tape? Why rubber? Maybe take a photo?
#2
Alexsan patriot 10/28/18 08:05
NEW 10/28/18 08:05
in reply to pschmid 10/28/18 07:17
I tried it with electrical tape, everything went wrong. Everywhere on the Internet it is recommended that the best way to close a hole is to put a piece of a bike tube on it, which is what I am trying to do.
#3
pschmid native 10/28/18 08:24
NEW 10/28/18 08:24
in reply to Alexsan 10/28/18 08:05
So you need to take a thicker camera. The hose has two ends. Is there a thickening at both ends?
#4
caravelle patriot 10/28/18 08:32
NEW 10/28/18 08:32
in reply to Alexsan 10/28/18 05:53
with soapy water.
the water will dry and will no longer slip.
#5
pschmid native 10/28/18 08:51
NEW 10/28/18 08:51
in reply caravelle 10/28/18 08:32
#6
Alexsan patriot 10/28/18 08:58
NEW 10/28/18 08:58
in reply to pschmid 10/28/18 08:24
The other end is the same.
#7
Alexsan patriot 10/28/18 08:58
NEW 10/28/18 08:58
in reply to caravelle 10/28/18 08:32
Thank you, I'll try!
#8
Osti patriot 10/28/18 11:39
NEW 10/28/18 11:39
in reply to Alexsan 10/28/18 05:53
The approach is wrong. It is necessary not to pull the cuff on the hose, but to push the hose into the cuff stretched between two pins or plates. The stretching method will have to be made from some kind of vise. Or enlist the help of a second person. One stretches with a simple hand tool between two pins, the second pushes the hose
I only explain my duties to you, but I do not limit your rights! (C)
#9
Osti patriot 10/28/18 11:40
NEW 10/28/18 11:40
in reply to Alexsan 10/28/18 08:58, Last modified on 10/28/18 11:40 (Osti)
The second option: a piece of the camera rolls on the hose into a "donut" and this "donut" rolled along the hose to the desired location through all the thickenings.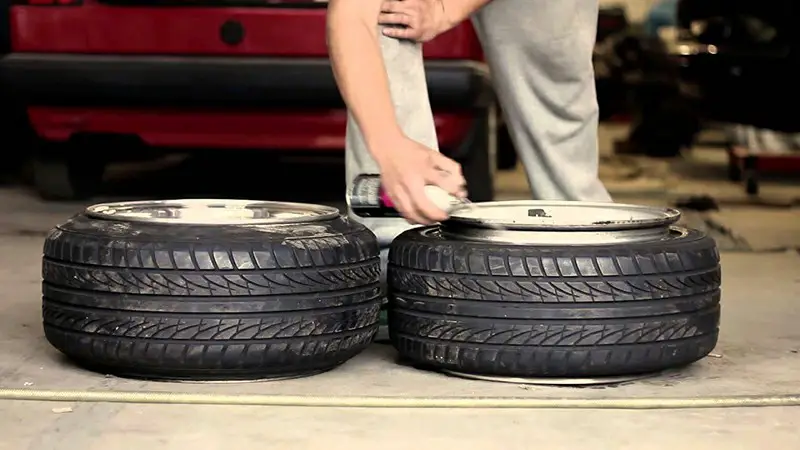
I only explain my duties to you, but I do not limit your rights! (C)
#10
Alexsan patriot 10/28/18 11:42
NEW 10/28/18 11:42
in reply Osti 10/28/18 11:39
This is also an idea, I'll try it, thanks! But it won’t work with a donut, I tried to roll up the edge, it comes out with a lot of tension.
#11
nikolka regular 10/28/18 12:38
NEW 10/28/18 12:38
in reply to Alexsan 10/28/18 05:53
https://www.amazon.de/s/ref=nb_sb_noss_2?__mk_de_DE=Å...
#12
Alexsan patriot 10/28/18 12:54
NEW 10/28/18 12:54
in reply Nikolka 10/28/18 12:38
Thank you, but this is not my choice. Firstly, it is a washing vacuum cleaner and there is a composite hose with an integrated water / steam channel. And secondly, I just want to close the hole neatly, because. I'm selling it as part of clearing the Keller from unnecessary junk. But my conscience does not allow me to sell or donate a faulty thing.
#13
Pentaxist local resident 10/30/18 13:12
NEW 10/30/18 13:12
in reply to Alexsan 10/28/18 12:54
https://www.ebay.de/itm/Schrumpfschlauch-OLEFIN-2-1-schwar...
Don't know Will such an acquisition pay for itself? But it works really cool. On cables, anyway.
The only thing - you need to be careful with the lighter so that the trunk of the vacuum cleaner itself does not burn.
But the advantage is obvious - such a hose takes any shape and fits snugly.
#14
The motorcycle gives a feeling of freedom, allowing you to discover new routes. However, in reality, this freedom can turn into a trap in an instant if you are unlucky enough to puncture a tire somewhere in the middle of the road. The feeling of annoyance will be ten times stronger if there is no way to fix a punctured wheel. At this point, it remains only to hope for cellular communication and help from other drivers on the road. Therefore, consider the basic recommendations for repairing a motorcycle tire on the road.
Always keep a rubber band or tire repair insert in the trunk. This simple tool will add peace of mind on the road. It will be much better if you learn how to use it in advance. You don't want to be the guy who has the right tool but lacks the skills to fix a problem, even something as simple as fixing a tire, do you?
The repair technology for tube and tubeless tires is different, but both types are subject to restoration (at least to such a state as to get home). Repairing a tubeless tire is easier. Repairing a tubed tire requires removing the wheel, removing the tire, and removing the tube to install the patch.
So you run over a nail, screw, glass, or that damned sharp stone and punctured a motorcycle tire. If the object that caused the damage is still in the rubber, the first step is to remove it. Pliers are great for this. Therefore, you should always keep this tool in the trunk: with it, you need to grab an object sticking out of the tire. Try to pull it out along the same path that it entered the tire so that the puncture does not increase and become torn.
After removing the object, clean the edges of the pierced hole. To do this, the repair kit must have a special tool - a tool for cleaning holes. All debris and rough edges must be removed to create a surface for patching.
Then you need to install a patch. Different kits offer different types of patches, so you should read the kit's manual to complete this step correctly. However, there are two main types of patches: long cord patches and fungus patches. Some kits may include adhesive to bond the patch to the tire rubber.
Patches or cord inserts are supplied with an awl for installation. It is necessary to bend the cord in half, and thread one half into the tool. This is necessary for a tight fit of the material. Next, bring the cord into the hole until it protrudes above the tire by about 1 centimeter. Then you can pull it out of the awl and put the tool aside. Take a knife and cut off the excess patch material by about 0.5 centimeter.
Fungus patches (plug and play type) require the use of a special tool for installation. Again, you must follow the instructions for the specific repair kit. Then stretch the patch material with pliers. When the puncture is closed, you can cut the patch over the tire.
After installing the patch, the tire needs to be inflated. For repairs on the road, you will need either a 12V electric compressor that can be connected to the motorcycle's electrical system, or a CO bottle 2 . Carrying a compressor with you is not always convenient. A more compact and more portable option is to use the small cans of CO 2 in combination with the tire inflator. This is the fastest way to inflate tires on the road.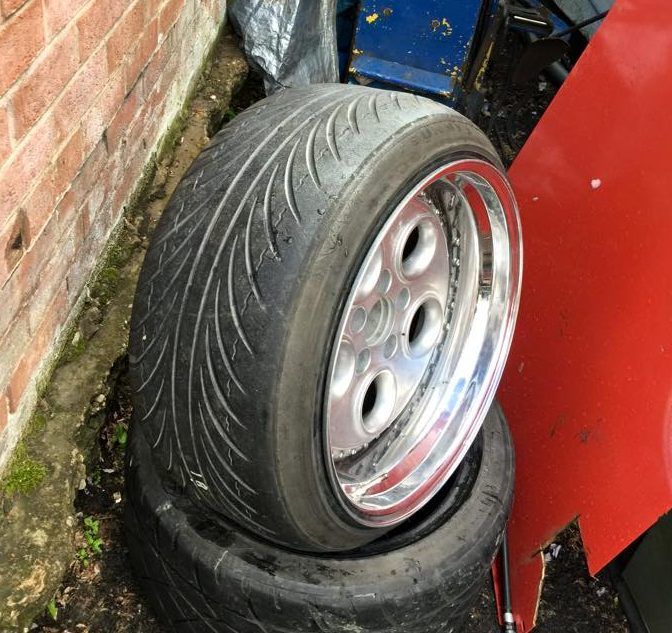
If possible, apply some soapy water to the patch to make sure it is airtight. If there is a leak, you will see tiny air bubbles around the repaired area.
On-road retreading of tube tires is a more labor-intensive process. If your motorcycle is equipped with such tires, then you will need a few more tools to repair them. In most models, you will have to remove and disassemble the wheel in order to get to the camera. The vehicle owner's manual should describe how to do this and what tools to pack in your luggage. In addition, you will need a tire removal tool. It makes the job easier.
Once the inner tube has been removed from the wheel, the remaining air must be completely bled out. The next step is to prepare the camera for patching. The repair kit should include a special scraper to roughen the surface around the punctured hole. This treatment is necessary to ensure adhesion of the patch to the chamber material.
After completing the preparation, you can start installing the patch.