Knowing how to change a tire is a necessary skill for all drivers. If you rely on a cell phone to save you in a roadside emergency, there’s always that chance you will forget to charge it, be out of range, or leave it at home. Flat tires can happen anywhere, and a cell phone is no substitute for knowing how to change a flat tire.
Thankfully, changing a tire isn’t all that hard! Just adhere to the following guidelines to be prepared in case you have a flat.
These items should have come with your vehicle:
Jack
Lug wrench
Fully inflated spare tire
Vehicle owner’s manual
If you have misplaced any of these items, or if your car did not come with these items, you should purchase new ones right away. And be sure you’re regularly inflating the spare tire to your vehicle manufacturer’s recommended PSI. You should check the spare’s air pressure every time you check your other tires.
Remember to check pressure every month and before long trips or carrying extra load.
Here are some items that don’t come with your vehicle but that you should stow in your trunk or glove box in case you have to change a flat tire:
Flashlight with working batteries
Rain poncho
Small cut of 2"x6” wood to secure the jack
Gloves
Wheel wedges
As soon as you realize you have a flat tire, do not abruptly brake or turn. Slowly reduce speed and scan your surroundings for a level, straight stretch of road with a wide shoulder. An empty parking lot would be an ideal place. Level ground is good because it will prevent your vehicle from rolling. Also, straight stretches of road are better than curves because oncoming traffic is more likely to see you.
Never attempt to change your tire on a narrow shoulder near oncoming traffic. Keep moving (slowly) until you find a safer spot. While driving on a flat risks ruining your rim, replacing a rim is better than being hit by an inattentive driver.
Make sure to consult your owner’s manual and review their specific steps on how to change a flat tire for your vehicle
Your hazard lights or “flashers” will help other drivers see you on the side of the road. To avoid an accident, turn them on as soon as you realize you need to pull over.
Once stopped, always use the parking brake when preparing to replace a flat tire. This will minimize the possibility of your vehicle rolling.
Wheel wedges go in front of or behind the tires to further ensure the vehicle doesn’t roll while you fix the flat tire. If you’re changing a rear tire, place these in front of the front tires. If your flat tire is at the front, put the wheel wedges behind the rear tires.
Bricks or large stones will work just as well as “real” wheel wedges. Just be sure they’re large enough to stop the car from rolling.
If your vehicle has a hubcap covering the lug nuts, it’s easier to remove the hubcap before lifting the vehicle with the jack. If your lug nuts are exposed, you can skip ahead to Step 6.
Use the flat end of your lug wrench to remove the hubcap. This will work for most vehicles, but some hubcaps need a different tool to come off. Consult your owner’s manual for proper hubcap or wheel cover removal procedures.
Using the lug wrench, turn the lug nuts counterclockwise until you break their resistance. You may have to use force, and that’s ok. Use your foot or all of your body weight if necessary.
Loosen the lug nuts about ¼ to ½ of a turn, but don’t remove them completely yet. Save that for when it’s time to remove your tire/wheel from the vehicle.
The right place for the jack is usually beneath the vehicle frame alongside the tire that’s flat. Many vehicle frames have molded plastic on the bottom with a cleared area of exposed metal specifically for the jack. To safely lift and avoid damage to the vehicle, follow the instructions for jack placement in your vehicle owner’s manual.
To prevent the jack from settling under the weight of your vehicle and coming off balance, place a small cut of 2x6” wood beneath it before attempting to raise your vehicle. This tactic is especially helpful on asphalt.
With the jack properly positioned, raise the vehicle until the flat tire is about six inches above the ground.
Never put any part of your body under the vehicle during or after raising the vehicle with the jack.
Now it’s time to remove the lug nuts all the way. Since you've already loosened them, you should be able to unscrew them mostly by hand.
Gripping the tire by the treads, pull it gently toward you until it’s completely free from the hub behind it. Set it on its side so that it doesn’t roll away.
Now place the spare on the hub by lining up the rim with the lug bolts. Push gently until the lug bolts show through the rim.
Put the lug nuts back on the lug bolts and tighten them all the way by hand. Once they are all on, check each one again, tightening as much as possible. You will tighten them with the wrench after lowering the vehicle to the ground.
Use the jack to lower the vehicle so that the spare tire is resting on the ground but the full weight of the vehicle isn’t fully on the tire. At this point, you should tighten the lug nuts with the wrench, turning clockwise, as much as you can. Push down on the lug wrench with the full weight of your body.
Bring the vehicle all the way to the ground and remove the jack. Give the lug nuts another pull with the wrench to ensure they’re as tight as possible.
If the hubcap you took from the flat tire will fit your spare, put it in place the same way you removed it initially. If it doesn’t fit, stow it away with the tire when you stow your equipment.
You have before you a jack, a lug wrench, wheel wedges, your flat tire, and possibly a hubcap. Don’t forget to put all of them in your vehicle before driving away.
You should check the tire pressure of the spare tire to make sure that it is safe to drive on. “T-Type” temporary spares, also called “mini-spares,” require 60 psi (420 kPa). If the tire needs pressure, drive (slowly) to a service station immediately.
Temporary spare tires aren’t made to drive long distances or at high speeds, so drive cautiously until you’re able to visit a tire technician. A professional should be able to determine whether your tire needs a repair or if it’s time to replace it.
Aside from taking your tire to a professional, the above procedure shouldn’t take more than 15 to 30 minutes to change a tire. Just be sure you don’t leave out any steps.
It’s beneficial practice changing a tire in your garage or driveway to ensure you’re ready to handle this situation if it ever happens to you.
Knowing how to fix a flat tire is great, but regular tire maintenance is even more important. In addition to reviewing this guide regularly, remember to do the following:
Keep your tires properly inflated
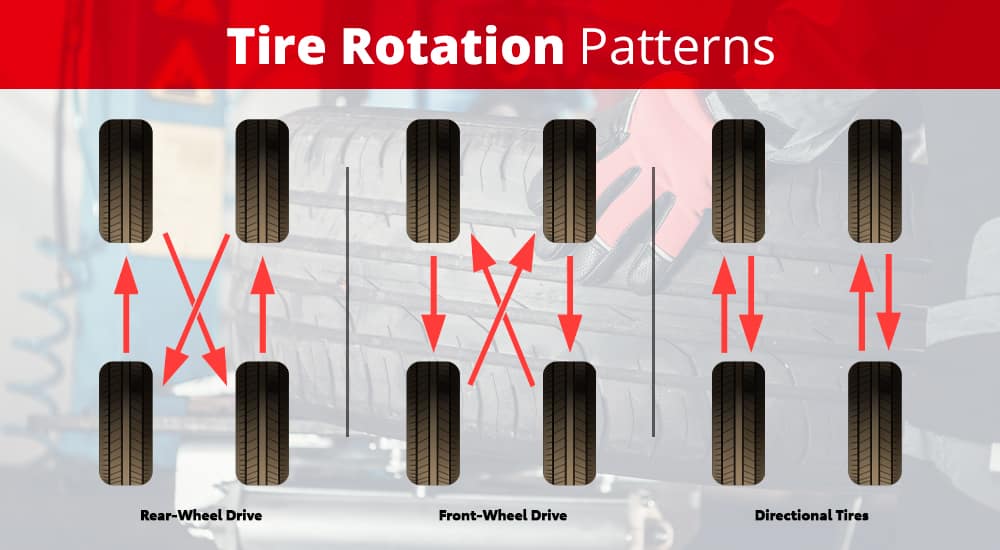
Rotate your tires according to the manufacturer’s guidelines
Monitor for tread wear
All of these precautions will extend the life of your tires and reduce the likelihood of a flat. While there’s no way to prevent flat tires completely, proper care can improve performance and ensure your tires last as long as possible.
There’s never a good time for a flat. That’s why Bridgestone DriveGuard tires are masterfully engineered to keep you moving for up to 50 miles at speeds up to 50 MPH without disruption.
There’s never a good time for a flat. That’s why Bridgestone DriveGuard tires are masterfully engineered to keep you moving for up to 50 miles at speeds up to 50 MPH without disruption.
See Details Find Your Fit
Your browser's Javascript functionality is turned off. Please turn it on so that you can experience the full capabilities of this site.
Changing a flat tire isn’t rocket science, but there are some important things to know to make sure you get that spare on properly in order to make it safely to the tire shop. Follow along as we show you, step by step, how to do it in this Les Schwab Quick Tips video. We cover:
 Make sure it’s pointed the right way and placed in the proper jacking point on the vehicle.
 This assures the wheel isn’t askew, and doesn’t then pop into the proper place while you’re going down the road, loosening some of the bolts and causing wobbling or worse — like the nuts breaking and the wheel coming off.
Spares are meant to be driven on short distances and not at high speed. The speed rating of your spare tire may be lower than your normal tires’. Have a tire technician check the condition of your spare at the shop so it’s ready next time you need it.
Schedule an Appointment
0003Related materials
Tire inflation with nitrogen and 7 more wirings at the tire fitting
The tire manufacturer's instructions say to change shoes when the temperature drops below +7°C. In my opinion, it's too early. There are still a lot of cars with summer tires on the roads around. And at this temperature, the braking distance on studded tires may be even longer.
I advise you to change the wheels to winter ones when the temperature drops below zero at night. That's when it really is time, because in the morning an icy area may come across on the roads. At the same time, out of habit, it will seem very slippery.
Precisely in order to do it at the most correct and convenient time. The vagaries of the weather are unpredictable. Residents of the Rostov region, for example, say that sometimes during the winter period they rearrange the wheels from winter to summer and back several times.
Dismantling wheels (that is, dismantling a tire from a rim) at home is a difficult task that requires appropriate skills and knowledge. We will describe a simpler job that, in theory, any average motorist who does not have special tools and experience in tire fitting should be able to handle.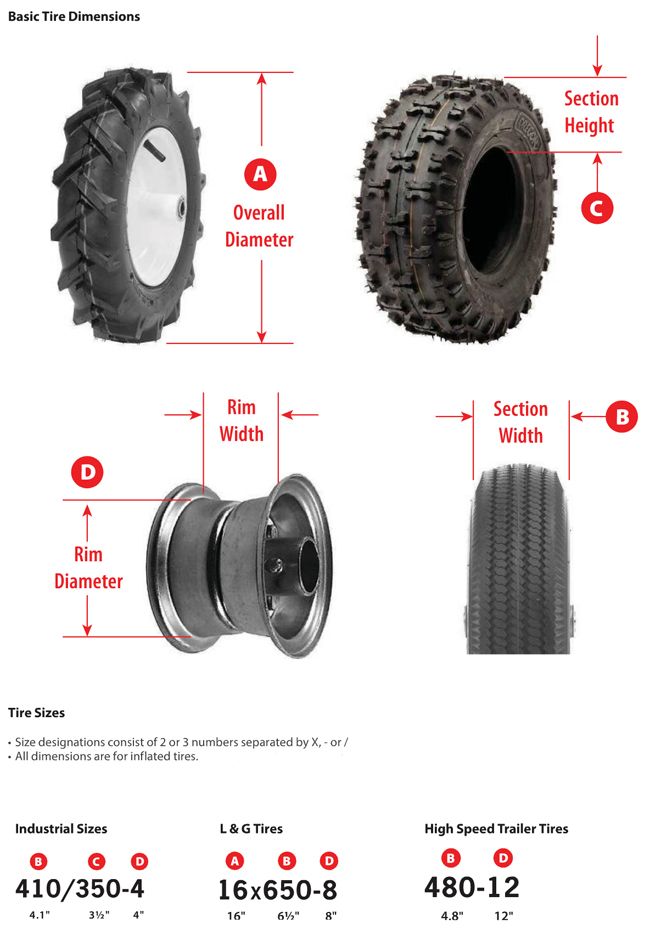 And therefore we mean that you have a complete set of serviceable winter tires mounted on disks. You remember that in the spring they did not lose pressure, there are no cuts on them, and a couple of self-tapping screws do not stick out of the tread in addition to the spikes. And, most importantly, the tread height is more than 4 mm. These are the modern requirements for winter tires. If at least one of the conditions is violated, then it is better to solve the problem before the onset of the hot tire season.
Related materials
If I change wheels, do I need to balance them every season?
There are car owners who meticulously balance tires before each season. In my opinion, this is not justified by anything. I recommend installing the wheels on the car, then drive at different speeds, but not higher than your usual ones. If the imbalance (it is manifested by vibrations on the steering wheel or seat) is not felt, then balancing can be postponed until future seasons.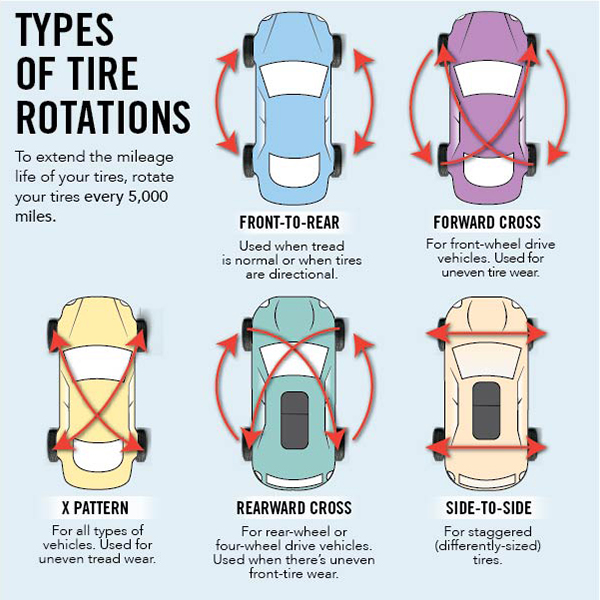 In principle, winter tires can be balanced before being stored for storage: after all, the spring period for changing wheels in tire shops is more extended in time compared to autumn, and therefore the queues are noticeably shorter.
So we take the wheels out of storage. For one, this is the corner of the garage, for the other, a balcony, for the third, the warehouse of the nearest car service that provides a wheel storage service. Depending on storage conditions, tires may have different temperatures. Wheels removed from a warm room, having cooled down by 20 ° C, will lose about 0.2 bar of pressure, and gradually, as they cool down. Well, the cold ones have nothing to lose! Therefore, cold ones can be immediately pumped up to the nominal pressure, well, maybe 0.1–0.2 bar more, given that it will only get colder further. And warm tires must either be inflated with a large margin immediately, or set the pressure at the end of all work, when the air in them cools down..jpg)
If you use a standard jack, it is better to place a special stand under the car for insurance. Well, or at least place the spare wheel so that when it falls, the threshold lies on the rim, and not on the tire. Please note that this will most likely damage the disc. Therefore, it is better to use an old unnecessary wheel.
If you use a regular jack, it is better to place a special stand under the car for insurance. Well, or at least place the spare wheel so that when it falls, the threshold rests on the rim, and not on the tire. Please note that this will most likely damage the disc. Therefore, it is better to use an old unnecessary wheel.
Related materials
Which jack is better? — expert examination of the ZR
We find a flat area with a hard surface. If you change wheels yourself twice a year, then I strongly advise you to get a convenient jack.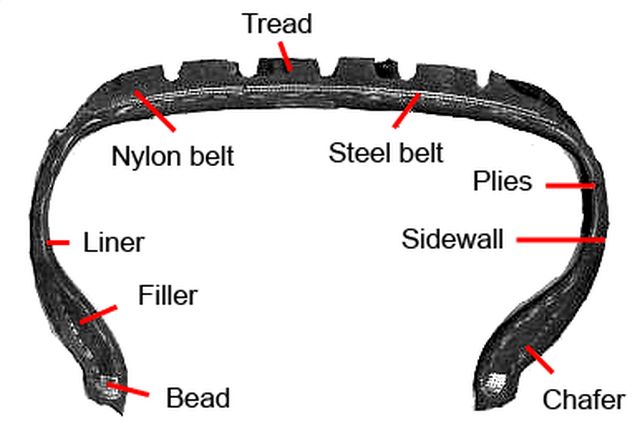 At least small and inexpensive, but rolling. It is noticeably more reliable and durable than the regular one that was equipped with your car. It is advisable to use a balloon wrench with a cruciform or with an extended handle - it is more convenient than the standard one attached to the car.
Prepare a wheel stop - yes, at least half a brick. Inspect the secret key for damaged code elements and clean the secret nuts/bolts on all wheels.
If the winter set of wheels has different disc characteristics, remember if spacers are needed between the disc and the hub lug - they should be prepared in advance.
The wheel jack is based on a hydraulic cylinder. Raises quickly, and lowers even faster.
The wheel jack is based on a hydraulic cylinder. Raises quickly, and lowers even faster.
 The arrow on the sidewall will help us. For installation on the front axle, we try to choose less worn tires.
  We clean the mating surface of the hub from dirt with a metal brush and apply a thin layer of lubricant. Better special, copper.
 Just in case, after the first ride, check the tightness of the wheel fasteners, and the next morning, check the tire pressure.

Our new video
Haval Dargo and Mitsubishi Outlander test (video)
The story stopped there: the test of the last Volga
5 meters, 9 seats, boosted motor... Is that Lada? Yes!
Did you like the note? Subscribe and you will always be in the know!
Driving in Zen
News smi2.ru
The annual replacement of winter tires, as a rule, follows a similar scenario - with the onset of frost, the first snow and ice, drivers take their winter tires from balconies or garages and massively are sent to tire centers or just the nearest tire fitting points.
Winter is coming very soon! It's time to prepare for it properly.
But will the work done in a nameless service be of high quality and safe? How to change summer tires for winter?
Winter tires Nokian Tires and the first snow
Here are some tips from Vianor's experts to make sure you've done everything you need to drive safely on winter roads!
 Don't wait for the cold weather
 Drivers who have lost control of their car in icy or snowy conditions are frequent customers of car services. Both tire fitting and body shop. However, winter tires do not require changing them only when frost sets in. The design of winter tires is such that they begin to work effectively even at an average daily temperature of plus 7 degrees Celsius. And summer tires at this temperature already begin to work incorrectly: the rubber compound hardens and does not provide proper grip.
Do not wait for snow and change tires in advance, based on the average daily temperature.
And don't be put off by the smiles of your neighbors or colleagues who put off changing tires until the last moment - they say, "it's too early." All this was described by the legendary Aesop in ancient Greece in his fable "The Beetle and the Ant", known to us from the translation of I.A. Krylov of her remake from Jean La Fontaine (in the Russian version - "Dragonfly and Ant"). “Summer red sang; I didn’t have time to look back, As winter rolls into my eyes.
It is better to make an appointment at the Vianor tire center in advance, and you will be received at the agreed time and without the need to waste precious time in line.
In Vianor tire centers, the technicians carefully check the condition of the winter tires brought by the customer before starting the replacement. In some cases, we recommend replacing tires with new ones. In some tire shops, unfortunately, they often put the tires brought by the client on the car almost without looking - just pay the money. It is not safe! After all, there is a whole set of signs that the tires have already exhausted their resource and can seriously let you down on the road - up to the complete destruction of the tire, followed by an accident and other sad consequences.
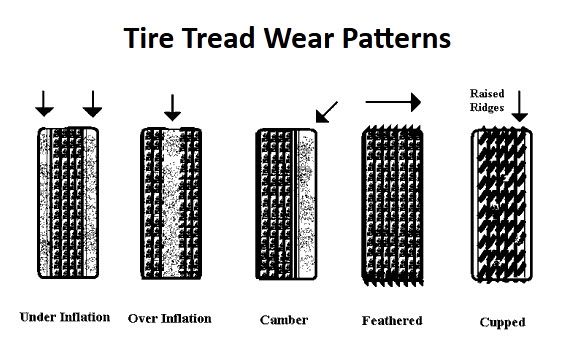
The very first parameter of tire wear is the remaining tread height. According to Russian legislation, for winter tires it must be at least 4 mm. You can check this not only with a caliper, but also with a simple match, the height of the sulfuric head of which is 3-4 mm. When immersing a match between the tread lamellas, the sulfur head must be completely hidden from view.
Most modern tires have built-in wear indicators. Nokian Tires, for example, have a DSI (Driving Safety Indicator) wear indicator on the central block of the tread, showing the value of the residual tread height of the tire in millimeters. The initial tread height of new Nokian Tires winter tires is on average 8-9 mm.
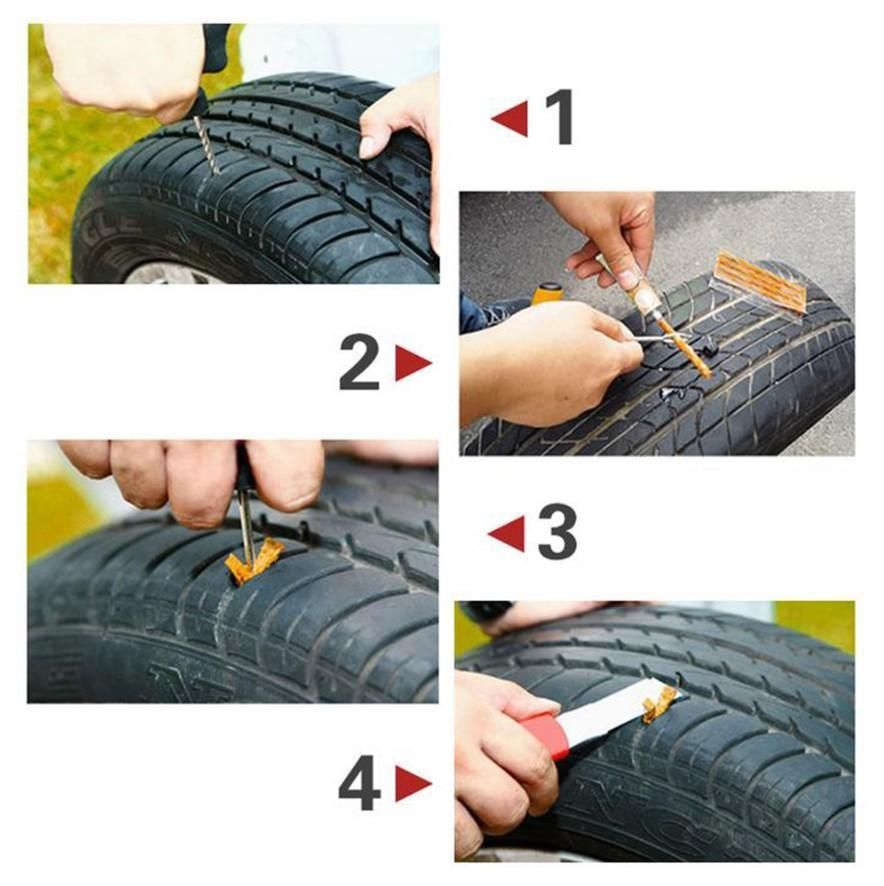
Tread height is not the only thing to consider. Damage such as splitting or cracking of the tread, bulges or other damage to the sidewall of the tire is a clear indication that it needs to be replaced.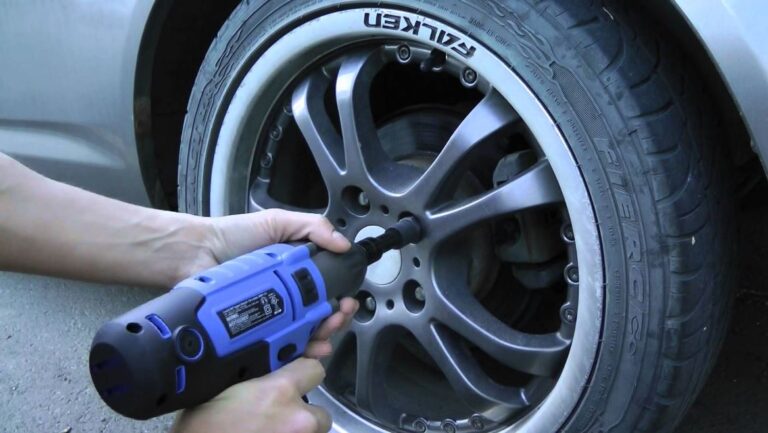 But if a self-tapping screw is suddenly found between the tread blocks, it can be easily repaired. The exception is run flat tires, most manufacturers of which exclude the possibility of repair.
Uneven tread wear should also attract your attention - when the shoulder area is worn much more than the central one and vice versa. In such a situation, variants with incorrect tire pressure or “left” wheel alignment angles are possible - wheel alignment may be required.
In Vianor centers, if such a service is available, they will always help you to make a high-quality wheel alignment
Nokian Tires experts, however, emphasize that a slight difference in the nature of tread wear is acceptable, because tires on a drive axle wear out more in the central part of the tread, while in freely rotating tires, the shoulder part. That is why the company recommends rearranging the wheels from one axle to another every 8 thousand kilometers. Another recommendation from Nokian Tires is that tires in the best condition (with the least wear) should always be mounted on the rear axle of the car and not on the front, even if your car is front-wheel drive. Finnish experts explain this by the fact that in an emergency it will help to avoid skidding of the rear axle associated with loss of traction, which is much more dangerous than skidding of the front axle.
On studded tires, pay attention to the number of loose studs. For example, according to the experts of the tire research and development center "Kama", the loss of more than 10% of anti-skid studs, especially in one tread area, will no longer allow the tire to demonstrate its original characteristics. The company recommends replacing such tires with new ones. Other manufacturers have similar recommendations.
The tire fitting process looks simple, but it is only at first glance - there are a large number of nuances that only a professional can take into account. “By eye” it is not easy for an ordinary person to determine the performance of tire fitting equipment or the qualifications of a master. Therefore, we will show you how a regular winter tire change takes place at one of the Vianor tire centers.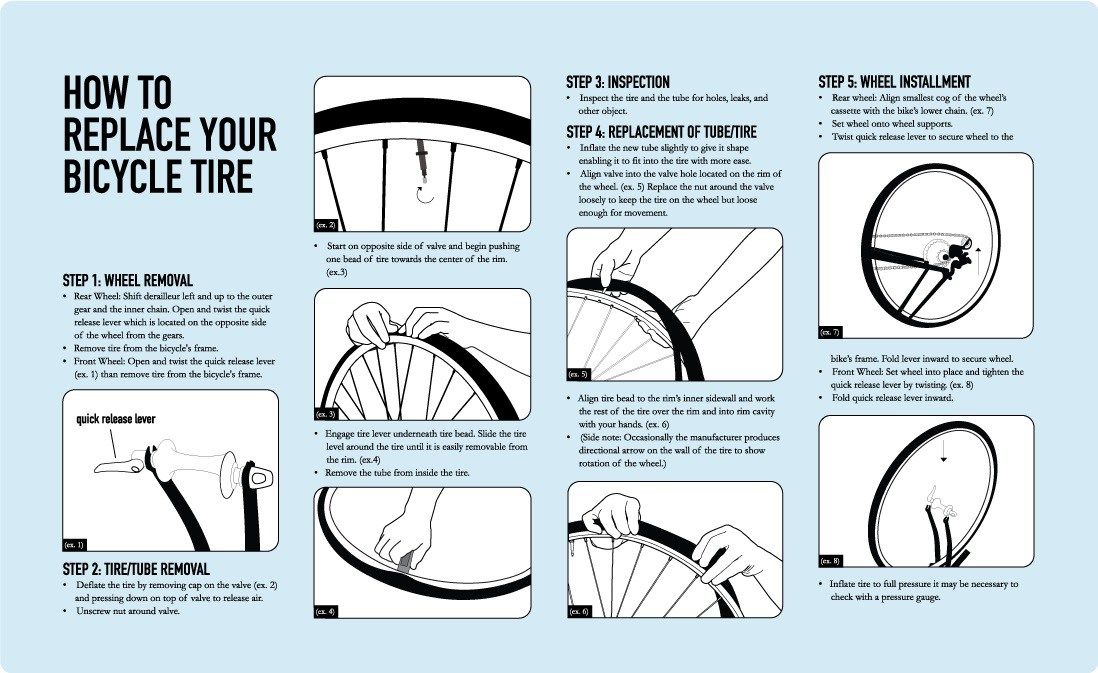
Tire Center Vianor in Moscow at Varshavskoe Shosse, 150
First of all, the car is installed on a hydraulic lift using high rubber buffers to prevent damage to the elements of the bottom of the car. Using rolling jacks is, of course, much cheaper for the service, but unsafe and inconvenient.
Vianor tire centers use modern equipment
Craftsmen use pneumatic tools to unscrew the wheels, passing them to the washing area.
Tire washing. In the largest Vianor tire centers, one lift has its own individual car wash, tire changing and balancing machine, as well as a complete set of tools. This means that work can take place simultaneously at several posts.
Specialized automatic car washes, which use a special shampoo, allow you to clean the wheel from reagents and other contaminants - so the customer's summer tires will be clean and the wheels will be maximally prepared for tire fitting work. Even a small piece of adhering dirt or bitumen can adversely affect tire balance.
After washing, the wheels are dried with compressed air and transferred to the tire changer. The wheel is carefully disassembled. The valve is changed to a new one - far from all tire shops do this, however, the poor condition of the valve is especially often the cause of a “sudden” loss of pressure in the tire.
Replacing the valve with a new one
We recommend changing the valves every time you change tires - it's not expensive at all. By the way, valve replacement is sometimes included in the free tire fitting service, which we offer to customers during the promotion period, when purchasing a number of tire models.
The next step: a new tire is installed on the disk, taking into account the direction of its rotation, if the tire is directional.
Installing a winter tire on rim
The assembled wheel is then sent to the balancing machine. In the Vianor tire center on Varshavskoe Shosse, the most modern and efficient machines are precise and easy to use.
Depending on the design of the rim, as well as the existing imbalance, the master sets the weights of the required type and weight.
Wheel balancing
The contact surface of the spoke and stud is cleaned and lubricated with special grease. It protects the connection between the hub and the disc from corrosion and sticking. The wheels are pre-spun using pneumatic tools.
The so-called copper grease protects the hub-rim connection from corrosion
The tires are set to the pressure recommended by the vehicle manufacturer. Please note that some winter tire manufacturers advise increasing tire pressure in winter - they recommend keeping winter tires at 0.2 bar (20 kPa) more pressure than summer tires.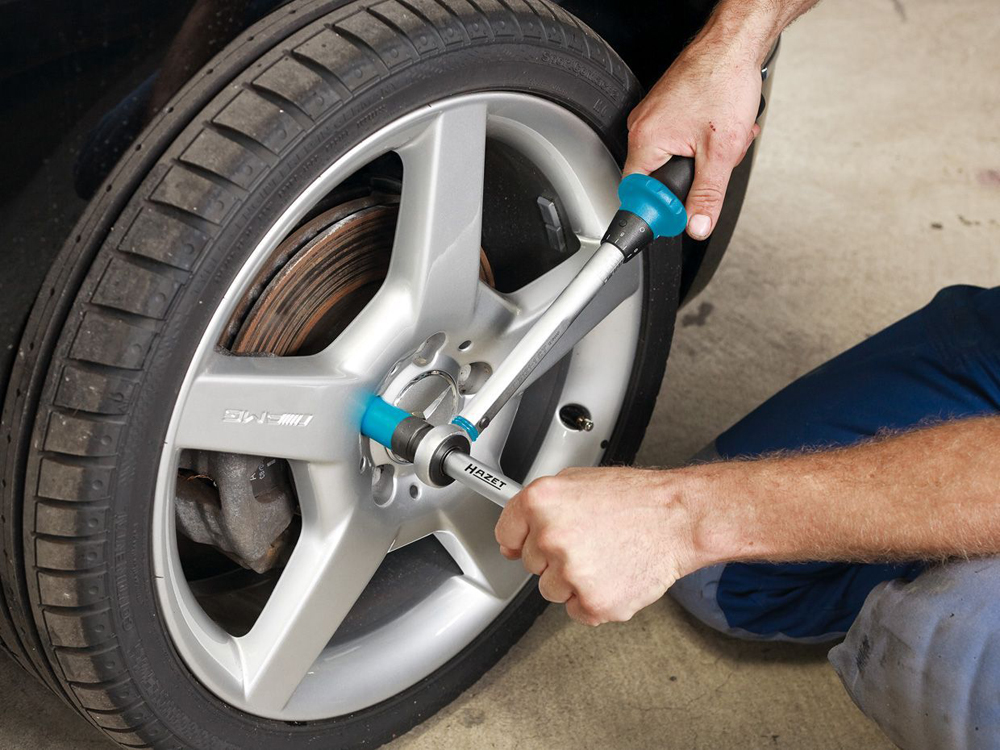 The tire pressure must always be checked with cold tyres.
The last step, if you do not take into account the neat packaging of summer tires in branded bags and then in the trunk of the client, is the final tightening of the wheel nuts. This process is carried out with the car standing on the floor of the workshop strictly using a torque wrench adjusted to the correct tightening torque.
Hand tightening of all wheel nuts with a torque wrench is very important.
This eliminates two possible serious problems at once - overtightening of the studs, and, conversely, insufficient tightening of the threaded connection. The first option can lead to the breakage of the stud, the second - to the loss of the wheel on the move. When performing tire fitting work in Vianor tire centers, you will not encounter such problems.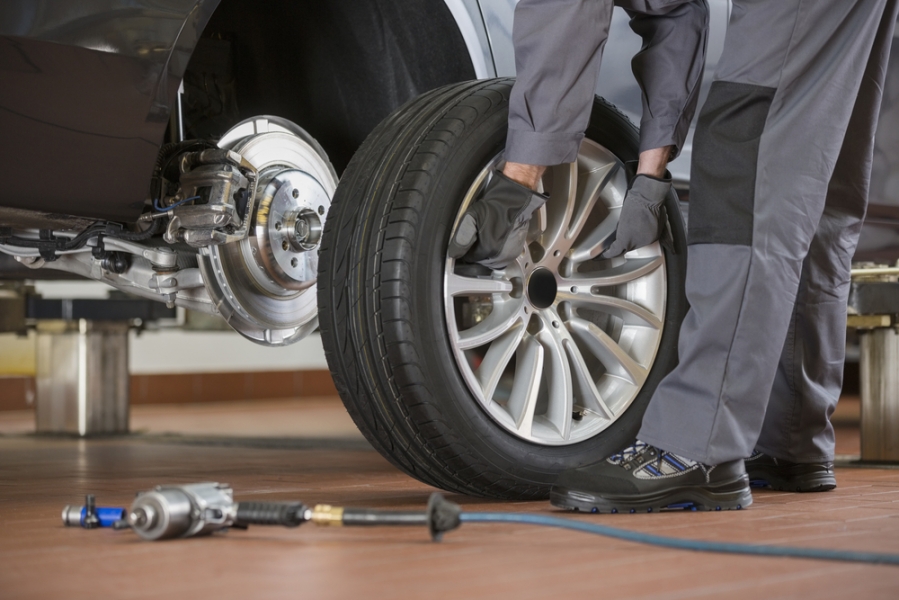
To prolong the life of your new winter tires, we recommend avoiding sudden acceleration, braking and cornering as well as high speed driving for the first 500 kilometers. This is especially important when using "studs" - the seats for studs on most of these tires are designed in such a way that for the final "landing" of the stud, the tire must be "rolled" to avoid premature loss of studs.
It is possible to get into an accident on a slippery road with good tires, if you do not take into account the decrease in the level of grip with the surface, speeding, not keeping your distance and making dangerous maneuvers. We encourage careful driving all year round.
Careful driving after tire fitting has another hidden meaning - adapting the driving style to the road conditions that have changed after the cold snap. Most of the so-called "tinsmith days" happen for two reasons - the driver delays the moment of changing tires until the last moment, and the loss of winter driving skill, which implies a much lower base level of grip on the surface.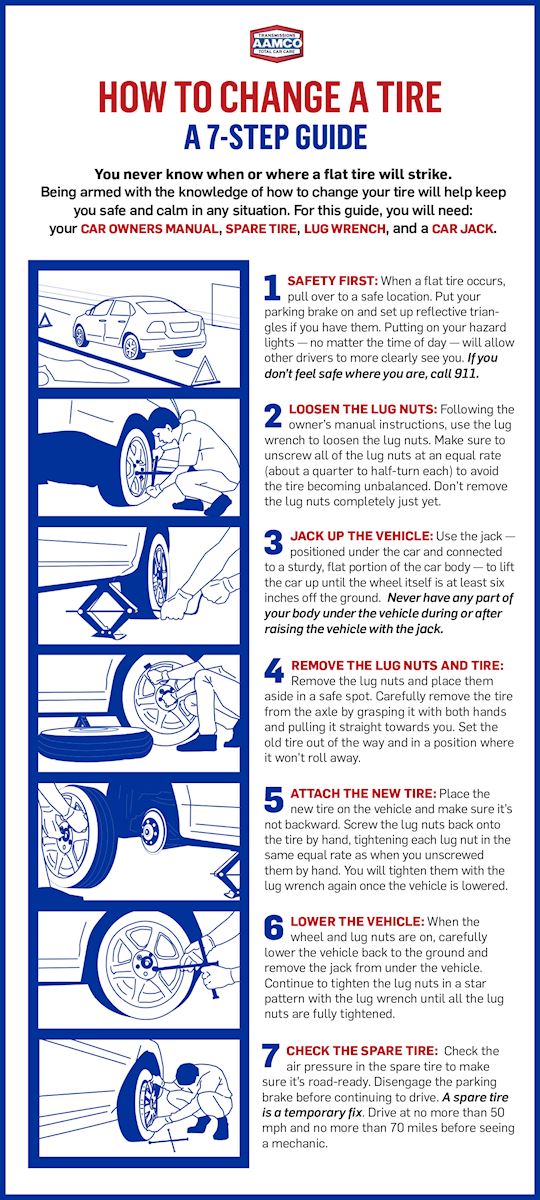
Unfortunately, not all car owners think that storing winter tires on the balcony is not the best possible idea. Temperature fluctuations, direct sunlight and storage of dismantled tires in a pile can quickly destroy even the best tires.
Proper storage of tires looks like this: tires without rims are stored on a rack or a special wooden stand; once every two weeks they must be rotated by 90 degrees (quarter of a turn) for protection against deformation. Long-term storage of tires in a stack or hanging is unacceptable. Complete wheels, on the contrary, cannot be stored standing up - only in a stack or suspended. When stored in a stack, tires should be repositioned once a month.
Tires must be kept clean, a special tire preservative may be used. Tires should be stored in a cool, dry place at temperatures between 0 and 15 degrees Celsius. Exposure to direct sunlight and moisture is excluded, placement of tires near heating radiators.