Please enable javascript to view the website ..
Repair help > Front-Engine Lawn Tractor repair > Front-Engine Lawn Tractor repair guides
January 1, 2015
By Lyle Weischwill
This step-by-step repair guide explains how to change a front tire on a riding lawn mower if the old tire is damaged beyond repair. Replacing the front tire is fairly easy; you just need a few tools and a manufacturer-approved riding mower part.
Follow the steps in this repair guide and video to replace the front tire on Craftsman, Husqvarna, Toro, Troybilt, Ariens, Poulan, MTD, Murray, Snapper, Yard-Man, John Deere and Weed Eater riding mowers and lawn tractors.
If you'd rather use tire sealant to repair the tire, the video How to Repair a Riding Lawn Mower Tire shows how.
Quick links
Tools required
Floor jack or bottle jack
Jack stand
Slot screwdrivers
Pry bars
Pliers
Valve stem core removal tool
Liquid detergent
Water
Wood blocks
Work gloves
Safety goggles
Compressor air supply
Repair difficulty
Time required
60 minutes or less
Repair difficulty
Time required
60 minutes or less
Replacing a front tire on a riding lawn mower
This video explains how to replace the front tire on a riding lawn mower.
01.
Park the riding mower on a level surface and set the parking brake.
Turn the ignition switch off and remove the key.
Wear work gloves to protect your hands and safety goggles to protect your eyes.
Lift the riding lawn mower hood and disconnect the spark plug wire.
Lower the tractor hood.
Tip: Disconnect both spark plug wires if your engine has 2 cylinders.
PHOTO: Disconnect the spark plug.
02.
Block the rear tires to keep the riding mower from rolling.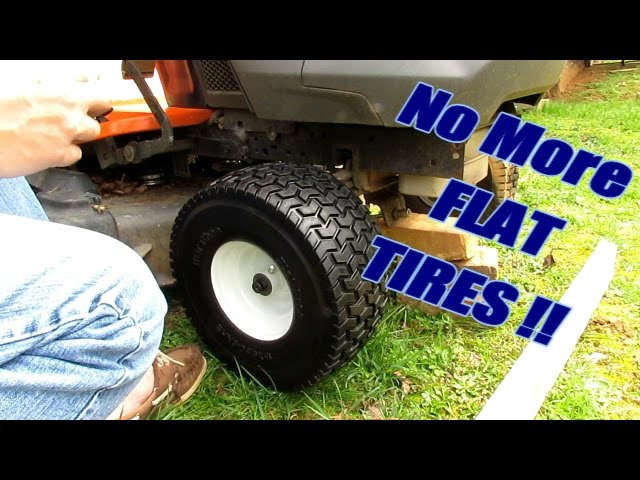
Position the jack under the frame and jack up the riding mower to raise the front wheel.
Place a jack stand under the frame to support the riding mower.
Remove the jack.
PHOTO: Block the rear wheel.
03.
Pull off the axle cover.
Remove the retaining ring and then pull off the washers.
Pull the tire off the axle.
PHOTO: Remove the front wheel.
04.
Remove the valve stem cap.
Remove the valve stem core, which lets any remaining air out of the tire.
Break the tire bead and pry the tire off the wheel rim on one side.
Pry the tire off the rim on the other side.
PHOTO: Pry the tire off the rim.
05.
Clean the wheel rim.
Set the new tire flat on a work surface.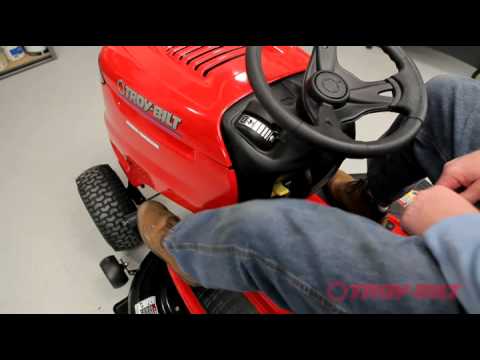
Lubricate the top tire bead with liquid detergent.
Pry the rim into the top side of the tire.
Flip the rim and tire over.
Lubricate the tire bead with liquid detergent.
Pry the remaining side of the tire onto the rim.
Warning: Use blunt tools to pry the tire to avoid damaging the new tire bead.
PHOTO: Lubricate the bead.
06.
Fill the tire with air to seat the tire bead.
Reinstall the valve stem core.
Fill the tire fully with air.
Tip: If the tire didn't fill with air, install a ratcheting tension strap around the center of the tire tread, tighten the strap to force the beads outward, and fill the tire with air to seat the tire bead. Carefully release and then remove the strap.
Tip: If the bead doesn’t seal, check the rim and replace it if you find damage.
PHOTO: Shoot air into the tire.
07.
Slide the wheel on the axle.
Reinstall the washers and snap the retaining ring onto the axle.
Push the axle cover onto the wheel.
PHOTO: Reinstall the wheel.
08.
Push the jack under the frame and raise the riding mower, and then pull out the jack stand.
Lower the riding mower to the ground.
Remove the wood blocks from the rear tires.
09.
Raise the tractor hood.
Reconnect the spark plug wire and lower the hood.
Tip: Reconnect both spark plug wires if your engine has 2 cylinders.
Warning: Undertaking repairs to appliances can be hazardous. Use the proper tools and safety equipment noted in the guide and follow all instructions. Do not proceed until you are confident that you understand all of the steps and are capable of completing the repair. Some repairs should only be performed by a qualified technician.
Choose a symptom to see related riding mower and lawn tractor repairs.
Main causes: punctured tire or inner tube, leaky valve stem, damaged wheel rim
Read moreMain causes: worn or broken ground drive belt, bad seat switch, transaxle freewheel control engaged, transaxle failure, dirty carburetor
Read moreMain causes: shift lever needs adjustment, neutral control needs adjustment
Read moreMain causes: worn or broken blade belt, broken belt idler pulley, blade clutch cable failure, bad PTO switch, damaged mandrel pulleys
Read moreMain causes: damaged cutting blade, worn deck pulley, damaged mandrel pulley, loose fasteners on mower deck components
Read moreMain causes: engine overfilled with oil, leaky head gasket or sump gasket, damaged carburetor seals, cracked fuel pump, broken fuel line
Read moreMain causes: clogged carburetor, damaged flywheel key, dirty spark plug, stale fuel, improper valve lash, engine needs a tune up
Read moreMain causes: faulty battery, bad alternator
Read moreMain causes: unlevel mower deck, dull or damaged cutting blades, worn mandrel pulleys, bent mower deck, engine needs tune up
Read moreThese step-by-step repair guides will help you safely fix what’s broken on your riding mower or lawn tractor.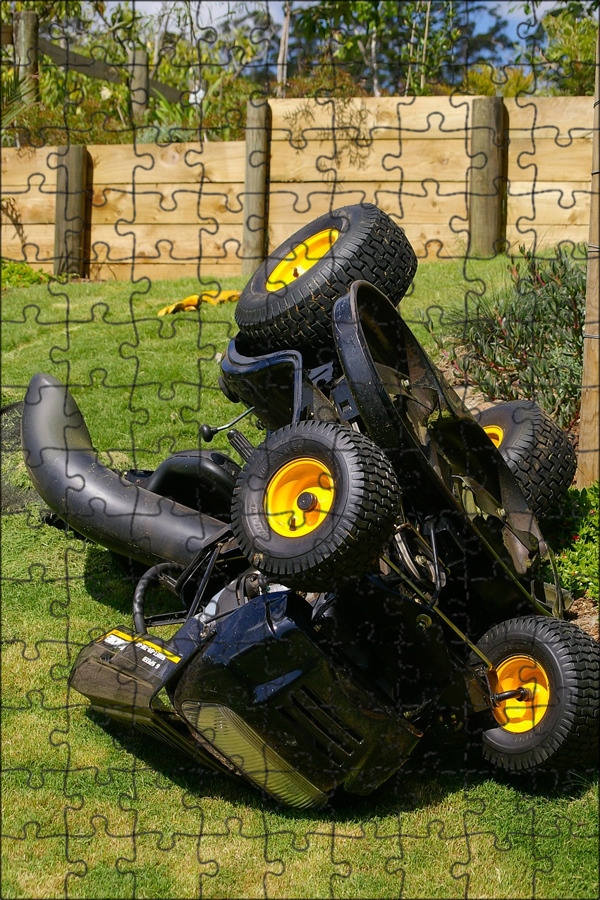
January 1, 2015
By Lyle Weischwill
Your mower can’t run on a damaged rear tire. Here’s how to install a new one.
Repair difficulty
Time required
60 minutes or less
Read moreJanuary 1, 2015
By Lyle Weischwill
If a blade on your mower is dull or bent, replace it following the steps in this repair guide.
Repair difficulty
Time required
30 minutes or less
Read moreJanuary 1, 2015
By Lyle Weischwill
Help your mower run better by replacing the fuel filter during your riding mower's annual tune-up.
Repair difficulty
Time required
15 minutes or less
Read moreUse the advice and tips in these articles and videos to get the most out of your riding mower or lawn tractor.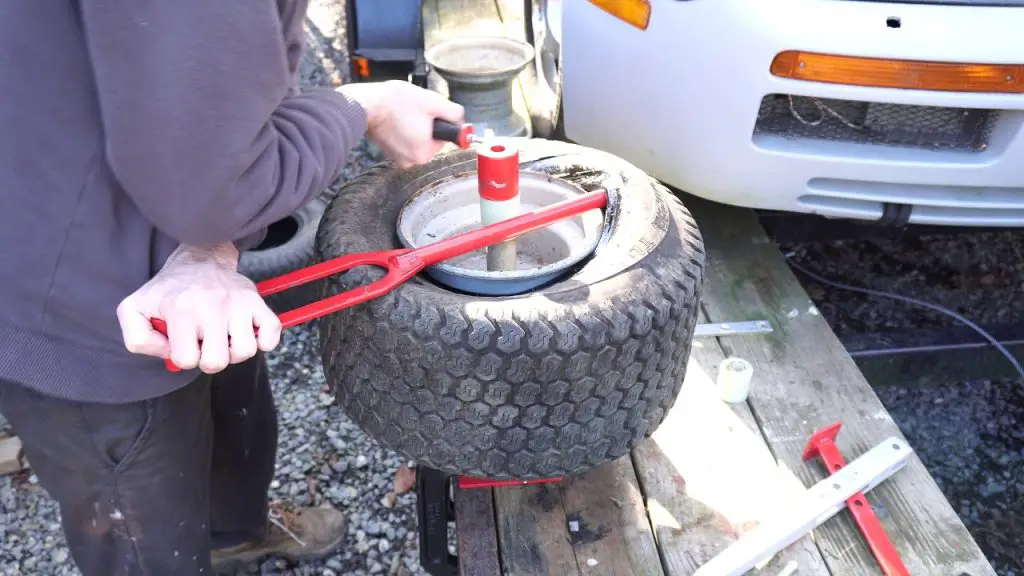
August 5, 2022
By Lyle Weischwill
Learn about Sears Technical Institute and the advanced technical content being developed for aspiring appliance techs.
Read moreAugust 6, 2020
By Lyle Weischwill
Learn how a blade removal tool makes replacing the blade easier and safer
Read moreApril 9, 2019
By Lyle Weischwill
Keep these 6 things on hand to keep the mower season running smoothly.
Read moreSamsung DVE52M7750V/A3-00 dryer parts
Shop GE JBP70WK4WW electric range partsShop Maytag MET8885XB02 electric range partsShop Kenmore 79096419406 electric range parts
Shop KitchenAid KEBS177YAL2 electric wall oven parts
Shop Model #917274961 Craftsman lawn tractor
Weatherking Furnace Repair Parts
Shop Craftsman 13953918D garage door opener parts
Shop Magic Chef 83EY-1 gas range partsShop Model #NX58K3310SS/AA-00 Samsung gas slide-in range
Shop MTD 31AS6HEG799 gas snowblower parts
Shop Craftsman 137212290 miter saw parts
Refrigerator Door Bin DA63-08646A
Refrigerator Parts CraftsmanNorge Refrigerator Repair Parts
Craftsman Snowblower attachment Repair Parts
Kenwood Speaker Replacement Parts
Shop Roper RT18HDXJW00 top-mount refrigerator parts
Shop Model #6209SR Roadmaster sidewalk wagon
Craftsman 12512008 wet/dry vacuum parts
If you’ve had a lawn mower for more than a couple of seasons, chances are you’ve had a flat tire. In this article, we’re going to tell you how to get a flat tire back on the rim and how to change a tire if you need to.
With our step-by-step guide—lawn mower tire flat & off the rim? Here’s how to fix it, you’ll be back to cutting your lawn in no time.
A tire that’s slipped off the rim is never a wanted sight!Using simple tools and a few helpful tricks, you can get your tire back on the rim or replaced. With a little effort and minimal cost, your mower will be ready to go again.
Want to know how to get your lawn mower tire back in working order? Let’s get stuck in.
For this repair, you’ll need a few tools. And if you need to replace the tire, a few more. For both repairs, don’t forget your safety gear. Here, we’ve listed what each job requires:
Not all flat tires are created equal.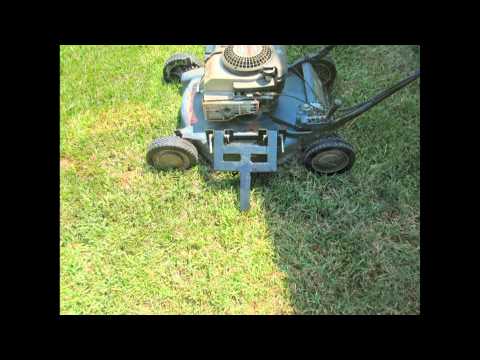 Sometimes a flat caused by a very slow leak or just time can simply be reflated. And it will last a good while until next time. But sometimes a flat causes the tire to come off the rim of the wheel, and this requires a more complicated fix. And in the worst case, with a damaged or worn-out tire, you’ll need to replace it.
No matter if your tire is just off the rim, or needs replacing, we’ve got you covered. Here is our step-by-step guide to fixing a flat on your lawn mower. Steps 1, 2 and 3 are required for both fixes. After that we’ve split the instructions depending on whether you’re putting it back on the rim (steps 4a to 7a) or changing the tire (steps 4b to 10b).
I know it’s obvious, but we’re nothing if not complete. Make sure your mower is on a flat surface. Then turn off the mower and remove the ignition key. It’s a good idea to chock the wheels as well.
What might not be so obvious, is that we highly recommend you remove the spark plug cable as well. Removing the cable means there is no chance of the blades moving while you’re fixing your flat. It’s never wasted time to do things safely.
In order to get to your tire, you’re going to need to jack up the mower. Any jack will do as long as it’s rated for more than the weight of the mower. We would recommend fixing your flat on a hard surface, driveway, garage or shed. But, if your mower is still on grass, and you’re using a bottle jack, you’re going to need to put wood under the jack to stop it from sinking into the grass.
Jak up the mower so your tire spins freely. You want enough height to make it easy to get your hand underneath the tire. Once you’ve reached the required height, support the mower with a jack stand.
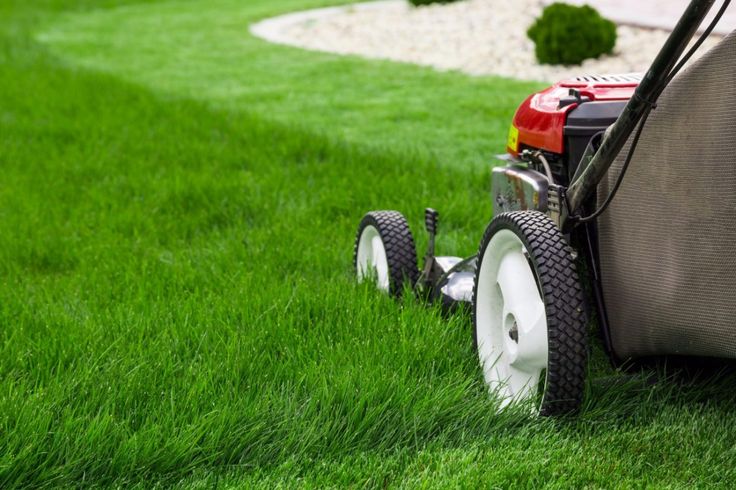
You need to check the tire for obvious damage, holes or sharp objects. If it helps, put a little chalk mark on the tire. Carefully roll the wheel round, inspecting both side walls and the surface for damage. When your chalk mark comes back around, you know you’ve covered the whole tire.
If you can’t find any obvious holes or damage, and the tire is not completely worn out, you can try putting it back on the rim, inflating it and seeing if it holds. If the tire is punctured, ripped, or completely worn out, you’re going to need a replacement.
These days most mower tires are tubeless. That means there is no inner tube inside the tire that holds the air. Instead, the air is held inside the tire by a seal formed between the tire bead and the rim.
In order to refill a tire where the bead has come off the rim, you first have to create a seal between the bead and the rim.
The easiest way to do this is to apply pressure to the surface of the tire. This pushes the bead outwards and helps create the seal you need. On used tires, it’s usually not possible to do this by hand. So instead, we can wrap a ratchet strap or a rope around the tire and use that to help.
Get your ratchet strap around the tire and ratchet it a few times to apply pressure. This pushes the middle of the tire down and the sides outwards.
Once you’ve applied a bit of pressure, try pushing the sidewalls near the rim. If the bead seems solid against the rim, you can start adding some air and seeing if you have a seal.
If air still escapes from the sides and the tire won’t inflate, ratchet a couple of times on your strap and see if that helps. Once you have a seal, inflate the tire enough to keep the pressure on the bead so that you can remove the strap.
After removing the strap, you can continue to inflate the tire. The optimum tire pressure will be on the tire wall. And that is the number to aim for. Usually it’s between 15-40psi and often around 20psi.
Make your to check the tire and inflate to the right pressure.Make sure you check your tire and inflate to that pressure. Under or over inflating can increase tire wear, decrease grip, and increase the chance of a puncture or blowout.
That’s it, your tire is back on the rim and fully inflated. Re-insert your jack and raise the mower enough to remove the jack stand.
Lower the mower back onto all its wheels. We recommend letting it stand for a few minutes before moving it. This way you can wait and see if your tire will keep pressure.
Once your happy everything is working, don’t forget to reconnect the spark plug wire and remove any chocks on the other wheels.
So, you’ve inspected the tire and decided to replace it. Now you need to remove the wheel. Take off the axle cover if there is one. Underneath will be a retaining ring. Use a slot screwdriver or pliers to pull it off.
Now you can remove the washer and pull off the tire. Beyond the tire is an inner washer. It’s best to pull that off as well. Make sure you put your two washers and the retaining ring somewhere safe. It’s really annoying to find you lost one when it’s time to put the tire back on.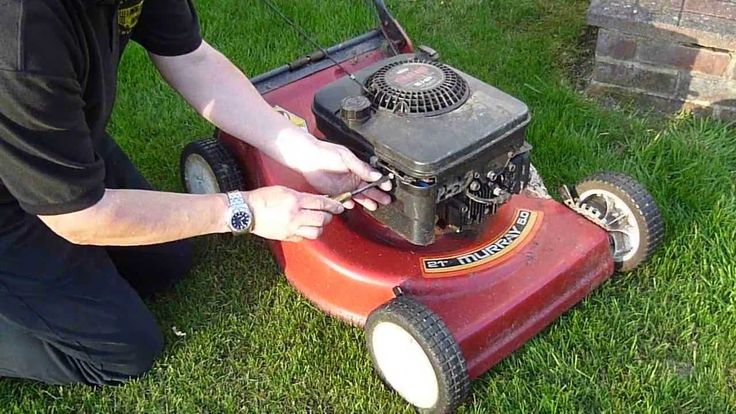
Take the tire and lie it flat with the valve facing upwards. Remove the stem cap and use the stem core removal tool to unscrew and pull out the core.
Push down on the tire to dislodge the bead. Using a couple of slot screwdrivers, pry the tire up and off the rim on one side. Take your time. Pry a little of the bead up, slide another screwdriver next to the first and pry a bit more. Continue around the rim until the whole side is free. Flip the tire over and do the same again so that you can pry the tire completely off the rim.
While you’ve got the rim separate, give it a clean. Removing any dirt and grime will give a better seal between the new tire bead and rim.
Now it’s the reverse procedure from removing the tire. Using your slot screwdrivers (and make sure there are no sharp edges that could damage the tire) pry one side of the tire onto the rim. Flip it over and pry the other side on.
Flip your tire vertical again and find your compressed air.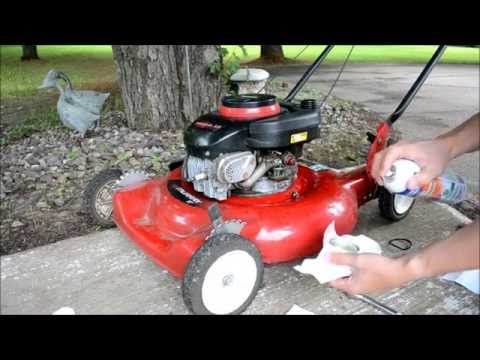 With a new tire, and not attached to the mower, it shouldn’t be necessary to use a ratchet strap or rope to get the bead to seal.
Push down a little on the tire and start to inflate. The bead should seal. Once you’re happy you have a seal, re-insert the valve stem core.
With the valve stem in, you can continue inflating the tire to the optimum tire pressure. Remember to check the optimum pressure on the tire wall and only fill to this value. As we said above (step 6a), over or under inflating a tire is not a good idea.
Using the reverse procedure from taking off the wheel, you can now re-install it. Find your washers and the retaining ring.
Put the back washer on first and then slide on the wheel. Add the front washer. Using pliers, put the retaining ring back on the axle and then replace the axle cover.
That’s it, you have a new tire. Re-insert your jack and raise the mower enough to remove the jack stand. Lower the mower back onto all its wheels.
Once your happy everything is working, don’t forget to reconnect the spark plug wire and remove any chocks on the other wheels.
Well done! You have fixed your mower tire and are ready to get back to your lawn.
I hope this guide has been useful to you. Whether you’ve put your tire back on the rim or replaced it completely, following our step-by-step guide should get your mower back on the grass in no time. Happy mowing!
0185103CM Cutting deck (A)
103CM Cutting deck (B)
Hydraulic pump
Engine
Wheels and tires
Housing, rear (A)
Housing, rear (B)
Housing, rear (C)
Cover (A)
Cover (B)
Cover (C)
Stickers
Pedals
Frame
Height adjustment
Steering
Seat
Fuel system
Transmission (A)
Transmission (B)
4 340 rub
Article: 5782950-03
Buy
Set of ignition lock with a key for the Husqvarna R 316T AWD
2 570 rub
902 902 902 902 CHARDOMILA: 5799433Holder of gas cables and shutters for rider Husqvarna R 316T AWD
2 810 rub
is not available
Articles: 5780234-01
Report about the receipt of
3 220 rub
is not available
Article: 5443017-06
Report the receipt of
cover for the Husqvarna R 316T AWD
2222222222 Report about the receipt of
Gaika for the Husqvarna R AWD
9000 2 430 rubArticle: 7312320-01
Buy
Fuel tank cover for the Husqvarna R 316t AWD
9000 2 600 rub0185Out of stock
Reference: 5842487-02
Notify me when it arrives
All Parts for HUSQVARNA R 316T AWD
Can't find the part you need?
Request a call back
Disassembly is performed differently in different models and brands of washing machines, but we omit all the nuances.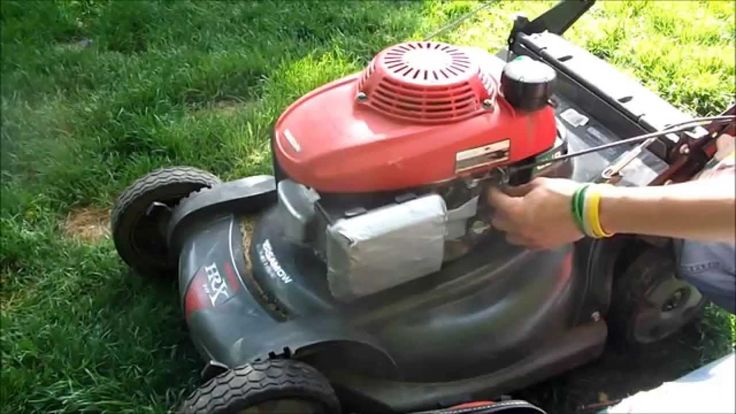 Detailed instructions can be found in the videos. So, the tank has been dismantled - now the task is to pull the drum out of it in order to get to the immediate location of the bearings.
In the case when it consists of two halves, it is already easier: just unscrew the fixing screws or bolts, remove the latches. But some manufacturers save on fasteners by gluing both halves with glue of a special composition - in this case, you will have to pick up a hacksaw.
Before pulling bearing out of the hub, you must remove the drum.
If you have a collapsible tank, simply unscrew the screws around the perimeter and remove the top.
If the tank is soldered, you will have to cut it. To do this:

After hitting the bush several times with a hammer, push the drum out of the tank section.
Now you will learn how to remove the bearing from the drum shaft of the washing machine without a puller:
In order to somehow knock out or remove the inner bearing race of the washing machine, you can apply the same method, only directed not at the outer, but at the inner ring of the part. This method can be used if the part cannot be removed using a conventional puller.
However, this raises another question: how to remove the remaining outer bearing race? You can also knock it out or try to pry it off with a puller.
After dismantling, clean the seat - you've done the job. If the part was defective, install a new one in place.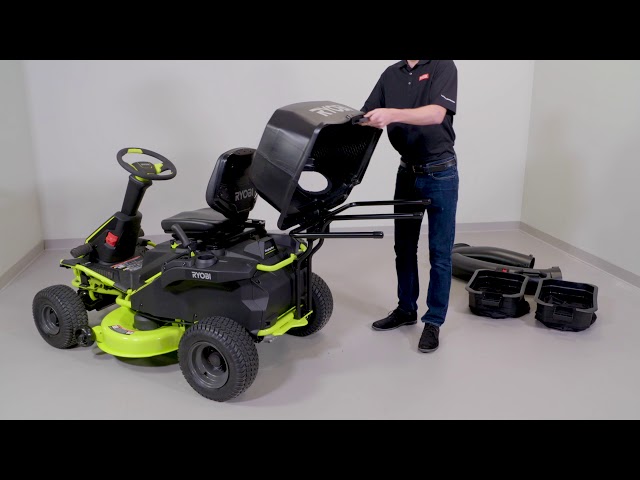 Lubricate the sawn drum with sealant around the edges and connect the two parts. Fasten it with screws.
Now you know how to knock out and remove the bearing from the washing machine drum - you can put this knowledge into practice. Video will help you:
Before replacing in the field, it is necessary to block the vehicle with reliable stops. Then remove the wheel, unscrew the bolts by first tapping them with a copper hammer. The brake drum is dismantled, the central nut is unscrewed, then the hub is pulled out. When the inner race "freezes" on the shaft, it can be removed with a puller or knocked down with a chisel. A similar procedure should be carried out very carefully so as not to damage the surface of the axis. If the upper clip remains, it is pressed out with a special tool or knocked out. If the element falls apart under heavy use, the entire assembly may need to be replaced.
Replacement of old or worn out elements is carried out in a given sequence. First you need to familiarize yourself with the mounting scheme. Then disconnect and dismantle:
Before installing new s/ws, check the seats, remove dirt and apply grease.
One way to remove a bearing without using a specialized tool is to heat the metal. When the temperature rises, due to the expansion of the metal, it becomes possible to remove the part without the use of physical force, which can adversely affect the performance of all equipment. If the temperature regime is violated, scale may form along the edge of the bearing. To successfully continue the dismantling work, the scale must be removed (knocked down).
When it is necessary to remove the bearing from the shaft outside the workshop (for example, in the case of car repairs on the road), two open-end wrenches are often used. It is difficult to remove the bearing from the shaft without a puller using a single wrench, as this causes it to wedged. If you grab the part with two keys, then the force is distributed evenly. In this way, even sticky clips can be dismantled, but only on condition that a support platform should be located under the key heads. To remove the nodes from the side on which the contact group of brushes is located, temporary supports are mounted, for example, end heads of the same diameter are installed.
In cases where the safety of the crankshaft bearing is not required, it can be quickly and easily removed by breaking it into pieces with a chisel.
When carrying out the dismantling of parts installed with interference, it is necessary to follow the safety regulations, otherwise, even when using a specialized tool, this operation can be traumatic.
Bearing is a small element of the technical equipment of the car. At a certain interval, it requires replacement, and all repairs are carried out according to the regulations, otherwise it will be difficult to decide how remove bearing and replace it in time. With self-repair, you can encounter a lot of difficulties, thinking not only how to remove the bearing, but also unscrew this or that nut first. There are times when the fasteners do not lend themselves, you have to use force or additional leverage.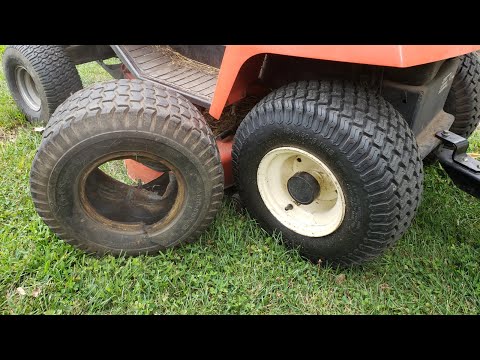 But in everything you need to have a measure, not to damage the parts that will be difficult to find later, to adapt to a car of a certain brand.
Typically, two elements are installed in household washing machines, which perform the connecting function of the drum with the pulley. Details provide uniform rotation at high-speed modes of an extraction and washing.
With careful use, replacement of the bushing may be required no earlier than 5-6 years, when normal wear occurs. Breakage can occur when the laundry is loaded incorrectly or excessively, causing imbalance, damage to the gland due to water ingress, which causes corrosion and breakage.
Dismantling and installation of new elements is quite simple, the main laboriousness lies in the complete disassembly of the washer to get to the p / w.
Before starting work, you should select new products, in accordance with the modification of equipment, prepare tools, consumables, be sure to turn off the power supply.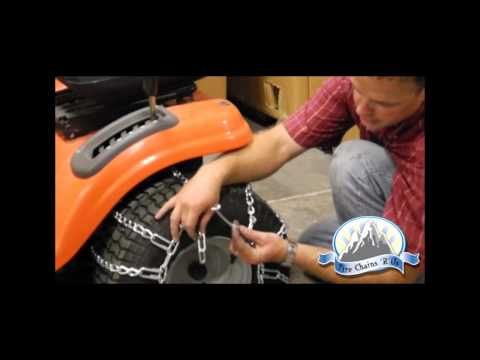 All water must be drained, filters unscrewed, supply hoses disconnected.
After disassembling and taking out the drum, it is necessary to cut it along the seam with a hacksaw or a metal blade, having previously made holes along the contour on the skirt for subsequent additional fastening.
Then it is necessary to pull out the sleeve, remove the stuffing box and use the puller to remove the r/w. In the absence of a special device, you can use a bar and hammer, tapping evenly along the contour of the clip.
After dismantling, carefully wipe the seats, removing dirt and old grease, check for damage, install new parts and reassemble in reverse order.
If the bearing assembly is found to be malfunctioning, they must be replaced urgently, because delay is fraught with the following, rather unpleasant consequences:

Do not over tighten when replacing bearings. If you can't do it yourself - call the master; if you procrastinate, repairing the washing machine will cost you much more.
Usually, two elements are installed in household washing machines that perform the connecting function of the drum with the pulley. Details provide uniform rotation at high-speed modes of an extraction and washing.
With careful operation, the replacement of the p / w may be required no earlier than 5-6 years, when normal wear occurs.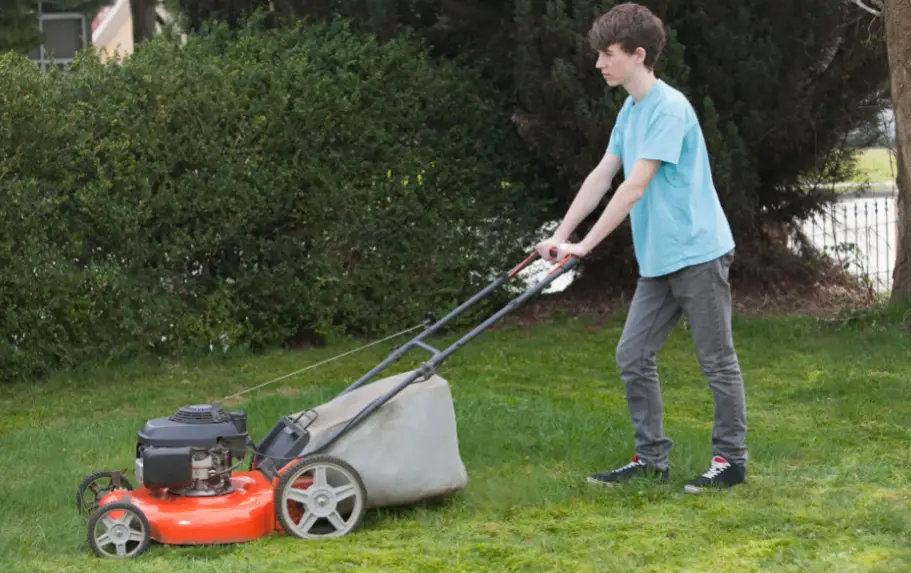 Breakage can occur when the laundry is loaded incorrectly or excessively, causing imbalance, damage to the gland due to water ingress, which causes corrosion and breakage.
Dismantling and installation of new elements is quite simple, the main laboriousness lies in the complete disassembly of the washer to get to the p / w.
Before starting work, you should select new products, in accordance with the modification of equipment, prepare tools, consumables, be sure to turn off the power supply. All water must be drained, filters unscrewed, supply hoses disconnected.
After dismantling and taking out the drum, it is necessary to saw it along the seam with a hacksaw or a metal blade, having previously made holes along the contour on the skirt for subsequent additional fastening.
Then it is necessary to pull out the sleeve, remove the stuffing box and use the puller to remove the r/w. In the absence of a special device, you can use a bar and hammer, tapping evenly along the contour of the clip.
After dismantling, carefully wipe the seats, removing dirt and old grease, check for damage, install new parts and reassemble in reverse order.
Replacing a bearing
The main purpose of a bearing is to reduce friction and protect mechanisms from rapid wear. There is a wide variety of bearings. They differ in purpose, size and location. The part is subject to wear and therefore requires timely replacement. But in solving the problem of how to remove the wheel bearing, a lot of difficulties arise, so experienced craftsmen and amateurs have come up with reliable ways to remove the bearing. Let's consider some of them.
If it is not possible to apply the first method when deciding how to remove bearing with a puller, then use the third method. It will require skill and the use of force, auxiliary tools. What is the course of action?

Thus, the third method is used in the event that the bearing is completely worn out, does not come out of its seat, therefore, it is necessary to apply force. There are times when it is difficult to solve the problem of how to remove the rear bearings from the shaft, so they simply have to be cut out. Experienced craftsmen resort to such a radical method, who got a completely worn-out running system for repair, and there is no other way to get a bearing to replace it. Beginners are not recommended to use the third method, because they simply cannot cope, but can damage other elements of the running system. In this case, an elementary bearing replacement will cost a pretty penny.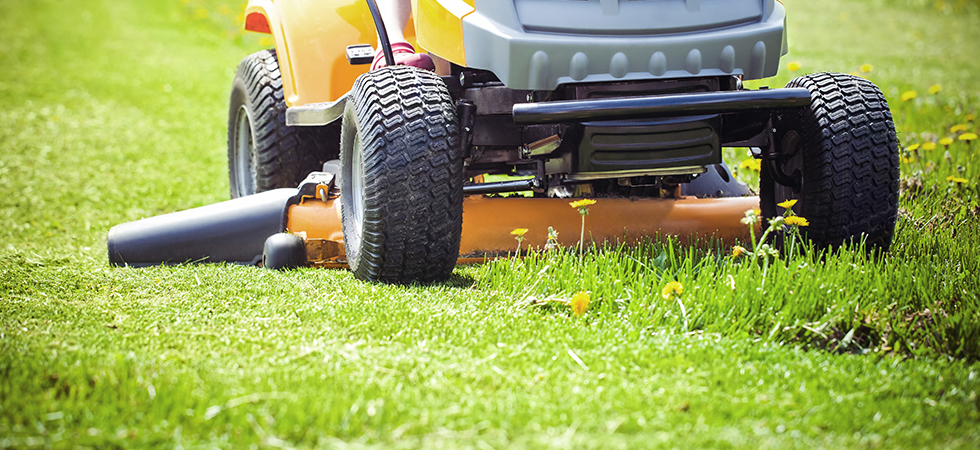
Without a puller, in the absence of standard tools, you will need a flyover or garage pit. One of the most effective methods is dismantling with a conventional chisel, which does not require special knowledge. The old element is simply split with a hammer blow and a new one is installed. The main task in the performance of work is to avoid damage and not be injured. It is advisable to use a gentle technique and protective devices.
In a similar way, the problem is solved, how to remove wheel bearing .
An equally effective way is to remove the part using an inertial hook, which you can make yourself from a reinforcing piece or a piece of wire. The diameter must be at least 8 mm, and the length must be at least 400 mm, one end must be bent at an angle of 90 degrees so that the inner clip can be fixed. You will also need some kind of hollow cylinder or an old heavy gear, into which a prepared metal bar will freely enter, to the back end of which another small segment should be welded perpendicularly so that you can hold it with your hand.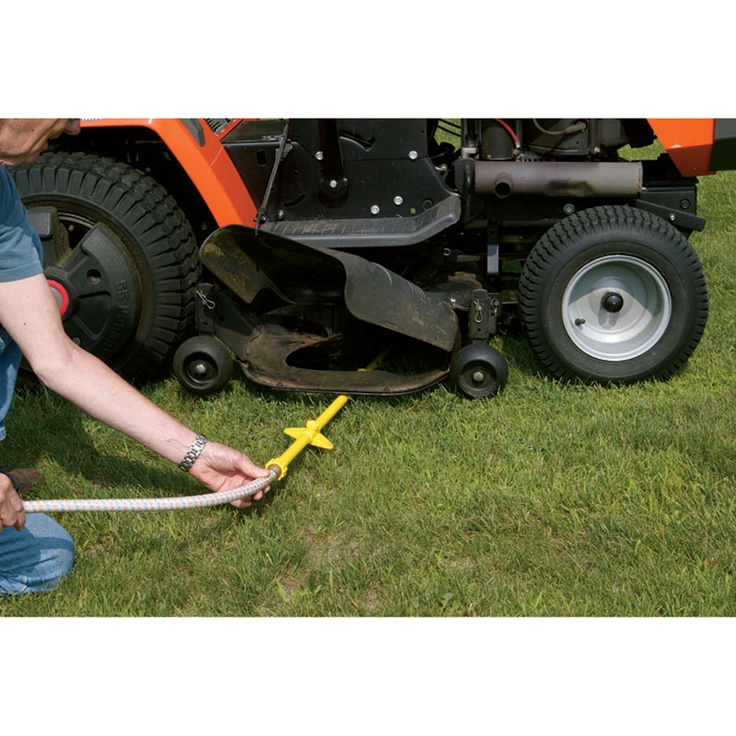
When the fixture is ready, the hook clings to the inner race, and the gear should be beaten back and forth against the stopper until the part is completely dismantled.
Extended car repair for advanced - on the knee, with improvised means and for a penny. Bearing replacement.
Before field replacement, the vehicle must be secured using secure stops. Then remove the wheel, unscrew the bolts by first tapping them with a copper hammer. The brake drum is dismantled, the central nut is unscrewed, then the hub is pulled out. When the inner race "freezes" on the shaft, it can be removed with a puller or knocked down with a chisel. A similar procedure should be carried out very carefully so as not to damage the surface of the axis. If the upper clip remains, it is pressed out with a special tool or knocked out.