Driving an ATV and getting the best performance without a functioning clutch is impossible. We’ll review how it works, some common issues, and the best fixes.
An ATV clutch uses stability and balance to transfer the power generated from the engine to the transmission. The crankshaft is linked to the clutch, so when the engine runs, it will spin and cause the clutch to engage it. An ATV has a multi-plate clutch, centrifugal clutch, or sheave clutch.
The ATV clutch is responsible for engaging and disengaging the engine from the transmission, allowing the rider to control the speed of the ATV. We’ll explain how it works, common issues, and common fixes below.
ATVs are great for off-road adventures but rely heavily on the clutch system to change gears and transfer power to the wheels.
As with any mechanical system, ATV clutches can develop issues over time. Here's an overview of how ATV clutches work and some common problems you might encounter.
The clutch is a system of components that transfer power from the engine to the transmission. The main parts of an ATV clutch are the clutch plates, springs, and baskets.
The clutch plates are engaged when the engine runs and are pressed tightly together. This allows the engine to transfer power to the transmission, which rotates the wheels.
When you pull in the clutch lever, the clutch plates disengage, separating them from each other. This disengages the engine from the transmission, allowing you to shift gears without grinding or stalling the engine.
There are three types of ATV clutches, and each function differently. This includes the multi-plate clutch, centrifugal clutch, and sheave clutch.
A multi-plate clutch is the standard option used in most vehicles. It transfers power from the engine to the transmission.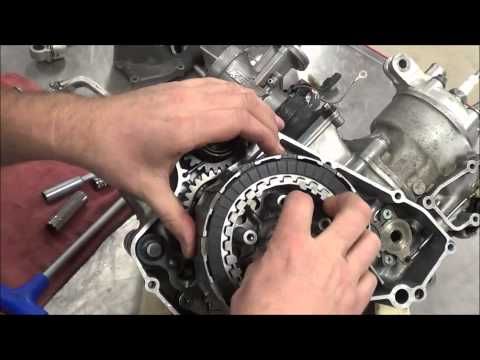 Multi-plate clutches are commonly used on high-performance ATVs too.
When the clutch is engaged, the friction material on the plates is squeezed between the metal plates, which causes the plates to lock together and transfer power from the engine to the transmission.
Multi-plate clutches can handle more power than single-plate clutches because they have more surface area for the friction material to grab onto. This allows the clutch to transfer more power without slipping or wearing out as quickly.
A centrifugal clutch is a simple clutch that relies on centrifugal force to engage the clutch plates. This clutch will spin the crankshaft as the drive shaft moves. It also has an outer clutch drum.
As the engine speed increases, weights inside the clutch move outward, forcing the clutch plates together and engaging the clutch. The weights move inward when the engine speed decreases, allowing the clutch plates to disengage.
Instead of using gears to change the ratio between the engine and the wheels, a sheave ATV clutch uses two conical pulleys, also known as sheaves, that can change their diameter to change the gear ratio.
As the engine speed increases, the sheaves move closer together, causing the belt to ride higher on the sheave and creating a higher gear ratio. This clutch type is often used with a CVT because it generates reliable power and runs at higher RPMs.
Several issues can arise with an ATV clutch system. Here are some common problems we notice when dealing with an ATV clutch.
A slipping clutch is a common problem in ATVs. This occurs when the clutch plates fail to engage correctly, which can cause a loss of power and slower acceleration.
One possible fix is replacing the clutch plates with new ones, or you might need to adjust the clutch cable to ensure the plates engage correctly. But if the clutch is completely worn down, it requires a new clutch.
This is because the teeth will have no grip. Without these teeth, there is no way for the clutch to engage, and it will continue to slip until it’s replaced.
If you're having trouble shifting gears or the gears are grinding, it could be a problem with the clutch basket. Over time, the basket can wear down or develop grooves, making it difficult to shift gears.
This can happen for various reasons beyond just the clutch. If the idle is set too high, it will hard shift because the clutch engages too soon. It can also mean the clutch is dirty or the spring is losing strength.
If the clutch lever is sticking or is difficult to pull, it could be a problem with the clutch cable. The cable might need to be lubricated or adjusted to improve the feel of the clutch lever.
The cable cannot push and pull correctly when there is insufficient tension. This leads to a leak and a loss of pressure. This sticky feeling with the clutch lever is the result.
If you hear a rattling or grinding noise when you engage the clutch, it could be a problem with the clutch springs or basket. The springs might need to be replaced, or the basket might need to be adjusted or replaced.
Hearing loud noises from the clutch area is common too. It’s not always a sign of something serious, but more times than not, a new clutch is needed.
The first place to look when the clutch is not engaging is around the pressure plate area. Check to see if the plates are clamping down at all.
If not, let's try to rotate the plates back into position. This indicates the teeth are worn and not capable of engaging. However, a replacement is probably the only solution if they are clamping but not engaging.
If you notice a burning smell coming from the clutch area, it could be a problem with the clutch plates. The plates might be overheating or slipping, which can cause a burning smell.
The burning smell is a signal something is seriously wrong with the ATV. This happens because of worn-out piston rings or a damaged cylinder wall. And when the clutch slips, it can lead to this type of damage.
A clutch is critical for adequately operating an all-terrain vehicle. Knowing how it works and how to identify common problems can help you keep your ATV running smoothly.
By performing regular maintenance and addressing issues promptly, you can avoid costly repairs and keep your ATV running for years. These are some of the common fixes that work best.
If the gear is slipping, the first place to look is at the plates. Identifying the problem as gear slippage is critical to fix the issue too.
If teeth are missing, replacing everything is best rather than simply trying to fix it. This can be done by looking at the chain and sprockets. A worn chain will always need more help or a complete replacement to engage with precision.
Next. We can look at the clutch cable. Any signs of damage can hinder the clutch’s ability to engage correctly or generate enough power to accelerate.
We recommend tightening or lubricating the cable regularly. If you notice any signs of damage, we can replace the cable.
Try to clean the clutch by removing the clutch cover. This will typically require a socket wrench and may require the removal of other components, depending on the ATV model.
Once the plates are removed, use a cleaning solution specifically designed for cleaning clutch components to remove any dirt, debris, and oil that may have accumulated on the plates.
Inspect the components for wear and damage. If any parts show signs of wear, it may be necessary to replace them. Be sure to clean the plates thoroughly and allow them to dry completely before reassembling them.
In some cases, it is possible to fix an ATV clutch without replacing it. The proper fix will depend on the specific problem with the clutch.
For example, when the clutch slips, there is still a chance it’s only a poorly aligned or misadjusted lever and cable. We can readjust it and see if that prevents further slipping.
If not, then we are likely required to replace it instead. A replacement is needed when the inner hub teeth have worn out too much. This prevents proper engagement between the clutch and the driveshaft.
The lifespan of an ATV clutch can vary depending on several factors, such as the type of riding you do, the age of the ATV, and how well you maintain the clutch system.
Generally, an ATV clutch can last at least 10,000 miles, but it's not uncommon for it to last much longer or shorter than that range. We recommend regular clutch checks every 3-6 months to avoid a sudden failure.
If you regularly ride on rough terrain, tow heavy loads, or engage in other activities that strain the clutch, it will wear out faster. It's essential to watch for signs of a worn or failing clutch, such as slipping, hard shifting, or unusual noises.
By addressing these issues promptly and performing regular maintenance, you can help prolong the life of your ATV clutch.
Here are some signs indicating that an ATV needs a new clutch.
If you hear a loud grinding or rattling noise when you engage the clutch or shift gears, this may be a sign of worn clutch plates or other clutch components.
If you're having trouble shifting gears, especially when the engine runs, this may be a sign of a worn clutch. You may experience difficulty getting the ATV to shift into gear or notice it slipping out of gear.
The clutch lever will feel uneven when trying to shift. This can be a sign of a worn clutch or a clutch not appropriately adjusted.
If the clutch doesn't engage at all, this may indicate that the clutch plates are worn down to the point that they can no longer engage properly.
The inner hub teeth can become too dull. This is the most severe issue and typically means replacing the entire clutch rather than a quick repair is the only viable solution.
CVT belt slippage will likely happen to anyone owning an ATV sooner or later. While as frustrating as it might be, there is often no reason to let it ruin your day.
A wide variety of reasons may be causing it, where most of them are just a normal part of owning an ATV. Other times it may be a sign of severe damage to the clutches, and expensive components may be necessary to fix the issue.
I recently experienced belt slippage on my own bike (Polaris Sportsman XP 1000). I was out trail riding with some friends when we decided to go up a small river. The water in the river was only in the ballpark of 15-20 inches deep. I expected my trusty Sportsman would have no problems handling it.
After riding in the water for about 5 minutes, the bike suddenly started losing its forward momentum. I was barely able to get it onshore with the little that was left.
It turned out water had gotten into my belt housing, causing the slippage. Luckily I had brought some tools and was able to drain all of the water. This fixed the issue, and after some laps in moderate speed on dry land, it was ready to go as normal again.
Out of interest, I decided to do a little more research on the subject as soon as I got back home. It turns out water is just one of many potential causes of why this is happening.
Related: Why Does Your ATV Belt Squeal? How to Fix It?
Page Contents
Many don’t realize that ATV belts (the belt in your CVT, continuously variable transmission) are indeed meant to be a serviceable wear item on the bike. Over time it will wear, and eventually, it needs replacing for the bike to function properly.
There is a variety of reasons why the belt wears out. Causes like excessive heat or poor riding style will greatly shorten the life expectancy of the belt. These will be covered further down in this post.
High age or high mileage is another common cause. If you see any cracking inside the cogs when you remove the belt and bend it backward, it’s time to replace it.
Bend the belt backward to check for cracks.Also, look for any chunks missing. If so, you have no other choice than to get a new one.
Over time the aramid cord within the belt will gradually lose its strength and adhesion, and you’ll get what’s known as flex fatigue.
If you start losing top-end power, this may be a sign of your belt starting to wear thin. You should find your belt’s minimum width in your service manual.
Remove the belt and use your calipers to measure the width in three different places. This will ensure a correct reading, and you will also tell if the belt is evenly worn or not.
If the reading you get is below the stated minimum, it’s beyond its serviceable limits and needs replacing.
No wonder the ATV owner experienced a significant increase in performance after replacing his worn-out CVT belt!Another widespread cause of belt slippage is the belt somehow becoming wet. The water will greatly reduce the friction between the belt and the clutch sheaves, leaving the whole transmission pretty much useless until it gets dried up again.
If this happens and the belt starts slipping, you mustn’t just give it full throttle trying to compensate. The spinning will create immense heat in only one spot, creating permanent damage to the belt.
You need to remove the moisture before you can drive any further.
The belt-case is made to prevent water from getting inside but cannot be considered completely waterproof.
Your belt cover will have a rubber seal, but if it is somehow damaged, twisted, or in some other way not seated properly, water will get inside.
Errors like these will from time to time slip through the factory quality control. A simple refitting of the gasket may be all it takes to fix the issue.
More common is water or snow entering the belt housing through its air inlet or outlet.
These ports need to be there for proper cooling of the CVT, and even though the manufacturers have improved the design of these inlets over the years, they won’t cope with every situation.
Even if you ride in shallow waters, water may splash and get sucked in if you ride too fast when you hit the water. Low speed is the key when riding in water or powdery snow.
Also, riding in low gear will allow you to keep the RPM’s up, optimizing the airflow out the exhaust port on the casing, preventing water from entering by blowing it out.
If you really wish to make your bike into a submarine, installing a good snorkel kit to extend the inlet and exhaust port will be your best bet.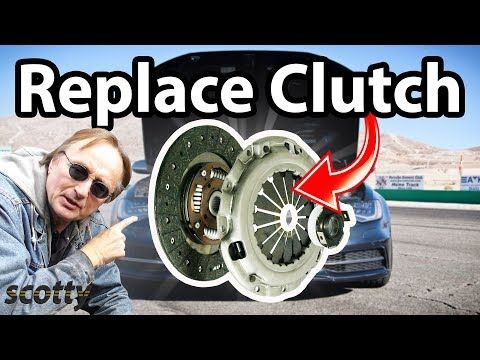
Another way water can get in would be unlucky and punching a hole in the CVT housing itself. Riding in areas with a lot of dry branches increases this risk. The housing is often just made out of plastic so that it can be broken.
This happened to a friend of mine. He found no issues with the seal, but he found a one-inch hole straight through it when he removed the cover. If the damage is not too bad, some strong sealant will patch it right up again. Alternatively, you can always get a new cover.
And finally, you have situations like the one I told about at the beginning of this post. When I got back home, I noticed that some of the bolts on the CVT housing had started to come loose, creating a small gap where water would enter.
Notice the gap between the housing and cover.All it takes to fix this issue is to tighten these bolts and keep an eye on them in the future. If the problem reappears, I will use some Loctite on the bolts’ threads to keep them in place. Do not overtighten these as this will rip the threads of the plastic housing.
Regardless of what caused water to enter the housing, you need to drain it. On the bottom of the housing, you will find a drain plug that can be removed. On Polaris bike, this is a red plastic plug.
Polaris CVT belt housing and drain plug.Let the case drain completely before you start the bike again. Let the bike idle for some time in neutral to let the fins on the clutch do their job. You can even rev it a little to speed up the process.
The airflow from the venting system will gradually dry up the belt and clutches. In just a couple of minutes, you should be able to start riding again gently.
Start at low speeds with little power to let it dry completely. If you hammer it right away, it will start slipping, potentially damaging the belt in just a matter of seconds.
With the belt removed, check for any grooves, nicks, or other damages to the inside of the sheaves. This will wear the belt prematurely and needs to be addressed.
In some cases, the damage can be repaired, and in other cases, you need to get ned clutches.
If you smell or feel your belt slipping at speed, it could be possible that your belt is heating up and not cooling properly.
Ideally, the bike should be able to keep the belt cool with its belt housing cooling system. And it’s actually a relatively simple system.
The fins on your clutches will suck cool air in the inlet port on the belt housing, where it’s being blown directly to the primary clutch before it’s being pushed out through the exhaust by the secondary clutch.
If something is disrupting this airflow, you will soon start to experience issues with the belt getting too warm, and you’ll get belt slippage.
Start by having a look at the exhaust port. If it’s full of mud, a simple cleaning will fix the heating issue. Also, have a look at the intake port to see if anything is blocking it.
Over time the rubber in a belt running too hot will start hardening until eventually, it will crack, and the cogs will peel off. This happens much sooner when the cooling is not functioning properly, so checking up on it regularly may be a good investment.
If you’ve ridden for some time with the belt too hot, you should inspect the surface of your clutch sheaves. If you can see something that looks like a black haze on them, this will be belt residue from previous belt slippage or even residue from normal belt wear.
This needs to be removed; otherwise, your belt is going to continue slipping. Even putting on a new belt will be useless before you get this stuff removed.
Use a Scotch Brite pad with some alcohol or acetone to rub it all off. If this does not work, you can try with some very fine sand-paper. In a worst-case scenario, you may have to replace your primary or secondary clutch.
Do not use brake cleaner as a detergent, as this will negatively affect belt performance.
If the bike does not want to take off smoothly but is jerking away, almost like it’s slipping, and then act as if it’s shifting gears, it may be because of a broken spring in the secondary clutch.
You need to take off the belt cover and inspect the spring. If the spring is broken, it needs replacing.
If you’re experiencing belt slippage after installing a brand new belt, you may have gotten the wrong size. Just a small difference in dimensions can affect its performance.
The difference can be hard to spot with just the naked eye, so make sure you compare the specific model number to your bike’s required belt dimensions before you purchase.
If you intend to use this kind of belt each time you change it, you can use shims to alter the clutches’ setup.
One of the first upgrades many do to their bike is installing a set of bigger mud tires. Keep in mind that doing so will affect how the clutches operate at different speeds.
The clutches will operate less efficiently, which creates more heat, which may lead to belt issues.
This can be prevented by installing a clutch-kit that allows the clutches to operate efficiently with your chosen tire size.
Another common rookie mistake is using high gear range when towing, riding up steep hills, riding in snow, or deep mud.
Doing so will burn the belt in no time, and as soon as you start smelling burnt rubber, you know it’s time to slow down.
Using the low gear range in situations like these will allow for better cooling because of the higher RPM’s and allow the clutches to entirely shift where they will get a better grip on the belt, which will result in lower heat and better momentum.
Too much heat will burn the sides of the belt, creating a shiny glazed look. This can happen to the whole belt or just to specific spots.
When the belt has gotten one or more of these burnt spots, the bike won’t take off without a significant jerking sensation. You will also smell burnt rubber and maybe even see some smoke.
To avoid this from happening, you need to do whatever it takes to keep the belt cool.
After some tough riding, it’s a good idea to put the bike in neutral and rev the bike for some seconds to cool down the metal clutches. This will prevent them from continue cooking the rubber in the belt after the bike is turned off.
After a hard pull through the mud, the last thing you want to do is to just shut off the bike as the remaining heat in the
If the drive and the driven pulley are not aligned properly, you may experience belt slippage and other performance issues.
The clutches can be aligned using a model-specific alignment tool and procedure. For Polaris bikes, the tool you are looking for is known as the “offset alignment bar. ”
”
In addition to the tool, you will need to get your hands on a service manual if you wish to perform this procedure yourself.
If a bearing inside the pulley system has gone bad, it may cause the pulley not to release the belt.
Grip the clutch firmly with your hands and push it in any direction to see if you feel any slack. If you do, it might be time for an overhaul.
A typical rookie mistake that some doo as soon as they get the immense power of a new ATV between their hands is hammering the throttle before the belt is properly broken in.
They do not realize that this is a surefire way to ruin the brand new belt in no time. The belt will burn, and you’ll get belt slippage.
All new belts need to be broken in properly to ensure proper belt performance and longevity.
 Let it dry completely before you install it on the bike.
ATV’s are meant to be ridden in dirty conditions. But if you’ve been pushing the limits a bit too much, or if your CVT housing is not properly sealed, you may have gotten sand, mud, or some other debris inside that is interfering with the proper function of the clutches.
Have a look at the air intake or exhaust port if they somehow have come partly loose, enabling dirt to enter. Any loose tubes need to be refitted properly.
Symptoms of a dirty CVT may be that the clutch will not engage until on higher rpm’s than usual, jerking, belt slipping before it catches and goes.
When this happens, proper cleaning is likely all you need.
Start by removing the cover and the belt. This would be enough to get a decent result, using some engine degreaser and a pressure washer to clean everything. Let dry before you reassemble. Try this first to see if it fixes your issue.
If it does not, a more in-depth cleaning may be necessary.
You will then need to remove the clutches and disassemble them for further cleaning. You will, in most cases, require a unique tool to disassemble your specific clutch.
PS! Be aware that the spring inside may be under tremendous pressure that needs to be released using the proper tool before the clutch can be disassembled safely. Different brands use different tools to achieve this.
If you are not comfortable doing this on your own, any dealer should have the tools to quickly take the clutch apart so that you can clean its insides as well.
Remember to put grease on the bushings and a drop of oil on the rollers before you reassemble.
Inside the primary clutch, you will find three or more rollers that roll up and down the helix when you increase or decrease the engine RPM. This is the mechanism behind the clutch sheaves moving apart or together according to how much throttle you apply.
Over time, these will wear out. Any issue preventing them from rolling freely may result in a clutch that is not functioning properly.
You may get belt slippage because the sheaves won’t be able to make proper pressure in the belt, or it won’t have the necessary range of motion needed to function at higher speeds.
I had this issue on an old snowmobile once (the same principals applies to ATVs with CVT systems). It would work fine in the lower gear range, but as soon as I pushed it slightly in the higher gear range, the belt started slipping.
I disassembled the clutch and found the rollers were badly worn on one side. So after a good cleaning and greasing (in all the right places) and a brand new set of rollers, the clutch was as good as new—no more belt slippage.
This cause is in the same ballpark as issues with the rollers. If the helix is somehow damaged or worn, the rollers will not be able to roll freely up and down as they are supposed to. Look for any cracks or burrs that should not be there.
Sometimes the whole thing will blow up into pieces, leaving you completely stranded.
When you have the clutch disassembled, you should check the bushings in the secondary as per the service manual.
Symptoms of a bad ATV belt
Loss of performance can be a sign of a bad ATV belt. If you see cracks when you bend the belt backward, if chunks are missing, or the belt sides have a glazed look, it is bad and needs replacing.
Due for a belt change! Have you noticed that your ATV has started to slip and its power has decreased? There are several reasons why an ATV skids. Usually the problem lies in a worn variator belt or clutch. And even a new ATV is not immune from such problems. Therefore, let's figure out how to solve the problem on our own.
The ATV clutch is responsible for changing gears and minimizing vibration. If this component fails, the rider will notice that the quad began to twitch, start from a place immediately at high speeds, or slip. Usually the cause of the malfunction is worn discs that simply began to slip. Such damage usually appears due to:
Complete replacement of the clutch or installation of new discs will solve the problem. The first option is more suitable for beginners, but experience is required to disassemble and assemble the component.
It must be said right away that the stages and features of replacing a node on a teenage all-terrain vehicle directly depend on its brand. Some brands hide the gearbox behind plastic parts, others install the assembly behind the footrest, etc.
To change the element, the rider needs to:
Please note that the procedure may vary for different ATVs. Therefore, before starting work, read the instructions for your ATV.
So, we figured out what to do if the clutch is slipping on a 125cc ATV. But how to treat an adult SUV? But here the rider will have to make extra efforts, because to replace the component on an adult ATV, you will have to immediately dismantle the variator. The procedure is as follows:

This will give you access to the clutch. Next, you will need to unscrew the fixing bolt, remove the washers and remove the damaged element.
ATV power loss or slippage is caused by a worn transmission belt. Usually the rider encounters such problems when the component is worn out by more than 1 cm. However, do not worry, because the belt is a common consumable and is easy to replace.
To fix the problem, the owner of the four-wheeler should:
 To do this, screw a bolt 5.5-8 cm long into a special hole.
 Note : When buying a CVT belt, pay attention to its manufacturer. Japanese or European components are more expensive, but last 2-3 times longer than Chinese belts.
09/14/2021 3307
The ATV clutch is responsible for both shifting gears and reducing vibration during the ride. ATVs for children are no exception.
As a rule, the occurrence of any problems with this component of motor vehicles, the rider feels immediately. It is recommended to service the ATV clutch every 6000-7000 km, but sometimes all kinds of problems can occur earlier. The rate of wear of the functional components of motor vehicles directly depends on the conditions of its operation.
The following points can serve as a signal that something is wrong with the motorbike clutch:
Depending on the severity of the failure, the problems described above can be solved either by repairing the vehicle's clutch or by replacing it completely. As for Chinese models of ATVs, here it is necessary to check whether the nuts on the clutch are securely fastened. Poor assembly of motorcycles can also cause suspicious sounds in the variator area.
To change the clutch on a children's ATV by yourself, you will need:
In general, this procedure is quite simple and fast. In older models of ATVs, everything is somewhat more complicated. Before proceeding with the dismantling of any components of motor vehicles, be sure to read the instructions from the manufacturer.
Even in Chinese models of ATVs, the clutch boasts an impressive margin of safety, and therefore its breakdown often occurs as a result of improper use of this equipment.
The main causes of premature ATV clutch wear include:
The only way to prolong the life of your ATV clutch is to use it properly and carefully. It is advisable to use good oil, and do not forget about timely maintenance.
The use of high-quality clutch discs in the ATV ensures a smooth start of the vehicle, and also fully ensures reliable grip without slipping even under fairly high loads. The exception is children's electric ATVs, in which there is simply no clutch disc.
The ATV clutch usually needs to be adjusted no more than once a year. Before starting work, place the vehicle on a special footboard.
The process of adjusting the clutch on a motorbike is quite simple, and consists of the following steps:
