It often occurs to many bikers that while purchasing a used bike they do not have an idea of whether it has tubeless tires or not.
“One of the easiest ways to check whether a tire is tubeless or not is to check what kind of valve the tires possess. More precisely, it also depends upon the number of times you get a flat tire while riding your bike.”
But, that’s only the tip of the iceberg!
We are going to dig a little further to differentiate different types of valves to check whether a bike tire is tubeless or not. Let us get right to it
Contents
Whenever you purchase a used bike for mountain biking from a local seller, it’s important to know the minor details of it to get away with any scam or fraud.
One of the issues that many bikers have to face is they cannot tell whether the bike has got tubeless tires or not. According to our experience and research, you can check a tubeless tire of a bike in the following ways:
The very first and most basic thing to do is to ask the seller about the overall specification of the bike as well as its tires. If the seller confirms that the tires are tubeless, you should ask him about the brand of tires he has installed on the bike.
If the seller does not know whether the bike tires are tubeless or not, better get away from such a deal as the bike is probably stolen.
It could occur to many bikes that their tires are tubeless, however, there might still be a tube inside them. In that case, Carbon Side Up from Bike Stack Exchange says that one should focus on looking at the valve stem of the bike.
The user makes the following assumptions based on how the valve stem might look like and its relation with a tubeless tire:

Based on these three assumptions, you can easily know whether the tires of a bike you are about to purchase are tubeless or not. The user also says that these assumptions may go wrong, but according to him, they are true in almost 95% of the cases.
Take an in-depth look at valve stems below.
Another way of seeing whether the tires have got tubes or not is to check the position of the valve stem on the wheels.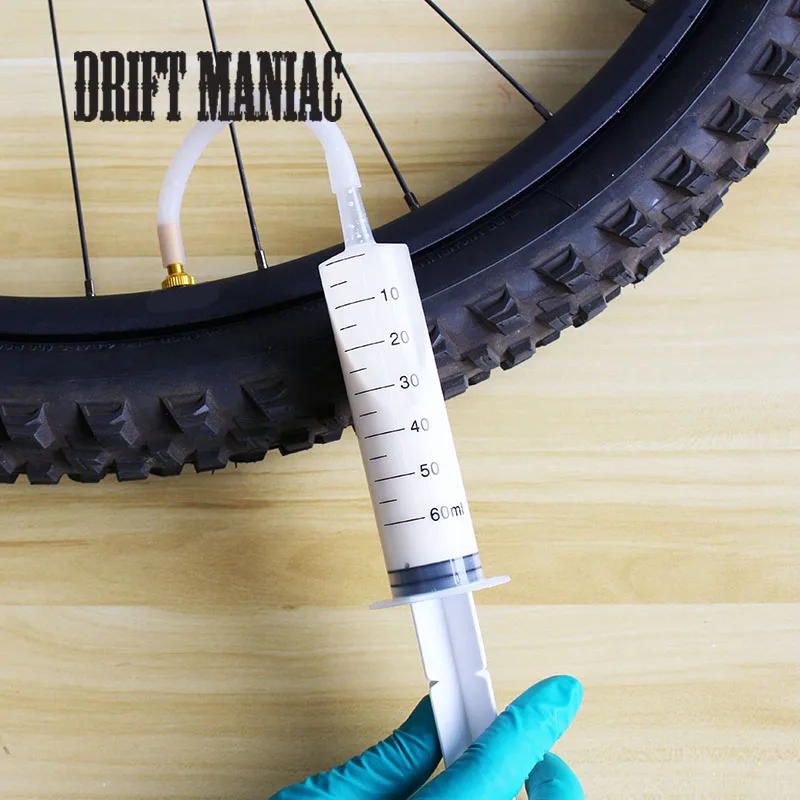
That said, tires that have tubes have a valve that directly gets inserted into the tire’s rubber. You can use the valve to inflate or deflate the tires accordingly.
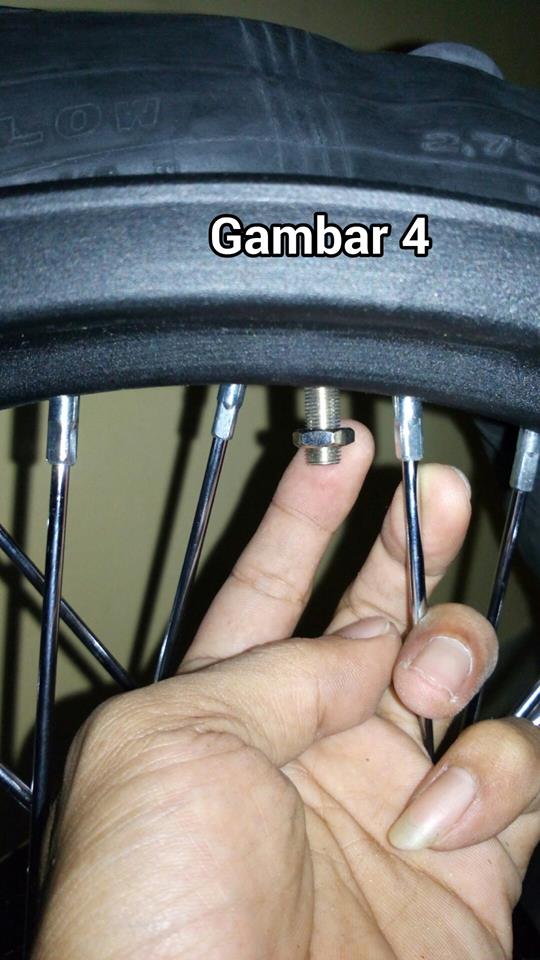
In the case of tubeless tires, the valve is usually installed on the rim rather than the rubber plus it’s sealed with a lockring. That’s another easy way to check whether the bike has got tubeless tires or not.
Modern Problems Require Modern Solutions! Based on this meme, you can check the tubeless quality of the tires easily.
Simply check the tire sidewall and see whether they are marked with anything like TR, TL, or UST.
Find other details of the tire and put them in the Google search bar. It will have enough info to show you whether the tires are actually tubeless or not.
Last but not the least, if the tires go flat frequently, that means they are not tubeless. Detach the rubber part from the rim and you will most probably find a tube inside the tires.
Keep track of the number of times your tires get flat or punctured and if it’s more frequent, then you, my friend, are not using a bike with tubeless tires.
Here’s a discussion on Tubeless and Tube Tires you’ll find helpful.
Identify the valve stem on the wheel and if it is Presta sealed with a lockring, then it would certainly mean that the tires are tubeless. Other than that, if the valve goes into the rim rather than the rubber, it would also substantiate the claim of the tires being tubeless.
Last but not the least, check the sidewall of the tires and see whether they are marked as TL (tubeless) or UST (Universal Standard Tubeless). These are some of the ways to know if the tires are tubeless or not.
The tires are most probably not tubeless if you are getting flat tires or instant punctures on a frequent basis. Better dismount the rubber and you will find a tube laying inside the rubber.
Bikes with tubeless tires remain inflated and maintain their air pressure for a long time. On top of that, bikers will face low flat tires and instant puncture issues while using tubeless tires. In the end, tubeless tires require less maintenance compared to tubed tires.
Checking a used bike from every angle and perspective is important for you because you are about to purchase it with your hard-earned money.
When it comes to checking the tires, simply follow the tips we mentioned above and make your evaluation based on it accordingly.
Tires Tubeless Tires
From riding to school since the age of 13, attending BMX races and events with his dad to himself conquering 50+ trails across the globe. For Rob, his Giant Stance 29 2 2020 is the friend that makes everything better. He is also a proud member of the International Mountain Bicycling Association (IMBA).
Asked
Modified 1 year, 10 months ago
Viewed 57k times
I suspect that the used bike I want to buy might have a tubeless tires, but one is flat. Is there any external feature to look at that would allow easily to tell this for sure?
I have no experience with tubeless tires and would not know how to replace it.
9
While your question of identifying a tubeless tyre has been answered, I think that might not actually be what you have to worry about.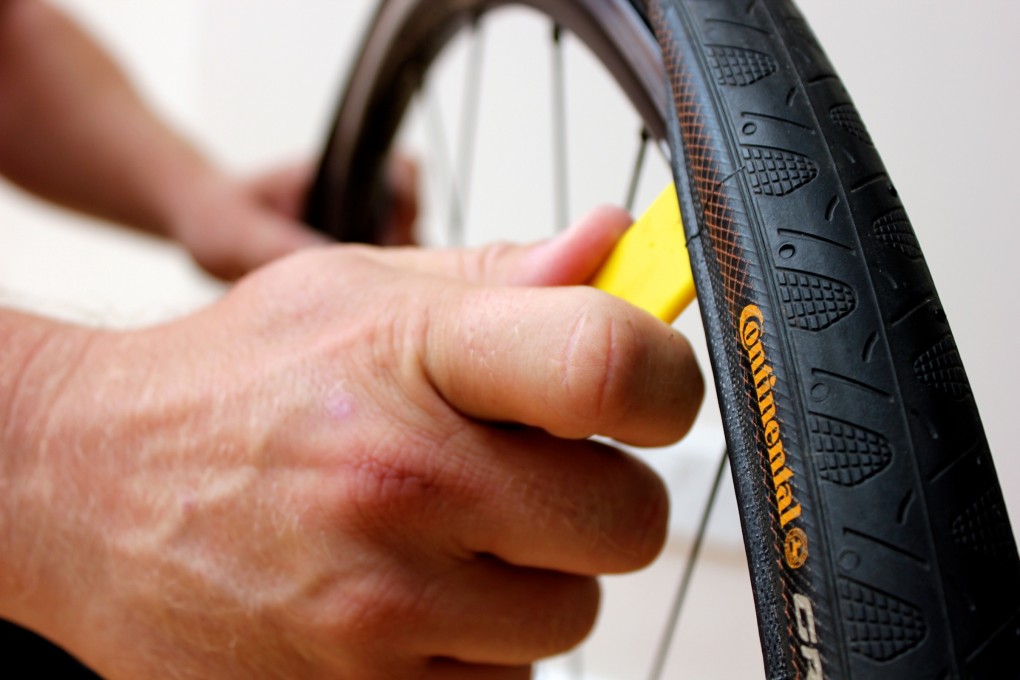 A bike might come with tubeless tyres, but that doesn't mean that they're set up tubeless. The tyres might still have a tube in them, so your concern should be identifying whether there's a tube inside or not. The easiest way to do that is to look at the valve stem, because a tubeless valve will almost always be secured with a substantial lockring, whereas a tube with a presta valve might have a little silver lockring or usually nothing at all. Any wheel with a Schrader valve is almost certain to have a tube in it as tubeless Schrader setups are extremely rare. This isn't foolproof, because some people will put a big lockring on a tube and some might put a small one on a tubeless valve, but I'm confident that this will be accurate over 95% of the time.
Schrader valve:
Presta valve (tube):
Tubeless presta valve:
7
Look at the tire sidewall for model/name, tubeless tires usually have TL, UST, TR or Tubeless in it; some tires don't (like Schwalbe Pro One), so google the model and see if it's tubeless or not. Keep in mind that some MTB tires can be setup tubeless regardless of what manufacturer claims, in this case you can unseat some tire bead and check if there's tube or sealant residue inside.
For a tubeless setup you need three things: the right rim, the right tire, the right valve-stem. Carbon side up shows how to identify the valve stem, and the tire and rim should be marked, but you need to check all three, because having tires and rims rated for tubeless may be used with a tube (I do this all the time on riding lawn mowers because their rims suck and leak even though designed for tubeless operation.)
However in your case there is an easy check since there is a flat tire. First look at the valve stem. If it is a presta use your fingers to loosen the stem nut (skip if it is too tight to loosen by hand), then wiggle the tire relative to the rim while watching the valve stem. if wiggling the tire moves the valve stem you have a tube if you feel the tube stretching against the valve stem, you have a tube, otherwise either you have a tubeless setup or a burst tube.
Sign up using Google
Sign up using Facebook
Sign up using Email and Password
Required, but never shown
Required, but never shown
By clicking “Post Your Answer”, you agree to our terms of service, privacy policy and cookie policy
Tubeless tires can hardly be called the know-how of the bicycle industry, however, they still raise questions for many. The topic itself, as a rule, is surrounded by a lot of skepticism and distrust, which are more often explained by a lack of understanding of basic things and a lack of experience in riding such wheels. To dispel all these doubts, we answer the main questions related to tubeless technologies.
These are bicycle tires that do not have a tube. At the same time, tubeless technology is not only about tires. We are talking about a whole wheel system, which also includes a special rim and a sealant that gives the wheel anti-puncture properties. The tubeless concept makes the bike more comfortable to use and improves its riding performance, which will be discussed in order.
How long ago did this technology appear and can it be trusted?
Those who hear about bicycle tubeless for the first time usually tend to be suspicious of them. You can dislike this technology for subjective reasons, but you definitely shouldn’t distrust it. Tubeless tubes have been massively used for cars and motorcycles for several decades, and during this time they have not given reason to doubt their reliability.
The first tubeless systems for bicycles appeared in 1999, when the French rim brand MAVIC, in collaboration with tire manufacturer Hutchinson, presented their concept of a simple and effective tubeless wheel. In the 2000s, this technology remained the prerogative of mainly professional athletes, who quickly appreciated its main advantages: lighter weight, more air in the wheel, good "traction" and durability.
In recent years, tubeless has finally ceased to be perceived as something exotic. For example, today a significant part of the MTB and almost all touring cars come with such wheels as standard. A wide variety of sealants are also available on the market, and the number of those who are discovering the benefits of tubeless technology is steadily increasing.
The tubeless system provides a special rim and tires that are labeled tubeless ready or TR. However, the rims themselves are easy to distinguish visually - they have a low side and characteristic walls with recesses, forming a kind of lock in which the tire cord is wedged when air is injected. Due to this, in the inflated state, the rubber reliably and hermetically “sits” on the rim, without breaking off the wheel even at low pressure. The rim itself is additionally glued with a sealing tape, after which the nipples are installed separately.
The benefits of tubeless wheels are revealed no matter how often and what kind of bike you ride: whether it's weekend trips, extreme downhill or long-distance touring. Nevertheless, for certain categories of cyclists tubeless still open up more opportunities: first of all, we are talking about those who are seriously passionate about off-road.
When actively driving off-road with tubeless tubes, you can ride on lowered wheels and at the same time not be afraid of such an unpleasant type of puncture as a snake bite. Low tire pressure, in turn, gives better handling, dampens vibrations more effectively and generally provides more comfort on difficult tracks. If we are talking about cyclists, then they appreciate tubeless for their anti-puncture qualities.
Road bikes also use tubeless wheels. Moreover, they are the pioneers of this technology. But road tubeless tubes are a different story: they are designed for different operating pressures and have tangible design differences. Therefore, further we will talk mainly about those tires that are put on mountain, touring and city bikes.
These are the two rim formats that define the features of a tubeless wheel assembly. BST is a standard that involves the installation of a special sealing tape that prevents air from leaking through the holes in the spokes. This is the most common version of tubeless systems.
UST is a blind rim in which an additional bridge isolates the spoke holes. Thus, there is no need for laying a sealing tape. In practice, this greatly simplifies life, because when installing a tire (especially without proper experience), the tape tends to crush, which is why you have to reassemble the wheel. It is easy to guess that such rims also have a drawback - their price.
The tubeless system in the form in which we wrote it above is already a full-fledged wheel, it can be installed on a bicycle and hit the road. But there is an important nuance. First of all, tubeless tubes are valued for their anti-puncture qualities: for this, a small amount of a special liquid, a sealant, is poured inside the tire.
Yes, you can. But you should not do this. Firstly, this is illogical: for no reason you are depriving yourself of the main advantage of tubeless - the anti-puncture effect. But more importantly, it is very difficult (or even impossible) to inflate such a tire in a completely flat state with a portable pump: to do this, you need either a strong floor pump or a booster. Naturally, no one will take such bulky things with them on the road. Filled with sealant 95% of punctures "seal" without a critical loss of pressure, and in most cases there is no need for even light pumping.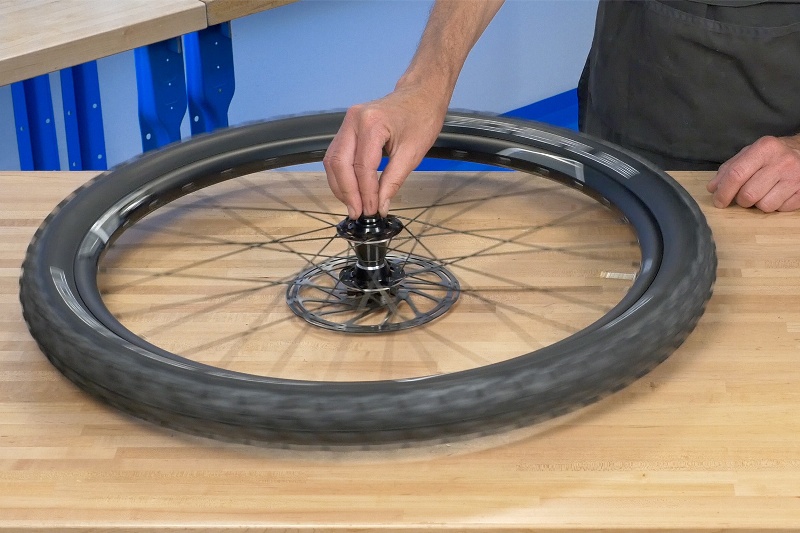 Thus, the probability of being with a flat tire is very low.
So, if you put tubeless, sealant is still needed. Such fluids are easy to find in any bike shop, they are inexpensive and require replacement on average once every three to four months, so there is no need to talk about any inconvenience. Yes, in order to cope with the fill, you need to acquire a certain skill, but this is much easier than constantly changing broken cameras. In addition, sealant can be replaced once a season in a specialized service.
Bicycle sealants are based on fine particles (rubber or polymer fibers) suspended in a liquid carrier. Inside the wheel, the sealant does not polymerize: it is in a liquid state and is distributed along the inside of the tire during movement. When a puncture occurs, the air flow begins to push the solution out. A fine suspension clogs the hole, and the sealant dries quickly. Thus, there is a reliable "sealing" of the puncture.
If we talk about typical punctures - collisions with thorns, wires, small glasses - such damage is self-healing without a noticeable loss of pressure. Usually, a puncture can only be guessed from a small spot on the surface of the tire. Naturally, the sealant works with more complex damage. You can count on it even if you pierce the wheel with a thick nail, 4-5 mm in diameter. If you don't understand how a liquid can seal such holes, you can watch numerous crash tests on YouTube that demonstrate the miraculous properties of sealants.
The consumption per tire is from 50 to 100 ml. If we are talking about standard MTV tires, the golden mean is about 60 ml per wheel. The exact dosage will always be written on the bottle. It is difficult to get confused even for those who do not like to read instructions: most sealants have measuring containers or a dosage scale on the bottle itself.
Here, too, everything is conditional and depends on the characteristics of the specific composition and intensity of punctures.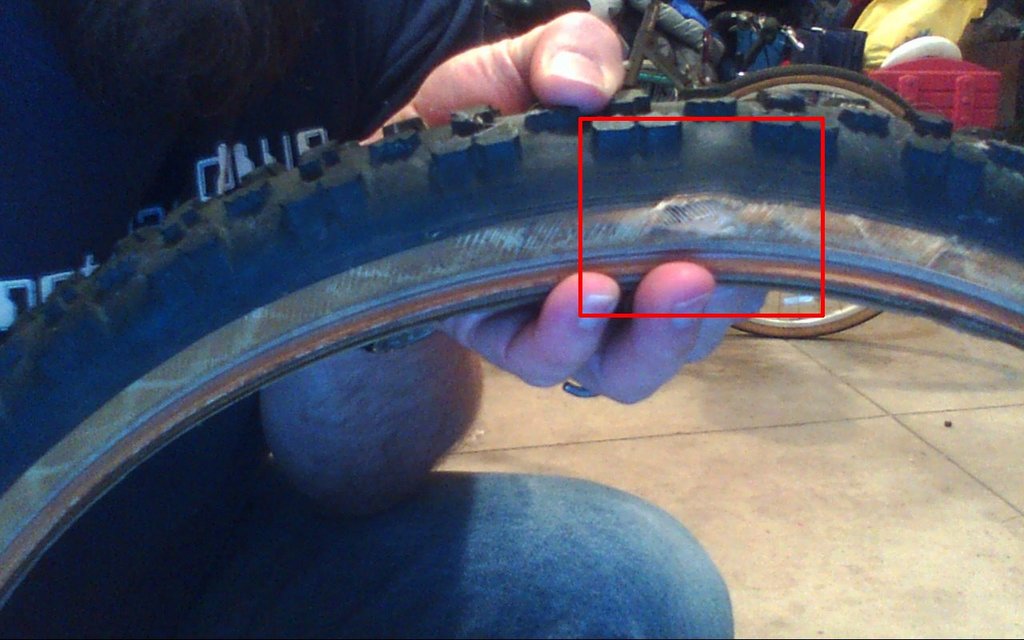 In the absence of serious damage that entails the leakage of a large volume of sealant, you can easily skate a whole season on one fill. Some cyclists prefer to do an incomplete start-up gas station and gradually add 20-30 ml of fluid every two to three months. You can also navigate by how effectively the sealant works: if you see that small punctures are sealed with a strong deflation of the wheel, it may be that the composition is no longer enough and it needs to be added. Be that as it may, sealant is a very economical thing that lasts for a long time.
The sealant inside the tubeless tends to dry out, forming a characteristic film. Whether or not to clean the tire cavity is up to you. This is a purely aesthetic moment, which does not affect the operation of the anti-puncture fluid. The sealant can simply be added as it dries and not bother with unnecessary worries. It is more likely that the tire will completely wear out than it will have time to completely clog with dried filler.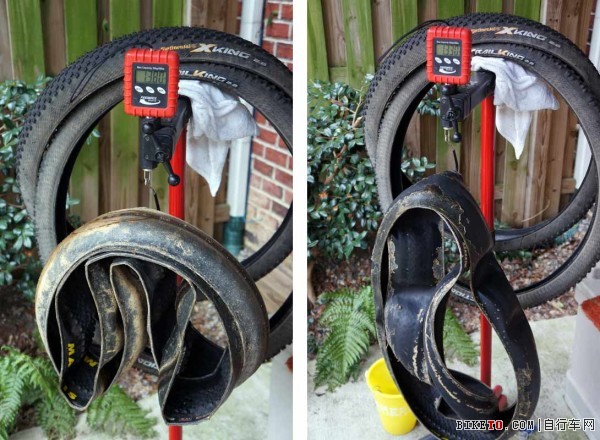
Serious damage - large diameter punctures, small cuts, run over nails with subsequent tire rupture - are repaired using special repair worms. These are rubber or fibrous bands that are inserted into the hole to reduce its area and allow the sealant to seal the puncture.
With long longitudinal cuts it is more difficult. Here you need to either sew up the dissection with nylon threads, or stick a patch on the inside of the tire. You don’t have to worry about the tightness of the repair site - the sealant will do this work, of course, if it does not have time to leak out. But being able to inflate a completely flat tire with only a portable pump will require skill.
In fairness, we note that such complex injuries are rare for most cyclists. But for those who are seriously passionate about off-road, it is better to play it safe with a spare camera. In this case, having caught a cut, you can always drain the sealant, unscrew the nipple from the rim and install a regular camera. And in order not to drive with a “hernia” protruding outward, we recommend placing, for example, a bill folded in half under the cut on the tire.
Tubeless allows you to forget about such an unpleasant form of damage as a "snake bite" forever. It usually happens when at full speed you catch a pothole in the pavement, unsuccessfully jump onto a curb or run into a stone on a downhill. Hitting the edge of a hard object, the tire is crushed, and the rim walls work like incisors, damaging the chamber in two places. In tubeless wheels, this scenario is excluded, because. there is nothing to break through here. Of course, it can be assumed that the rim will cut the tire itself, but this should be a blow of enormous force, which is almost never encountered in practice.
Rejection of the chamber increases the volume of air in the wheel. This changes the contact patch (it becomes flatter) and allows the wheels to better absorb off-road bumps. Add here the ability to ride at low pressure, without being afraid of a snake bite, and it becomes completely clear why tubeless lovers of hard off-road riding so idolize. Soft tires with a large contact patch "fit" all the bumps in the road, giving excellent traction on rocks, forest primers and other off-road.
In addition to traction, tubeless tires improve shock absorption, dampen vibrations better, and generally provide more off-road comfort. At the same time, to get the most out of this rubber, you need to experiment a lot with tire pressure, trying to find the indicators that will best suit your individual riding style.
Finally, the camera is extra grams. By refusing them, you can save an average of 70-100 g of weight on each wheel. For some, this may seem like a formality, but it is worth considering the fact that extra grams on the periphery of the wheel have a stronger effect on driving performance. This difference is especially felt on road bikes: road bikes, gravel, touring.
They also exist. Moreover, it is far from formal. First, it's the price. The difference becomes especially noticeable when you buy tubeless systems separately: rims, tires + small things (tape, removable nipples, sealant). For tubeless you will have to pay an average of one and a half times more than for ordinary wheels, plus or minus the same class. And if we are talking about more advanced UST rims, then this means another + 30-40% to the cost.
With tubeless by default, everything is more difficult in terms of installation (here we are talking about conventional BST systems). You need to learn how to properly glue the tape, accurately insert the nipples, carefully install tight rubber, making sure not to displace the tape and not fill everything with sealant. On the other hand, all this comes with experience, but what you will always have to put up with is the difficulty with pumping a completely flat tire.
A tubeless tube cannot be inflated until its landing board snaps into place on the rim.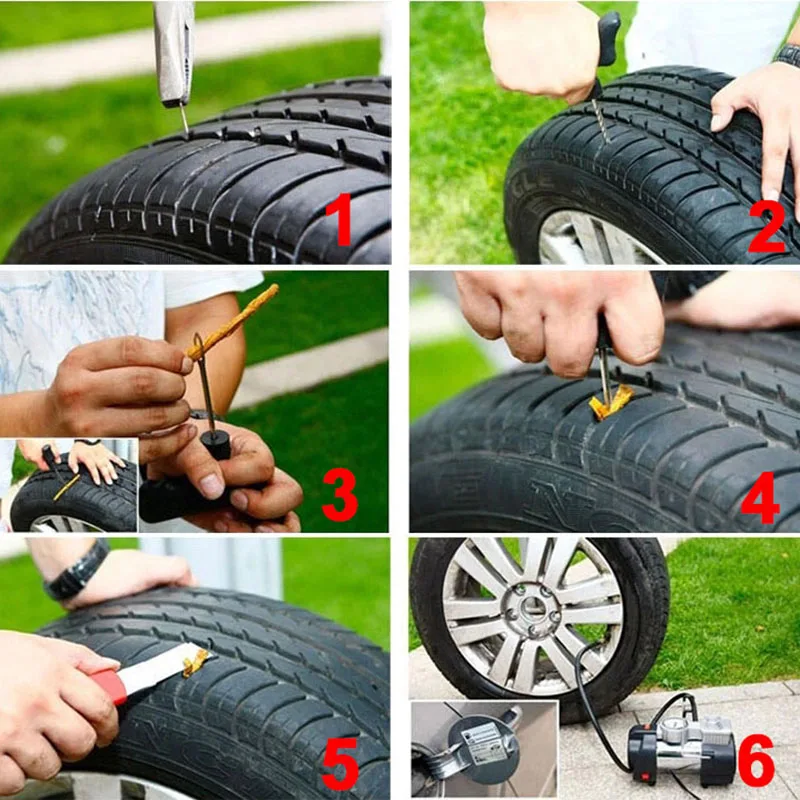 To do this, you need to sharply introduce air into the tire. The tire should straighten up and fall into the grooves with a characteristic click - then it can be safely pumped further. This all sounds simple if there is a compressor in the garage. Putting a tubeless tube into the grooves by pumping air with an ordinary floor pump is quite difficult, and almost impossible with a portable bicycle pump.
All this makes life much more difficult. But there are solutions. In the field, a compact can of compressed air can help out. At home, installing tubeless tubes greatly simplifies the booster. This is a cylinder into which a high pressure is pumped with a pump, then it is connected to a nipple, the valve is lowered - and the air from the reservoir pumps up the wheel sharply.
As you can see, tubeless cameras also have enough disadvantages, but it is wrong to consider them in isolation from the advantages. For example, the probability of being with a completely flat tire away from home is very low, due to the anti-puncture qualities. Complicated installation is offset by the lack of punctures and roadside repairs. And by overpaying in price, you save on interchangeable cameras, and, of course, win as a roll on off-road.
Now I will campaign for tubeless wheels, which I consider the second great gift of bicycle marketers (the first gift is the transition to the 1x system, one star in front). I myself got to tubeless only last year, along with a return to the MTB theme.
Anyone who more or less seriously rides offroad and is still on cameras, I recommend that you carefully read the text below - only practice, only relevant info, no lyrics about UST wheels and ghetto tubeless. Perhaps I can convince you to look in that direction.
Well, the rest can also be found for development. This will only be about mountain bikes and hard off-road use, although there are also advances in this direction on the highway, but more on that another time.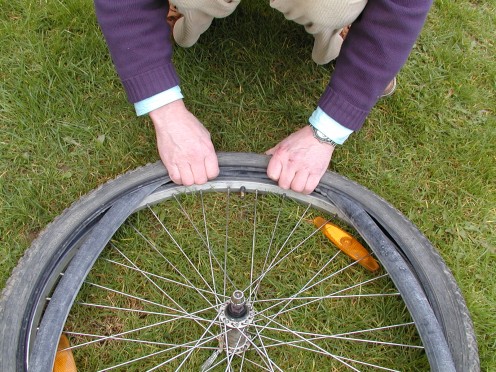
Contents:
An advantage that is important for any rider, regardless of style and level of riding - you can forget about 95 percent of punctures. Any little thing, such as plant thorns, wire, small glasses, etc. sealed with sealant almost instantly. On chamber wheels, each such episode would turn into a seal / replacement of the camera.
Absolutely real picture
Ability to drive at low pressure. This point will be appreciated by cyclists who ride on a hard off-road, where there are a lot of stones, roots and loose dirt. A soft tire spreads over the surface, clinging to each tread cube, licks bumps, and it is extremely difficult to break it with a snake bite (but, of course, everything is possible if the pressure is too low - both the tire and the rim are crushed).
Therefore, to get the most out of tubeless, the tire pressure setting must be very precise. Let's take a conditional wheel weighing 80 kg and a 2. 35 tire, with chambers it will have to fill at least 2 atmospheres, and with a tubeless wheel 1.5, or even less, will be enough. The difference in behavior on the ground will be enormous.
The next benefit is better cushioning, less vibration, more comfort. It is possible to have a bike with excellent suspension, but low-pressure tires, especially large-volume ones, are the best to eat small things. For example, I currently have a Schwalbe Nobby Nic 29×2.60 in front and a Maxxis Agressor DD 29×2.50 in the back, my weight is within 100kg and I ride with 14psi/21psi (0.97/1.45atm) pressure - perfect. The grip is just crazy, the bike goes smoothly and rolls perfectly.
Tubeless wheels roll even better, and rolling resistance measurements do show some improvement over tubeless ones. Subjectively, it is difficult to feel, but in any case, the best roll forward, albeit a little bit, is not bad.
Well, the weight, where without it. Even with the sealant, on average, you can save up to 100g per wheel by eliminating tubes.
Let's start with the fact that tubeless tires are initially more trouble - to install them, you need special rims and tubeless ready tires, you need a special sealant, you need rim tape and nipples. And the installation process itself is not always simple and sometimes requires a compressor or booster.
Unrepairable outside the walls of the house or workshop. If you cut the tire badly and need to glue it from the inside, or it was torn off the rim due to too low pressure, then with a portable pump you will never put it back. There are two solutions to the problem: a CO2 cartridge with you, the pressure in which allows you to put a tubeless on a rim or a spare tube. Both options are good, I stick with the second.
It's expensive. If you have a simple bike or an old model, then its rims do not support the installation of tubeless, you need to buy new ones. The tubeless ready rubber itself is more expensive than the tubeless one, although lately almost all MTB tires in the most popular price range of 40-60 euros have been produced only in the tubeless version. Well, rim tape, nipples and sealant also cost money.
The sealant tends to dry inside the tire and coat the inside of the tire with a thin adhesive layer. Because of this, about once every six months, you need to remove the tire and scrape out all the muck. You can not do this, but simply add new sealant slowly as it dries, but then a layer of dried sealant will grow (nothing to worry about).
An important factor is that the rim must fit the width of the tire. Here are the options if the dimensions don't match:
Narrow: pear-shaped profile, poor steering, increased rolling resistance, tire feels rolled (floats)
Correct contact patch, tread cubes in place. Minimum rolling resistance with maximum grip.
Wide: Vibration absorption deteriorates, side studs catch on the road in a straight line, poor steering
First, make sure your rims are ready for conversion. To do this, you can google the description of the rim model, it should be labeled tubeless ready, TR, TLR. You can make it easier - look at the profile of the rim, it should have small indentations near the walls that keep the tire from falling off at low pressure in a turn. When installing the tire, as it were, snaps into these grooves and holds firmly there.
Rim tubeless ready
Unfortunately, stock bikes have only recently been fitted with such rims, and we are talking about models in the middle price segment and above.
You can fit tires tubeless and on a regular rim, but the lack of these seats will not allow you to take advantage of low-pressure riding - the tire will simply rip off with a strong side load. On the other hand, even one such important plus as puncture resistance is worth it to switch to tubeless and on a regular rim.
So, to install tubeless tires, you need to buy these nipples, sealant and rim tape .
The size of the tape should be taken a little less than the inner width of the rim, let's say the rim is 25i, so the tape will be 23mm, give or take.
But here is a nuance, it is usually recommended the other way round, so that the tape is slightly wider than the rim, then due to the concave profile it will completely cover its entire width. At first I did this, but it turned out that when removed, the tire tore off the tape, jumping out of its seats. I bought tape already on the rim, to seal only the place where the spokes, and everything was fine.
Approximately 60 ml of sealant for one tire size 27.5x2.25, 473 ml cans will last for two seasons.
To put a tire on a rim, you must have either access to a compressor or a good floor pump (the latter does not guarantee success).
So, having prayed to the bicycle gods, we begin. We clean and degrease the inner surface of the rim, then glue the rim tape. You need to glue carefully, but with an interference fit, completely, the entire circumference, even with an overlap. One layer is enough. They pasted it, smoothed it with their fingers, made sure that the tape stood up evenly, without bubbles.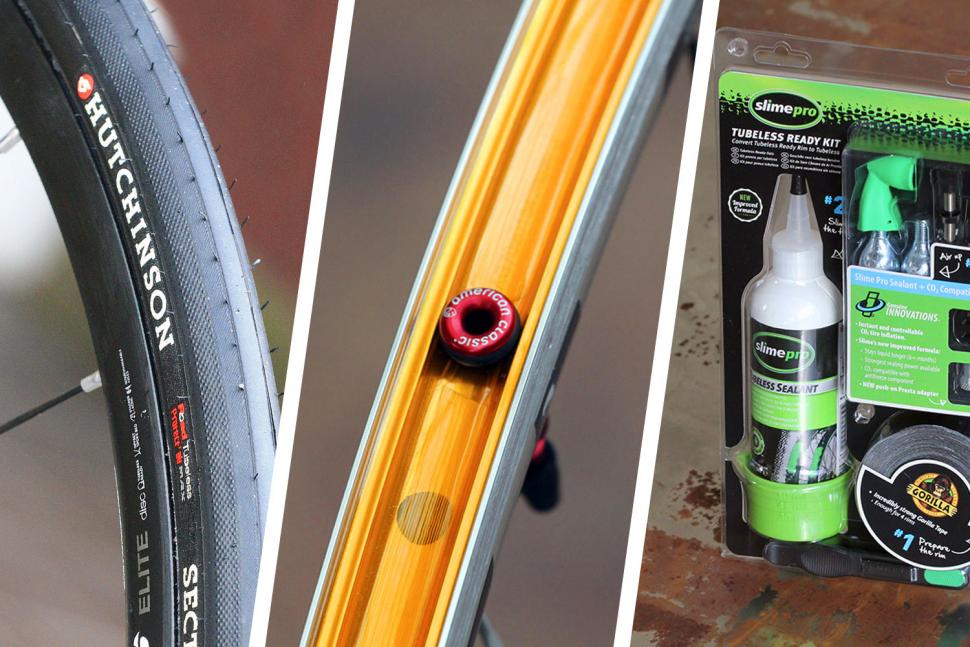
Now with something sharp, make a small cross cut at the hole for the nipple. We very carefully insert the nipple for tubeless tires into this cut and slowly push it through, put it in its place. We tighten the nut, confidently, but without fanaticism, it is not necessary that the sealing gum is deformed.
The job is almost done, it remains only to put the tire on the rim, but this is just the biggest problem if you do not have a compressor or booster. We do everything, as usual, first one side, then the second, preferably with bare hands, without the use of montages. If it doesn't fit, try my recommendation on how to put a stubborn tire on a rim.
If you have a compressor, then everything is simple - blow into the nipple, the tire will click into place and it's done. But if there is only a floor pump, then the chances of pumping up a tubeless wheel are 50/50. First you need to unscrew the core of the nipple (spool), with a special key or pliers, so that air enters the tire without resistance.
We turn on the pump, once again ask the mercy of heaven and begin to pump furiously. The harder you pump, the more air comes in, expanding the tire. With any luck, this will be enough and the bead cord of the tire will jump into its grooves on the rim. If not, then you swear and try to swing even more furiously. Most often, if the tire does not rise immediately, then it will not rise.
When I got tired of these exercises, I bought myself a booster - figuratively speaking, a bottle with a hose into which you can pump a lot of air by creating a pressure of 8-10 atmospheres. Then you connect this bottle to the nipple, open the valve, and watch with joy how the tire jumps into the right place.
Schwalbe booster is a useful item
An extremely useful booster item in the tubeless inventory. You can buy it, it costs between 40-50 euros. You can make it yourself, even from an old fire extinguisher, even from a 1.5l plastic bottle (google DIY tire booster). Also, if you do not already have a floor pump, you can buy a pump with an integrated booster, but it is quite expensive (like a regular floor stand and a booster separately).
Now that the tire is in place, screw in the spool and inflate the wheel to its maximum pressure to see if it deflates. Usually, at this stage, if there is an air leak, it is because the rim tape has not adhered well or is torn in the area where the nipple is attached. Then you have to disassemble everything and re-glue the tape. But most often the pressure holds, you can fill in the sealant.
Unscrew the spool again, and pour "milk" directly through the nipple, as much as necessary (about 50 to 100 ml is needed, depending on the volume of the tire). There are measuring bottles, but you can fill it with a syringe.
Schwalbe Doc Blue Sealant - actually it's a regular Stan's Notubes, so you can safely buy
When the sealant is poured, it is necessary that it spreads on the inner surface of the tire, for this, spin the wheel on the axle, tap it on the floor. Sometimes you can immediately see that in some places the tires had micro holes, sealant begins to ooze out of them. It's all right, nothing to worry about. Screw in the spool, clog the working pressure and go for a ride - this is the best way to get the sealant to the right place.
If what you read seems like a complex operation, it is actually very simple, taking about half an hour if for the first time. For visualization, here is a video for you on how to put a tubeless tire on a bicycle:
I deliberately did not touch on the topic of ghetto tubeless, this is when ordinary rubber is put on a regular rim. This topic itself is dubious, but if you have such a need, just google this phrase.
Sealants are different, at least four or five well-known brands make "milk", they have slightly different properties. Two main requirements: to quickly seal the punctures and not dry out for a long time.
I read somewhere a comparison of all the main sealants and there I came to the conclusion that these two claims are poorly compatible: either it does not dry, or it glues well. Therefore, most tubeless bikers use the old, trusted Stan's Notubes (or Schwalbe Doc Blue, which is the same). It dries up and every two or three months you need to add a little, but these are the costs of technology.
He glues all the little things instantly, cuts, of course, are worse, but also not bad. There is also a recipe for adding decorative glitter to the sealant to thicken the consistency and improve the sealing speed, but for me personally, what I have is enough.
How many atmospheres to fill is determined empirically. I take a small gauge with me on the trail and start riding, gradually reducing the pressure until I feel good in terms of smoothness, and in terms of grip, and in terms of overrunning. As soon as the roll has fallen and the tire has begun to "float" - stop, return to the previous level. It's simple, experiment once and then stick to these values.
Before I started using tubeless bikes, my bike had some average pressure for all roads. Now, before I leave the house, I inflate tires for a specific style of the current ride. Since I ride aggressively on hard rocky trails most of the time, I have an MTB setup, as I wrote earlier - 14/21psi, but if I'm going to roll far on asphalt, I stuff 20/28psi. Already very different behavior of tires at different pressures, I want to squeeze the maximum.
Riding a bike, you are pierced by something small, and on the go it is not even noticeable, you are driving, but it is just stuck. When something is more serious, and you can hear the “milk” hissing and splashing, it’s better to stop. First you need to lower the puncture site down so that the sealant penetrates well into the hole, and then start rotating the wheel.
The gluing process is similar to clot formation, contacting with air, the sealant particles become thick, new particles are deposited on them and a layer of hardened sealant grows at the puncture site from the inside. When the air has stopped oozing, you can pump up the wheel to restore pressure and drive on. The whole operation usually takes a minute or two. Compare how much it takes to change a camera.
In 95% of cases, self-sealing a tire is quick and painless, but sometimes there is a large cut or tear, then the sealant simply cannot cope. In the field, such a nuisance is difficult to eliminate. There are special patches that look like fungi for car tubes, but I have not personally used them and have heard mixed reviews.
If you find yourself in the described situation, then you need to be prepared for this. Some carry the usual camera patches and CO2 cartridges. They seal the cut from the inside, then use a spray can to bead the tire, pump it up to working pressure and move on.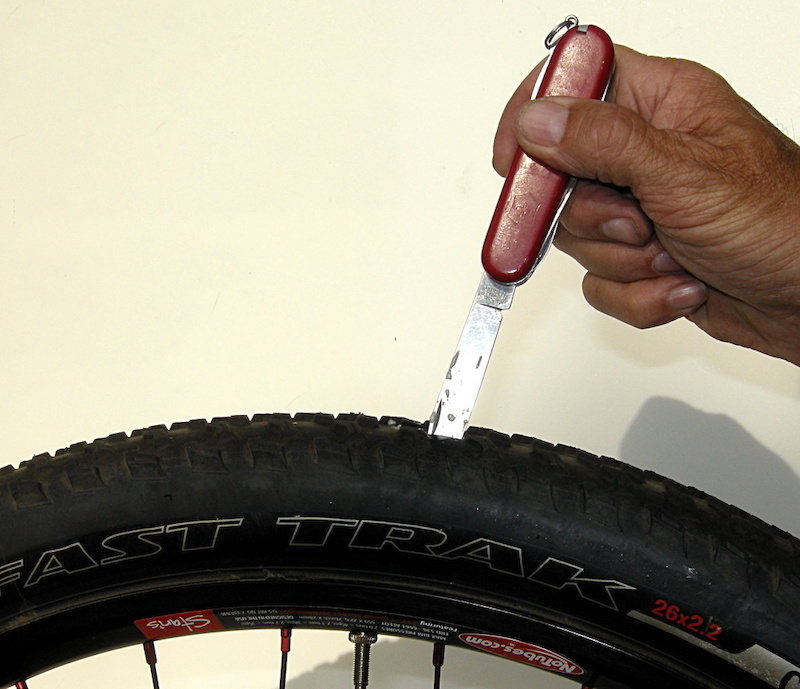 This option is so-so, because on rocky trails you can tear the sidewall of the tire and most likely no fungus will help. You need to darn with a needle and thread, and then glue the patch from the inside.
Therefore, I get by with a spare tube, if such a misfortune happens, then I simply disassemble the tire, unscrew the tubeless nipple, and put the tube, having previously poured out the sealant. There is only one caveat - the tire, most likely, already carries a lot of small thorns, wires and other muck, which is enough on the roads. If you immediately put the camera, then most likely it will immediately pierce from the inside. Therefore, you must first carefully probe the inner surface with your hands and pull out all the sharp rubbish sticking out.
Based on this, the conventional wisdom that tubeless is not good for travel is a myth. Firstly, it is not so easy to ruin the tire so much, and secondly, you can temporarily roll back to the camera without any problems. But you get an almost complete absence of trouble with punctures.