
Delivery options and delivery speeds may vary for different locations
Sign In
or enter a zip code
Email * Password *
REPAIR & HOW TO
MAINTENANCE
TROUBLESHOOTING
GUIDES
TIPS & TRICKS
ALL ARTICLES WATCH VIDEOS ABOUT US SHOP PARTS CONTACT US
There are three types of starters fitted to motorcycles, ATVs and side-by-sides, and the steps below detail how to test each one of them.
Tools Needed – How to Test StartersBefore bench testing a starter, make sure to:
The first type of starter has a starter motor and a solenoid incorporated into a single unit. The starter features a Bendix gear that engages with the flywheel in order to start the engine. This type of starter is commonly found on side-by-sides, utility vehicles and automobiles.
The second type of starter has a separate starter motor and solenoid, but still features the Bendix gear that engages with the flywheel to start the engine. This type of starter is generally found on larger motorcycles and ATVs.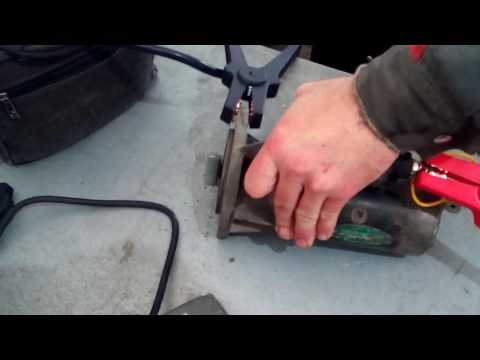
The third type of starter also has a separate starter motor and starter solenoid, but this starter engages with a reduction gear and one-way clutch to start the engine. It doesn’t use a Bendix gear. This type of starter is generally found on sports motorcycles and ATVs.
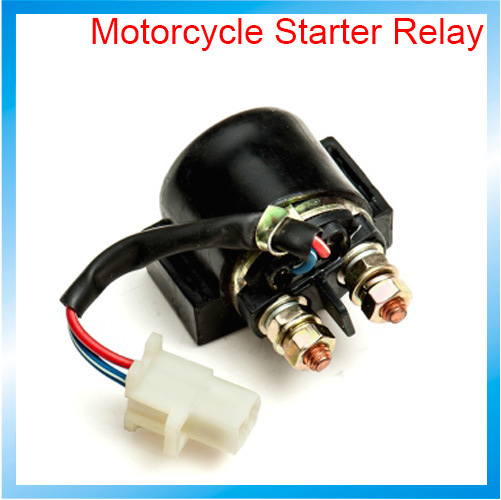
Testing a Bendix Gear Starter/Solenoid UnitThere are two nuts on the solenoid. The one furthest from the starter motor secures the wire coming from the battery, and the one closest to the starter motor secures the wire going from the solenoid to the starter motor. There’s also a spade terminal on the solenoid that connects to the wire from the ignition switch or push button, which triggers the solenoid to engage the Bendix gear.
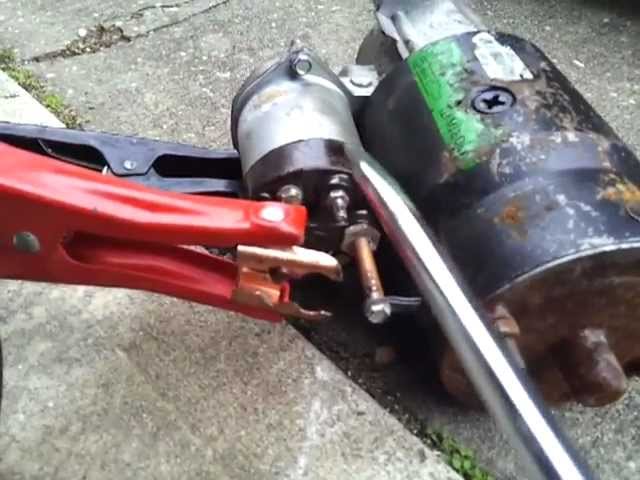
Testing Only the Solenoid1. Connect a negative jumper cable to the negative terminal of the battery and the body of the starter motor.
2. Connect a positive jumper cable to the positive terminal of the battery.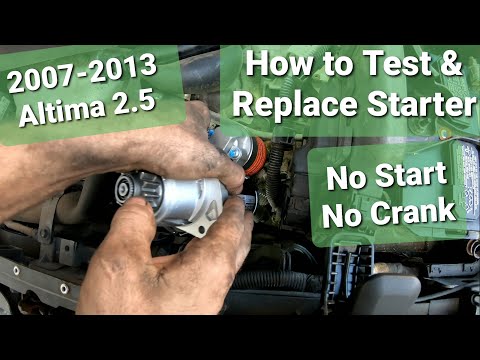
NOTE: The positive jumper cable is now live, so be careful not to touch the other end against a ground surface.
3. Touch the free end of the positive jumper to the spade terminal on the solenoid. You should hear a clicking sound from the solenoid, and the solenoid should force the Bendix gear out of the starter motor. If the solenoid makes no sound and doesn’t force out the Bendix gear, the starter/solenoid unit must be replaced.
Testing Only the Starter Motor1. Connect a negative jumper cable to the body of the starter motor.
2. Connect a positive jumper cable to the positive terminal of the battery, and the other end to the nut on the solenoid furthest from the starter motor that secures the wire from the battery to the starter motor.
3. Touch the free end of the negative jumper cable against the negative terminal of the battery. You should hear the starter motor spin but the Bendix gear will not engage. If the starter motor fails to spin, it must be replaced.
1. Connect a negative jumper cable to the negative terminal of the battery and the body of the starter motor.
2. Connect a positive jumper cable to the positive terminal of the battery.
3. Connect the free end of the positive jumper cable to the nut on the solenoid from the starter motor that secures the wire from the battery to the starter motor.
4. Connect one end of a test lead to the positive jumper cable attached to the solenoid.
5. Touch the free end of the test lead to the spade terminal on the solenoid. The starter motor should spin and the solenoid should force the Bendix gear out of the starter motor.
Testing a Bendix Gear Starter with Separate SolenoidThe starter has a single wire connecting to it from the solenoid. The solenoid has two terminals at one end, and a pair of wires leading out from the other end. The starter motor features a Bendix gear.
1. Connect a negative jumper cable to the negative terminal of the battery, and the other end to the body of the starter motor.
2. Connect a positive jumper cable to the positive terminal of the battery.
3. Touch the free end of the positive jumper cable to the positive wire coming from the starter. The starter motor should spin and the Bendix gear should be forced out of the starter. If it doesn’t, the starter motor is faulty and must be replaced.
Testing Only the Solenoid1. Connect a negative test lead to the negative wire coming from the solenoid, and a positive test lead to the positive wire coming from the solenoid.
2. Connect a positive jumper cable to the positive test lead, and the other end to the positive terminal of the battery.
3. Connect a negative jumper cable to the negative test lead.
4. Touch the free end of the negative jumper cable to the negative battery terminal. The solenoid should make a clicking sound, indicating that it's working.
5. Connect a multimeter to the two terminals on the solenoid.
6. Set the multimeter to resistance. The multimeter should show an open circuit.
7. Touch the free end of the negative jumper cable to the negative battery terminal. The multimeter should show an open circuit, proving the solenoid is working. If the solenoid makes no sound and doesn’t make a closed circuit, it’s faulty and must be replaced.
Testing a Starter with Separate SolenoidThe starter has a single wire connecting to it from the solenoid. The solenoid has two terminals at one end and a pair of wires leading out from the other end. There is no Bendix gear, but there’s a splined shaft coming from the starter motor.
Testing Only the Starter Motor1.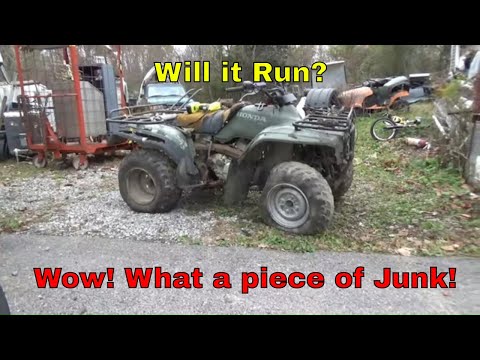 Connect a positive jumper cable to the positive terminal of the battery, and the other end to the nut on the starter motor that secures the positive wire from the solenoid.
2. Connect a negative jumper cable to the negative terminal of the battery.
3. Touch the free end of the negative jumper cable to the negative battery terminal. The starter motor should spin. If the starter motor fails to spin, it’s faulty and must be replaced.
Testing Only the Solenoid1 -7. Repeat the steps for testing only the solenoid, as outlined in the previous section.
body
Delivery options and delivery speeds may vary for different locations
Sign In
or enter a zip code
Email * Password *
REPAIR & HOW TO
MAINTENANCE
TROUBLESHOOTING
GUIDES
TIPS & TRICKS
ALL ARTICLES WATCH VIDEOS ABOUT US SHOP PARTS CONTACT US
A motorcycle, ATV or side-by-side that won’t start is frustrating, but testing to see if the starter motor is at fault is a piece of cake.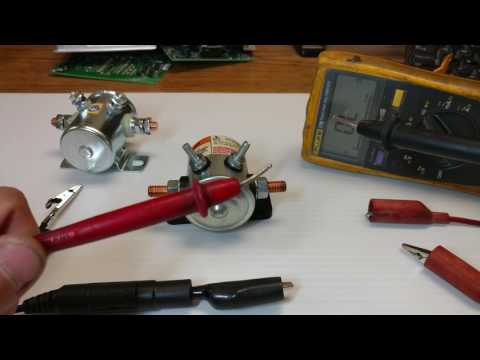
Despite coming in various shapes and sizes, all starter motors work the same way, so you can apply these steps whether you’re testing one for a motorcycle, ATV or side-by-side. Watch the video above for the full version of testing powersports vehicle starters, or read on below for the quick version.
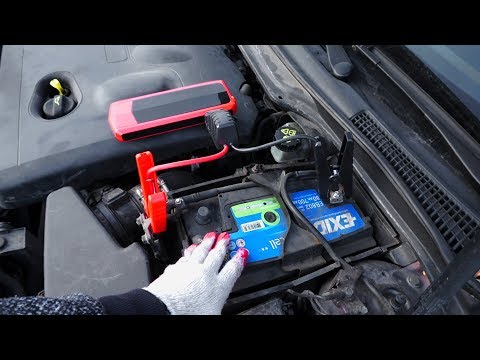
Testing Motorcycle, ATV and UTV StartersStep 1. Use a digital multimeter set to DC volts to check if the vehicle’s battery is properly charged. Connect the multimeter’s probes to the positive and negative terminals of the battery. If the reading is between 12-13 volts, the battery is good. However, if the reading is below 12 volts, you’ll need to charge the battery.
Step 2. Using jumper cables, connect the positive cable to the positive terminal on the battery, and the negative cable to the negative terminal.
NOTE: To avoid an electric shock, make sure the free ends of the jumper cables don’t touch one another.
Step 3. Attach the negative jumper cable to the starter motor’s body to ground it.
Step 4. Hold the positive jumper cable to the battery cable terminal on the starter motor, which will activate if it’s working correctly. If there’s something wrong with the starter motor, then nothing will happen.
NOTE: The starter motor doesn't have to be removed from the vehicle. If you’re testing a starter motor that’s already been removed from your bike, ATV or UTV, hold it firmly as you test it to prevent it from moving around. The starter motor’s battery cable terminal is usually on the starter motor body, but may be on the solenoid if your starter motor has one.
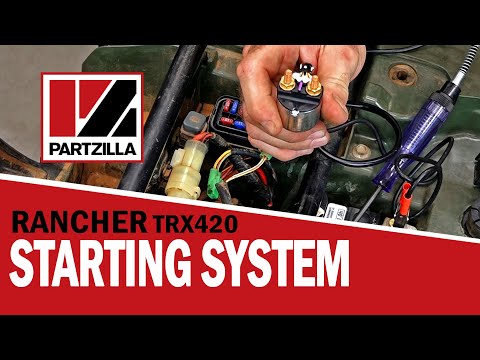
If you’re having starting problems, the starter motor is just one of several electrical components that could be causing problems.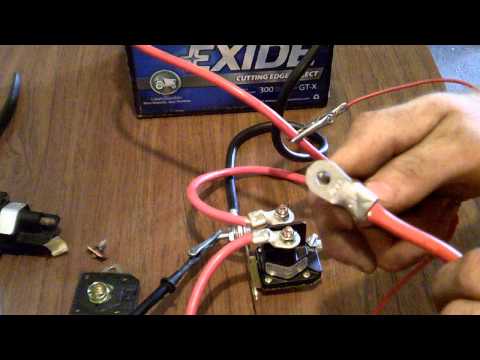 The starter relay or solenoid could be the actual culprit. Watch the video below to learn how to test a starter solenoid for a motorcycle, ATV or UTV.
body
Contents of the article:
Good afternoon, dear friends. Studying the design of the starter and its principle of operation, we briefly touched upon its possible malfunctions. Since this is an important unit in a car, the ability to diagnose the breakdown of its parts in time is a guarantee of high-quality repairs, saved money and nerves.
Today we will learn how to check the starter removed from the car at home from the battery, we will analyze in detail the signs of its malfunctions, what kind of breakdown they indicate. If you correctly determine the defective spare part, then you can not buy a new starter, but only replace a small part of it, which is inexpensive.
This method allows you to make a preliminary conclusion about the performance of the two main electrical elements of the starter: the solenoid relay and the electric motor. Gives an opportunity to evaluate their simultaneous work. All work will be carried out on the table, emitting a test at home from the battery. This technique is suitable for checking a new or used starter before installing it in a car.
What you need:
We will divide the test into three stages.
In this way we can determine with what effort it "jumps out". In other words, determine the performance of all windings of the solenoid relay.
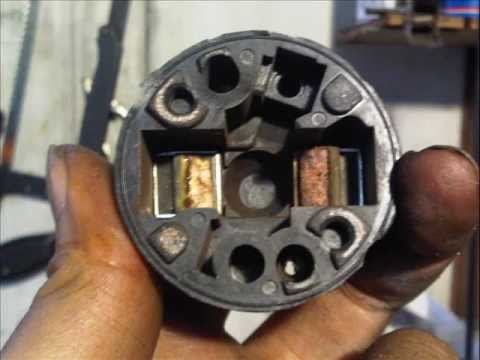
We see that the electric motor has started and its armature rotates at a high frequency.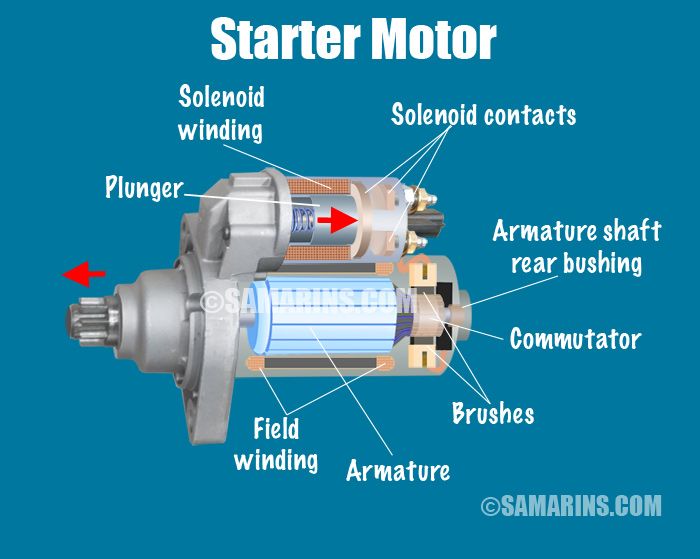 This means that the windings of the armature, stator (if permanent magnets are not used), the brush apparatus are in good order.
Faults:
The armature does not rotate, the speed is low - the contact is broken in the circuit section from the power bolt to the motor windings. Breakage in the windings, possibly large wear on the brushes or slip rings of the rotor.
At this moment, the relay should work, the bendix should pop out and the "penny" of the power bolts should close, the electric motor should start. If all this happened and the anchor spins at a high frequency - everything is fine, the starter is working.
Open circuit of the retractor windings - the bendix will frantically walk in both directions, the relay will “buzz”.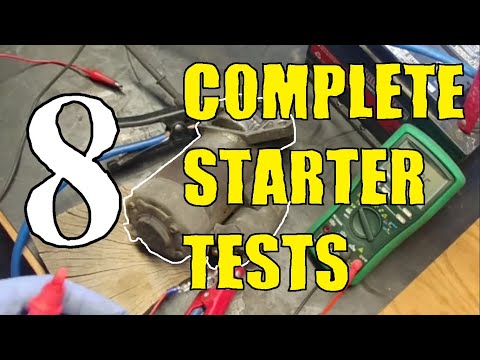
The armature of the electric motor does not rotate - there is no contact on the “pyatak” of the power bolts or the power plate of the movable contact of the retractor is damaged. Possible causes of malfunctions of the electrical part of the engine, discussed in the second stage.
Video tutorial on how to diagnose a starter removed from a car:
Causes:
Causes:
Causes:
Causes:
The retractor relay does not work. Because there is no voltage at the relay enable terminal, a break in the wire or a malfunction of the contact group of the ignition switch. There may be a discharge of the battery.
See also: How to check the starter solenoid relay with a battery test lamp
What to do?
Check for voltage at this terminal. If it is, then the ignition switch and the wire going to it are normal. It is necessary to check the solenoid relay with a multimeter, it may not be working properly - an open connection between the windings and the terminal, an open circuit in the windings themselves.
If there is no voltage or it is below 12 volts, it is worth looking for problems in the ignition switch or wiring. But it can all be done in the garage, and if trouble caught far from home? Required:
 If there are no other starter malfunctions, then it should “come to life”.
 The main thing is not to forget about safety measures so that you don’t get electrocuted, the car doesn’t move forward without your knowledge, etc.
When the key is turned to the “Start” position, a strong voltage drop is observed. This is noticeable by the control lamps on the instrument panel. The starter turns the engine lazily, and after two attempts to start the engine, the battery is completely discharged. The electric motor gets very hot.
Cause:
Short circuit in the stator or armature windings of the starter motor or solenoid relay. The brushes are worn out or there is damage, as a result of which they are closed to the housing. Collector slip rings worn out due to wear.
When you try to start the motor, a large current flows around the windings immediately to ground, a short circuit occurs, as a result of which the battery is quickly discharged and the unit is very hot.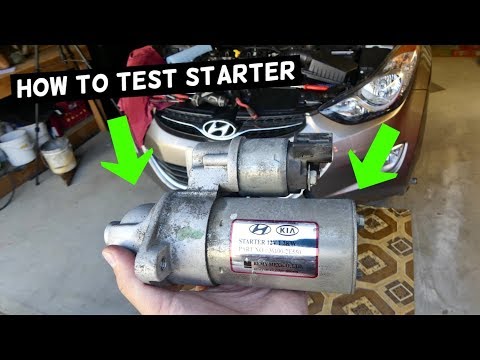 To accurately determine the defect, it is necessary to remove the entire mechanism from the car, completely disassemble it, visually inspect and “ring” the entire electrical part.
In conclusion, I would like to note that you should not buy a new starter if it breaks down. It often happens that a small part fails, which you can replace yourself, and its cost is several times lower than the entire unit. The main thing is to correctly diagnose. As described above, this can be done both on a removed starter and on a car, according to the characteristic signs of its breakdown.
Every ATV owner sooner or later faces a breakdown. And it doesn’t matter if you decide to buy an inexpensive ATV or a branded device.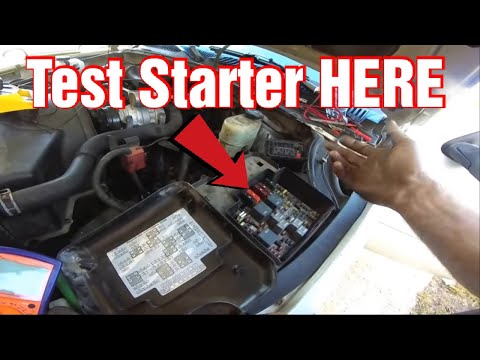 Of course, this is an unpleasant situation, but most problems can be fixed by hand. So let's figure out what to do if the ATV does not start.
Constant driving to the limit and improper operation of the equipment often causes a number of breakdowns. Due to high loads, it can fail:
But most often, problems arise because of some trifle, such as low-quality gasoline, lack of oil or improper preservation of equipment.
The first thing a motorist needs to do if the ATV does not start or stalls is to check the gas tank. If the fuel is idle for a long time, it may evaporate, and if the tank is empty, gasoline should be added. But if there is fuel in it, it is advisable to drain it. Very often, low-quality fuel comes across, which after a while simply ceases to ignite.
Don't forget the oil. If a low-quality liquid was poured into the system, the device will lose dynamics and may even stall. This problem is especially relevant for four-stroke quads, since their power unit must literally “float” in oil.
Another reason why the ATV does not start is improper preservation of the equipment. Even if you leave the device for a day in the garage, it must be prepared for downtime, otherwise starting the engine will be a real test.
Preservation required:
Many riders ignore such a simple procedure, but it is this that most often causes problems with starting equipment.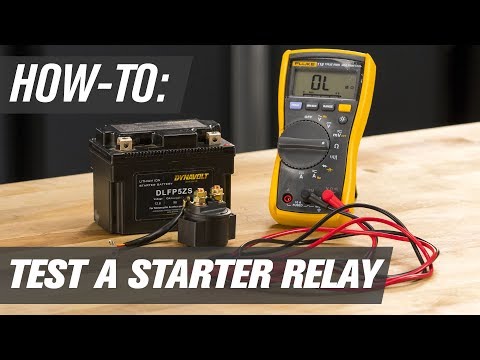 For example, it is almost impossible to immediately start a “cold” engine. Therefore, the driver begins to methodically press the "start" button, and at this time the battery is discharged. After 10-15 attempts, the battery runs out, and it becomes unrealistic to start the equipment.
Important: In severe frost, it is imperative to carry out conservation of the ATV. If this is not done, condensation will collect at the bottom of the carburetor, and the quadric will have to “warm up” for several days.
ATV won't start due to starter or bad contacts. In this case, follow:
 After that, the contacts are lubricated with a special grease. However, if the damage is severe, it is better to replace the part.
 But what if the Chinese ATV won't start due to problems with the starter in the field or away from home? In this case, the rider needs to close the relay contacts with a screwdriver. Thus, the rider will be able to start the device bypassing the faulty starter.
No spark is another simple but annoying failure. It usually occurs due to damage to the coil or a break in the wires that go to the candle. Solving the problem is easy. The rider just needs to unscrew the candle, insert it into the cap, attach it with a metal part to the motor and press "start".
Even minor downtime can prevent the ATV from starting, especially if it has been improperly preserved. And in order to “reanimate” the equipment after the winter, you should:


-Step-3-Version-2.jpg/670px-Fix-a-Wheelbarrow-Tire-(tubeless)-Step-3-Version-2.jpg)