By
Kamron Sanders
Kamron Sanders
Kamron Sanders is a home improvement expert and writer with over 15 years of hands-on construction, remodeling, woodworking, home repair, and landscaping experience. He has also written for HGTV. Kamron's expertise ranges from troubleshooting saws and lawnmowers to painting kitchen cabinets.
Learn more about The Spruce's Editorial Process
Updated on 07/08/22
Reviewed by
Deane Biermeier
Reviewed by Deane Biermeier
Deane Biermeier is an expert contractor with nearly 30 years of experience in all types of home repair, maintenance, and remodeling. He is a certified lead carpenter and also holds a certification from the EPA. Deane is a member of The Spruce's Home Improvement Review Board.
Learn more about The Spruce's Review Board
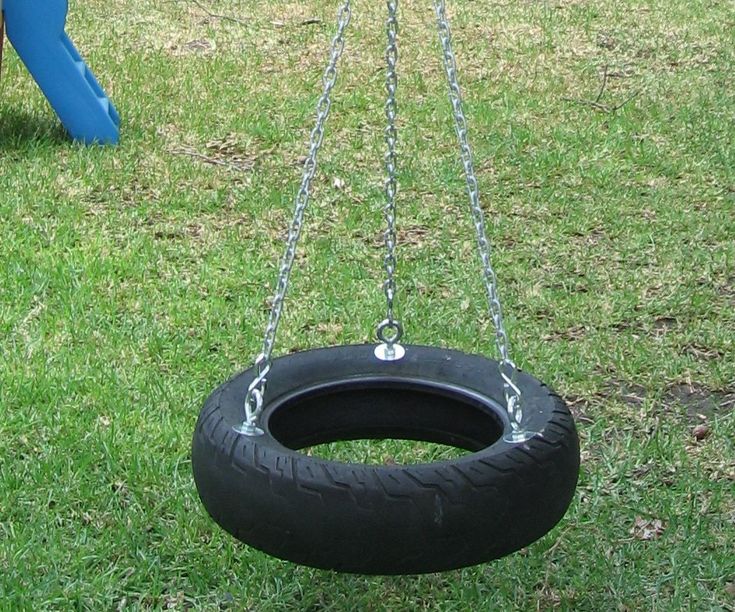
Stephen Simpson / Getty ImagesProject Overview
Introducing a tire swing to your backyard is sure to be a decision that you (and, more importantly, your kids) will be happy you made. If you've seen tire swings and assumed they're too hard to install or difficult to make safe, you may be surprised to know that this project is actually very simple. And, when done right, tire swings can be a safe form of entertainment for both children and adults.
11 Delightful Swing Ideas for Yards of All Shapes and Sizes
There are two popular styles of tire swings. One type features a horizontal tire with ropes attached at three equidistant points. The second type features a vertical tire with a rope simply tied around the top of the tire. For this project, we'll focus on the latter option as it's quick, easy on the wallet, and a more versatile option for users of all sizes.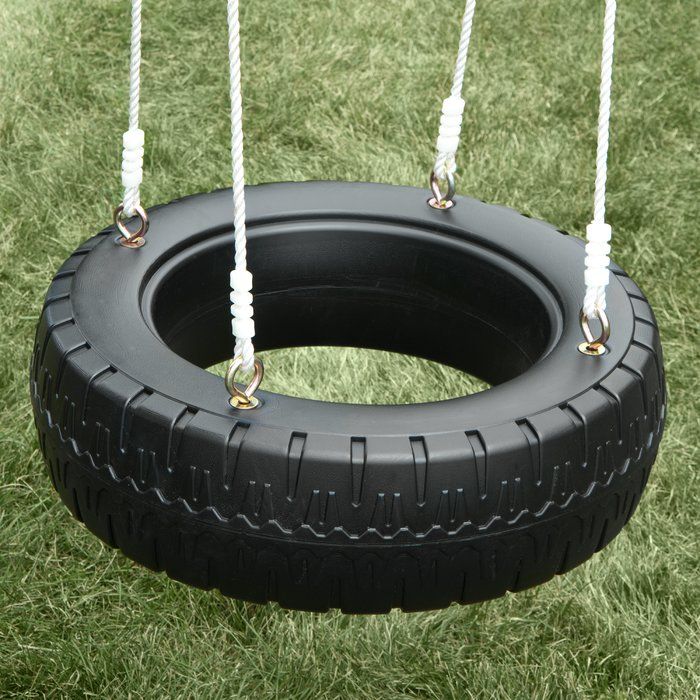
A tire swing requires a solid branch at least 8 to 10 inches in diameter that is in good health. Fruit trees, evergreens, and other softwood varieties should be avoided, as these are prone to breaking under pressure. Instead, look for strong, mature trees such as oak trees, maple trees, hickory trees, and other hardwood varieties.
How to Build a Swing
If you don't have one already, recycled tires in good condition are readily available. Check tires stores, online listings, and family and friends. Look for a relatively large tire with a wide sidewall and no dry rot.
Polypropylene rope is perfect for a tire swing, as it won't be compromised as a result of outdoor exposure. When used properly, 3/4-inch polypropylene rope is more than strong enough to hold the weight of a tire and any potential user. The amount needed will be determined by how far your branch is from the ground, but you should aim for a branch no further than 15 to 20 feet high.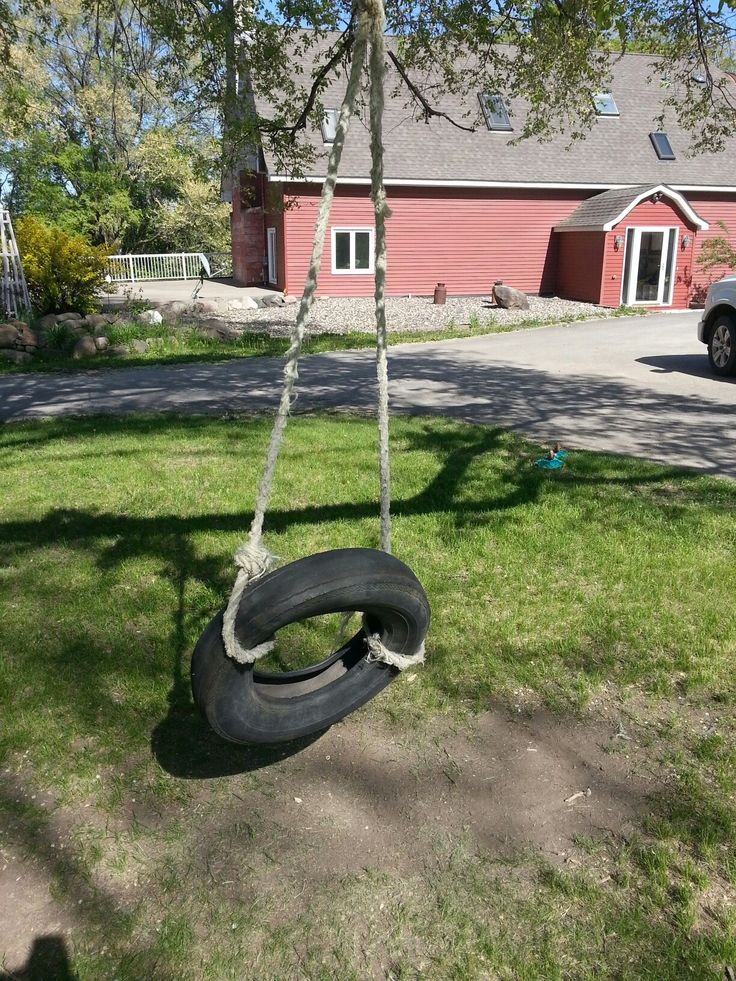 In this case, a 50-foot rope should do the trick.
Polypropylene rope is a strong, synthetic rope that is resistant to rot and deterioration due to water. While many styles are colorful, varieties that imitate the look of natural rope can also be found.
If you don't have a ladder long enough to lean on the tree branch, there's an easy way to get your rope over the branch. Simply tie string (something like mason line string will do the trick) around a small object like a bean bag and toss it up over your branch. Once over, tie the other end of the string to your rope and pull it over the branch. Repeat this process once more to double the rope over the branch and prevent it from slipping down the branch.
To secure the tire to the rope, no hardware is needed. Simply slide the two ends of the rope through the center of the tire and around the top of the tire twice. Adjust the tire until it sits 3 feet off of the ground to account for rope stretch. Approximately one foot above the top of the tire, tie a bowline knot with plenty of excess rope left at the end. This will be trimmed later.
Improperly tied knots can pose major safety risk. If you aren't confident in your knot tying abilities, consult with someone who can help ensure the job is done correctly.
Step back and inspect the tire, the rope, and the positioning of the tire from the ground and tree. Once you've verified that the rope is properly knotted and the tire is adequately spaced from the tree and ground, have an adult carefully test the swing. This will allow the adult's weight to set the knots and stretch the rope.
Once the knot has been fully set, trim the excess rope from the knot, leaving approximately 4 to 5 inches. Use a lighter to burn the ends to prevent fraying.
Without drainage, the tire will be prone to collect water, leading to messes and mosquitoes. To add a drain hole to the tire, use a 7/8-inch paddle bit and drill through the lowest point of the tire.
To further prevent pests, consider treating the tire with a bug repellant that is safe for human contact.
Depending on the size of the user, this tire swing can be used by sitting inside or sitting on top. Always hold the rope tightly and avoid swinging toward the tree.
While the polypropylene rope and the tire will likely last forever, trees are living and ever-changing. Make a habit of consistently inspecting the tree branch and the position of the rope on the tree. Should you suspect anything has been compromised, always act on the suspicion and ensure the safety of the swing.
Additionally, tire swings can serve as ideal homes for wasps, bees, spiders, and other biting and stinging creatures. Always inspect the inside of the swing before playtime and instruct your kids to do the same.
The 9 Best Swing Sets of 2022 for Your Backyard
Photo: istockphoto.com
Sometimes the simplest things can bring the greatest summertime pleasures. Outdoor fun doesn’t have to include expensive, custom-built play sets; you can create instant outdoor entertainment by upcycling an old tire into a one-of-a-kind swing. Read on to learn how to make a tire swing the easy-peasy, old-fashioned way!
Tools & MaterialsRELATED: The Best Tree Swings for Backyard Fun
Advertisement
This project is perfect for beginners, as you only need a few tools and basic knot knowledge—oh, and you need a tree (a big tree).
Chances are, if you’re looking into how to make a DIY tire swing, you already have a tree in mind for mounting it. Just make sure that it’s large, healthy, and the branch that will hold the tire swing is at least 8 inches thick. If a tree shows signs of decay or has cracks or dead branches, it’s not suitable for a tire swing.
Other considerations include making sure there’s enough clearance between where the tire hangs and the trunk of the tree as well as the ground. And removing large rocks or other tripping hazards from the area beneath the swing.
Photo: istockphoto.com
Any standard-size passenger car rubber tire will work for a swing, though you could use a smaller or larger tire as long as you factor the weight into your specific project. If you find a used tire, be sure it has some tread left to prevent any wires from popping through the surface and scratching or poking swing users.
Give the tire a thorough cleaning with a pressure washer.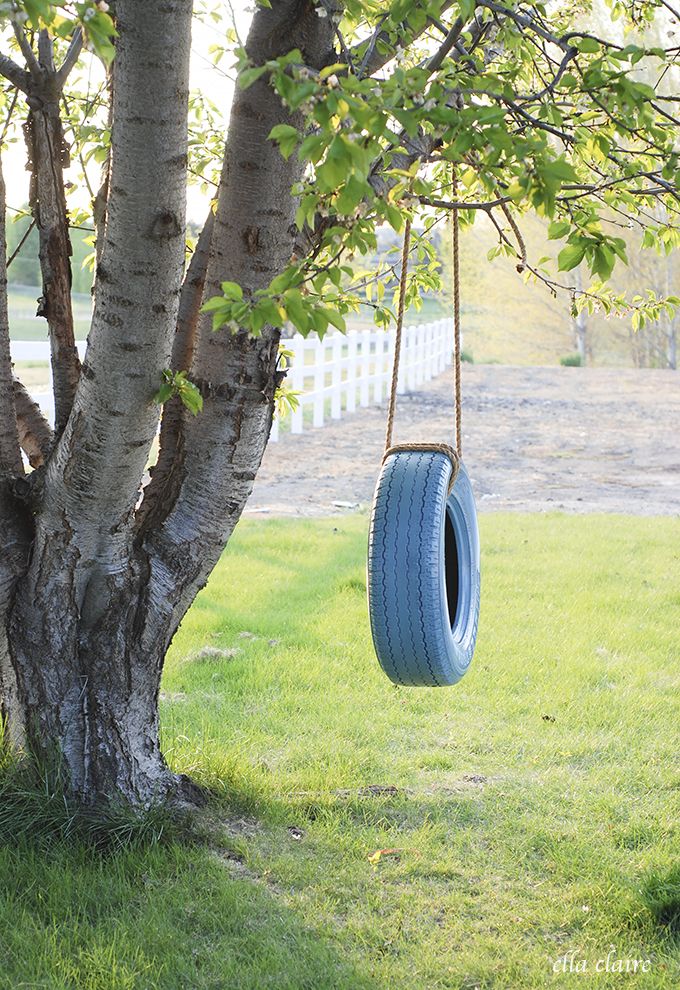 If you don’t have the right tool, take the tire to the car wash to clean it with one of the high-pressure hoses on the premises.
When you’re ready—that is, when you’re satisfied with the cleanliness of the tire—drill holes in the bottom of the tire to prevent water from pooling when it rains. You don’t want mosquitoes to get wind of any standing water! On that note, you’ll also want to check for bees, wasps, and other insect pests each time you or your kids use the tire swing.
Advertisement
RELATED: Weekend Projects—5 Fun DIY Swing Sets
Photo: istockphoto.com
Determine the maximum weight your tire swing will hold. That includes the weight of kids (or adults) that will use it as well as the weight of the tire you choose. Then select a heavy-duty braided exterior rope that is rated for three times that weight.

Cut a section of rope to the desired length plus a little bit extra for tying a couple of knots. If needed, melt the ends to keep the rope from fraying. Tie a double bowline knot on one end of the rope, making sure to leave a little slack in the loop portion of the knot.
Toss the knot end of the rope over the tree branch. If you need a little help, place a softball in a sock and tie the sock to the knot end of the rope; then toss the ball over the branch. Thread the opposite end of the rope through the loop of the bowline knot and pull it tight. The knot will travel upwards until it finally reaches the branch.
Tie another double bowline knot around the top of the tire, tightening it so the tire hangs at the desired height off of the ground.
Photo: istockphoto.com
Have the heaviest member of your family test the tire swing to ensure its strength. You may not want to tell this person why he or she was chosen…
Let your impatient kid swing already.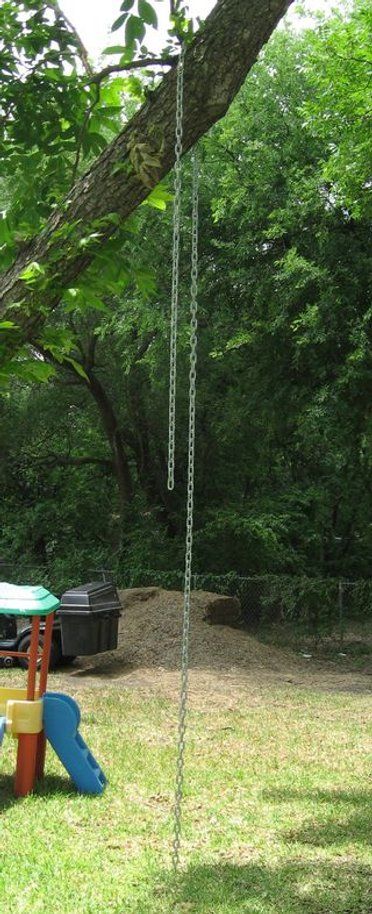 You can cut off the excess rope later. Pat yourself on the back and admire your handiwork from the street, just like the neighbors will.
RELATED: How to Make a Tire Swing with Chains and Bolts
Got questions about how to make a tire swing? You’re not alone!
Advertisement
One of our favorite DIY tire swing ideas is to find a tire, clean it thoroughly, and hang it by a rope from a sturdy tree branch.
First and foremost, you need a tire. You’ll also need some tire cleaning supplies (or clean it at a self-serve car wash), braided exterior rope rated for three times the weight of the tire and swing users combined, and some basic knot knowledge. You’ll also need a sturdy branch on a large, healthy tree.
The best rope to use for a tire swing is one that is braided, designed to hold a lot of weight, and rated to withstand outdoor elements such as UV rays, rain, etc.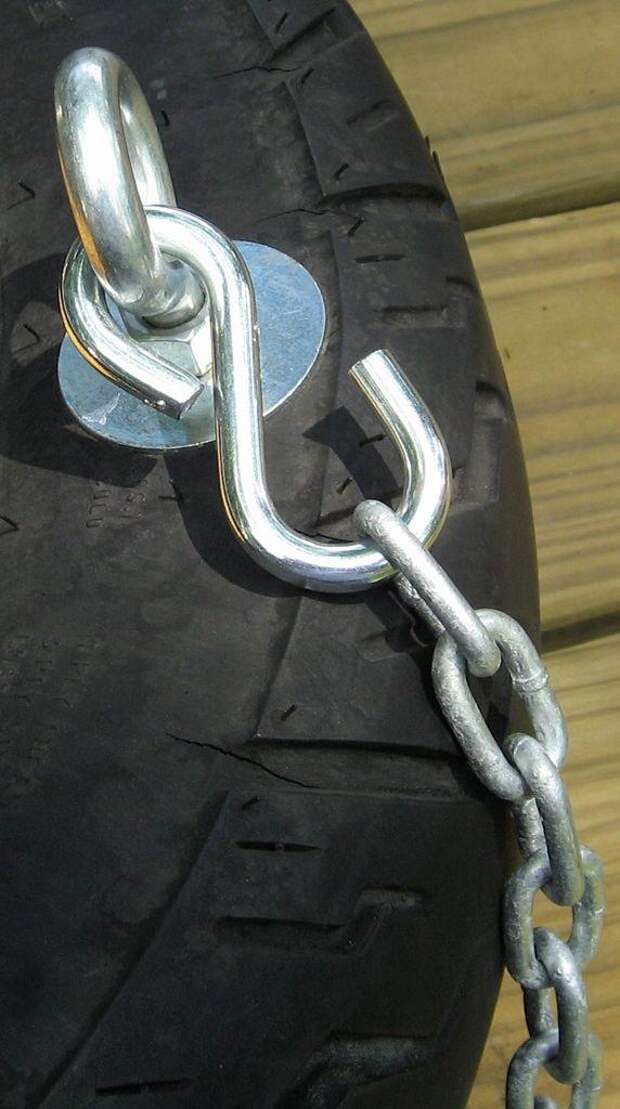
Kick off your summer staycation by adding a tire swing to your outdoor space. This simple project can add hours of fun and relaxation with minimal effort and expense. Just be sure to keep safety top of mind by thoroughly inspecting the tree and branch that you intend to mount it on, and by selecting rope that is rated for the amount of weight that your specific tire swing will hold.
Advertisement
Believe in yourself! No matter how trite it may sound, however, until you yourself make sure that you can really cope with this or that situation, nothing will work out. You may be one step away from solving the problem, but because of the fear of doing something wrong (or being judged by others), you will not take the necessary actions and will not achieve the desired result. Try to overcome your fear. And do not forget that not everyone gets everything perfect the first time. It might be worth trying again to get what you wanted out of it.
Another tip that will help you choose the right solution is to take a sheet of paper and write down all the pros and cons of one or another option. Next to each item, put a number from 1 to 10, depending on the priorities and importance. And the more detailed your notes are, the sooner you can decide what exactly you need. Also, don't forget to write down the action plan - so you can be sure that you haven't missed anything important (or just go back to your notes during the process and check that you are going in the right direction) and you always have before your eyes there will be a real picture of what is happening, and not vague ideas about what lies ahead for you.
Learn to accept help, but only if you are sure that it will definitely benefit you (and not spoil or confuse everything even more). Therefore, do not hesitate to consult and learn from those whom you consider more successful and professional, but just do not forget to double-check and analyze the information received. After all, as you know, what can work in one case will generally be contraindicated in yours and vice versa.
Instead of voicing the first thing that comes to your mind, it is better to weigh the pros and cons, think about what pitfalls you can expect in this or that case, and only then give your assessment of what is happening (along with your vision of the problem and the optimal decision). In addition, psychologists recommend not blindly following the advice of well-wishers - of course, you can ask for help, but first learn to double-check the information and analyze what will happen if you do exactly as you were told. Otherwise, you can do something, for which then you will also have to answer (just to you, and not to the person who advised you something).
Experts remind you that the world is not divided into black and white - it has many more shades and that is why it is so attractive. Therefore, do not limit yourself in decisions, do not think that it is right either this way or nothing at all - try to look at the situation from a different angle and come up with a non-standard solution (and it doesn’t matter that no one has ever done this before you, because perhaps you will invent an innovative approach, or just be resourceful and creatively handle the problem).
Even if you think that inaction is the best option if you can't decide, psychologists are sure of the opposite. Not taking any action at all is also a decision that will entail certain consequences. Keep this in mind the next time you console yourself with the fact that you still have a lot of time ahead of you and in general, maybe “it will somehow resolve itself”.
Before doing anything, ask yourself why you need it and if it's really what you want (that will benefit you). If your actions do not run counter to your desires and needs, then you are doing everything right.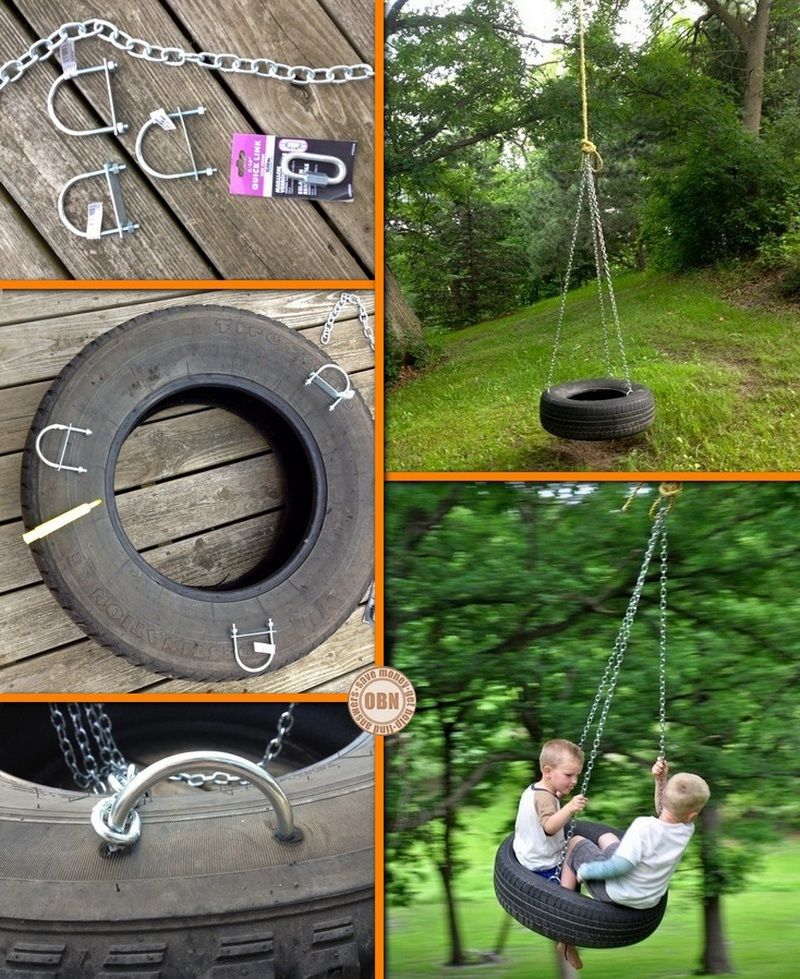 But, if something suddenly confuses you, then you should take a break and come up with another way to solve this or that problem.
"I myself" is, of course, good, but let's be honest and admit that not everything is in our power (no matter how good professionals you are, however, there are those areas in which you are absolutely nothing Do not understand). Therefore, do not try to be ahead of the rest and make those decisions on your own, for which you will then have to answer (especially if you are not well versed in the issue). Don't be afraid to ask like-minded people for help. Thus, you will protect yourself from wrong actions and will be able to learn the experience that will be useful to you in the future.
To avoid mistakes and serious consequences, psychologists recommend imagining… what would happen if you made all possible mistakes and the result turned out to be so deplorable that you could not even dream of it. Try to assess the severity of the consequences for you personally and for others. Think about what exactly motivated you when making that decision, which eventually led you to a dead end. Also remember your feelings (disappointment, fear, frustration, and so on) and emotions. Presented everything in great detail? Now change the script and imagine that success and recognition awaits you. Try to describe your emotions when a positive decision is made on this or that issue, what exactly you feel, what guided you in this choice, and so on. Here is the answer for you. The decision that did not cause you enthusiasm and led to failure is clearly erroneous, so you should not even waste your time and effort on it. Choose the path that will help you get the desired result.
Bought this swing a few weeks before giving birth. Initially, they thought that these swings would rather be entertainment for the crumbs, a kind of leisure while he was awake.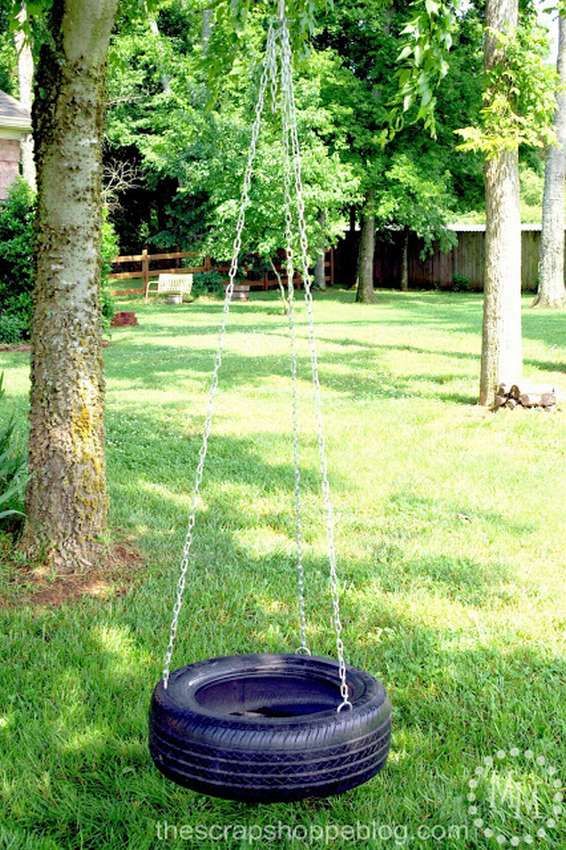 Now, after almost 6 months, I often thank fate for having advised me to buy this device.
Baby entertainment? - Oh sure! But first of all, it is helping young mothers and fathers not to go crazy and, although not often and not for long, but still do their own thing and spend more time on themselves and on each other.
We put the swing in the kitchen and I think that it is exactly where it belongs, because it eliminates the need to rush to the bed every time while you are eating or cooking. The child swings or simply sorts out toys, looks at you while you are doing your own business, feels your presence and is not naughty. In addition, by placing a swing next to the dining table, you can interact with guests while babysitting and have a full meal without rushing and listening to screaming or crying from another room.
At an older age, the swing is useful for the first feeding: the baby is not yet able to sit, so it is too early to use the high chair, and the baby can be comfortably lifted up in a sun lounger.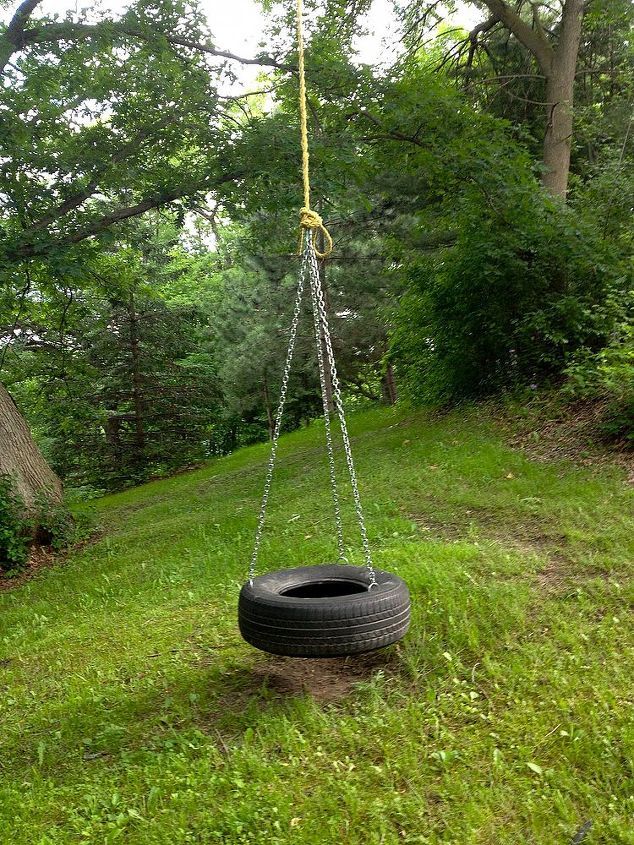
Why this swing? 1) Relatively low price (3909 rubles on the site "Smart Parents") in comparison with analogues; 2) Possibility of work both from a network, and from batteries; 3) Swing occurs both under mechanical action and from electricity; 4) The presence of positive feedback; 5) Colors that would fit the interior.
And just a little, so as not to tire, about the swing itself.
Appearance
There are three toys included, but they are very high up. If at first, when the child is still small and can only follow them, this was not a problem, then when he became older, he had to attach other toys (see photo) so that he would develop fine motor skills and not get bored in the chair.
The cover is easy to remove, and although it is not recommended to wash it, I still washed it on a gentle cycle - the fabric looks like new. Of the pleasant things - a headrest, a five-point seat belt, a side mesh from playful fingers, plastic pads on the legs that do not scratch the floor, the ability to change the position of the back.