Chinese-made ATV brands such as TaoTao, Baja, X-Pro, and Linhai offer an affordable entry point into ATV riding. But just like with anything with an engine, you may eventually find yourself in a situation where the vehicle does not want to start.
Often, particularly with newer bikes, the issue turns out quite obvious and relatively simple to fix. On older models that have had a rough life with a lot of use and abuse or have been sitting a lot, you may have to put more effort into getting it running again.
Before spending too much troubleshooting potential mechanical issues, it is a good idea to revisit the proper starting procedure for your ATV.
Forgetting one or more steps in the standard start-up procedure is the most common cause when an ATV won’t start.
If that’s the case, no worries, it has happened to me, and it usually happens to everyone at some point.
Chinese ATV starting procedure (ATVs with an electric starter)
Tip:1 Most ATVs have a starter interlock feature that prevents the starter from engaging if the gear shifter is not in park or neutral and the brakes are not engaged. You won’t hear any noise in this case, and the ATV will act like it’s completely dead.
The brake must be engaged for the ATV to start.Tip2: Chinese ATVs often have a manual choke lever on the carburetor. Alternatively, there is a choke lever on the handlebars. When it’s cold or if the bike has been sitting, you may need to activate the choke for the bike to start.
Manual choke lever on a Chinese ATV. Move the lever up to turn the choke on and down to turn the choke off.If the ATV did not start after the basic start-up procedure, a mechanical issue might be causing the problem.
The fastest way of troubleshooting a no-start situation is based on what symptoms the ATV displays and then through a process of elimination, beginning with the most fundamental issues.
Note that this post covers the most common causes to look into when your Chinese ATV does not want to start. The list of possible causes is almost endless. If you do not find a solution to the problem in this post, please refer to our more in-depth ATV won’t start troubleshooting guide.
If you at any point feel that you’re stepping outside your mechanical comfort zone, your best bet is to take the bike to the dealer for further investigation and assistance.
You go to start the ATV like you usually would with the ignition key set to start and the kill switch turned off / set to the “RUN” position. But when you hit the power button, nothing happens.
If the battery voltage drops too low, it may not have enough power to turn the starter engine.
How to read battery voltage using a multimeter
If the battery voltage is low, you need to recharge the battery.
A battery sitting at a low voltage for an extended period may be damaged beyond repair.
Related: How to Test an ATV or UTV Battery. Good, Reduced, or Bad? and How to Charge a Dead ATV Battery
The wire connectors should be firmly connected to the battery terminals. Snug them up if they are loose. Also, make sure the wire connectors are in good condition and properly connected to the wires.
If there is any corrosion on the battery terminals or wire connectors, they need to be cleaned for a proper connection.
Caution: Always wear protective eyewear when working with or near the battery. Be careful not to short the battery by accidentally touching ground with the tool when working on the positive battery terminal.
Most Chinese ATVs have the main fuse on the positive (red) starter wire.
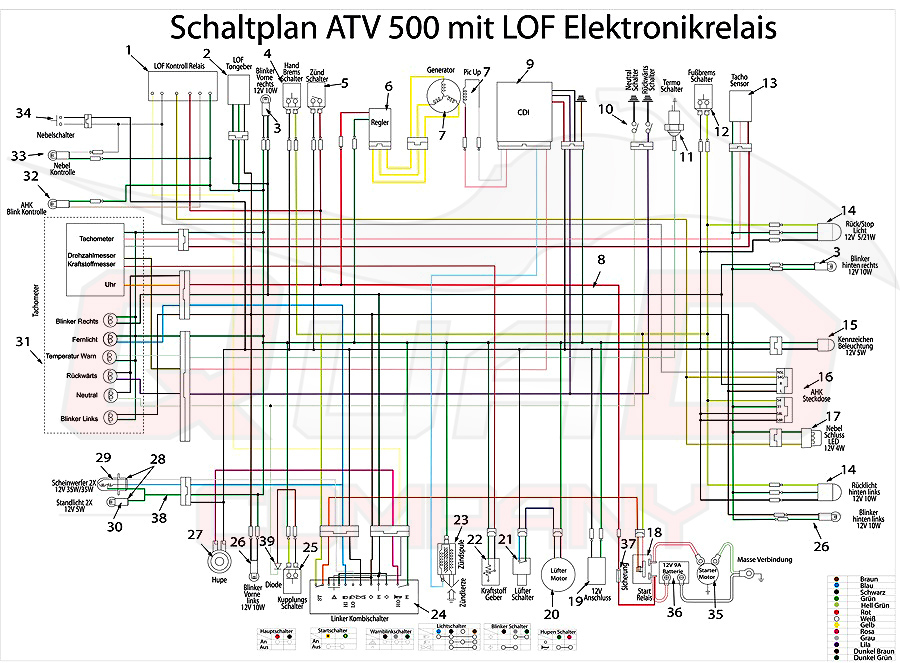
ATVs either have a starter relay or a solenoid. We’re not getting too technical about the difference between the two, as they serve the same purpose.
The starter relay/solenoid is a component in the ATVs electrical system that activates the electrical starter when you press the starter button. They are powered directly from the battery with a heavy gauge red positive wire and ground through a black wire or directly through the frame.
Smaller ATVs typically use a relay due to the low current required to run the starter, while bigger ATVs typically use a solenoid.
A starter relay looks almost like any other relay; a small box about 1×1 inch in size.
Starter relay on a 90cc ATV. The smaller gauge red wire should not be there originally. Someone has added a led bar and needed somewhere to get power.The solenoid is cylindrically shaped and slightly larger than a relay. It has three or four connectors, typically located near the starter motor.
Each time you press the starter button, the relay/solenoid should make an audible clicking sound. The sound is less audible on relays than on solenoids. If you hear a click, you know it is getting power.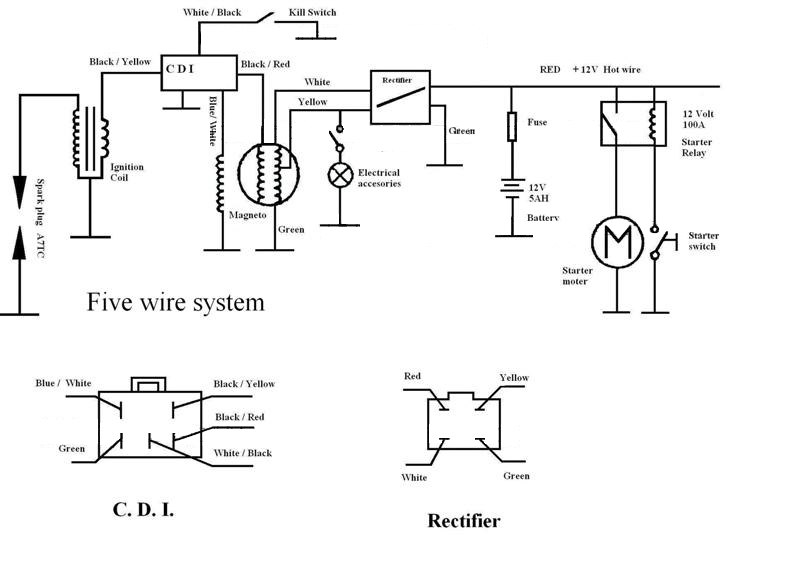
If there is no sound, the relay/solenoid may not get power or be seized.
You can use a multimeter to test if there is a power issue. The multimeter settings are the same when reading the battery voltage.
The relay/solenoid gets power if you get a reading of 12V or more at the battery side connector.
If there is no reading, ensure the wires coming from the battery are not damaged, are properly connected, and there is no corrosion at the terminals. Also, check for rust as three-prong solenoids grounds through the base.
Starter buttons can go bad from internal corrosion or mechanical failure. If you have a multimeter, testing the starter button is relatively straightforward.
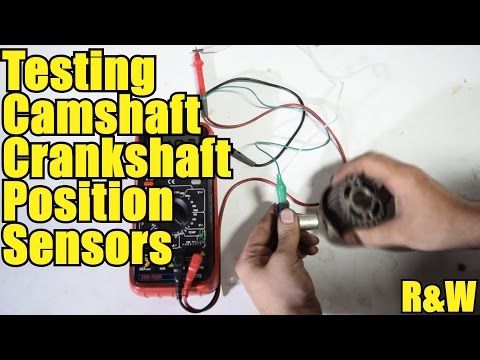
The kill switch is typically unused over extended periods and may therefore short out due to internal corrosion.
The two internal terminals on a working kill switch should connect when the switch is in the “Off” or “0” position. Moving the switch to the “Run” or “1” position should break the connection.![]()
To test if the switch is working, you can use a multimeter to test for continuity as you did with the starter button.
As a short-term solution with a corroded switch, you could attempt disassembling and cleaning the switch internals with a wire brush and some WD40. But for a long-lasting result, you are likely better off replacing it with a new one.
If both switches check out alright, ensure the wiring from each button is undamaged and properly connected.
You press the starter and hear a clicking sound, but the starter does not engage, and the engine does turn. This indicates there is an issue with the solenoid or possibly with the starter.
Because there is a clicking sound, you know that the solenoid is getting power. But the solenoid could be faulty even if it clicks.
Inside a solenoid, a spring-loaded, electronically charged magnet switch is connected to a steel bar.
Pushing the starter button activates the magnet switch so that the steel bar completes the circuit between the positive input terminal from the battery and the output terminal going to the starter. This is what causes the clicking sound.
When releasing the starter button, the spring ensures the connection is broken instantly and disengages the starter.
When you hear a click but the starter does not engage, there is no connection between the two terminals. This is usually caused by corrosion at the base of the terminals. The metal bar comes up but is too corroded to pass an electrical current between the two terminals.
The solenoid internals may rust if exposed to water, causing the solenoid to seize up.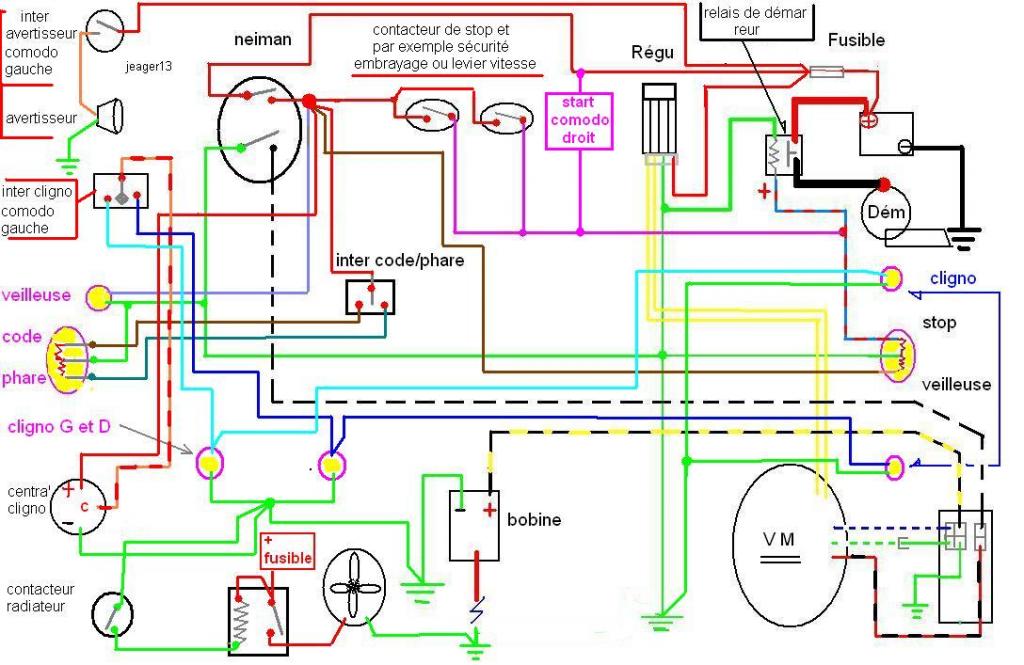 This eventually causes the solenoid to burn out as the rider keeps trying to start, but the solenoid cannot complete the circuit.
One way to test a solenoid is to jump the main terminals manually using a heavy gauge wire. Do not attempt this if you are not confident in what you are doing.
A safer way of testing a solenoid is by removing it from the ATV and activating it by applying an external 12 V source (car battery) to the terminal for the starter button. Then test for continuity between the input battery terminal and the output starter terminal.
In this case, the engine turns over as expected, but the ATV does not want to fire up.
An engine needs three essential components to run; fuel, spark, and air. When the engine turns over but does not start, there is usually an issue with either of the three components.
Before you do anything, ensure there is gas on the fuel tank and the fuel valve is open (in the ON position). You’d be surprised how common it is to misjudge how much fuel is left.
There are several ways to test if the ATV is getting fuel, but my favorite is removing the spark plug. That way, you’ll be able to check for spark simultaneously.
Another way to quickly test if the ATV is getting fuel is by spraying a shot of starter fluid into the air intake. If the ATV starts with starter fluid, you know there is a spark, and the issue is likely fuel-related.
Make sure enough fuel reaches the carburetor from the fuel tank.
When troubleshooting a no-fuel situation, I recommend first removing the fuel line from the carburetor or opening the carb overflow.
If fuel comes out, you know that the issue is not with the fuel delivery system up to the carb but with the carburetor itself.
Depending on your findings, these are the usual culprits to look into:
Fuel delivery system
Carburetor issues

For more detailed instructions on what to do if your ATV is not getting fuel, whether it has a carburetor or it is fuel injected, please refer to this post for guidance.
If the fuel is bad, it may not ignite, even if it reaches the cylinder. Fuel can go bad over time due to evaporation or from contamination with dirt or water.
Related: How to Know if the Gas in Your ATV Is Bad or Not
There are two main ways of testing an ATV for spark.
Caution! Electrical shock hazard. Do not perform a spark test if you are unfamiliar with the procedure!
Visually check for spark
 Make sure you are not touching any metal components.
With a spark tester tool (safer)
Please refer to these posts to learn more about troubleshooting an ATV that turns but has no spark and this one to learn how to test an ignition coil.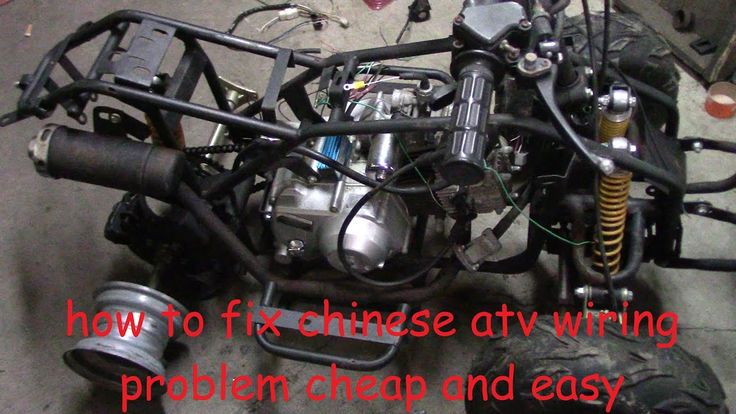 In the last post, we also cover a range of other ATV no-start scenarios like:
Related: How to Start a Dead ATV: Step-By-Step Guide
Air is the final of an engine’s three essential components to start and run.
 If you don’t know how to do this or don’t have the tools, your best bet will be to take the bike to a mechanic. Lack of compression is usually caused by a mechanical failure with the cylinder, piston, or valves.
Your ATV won’t start. It is a frustrating situation that many ATV owners and riders will face. Since this is a troubleshooting guide, we will begin with the very basics. The first place to look is the fuel gauge to ensure sufficient gas, followed by testing for a spark.
To check for the spark, turn the ignition to the ON position, remove the spark plug, and ground the hex part of the plug to bare metal on the engine. Clean up any spilled gas, spin the engine, and watch for a spark jumping across the gap. To test gas flow, remove the carburetor’s fuel line, hold it over a container, and watch the flow. It should be the full stream of the line size.
If the ATV has spark, fuel, and gas flow but will not start, what comes next? If you find yourself in this challenging scenario, don’t panic. There are a few more things to try before you should call for help. Run through this checklist after determining that your ATV does have spark and fuel but will not start.
Before running through an extensive list of complex problems and their solutions, start with the simple tests. If your ATV has spark and fuel but will not start, it could be something as simple as the petcock valve in the off position. Double-check the petcock valve as soon as you suspect engine issues.
If your ATV’s petcock valve is not in the ON or RUN position, put it there. Try starting the engine again. If that was the problem, of course, your ATV should start right up.
Check Your GearIs the ATV in park or in neutral? Checking your gear could be a simple solution to a simple problem, but people often overlook it. After checking for gas and ensuring a spark, always make sure that your ATV is in gear. Many ATVs are designed not to start unless it is in the right gear.
Put your ATV into the correct gear if need be, then try to restart it. With luck, this was the issue and you’re able to get going again with minimal troubleshooting.
Check the BatteryIf you are not experiencing a simple run switch or gear issue, the battery could be the problem. This is the next step in your DIY troubleshooting checklist. Ideally, you have a battery tester in your traveling tool kit. Use it to check your battery’s status.
If it has a low charge or is dead, you can try boosting it. You may need to stop for the day to get the battery onto a charger. In the worst-case scenario, your battery won’t hold a charge and will need replacing.
If it does turn out to be a battery issue, consider investing in a battery charger for the future. If your ATV sits unused, you can plug it into a trickle charger to prevent unwanted drainage.
Consider Fuel QualityYes, you have gas, but how old is it? If you are trying to run your ATV using gas that has been sitting in the tank too long, that could be your problem. Degraded gas is not ideal for your ATV, and the machine may refuse to run. You may be able to change the fuel filter and replace the gas yourself. If you don’t want to or don’t feel comfortable, this is an easy job for a mechanic.
If you’ve gone through all of these steps and your ATV still won’t run, even though it has gas and spark, it could be an airflow issue. Exhaust needs to leave the system properly. And, the ATV requires air for combustion. If the engine isn’t getting enough air, the ATV will not start. The issue may lie within your air filters, which may need repairing or replacing.
Again, this is the kind of issue that might be within one’s DIY skills. However, if you are not comfortable handling these parts of an engine, leave it to the pros. You do not want to cause more damage with an at-home fix accidentally.
Other Engine IssuesOther engine and system issues could prevent an ATV from starting even with spark and fuel. An intake valve that is too tight is one example as this impacts compression. It could be a dirty carburetor or even a carb O-ring requiring replacement. If you are still stumped because the ATV won’t start when you have spark and fuel, it may be time to head to a mechanic for expert help.
Disclaimer: While we endeavor to keep the information on our blog up to date and correct, Maxtrade (Coolster) makes no representations or warranties of any kind, express or implied about the completeness, accuracy, reliability, suitability, or availability with respect to the website or the information, products, services, or related graphics contained on the website for any purpose. Any reliance you place on such material is therefore strictly at your own risk.
The original mix of a motorcycle and an off-road vehicle - an ATV has long and firmly entered the life of those who love fast and comfortable riding in the most impassable places. From the SUV, the ATV inherited excellent stability, and from the motorcycle - mobility and increased cross-country ability.
Today ATVs are divided into sports and utility. Each of them has its own characteristics, but each of them from time to time needs repair and complete diagnostics of all components and systems of equipment. nine0003
During operation, especially with intensive use of the vehicle, it may fail:
In the event of any of these situations, you can order an on-site repair of ATVs or a tow truck to deliver faulty equipment to the service.
 Petersburg and the region
 Repair of ATVs is one of the specializations of our company. Therefore, our employees carry out repairs of any complexity, regardless of the year of manufacture of the ATV, its manufacturer and series.
At a high level, our highly qualified craftsmen carry out maintenance and repair of ATVs 150 cubes in St. Petersburg, as well as other various motor vehicles. nine0003
Our list of services includes:
Also, here you can order repair of wheels, tires, starter, ATV gearbox and purchase spare consumable parts for any brand of this type of equipment.
It's not the first year that we have had an official repair service for Yamaha Grizzly ATVs and other vehicles of this company.
We repair the following ATVs:
Repair of Chinese ATVs
We also repair the following parts of this equipment:
Having started our activity in the restoration and repair of a wide variety of equipment in 2009, today we have extensive experience in working with various types of ATVs and know exactly what each of our clients needs.
Our main advantages:
 Thus, even the most difficult case does not take more than 2-3 days (the master announces the final repair time after a complete diagnosis of the vehicle components and systems). nine0014
 In addition, we work with both individual clients and large customers, regardless of their form of ownership. Therefore, if you contact us, you will no longer need to look for another service - we offer the most favorable conditions for you and the best service for your equipment! nine0003
Your name and/or company (required)
Your phone number (required)
By submitting your data, you accept the privacy policy
Your browser does not support JavaScript!. Please enable javascript in your browser in order to get form work properly.
Diagnostics and repair of ATVs are important areas in the maintenance of motor vehicles and all-terrain vehicles. It is important. So that the vehicle constantly remains on the move, does not have problems with movement and safety for the driver and passengers. Therefore, it is necessary to undergo technical inspection constantly, in time to change broken or failed spare parts and assemblies, to undergo an inspection of the condition of the machine, technical fluids. nine0003
We offer repair of ATVs in Krasnoyarsk and on favorable terms. There are low prices, promotions and discounts are constantly held. It is possible to order spare parts and accessories for tuning for any brands of all-terrain vehicles, snowmobiles and motorcycles. The employees of our workshop have extensive experience in servicing Yamaha, BRP, Suzuki, Honda and other brands, they immediately identify breakdowns and their causes. The use of modern computer equipment will allow you to detect problems in time and eliminate them. Departure to the client is possible. nine0003
When an ATV arrives at the service station, a complex diagnostic must first be carried out in order to identify all possible problems. It usually includes the following steps:
Every machine needs regular maintenance. Especially for ATVs, which often work in intensive operating conditions, which is called "wear and tear". therefore, attention to the technical side of their work needs a lot. Off-road can lead to frequent breakdowns, even if the car drives well and is not noisy - this does not mean that you can not visit the service. On the contrary, regular inspections will allow the iron horse to serve longer. nine0003
This should be especially remembered by beginners who pay more attention to tuning than repair. Unfortunately, all equipment is subject to wear and tear. When contacting a motorcycle service, you must have a service book with you, it also indicates the frequency of visiting the service station. If your equipment is older than 3 years, then it is better to undergo repairs a little more often. And you definitely shouldn't repair an ATV yourself, especially if you don't understand how it works. The risk of harm is much greater, and savings are unlikely to succeed. Recommendations of experts: contacting the service at least twice a year - in preparation for the active summer season and winter. nine0003
We offer quality service and competitive prices. The standard check includes:

Experienced technicians available for a wide range of repairs. You won't have to wait long - a large warehouse of spare parts and the necessary equipment will allow you to carry out repairs quickly. Qualified masters use modern equipment, including computer programs. Quality repairs are guaranteed - you can contact us with any problems and brands of ATVs and motorcycles.
The heart of the machine requires careful attention. To extend its service life, it is better to use fuels and lubricants that have been tested and recommended by the manufacturer, and regularly conduct diagnostics. The main areas of repair:
It is subjected to crazy loads, so it can quickly fail. Breakage is better not to allow, because the equipment can fail at any time. Therefore, the load must be uniform. When repairing, specialists can replace bearings, hubs, levers, shock absorbers, bushings of levers and shock absorbers, ball bases. After that, alignment-adjustment is required.
Also an important part of the machine that needs attention. Among the main works, one can single out the replacement of the variator, its belt and cover, cardan and its cross, drive, CV joint and its anther, gearbox oil seals. nine0003
Electronics can fail in any technique. But our experts will quickly carry out maintenance of the battery, replace the ignition locks, starter, alternator and repair the wiring.
Alas, no one is immune from accidents, especially if the ATV is constantly used in extreme conditions. Customers may face problems with damage to the body, plastic, attachments, frame geometry. Therefore, after an accident, it is worth contacting professionals who can carry out serious work, including sawing and overcooking the frame. nine0003
Repair begins with a visual inspection, determining the degree of damage, the complexity of the work. Plastic parts and steering gear require the least time to eliminate shortcomings, most of all - the chassis and frame.
In addition to repair, we can carry out ATV tuning. We offer customers a large list of additional accessories and equipment that will help make your vehicle stand out, increase its efficiency and extend its life. You can modify the nodes, install additional devices, tune the engine, or even paste over the entire body with a protective or carbon film. In the basic equipment, not all cars will be able to overcome deep fords, move through fallen trees, move through impenetrable swamps and ruts. But tuning will help to do this. Also among the useful additions is equipping cars with trailers, snow plows, devices for clearing the territory and even plowing the land. nine0003
A full range of services for diagnostics, repair, replacement of parts and tuning in the company includes:
Tire fitting is also important for repair, because tires need to be changed constantly, they need to be balanced and changed when driving style or type of road changes. When changing tires, it is important to take into account the pressure, because it is different from a car. Therefore, when choosing any repair work, contact the professionals in their field. Recently, for the repair and tuning of ATVs, the service of pasting with a film - carbon, vinyl or ordinary protective film - has become popular. It can be glued to the entire body, individual parts, imitate textures and airbrushing, give a metallic sheen or camouflage vehicles. The transparent film will protect the surface from fading. Headlights can be glued with armored film so that they do not break or chip. For those who like to stand out, there is the option of pasting the body with matte carbon - it looks stylish, makes it easier to wash and clean. nine0003
To prolong machine life, keep rubber and plastic parts clean, change consumables and oil regularly, and lubricate suspension arms regularly.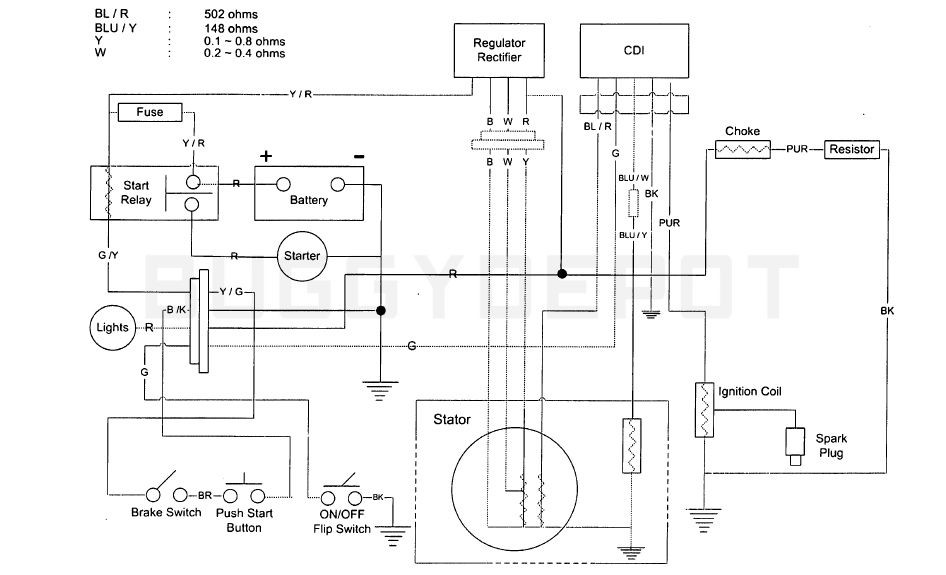 According to reviews, this will help to operate all-terrain vehicles longer.
| No. | WORKS | nine0002 BRP |
| 1 | Rewind winch | 500 |
| 2 | Winch repair with removal and rewind | nine0002 from 3000 |
| 3 | Installing tracks on an ATV | 10000 |
| 4 | Installing the backrest | nine0002 100 |
| 5 | Installing the windshield | 3000 |
| 6 | Arm and footpeg bottom protection installation | nine0002 3500 |
| 7 | Case installation | 600 |
| 8 | Installation of a wardrobe trunk with additional electrical elements | nine0002 1500 |
| 9 | Installation of the winch in a regular place + wiring layout | 1500 |
| 10 | Installation of a non-standard winch + wiring layout nine0242 | 3500 |
| 11 | Front/rear kengurin installation | 1000 |
| 12 | Installing heated handles nine0242 | 2000 |
| 13 | Installing Heated Handles with Trigger | 2500 |
| 14 | Power body kit installation nine0242 | from 2000 |
| 15 | Snow plow installation | from 2000 |
| 16 | Radiator extension installation | nine0237 |
| 17 | Installation of additional lighting | from 1500 |
| 18 | Handlebar guard installation | nine0237 |
| 19 | Installation of arch extensions | 1000 |
| 20 | Installing snorkels | nine0002 from 4000 |
| 21 | Alarm setting | 3000 |
| 22 | Installation, activation of GPS/GSM tags | nine0002 500 |
| 23 | Seat heating installation | 2000 |
| 24 | Installing footrests for a second passenger | nine0002 2000 |
| 25 | ATV wash | 300 |
| 26 | Frame geometry restoration | from 20000 nine0003 |
| 27 | Locksmith work | 500 |
| 28 | Cylinder head cover replacement | 500 | nine0255
| 29 | Oil change in internal combustion engine | 600 |
| 30 | Replacing the Recoil Starter | |
| 31 nine0003 | Replacing the oil seal from the right crankcase cover | |
| 32 | Replacing the CPG without removing the engine | 10000 |
| 33 nine0242 | Overhaul (ICE) with removal | 40000 |
| 34 | Overhaul (gearbox) with the removal of the internal combustion engine | |
| 35 | nine0237 15000 | |
| 36 | ICE valve adjustment | 2500 |
| 37 | nine0002 Repair work with the removal of the left engine cover | from 1500 |
| 38 | Repair work with the removal of the right cover (semi-crankcase) | from 1500 |
| 39 nine0242 | ICE diagnostics | 1500 |
| 40 | Diagnostics of the fuel system carburetor, injection | 500 |
| 41 nine0242 | Chassis and transmission diagnostics | 1000 |
| 42 | Electrical diagnostics | 500 |
| 43 | nine0237 300 | |
| 44 | Front gear oil change | 300 |
| 45 | nine0237 300 | |
| 46 | Grease packing oiler press | 100 |
| 47 | nine0237 | |
| 48 | Maintenance | 8500 |
| 49 | Plastic replacement 1 element nine0003 | from 1000 |
| 50 | Plastic repair 1 element | from 1000 |
| 51 | Cooling fan replacement nine0003 | 3500 |
| 52 | Air filter assembly replacement | 400 |
| 53 | Carburetor replacement + adjustment without add. |