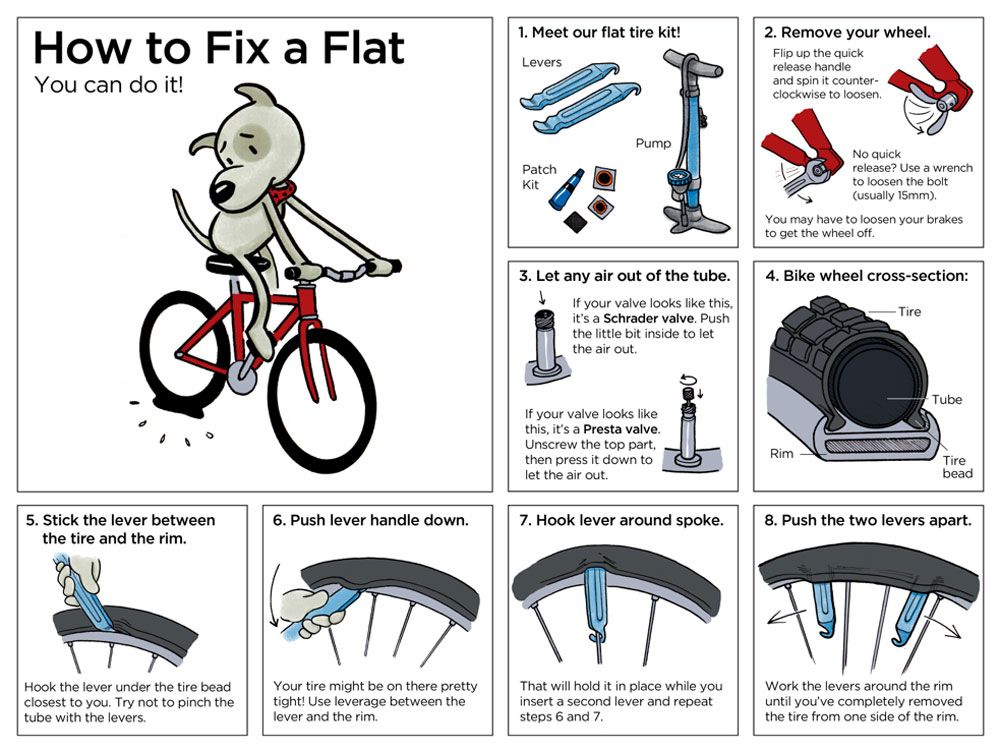
Anyone who has been riding bikes for a while can tell you that sooner or later, you’re going to get a flat. Even with tube sealant that prevents flat tires for up to two years, it’s just an unavoidable occurrence. When flats occur, the best thing you can do is be educated and prepared to patch the tube so that you can quickly get back on the road. Let's get started:
Materials NeededConsider these different flat tire scenarios: The at-home repair scenario where you're walking your bike into the garage and notice that the back wheel is sagging a little bit—you have a flat. Or, the on-the-trail repair scenario where 20 miles into a 50 mile ride, you go down hard on a rock and get a nasty pinch flat.
We’re going to walk you through some of the materials you’ll need for either situation, and then how to use them for both. Here’s a list of some things you will need to repair your tube.

Follow these 4 easy steps to patch your bicycle tube and repair your flat.
Step 1. Remove Your Tire
Take your tire lever and hook it around the outer edge of the tire (the bead) to get it off of the rim. Once you have the tire lever under the tire rubber, hook the other end of your tire lever around one of your spokes to keep the tire elevated. With a second tire lever, work your way around the rim, taking the tire out of the bead until one side has been completely removed from the rim.
Step 2. Find the Leak
If the puncture or gash in your tube is not easily apparent, you’re going to need to fill the tube back up to locate where the air is escaping from. There are a couple of different ways to find the leak. The layman’s way would just be to run your hand along the tube and try to feel it out.
The bucket of water method that we mentioned earlier, however, is a more accurate way. If you’re at home, fill your sink or a large bucket full of water and submerge each end of the tube. Watch for air bubbles escaping from your tire to locate your problem area.
Make sure you submerge each side, as there may be more than one puncture. Be sure to check the inside of the tire to make sure that the puncture-causing object has been removed. Once located, mark that spot with your tire marking chalk.
Step 3. Patch the Hole
When patching the hole in your bicycle tube, make sure that the area around the puncture is clean so that the patch will stick. Using the scuffer from your patch kit (sand paper or emery paper will also do the trick), rough up the area around the puncture so that your adhesives have something to grip.
If your patches don’t require glue, simply press them firmly over the hole. For patches that do need glue, add a layer of glue and spread it evenly around the area. Wait for the glue to get a little tacky, and then press on your patch. If you have the materials available to you at home, some cyclists will sprinkle talcum powder on top of the patch so that that patch/adhesive doesn’t stick to the inside of the tire.
Step 4. Put It All Back Together
Put a little air into your tube and then put it back in the tire, making sure, again, that there are no foreign objects remaining in the tire. Be sure to insert the tube and tire back into the rim using only your hands, as the tire levers may pinch the tube and cause another flat (we certainly don’t want that after all your hard work).
Once you’ve pushed the tire back in and the valve stem is securely inside the tire, inflate your tube back to maximum pressure, being sure to check the tire one more time to make sure that the bead is installed snugly. Ready to ride!
Repairing a bike inner tube is not only simple and cheap, but it's also mandatory in respect for the environment.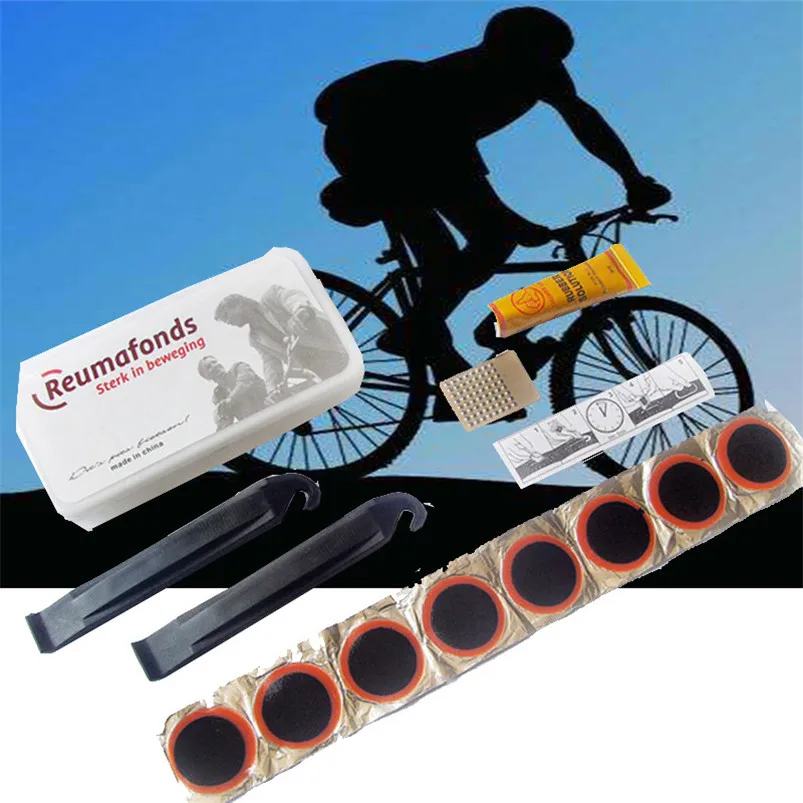 Indeed a punctured tube can be repaired many times before being thrown out. A different matter is when the tube is cut or the valve leaks, since it's more difficult repair the tube. Anyway most of the times the leak is caused by a nail or a thorn, and the hole is very tiny.
Although many of you already know this process, I'll explain how to easy add a patch to a pierced bike inner tube.
All you need is a pump and a repairing kit. I take for granted you already know how to remove the wheel from the bike and the tube from the wheel, so I don't deal this topic here, ask in comments if you fall in some obstacle.
The repairing kit is composed by some patches (probably of different sizes), some scratch tools (sandpaper or a little metal grater), a little tube of mastic (a type of glue) and maybe some little rubber tubes to spread mastic.
First thing to do: find the hole. This could be simple or pretty long. If you're lucky the hole is big enough to listening the air flowing out when you inflate the tube.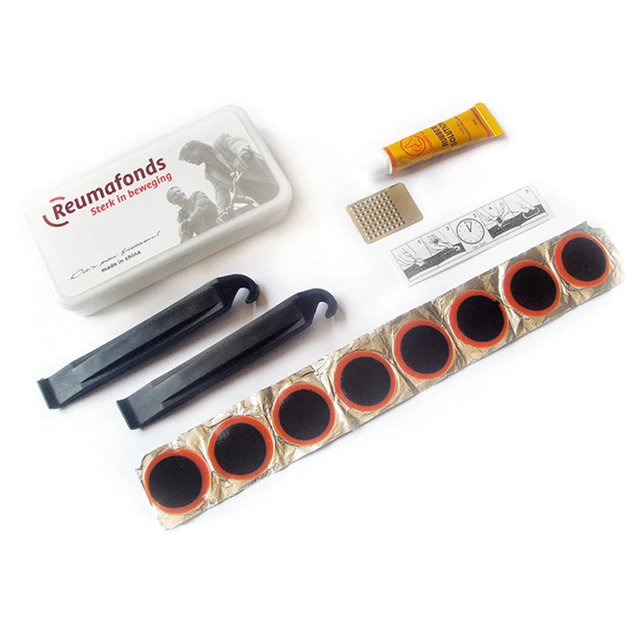 But many times the hole is so tiny that air comes out very slow and it's difficult to find, in this case go to next step.
To find the tiny holes inflate the tube. Don't be scared to inflate the tube very much, it could also become double in dimensions without exploding, and this will help you find the hole, since some hole remain closed with low pressure. At this time dip the tube into water, a sector at a time, until you see the bubbles coming out.
Mark the hole with a permanent marker, so you will not have to make the entire process a second time if you look away for an instant ;-)
Make the mark twice as big as the patch with an "X" through the center of the hole, it allows for spreading out glue if too much is applied.
With the help of sandpaper or grater scratch the rubber all around the hole, this will help the mastic to adhere to the tube. No reason to wash away the rubber powder when finished, just blow it away or clean with your hand.
Time to spread the right amount of mastic on a surface a little wider than the patch. Move the head of the mastic container from center to the border, as pizza maker does with the tomato sauce.
Use a thin layer of glue. More isn't better and if it is cold will take much longer to cure. If too much comes out use the small rubber tubes in the repairing kit to spread it out.
The mastic will now dry in a few minutes. About 10 minutes will be probably a good time to wait before attaching the patch.
Don't touch the area that has been roughed up. Oil from your hand will contaminate the surface and impact glue adhesion.
The patches have a metal cover on the glue side, and a plastic foil on the other one. When you remove the metal cover, the plastic transparent sheet should remain in place, you'll remove it after the gluing process.
Push the patch very hard over the dry mastic, you should use now an hard tool to make pressure, as the back of the pump.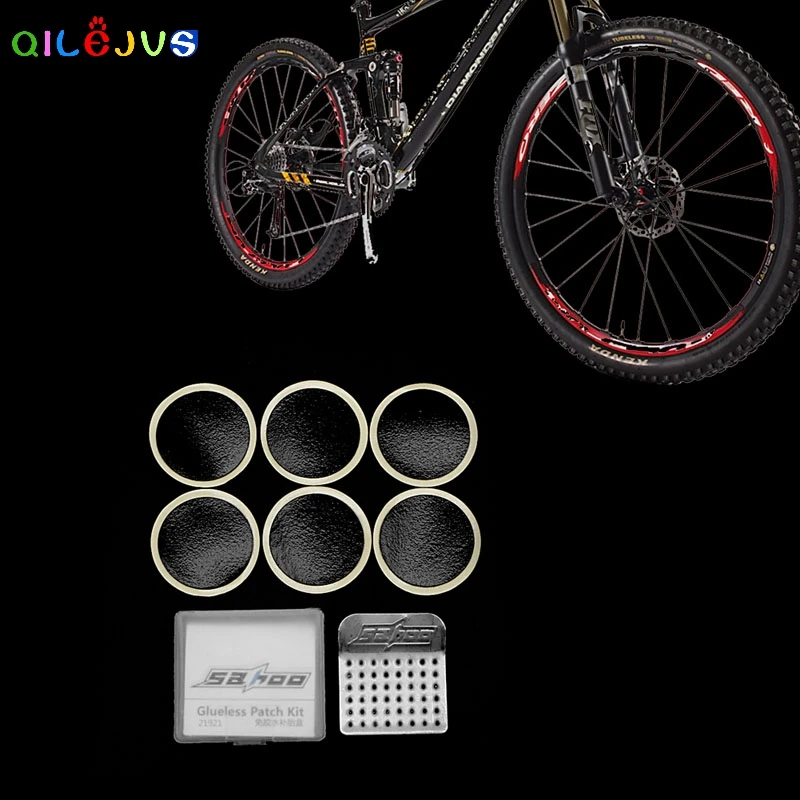 The more pressure you apply the more efficient the fixing will be.
To remove the thin plastic sheet you have to keep down the patch red border with your nail. It's not a big problem if the border detaches, anyway try to leave it glued. If the plastic layer won't release from the top of the patch, leave it be, when 60+ psi push it against the inside of the tire, it isn't going to make any difference.
Now you could in theory assemble the tube on the wheel, inflate it and ride. So don't be afraid to do that, BUT...
Remember to check both the inside of the tire and the tube protector strip on the rim for what caused the hole! If you miss that step you'll probably incur in the same identical accident for the same reasons.
Otherwise this is probably your reserve tube, you are at home fixing it meanwhile you relax your limbs after an hard riding morning, and you can wait some more time before inflating the tube to check the good air detaining.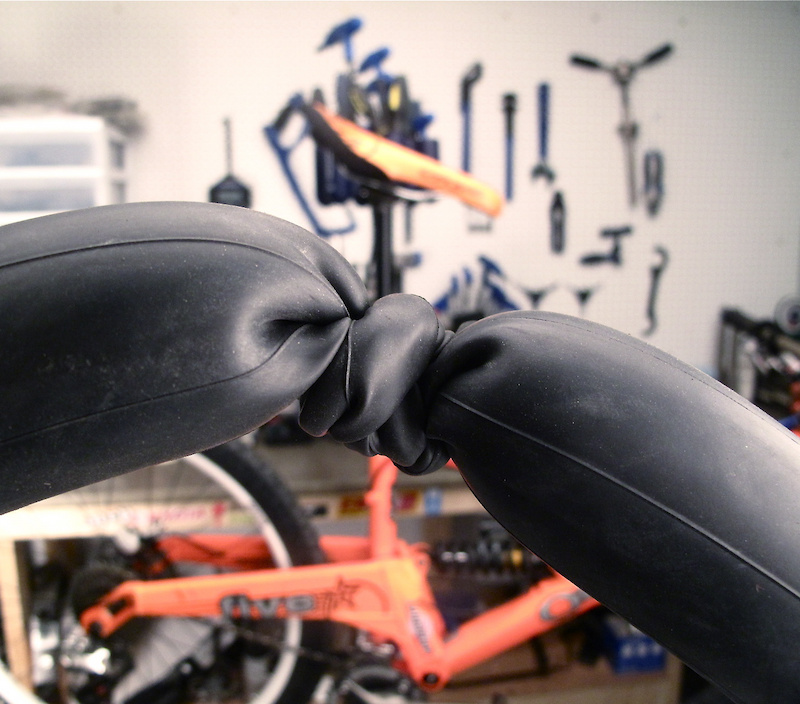 Let's say ten minutes...
Inflate a lot the tube and hang it somewhere in your haven, if it's still inflated the next day your reparation is perfect, if not restart from step two ;-) Obviously you can test the tube into water right away.
Now deflate (this is the tedious part), roll up the tube and hold it with an elastic. If you predict to not use it in a few time, you probably should scatter it with talcum powder, so the rubber will last much more time.
Also pay attention keeping your reserve tubes in the little bag under the saddle, because continual rubbing can wear out the borders. A solution is to put the tube in an old sock, which makes a great rag and you can put it on your hand if you need to swing a derailleur out of the way to remove the rear wheel.
And remember, always bring at least a reserve inner tube with you, among with the necessary to change it, and to be safe bring also a repairing kit, it happens to get three or more blowouts in the same trip! I'm not speaking about city cycling ;-)
Did you make this project? Share it with us!
content
The critical decision after applying the solution is to let the area dry for at least one or two hours, especially if it is hot and humid, because if we let it dry for just a few minutes and apply a patch, it will most likely will dry. take longer or finish peeling early.
Xiaoling Tire Adhesive 20g Ultra High Quality Tire Repair Adhesive Tire Repair Tool Waterproof Patch Adhesive Patch.
How much does it cost to fix a flat tire? While you might think that puncture repair can be expensive, it is actually one of the cheapest auto repair services. The price usually ranges from 6 to 20 euros, although they are usually around 10 euros.
Remove the wheel with a 15 mm wrench or by hand if the wheel is secured with a quick release. Use the tire levers to pull out the tire and tube. Using a bowler hat, inflate the pierced tube until you find where the air is escaping from. Sand the tube at the puncture site.
Apply a hot iron to the bottom of the patch for 30 seconds to a minute. If necessary, turn the garment inside out to get to the bottom of the patch. Pry off the edge of the patch with the blade of a butter knife. Grasp the edge of the patch and slowly peel it off the fabric.
To apply bicycle patches, first use vulcanizing adhesive to seal the gap. Make sure you apply enough and wait a few minutes for the glue to dry. Position the patch so that it is fully attached to the tube.
STEP BY STEP HOW TO APPLY A PATCH/APPLIQUE ON A CAP?
Epoxy adhesives are generally not recommended - rubber peels easily. Cyanoacrylate instant adhesives will be the best choice for bonding rubber or rubber. Cyanoacrylate adhesives cure in seconds so you can quickly check if it will stick or not!
The answer is simple. It's just a matter of physics. Bicycle tire pressure is reduced due to the composition of the air containing nitrogen and oxygen. Be aware that a flat tire is not always synonymous with a puncture.
It usually takes 15 to 20 minutes to repair a puncture. But the time will also depend on the complexion and the type of tire puncture.
If this is your first bike, it's best to start with something assembled. With a little knowledge, it's very easy to screw up things like stem size, handlebar type, or how to combine hubs/gears/brakes, plus it's a lot more expensive.
Insufficient tire pressure.
Too high pressure reduces tire grip; too low pressure allows the tube to pinch on impact (on a pothole, on a step), and rubbing the rubber against itself often causes holes in the tube.
Although some brands offer tires that promise to last around 10,000 km, in practice it is very likely that we will have to replace them when we get close to 3,500 km or about 3,200 km.
Be aware that tires can lose air due to differential pressure, this effect is called the permeation process and affects all tires, regardless of type or application, since the joints that make up the tire are not completely sealed, and their porosity allows . ..
..
How long do they last? The patch provides up to 8 hours of heat, providing a lasting effect on pain, up to 24 hours of relief. 4 , even after removing the patch.
Lion Patch, Hot Pain Relief Patch, Topical Analgesic, Helps Relieve Muscle Pain, Back Pain, Mild Arthritis Pain, Adhesive Patch, 12 cm x 18 cm, 6 Patches, box.
Another way to remove the patch without causing harm is to heat some olive oil until it is warm, then use a cotton swab to soak the patch well with this mixture and leave for a minute, then carefully remove the bandage. and you will see how it comes out easily and without...
These are adhesives based on phenolic resins.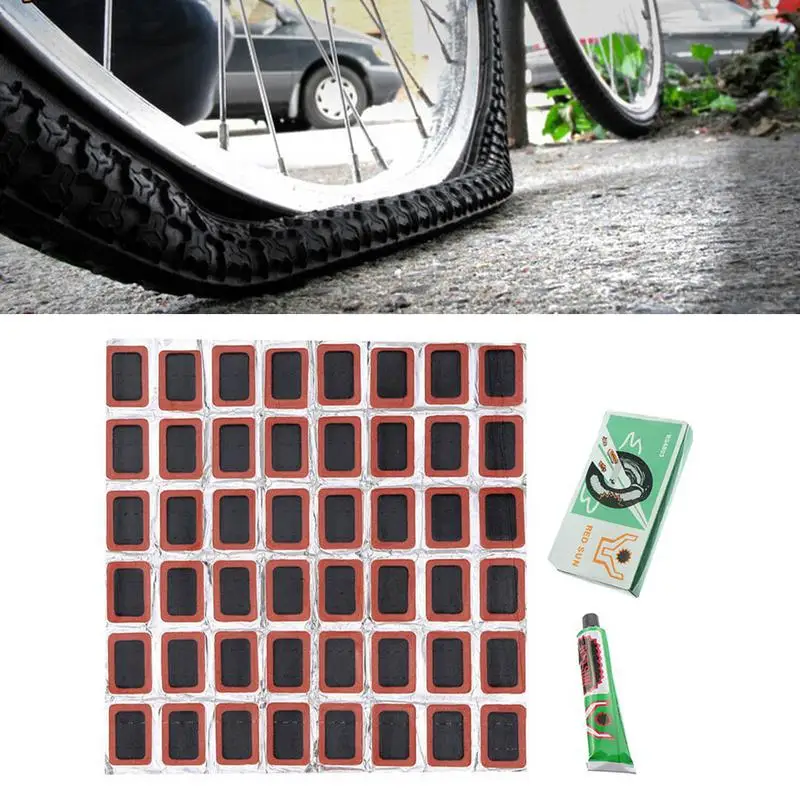 These adhesives instantly react to interaction with the surrounding air and dry quickly.
Set the iron to 110º without steam. Lay a white cotton cloth over the patch and apply the iron for 20-30 seconds. Move on to small heat strokes until the entire patch is stuck. Make sure it is well glued and the edges are not raised.
The Iron-On Embroidered Patch has the same finish quality as the sew-on patch. The difference is that a hot melt sheet has simply been added that allows you to place it on clothing by heating it with a simple household iron.
Step 1: Decide where on the garment you want to place the patch. Step 2: Apply the patch in the right place. Step 3: Place a cotton cloth between the iron and the sticker. Step 4: Iron without steam for about 20 seconds.
Mix one or two grated potatoes, a tablespoon of flour and a tablespoon of milk, soak two cotton pads and place them under your eyes for 15 minutes.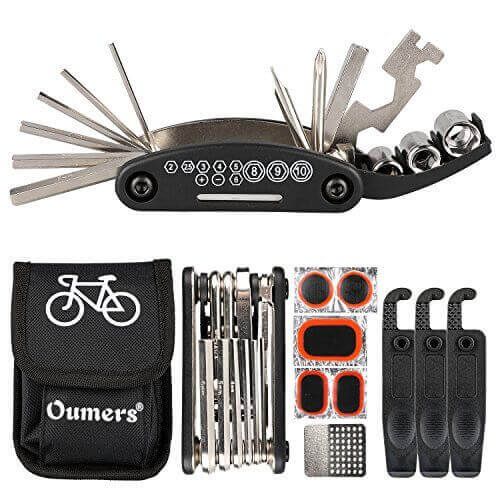 After the procedure, wash yourself with cold water.
We usually find latex patches and special adhesive to repair the tear. In these cases, it is recommended to empty the pool and clean the area with alcohol before applying the adhesive and installing the patch and let it dry for one or two days before refilling our pool.
Rubber to rubber can be bonded with either Adiglue or Adiseal. Adiglue is the best adhesive for bonding rubber with a small surface area. For products with a larger surface area, Adiseal Adhesive & Sealant is the best adhesive for bonding rubber.
The best adhesives for this type of plastic are polymer adhesive, epoxy or epoxy adhesive, binder, superglue and cyanoacrylate, also known as instant or cyanoglue.
Cyanoacrylate instant adhesive in drops.
It usually takes about a year for a tire to lose its minimum safe pressure, but if our car has been exposed to extreme temperatures and the situation suddenly changes, the porosity can increase and lose more air than usual.
The correct pressure will be no more than 9.5 bar, which is the maximum value to which we must inflate our tubes. A pressure of around 8-9 bar is what maximizes our ratio between friction and grip.
Tire condition of my bike: watch out for inflation!
An easy way to tell if your tires are ready to be replaced is to deflate the wheel and flatten the tire with your hand: if you feel resistance, a hard touch like plastic, or holes appear on the side when tightened, then the tire is damaged. it's time to change.
The best thing in these cases is to put the vulcanized patch inside, a quick and safe repair, that is, in a workshop, that after a while the tires can lose air and be damaged, of course that ...
The cost of tire repair depends largely on the type of damage.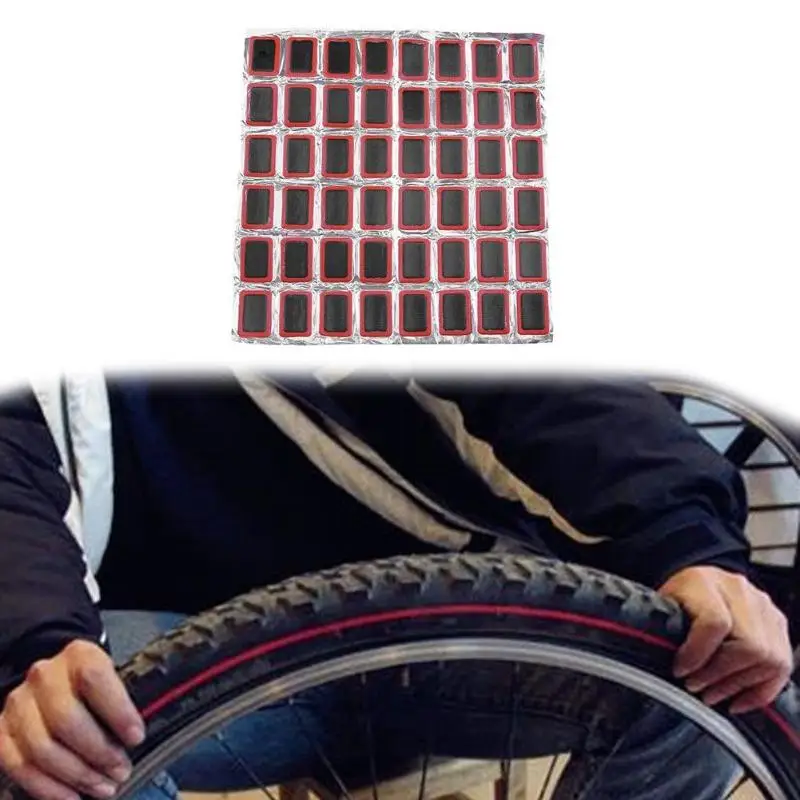 A punctured tire can be easily repaired with a vulcanizer and will cost no more than 200 pesos.
Driving with a flat tire. Drive slower. Avoid driving faster than 24 to 32 mph (15 to 20 km/h) with a flat tire. You can cause irreparable damage to the metal wheel under the tire and even lose control of your vehicle.
The presence of a lump or egg in the tire is a clear sign that the inner layers have suffered irreparable damage, it is the inner part of the tire, the radial structure that has undergone a rupture. The tire is supported by air or nitrogen pressure (better than the latter).
Mountain bike tire pressure chart
| Tire width (inches) | ||
|---|---|---|
| 60 kg | 2 bar / 29 psi | 1.9 bar / 27 psi |
| 70 kg | 2. 1 bar / 30 psi 1 bar / 30 psi | 2 bar / 29 psi |
| 80 kg | 2.2 bar / 32 psi | 2.1 bar / 30 psi |
| 90 kg | 2.3 bar / 33 psi | 2.2 bar / 32 psi |
Driving on very hot days with a low pressure tire increases the chance of tire blowout due to overheating, increases fuel consumption, reduces tire life by up to 15% and reduces tire response when braking.
Chain: depending on use and cleanliness, it can last from 3,000 to 4,000 km. To find out if a chain is worn, you must measure it with a tool that is originally called a "chain gauge" and is essentially a gauge.
Tire shape.
The tire may deform and lose its original roundness. If we see that the central part is flattened, then there is more wear and we are losing traction. Cracks: Micro cracks in a tire are a sign of rubber wear.
Your tires can last anywhere from 1,000 to 10,000 km, with numbers that wide it's best to watch for obvious signs of wear and be ready to replace them when the time is right.
6 tricks to avoid puncturing your bike
Wheel porosity, when air seeps through the tire itself, is often overlooked. This is usually caused by poor casting or corrosion due to the use of incorrect wheel weights. There is a correct and generally accepted way to fix these types of leaks.
The tire rim can also bend and cause the vehicle to move. More importantly, you risk injury when you drive with a flat tire. Also, it is easy to lose control of the car without proper traction.
Each patch contains enough hormones for 1 week (7 days). Therefore, do not wear the same patch for more than a week.
Plaster can be used within 12-24 hours. 4-5 times a week.
How are they used? Open the package and take Therma Pad® Fem out of the package. Place the sticky part on the outside of your underwear on the affected area. The ideal temperature is reached 20 minutes after application, and the effect lasts up to 12 hours.
Apply the adhesive surface of the patch to the skin and remove any remaining protective coating. Press the patch firmly against the skin with the palm of your hand for about 10 seconds. Smooth out the patch, making sure the edges are well sealed.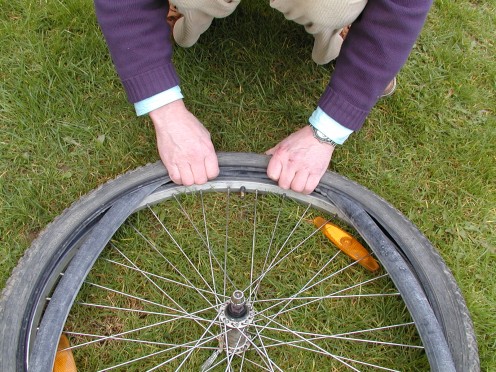 Leave the patch on for seven days.
The patch is usually applied to the skin once every 7 days. Every time you change your patch, change it around the same time. Follow the directions on the prescription label carefully and ask your doctor or pharmacist to explain any part you don't understand.
m. Plaster [= a piece of cloth, paper, leather, etc., which is applied to something, usually to cover an opening, or a piece of cloth or other similar material containing medicine, and applied to a specific part of the body ].
90,000 volcanic for bicycle chambers: Equipment and processing methodsContent
would seem to be more naught than repairing punctured cameras. Meanwhile, the rubber repair process known to many for decades is actually much more complex and confusing than a simple patch sticker.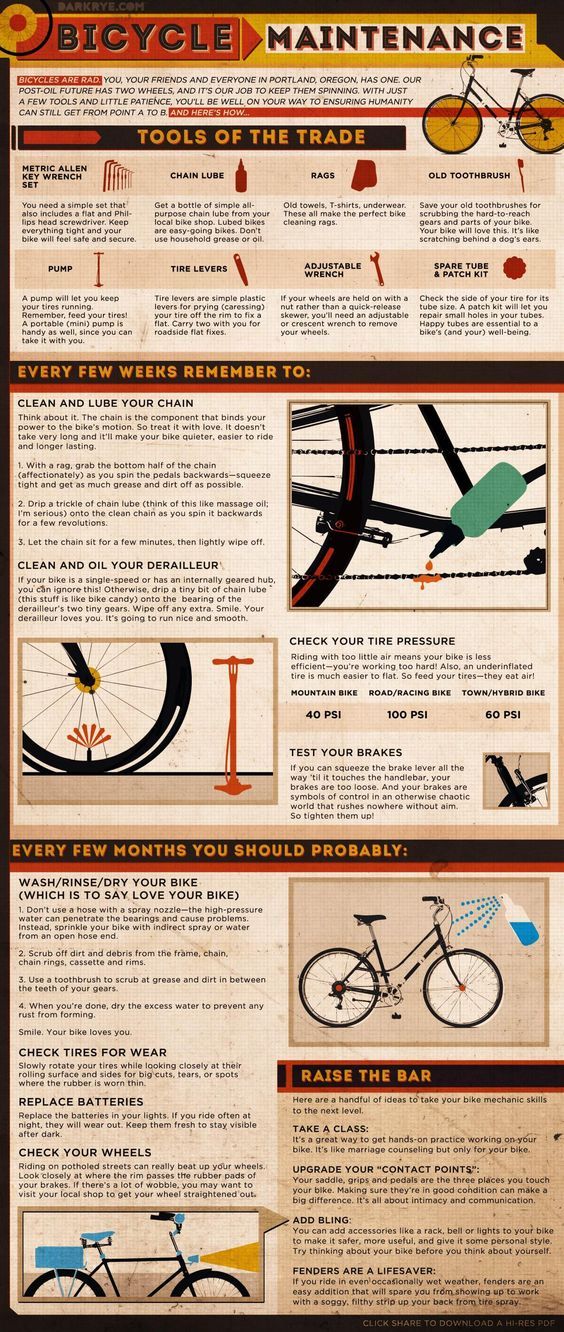
The tube in the wheel is a simple rubber donut that is needed to hold the air in it under pressure and maintain the working pressure inside the tire of the wheel. Tubeless tires themselves hold air under several atmospheres by sealing the sidewalls with perfectly flat wheel rim beads.
On the road, two troubles can happen with a tire and tube: a puncture and a cut. Both failures are eliminated by the application of rubber patches, followed by cold or, now used much less frequently, hot vulcanization. Everything is simple! Only the process itself is often similar to the preparation of a magic potion. Even if we take into account that many hard, filled rubbers cannot be vulcanized.
Vulcanization is an endothermic (with heat input) chemical process of building an integral molecular network of rubbers with binders, as a result of which the strength characteristics of the finished material increase. After vulcanization, rubber becomes rubber - a material with increased hardness and elasticity, with reduced plasticity and the degree of swelling or dissolution in organic acids.
The binder is mainly sulfur, to a lesser extent - metal oxides, peroxides, amine-type compounds. Catalysts are also used to speed up the vulcanization process.
A special heating device - a vulcanizer - can inseparably solder the tube or tire only with raw rubber, that is, rubber that has not been exposed to temperature. Any piece of the old camera is already vulcanized rubber.
Raw rubber is sold in sheets covered on both sides with a protective polyethylene film.
This rubber has very pronounced plastic properties: it can be molded into a lump, it sticks to smooth surfaces.
In 1939, Charles Cornell started manufacturing a new tube and tire repair material in Johnstown, Ohio (USA), later founding the company now known as TECH International. For more than ten generations, this revolutionary material has been used by people around the world to successfully repair tubes and tires using cold vulcanization at home. All this is real, thanks to the ready-made patches and glue familiar to all of us in a portable set.
Repair kit for bicycle inner tubes
Cold vulcanization occurs due to a chemical reaction between the active components of a special adhesive and a layer of raw rubber that has a bright color on the finished patch from the kit. The main advantage of cold curing is the ability to repair a punctured tire away from your garage or service shops. The entire repair, taking into account the cleaning of the damaged area on the camera, takes no more than 10 minutes.
Tubeless tire repair kit with raw rubber cords
An older and well-known way of repairing rubber is hot vulcanization. In the past, when there were no tire shops on every corner and absolutely all the wheels were with cameras, all drivers of cars and bicycles repaired rubber in their garage using a home-made gasoline or electric vulcanizer.
An old electric vulcanizer has a tubular electric heater (TEH) with three contacts: one for connection to 6 volts, the second for power supply from 12 volts, the third is common.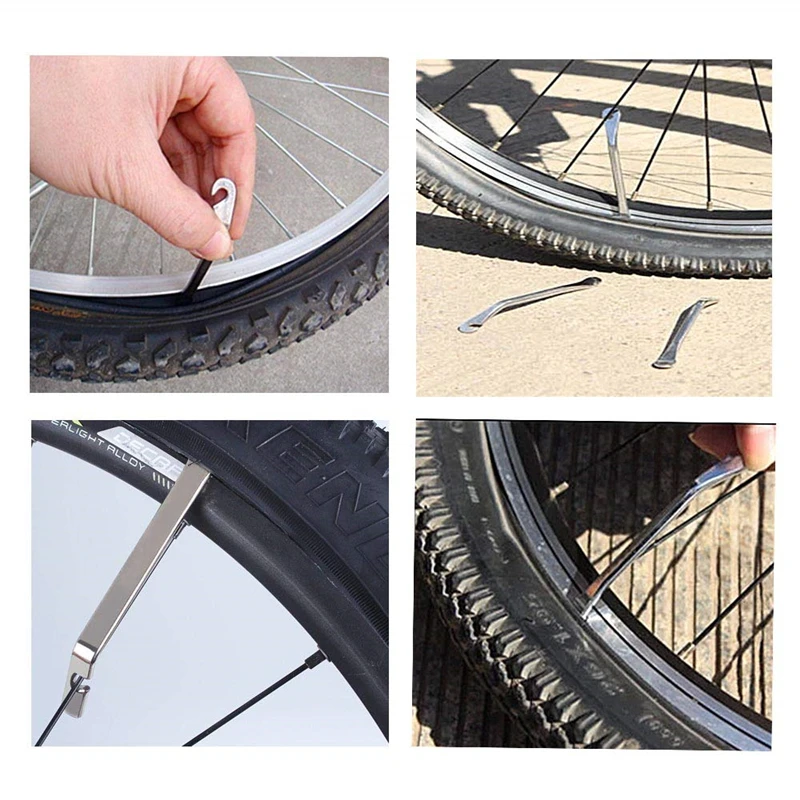
Pressing with a clamp is mandatory, because if not pressed, gas bubbles released during the heating process can create voids in the patch.
A homemade vulcanizer made from an old piston heats up rubber by burning gasoline. To limit the temperature, a sheet of paper is placed between the piston and a piece of rubber. In practice, the temperature can also be monitored using granulated sugar. Sugar begins to melt at 145 degrees, at approximately the same temperature paper is charred.
Hardening of raw rubber starts at approximately 90 degrees and proceeds optimally and quickly at 147 degrees. Above 150 degrees, rubber molecules begin to break down, forming rapidly oxidized low molecular weight unsaturated hydrocarbons. The 160 mark is critical for rubber as the material begins to char.
Due to the increased destructive oxidation of rubber at high temperatures, it is impossible to keep the chamber in the vulcanizer for a long time even at the optimum 147 degrees.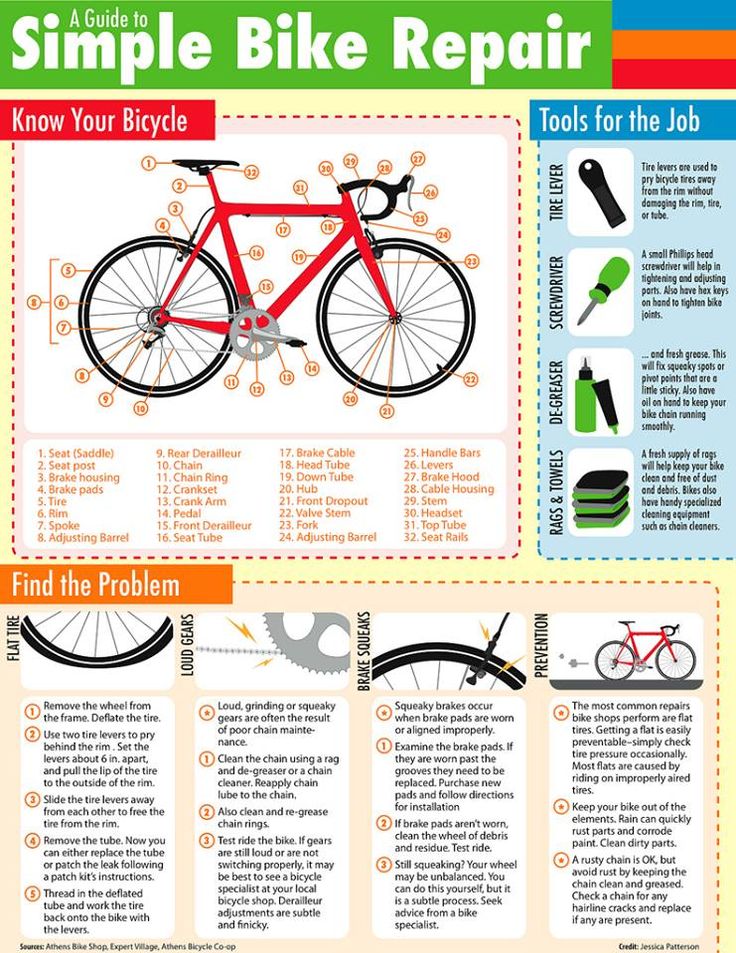 It is usually enough to warm up a thin patch for 8-10 minutes.
Stationary floor vulcanizer for industrial use
Conventional hot vulcanization can patch a tube or splint 40% more efficiently, but requires at least 20 minutes to complete, including preparatory operations.
In addition, you will have to carry a bulky heating device with you.
The average cure rate at 147 degrees is 1mm of raw rubber thickness for every 4 minutes. Therefore, it will take at least 8 minutes to warm up a regular patch 2 mm thick, without taking into account the time to warm up the vulcanizer to operating temperature.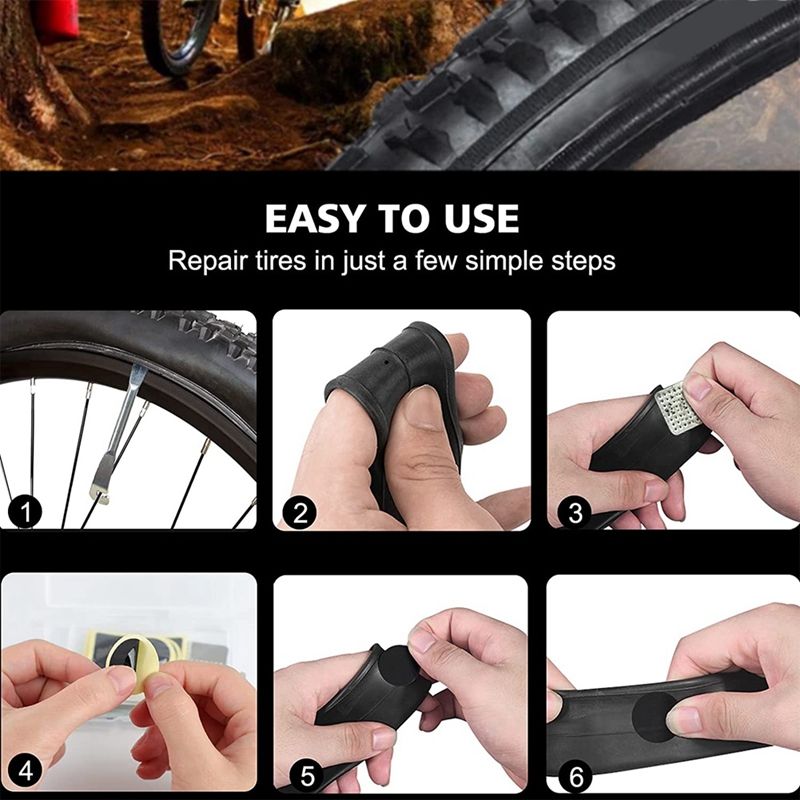
Many people use glue when hot vulcanizing, although a piece of raw rubber is already tightly welded to the chamber without it. It is also not necessary to cut the extra spacer out of the old chamber to apply over the patch. When heated, a raw patch itself becomes normal hard rubber. This extra padding is only useful for smoothing and firming if a thin piece of raw rubber is used.
Vulcanizing Cement is sold in cans like BL, OTP, Tip Top RAD, or aerosol cans: Zefal Repair spray, Abro Quick fix tire, Tire sealer. These compositions are non-toxic, since they do not contain aromatic and chloride hydrocarbons.
Road tire repair cans
Carburizing of the liquid vulcanizer starts at 18 degrees. Hot vulcanization at temperatures up to 150 degrees is also applicable to it.
The repair process is simple, you don't even need to remove the wheel from the bike, just:
