Photo: istockphoto.com
Driving is a luxury that many people across the country enjoy, but if proper care isn’t taken to maintain a vehicle, it can result in rapid wear, part failure, and poor control. Tires are one of the features of a car that can sometimes be overlooked, but it’s important to ensure that you know how to use a gauge to check tire pressure. Underinflated tires increase braking distance, reduce steering control, and accelerate tire wear, which can result in complete tire failure. Overinflated tires are not as hazardous, but they can still increase tire wear, affect the wear pattern of the treads, and reduce control. To ensure that your tires are not under- or overinflated, it’s necessary to understand how to use a tire pressure gauge.
Tools & MaterialsIt’s best to check the tire pressure when the tires are cold, such as first thing in the morning or after the vehicle has been parked in the shade for several hours. This helps to increase the accuracy of the readings. In order to test tire pressure, you’ll need to purchase a viable tool such as this tire pressure gauge—a favorite in our researched guide to the best tire pressure gauges.
Advertisement
Learning how to use a low-pressure tire gauge is relatively simple, though you will need to find the manufacturer’s recommended PSI before you can begin. While it may seem like the first thing to do is take out the tire pressure gauge, that wouldn’t get you very far unless you already knew the manufacturer’s recommended PSI for the tires. Given that most people don’t typically memorize this information, it’s a good idea to check and verify before using the tire pressure gauge.
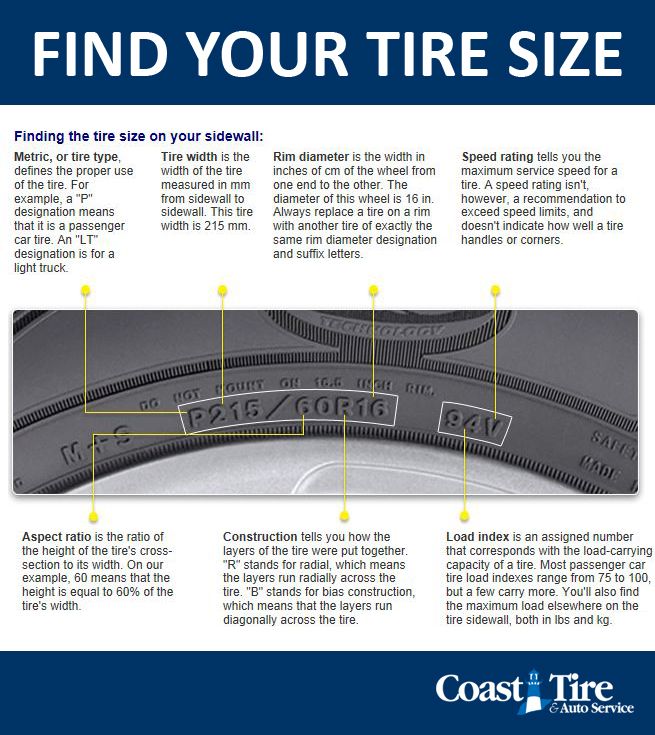
Tire and loading information is commonly included in the owner’s manual, though you may also be able to find it on a sticker on the driver’s side door, near the trunk lid, inside the fuel door, or even inside the console. Look for a two-digit number, like 35, followed by PSI, which means pounds per square inch.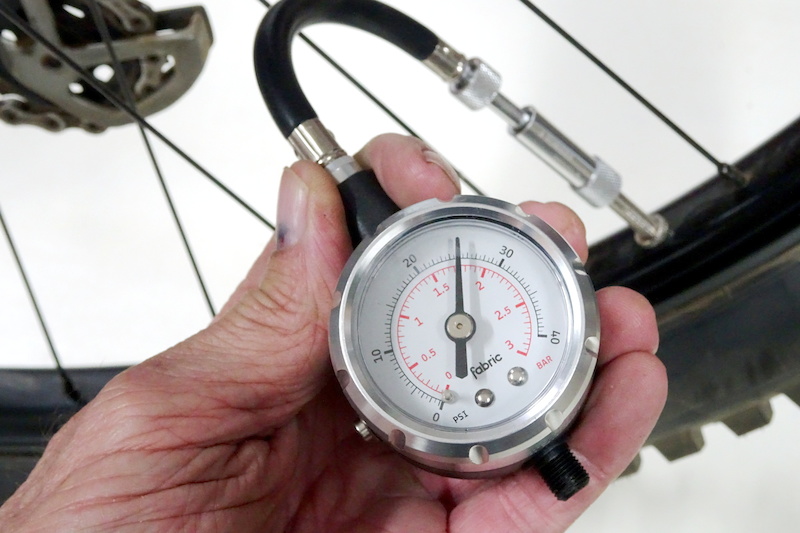
Related: The Best Jump Starters With Air Compressors for Your Car
Photo: istockphoto.com
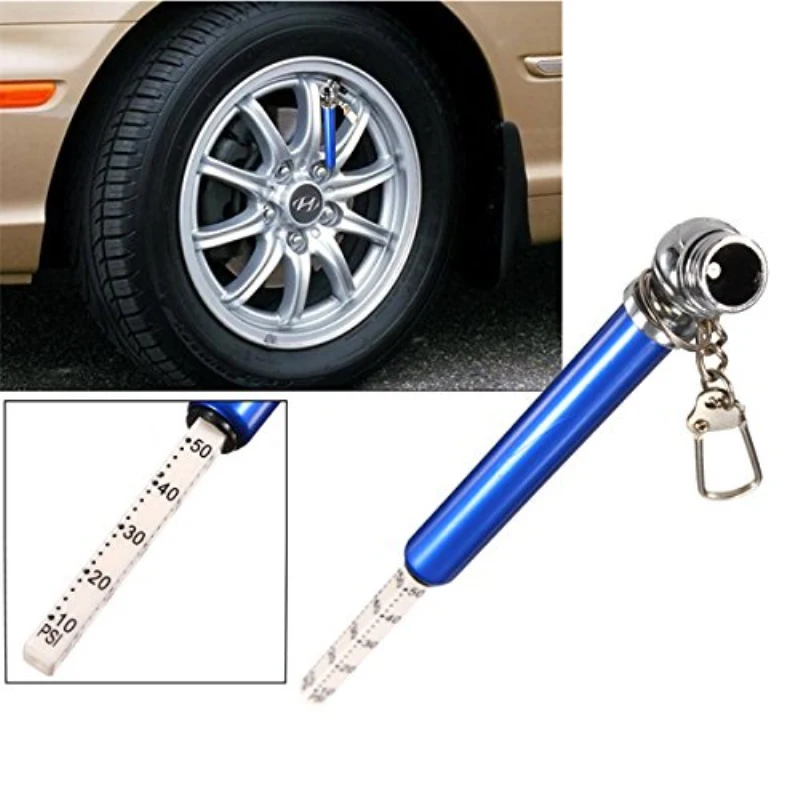
STEP 2: Locate the tire valve and remove the cap.Each tire has a valve used to inflate or deflate it, depending on the suggested PSI and the current tire pressure. The tire valve is typically a small, black tube about an inch long with a threaded cap. It can commonly be found on the inside of the rubber wheel, protruding through a gap in the hubcap. Locate this valve, then remove the threaded cap so that the tire pressure gauge can fit over the top of the valve. Make sure to keep track of the tire valve cap because it’s very small and easy to lose.
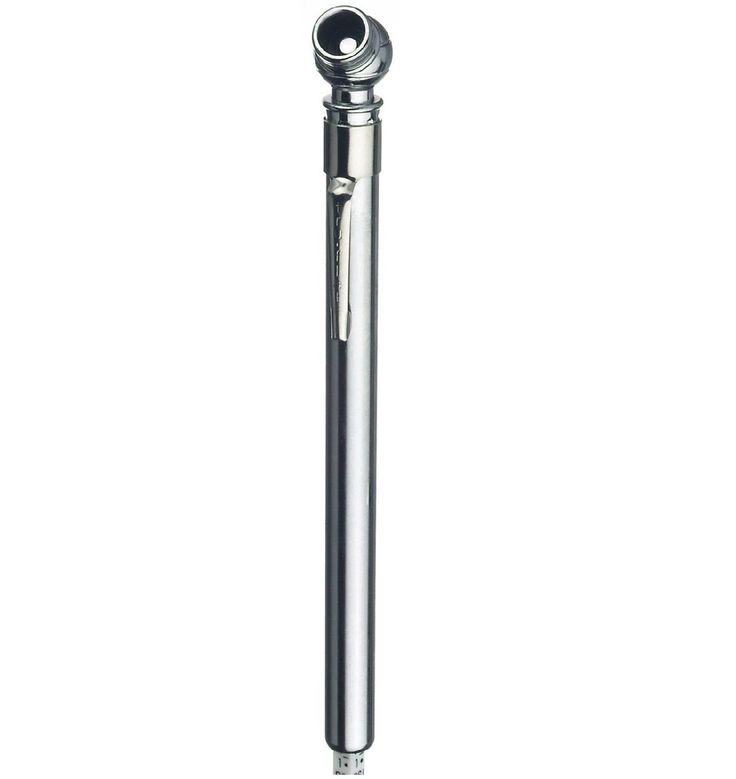
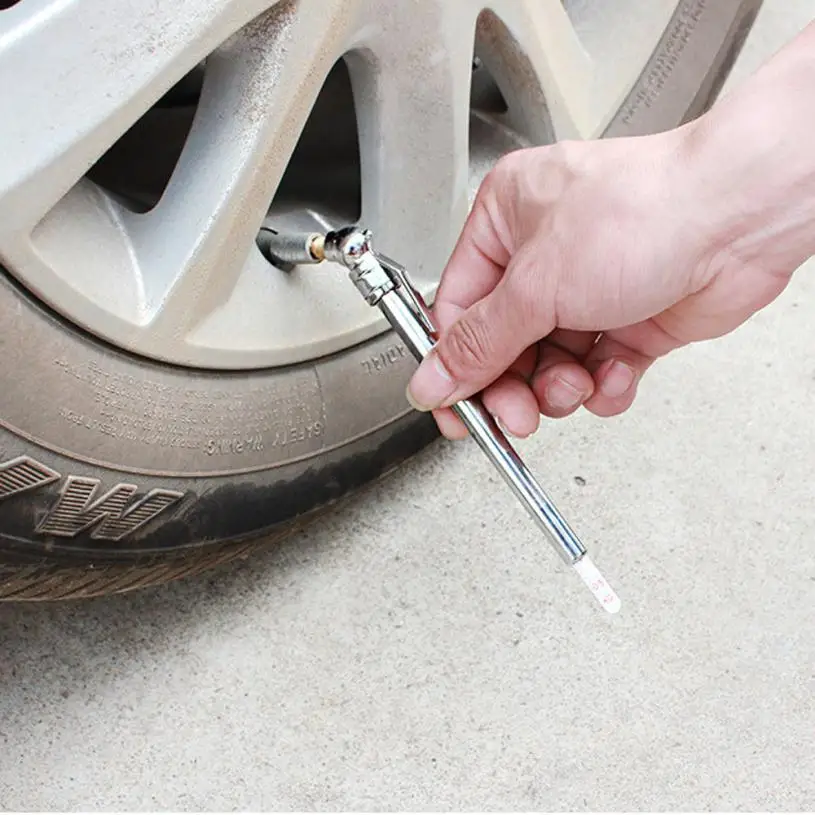
STEP 3: Press the gauge onto the tire valve.The next step to learning how to use a tire pressure gauge is to simply press the gauge down onto the tire valve after the threaded cap has been removed. Each tire valve contains a spring-loaded valve core that automatically seals itself using air pressure from inside the tire. By pressing the gauge against the valve core, the gauge opens the valve to the internal air pressure of the tire and allows the gauge to act as the seal while simultaneously measuring the tire’s PSI rating.
Advertisement
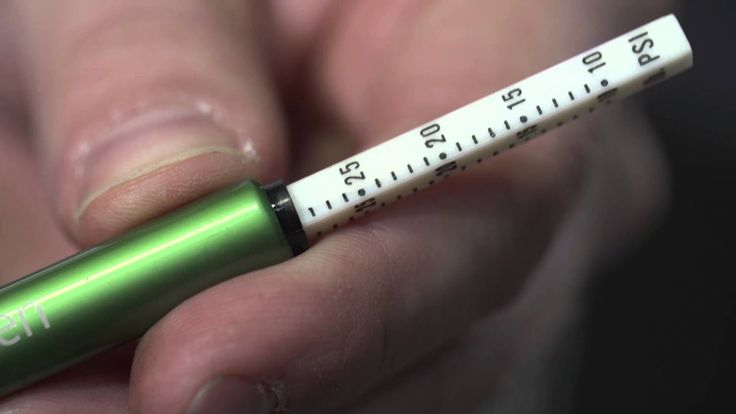
STEP 4: Check the reading on the tire pressure gauge.The tire pressure gauge should be held firmly against the open tire valve so that no air is escaping. If the tire pressure gauge is making a hissing sound, you need to adjust the angle of the gauge inside the tire valve until it is silent. This indicates that the tire pressure gauge is measuring the full tire pressure instead of getting a partial reading due to escaping air. To check the reading on the tire pressure gauge, simply read the slide ruler for manual pen gauges, the dial for dial pressure gauges, or the digital screen for digital pressure gauges. The ruler, dial, or screen should display the current tire pressure in PSI.
Photo: istockphoto.com
After taking the tire pressure measurement, write down the current pressure for each tire so that you don’t forget and need to check again.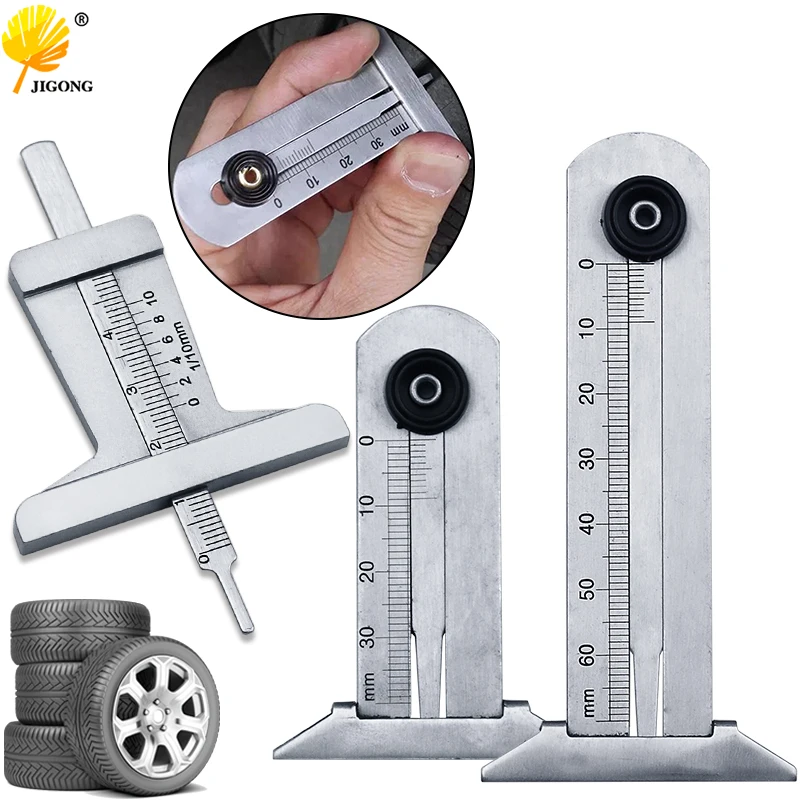 If the pressure within each tire is too high, you can easily drain some air by holding the tire pressure gauge against the tire valve at an angle, listening for the hiss of escaping air. Periodically check the tire pressure to ensure that you don’t drain too much air and stop once you reach the desired PSI.
If the pressure within the tire is too low, connect an air compressor such as this portable inflator—a favorite in our researched guide to the best tire inflators—to the tire valve to inflate it. After inflating the tire, use the tire pressure gauge to check the PSI and make sure it is now at the correct level according to the manufacturer’s recommendations.
It’s advised to check the tire pressure on your vehicle at least once per month to ensure that you are safe while driving and not doing any unexpected damage to your tires.
Advertisement
RELATED: I Tried a Cordless Tire Inflator―Did It Work?
Final ThoughtsEffectively using a tire pressure gauge is a necessary skill for a driver to have in order to be certain that their vehicle is properly maintained.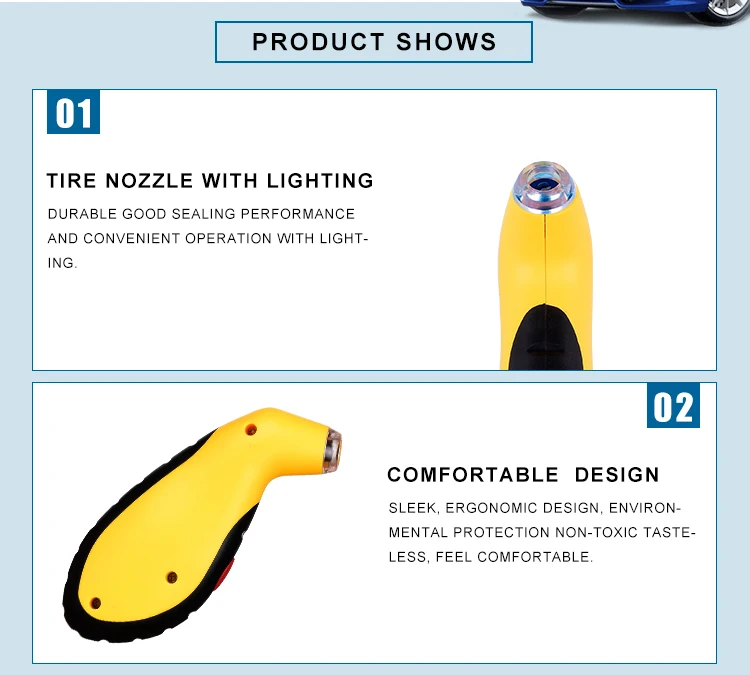 Additionally, by checking the tire pressure of the vehicle, drivers can ensure that they are getting the most out of each tire, instead of accidentally causing premature wear and tear due to overinflated or underinflated tires. Also, keep in mind that you can deflate a car tire with only a tire pressure gauge, but to fill the tire you will need access to an air compressor and a suitable attachment for filling tires. Consider investing in a home air compressor or find a local gas station that has one available for use.
Advertisement
Maintaining proper tire inflation is relatively simple and essential to the overall tire performance of your vehicle. A properly inflated tire will provide longer life, quicker steering response, better fuel efficiency and a smoother ride than an improperly inflated tire. Both underinflation and overinflation can cause headaches like premature treadwear and possible tire failure. The best way to ensure you're getting the most out of your tires is to check your tire pressure on a monthly basis.
Knowing how to use a tire pressure gauge is very simple. Here’s how to check tire pressure and refill your tires.
Items You Need When Checking Tire Pressure
Tire pressure gauge
Air compressor
Pen and paper
Your tire pressure gauge can be digital or standard. Auto parts stores typically carry both. Many auto parts stores sell portable air compressors that run from your car battery or 12v power port. Alternatively, you can use the air compressor found at most gas stations. They usually cost $0.50 or $1.00 to use.
Vehicle manufacturers specify PSI – literally “pounds per square inch” of pressure – assuming tires are cold. Tires are considered cold when the vehicle has been parked for three hours or more, or if the vehicle has been driven less than a mile (1.6 km) at moderate speed. PSI is the unit your pressure gauge uses to provide readings.
Look on the driver’s side door jamb or your owner’s manual to find the recommended cold tire PSI for your front and rear tires.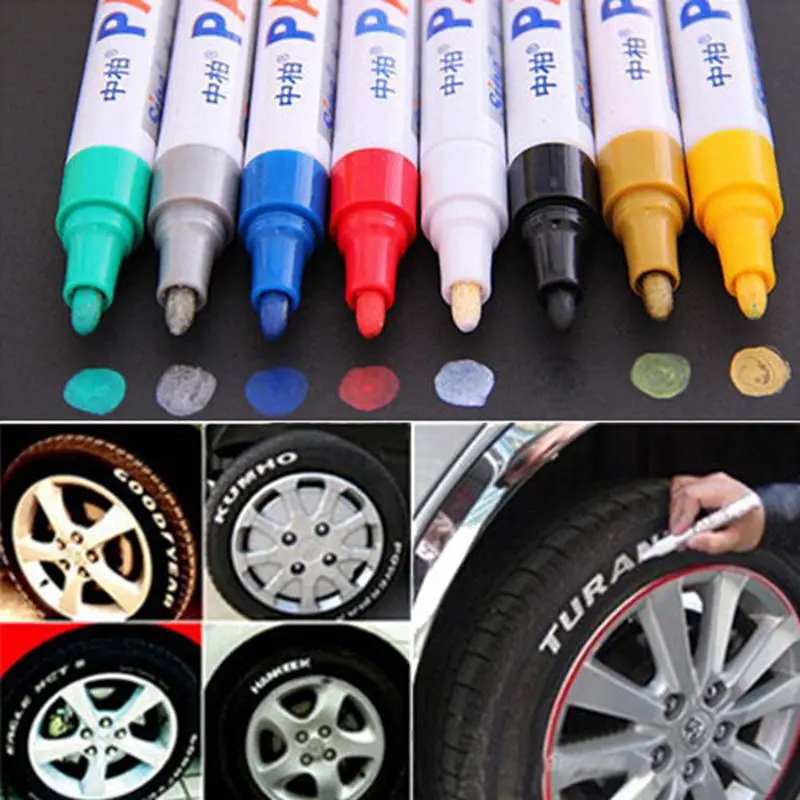 If you cannot find it, you should consult your vehicle dealer, manufacturer, or a qualified tire professional.
If your front and rear tires require different pressure levels, write down the correct PSI for each to avoid getting confused as you move around your vehicle checking tire pressure.
Remove the valve cap from one of your tires. Then place the pressure gauge on the valve stem and press down hard enough so the hiss sound disappears and your gauge provides a reading. With a standard gauge, the air pressure will push a small bar out from the bottom of the gauge. Measurement units are etched into the bar. A digital gauge will show you the reading on a screen.
Write down the reading and repeat this process for all four tires.
Use an air compressor to refill any tires with low pressure. Many air compressors are different, so read directions carefully to be sure you’re using it correctly.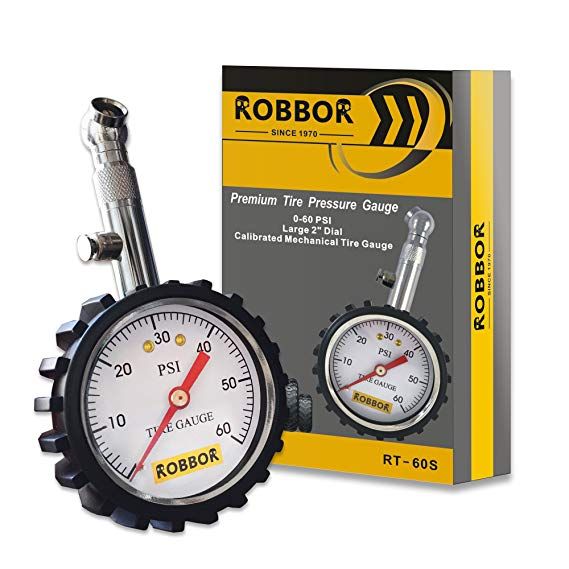
If you’re using the air compressor at a gas station, be sure to park so that the hose will reach all four tires. Insert change into the machine until you hear the motor running. Fill each tire by placing the end of the hose over the valve stem and pressing on the lever.
Using a gas station air compressor means your tires might be “hot.” If it is necessary to adjust inflation pressure when tires are “hot”, set their pressure to 4 psi (14 kPa) above the recommended cold inflation pressure. Recheck the inflation pressure when the tires are cold.
After filling your tires, use the gauge to check pressure again. At this point, it’s ok if you overfilled the tires because you can always let some air back out. Never drive on overinflated tires. Overinflation can result in decreased traction, premature wear, and decreased impact absorption.
Make the above procedure a monthly ritual. Regularly checking your tire pressure is the best way to ensure your tires never dip far below the optimal PSI.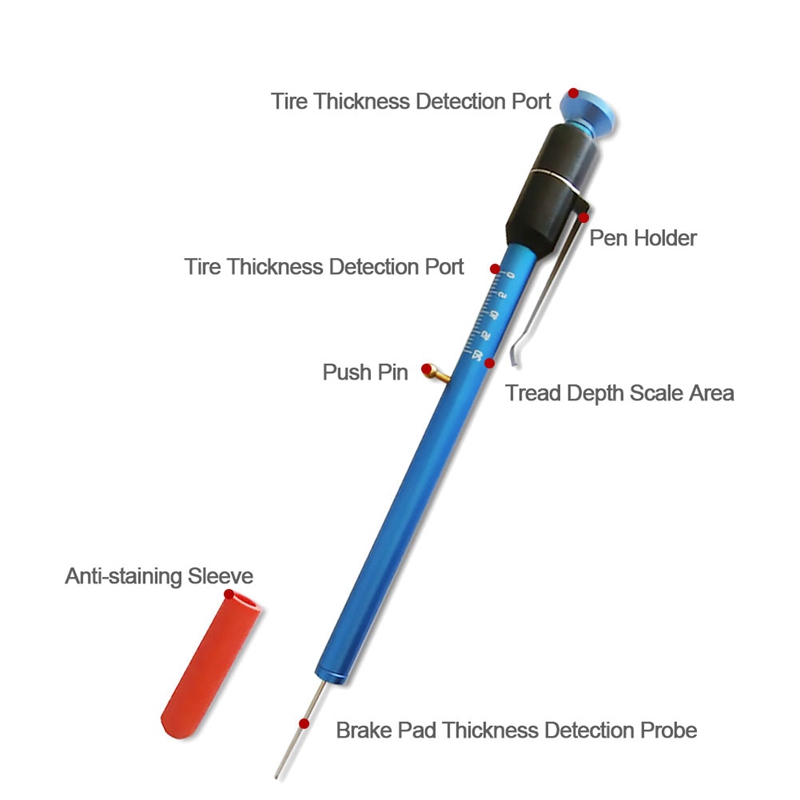
Accuracy matters and you should keep that in mind when choosing a gauge. For just a few dollars, you can find a quality, accurate tire pressure gauge that gives accurate readings. If you’re not sure which one to purchase, ask a professional technician which he or she prefers.
A digital tire pressure gauge will provide accurate readings, but don’t forget that it operates on a battery. If you think having to replace the battery will prevent you from using it, it’s best to go with a standard gauge.
It’s best to use your personal tire gauge versus those available attached to air hoses at service stations. Of all the pressure gauges out there, they’re the most likely to be weathered, and possibly inaccurate.
There’s never a good time for a flat. That’s why Bridgestone DriveGuard tires are masterfully engineered to keep you moving for up to 50 miles at speeds up to 50 MPH without disruption.
There’s never a good time for a flat. That’s why Bridgestone DriveGuard tires are masterfully engineered to keep you moving for up to 50 miles at speeds up to 50 MPH without disruption.
See Details Find Your Fit
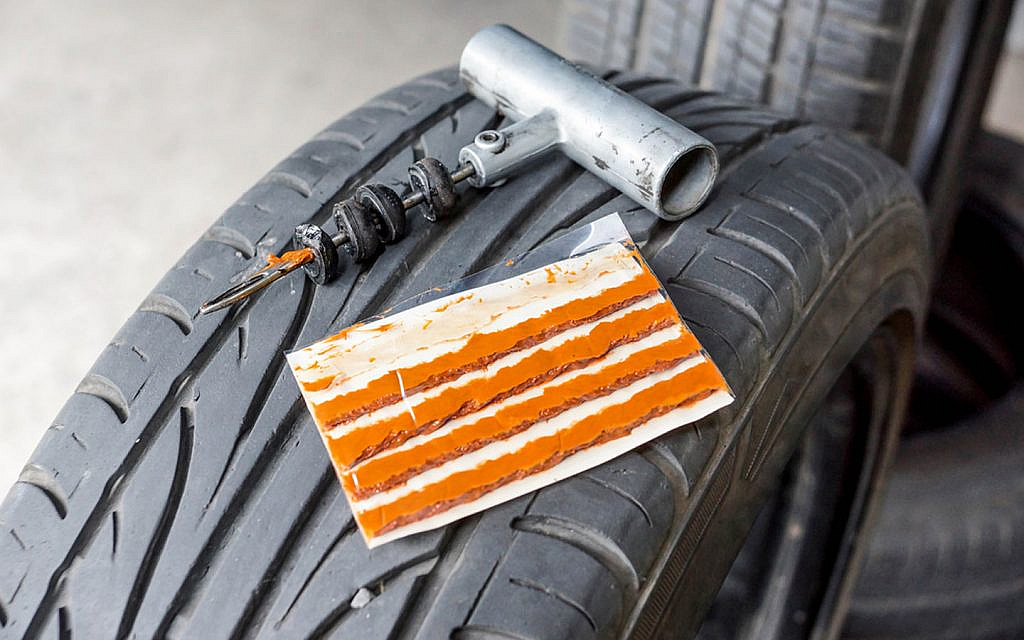
Modern passenger cars are equipped with tubeless tires. Tires with rubber chambers inside are extremely rare today, only on super-budget vehicle options. Car owners have long appreciated all the convenience and benefits that tubeless tires have. Unlike chambered rubber, they keep air in the wheels by being sealed to the rim. The tightness of tubeless tires is ensured by a two-millimeter layer of rubber applied to the tire from the inside. It is he who prevents the passage of air. The coating of soft rubber layer provides tightness at the junction of the tire with the rim of the rim. The tire bead sits on the so-called rim shelf, which is equipped with a special rounded ledge. Thanks to him, the tire is securely connected to the wheel rim, and complete tightness of the joint is achieved. A tubeless tire is filled with air through a valve installed on the rim, on its rim.
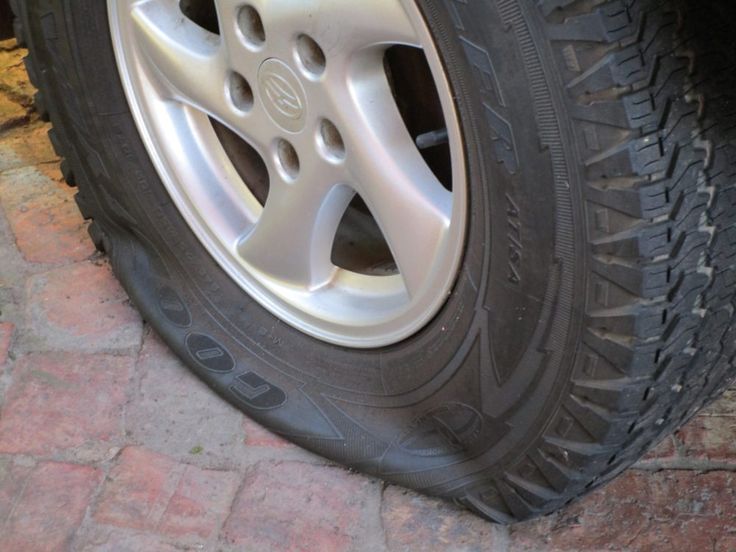
Why did tubeless tires become so popular that they gradually replaced tubed tires? First, tubeless tires are much lighter. This is a very important and great advantage, because heavy weight enhances the inertial movement of the wheel when driving on, to put it mildly, imperfect road surfaces, which we still have much more than smooth autobahns. As a result, this affects the condition of the chassis, accelerates its wear. In addition, tubeless tires do not heat up during driving in the same way that chamber rubber heated up, in which the inner cylinder rubbed against the tire while driving. Such friction led to its rapid wear, and also increased the likelihood of tire rupture during movement. When a tube is punctured, the tube tire loses air very quickly, since it escapes not only from the puncture site, but also through leaky tire beads that do not fit snugly against the rim flange.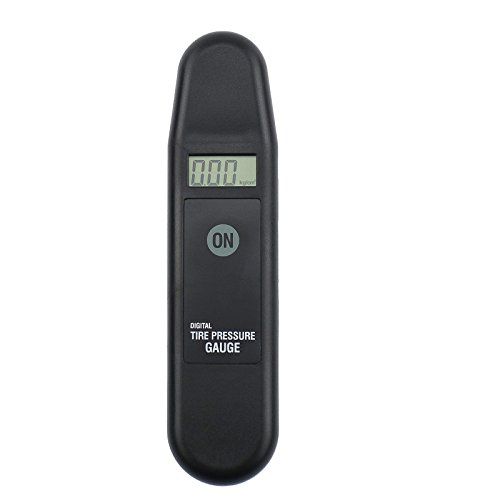 In addition, if such a tire is punctured, you will not be able to stop the car immediately, it will travel more than a dozen meters by inertia until it comes to a complete stop. During this time, the tube and the tire can be damaged more thoroughly, the rubber of the inner cylinder will “chew”. With tubeless tires, this option is excluded. Even if a puncture occurs, thanks to the tightness of the chamber and its periodic pumping, you can get to the tire service.
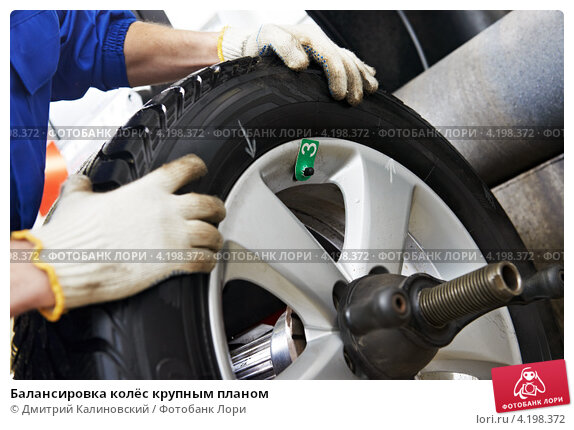
Tubeless and tube tires also differ in how they are mounted / dismantled. If chambered rubber can be freely disassembled or, conversely, installed at home, then such a number will not work with a tubeless one - the risk of damaging the side flanges is too high, damage to which will lead to depressurization of the tire. Due to the peculiarities of installation and dismantling, many motorists find it impossible to repair a tubeless tire with their own hands, especially on the road, not in a comfortable garage, but on the side of the road. And in vain. Of course, it will not be possible to completely eliminate the problem at a professional level without special equipment. But to make sure that the damaged tire still travels, and sometimes not only reaches the tire fitting center, but goes more than one hundred kilometers after an impromptu repair, is quite realistic.
To do this, use special tire repair kits, which can be purchased everywhere today by going to any car shop. Better yet, buy everything you need to repair a tubeless wheel yourself separately and always have it ready. By doing this, you will save some money, which is always nice. The fact is that manufacturers of ready-made repair kits, in an effort to make their kits more expensive and solid in appearance, include in them both really useful tools and materials, as well as those that you can easily do without. Using repair kits or separately purchased harnesses and tools, you can repair tubeless tires not only for cars, but also for trucks. This can also be regarded as one of the advantages of tubeless tires over tube tires. It is much more difficult to repair it with a puncture. It is necessary to disassemble the wheel, remove the chamber, find the puncture site, and then degrease the working area, cut out the patch, and seal the rubber balloon. After drying, the camera is installed in place, and the wheel is beaded. With a tubeless tire, everything is much easier.
RUNWAY Tubeless Tire Repair Kit, 7-Piece
If you find that your car's tubeless tire wheel is damaged, first assess the severity of the situation. If, in your opinion, you can do without repair, having reached a reliable tire service on periodic pumping of the wheel, then it’s better to do so. Tubeless tires were designed to hold air even with foreign objects sticking out of the cord. But do not forget that riding with a nail or other object in the tire causes the puncture to gradually expand and the tire around the damaged area begins to gradually collapse.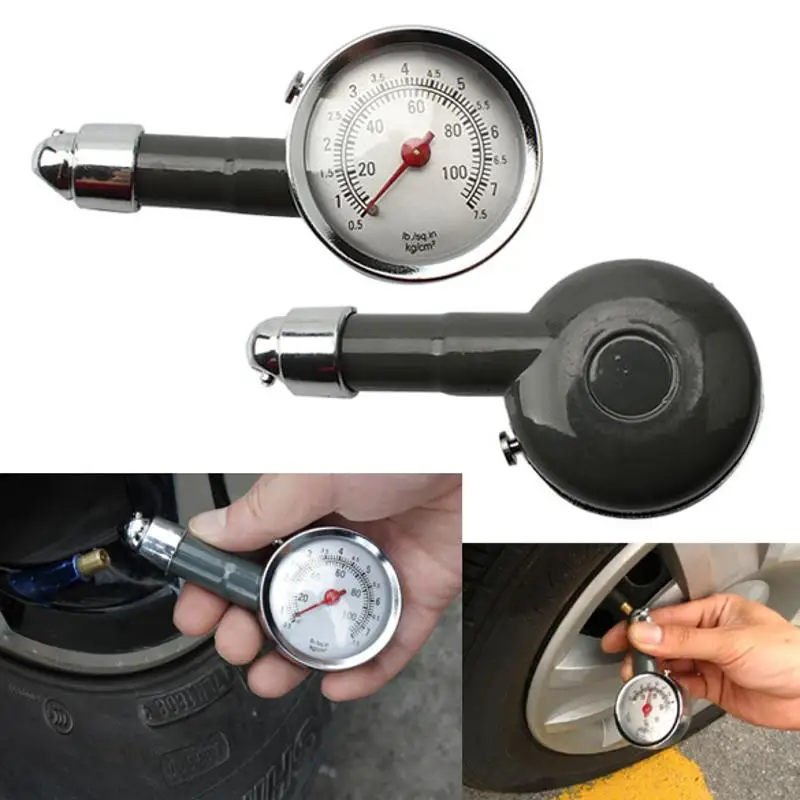
But, if it so happens that the damage to the wheel received on the road is too extensive, the chamber does not hold air and it will not be possible to complete the journey on pumping the tire, you need to choose the best method of temporary repair and immediately proceed to it. A tubeless tire is repaired in the following ways:
When choosing a repair using a tourniquet, you need to decide what type of material will be used. The harness can be cord or rubber. Let's consider both of these options.
Wheel repair kit, 6 pieces
Cord harness has found wide distribution as a repair material for tubeless tires. With this harness, you can carry out repairs in any conditions: on a city street or on the side of a country road. It is a strip of high-strength nylon, which is richly impregnated with high-quality rubber-based adhesive. Such harnesses are supplied to the domestic market by many manufacturers, they have certain differences in technical characteristics and cost.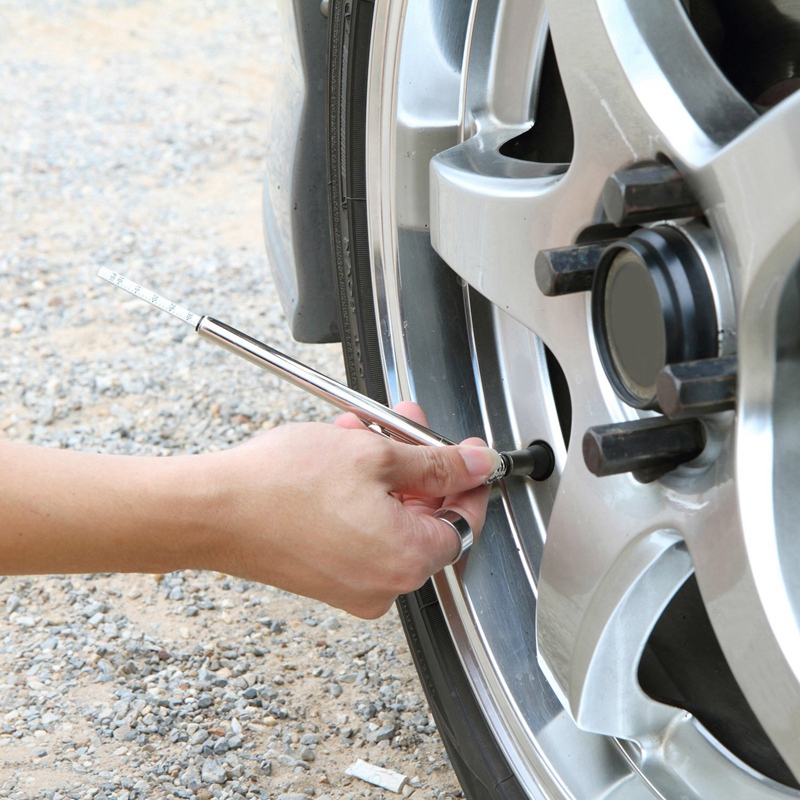 But all cord harnesses are installed according to the same type of scheme:
First of all, they find the place of damage and mark it with wax crayon or another marker.
Remove the item that damaged the tire if it is stuck in the cord.
Then you should check the tire pressure, it should not fall below 0.5 atmospheres.
Take a spiral awl and use it to determine at what angle the tire is damaged.
Apply vulcanizing glue to the awl.
Using the awl inserted into the puncture, coat the puncture site with glue in the most thorough way, for which you need to rotate the tool lubricated with it clockwise. Perform this action three times - lubricate the awl and insert it into the puncture, then leave the tool in the cord for the time being.
In the meantime, select the desired harness and carefully remove the protective film from it.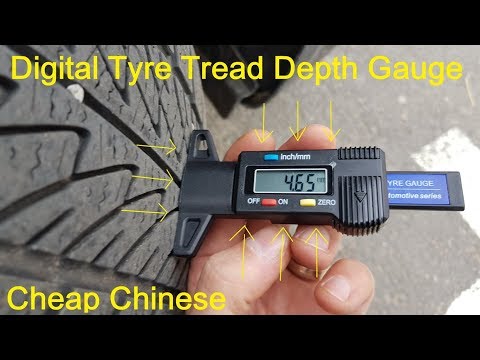
Insert the tourniquet into a special needle, focusing on the center.
On both sides, cover the surface of the tourniquet with vulcanizing glue.
Remove the helical awl from the tire where you left it at the puncture site.
Install a pen with a needle and a tourniquet placed inside into the puncture.
By pressing the handle, install the needle with the tourniquet into the puncture, advancing to the stop at a given angle.
Remove the pen with the needle from the puncture site without rotating it.
Carefully cut off the parts of the tourniquet sticking out on the surface.
Then you need to determine how tight the tire is repaired. This can be done with the help of a special liquid, which is used to determine the puncture site. If, after applying such a liquid, no air bubbles appear, then the tire is temporarily repaired and can be used further. If air bubbles appear, try installing an additional tourniquet in the place of damage to the tire.
This method of temporary repair is inexpensive, but it has proven its effectiveness more than once. A tire repaired in this way without repair will serve you for a long time - up to 6 months.
A rubber harness costs more than cord, but it is also more reliable. They install it in much the same way as the cord one, but there are still some differences. For example, when installing a rubber band, do not use an awl in the form of a rasp, since it can damage the rubber band during installation. In addition, the rubber band must be mounted on the adhesive specified by the manufacturer in the instructions for the repair kit.
Raw rubber band for repairing RUNWAY tubeless tires, 5 pcs
In this case, an anchor is a special type of bundle, one end of which ends with a small patch.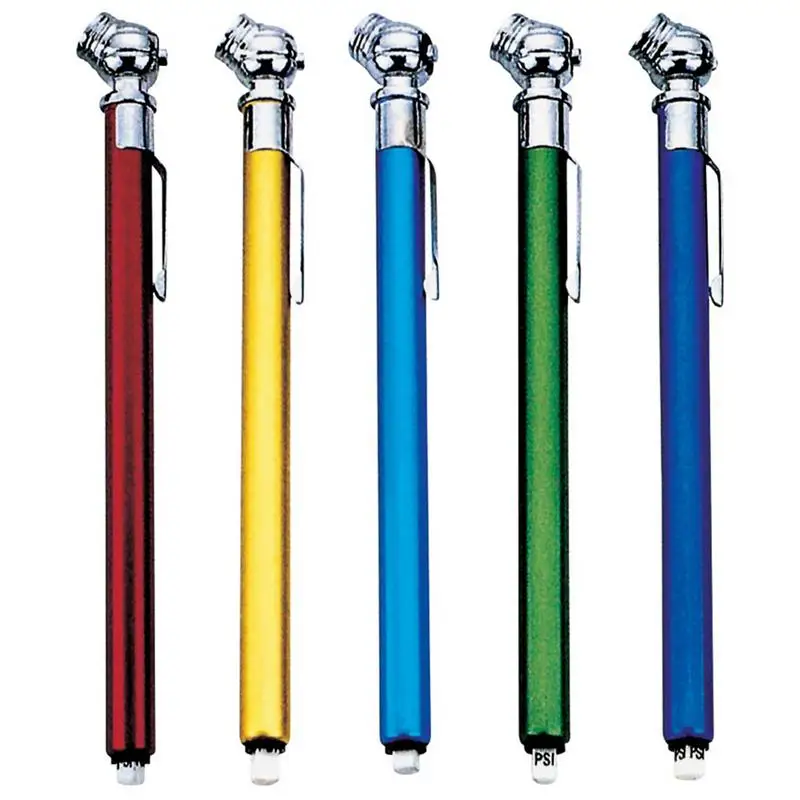 The anchor is installed in the same way as other types of harnesses, but in addition, it glues the puncture site with an internal patch. To do this, the tourniquet is pushed inward, and then pulled a little in the opposite direction. Anchor can only be installed using a special cutter with a diameter of 6 mm. It is purchased separately from the set. But your efforts will surely be crowned with success, because the anchor is considered the most reliable option for repairing a tubeless tire with a harness. But with the help of harnesses, you can not repair side punctures. And in any case, even if the repair is successful, it is necessary in the coming days to choose the time to visit the tire service. Remember that prolonged use of the harness will cause irreversible damage to the tubeless tire. And until the problem is fixed, constantly monitor tire pressure.
The second option for repairing tubeless tires involves the use of sealant. This option cannot be called optimal, but it has become widespread, since tire repair in this way is carried out very quickly, literally in a matter of minutes.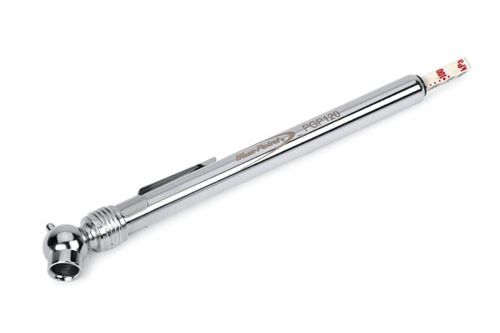 And the result of its implementation is guaranteed to allow you to get to the intended purpose of the trip, without first stopping by the tire service you met along the way.
The sealant is very easy to apply. In this case, it is not necessary to remove a nail or other object from the cord, due to which the tire was damaged. Simply attach a bottle filled with sealant to the valve on the rim of the wheel and see that the contents of the bottle are pumped into the wheel. Keep in mind that repairing a tire with sealant will significantly disrupt the balance, so choose a moderate speed. But on the other hand, repairs with the help of a sealant are easy, simple and very fast. You can use it even while standing in a traffic jam.
Today, you can easily buy different types of sealants. The most widely used gel, liquid, aerosol formulations. Gel ones are good because they can be used all-season, both in the summer heat and in the cold season. But at the same time, they significantly worsen the balance of the wheel.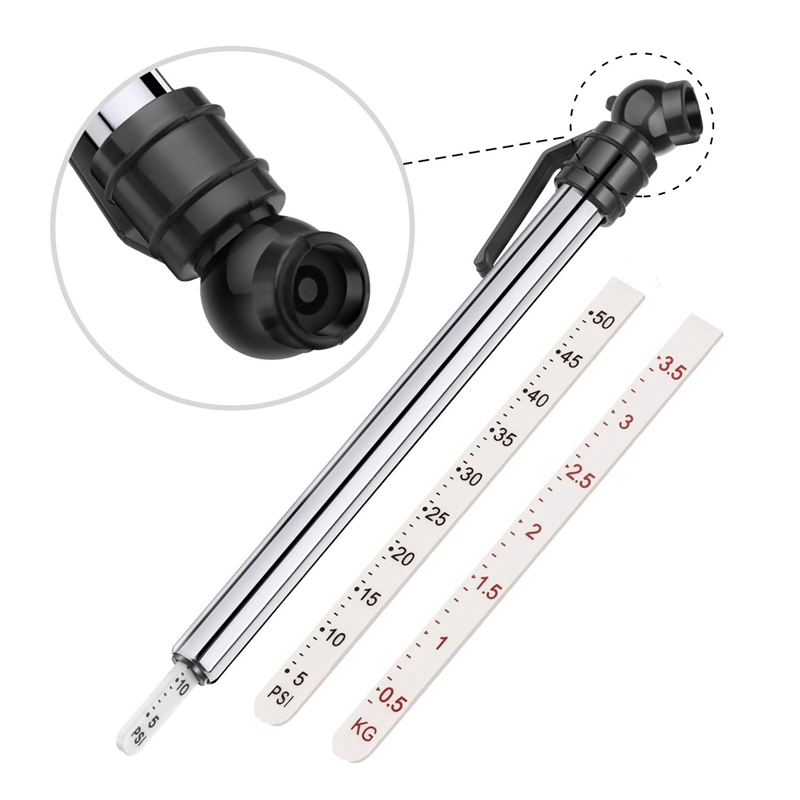 Liquid sealants are highly reliable, but they are not very convenient to use. Aerosol compositions make it possible to restore the performance of the wheel without a jack and a pump. But in the cold winter period, they will not work. If we compare the restoration of a tubeless tire, carried out with the help of sealants and harnesses, cord or rubber, then the latter are considered the preferred option, since they provide a fairly high quality of the repair performed with their help.
As you can see, do-it-yourself tubeless tire repair is possible, albeit temporary. You just need to stock up on funds for its implementation, without delaying the purchase of harnesses or sealant, because a lot of trouble awaits us on the roads. Meet them fully armed and quickly solve the problem. For guaranteed success, you must strictly follow the recommendations given by the manufacturer of repair materials in the instructions for use.
 How to use restoration pencils to repair scratches on a car. Advantages and disadvantages of restoration pencils. How to use.
 Every happy car owner considers his vehicle to be something special, spends quite a lot of money on caring for it, and perceives any scratch on the paintwork as extremely painful. To a large extent, this is due to the high cost of a new vehicle, as well as a significant decrease in its sale value, even with minimal defects on the body.
Contents
Scratches appear on any car sooner or later, and it does not depend on the brand of your car, your driving experience or driving style.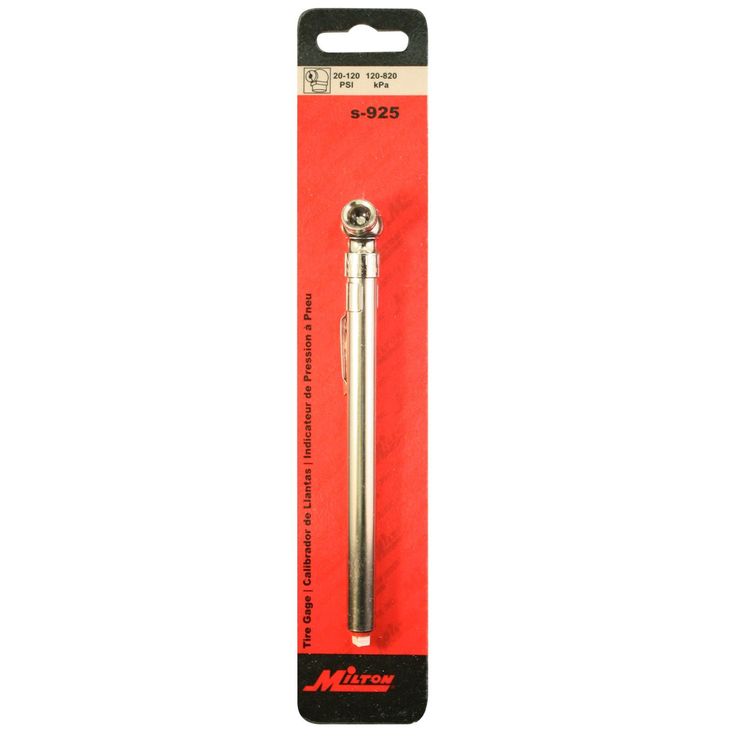 Small scratches can occur on a car even in the most harmless situations: stones that fly out from under the wheels of another vehicle, branches that you can accidentally run into, hail and precipitation, sloppy parking neighbors, and so on.
Scratches are not just a cosmetic defect. Water, dirt, chemicals penetrating through the damage lead to the formation of foci of corrosion of the body, which is much more difficult to deal with. Particularly serious consequences are scratches obtained in winter, due to the constant ingress of water with chemical reagents that are sprinkled on roads. Therefore, it is necessary to immediately eliminate scratches and chips, in order to avoid negative consequences.
Restoration Pen is an alternative to other methods of dealing with scratches on the vehicle body, allowing you to quickly remove scratches and thus restore the car's presentable appearance, as well as prevent corrosion.
Modern scratch touch-up pencils are distinguished not only by their efficiency, but also by their careful attitude to intact paintwork. Unlike conventional products, such as polishes, which remove a certain layer of paint surrounding the scratch when applied, the pencil works only at the site of damage and does not affect entire areas. In addition, there are a number of other advantages that such a pencil is endowed with:
There are two types of vehicle products, each depending on the severity of the damage:
 This tool is more versatile because it is suitable for scratches of any depth and size. Unlike wax products, it does not wash off after washing the car, because it contains paint. The only difficulty in acquiring it is the selection of a shade.
The company makes markers for car body restoration, which can be selected by color stretching. Available in 50 metallic colors and 3 whites. The composition is sold in aluminum tubes of 12 milliliters. The NewTon pencil contains high-quality acrylic paint, which ensures the durability of the coating. There is a real sample of paint on the cover of the pencil. A thin brush allows you to accurately apply paint to an area of \u200b\u200bany size. Designed for repeated use.
Most of the pencils on the market have a small volume, which is no coincidence. It is advisable to use the pencil as much as possible after the first opening, as the remaining product can simply dry out.
 How to start a car in winter, do I need to warm up a car in winter, useful tips