I think it’s safe to say that at one point or another, we’ve all had problems with an ATV starter. If you haven’t yet, you will. I have had starter issues with just about everything I have owned. You go to start your ATV and all you hear is, "CLICK". No engine crank.So you try it again and "CLICK". Nothing. You know the battery is good, you have the clutch pulled (if it has one), the ATV is in neutral, and the light is on but still… nothing. The first thing you should do in this situation is to check the battery and connections.
If you haven't read our post on multimeters yet, now's a good time to check it out.
More than likely, you already know that the battery is good, but we’ve all been in a hurry. I've mentioned before that it seems like it can be easy to overlook something small because we’re so used to taking care of it.
Kind of like when you call tech support for a computer issue and the first thing they ask is, “Is it plugged in?” I know I am guilty of doing a quick run through and noticing later on that the battery terminals were loose or that the battery was low. Once you have verified that the battery is NOT your problem, the next thing you should look at is the starter solenoid.
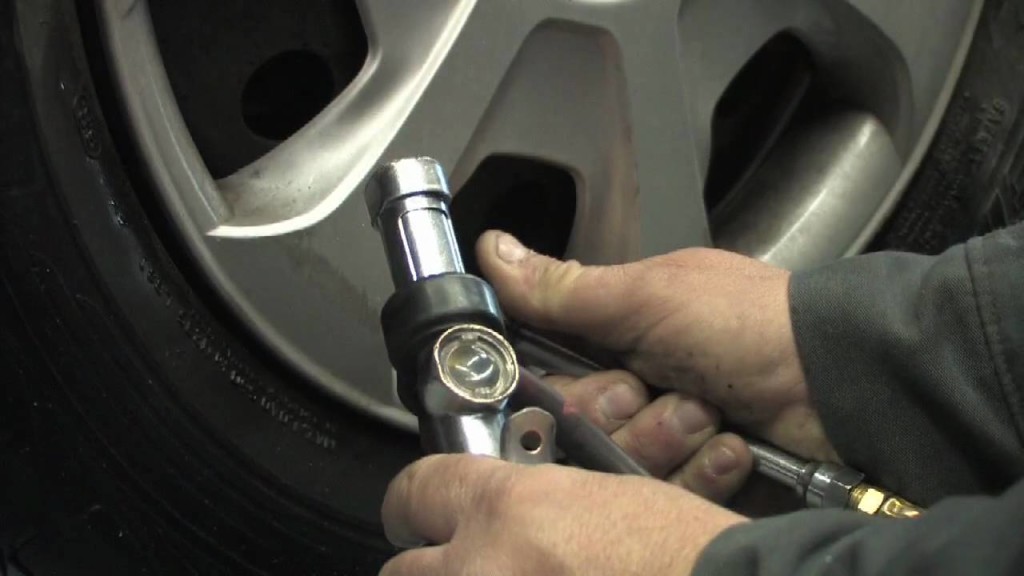
An ATV starter solenoid can normally be found on the frame. It is usually located on the outside of the plastic right next to or under the battery and near the wiring harness.
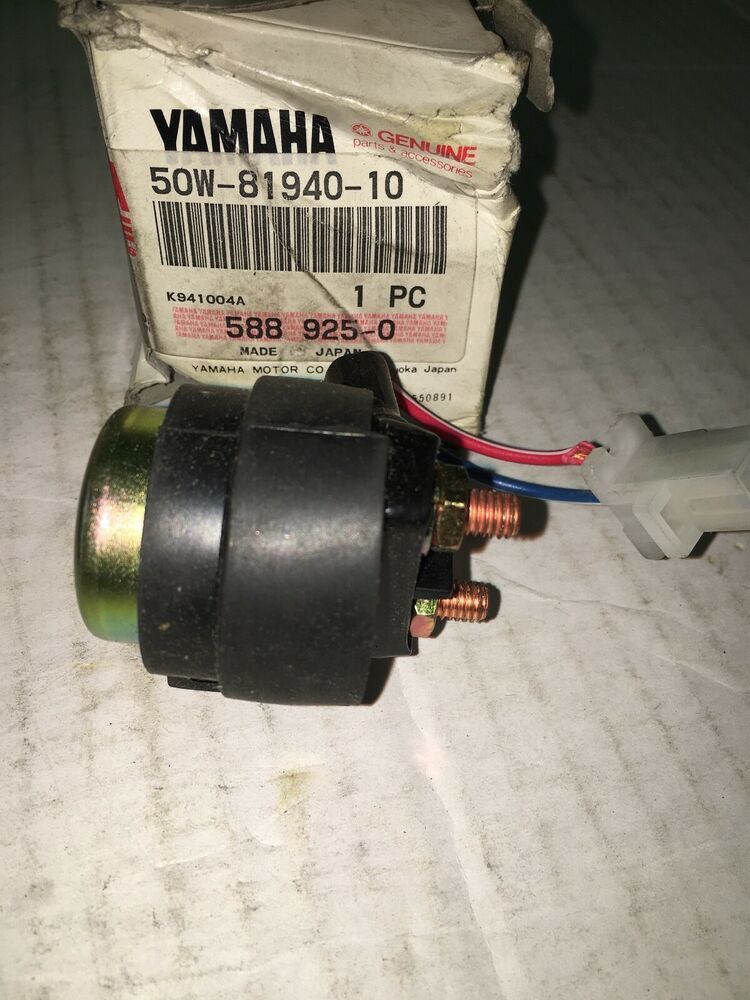
A starter solenoid is a switch that controls a high amp load with a low amp. Starter solenoids come in all different shapes and sizes, but normally they have a round or square body with two larger and two smaller wires. The larger wires are for the high amp load and the smaller wires are for the low amp switch. If yours only has one smaller wire, the ground is coming from the frame where it is mounted.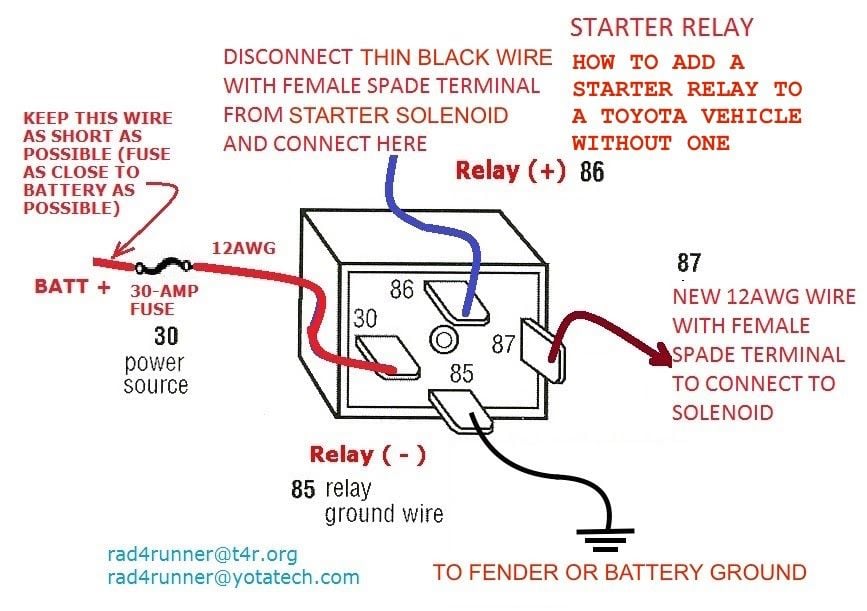 It may be sitting in a plastic or rubber cover, but it's not uncommon for it to be on the outside.
Of the two larger wires, one of them will be coming from the battery (red) and the other will go to the starter (black). You should be able to get a voltage reading from the red wire coming from the battery. Do this by using the voltage setting on your multimeter, with the red lead on the post and the black lead on a frame ground or negative battery terminal.
If you do not have voltage at the post on the solenoid that connects to the battery, check your connection at the battery and then trace the cable from the battery to the solenoid checking for any breaks or a loose connection.
The other wire should not have a voltage reading.
Of the two smaller wires, one is a negative, or a ground, and the other is positive. I have found that the easiest way for me to test these is to unplug the connector and put both test leads into the ATV wiring harness side connector; the reading here should also be zero.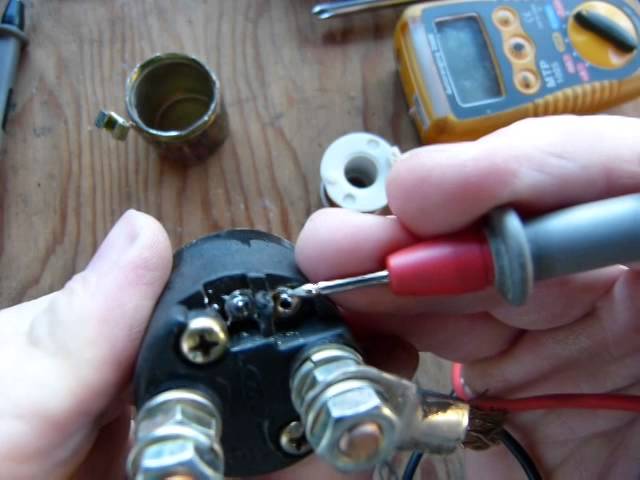
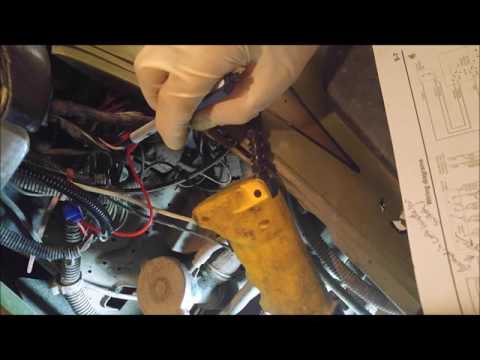
Now turn the key and get the bike ready to start (do not actually start the bike, just take the usual steps you would before starting; i.e., turn the key, make sure the bike is in neutral, etc.) This step can get kind of tricky if you've only got one set of hands. I definitely recommend using test leads with alligator clips on the ends. You can pick up the clips for around 50 cents a piece and make your own or buy a pre-made set for a couple of bucks.
When you push the start button, you should get a reading of 12V.
This battery in this photo is our test battery, so we expect the voltage to be a little low. We use this guy whenever we've bought a used ATV without a battery or for demonstration purposes. Along with our multimeter, he's made appearances here, here, and here. As long as you have a reading that is close to 12V, we'll move on.
If not, you may want to run this test a few more times to make sure you have done all of the normal stuff you would do when you start your ATV (like making sure it is in neutral, all of your wires are connected, etc).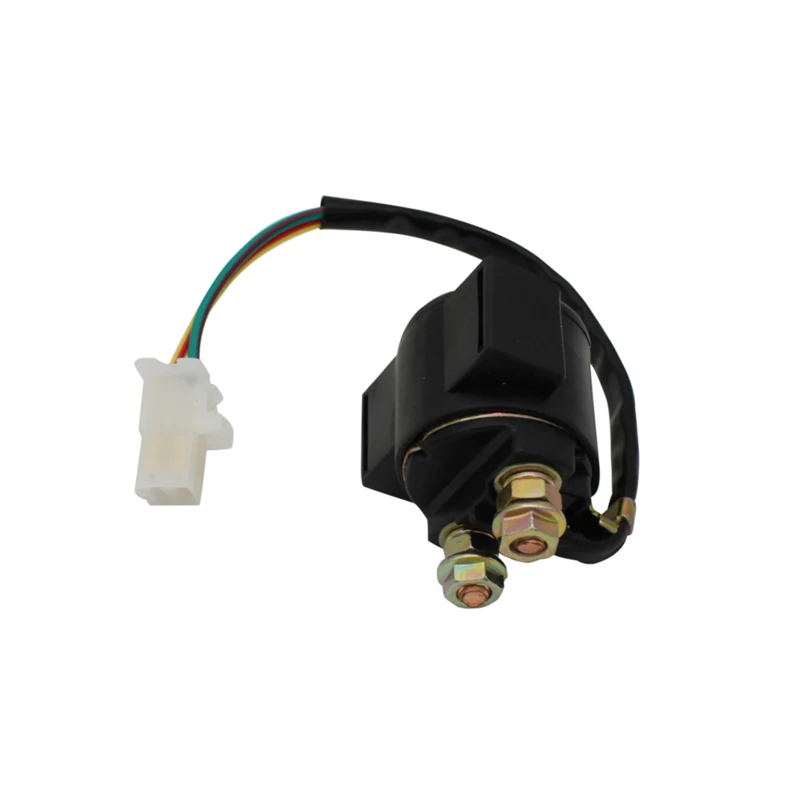 I know it is redundant but you would not believe the amount of times I have been called out to a HMMWV (that would be a Hummer in civilian speak) that would not start, only to find it was left in gear.
If you still are unable to get a voltage reading, more than likely there is an issue with a safety switch or a kill switch. Due to the vast differences between ATV models, you will want to refer to the service manual for your specific model of ATV. If you are stuck on this step, feel free to contact us and I will see what I can dig up for you. If you've gotten a voltage reading close to 12V, you can confirm that thepush button is working and giving the solenoid the signal to close.
The last thing to check now is the starter. To test the connection between the solenoid and the starter, plug the connector back into the wiring harness and test for voltage on the starter side (big terminal) while pushing the start button.
If you've gotten a voltage reading close to 12V, you can confirm that the push button is working and giving the solenoid the signal to close. The last thing to check now is the starter. To test the connection between the solenoid and the starter, plug the connector back into the wiring harness and test for voltage on the starter side (big terminal) while pushing the start button.
If you do not have voltage reading, then your solenoid is bad and will need to be replaced. If you do get a voltage reading, trace the large wire from the solenoid to the starter and make sure it has no cuts or breaks and that it is tightly connected to the starter. If there are no issues with the wire or connection, then your issue is with the starter and it will more than likely need to be replaced.
It seems like a lot of steps to get to this point, but if you don’t conduct all of the above tests in the correct order, you could be misdiagnosing the problem.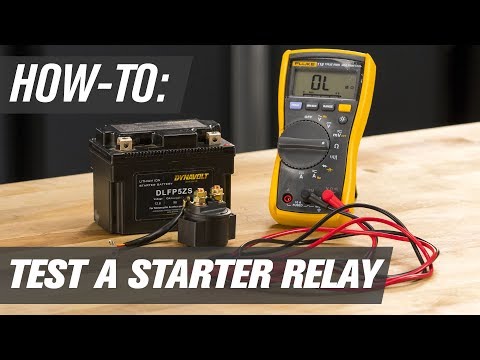 What may appear to be a bad solenoid, may really be something as simple as the kill switch being turned off or the bike being in gear (Don’t ask me how I know. Ok, ask). We'll be back in the next few weeks with some more troubleshooting posts, but in the meantime, let us know what you think.
Have you ever spent a couple of hours troubleshooting your starter only to find that your bike was in gear or the kill switch was off? Tell us about it. We want to hear everything. Good experiences, bad experiences, requests, whatever you've got. Let us know in the comments below or give us a shout on Facebook.
Click! Click! Click! Don’t let it spoil your day. I’ll bet we can have her up and humming in no time at all.
The most common cause of a repeating click sound when attempting to start an ATV is a flat battery. However, a single click sound suggests a faulty starter solenoid. A complete list of common causes include:
In this post, you’ll learn about all the most likely causes of your ATV click sound.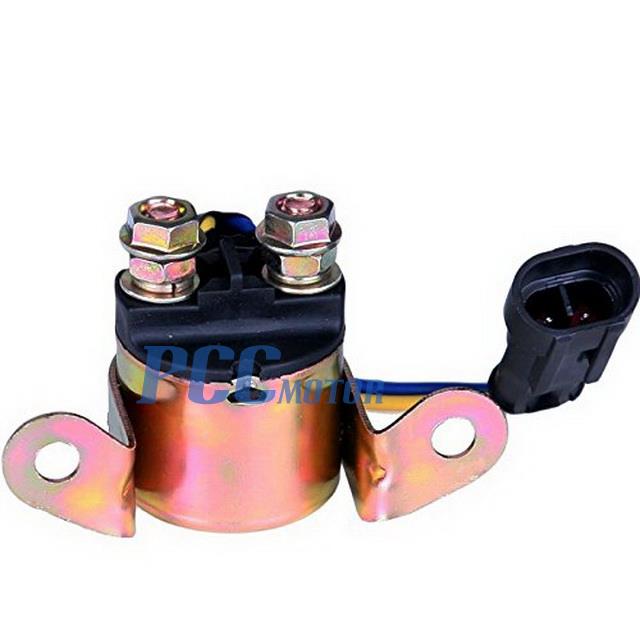 You’ll learn how to diagnose it and what you’ll need to do to fix it.
Page Contents
Loose battery connections cause high resistance, which prevents battery voltage from getting to the starter motor. It also prevents your battery from receiving a proper charge. A common symptom of an ATV battery issue is a repeated clicking sound when you hit the start button.
Loose connections will mimic the sound of a flat battery. You can still start your ATV if your engine is fitted with a pull starter.
It’s a common fault and a really simple fix. A battery is pretty heavy, and if a battery isn’t secured firmly with a bracket, the cables tend to work loose as the battery is moving about.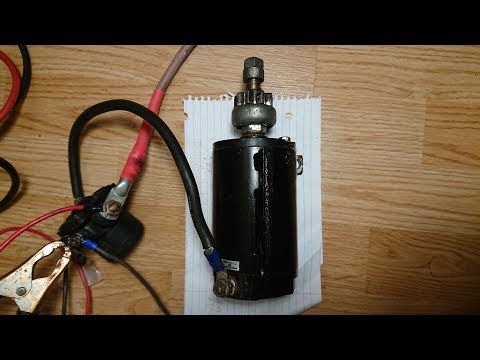
To check, give the battery cables a little wiggle and see if they’re loose. Tightening will solve the problem, and you’ll need to secure the battery if it’s loose.
After checking for loose connections, go ahead and check that they’re clean. Rusty battery wires or white acid corrosion on the battery posts will cause high resistance.
You’ll need to remove them to clean them thoroughly. The acid will burn the skin, so gloves and eye protection is advised.
To easily remove the white crusty corrosion, sprinkle some baking soda on the terminals and add a small amount of water. This will neutralize the acid and remove the corrosion.
Use a wire brush to clean the surface. Now remove the terminals and clean around the poles and the terminals. Apply a coat of petroleum jelly to help protect against corrosion.
This is the most likely cause of the clicking sound as you hit the key. A flat battery is sooo common, especially in ATVs that lay up for a time.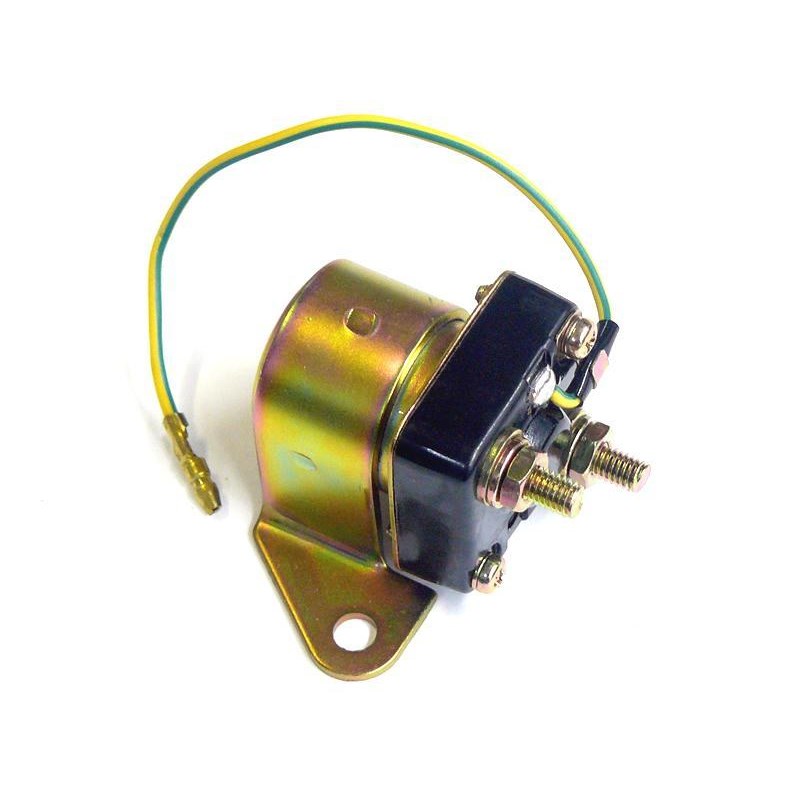 Batteries usually give the most trouble in the colder months of the year.
To test a battery we’ll need to run two tests, a volt test and a crank test. We’ll need a DVOM (Digital Volt Ohm Meter). But if you don’t have one, just go ahead and turn the lights on (if fitted) if they’re dim. You can bet you found your problem – a flat battery.
If you have a DVOM, then go ahead and connect it up, set the meter to 20v DC – Red test cable to positive (+) pole of the battery and the black test cable to the negative pole (-) of the battery.
Your ATV is likely has a 12-volt system, even though your battery actually measures 12.65 volts when full. But you can confirm the battery size by checking the label on the battery casing.
Hold the test leads firmly on the battery and record the reading.
A reading below 12.4 volts and your ATV may struggle to crank the engine.
If your battery is low, you can attempt to jump-start from another vehicle or charge your battery with a battery charger, see jump-starting below.
The second battery test is the crank test, this test loads up the battery and measures battery strength. The reason we run this second test is because the battery may show a full 12.65 volts when tested unloaded, however, it may actually fail when loaded.
The crank test is covered below in “Checking ATV Battery Health” However, to run this test the battery must show at least 12.5 volts, if that’s not the case, see battery charging below.
All batteries need to be charged and discharged. It’s what keeps them healthy and alive. Batteries hate the cold, and they hate being left to discharge. It’s not uncommon for a battery to prematurely die because it wasn’t used regularly.
If you have a battery charger, they’re easy to attach. Ideally, you’d disconnect the negative terminal, but it won’t hurt if you don’t. Just don’t attempt to start the engine with the charger attached.
Connect the charger Black to the negative battery pole and Red to the positive pole before plugging the charger in.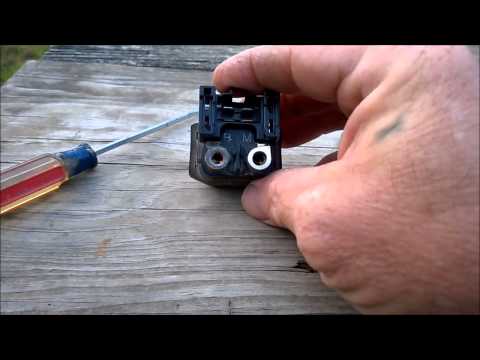 Your battery may take 2-3 hours to charge fully, depending on the amp rating of the charger and how low the battery is.
If you don’t have a battery charger, consider buying a smart charger. It will charge your battery and is designed to be connected to your ATV when not in use.
The smart charger charges your battery only when needed without risk of overcharging, and you’ll avoid that disappointing click click click!
If your battery is totally discharged, your charger may not turn on. This is a safety feature of the battery charger and will need to be overridden. Here’s the hack –
Your ATV is a 12-volt system, as is your car, truck, and riding mower. All can be safely used to boost start your ATV. You’ll need a good set of jumper cables and obviously a donor vehicle.
Position the vehicle so that the cables reach your ATV’s battery posts comfortably. Connect your jumpers in the following sequence:
Battery failure is common these days. Batteries seem to only last 3 to 4 years, but when I was a lad…..
Checking the voltage is only part of checking your battery health. Your battery will need to be at least 75% charged for this test. So if it’s soft, you’ll need to charge it.
Cranking Battery Test – It is possible for a faulty battery to show a full 12.65 volts. For this test, we’ll connect a DVOM to the ATV and have a helper crank it over. If the battery voltage on the DVOM reads below 9.6 volts while cranking for 3-4 seconds, you’ll need to make a trip to the auto store.
Use Min/Max DVOM setting to catch the min voltage on crank.
ATV starter solenoids give tons of trouble, and it doesn’t surprise me. The places they bolt these things, honestly, I find it hard to understand. Some of them double as a mud flap.
A common symptom of a faulty starter solenoid is a single click sound when you hit the start button, if this sounds like your problem, then suspect your solenoid is faulty. There are however other faults that produce this same symptom and so we’ll run a couple of tests below to confirm our suspicion.
To locate your starter solenoid, follow the positive wire from the battery, and you’ll eventually reach the starter solenoid.
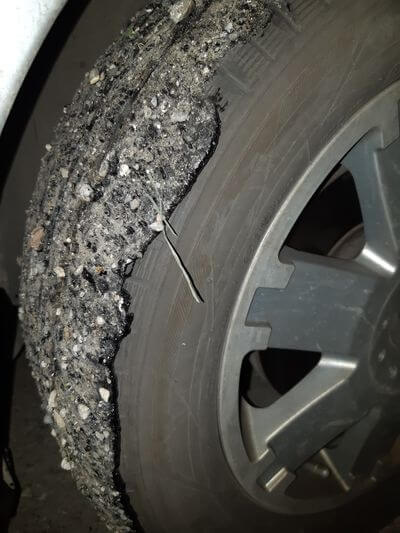
Corrosion on the connectors is common, as is broken or corroded wiring on older bikes. The wiring might not be noticeably damaged, but internally the copper wiring corrodes. You can try the wiggle test as you hit the start button to see if it makes a difference.
Testing is straightforward. Make sure your bike is in neutral with the brake applied. We’re going to attempt to crank over the engine by hot wiring.
Your engine won’t start unless you want it to. If you do want it to start, turn the ignition switch on, but for this test, you can leave it off. We’ll use two jumper wires with the power jumper wire fused.
Two results are likely:
1 The engine cranks over as normal – this suggests high resistance in the control wiring, such as loose, damaged, corroded connectors. Run a volt drop test to isolate the problem.
2 The engine just clicks, same as before – this suggests a faulty solenoid, replacing will most likely fix the problem.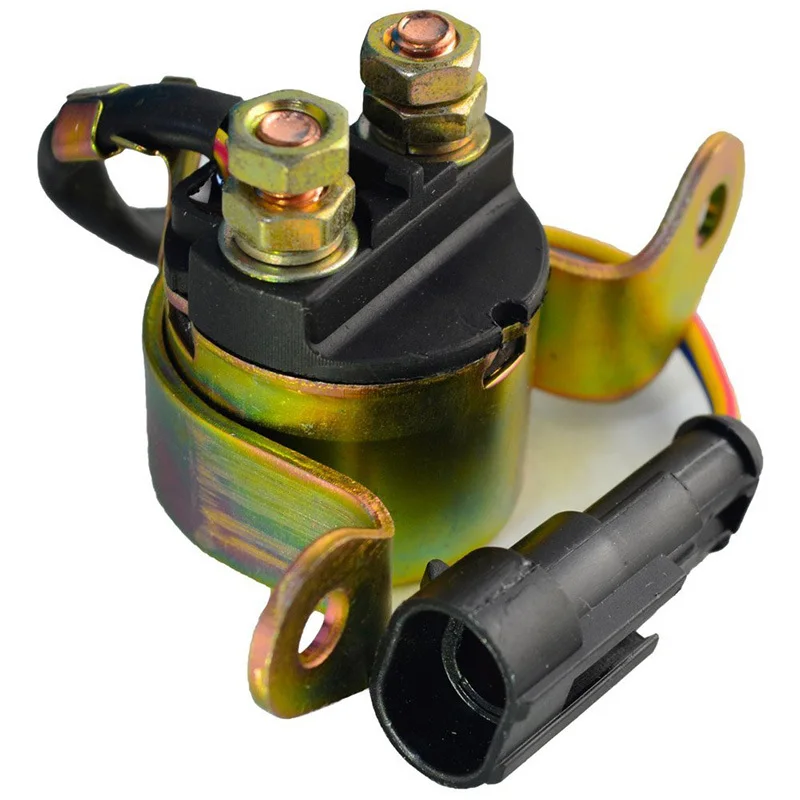 However, there are still a couple of other possible causes and to eliminate them follow this quick test.
Caution – If your solenoid is located close to the battery as per the picture below, do not cross the solenoid. Batteries vent combustible vapors and crossing the solenoid causes arcing, which poses a risk.
Two results are likely:
1 The engine cranked over without issue – go ahead and replace the solenoid.
2 The engine still won’t crank over – if you are sure that your battery is OK, then see the list of possible causes below.
However, if you are not sure you checked the battery correctly, you can eliminate it as a possible cause by connecting to a known good battery and repeating the test. See jump starting above.
If the engine still doesn’t crank, you may have one of the following problems:
Hydro-locked engine – cylinder full of water or gas, commonly caused by a leaking carburetor needle seal.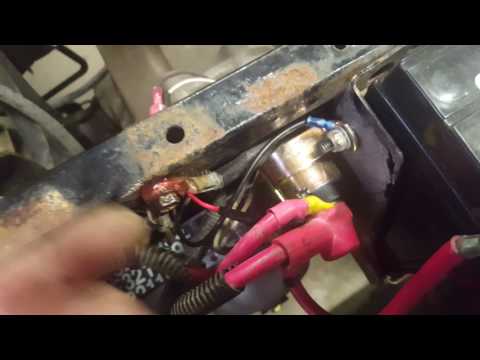 Remove the spark plug to check and release the fluid.
Jammed starter motor – starter motor caught in the ring gear, remove the starter, test, repair, and refit. See below.
Jumped timing could cause the engine to lock, check the engine turns over, use a wrench or go ahead and check the timing marks. See “How to tell ATV jumped time?”
Starter motors wear out like any motor. They have a pretty tough job. Symptoms vary from intermittent starts to no sound when you hit the button, and starter motors can seize.
Remove the spark plug, and if you have a pull start on your engine, try to turn it over and check the starter again by crossing the solenoid.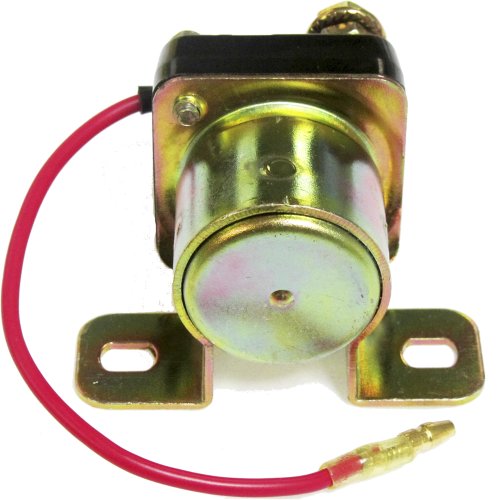 If it still won’t crank, remove the starter for bench testing.
The starters are easy to remove but be mindful of the O-ring seal when removing. With the starter on the bench, try turning it with your hand. It should be free to turn.
If it’s not, you found your problem, have the starter reconditioned or replace it.
If your starter does turn freely by hand, get a set of jumpers and a battery.
This isn’t a hugely common complaint, but I’ve had a few that have tested my patience. The start button is, as you know, right out there when it comes to catching the weather, as are most others don’t get me wet electrical kit.
Moisture and wiring don’t work well together. A loose, corroded, or almost broken wire/terminal or dirty fuse, or bad grounds will all cause high resistance. This means when you load the circuit, it fails.
Troubleshooting these kinds of problems isn’t hugely complex, but it can be tedious as you trace wiring and strip components to check and verify. A DVOM and volt drop testing will locate the issue.
A wiring diagram for your model will make life a lot easier, but it isn’t essential.
Try the wiggle test before investing a lot of time. Often wiggling the wiring loom around the ignition switch, start button, steering loom, solenoid, and relays will reveal the problem.
Are ATV batteries 12 volts? Most ATV batteries are known as 12 volt systems. The battery voltage actually measures 12.65 volts when fully charged. Your ATV can be safely jump-started from a car or truck, as they too run 12 volt systems.
You may find the following posts useful:
How do kill switches work?
Will bike start without a kill switch?
10/11/2022
Owners of old vehicles often have a question about how to connect the wires to the starter, because over time, problems with starting the internal combustion engine occur more and more often.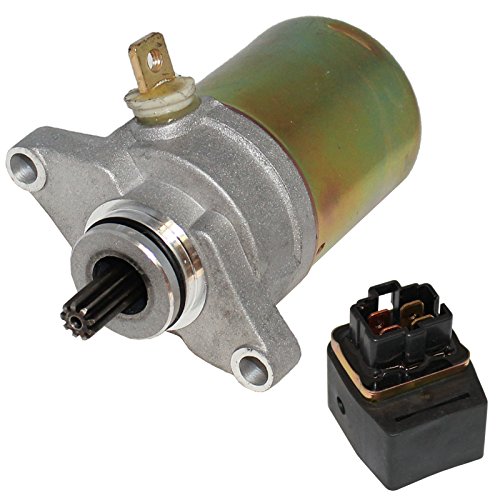 In this case, problems are often associated not so much with the starter, but with the connection and switching elements. You can try to independently create a contact that will power the starter with energy from the battery.
First you need to figure out what the starter wiring diagram looks like. It is not particularly difficult. The circuit begins with the contacts that are in the ignition switch. If the ICE is turned off, the circuit is broken, but it closes when the driver turns the ignition key. After that, the current of the solenoid relay is transmitted. The starter may have its own relay, which is used to unload the system.
This starter wiring diagram is outdated, it is rarely used in modern cars.
The simplest circuit for connecting a starter. The key element for supplying current is the solenoid relay, the design of which provides for the use of two types of winding: holding and retracting.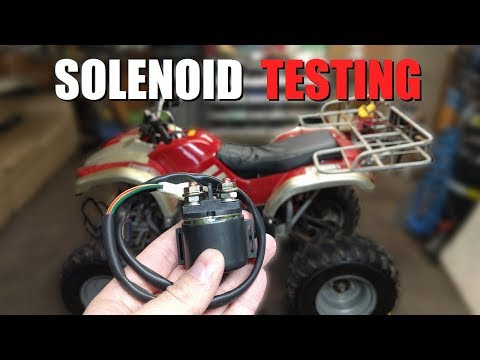 Such a scheme allows, if possible, to turn off one winding in order to save some amount of electricity.
The windings move the core, which closes the contacts. After that, the retracting winding is turned off, and the core remains retracted for a while.
The solenoid relay draws about 50 amps, while the solenoid winding draws 40, and the holding winding draws 10.
The connection of the starter relay is a little more complicated. This intermediate element helps to unload the contacts and make the diameter of the electrical wires smaller.
Electromagnetic relay allows you to control the current strength within the required limits. Thus, almost all devices with high power that are connected to the vehicle's electrical network operate through an electromagnetic relay.
With an intermediate relay, the system becomes not only more reliable, but also economical.
So, how to connect the starter relay directly? First you need to do the following:
In the engine compartment near the headlight on the right, you need to find a red wire with a plug connected.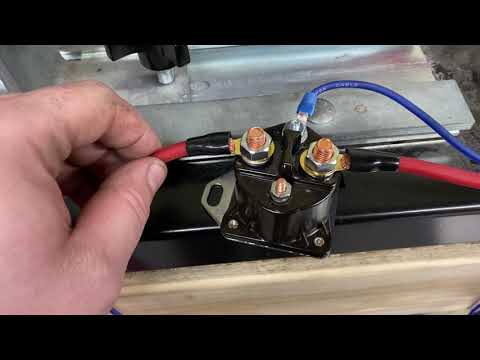 We disconnect the cord, and instead we connect a pre-prepared cable with the desired connector.
We switch the internal combustion engine to idle mode.
Start the ignition.
Connect the clamp to the "+" battery.
If you are wondering how to connect the wires to the starter, such manipulations are often enough. In situations where the car often refuses to start, a prepared additional cable can help out a lot.
The starter can be started with more than just the battery. If the problems are not with the spare part itself, but with switching, you can start it by closing the contacts on the relay with a screwdriver.
To do this, perform the following manipulations:
Find terminal S (it resembles a petal in shape). This contact is responsible for starting the starter.
It is terminal S that closes. The remaining contacts must not be touched in any way.
Only close when the vehicle is at idle.
In this way you can transfer voltage directly to the starter winding.
So you found out which wires go to the starter. It is important to manipulate with a suitable contact, and then the starter will connect without problems.
In some vehicles, namely from Renault, the S terminal is used as a threaded outlet.
Connecting the starter in this way is effective but not safe. Most auto mechanics do not recommend using it as a permanent way to start a vehicle.
If you are wondering how to connect the auxiliary starter relay, follow these steps:
Fix the relay in a comfortable position.
Connect the cable to the starter.
Remove the red wire from the flat terminal, connect the cord from the auxiliary solenoid relay to it.
Connect another wire with an 8 mm ferrule to the starter positive.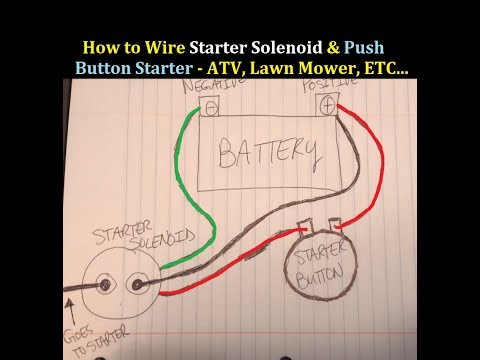
Connect the auxiliary solenoid relay to the main relay using terminal 30.
Put wire 85 on ground.
It is important to understand not only which wires go to the starter, but also where this spare part is located. In modern vehicles, the starter is located in the fuse box. To find out exactly where, check the vehicle manual.
If the manual is not available, there may be problems finding the starter relay. In this case, alternately put your finger on different relay housings and turn the ignition key. This will give you a feel for exactly where the switch is clicking.
In most cases, the starter does not break immediately. Basically, this is done gradually. If you notice that its speed has slowed down, pay attention to the state of the chain elements. Also, the problem may relate to the vehicle battery.
Most often, the starter turns slowly or refuses to work at all due to:
A discharged or broken battery.
Poorly fixed contacts. For this reason, the power circuit cannot be closed.
Broken wires leading to the terminals.
Damage to the circuit between the battery and the starter.
Faulty contact status.
The starter relay wiring diagram also shows that the problem with the spare part may be related to a malfunction of the close relay. A fairly common cause is a short circuit in the winding.
Now you have learned how to connect the starter relay directly. It should be noted that these methods are not entirely safe for both the vehicle and the driver. The above connection methods are relevant only if the starter refused to work unexpectedly, and you need to start the car urgently.
The best solution would be to contact the service center, where the car can be fully diagnosed and determine the cause of the breakdown. Oiler auto mechanics will be happy to help you solve this problem, and if necessary, provide quality components at competitive prices.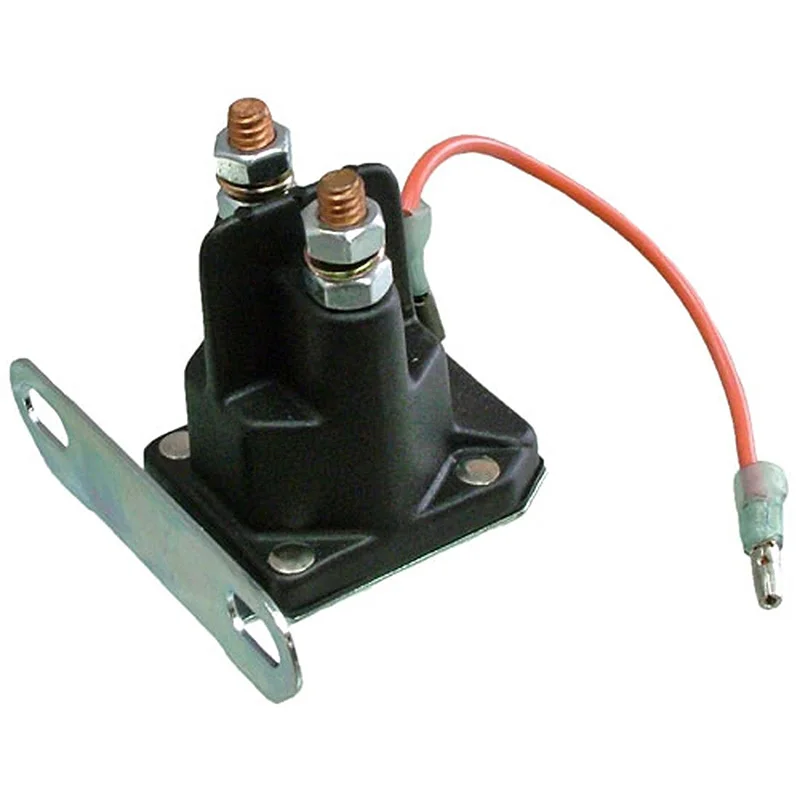
Most vehicles use a starter-mounted solenoid that acts as a high power switch to connect the starter drive gear to the flywheel to start the engine. Most solenoids on the starter are easily connected when the starter is mounted to the engine. Other solenoids - mostly on Fords - are mounted remotely. These solenoids are located in the engine bay next to the battery, making wiring much easier. Whether you have a trigger or remote type solenoid, follow these steps to get your device up and running in minutes.
Content
Disconnect the black negative cable from the battery.
If necessary, jack up the vehicle and support it securely on the jack stands. Depending on your vehicle model, you may need to install and connect the starter-solenoid assembly from under the vehicle.
Bring the starter as close as possible to its mounting bracket on the engine. Sometimes you can use the socket to support it when making electrical connections, and this is handy as the starter motor is a bit heavy and awkward to operate while you hold it with one hand.
Use a wrench or ratchet and socket to connect the red battery cable to the large bolt on the solenoid and the ignition bypass terminal wire to the small bolt under the first bolt. If there is enough space, you can start screwing in the starter mounting bolts without tightening them before making the connections.
Make sure the wires are well connected and complete the installation of the starter on the engine.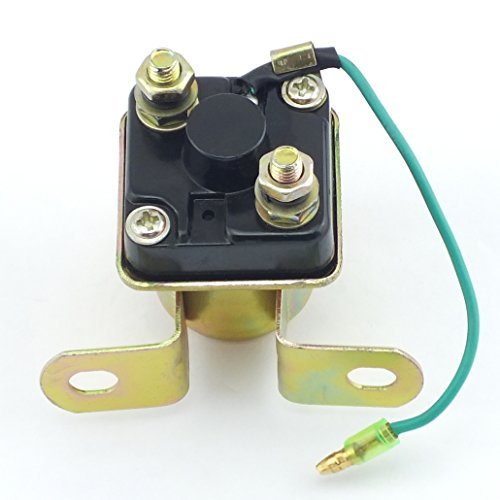
Lower the car and reconnect the black negative cable.
Disconnect the black negative cable from the battery.
Install the solenoid in place in the engine compartment with a wrench or ratchet and socket.
Connect the red cable from the battery to the large bolt on the left side of the solenoid.
Connect the starter cable to the large bolt located on the right side of the solenoid.
Connect the control wire to the small control circuit terminal on the left side of the solenoid. It is usually marked with an “S” (see Tips below).
Connect the other small wire to the ignition bypass terminal which is on the right side of the solenoid.
Connect the black negative battery cable.