Knowing how to change a tire is a necessary skill for all drivers. If you rely on a cell phone to save you in a roadside emergency, there’s always that chance you will forget to charge it, be out of range, or leave it at home. Flat tires can happen anywhere, and a cell phone is no substitute for knowing how to change a flat tire.
Thankfully, changing a tire isn’t all that hard! Just adhere to the following guidelines to be prepared in case you have a flat.
These items should have come with your vehicle:
Jack
Lug wrench
Fully inflated spare tire
Vehicle owner’s manual
If you have misplaced any of these items, or if your car did not come with these items, you should purchase new ones right away. And be sure you’re regularly inflating the spare tire to your vehicle manufacturer’s recommended PSI. You should check the spare’s air pressure every time you check your other tires.
Remember to check pressure every month and before long trips or carrying extra load.
Here are some items that don’t come with your vehicle but that you should stow in your trunk or glove box in case you have to change a flat tire:
Flashlight with working batteries
Rain poncho
Small cut of 2"x6” wood to secure the jack
Gloves
Wheel wedges
As soon as you realize you have a flat tire, do not abruptly brake or turn. Slowly reduce speed and scan your surroundings for a level, straight stretch of road with a wide shoulder. An empty parking lot would be an ideal place. Level ground is good because it will prevent your vehicle from rolling. Also, straight stretches of road are better than curves because oncoming traffic is more likely to see you.
Never attempt to change your tire on a narrow shoulder near oncoming traffic. Keep moving (slowly) until you find a safer spot. While driving on a flat risks ruining your rim, replacing a rim is better than being hit by an inattentive driver.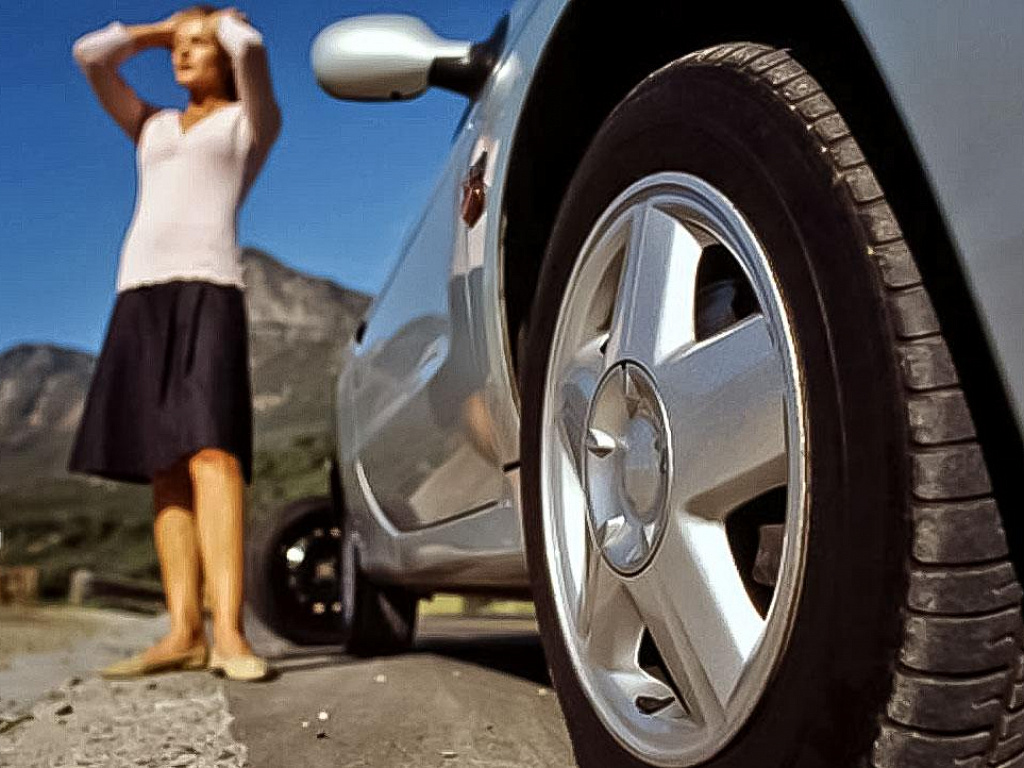
Make sure to consult your owner’s manual and review their specific steps on how to change a flat tire for your vehicle
Your hazard lights or “flashers” will help other drivers see you on the side of the road. To avoid an accident, turn them on as soon as you realize you need to pull over.
Once stopped, always use the parking brake when preparing to replace a flat tire. This will minimize the possibility of your vehicle rolling.
Wheel wedges go in front of or behind the tires to further ensure the vehicle doesn’t roll while you fix the flat tire. If you’re changing a rear tire, place these in front of the front tires. If your flat tire is at the front, put the wheel wedges behind the rear tires.
Bricks or large stones will work just as well as “real” wheel wedges. Just be sure they’re large enough to stop the car from rolling.
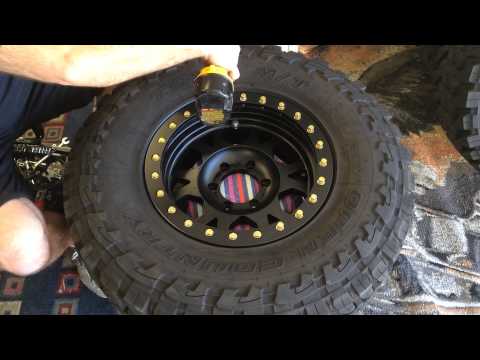
If your vehicle has a hubcap covering the lug nuts, it’s easier to remove the hubcap before lifting the vehicle with the jack.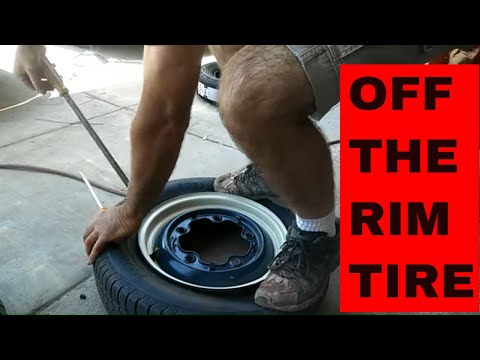 If your lug nuts are exposed, you can skip ahead to Step 6.
Use the flat end of your lug wrench to remove the hubcap. This will work for most vehicles, but some hubcaps need a different tool to come off. Consult your owner’s manual for proper hubcap or wheel cover removal procedures.
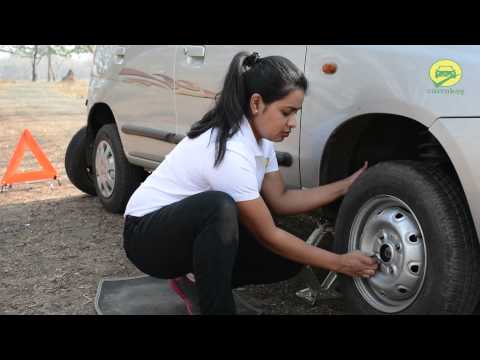
Using the lug wrench, turn the lug nuts counterclockwise until you break their resistance. You may have to use force, and that’s ok. Use your foot or all of your body weight if necessary.
Loosen the lug nuts about ¼ to ½ of a turn, but don’t remove them completely yet. Save that for when it’s time to remove your tire/wheel from the vehicle.
The right place for the jack is usually beneath the vehicle frame alongside the tire that’s flat. Many vehicle frames have molded plastic on the bottom with a cleared area of exposed metal specifically for the jack. To safely lift and avoid damage to the vehicle, follow the instructions for jack placement in your vehicle owner’s manual.
To prevent the jack from settling under the weight of your vehicle and coming off balance, place a small cut of 2x6” wood beneath it before attempting to raise your vehicle. This tactic is especially helpful on asphalt.
With the jack properly positioned, raise the vehicle until the flat tire is about six inches above the ground.
Never put any part of your body under the vehicle during or after raising the vehicle with the jack.
Now it’s time to remove the lug nuts all the way. Since you've already loosened them, you should be able to unscrew them mostly by hand.
Gripping the tire by the treads, pull it gently toward you until it’s completely free from the hub behind it. Set it on its side so that it doesn’t roll away.
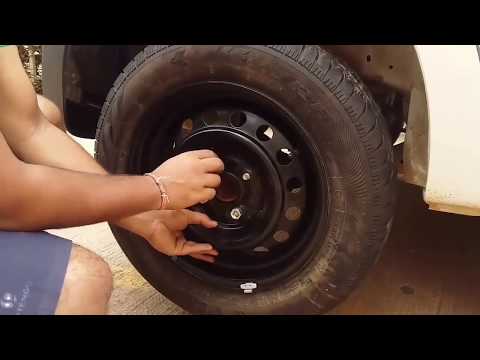
Now place the spare on the hub by lining up the rim with the lug bolts. Push gently until the lug bolts show through the rim.
Put the lug nuts back on the lug bolts and tighten them all the way by hand. Once they are all on, check each one again, tightening as much as possible. You will tighten them with the wrench after lowering the vehicle to the ground.
Use the jack to lower the vehicle so that the spare tire is resting on the ground but the full weight of the vehicle isn’t fully on the tire. At this point, you should tighten the lug nuts with the wrench, turning clockwise, as much as you can. Push down on the lug wrench with the full weight of your body.
Bring the vehicle all the way to the ground and remove the jack. Give the lug nuts another pull with the wrench to ensure they’re as tight as possible.
If the hubcap you took from the flat tire will fit your spare, put it in place the same way you removed it initially.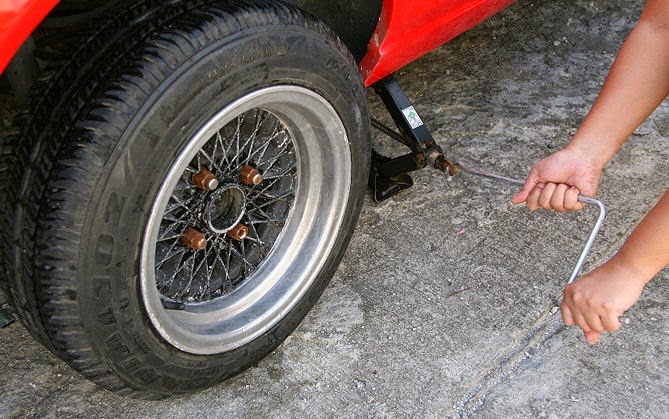 If it doesn’t fit, stow it away with the tire when you stow your equipment.
You have before you a jack, a lug wrench, wheel wedges, your flat tire, and possibly a hubcap. Don’t forget to put all of them in your vehicle before driving away.
You should check the tire pressure of the spare tire to make sure that it is safe to drive on. “T-Type” temporary spares, also called “mini-spares,” require 60 psi (420 kPa). If the tire needs pressure, drive (slowly) to a service station immediately.
Temporary spare tires aren’t made to drive long distances or at high speeds, so drive cautiously until you’re able to visit a tire technician. A professional should be able to determine whether your tire needs a repair or if it’s time to replace it.
Aside from taking your tire to a professional, the above procedure shouldn’t take more than 15 to 30 minutes to change a tire.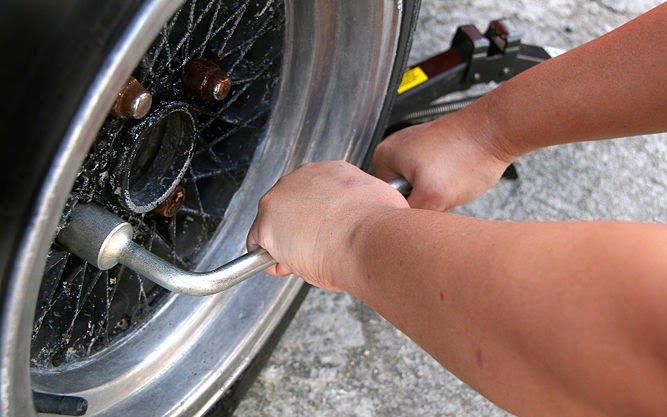 Just be sure you don’t leave out any steps.
It’s beneficial practice changing a tire in your garage or driveway to ensure you’re ready to handle this situation if it ever happens to you.
Knowing how to fix a flat tire is great, but regular tire maintenance is even more important. In addition to reviewing this guide regularly, remember to do the following:
Keep your tires properly inflated
Rotate your tires according to the manufacturer’s guidelines
Monitor for tread wear
All of these precautions will extend the life of your tires and reduce the likelihood of a flat. While there’s no way to prevent flat tires completely, proper care can improve performance and ensure your tires last as long as possible.
There’s never a good time for a flat. That’s why Bridgestone DriveGuard tires are masterfully engineered to keep you moving for up to 50 miles at speeds up to 50 MPH without disruption.
There’s never a good time for a flat. That’s why Bridgestone DriveGuard tires are masterfully engineered to keep you moving for up to 50 miles at speeds up to 50 MPH without disruption.
See Details Find Your Fit
Posted by Benjamin Hunting Know How
Learning how to change a tire can seem intimidating at first, but it’s really a simple process involving basic tools that you can keep with you in the trunk of your vehicle at all times. It’s always a good idea, however, to learn how to tackle this task before you have a flat, rather than wing it during an already-stressful situation.
That’s why we’ve put together this quick guide that you can use to practice in your driveway. These are the basic steps you’ll need to go through when changing out a flat, swapping summer tires for winter rubber or simply upgrading your car’s rims.
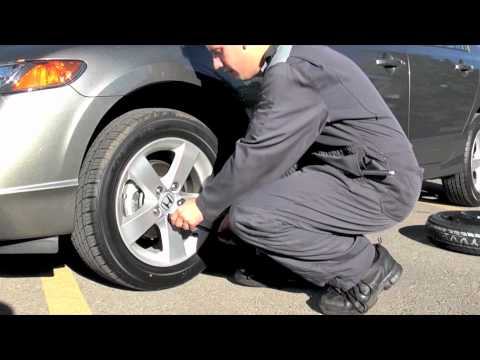
A big part of learning how to change a tire is making sure you know how to stay safe while doing so. To start things off, you’ll want to set the vehicle’s emergency brake, put the transmission in park (if it’s an automatic) or in gear (if it’s a manual) and turn off the motor. Finally, chock the wheels (with a brick, for example) to ensure that rolling away isn’t possible.
You’ll need three basic tools to change a tire. The first is a lug wrench, which offers enough lever-action to break lugs loose. Most likely, your car came with a portable lug wrench, but it’s always a good idea to do a reality check and make sure it fits your wheel lugs. If you’re at home, you can use an impact wrench to loosen your lugs, too.
The second important tool is a jack that can safely fit under your car and lift it up, followed by a set of jack stands that will hold the vehicle in the air while you’re working. If you don’t have space in your trunk for jack stands, then make sure that the jack supplied by the manufacturer is a safer, mechanical screw-type jack rather than a hydraulic jack.
Before you jack your car off the ground, you’ll have to break the lugs loose with the wrench. It’s far easier to do this with the vehicle’s weight immobilizing the wheel, so don’t jack your vehicle up until the lugs are loose.
4. Jack the Car and Remove the WheelOnce the lugs are spinning freely, locate the manufacturer-specified jacking point for your vehicle, which will be listed in the manual, and slowly lift the car off of the ground. Make sure that you lift only until there’s a bit of daylight under the tire. Don’t lift too high, as your car or truck isn’t completely stable when teetering on three wheels. And don’t put any part of your body under the vehicle in case the jack fails.
At this point, you can remove the lugs, replace the wheel and tire with a new one, and then finger-tighten the lugs back on the studs.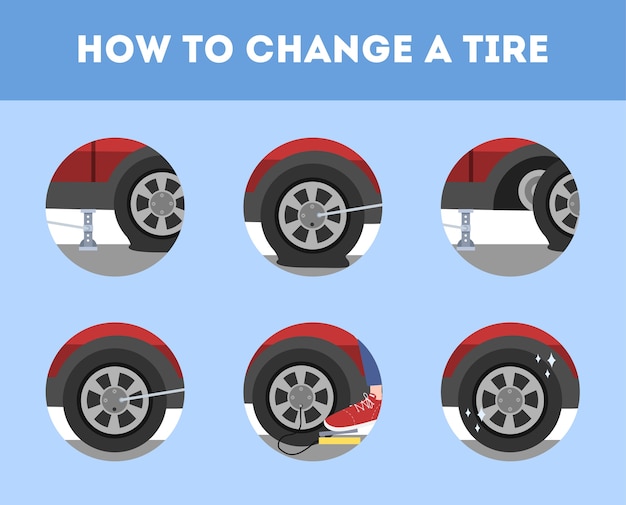 Some vehicles will have studs that come out completely, rather than lugs, but the steps remain the same.
Gently lower the car on the jack until the wheel is back on the ground. At this point, use the lug wrench to tighten the lugs as much as possible. If you have a torque wrench, you can set it to factory specs and tighten with that. Do not use an impact wrench during the tightening process, as it can easily over- or under-torque the lugs.
The most important part of learning how to change a flat tire is safety. Always ensure your vehicle is safely jacked, and that you follow manufacturer recommendations. And remember, just because your lug wrench makes a handy prybar in your garage, doesn’t mean it should live there. Keep your emergency spare tire kit available in the trunk to stay prepared for surprises down the road.
Check out all the steering and suspension parts  For more information on how to change a tire, chat with a knowledgeable expert at your local NAPA AUTO PARTS store.
Photo courtesy of Flickr.
Categories
Know How
Tags
emergency repair, flat tire, flat tire repair, jack safety, replacing a tire, roadside assistance, tire change, tire safety
Having been bitten by the car bug at a young age, I spent my formative years surrounded by Studebakers at car shows across Quebec and the northeastern United States. Over ten years of racing, restoring, and obsessing over automobiles lead me to balance science writing and automotive journalism full time. I currently contribute as an editor to several online and print automotive publications, and I also write and consult for the pharmaceutical and medical device industry.
Every car needs a tire change from time to time. A fairly simple procedure, but not all car owners know how to properly produce it.
Most often, tire replacement is required for two reasons:
1. Wear of one, two or all tires at once.
2. Severe damage to one or more tires beyond repair.
To ensure that incorrectly installed tires do not cause a serious accident, certain rules should be followed when replacing them.
Rule one: The tires to be installed must have the dimensions provided by the car manufacturer, or differ from them by no more than 2%.
You can find out the tire sizes that can be fitted to your car from the vehicle manual, from the tire description, or call your dealer.
Rule two: Tires must also have an appropriate load index and speed index, not less than those provided by the manufacturer for this vehicle.
It is possible to replace tires with higher index values, but not with smaller ones.
You can also find out which load and speed indexes correspond to your car from the instructions, tire descriptions or from a car dealer.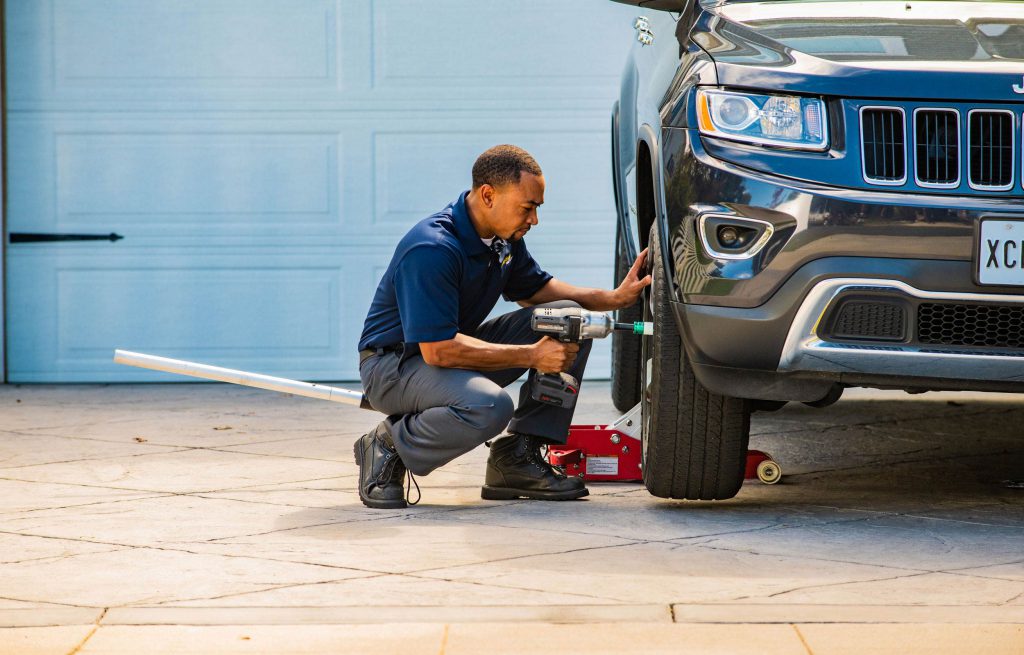
Rule three: Tire pressure must match the pressure specified by the vehicle manufacturer (the pressure in the front and rear tires may be different).
Under-inflated or over-inflated tires can have a very negative effect on vehicle stability and handling.
For exact tire pressures, see your vehicle manual or call your dealer.
Fourth rule: (relevant for those owners who buy ready-made tire sets in stores along with rims)
When buying, you need to make sure that the wheels have offset and landing parameters provided by the car manufacturer.
Mismatch between the offset of the disks and their landing parameters has a very negative effect on the handling of the car, and also quickly wear out the suspension of the car, rendering it unusable.
Refer to the vehicle manual or call your dealer for exact offset and landing parameters.
On all cars, without exception, tire wear occurs unevenly - as a rule, the front tires wear out noticeably faster than the rear ones.
Many owners are tempted to change only the front tires and leave the rear tires for another season or two.
However, in this case, the owner needs to know that maximum driving safety will be ensured only if all four wheels of the car have the same tread. In all other cases, the car will have a much greater chance of losing control.
Therefore, the safest option for changing tires is to install a complete set of 4 pieces.
Of course, car tires are a very expensive commodity, and not all drivers have enough money to replace all 4 tires at once.
In this case, the driver can divide the complete tire change into two stages - first change the front pair of tires, and after some time the rear (tires are changed ONLY IN PAIRS).
Moreover, it is better not to delay the replacement of rear tires, since while the car is running on old tires, there is an increased risk of skidding the rear axle.
In the event of a tire replacement due to serious damage (such as a cut), the basic rule applies - the tread thickness on all tires must remain the same.
If there is no way to restore the tire, you will have to change at least a pair of tires.
It is only possible to replace just one damaged tire without compromising the handling of the car in one case - if the damaged tire was just bought and managed to drive only a few hundred kilometers.
In this case, the owner of the car can buy one exactly the same new tire and replace the damaged one without fear of losing control of the car.
If, on the other hand, the owner managed to drive quite a lot on new tires - more than a thousand kilometers - then its tread has managed to wear off and replacing one tire is no longer enough.
We must not allow a situation where the thickness of the tread pattern on the wheels of one axle will be different - in this case, the probability of losing control is very high.
By the way, the remaining good tire does not have to be thrown away - it can be left on the spare wheel if there is a bad tire, or in extreme cases, sold - also to someone for a spare tire.
Every experienced car owner knows that it is recommended to change the tires installed on the front axle of the car in the first place.
Despite the great danger of skidding the rear axle of a car with worn tires, there is an even greater risk of front tire rupture also due to wear, after which an accident with very serious consequences simply cannot be avoided (see video).
The reasons for the rapid wear of the front tires of a car are simple - they experience increased stress due to constant steering.
Due to the very serious consequences of blown front tires (see above), increased requirements are placed on them in terms of strength and safety.
To reduce the risk of this tear, when changing tires in pairs, the front tires are changed first.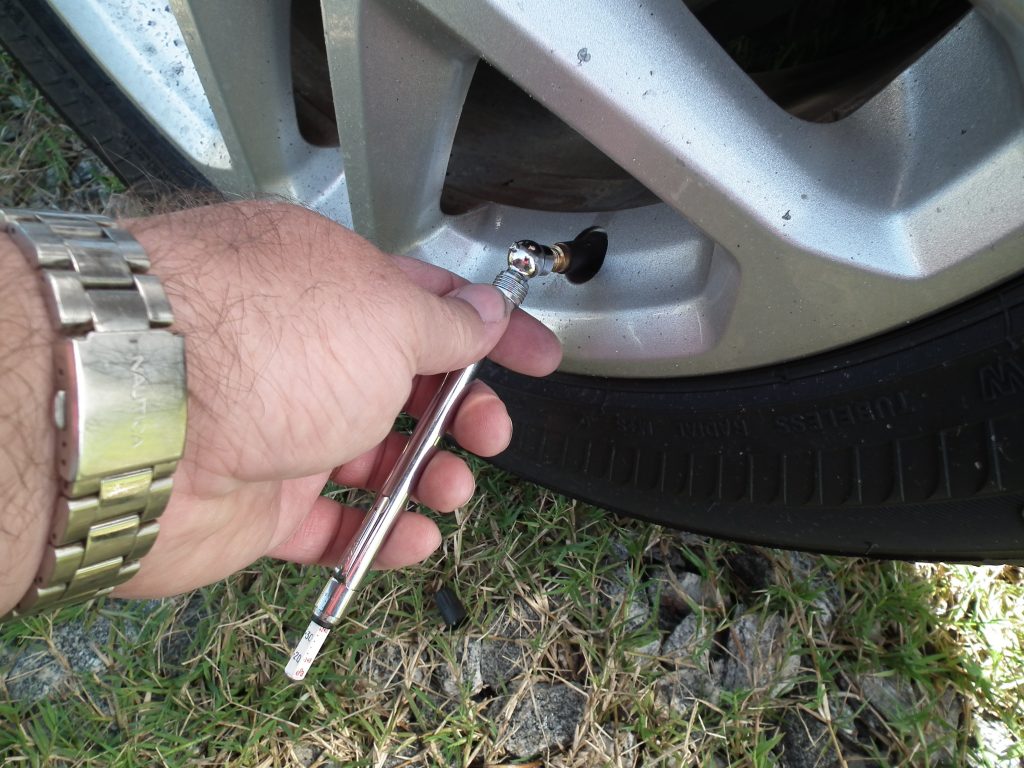
To prevent the possibility of an accident due to a broken wheel, the owner should regularly check their tires for wear and cracks, and not bring them to a state where they can burst from a sharp stone or a good hole.
The article provides information on the correct installation of tires and features of the tread direction.
A tire is a multi-layer shell of complex design that is attached to the wheel rim. The shock-absorbing part is rubber or polymer, with a printed pattern, which, as a rule, indicates the direction of rotation of the wheel. The pattern is applied to the protector. The tread is the working area that creates the grip of the car with the road.
Tires are classified according to the following criteria:
Understand! Universal in reliability while driving are inferior to specialized ones. The directional ones provide better grip on wet roads at high speeds. If you correctly determine the direction behind the rotation of the wheels, the effect of aquaplaning disappears, which guarantees good rubber grip in puddles.
Rubber design features are distinctive features that improve the driving characteristics of the vehicle. It is important to understand them for the correct choice of replacement rubber.
Tubeless, long lasting elasticity in the event of a puncture. The rubber tightens around the stuck object. It does not overheat when driving, due to heat dissipation by the open (metal) part of the rim. Unlike the chamber one, there are increased requirements for rims, the need to apply additional sealant at the junction of the rim and rubber, and the complexity of installation. Tubeless are used more often, properly mounted - high wear resistance.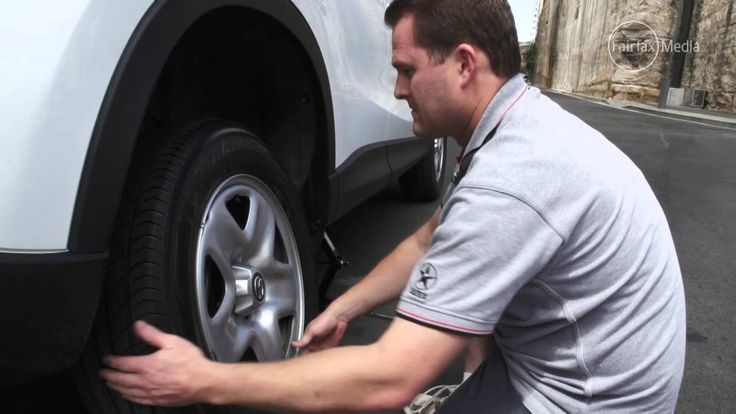
The difference between diagonal and radial tires can only be correctly identified by marking. Radial - r. Diagonal - do not have a letter index. You can understand the marking of the diagonal ones by the presence of the designation TT - operation with a camera. Those who care about speed need to understand the differences.
Summer Drive Protection Sound Comfort
Rating:
4.5
Tires Goodyear Eagle F1 Asymmetric 3 SUV
Summer Drive protection
Rating:
4.5
Tires Goodyear Eagle Sport TZ
Summer Drive protection
Rating:
4. 5
5
Tires Goodyear EfficientGrip 2 SUV
Summer Drive Protection Run On Flat
Rating:
4.5
Tires Goodyear EfficientGrip Performance
Winter Drive protection
Tires Goodyear UltraGrip Arctic 2 SUV
Winter Drive Protection Sound Comfort
Rating:
4.5
Tires Goodyear UltraGrip Ice 2
Winter Drive Protection Sound Comfort
Rating:
4. 5
5
Tires Goodyear UltraGrip Ice SUV
Winter Drive protection
Tires Goodyear UltraGrip Performance+ SUV
All season Drive protection
Rating:
5
Tires Goodyear Vector 4Seasons Gen-3 SUV
Summer Drive Protection Run On Flat
Rating:
4
Tires Goodyear Wrangler HP All Weather
All season Drive protection
Rating:
4. 5
5
Tires Goodyear Vector 4Seasons
Summer
Rating:
4.5
Tires Goodyear Wrangler All-Terrain Adventure with Kevlar
Summer Drive protection
Rating:
4.5
Tires Goodyear EfficientGrip SUV
Summer Drive Protection Run On Flat
Rating:
4
Tires Goodyear Eagle F1 Asymmetric SUV
Tire tread provides traction.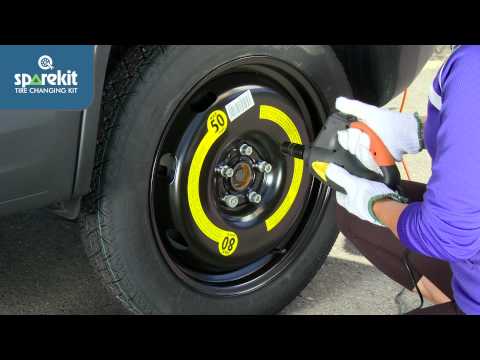 You can determine by the tread:
Asymmetrical tread pattern is larger on the outside. Do not purchase with even the slightest difference in the pattern - the tires rotate with a minimum lag - uneven grip with the roadway. Especially important for the highway, sharp descents.
Before determining the direction of a tire, it is important to know that Goodyear's tire direction marking for an asymmetric pattern is: LEFT; RIGHT - right; outside - outer side, inside - inner. install tires on the car according to the pattern on the tread or arrow.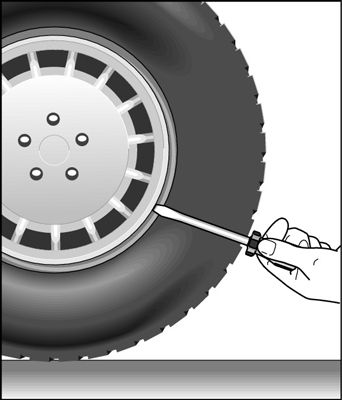 If symmetrical - navigate along a symmetrical pattern, its direction must coincide with the direction of movement of the wheel. If you need to install in the direction - the correct designation is ROTATION - rotation.
How to find out the direction if there is no marking - herringbone pattern? Rotate the tire in both directions - the top of the "herringbone" should be the first to touch the road. This is the correct way to install a wheel without a direction marking.
Recently, manufacturers have switched to symmetrical wheels, as it is impossible to know which one will fail. Correct replacement scheme:
It is also worth understanding that it is impossible to use anti-corrosion agents for processing fasteners on the road - imbalance.