The following was published in CCJ's Equipment Maintenance Toolkit, 8th edition, sponsored by Valvoline Heavy Duty. CCJ's Equipment Maintenance Toolkit is a complementary industry resource, courtesy of our partnership with Valvoline Heavy Duty. You can download the entire Toolkit here.
A properly functioning wheel-end hub is essential to all medium- and heavy-duty truck and trailer brake systems. Which means when a hub begins to leak, the outcome if untreated can quickly become catastrophic.
As such, industry manufacturers advise hubs be checked regularly as part of any preventive maintenance procedure.
Hendrickson says hub assemblies are filled with lubricant during production. On the inboard side, lubricant is contained in the hub by the hub seal. Hendrickson states this is where leaks will most commonly occur.
"Major leaks can be obvious, as it will cause lubricant to coat brake surfaces and the inside of the wheel assemblies," Hendrickson states.
But oil seals are not the only root causes of leaks, SKF adds. "If you look, you will find that leaking wheel ends leave clues pointing to which component or components are the culprits," the company states, adding sometimes a tech "may find that just changing the seal may not be your permanent solution."
Manufacturers state when a leak is uncovered or appears likely, a technician should begin a service event by shutting down the vehicle, chocking the wheels and supporting the vehicle on stands. Hendrickson states to remove the dust shield inspection grommets to inspect brake linings for oil and grease. The company says with smaller leaks, technicians also will be required to perform a complete removal of the brake dust shields for proper inspection.
Hendrickson
When disassembling a wheel end, SKF states that technicians should check the condition of hubcap, flange, window and centerfill plug. They also should check bolts and axle flange area on drive axle. After removing the hubcap, the company adds techs should check the condition of the lubricant.
SKF states cloudy or milky lubricant indicates water in the system, shiny indicates bearing wear, metal flakes present could indicate loose shavings from an axle component, grit and sand indicates lube contamination, and burnt smells indicates overheating.
Next, SKF indicates techs should check the condition of the fastening system, then remove the outer bearing and inspect it for signs of damage. A hub assembly spindle can then be evaluated to look for thread and chamfer damage, and the bearings should be set aside for further separate inspection, SKF notes.
To check for leaks, Hendrickson advises technicians to look at the inboard side of the hub. "A small amount of lubricant may be visible at the hub seal. This is a normal occurrence and does not indicate a seal leak," the company says. Lubricant also may be uncovered at the spindle bearing shoulder to hub joint, which also does not guarantee a seal leak. Hendrickson this area should be wiped clean post inspection to remove dirt and other contaminants.
STEMCO confirms that not all visible lubricant equates to a leak.
"We often see this in new seals that we test every day," the company says. "This seepage is most likely a result of grease pre]lube escaping from a newly installed seal. Our factory places this grease pre-lube into the seal upon assembly to reduce the frictional heat generation upon seal 'run-in.' If the visible seepage extends well out onto the hub and is quite damp, then the seal may be leaking and should be replaced at the first opportunity."
Hendrickson
"If a hub seal is leaking, a large quantity of lubricant will be present," Hendrickson states. "Oil or grease may be spattered on the dust shield, brake shoes or brake drum. If this is the case, the seal and other components will need to be replaced."
Another thing to look at is the proper venting of the wheel end, STEMCO says. All wheel ends generate heat and when this occurs it will result in pressure in the wheel end, the company says. "If this pressure has no way to vent through the hubcap vent or axle vent then the wheel seal is likely to start leaking due to the excessive amount of pressure."
SKF adds that when inspecting the hub, technicians also should check for broken fasteners and bolts, cracks in the hub housing, damage to hub and bore. "If the bearing cup is loose in the hub, this indicates a serious condition and the hub must be replaced," the company says.
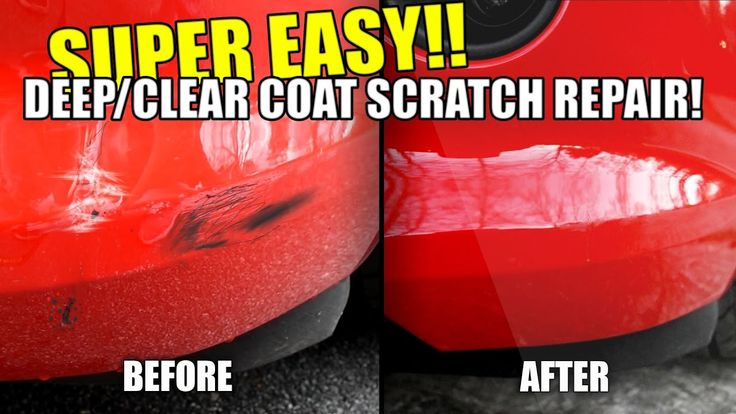
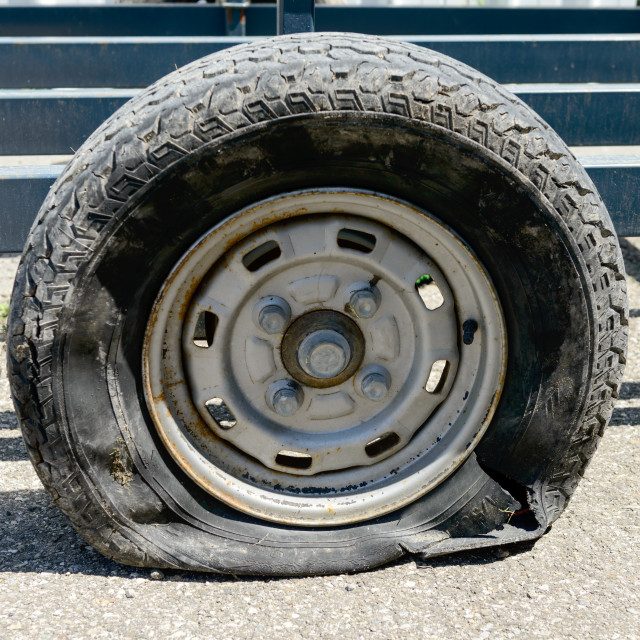
Uncover the 3 major causes of wheel seal failure and learn what preventative steps you can take to avoid wheel seal downtime.
Wheel ends of semi-trucks and trailers have several components that are vital to your success while over-the-road. A real make or break component is your wheel seal. This component can mean the difference between getting to your destination quickly, and being parked on the side of the road because D. O.T. has you listed as “out-of-service.”
In this article, we will uncover the 3 major causes of wheel seal failure and teach you preventative steps to avoid wheel seal downtime.
A wheel seal plays a vital role in the longevity of your wheel bearings. Wheel seals are designed to keep your wheel bearing lubricant within the wheel end, and keep all debris, dirt, and other contaminants out while on the road. They can be installed directly into the hub or onto the spindle with dedicated installation tools, dependent upon the seal.
There are 3 major causes of wheel seal failure. They include the following.
The improper installation of wheel seals is the most common cause of wheel seal failure.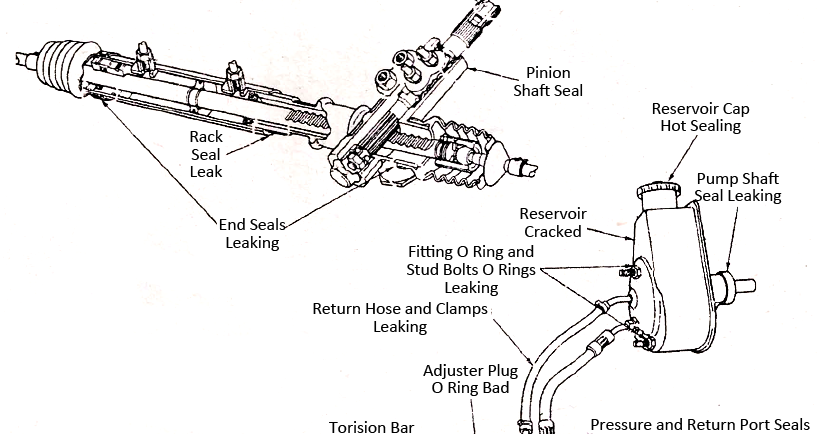 Between selecting the proper fit and the use of proper installation tools, you would think proper installation would be a straight forward process. This is not the case. There are many factors during the installation process that can create headaches, if not done properly.
Did You Know? 9 out of 10 times – Improper installation is the cause of wheel seal failure.
First, correct application, your wheel seal needs to fit on the spindle or within the hub properly before actually installing it. Before you begin the installation process, you should line up the seal and inspect for a snug fit. If your seal is for a spindle mount, check this by gently sliding your seal onto the bare spindle shoulder and look for gaps between the inner diameter of the seal and the spindle. If your seal is a hub mount, place the seal over the hub and again check for any gaps between the seal and the hub. If it all lines up for a snug fit, you know you have the correct seal that should fit properly.
Next, before you begin installing your wheel seal onto the spindle or into your hub, make sure you are installing the new wheel seal in the proper direction. There may be text on the seal itself telling you which is the oil side, but if not, you want to make sure your seal is installed with the sealing lip towards the “wet/oil” side. This allows pressure to push the wheel seal onto the spindle and create a proper seal. A seal that is installed backwards will eventually blow out and start leaking causing you more downtime while you repair the wheel end.
Your wheel seals should be inspected with a proper walk around before getting on the road each day. If you establish this good habit, your risk of D.O.T. finding a leaky wheel seal and labelling you “out-of-service” will decrease.
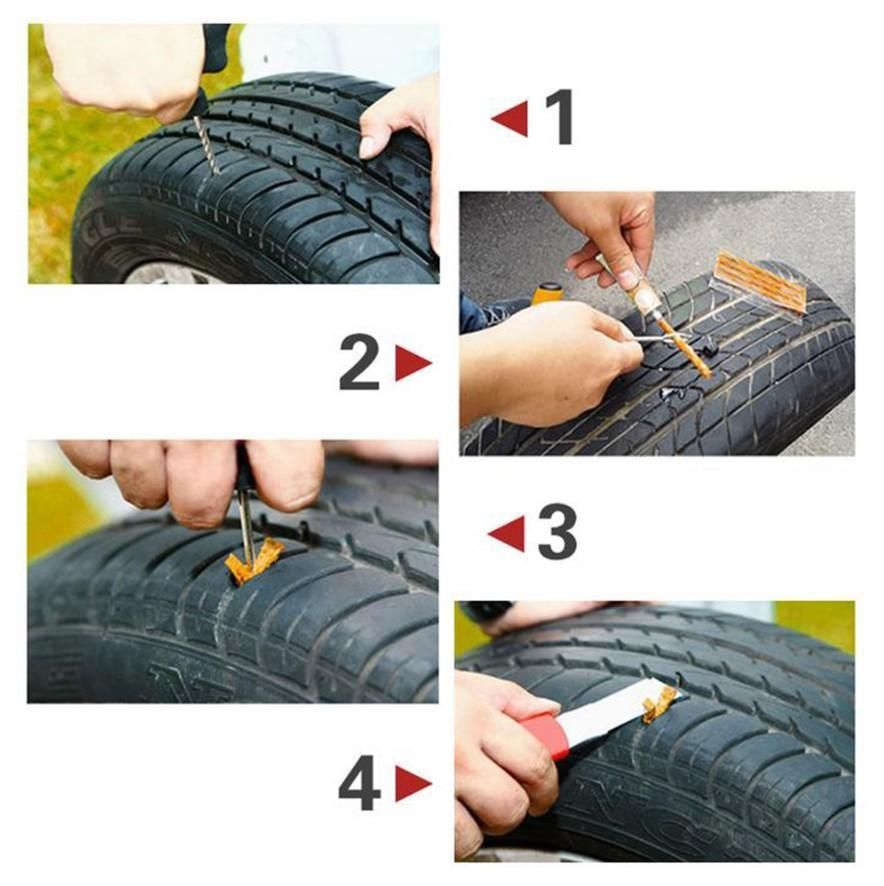
Lastly, the use of proper tools during the installation of your wheel seal is a major game-changer on how successful your installation will be. Most wheel seal product boxes will contain a tool number for the proper tool to be used during the installation of the new seal.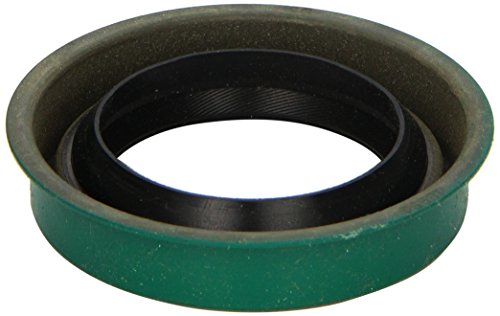 Recently, some manufacturers are even offering hand-installable seals that require no tools for installation. These hand-installable seals can be installed within minutes with the simple force of your hands. Hand-installable seals can help alleviate the hassle of selecting the correct tools. New hand-installable seals are making the job faster and easier than ever before.
When using an installation tool, place the oil side facing up. Some seal manufacturers may recommend to lightly lubricate the outside diameter of the seal with clean oil. Never use bore sealant on the seals outside diameter. Once your tool and seal are ready, drive the seal straight and firmly onto the spindle or into the hub with a 3 to 5-pound hammer. When you hear a sound change, stop driving the seal because it has now bottomed out. Over-driving will crush the seal and allow oil to leak out of the wheel end and also allow contaminants in. For spindle mount seals, run your finger along the inside of the newly installed seal to double-check for a flat and equal installation of the whole seal. For hub mounts, run your finger along the outside diameter of the newly installed seal to check for a flat and equal installation.
The process of adjusting your wheel bearings is critical and cannot be stressed enough. Many times, people will get into a hurry and will not follow the proper procedures. The bearing adjustment procedure will make sure your bearings are perpendicular and lateral all the way around, otherwise known as being properly seated.
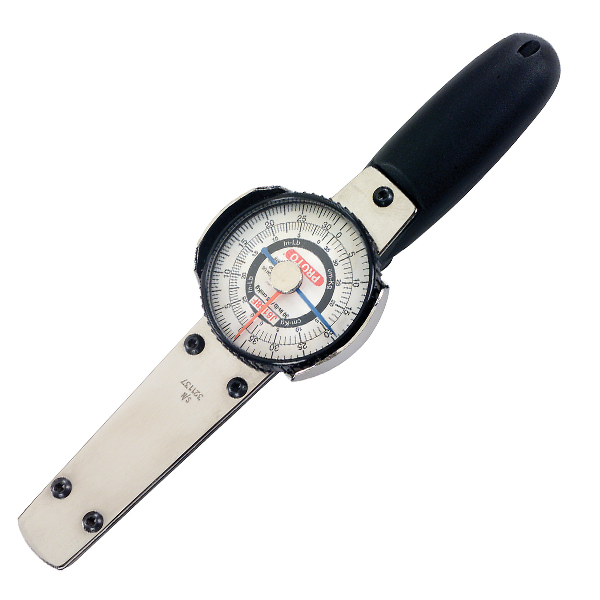
One major mistake that many will make while adjusting their bearings is the use of an impact wrench. DO NOT DO THIS! An impact wrench can easily get away from you and you can severely over-tighten or under-tighten your wheel bearings. Instead, use a breaker bar with the proper socket size, followed by a torque wrench to tighten to the manufacturer’s specifications. You should check your manufacturer’s specifications before installing your new seal, but you can also follow the recommended RP-618 Bearing Adjustment Procedure.
When you complete the bearing adjustment procedure, you should use a Wheel End Dial Indicator Tool that will display the wheel bearing end play. A wheel bearing end play of 0.001” to 0.005” shown on the Wheel End Dial Indicator is the most common end play desired, but check your manufacturer’s specifications to be sure. Be careful when adjusting your wheel bearings, under-tightening or over-tightening your bearings can wear them out even quicker.
Another mistake that people make prior to installing new wheel seals is not taking the time to completely inspect and clean all components to see if they are worn or damaged. Dirty, worn, or damaged wheel bearings or races can have damaging effects on your equipment. While inspecting and cleaning the wheel end components, if you see any pitting, spalling, or discoloration of your wheel bearings or races, these worn or damaged components could be caused by improper installation.
Discoloration around your bearings, such as purple or yellow, means there may not have been enough oil to keep the bearings lubricated and they may have been overheated. Purple or yellow color usually means your bearings got so hot; they baked the carbon steel right out of the bearing. Always check your recommended oil capacities and follow it as close as possible at all times. The resting lubricant should be between the “fill” and “full” lines on the wheel hub window, if your machine is equipped. Improper lubricant can also cause premature failure of internal components. A synthetic GL-5 lubricant can help dissipate heat better and keep your wheel ends operating at a cooler temperature.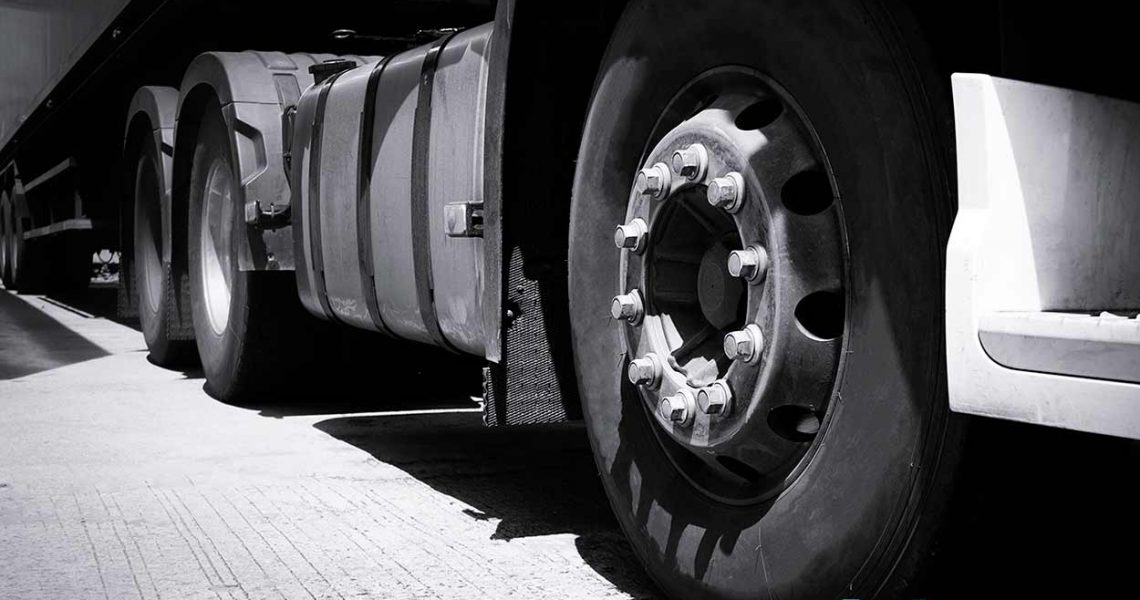
Every time a new seal is installed, you should be inspecting and cleaning the spindle of any burrs, dings, dents, or contaminants. Contamination, like rocks, pebbles, dust, and water, can quickly deuterate the inside of your wheel ends, but to help keep your wheel end components like new, you can use solvent, a scraper and/or emery cloth to clean the wheel end. The surface of the spindle should be smooth for installation, as your inner and outer bearings will be going on this surface and you want to make sure the bearings are properly seated.
When inspecting and cleaning the spindle, you should also use a wire brush to clean the spindle threads. If the spindle threads are not properly cleaned with a wire brush, these contaminants can be mistakenly introduced into the wheel end while re-installing the wheel hub. Contaminants will move freely within the hub causing possible damage to your wheel bearings, races, and other internal components.
Easily overlooked, your hubcaps and axle vents being plugged or damaged can be a factor for wheel seals leaking. As the oil in your wheel end heats up, it will begin to create pressure and that pressure needs to be released somewhere. That pressure is typically discharged through the axle vent and small hubcap vent. If either of these two are clogged or damaged, that pressure building up will find another way to discharge itself, and it’s usually through your wheel seal. A quick morning pre-check that these holes are not damaged and are free of buildup can save you from blowing your wheel seal later down the road.
At Wheelco, we stock only the brands we trust to successfully get the job done. National is our leading brand of wheel seals with their innovative hand-installable Dynamic Edge® Technology as well as their standard wheel seal, which require installation tools.
The National® brand of oil seals and bearings has built a reputation as one of the most respected names in the industry. They provide premium quality, no-compromise solutions for virtually every wheel-end repair. National keeps pace with industry changes and provides advanced technologies to meet the needs of today’s vehicles. They are committed to providing high end, premium products that meet or exceed the original equipment specifications across the full spectrum of wheel bearings and oil seal needs.
Our Wheelco experts are ready to answer your heavy-duty questions and needs. Stop by any of our Wheelco locations or give us a call and see how we can help you stay on the road.
Heavy Duty Seals Quick Guide
Download
PrevPreviousWheelco Truck & Trailer Announces New Wheelco Emergency Roadside Assistance
NextWheelco Truck & Trailer Launches First Products in ProRig BrandNext
At Wheelco, being customer driven is more than just a motto we live by. It means that our employees will do everything we can to best serve you, our valued customer.
Customer driven is more than just offering you advice, giving time-honored service or contributing the latest tech-support. It’s about being there—whenever and wherever you need us—in-person, over the phone or online.
Facebook Twitter Linkedin Instagram Youtube
October 26, 2022
Wheelco is expanding and opening another distribution center with a store front that will be open November 7th, 2022.
Read More »
April 1, 2022
Industry leading distribution company providing high-quality products and exceptional service for 61 years and counting.
Read More »
March 4, 2022
Our selection of clutch & flywheel assemblies offer ease of installation, performance, and reliability.
Read More »
Have a question and want to talk to a human? Get help from one of our a dedicated Customer Service Representative who know the industry. Our team helps customers like you get answers to their unique problems. Get help the way you want - Phone, text chat or email.
(800) 952.3674
Text Wheelco to 797979
Popup
Diagnostics and repair of trucks and trailers in Moscow
Working hours:
Mon-Sat from 9:00 to 18:00
Sun day off
+7 (9018) 9038 -18
An important step in maintaining the required technical condition of a cargo semi-trailer is timely diagnostics and high-quality repair of its running gear.
Diagnostics and repair of running semi-trailers
How to get to us
Any suspension or axle element receives a huge load during operation, which leads to premature failure. Therefore, timely and regular diagnostics will help to identify malfunctions, and their elimination will not only minimize the cost of restoration, but will also guarantee the safe operation of the vehicle, which will help to avoid unwanted accidents on the road.
The undercarriage of a truck consists of suspension mechanisms that provide a connection between the body and the wheelbase. Suspension is responsible for the adequate distribution of dynamic loads on each support element, it also contributes to an increase in the traction performance of the semi-trailer. In addition, it adapts the chassis to any surface, is responsible for absorbing vibration and friction forces that occur when the wheel rubs against the road surface.
During diagnostics, the condition of such mechanisms and assemblies is assessed, such as:
Another important load-bearing element is the frame, on which the chassis and body are attached.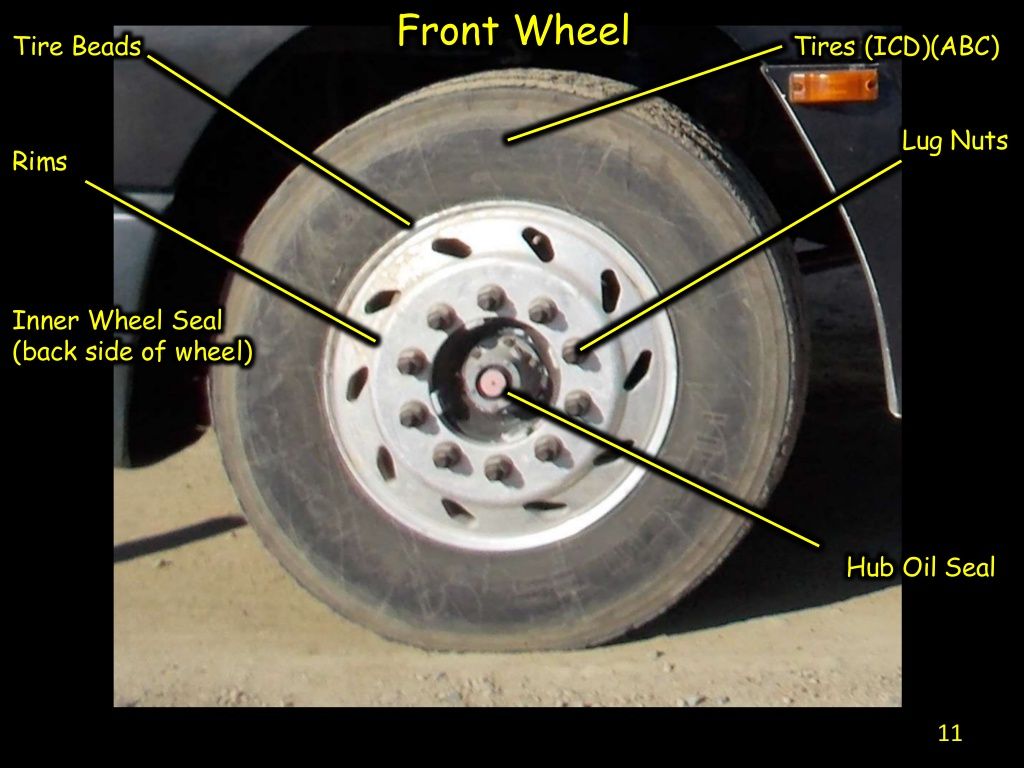 If a direct relationship between the frame and the load on the undercarriage and the weight of the truck is violated, then this leads to a vertical deflection of the part itself. The geometry of the frame can also be broken as a result of an accident or any mechanical damage, in which fractures, cracks and divergence of the part along the plane are formed. This is also a serious violation that prevents the correct operation of the vehicle.
If during the diagnostics any problems are identified in the condition or operation of individual parts and entire assemblies, our experienced craftsmen will promptly eliminate them. Service specialists work with semi-trailers of various modifications, so we offer our customers the following services:
Turning to our service, in addition to high-quality work performed by experienced craftsmen, you also receive:

A professional team, modern technical equipment, as well as the use of high-quality spare parts allow us to provide our customers with high-quality repairs of any cargo semi-trailers in a short time.
For all questions and to make an appointment for repairs, please call: +7 (985) 905-83-18
Freight service address: Podolsk, Yunykh Lenintsev Avenue, 59a
E-mail: mail@ sas1.ru
Volvo black smoke GAZelle oil seal leak YaMZ engine breather Kamaz engine won't start Kamaz smokes black smoke Kamaz bridges are walking Kamaz does not hold the road MAZ smokes black smoke MAZ engine does not start
MAN breather MAN black smoke mercedes actros black smoke Gas pedal not responding Renault diesel black smoke Renault magnum engine won't stall Breather engine KAMAZ Sapunit Scania Scania black smoke
Volvo engine knock ZIL engine knock KAMAZ engine knock MAZ engine knock Scania engine knock Compressor knock at MAZ speed Scania compressor noise Engine oil leak Kamaz Leak of the oil seal of the hub Kamaz
Beating when braking abs light on Burning brake pads The rim is heated Right wheel shaking Burning brake drum Burning brake caliper Skids when braking Kamaz trailer slows down badly
Wedge wheel when braking Wedge brake caliper MAN tga pulls to the left when braking Rear axle not braking Poor braking semi-trailer krone Bad trailer braking Why is he folding the truck Pulls to the left when braking When braking pulls to the right
The brake pedal falls Whistling brake pads Squealing when braking Squeal when braking Decreased brake efficiency Volvo truck brakes The brake pedal is pressed hard The tractor does not slow down Truck brakes failed
Engine vibration at RPM The motor stalls Check engine light is on Rumble in the engine Engine eats oil Engine starts and stops The engine runs jerky Loose rings in the engine Ringing in the engine
Condensation in the engine oil Nagar on candles Engine does not turn off after ignition off Engine won't start Low engine power Low oil pressure in the engine Knocking in the engine when revving Knock in the engine Rattling noise when starting the engine on a cold
Piston knock Knocking fingers in the engine Engine oil leaking Replacement crankshaft seal leaking Crankshaft oil seal leak Crack in cylinder liner Troit engine Noisy engine when cold Noisy timing roller
The car leads away Howling rear axle Vibrations in suspension Noise in gearbox Thunder suspension The hubs are heated Long stopping distance Chewing rubber
Pecking machine Heels the car The car catches a rut The car pulls to the side Uneven tread wear Extraneous noise in the differential One side of the car sank Penetrating suspension
Sagging springs The car is swinging Knock in suspension Hub seal leaking Semi-axle oil seal leak Bridge seal leak Shakes the car while driving Suspension noise
Howling diesel Howling diesel turbine Diesel turbine humming Diesel smokes white smoke Diesel smoke blue Diesel does not respond to the gas pedal Diesel troit on cold Smoke diesel Mercedes Diesel smokes black
Diesel does not develop power Diesel won't start in cold weather Diesel jerks when accelerating Diesel starts for a long time Does not stall after shutdown Diesel won't start The diesel engine does not stall after the ignition is turned off Poor starting diesel engine Leaking diesel
Diesel overheats Diesel starts bad Diesel engine breakdown Breather diesel engine Diesel engine knock Knocking at idle diesel engine Difficulty starting diesel Black smoke from the exhaust Noisy diesel at idle
The battery is quickly discharged Check man tga lit up The check on Kamaz caught fire spark starter abs light on all the time Blinking check and troit engine Turn signals won't turn off Dimensions do not light up
Headlights do not light up Starter does not start Car battery not charging Feet don't work Generator winding broken Wiper blades stop RPM drop when headlights on Fuse 9 blown0003
Constantly lit dimensions The fogs are sweating Pulsing headlights Starter spins but won't start Starter clicks but does not start Headlights shine dimly The turn signal flashes frequently
When you press the clutch, the noise disappears Reverse gear disengaged Turns off transmission Vibration in gearbox Howling checkpoint Rear wheel bearing buzzing Rear axle humming Burnt clutch smell Gear does not turn on
Clutch slips Disappeared release Clutch slip Clutch slips Kicks the box knocking box Box seal leak Main shaft oil seal leak Difficulty shifting gears
Oil flows between the box crackling checkpoint Clunking noise when shifting into reverse gear Noise in the box Gazelle box noise Noisy reverse gear Noise box Noisy gearbox Noise in neutral
Large steering play Large steering wheel play The steering wheel dangles The truck does not hold the road The hydraulic booster is buzzing Biting hydraulic booster Steering gear play GAZelle
Steering wheel play The car does not obey the steering wheel Hydraulic booster fails Hydraulic oil foaming The steering wheel is spinning Torn power steering hose Knock in rail
Tie rod knocking Steering oil seal leaking Steering wheel turns hard Shock when turning the steering wheel Hydraulic booster leaking Noise gur Noisy steering wheel
KAMAZ
ZIL
Ural
MAZ
GAS
Mercedes
Scania
Renault
DAF
MAN
Volvo
Iveco
Ford
Shaanxi
Dong Feng
Foton
FAW
HOWO
BAW
Schmitz
Crown
Grunwald
Kogel
KAMAZ
ZIL
Ural
MAZ
GAS
Mercedes
Scania
Renault
DAF
MAN
Volvo
Iveco
Ford
Shaanxi
Dong Feng
Foton
FAW
HOWO
BAW
Schmitz
Crown
Grunwald
Kogel
| Job | N/C | Cost, rub |
|---|---|---|
| Oil change | 1 | 2028 |
| Replacement front disc brake pads | 1.8 | 3650 |
| Replacement rear disc brake pads | 2 | 4056 |
| Replacement front pads drum brake | 5 | 10140 |
| Replacement Kingpin Tapered | 5.6 | 11357 |
| Turn the brake drum | 0.7 | 1420 |
| Turn brake disc | 1 | 2028 |
| Brake caliper replace | 1.2 | 2434 |
| Caliper brake repair, from | 1.5 | 3042 |
| Energy storage replace | 0.8 | 1622 |
| Brake discs replace (Front) | 6. 3 3 | 12776 |
| Brake discs replace (Rear) | 7.6 | 15413 |
| Rear hub oil seal replace | 3.8 | 7706 |
| Front hub replace | 2.6 | 5273 |
| Brake chamber replace | 0.8 | 1622 |
| Brake chamber repair | 0.5 | 1014 |
| Replacement rear shoes drum brake | 5.4 | 10951 |
| Tie rod assembly replacement | 1.4 | 2839 |
| Tie Rod End Replacement | 0.7 | 1420 |
| Replacing one front spring | 3.8 | 7706 |
| Replacement of one rear beam spring | 3.5 | 7098 |
| Replacement shock absorber | 0.5 | 1014 |
| cab torsion bar replace, Renault | 0.8 | 1622 |
| Cabin cushion front replace | 0.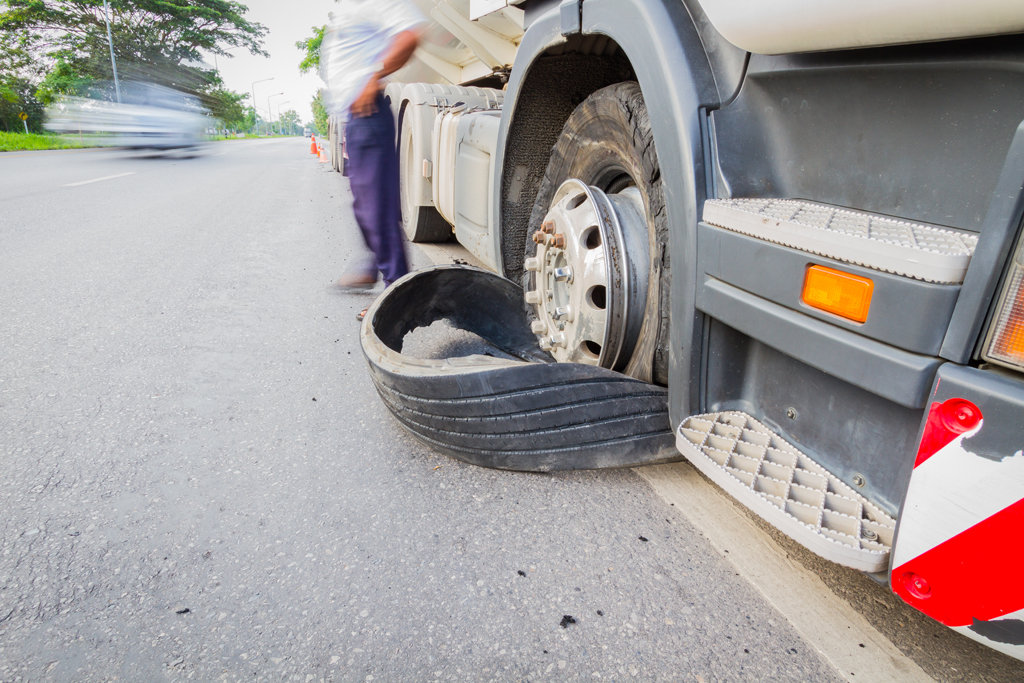 5 5 | 1014 |
| Cab rear cushion replace | 0.8 | 1622 |
| Cab front bushing replacement | 6 | 12168 |
| Replacing rear cab bushings | 4.2 | 8518 |
| Cab lift pump replace | 1.2 | 2434 |
| Cab lift cylinder replace | 1.2 | 2434 |
| Air spring replacement | 0.8 | 1622 |
| Shank oil seal replace | 1.6 | 3245 |
| Clutch replace (tractor) | 13.2 | 26770 |
| Clutch replace (van) | 15.2 | 30826 |
| Rear reducer S/R | 7 | 14196 |
| CCGT replace | 1.6 | 3245 |
| Replace gearbox cable, from | 2 | 4056 |
| Front engine mountings,replace | 4. 5 5 | 9126 |
| Rear engine mountings replace | 3.3 | 6692 |
| Replacement of the main brake valve | 2.6 | 5273 |
| Replacing the water separator valve | 1.6 | 3245 |
| Replacing the air handling unit DXI | 2.6 | 5273 |
| Floor sensor replacement | 0.8 | 1622 |
| Floor level calibration | 1 | 2028 |
| Air valve replacement, from | 1.5 | 3042 |
| Air valve repair (no warranty), from | 2 | 4056 |
| Replacement DCI injectors | 4.2 | 8518 |
| Low pressure pump replacement | 2.2 | 4462 |
| Replacing the dosing block injection pump | 2.5 | 5070 |
| Manual Priming Pump Replacement | 0.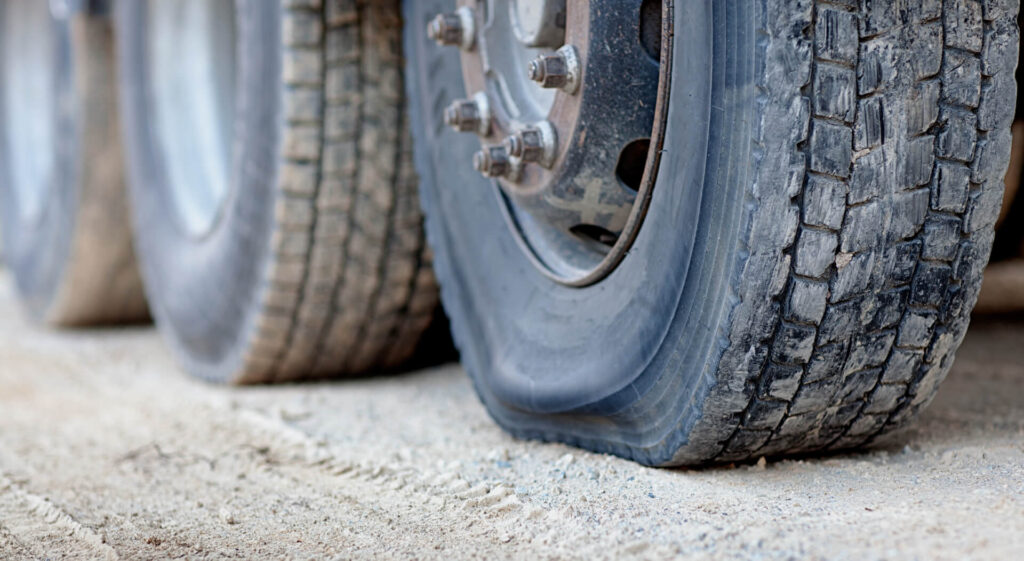 5 5 | 1014 |
| DCI valve adjustment | 3 | 6084 |
| DCI compressor replacement | 3.5 | 7098 |
| Compressor replacement MAGNUM | 5.5 | 11154 |
| S\R fuel tank, from | 2 | 4056 |
| Fuel pickup replacement | 0.8 | 1622 |
| Low fuel pressure, measure | 0.8 | 1622 |
| Fuel return, measure | 0.8 | 1622 |
| Turbine replace | 4.2 | 8518 |
| Pan gasket, replace | 3 | 6084 |
| Radiator, replace, from | 3.8 | 7706 |
| Viscous coupling, replace, from | 2.6 | 5273 |
| starter replace | 1.3 | 2636 |
| Alternator replace | 1.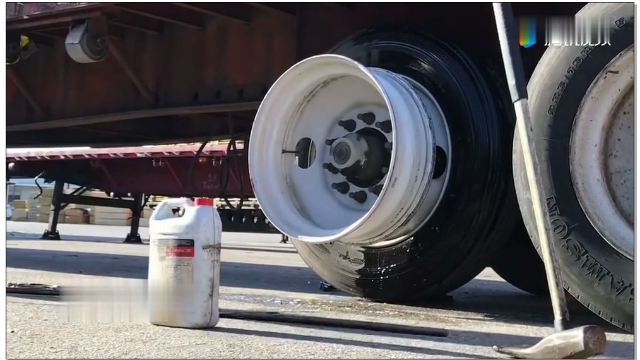 6 6 | 3245 |
| Replace drive belts (all), from | 1.8 | 3650 |
| Replace alternator belt | 1.7 | 3448 |
| Replace fan belt | 1.5 | 3042 |
| Pump replace DCI | 3.8 | 7706 |
| Pump replace DXI | 3 | 6084 |
| Thermostat replace DCI | 1.7 | 3448 |
| Thermostat replace DXI | 2 | 4056 |
| Electronic diagnostics | 1 | 2340 |
| Truck Electrical Repair | 1.5 | 1560 |
| Repair of electronic components | 2.5 | 3120 |
| Job | N/C | Cost, rub |
| Replacement of half spring silent block | 2 | 3120 |
| Replacement 3D silent block (SAF axle) | 3 | 4680 |
| Air spring replacement with cup | 1. 5 5 | 2340 |
| Beam spring replacement | 3.5 | 5460 |
| Replacing shock absorber | 0.5 | 780 |
| Replacing shock pad | 2 | 3120 |
| Bridge Beam Replacement | 7 | 10920 |
| Hub bearing replacement | 0.8 | 1248 |
| Replacement of brake discs (1 axle) | 5.4 | 8424 |
| Replacement pads, disc brake | 1.8 | 2808 |
| Caliper replacement | 1.2 | 1872 |
| Replacing caliper anthers | 0.8 | 1248 |
| Caliper Guide Replacement | 2 | 3120 |
| Caliper repair, complete | 3 | 4680 |
| Replacing the approach mechanism | 2 | 3120 |
| Energy storage replacement | 0.  |
 Specify more exact prices by phone of acceptance or directly in our tech. center.