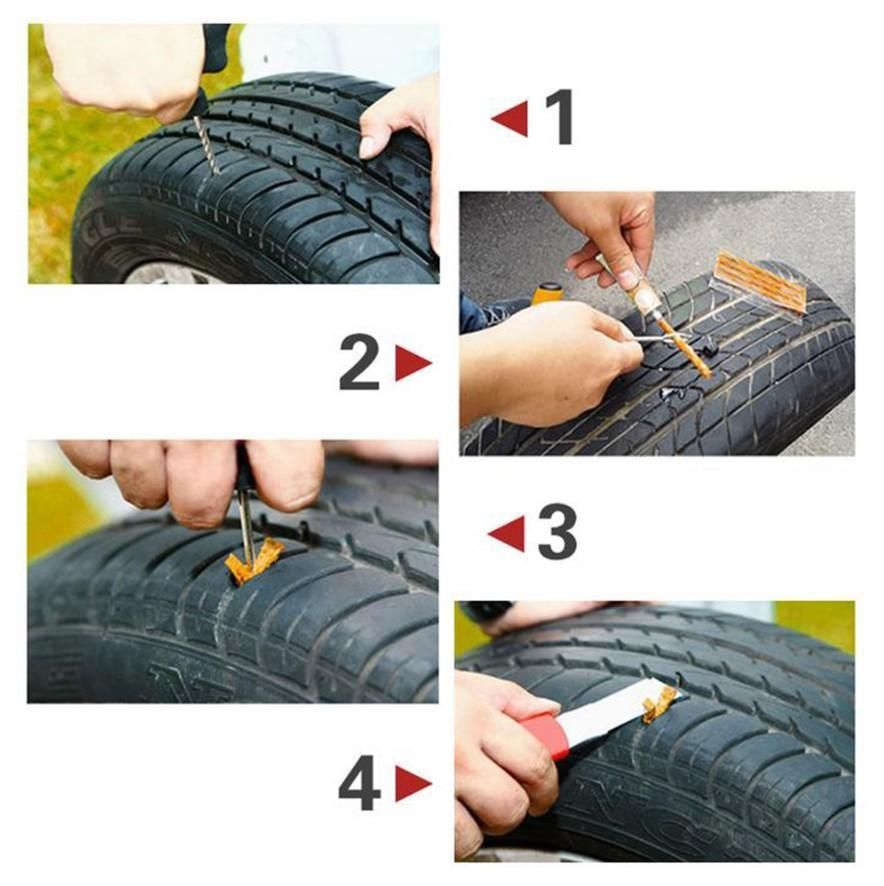
Tire plugging is the fastest method to repair a punctured car. Tire plugging uses a cord to prevent the airhead from escaping. If you are an experienced person, you can avoid damage to your car with simple tips.
So, how long does a tire plug last? Most manufacturers say that plug versions can last 7-10 years if installed correctly.
Yet, this number is meant as a reference because you can’t always fix it perfectly. The article gathers useful knowledge and some of the most frequently asked questions about tire plugs. Let’s scroll down to read more information!
Buy Best Tire Repair Kits at Amazon.com
What Is A Tire Plug?It is the primary tool in the repair by plugging method. From the outside, it looks like a standard wire, and the structure is quite remarkable; it is a sticky object; depending on the case, the item can expand or contract to match the size of the hole.
Its working principle is also quite simple: after being inserted into the tire, the plug wire will sense the pressure, determine the shape of the wound, and then automatically expand to adapt.
In addition, the material that makes the wire must be guaranteed to meet the standards, confirming the certainty so that after the air is pumped in, there will be no problems.
There is no denying the convenience that the plug method brings, and you can even repair it without removing the tire from the rim. You can even plug in the tire in some exceptional cases, even when the wheels are connected.
How Long Does A Tire Plug Last?When a vehicle is repaired correctly and maintained, a plug’s life span can last up to 7-10 years. It is an unbelievable number for a wheel that has been repairable.
However, manufacturers advise users not to overdo patching like this in practice. When using too many repair measures, the impact will affect the inherent functions, causing deflation and explosion.
When traveling on the road, the car’s wheels have problems, do not rush to decide when the experience is not proficient; the best way is to take the car to a repair center to have expert advice on the appropriate repair method.
Is Plugging A Tire A Good Idea?Buy Best Tire Repair Kits at Amazon.com
Plugging or patching is only a temporary measure before you have enough time to change into a new tire. The life of a tire after plugging can last from 7-10 years or 25,000 miles; no one can be sure that there will not be any problems.
Plugging in tires will be a good idea, even effective if the wheel is in an emergency that needs to be moved.
Is It Safe To Plug In A Tire?You can safely use your plugged-in tires when traveling in a specific section of the road. Unlike a spare tire, which has a short life, it is possible to prevent air from escaping through a previous puncture completely with a plug repair method.
Via many surveys, experts think there is a better measure than a plug – radial patch. It is a suitable method available on almost all popular tires on the market.
The process takes about 30 minutes while using a wire to insert the air hole takes up a few minutes. Both must be vulcanized to reinforce and increase the rubber surface’s certainty.
Is It Ok To Drive On A Plugged Tire?As long as the wound has adequately been reinforced, you are entirely safe traveling by car with tires. The safest time to use is not too long from when you repair using the above method.
Besides, some notes have also ensured stability when operating this type.
However, do not drive when there is a wound near the wall or on the side of the wheel; if the plug diameter exceeds ¼ inch, it is best to replace the tires.
Finally, the body’s weight, do not use plug tires to carry heavy objects; this inadvertently puts pressure on the wheels when the tires are weak.
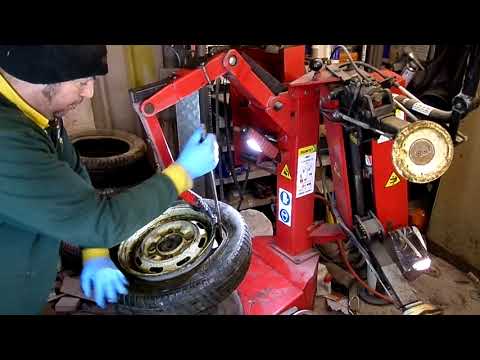
Here are some ways to help you better understand the plugging process.
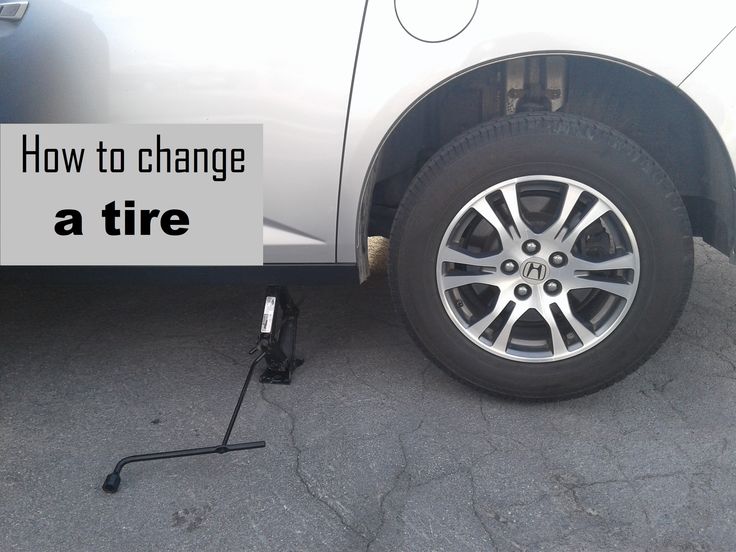
Step 1: Locate the leakThis step does not require you to remove the wheel altogether, but you can use a jack to support the wheel’s weight, so it is pretty easy to do the following steps.
The above article has provided you with knowledge related to plugging or manipulations to perform this process. Hopefully, it will help you when you encounter a similar situation.
Alvin Reyes
Alvin Reyes has expertise in automotive evaluation. He collaborated with famous newspapers and is still making efforts in tire review for DrivingPress. com
Home » Tire Patches vs. Tire Plugs: Which Is Better?
What are tire patches and tire plugs? Well, they are useful when you get a flat tire. In such cases, there’s a good chance that a minor repair can get you back up and running again quickly.
Three of the most common of these “minor repairs” are:
The first option, a tire plug, is cheap and fast to administer. Plugs work best when you’ve run over a nail or similar blunt object that punctures the tire and causes it to leak air. After the nail or sharp object is removed, the plug can be inserted into the hole to fix the leak. While plugs of the old days were problematic and served more as a band-aid type of repair than anything else, many plugs available today actually vulcanize to the tire to provide better stability.
A patch, on the other hand, is considered to be a better quality tire repair. However, it’s a bit more laborious of a repair than a plug. Patching a tire actually consists of removing the tire from the rim and then using a die grinder to clean up a 2-inch diameter around the puncture to give the patch enough of an area to bond with. The patch is then pushed from inside the tire through the outside of the tire, sealed, and let dry.
The best modern tire repair solution is a plug/patch combo product. This is one piece and it combines the best benefits of both options.
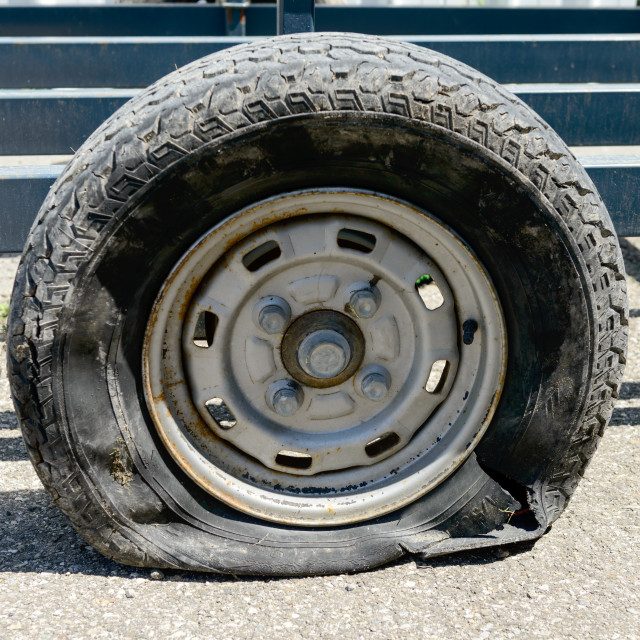
Keep in mind that not all tire damage can be repaired. For example, tire bubbles are a dangerous problem that will result in needing new tires.
The question is: Can or should you repair a tire on your own?
If you purchased your tires from a mechanic or tire-specific business, then chances are they will either plug or patch your tire for free if it develops a leak and a patch or plug can resolve the issue.
Many tire-specific businesses will also fix your tire via these means as a way of developing goodwill with you, the customer, so that when it comes to buying new tires you’ll consider purchasing that next set from them.
However, outside of these two scenarios, tire patching and plugging aren’t necessarily expensive (usually only $10-$20 a repair), but more of an inconvenience.
Considering this, patching your tires on your own might not be worth it.
DIY patching or plugging is still an option, yet we’d advise you to be absolutely sure of what you’re doing before going the patching route.
The plugging route is fairly simple (and cheap, as plug kits can be purchased for just a few dollars), as all you really need to do is locate the hole and insert the plug. Going the patching route is also fairly inexpensive, but there’s a lot more involved.
For instance, patching a tire consists of:
Plugs won’t usually work when a puncture is near the sidewall, as it likely won’t be able to completely seal the area. Plugs are also ineffective when the puncture is on an angle. Patches are usually the better-recommended option, but they do have their limitations. For instance, if a puncture is greater than a quarter-inch in diameter, a patch will likely be ineffective and the tire may be too damaged to repair.
Plugs, when installed correctly and in the right situations, can help a tire last for up to 25,000 additional miles. But while plugs can be effective, usually patches are considered to be the better, more secure option of the two. The patch/plug combo is the safest and most reliable option.
Are plugs just band-aid repairs?Yes and no. Years ago they were and if they aren’t installed correctly or in the right situations today, they still are. However, today’s plugs vulcanize to the tire and can help it last for tens of thousands of miles more.
iXBT.com projects require cookies and analytics services. By continuing to visit project sites, you agree to our Cookie Policy
Almost every car owner has experienced a flat tire. The most insidious thing is if it happened on the road, and there is no way to quickly get the car to the nearest tire service. In this situation, any car owner will come to the aid of special tool kits for quick tire repair, which can be bought on Aliexpress at an affordable price. All sets have positive feedback from real buyers, good quality and free shipping.
Buy here
Starts the list with a good kit for a quick repair of tubeless tires. Supplied in a plastic case in which each tool has its place. The kit includes: cutter, rasp, awl with a spare tip, rubber bands and glue. Using the set is quite simple and convenient. If a puncture is found in the tire, you need to carefully expand it with a rasp, thread the tourniquet into the eye of the awl, insert it into the hole so that a small piece of thread sticks out of the hole. In conclusion, it remains to remove the tool, and cut the tourniquet with a blade.
Sell here
Another very interesting set that will come in handy for every car owner. Judging by the reviews, the set is really useful and has a good quality. With it, you can quickly install plugs for repairing tire punctures. The principle of operation is simple: first, a rubber plug is taken, which is installed in a vacuum gun, after which the rubber plug is inserted into the puncture with a tool. Everything is very simple. It only takes a couple of minutes and you can move on.
Ask for price
Effective tire repair kit, which includes: universal patches and a special roller. This method of self-repair of a punctured wheel will require its disassembly, so it cannot be called quick and simple. However, this set allows you to most effectively repair a large puncture. Judging by the reviews, the patches are of good quality, made of thick rubber. The roller is comfortable, has good corrosion resistance. There is expedited shipping, so you don't have to wait for the goods.
Buy here
Every self-respecting car owner should have such a simple but effective kit. It includes: a spiral file, an awl with an eye, harnesses (5 pieces + 5 pieces as a gift) and glue. The set is very useful, it will allow you to quickly and easily fix a puncture of tubeless tires right on the road. The thing is really worthwhile, and it is inexpensive.
Sell here
A very useful set for any car owner, which consists of two special screwdrivers with a screw nozzle. The nozzle has three special hooks that allow you to pull stones out of the tread of car tires. The length of each screwdriver is 320 mm. Supplied in a carry case for easy storage.
Get Price
This repair kit is popular among owners of vehicles with tubeless tires. The set includes: a tool with a file tip, a tool with an eye, 5 cords and a special activator glue. The kit will help to quickly restore the integrity of the wheel after a puncture. The reviews are positive, the product is fully consistent with the description, there is an expedited delivery. The set is inexpensive and successfully copes with its task.
Buy here
A very useful set of universal clips that will allow you to remove the rubber from the wheel with your own hands. Size: 16x13x5 cm. Made of hard plastic. Judging by the reviews, the product is worthwhile, made with high quality, does not scratch the disk during operation. However, it is recommended to hold the tool a little, as it can pop out on alloy wheels. The thing is interesting. The seller is responsive, promises to deliver the goods quickly.
Sell here
Very interesting kit for quick repair of punctures in tires up to 10 mm in diameter. Allows you to perform quick repairs without removing the wheel on the road, which is very convenient. The kit includes: vacuum gun and special paste. Tool size: 30x5.5x3 cm. Judging by the reviews, the set is convenient and effective. The only thing is that the delivery is not very fast.
Ask for price
A good set of good quality tire changers. Includes 24 mushrooms. With its help, it is possible to carry out high-quality and reliable tire repair. Installation work is easy and simple. Fungi fill the puncture channel, protecting the tire carcass from moisture, dirt and foreign bodies, thereby protecting the tire. Allows you to repair damage of a fairly serious size.
Buy here
Rounding out the list is a great quick repair kit that every self-respecting motorist should have. The set includes: a case made of durable plastic and 98 essential tools. Its weight: 1.5 kg. In an emergency, the car owner will be able to independently make minor repairs to the wheel without removing it from the car. This set does not take up much space in the trunk, easy to transport. Judging by the reviews, it has good quality and fast delivery.
Thank you all for your attention. I hope the selection was interesting, and for someone even useful. All successful shopping.
Robot vacuum cleaner from Roborock has long been something technological, exemplary for manufacturers and customers. At the moment Roborock S7 was released, the vibrating mop idea continued to advance to the masses and changed...
A pilot project will soon be launched in Russia for the direct delivery of Russian wine to the end consumer through the Russian Post infrastructure. Most likely, the Moscow region and Mordovia will be the first...
After all the famous events of last year, the domestic industry begins to catch up and resume own production. A young and dynamically developing group of companies...
In the market of computer there is a choice of cases for every taste and budget, but 1STPLAYER stands out from them with its unorthodox approach to development. 1STPLAYER has quite a lot...
Lately, we have gone through very impressive quality FiFine K69 USB microphones.0 and Maono PD400X, as well as the no less worthy budget Maono DM30, which also surprised me. Today...
A large number of ships can surprise you with their size. A tanker called Knock Nevis makes it more spectacular than the rest. Built in 1979, it is still the largest marine...
An electric chain saw is much easier to use than a gas chain saw. Despite this, it still remains a technically complex device that needs maintenance and care. If we advise you to contact service centers to deal with difficult damages, you can learn how to fix minor faults yourself. In the article, we repair an electric saw, understand the principle of its operation and study the most common causes of breakdowns.
Before you check the power saw for breakdowns and repair it, you should figure out how this tool generally works.
The power source is electricity from a standard 220-volt outlet. The engine is located under the saw body, and excess heat is removed from it through special holes. The saw group, which is a tire and chain, is similar to that found in gasoline and cordless saws. The lubricant necessary for the smooth running of the chain along the guides is supplied automatically from the reservoir. An element such as an oil pump is responsible for this.
An electric motor drives a sprocket that sits next to the bar and is connected to the chain. The saw chain runs on the tire, rotating from the work of the sprocket. Sawing is carried out due to the teeth located along the chain.
Let us briefly analyze what causes most often lead to problems with the operation of the chain saw:
As an example, we disassemble the Makita UC3530A electric saw, however, in the design of different models, as a rule, there is no dramatic difference.
We examined the problems that owners of electric chain saws face, and also analyzed in detail the principle of operation and the scheme for disassembling these tools. Now let's move on to how to fix the electric saw and determine the cause of the malfunction.
Imagine a situation in which the chain saw is connected to the power supply, and you hold down the start button, but nothing happens. In extremely rare cases, the saw smokes in the places of the power circuit. This may be due to a malfunction of both the tool itself and the power supply. Let's take a look at the factors to consider:
The saddest scenario - a breakdown is caused by a burnout of the stator / rotor windings. This malfunction is difficult to fix at home and without specialized skills, so the best solution would be to contact certified centers for professional engine repair.
Carbon brushes are a consumable resource, so it is important to regularly monitor their condition. If the electric saw sparks or refuses to turn on at all, this indicates the need for repair. There may be two options here:
Let's take a quick look at how carbon brushes are replaced. This process is very simple, so anyone can repair even at home:
Consider how to change the saw chain on a side pull saw:
One of the reasons that the saw buzzes, but does not turn the chain, may be a lack of lubricating fluid. It is also necessary to extend the life of the chain saw. There are three reasons why lubrication problems could begin:
Traditionally, the overheating of an electric motor is attributed to increased load: the owners use their chain saws so intensively that their motors cannot stand it. If the engine heats up even at the slightest load, there may be several reasons for this:
The power indicator determines whether the electric saw can accelerate to the desired speed. A low value will not allow you to work with wood efficiently enough. If your electric saw does not cut at full engine power, this problem has the following reasons:
If the saw stops rotating the chain during operation, this may be caused by the following factors:
Like many elements of a saw - a chain, carbon brushes - the tire tends to wear out. But how to capture this moment? This becomes especially noticeable if the chain begins to tilt to the side during operation. Because of this, sawing is uneven, sloppy. This result indicates uneven wear of the saw group. Repair involves the replacement of all its components: tires, chains, sprockets.
A damaged torsion spring may be the reason why your saw will not work even under minimal load (in other words, the chain on the saw will slip). Replacing the spring requires a thorough analysis of the saw, so we briefly summarize the sequence of actions:
One of the reasons for the failure of the electric saw is the wear of the bar on which the chain is attached. You can dismantle the old and install a new tire with your own hands, and then we will look at how:
One of the reasons why the chain on the saw flies off may be the incorrect installation of the chain on the saw bar. Earlier we already mentioned the issue of changing the chain, but now we will touch on the topic of putting it on the tire in more detail.
First of all, make sure you protect yourself: put on thick protective gloves. After removing the old chain, take a new one and start laying it on the guide gradually so that it is clearly fixed in the grooves. This is necessary to prevent injury during operation.
It is important to pay attention to the fact that the teeth must be located in the direction of the chain movement along the bar. Often there are marks on the saw sets and the saw itself, allowing you to correctly determine the direction of rotation.
If your saw chain is slipping off, you may have pulled the chain too loose on the saw bar. Proper chain tension will extend saw blade life. It is important to maintain a certain degree of tension and regularly maintain it.
There is a way to quickly check if the saw chain is well tensioned on the bar: in the center of the top of the bar, select the tooth and pull it up. As a result, if the chain is rotated by hand, a third of the point should remain on the guide bar.
A power saw, like any other cutting chain tool, is extremely dangerous to operate. We recommend that you follow a number of rules so that you do not get hurt during operation and do not shorten the life of the saw: