Last Updated September 9, 2022
TireHungry.com is reader-supported. When you buy through links on our site, we may earn an affiliate commission at no added cost to you
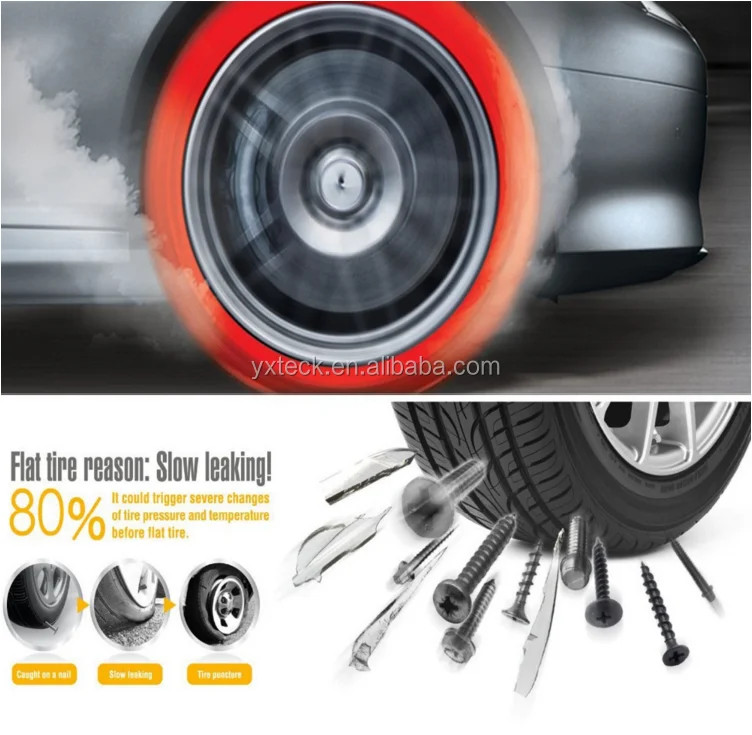
Most of us have experienced running our cars on a slow leak. The hard part about it is trying to fix it in the middle of the road or during a long drive. It’s annoying and inconvenient especially when you are on the go.
People always take extra precautions to bring an extra tire, but frankly speaking, not every car owner knows how to change a tire properly.
You need a specific set of tools and experience to replace your tire with a spare one. It’s time-consuming and stressful to go through, especially for new drivers. Using aerosol repair such as Fix-a-Flat is a good way to start repairing your tire with slow leaks.
What's In This Guide?
Fix-a-Flat was invented in the ’70s by Snap products. Fix-a-Flat aerosol sealant became a well-known brand because of its genius way to mend punctured tires. For over 50 years, it is still doing its job and has made huge strides in the automotive industry.
Even to this day, Fix-a-Flat has been able to compete with other brands in terms of mending vehicle tires. They have proven enough that they can help out vehicle owners with flat tires and slow leaks.
Before you start with the procedure, it is best to research how to apply Fix-a-Flat property to prevent any wastage and tire complications. Here is a quick list on what are the things to do and to observe before considering using the product.
While the serviceable life greatly depends on the severity of the climate and location, you can still make the most out of your winter tires’ value within their lifespan. In order to do so, you need to identify what makes it unique compared with regular, all-season tires, so you can apply appropriate care and maintenance specifically for these types of tires.
To better understand the situation, knowing where the slow leak is coming from is the top priority. It’s best to touch the tire and try to determine where the air is coming out from. That way, drivers will be able to check how many slow leaks are possibly there. Touch the treads and sidewalls. If the slow leaks can’t still be found, Applying water with soap on the tire will also be helpful. By dropping the water soap on the tire, It will be easier to know the area where the slow leak is by checking the bubbles.
Now that you have established that your tire has indeed slow leaks on it, you can now use Fix-a-Flat aerosol repair to mend your broken tire and get back on the road as quickly as possible. The good thing about it is you will instantly see the instruction at the back of the aerosol can.
Compared to the traditional way of changing tires in the middle of the road, Fix-a-Flat offers a more convenient way of putting your tire back together again.
Since we have already mentioned that it’s important to know where the leak is coming from, you now need to press on the punctured area of the tire by moving it to the bottom. You can do that by slowly moving your car up until the punctured area of the tire is on the bottom part. The reason why you need to do this is to minimize slow leaks when applying the Fix-a-Flat sealant aerosol.
Keep in mind that Fix-a-Flat can repair small punctures and cuts to the tread alone. It cannot be used for any sidewall punctures. If the punctures are found on the sidewall, not forcing to drive the vehicle would be the primary option. Use your spare tire or better yet, consult a mechanic for a more detailed and furnished repair.
Step 2: Check The Date Your Aerosol Sealant Was ManufacturedA very vital piece for the process is to know when was the sealant manufactured. Fix-a-Flat has a shelf life of 2 years. Using an expired one could result in a much more alarming state.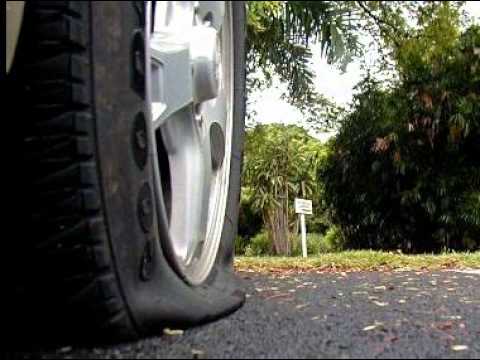
Make sure that all components of your Fix-a-Flat sealant are fully incorporated. To do that, you have to shake it well for at least 30 seconds to 1 minute before using it. This is a simple and very important part of the process.
Note that there were some reviews whereas the aerosol spray did not work because it was not shaken well before use. This could result in a critical error that would lead to an even bigger problem. Not following this crucial instruction may lead to product waste and the tire may possibly not get repaired.
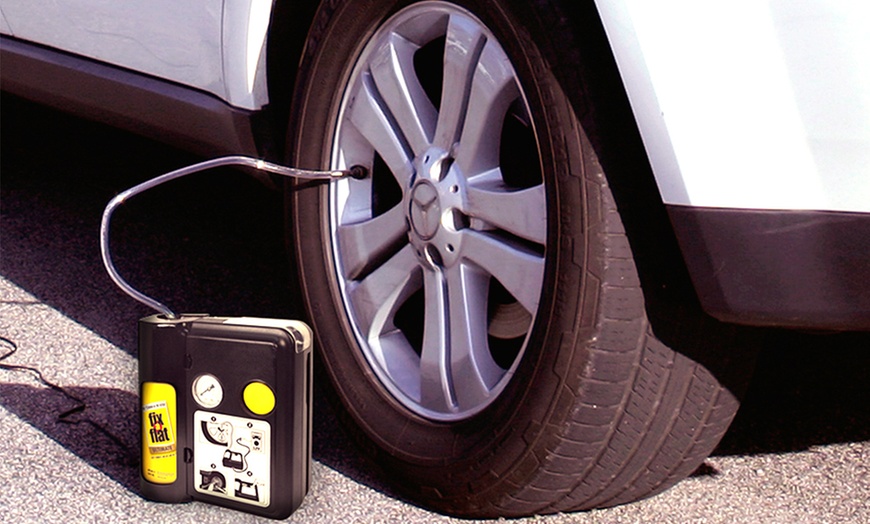
Step 4: Attach the Hose on The Air Valve StemThis is the time where you’ll apply the sealant to your tire. Attach the hose to the valve, remove the safety pin and press the yellow button to start putting air and sealant to the tire. Keep in mind that you will use the whole sealant can on your tire. Make sure that you apply the whole sealant to your tire to prevent any malfunctions. We will give you a quick guide on which size to use for every type of vehicle.
It’s easy to know if the procedure was done correctly. The tire rim should start to lift off the ground during the process. If you see that the white liquid stops flowing to the hose, that simply means that you’ve used up all the sealant from the can.
Step 5: Drive Your Car AfterwardsYou do not want your sealant to sit on the bottom part of the tire. It will cause malfunction and imbalance to your car. You want to make sure that the sealant is completely flowing in the tire. To do that, you have to drive your car for about 5 to 10 minutes and check whether there are changes. After driving for 5 to 10 minutes, inspect your tire once again and see if there are improvements.
For some cars, TPMS (Tire Pressure Monitoring System) is a way to determine whether your sealant was effective. You can easily see the TPMS on your car dashboard. If the light turns on, it means that the procedure was able to fix the problem.
As soon as you were able to fix your tires using Fix-a-Flat, it is highly recommended that you seek help from tire experts to check the condition of your tires. You would want to make sure that the tire is properly checked and fixed. That being said, Fix-a-Flat is a very effective tool to fix your tires for an emergency. But you need to make sure to cross out every possible factor as to why your tire had a slow leak. Consulting from experts and securing spare tires, and another Fix-a-Flat can is most helpful.
You only have to resort to aerosol sealants when there is an emergency at hand. Depending on this, every time you have tire trouble will result in unexpected tire replacement and could cost you more money.
Step 7: Measure The Pressure Of The Tire Using a GaugeIt is very well proven that having a gauge can serve as a huge help whenever you have tire problems. By measuring the PSI of your tire, you would be able to determine whether the aerosol worked or not. Keep in mind that the standard pressure of the tire should be around 30 to 35 PSI. If the PSI still falls behind the recommended range, it is most likely that the slow leak issue has not been solved yet.
Every vehicle has a different tire size. Surely, an SUV vehicle has a bigger tire compared to a sedan. Subcompacts would have the smallest tire size while trucks have the biggest ones. It is imperative to determine your tire size before availing Fix-a-Flat. That way, you will be sure that you have enough, not less sealant for your tire whenever you get a slow leak.
We will list down different sizes of Fix-a-Flat sealant and tell what size of the vehicle is it best used for.
 (#S60430)
If ever you have a larger size for a smaller vehicle, it’s best to consult tire experts on how to proceed with the method. Alongside this, you can also monitor the fixing by using a tire pressure gauge to check the tire’s air pressure.
Risks and ConditionsYou can see tons of reviews from the internet whereas they say that Fix-a-Flat indeed works. However, there are also reviews that state that it did not help at all. It is hard to argue about the matter, that is why it is important to keep in mind that Fix-a-Flat is not a permanent solution
Aside from that, we have to remember that Fix-a-Flat can fix small punctures such as nails or small shards (1/10th of an inch or lower). However, there is not enough evidence that FIx-a-Flat can mend broken tires with large holes (a quarter of an inch or higher).
Slow leaks are frequently associated with pinch damage to the sidewall, particularly on the inner sidewall where these are not apparent. These are results from low-pressure collisions with curbs, potholes, and railroad tracks. These usually cause a bubble on the sidewall between the layers of the case, which might subsequently burst more forcefully. Even if the source of the initial leak is fixed, sealants will not be able to repair this sort of damage.
Even with tiny punctures, tire sealants may react differently with the tire, preventing a proper fix and may result in a tire replacement.
Other ConsiderationsThere were reports that Fix-a-Flat does not seem to work well in cold regions. The reason behind this is that sealant gets frozen quickly and causes the tire to have an imbalance movement when on the go.
Keep in mind that by using any sealants, the tire is at risk for a long period of damage.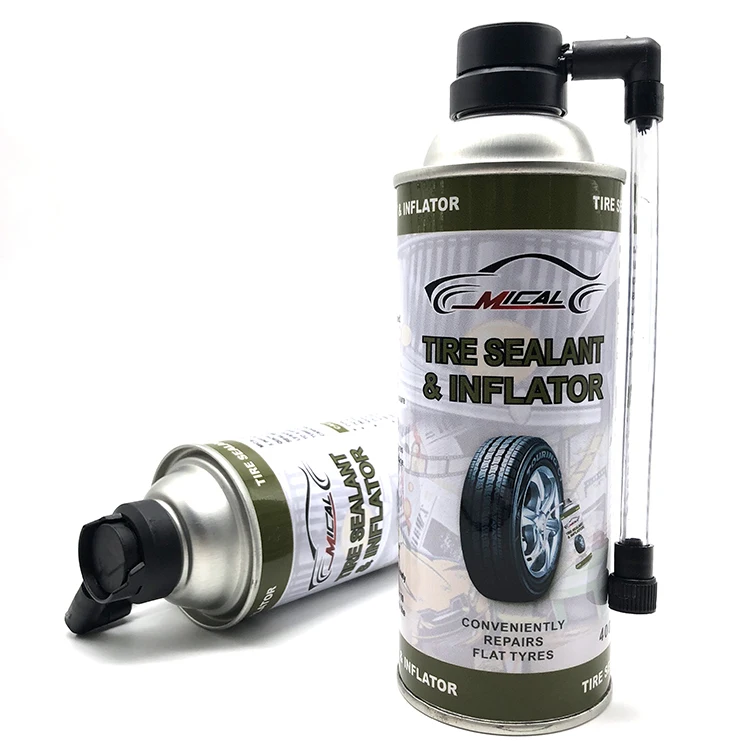 It may not manifest quickly but if not treated right away, it can cause the tire to be inefficient and be subject to replacement.
Lastly, Improper use of any sealants can disrupt the detection of TPMS for vehicles. That is why it is highly recommended to follow all the steps precisely to prevent this from happening.
FAQ’sHow Long Can Fix-a-Flat Be Effective?Fix-a-Flat sealant can be effective for as long as 3 days or 100 miles of driving if the sealant is applied correctly. Knowing that this is not certainly a permanent solution to slow leaks, it is better to get your tires repaired and consult the experts whether it needs a replacement.
Can I Use Fix-a-Flat on Quiet Tires?No, Quiet tires have treads that are coated with foam. If any sealant is applied, the sealant may absorb all the foams from the tires resulting in strong vibration and unwanted noise. Since there is no way to remove the foam, this will lead to tire replacement.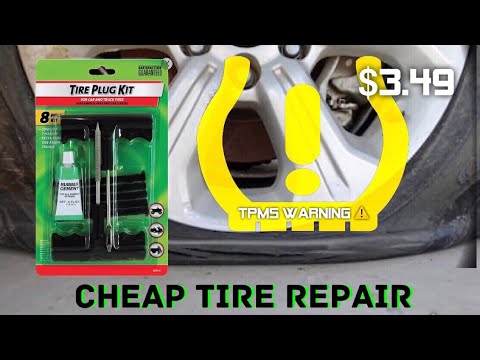
Yes, there are. But what makes Fix-a-Flat aerosol sealant stand out is its household name. Primarily, its reputation in fixing small punctures has been tested and proven by many car owners. Aside from that, Fix-a-Flat has by far, the easiest and quickest method for mending slow leaks.
ConclusionWhether the reason for having a slow leak is a rough road or a nail on the road, we proved that there are ways to mend our tires easily and quickly. However, we have to remember that aerosol such as Fix-a-Flat is only as good as a bandage. Learning how to replace a flat tire, and determining whether a tire has a slow leak is important for us to be able to decide on which best route to take.
Recently Published GuidesTop Tire Retailers
A flat tire is not a fun situation to be in.
It can happen at the most inconvenient time leaving you stranded on the road.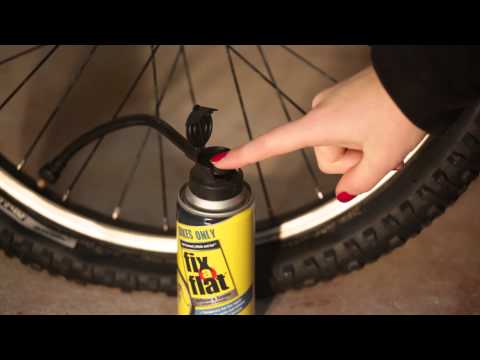
Oftentimes, the cause of a flat tire is a result of a slow leak due to a puncture in the tread area of the tire or air leaking around the rim.
While tire sealants can in some cases fix rim leaks, the products are not really recommended for such a leak.
If you want a proper guide on fixing the leaks, you can check our in-depth guide: How To Fix A Tire From Leaking Around The Rim?
Here though, we’ll talk about how tire sealants can offer a quick and painless temporary solution for slow leaks around the tread, can stop a tire from losing air too quickly, and put you back on the road with ease.
The short answer is yes, you can use fix-a-flat sealant to fix small punctures but it may not be the most reliable product.
Fix-a-Flat does not contain any particles to physically clog up the hole. Instead, it contains air in the sealant which when released from the can pushes the sealant into the tire, finds the source of the leak, and forms a latex foam to seal the leak.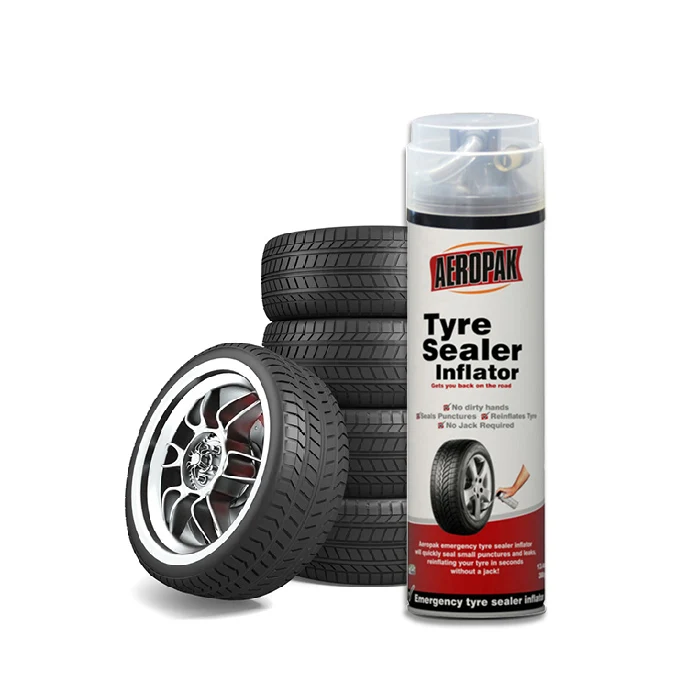
Of course, a product as such that does not contain particles to physically seal the leak, you can imagine that it will only work for very minor leaks and in some cases even outright fail to mend the leak which is apparent from many unsatisfied consumers that complain about the very same issue.
Although the manufacturers claim Fix-a-Flat seals punctures up to a quarter-inch (1/4’’), several unhappy consumers fail to agree with this claim.
The consensus around Fix-a-Flat is very mixed.
Some consumers complain that Fix-a-Flat is just evil in a can as it does not work in fixing a flat whatsoever and instead damages their tire.
Others praise it for being a quick and effective solution for getting them back on the road.
The bottom line is that Fix-a-Flat is not really the best when it comes to a tire sealant product and there are other options available that offer much better reliability.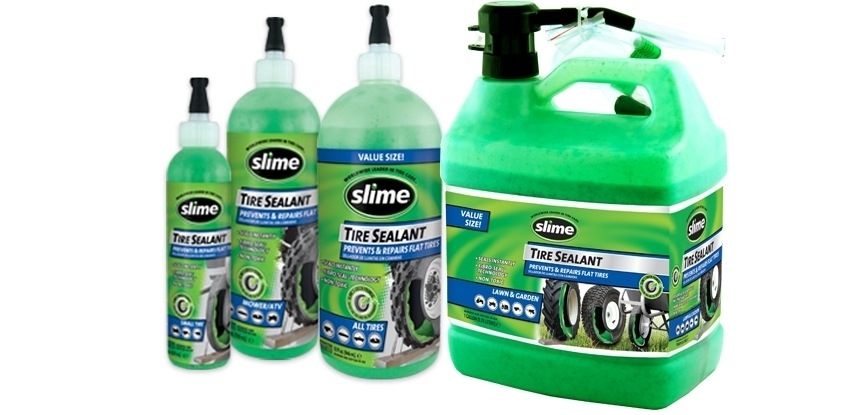
Watch this short video from Scotty Kilmer addressing the issue:
Fix-a-flat, along with other tire sealants of the sort, is intended to be used temporarily, preferably only for emergencies allowing you a quick and reliable solution to get you back to an auto-shop or your home.
Different manufacturers claim different lifespans for their sealants.
The manufactures of Fix-a-flat rate it for about 100 miles or 3 days after it is used (whichever comes first).
It is possible to get more or less life from the sealant which is apparent from many consumer reports.
Several consumers report that their can of Fix-a-Flat was unable to withhold the leak in the first place while the same can lasted for weeks for others.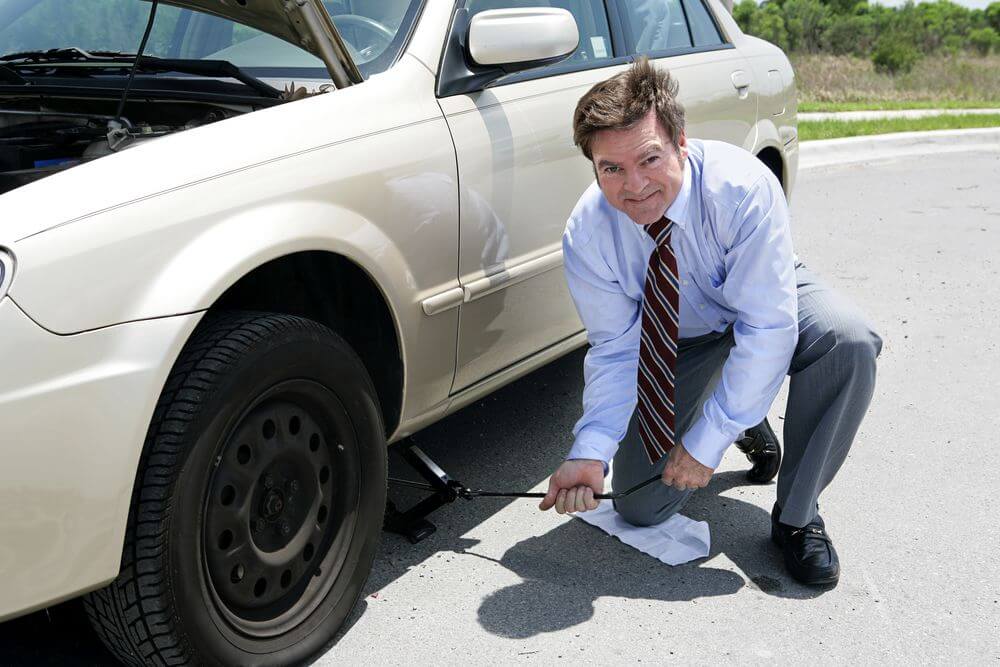
Fix-a-flat certainly isn’t the brightest against its competitors when it comes to reliability.
However, the key takeaway is that you should always use the sealant as a temporary fix only and not try to get more life out of the sealant than the manufacturer’s recommended usage.
An important question that drivers have in mind is whether a tire sealant like Fix-a-Flat is bad for their tires? Will it cause damage and potentially ruin their tires?
Well, the answer to that question is that it depends.
Many modern tires include a Tire Pressure Monitoring System (TPMS) sensor that gives real-time information to the driver about the pressure inside the tire.
Tire sealants are notorious for damaging the TPMS sensor.
However, the manufacturers claim and many consumers report the fact that Fix-a-Flat is entirely TPMS-sensor safe.
The contents inside Fix-a-Flat are just a liquid foam formula with air.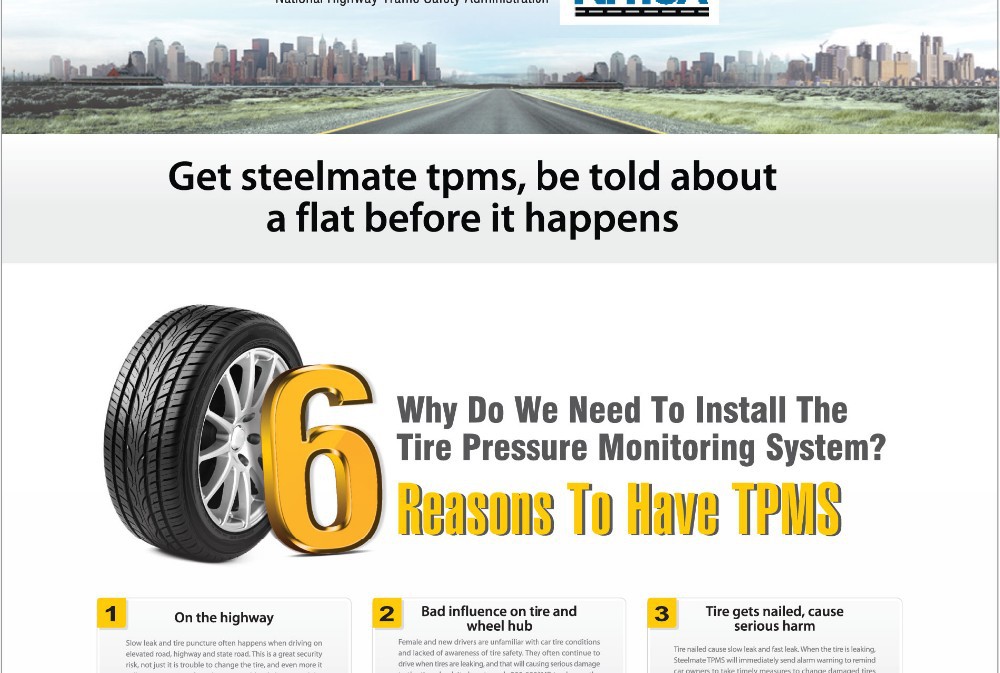
At extreme cold temperatures, the material inside Fix-a-Flat freezes and solidifies inside the tire.
Such an outcome is hazardous for safe driving as it causes tire imbalance, poor handling, and steering on the road.
Corrosion is something drivers are always paranoid of when it comes to using Fix-a-Flat or even any tire sealant for that matter.
But do these products actually cause corrosion?
Well, the answer is no, only if you use them as a limited-time solution. After all, tire sealants really are not a permanent fix and the onus is on you the driver, to clean the stuff and repair the tire as soon as possible, or else prolonged exposure to the chemicals may very well lead to corrosion building up on the rim.
If used only for the recommended usage of 100 miles or 3 days (whichever) comes first, fix-a-flat does not corrode aluminum or damage any protective coating that modern rims come with.
Consumers complain that Fix-a-Flat left a huge mess in the rim, but that is merely because they tried to use the product as a permanent solution, which is certainly not advisable.
TL;DR
Fix-a-Flat is TPMS sensor-safe, does not corrode or cause any damage to the wheels but does freeze in extremely cold temperatures resulting in tire imbalance.
Tire sealants available on the market can be divided into two categories:
The idea is the same in both these categories. They generally (with some exceptions e.g., Fix-a-Flat) contain some form of high strength Aramid Fibers commonly known as Kevlar in the liquid that find the hole or the puncture inside the tire and plug it from the inside.
The liquid acts as a carrier for transporting the fibers to the site of the leak and the fibers then clog up the hole essentially forming a seal.
Tire sealants are intended to be used in a worst-case scenario only.
There are much better options for fixing a flat tire, but they all boil down to availability, the amount of time you have on your hands, and ease of access on the road.
You can mount a spare tire to get you back on the road, but chances are that if you are short on time or have no experience in changing a tire, it can prove to be a nightmare for you.
For similar reasons, having a tire plug kit in the trunk of your car will do you no good as well as it takes quite a bit of experience and familiarity and a fair bit of time as well to install a plug.
Another option may be using a 12-volt air compressor to easily inflate the tire that provides you with enough tire pressure to get you back home or to an auto-shop if the leak is slow enough.
But if none of the options are practical in a flat tire scenario, carrying a can of sealant in the trunk of your car can turn out to be a lifesaver.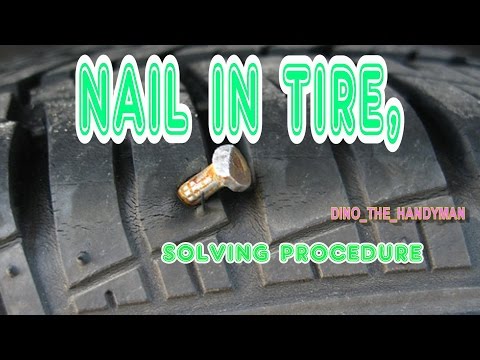
A sealant is a quick and easy fix that does not require jacking up the car or unmounting the tire from the wheel. Little to no expertise is required for using a tire sealant.
This alone makes it worthwhile to have it in the boot of your car.
An important thing to note when it comes to using a tire sealant is that future repairs can be a real pain for you as most auto-shops are unwilling to repair a tire that has been treated with a tire sealant as it takes additional effort and time to clean the tire.
You may end up very well just replacing the tire instead of repairing it.
So, just keep that in mind when using a tire sealant that you may need to clean the tire yourself first or find a local auto-shop willing to first clean it for you.
While fix-a-flat is capable of mending slow leaks and is comparatively the cheapest, it is not the best tire sealant product by far. There are several products available that outperform Fix-a-flat and give you more bang for your buck.
This green-colored viscous slime product reliably seals up to 1/4’’ (6mm) hole. It is TPMS sensor-safe, and does not cause any damage to the alloy construction of your wheel. The edge it has over Fix-a-Flat is that it has a great lifespan and does not freeze in extreme temperatures and offers much better reliability across its cans.
However, it is a tad bit more expensive, more difficult to apply into the tire, and requires more quantity (16 oz./473 ml for regular full-sized tire and 12 oz./354 ml for motorbikes).
The advantages and the overall reliability of the product far outweigh its cons and due to these facts, it is our go-to recommendation for on-road purposes.
For off-road purposes, it is one of the best products available on the market.
While other products claim to mend up to 1/4’’ (a quarter-inch) puncture, FlatOut tire sealant actually claims to mend up to 1/2’’ (half-inch or 12 mm) hole!
That is double the size of a puncture! Satisfied consumers verify that it can actually mend a hole that size, which is no ordinary feat whatsoever.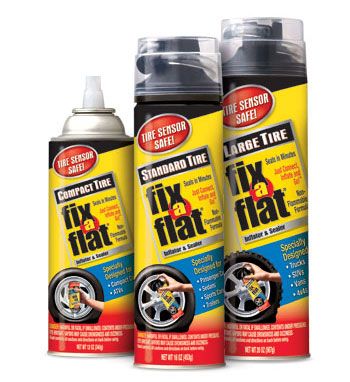
Considerably more on the expensive side, yet it is a capable sealant that manufacturers claim to last more than 6 months and is perfectly capable of mending holes up to a quarter-inch (1/4’’ or 6 mm puncture).
Tire sealants are a cheap and relatively easy solution when it comes to a slow leak resulting in a flat tire. However, we cannot re-iterate enough that they are intended for temporary use or emergencies only when time is of the essence and no other viable options are available. In such a scenario, a can of tire sealant can prove its worth by immediately and painlessly putting you back on the road without having to jack up the vehicle and remove the tire.
(Visited 9,665 times, 8 visits today)
90,000 here are you yourself (and you can’t) - the magazine for the wheel ofLADA
UAZ
KIA
Hyundai
Renault
Toyota
Volkswagen
Skoda
Nissan
BM -Benz
Mitsubishi
Mazda
Ford
All brands
Most often, we ourselves are to blame for the fact that tires become unusable.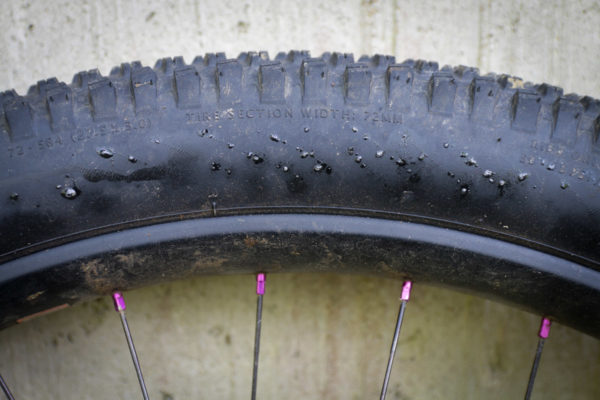 But this can be avoided.
Related materials
You have never seen such tires: even the police were surprised
In the process of using a tire, a variety of damages can occur, most of which are the fault of the driver. As a result, rubber is wasted, and since the law prohibits the use of different tire models on the same axle, you have to spend money on replacing the second tire.
The most common damage is puncture . This is the most harmless type of damage, but only if you notice it in time and repair it right away. It is absolutely impossible to drive on a flat tire, even a couple of meters! The damage caused by running on a flat tire or with low pressure is catastrophic. This causes the sidewalls to deform more than they should, which causes the tire to overheat, delaminate, and the carcass becomes unusable due to broken cords. As a result, the tire will have to be thrown away. In addition, the edge of the rim can also be damaged.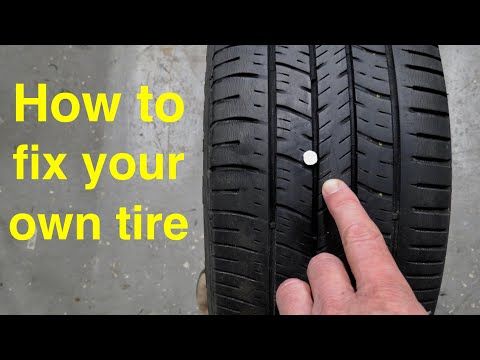
Punctures are of two types: with and without cord damage. To determine this, it is necessary to remove what pierced it. If the edges of the puncture tightly converge, then the cord is not damaged and it will be possible to repair the tire without removing it from the disk. Otherwise, if the edges do not converge, you will have to disassemble the wheel and make repairs with strengthening the frame from the inside. Alternatively, in the field and in the absence of a spare wheel, such a puncture can be repaired without removing the tire from the rim, after which you can carefully drive to a tire fitting or garage and make a full repair.
Related materials
Is it possible to pump up a wheel without a compressor - the experiment "Behind the wheel"
When repairing, the puncture site should be cleaned and marked. Further, it all depends on what kind of repair kit you have - as a rule, instructions are attached to them. There are sealants that are poured into the tire through the nipple, after which the wheel turns with the puncture down and the substance seals the hole. Repair using a tourniquet or insert is somewhat more complicated, but also more durable: the edges of the hole are polished with a special tool, after which the tourniquet treated with a special compound must be inserted into the tire through a puncture with a special awl, pulled out (not completely) out and cut flush with the surface.
In case of damage to the cord due to a puncture, the tire must be removed from the rim in order to install a reinforced patch with an additional cord on its inner surface. One of the sides of such patches has an adhesive layer that promotes cold vulcanization. After such a repair, wheel balancing will be required. To seal punctures from the inside, patches in the form of a mushroom are also used, with a leg that goes into the puncture. Such patches are also covered with a special adhesive for cold vulcanization.
Cuts or holes , unlike punctures, are not repairable, as they violate the integrity of the frame, which can no longer be strengthened. In addition, breakdowns are always sudden and occur on the go: the tire abruptly loses pressure and before the car comes to a complete stop it has time to make several revolutions “on the rims”, which breaks the cord and destroys the layers. It is not recommended to use such a weakened tire, even if it was possible to repair and strengthen the place of the rupture or cut, in the future.
Related materials
8 tire storage rules - do you follow them all?
Incorrect storage of tires can cause cracks . The danger of such damage is that moisture enters the cord through cracks, which renders the frame unusable. In addition, air can escape through cracks. Unfortunately, cracks are not repairable, and tires with them will not last long: sooner or later they will deform, become covered with swellings due to rusted and torn cord or because of driving with pressure below the recommended one.
Blisters or bulges can appear on a tire for a variety of reasons - it always happens due to a broken cord or delamination in the carcass. In the first case, an obstacle was hit and the impact broke the cord or the cord was cut through with a sharp object. In the second case, there is no damage on or near the hernia, which means that it appeared either due to a factory defect, or due to frequent driving with pressure below the recommended one. The danger of hernias is that they can explode at any moment and provoke a skid, which will lead to an accident. If there is nothing to replace a tire with a hernia, then it is better to rearrange it to the rear axle and drive very carefully. Like cracks, a hernia cannot be repaired. Sometimes small blisters resulting from impacts or cuts are reinforced with reinforced patches, but there is no guarantee that the tire will not explode. Therefore, tires with hernias are recommended to be replaced immediately.
Related materials
Tire blackening - 6 ways to polish. Inexpensive!
Tire sidewalls can be damaged by rubbing against curbs or the asphalt edge when pulling over. If you are prone to such a driving style, then it is recommended to inspect the inner and outer sidewalls from time to time and, if abrasion is found, swap the wheels in order to prevent the cord from being exposed - the rubber thickness on the sidewalls is small (1.5–3 mm), and it can be rubbed to the frame very quickly.
Often the cause of tire damage can be poor-quality tire fitting , during which the bead ring was damaged. In this case, the tire loses its geometry and “sits” crookedly on the disk - it writes out “eights” during rotation, and lateral vibration appears during the ride. It is impossible to repair such a tire - you need to replace it with a serviceable one as soon as possible before it damages the suspension: rods, hubs and bearings.
You can find out whether you are using tires correctly and what invisible damage they have received by the characteristic wear of the tread, the varieties of which are collected in the table for convenience:
Double side shoulder wear
Driving with lower than recommended tire pressure.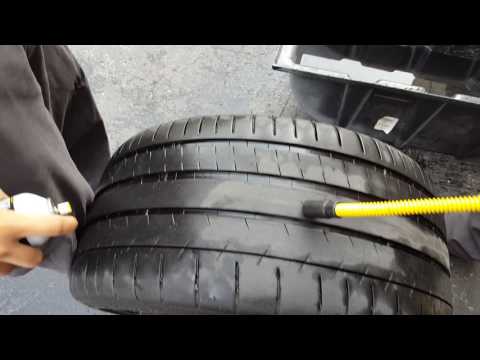
Inflate the tires to the pressure recommended by the automaker (a plate with recommendations is attached in the driver's door opening) and find the cause of the fall: puncture, cracks, hernia, nipple, rust on the disc rim in the place where the tire fits, etc.
Center wear
Tire pressure too high.
Reduce the pressure to the recommended (indicated on the tablet in the driver's doorway)
In the form of rings and furrows
can be found on trailers or rear wheels of pickups and vans due to vibrations and vibrations and vibrations due to vibrations and vibrations bouncing at high speeds.
Changing wheels on a loaded axle to equalize wear, driving with a heavier load.
Chipped wear with cuts
Frequent wheel spin on rocky surfaces.
Move the wheels to a non-driving axle, use the gas pedal more carefully when starting to move.
Photo: Petr Urbanek / Unsplash
Our new video
Iranian cars for Russia: what, when, how much
Consumption 2–3 l/100 km! Test of the most economical UAZ
Test of the earliest surviving VAZ-2103
Like this article? Subscribe and you will always be in the know!
Driving on Yandex.Zen
News smi2.ru
Hello, dear guests and readers of the site "Electrician's Notes".
I continue a series of articles about RCDs. And today I want to answer your question why RCD knocks out.
After all, it works unexpectedly and suddenly, which leads many citizens to a dead end. By the way, I have long wanted to write this article.
I have accumulated a whole collection of stories on this occasion, and it will take a lot of time to consider each case separately and in detail.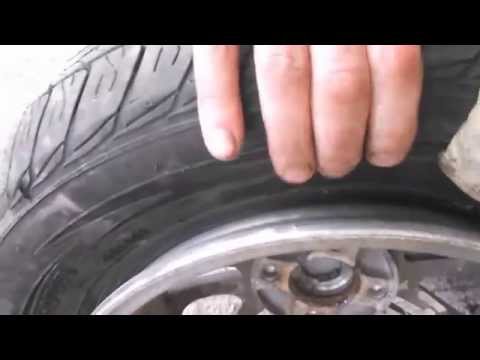 So I decided to do the following. In this article, I will describe all the reasons for the operation of the RCD, taking into account my acquired experience. If you do not find the answer in this article, then write to me by mail or in the comments, and I will be happy to help with solving your problem.
So let's get started.
Do not think that RCD trips just like that. In most cases, this happens for reasons that I divide into the following groups:
All of the above causes are due to the presence of leakage current in the circuit. We just need to decide if there is an actual fault in the circuit and the RCD reacts correctly, thereby protecting us, or if the RCD trip is false and disconnects consumers needlessly. Let's consider each of these points in more detail. The residual current device (RCD) may trip falsely due to a malfunction of the normally open contact of the "Test" button. This contact can "stick", which will lead to a permanent operation of the RCD. Whoever forgot what this button is, then read my article about the principle of operation of the RCD. In such a situation, as soon as you lift the RCD lever in the direction of switching on, the RCD will not turn on, i.e. lever will not lock in the on position. The next reason for false operation of the residual current device is a malfunction of its trigger. RCD in this case will suddenly turn off from any extraneous vibrations and fluctuations, for example, when the door of the apartment suddenly slams or when working with a puncher. During operation, condensed moisture can form in the RCD enclosure, which will lead to leakage currents inside the RCD circuit. This will cause it to turn off accordingly. Personally, I only once encountered the manifestation of such a cause of a malfunction. The residual current device was installed in the ASU in the open air, which contributed to the accumulation of moisture inside the housing. At the time of switching on sufficiently powerful electrical receivers of an inductive or capacitive nature, as well as switching power supplies (phone charger, computer), the residual current device may work falsely. This can be explained by the occurrence of a short-term leakage current due to the peculiarities of the circuits of these devices. The most common RCD false trip that I have seen and eliminated occurs when the wrong connection diagram is chosen. The number of cases of errors when connecting an RCD leaves much to be desired, so I suggest you study the most common errors when connecting an RCD and not make such mistakes during installation. When a person touches current-carrying parts under operating voltage, a current begins to flow through his body (leakage current to the ground through the human body), which causes the RCD to turn off. I think you will be interested in reading articles about the effect of electric current on the human body and an example of an industrial accident with two electricians. If we take statistics, then such cases are quite rare, about 2-3% of all cases of RCD tripping. This is primarily due to a high level of protection and electrical safety, as well as a low possibility of electric shock in networks with a TN-S and TN-C-S grounding system. Taking this opportunity, I remind you that the use of RCDs in the TN-C grounding system is prohibited by the PUE. What should I do if the RCD is knocked out or tripped? I hear this question almost daily. Below I will give an algorithm of actions to identify the cause of the tripping of the RCD. Step 1. Turn off the input circuit breaker in the apartment or floor switchboard, and try cocking the RCD activation lever to the on position. If the RCD turns on, then go to step 2, if not, then the cause of the RCD trip is its trigger. In this case, you need to buy an RCD and install it instead of the faulty one. Step 2. It is necessary to disconnect the output circuits from the RCD, i.e. disconnect the outgoing wires from the output terminals of the RCD. Next, turn on the introductory circuit breaker in the electrical panel and try to turn on the RCD. If the RCD turns on, then go to step 3, if not, then the reason for turning off the RCD is a faulty contact of the "Test" button. Step 3. If, after checking the RCD in the first two steps, the RCD turned on, then the reason is: Let's move on. First of all, you need to decide in which circuit the RCD is installed and what is powered by it. Then we proceed to the next algorithm of actions. Step 4. Disconnect all electrical devices of this group (lines) from sockets or terminals and try to turn on the RCD. If it turns on, then go to step 5, if not, then the reason for the tripping of the RCD is: In this case, you need to call the specialists of the electrical laboratory at the place of residence, and they, in turn, will find and eliminate all faults.
Faulty "Test" button
Faulty trigger
Leakage current inside the RCD
Short-term leakage current
Wiring diagram
Human exposure to voltage
 But I recommend installing it anyway. Why? This will be a separate article.
What should I do if the RCD trips?