Tires can become damaged for a variety of reasons, and it can happen without the driver being immediately aware there's a problem. The most common types of damage are punctures, cuts, impacts, cracks, bulges and irregular wear. In this section, we'll explain the signs and symptoms to help you diagnose the issue, plus some useful tips on how to prevent them.
There are several types of irregular wear, the most typical variations being heel and toe wear, one-sided wear, and center wear. Here we explain how and why they occur.
a. Heel and toe wear
Heel and toe wear is a pattern caused by normal usage and suspension settings. It's the outwardly visible (and audible) manifestation of various distortional forces at work on the tread. To explain further, let's dive a little deeper into the design of the tread.
Tread grooves and sipes are essential in ensuring safety on wet and flooded roads. Particularly with low-profile tires, a higher percentage of tread void is necessary to take up the water and to improve protection against aquaplaning. Cross-grooves for water drainage take the form of freestanding blocks in the shoulder area. These shoulder blocks can wear into a heel and toe pattern as a result of rolling mechanisms under certain operating conditions.
These operating conditions include:
While the tire is rolling along the road, the freestanding blocks deform as they approach the contact patch of the tire, and they're compressed as they touch the tarmac. After they lose road contact, however, the blocks will snap back into their original shape, rubbing the surface as they do so. The result is a wear pattern on the block run-out edge, and it's more likely to appear on non-driven wheel positions.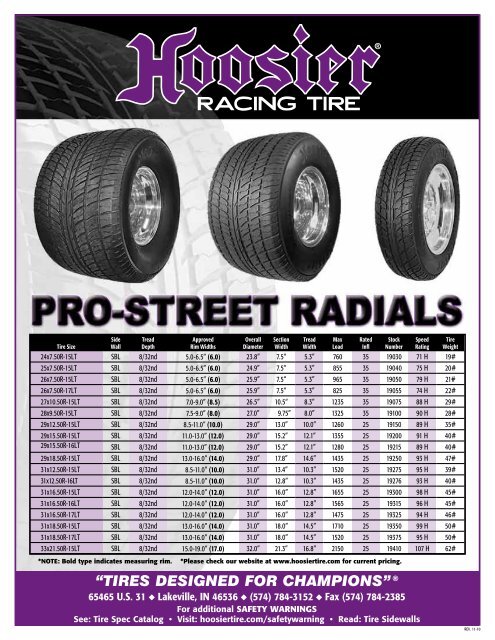
A minor amount of heel and toe pattern wear is reasonable and has no discernible effects on driving comfort. But if the wear is more extensive, more specific issues may be at fault. These can range from improper inflation, excessive toe-in, and low-wear applications.
b. Center wear
You can find this wear pattern on the driven wheels of highly motorized cars. During energetic acceleration, in stop-start urban traffic, or when accelerating away from traffic lights, these high torque levels can quickly increase wear of the tread center. Even today’s mid-range vehicles have modern engines which can generate high levels of torque and are capable of producing high degrees of slip.
c. One-sided wear
The single biggest reason for one-sided wear is because of axle geometry. Deviations can develop over time and are the result of, for example, aggressively mounting a curb.
Lowering the height of a vehicle in conjunction with low-profile tires can also affect wheel alignment.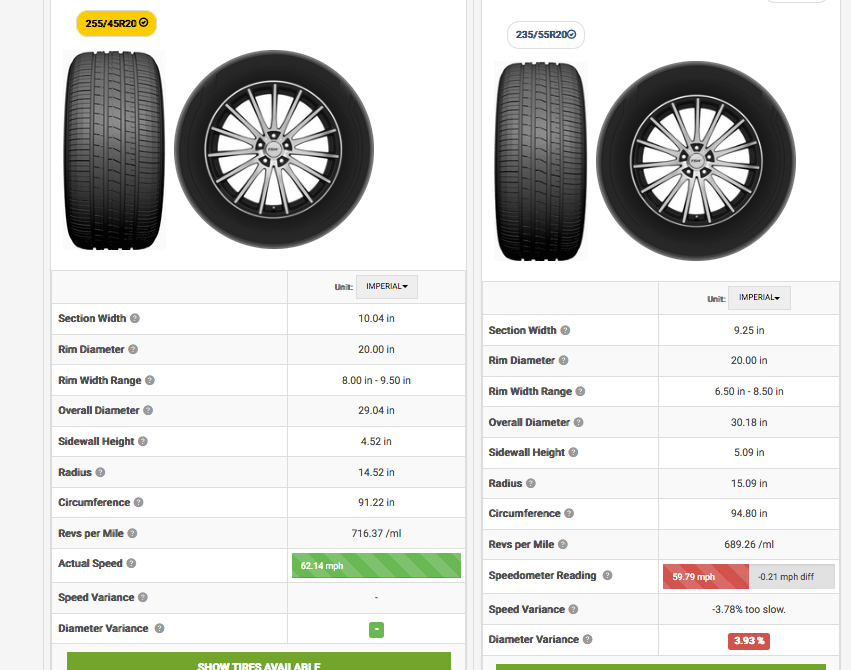 During driving, modified suspension arms tend to deviate the alignment of the wheels from the specified position. The problem can catch drivers unaware, because wheel alignment values can still be found to be within tolerance limits when measured in a static position on an axle measurement bench. But the manufacturer’s alignment data applies to vehicles as delivered and may not necessarily apply to customized cars. Thus, the result may be an increase in non-uniform treadwear.
If a vehicle’s wheels are misaligned, a qualified specialist can correct the deviation by re-aligning the wheels.
An impact break is damage inflicted on the carcass (the casing of the tire) after the tire comes into contact with certain obstacles. A pronounced bulge on the sidewall of the tire indicates destroyed cords inside the carcass.
Damage of this kind is usually caused by driving over objects – like curbs or speed bumps – at excessive speed or the wrong angle. Overstressing the carcass causes individual cords to break. The exact extent of the damage will depend on the speed and angle of impact, and the size of the obstacle. Careful motorists are usually able to avoid this type of damage, unless an obstacle suddenly appears in front of a vehicle and they can't steer around it.
Ignoring such damage increases the risk of tire failure at some point in the future, either delamination of the tread and plies or disintegration of the tire sidewall.
An impact break is sometimes confused with a sidewall indentation, but they are not the same thing. As we explain below, dimples or indentations in the sidewall are not a cause for alarm.
A tire sidewall is not always perfectly even; sometimes there will be dimples and indentations and may require a more detailed inspection to determine the causes. The essential thing to know is that indentations are harmless and aren't detrimental either to driving or safety characteristics. The dimples are superficial.
Indentations in the tire are best illustrated if you were to imagine tying a string around an inflated balloon and then gently pulling the string tighter. If the balloon is the tire, the string is the embedded carcass cords which are concealed by the rubber. These cords provide the tire with its strength and stability, and transfer steering and braking forces while driving.
During manufacture of a tire – or rather when constructing the carcass, to which the steel belt and the tread are attached – there are often one or two overlaps in the carcass. It's this overlap which is sometimes visible as an indentation after the tire is fitted and inflated.
But if you're in any doubt, have the sidewall indentations checked by a qualified tire specialist.
Cuts are the result of external influences like bad road conditions, protruding bodywork parts, or sharp, foreign objects such as stones or glass. If you discover damage in the form of a cut on the tire surface, you should visit your local tire dealer and have your tires immediately checked by an expert.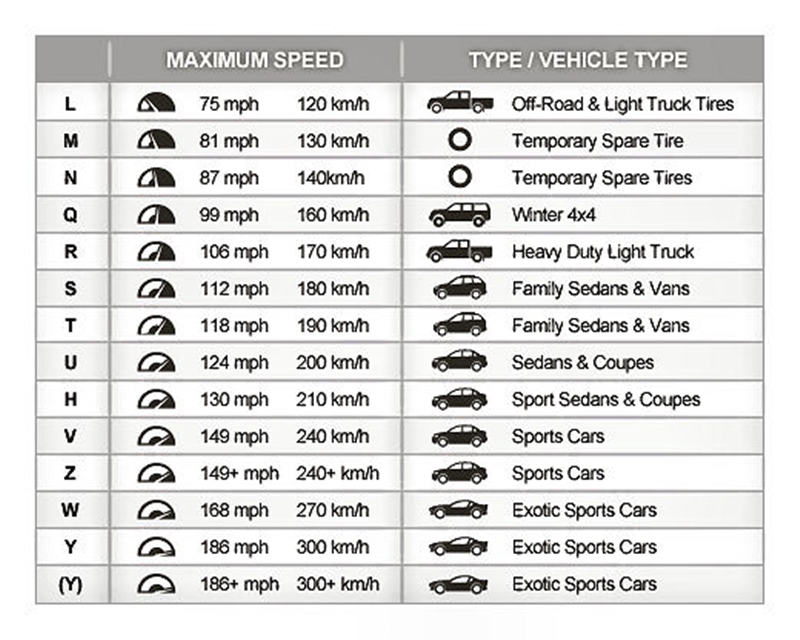
Punctures are the consequence of sharp objects on the road – for example, nails, screws, or broken glass – which pierce through the surface of the tire. If the puncture is deep enough, the tire could begin to lose air pressure. If you find that one or more of your tires are continuously losing pressure, or if you discover a nail or screw embedded in the tread, then visit your local tire specialist as soon as possible to have them repaired.
Change the position of the tires on the car at regular intervals (unless otherwise recommended by the vehicle manufacturer) to promote even tire wear. The position of the tires should be rotated, for example, when making the seasonal transition from summer to winter tires.
By rotating the wheels from the powered to the non-powered axle on a regular basis, drivers can expect to have a uniform pattern of wear on their tires. But as always, please observe the recommendations provided by the vehicle manufacturer.
If you find yourself in a situation where you have to drive over an obstacle in the road, approach it slowly and as close to the perpendicular as possible. Afterward, check your tires for exterior damage such as cuts, cracks or bulges. Also, avoid driving aggressively on unpaved roads.
Dealer Locator
But as with any vehicle components, tires are not immune to damage. And there are damages that are beyond repair. One such damage is within the tire sidewall in a form of bulge, cuts or chipped off rubber. So it begs the question, “how much sidewall tire damage is too much?”
To determine how much sidewall tire damage is too much you need to check the threads in the area of damage. If you can see the threads or the radial cords, it’s time to replace the tire. These threads are located 0.125 to 0.188 of an inch beneath the surface of the sidewall.
What's In This Guide?
Any relevant issues or deficiencies you encounter within the sidewall of your tires, may it be on the inner or outer side of the wall can be considered as sidewall damage.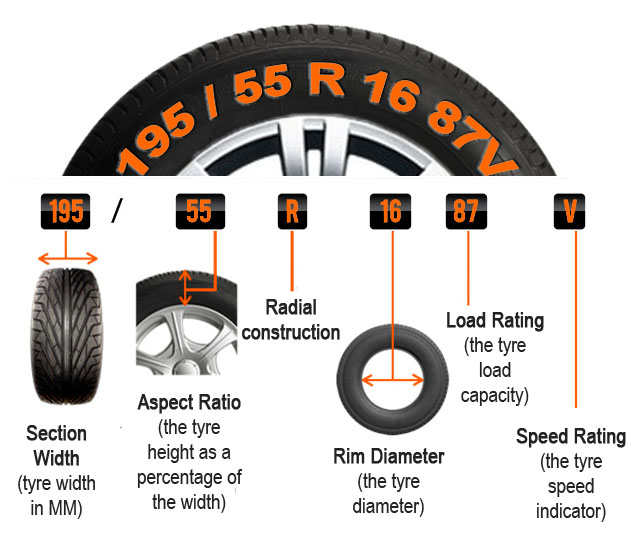 This is a very serious concern and can lead to a complete tire failure. Having said that, tire replacement is the most sound decision you could ever take to address this issue.
Since sidewall tire damage is any irregularities found within the walls of the tires, it can be categorized from minor cuts and abrasions, bulging or bubbles, to more severe cases of missing huge chunks of rubber.
Missing huge chunks of rubberThese are portions within the sidewall of the tire that has been chipped off from the tire. Also, it is most likely that the inner cords that hold the structure of the tire are already exposed.
Deep and big abrasionsAbrasions caused by hitting a curb or running on a deep pothole will vary their size depending on the impact. These can range from a slash-like appearance or rough scapes to some extent. However, regardless of the size, these abrasions should not be left unnoticed.
A sidewall bubble is a bulge protruding on the side of the tire caused by high-impact damage such as hitting a pothole, running into a curb, or driving too fast over speed bumps. Like any other sidewall tire damage mentioned, you shouldn’t ignore it since it can also cause a blowout.
Causes of Sidewall Tire DamageSidewall tire damage can be obtained by one or more factors brought by the driver’s negligence to the quality of the tires. These factors are not limited to the tire age, factory defects and poor quality checks, overloading, under-inflation, and tire wear.
Tire AgeTires are built to withstand rough road conditions and certain load limits. However, their elasticity, strength, and durability don’t last forever. The majority of tire manufacturers declare an 8 to 10 years lifespan from the manufacture date.
After such, the rubber components will become brittle and dry, the inner plies that hold them together weaken, and eventually, their parts will start to fall apart.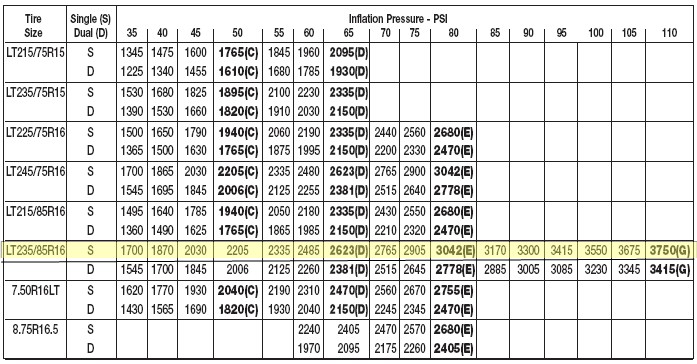
Whatever the type you’re using, or regardless of your frequency using it, tires deflate by themselves even in normal conditions. That is why a regular air pressure check is essential for your safety and tires’ longevity.
The case of under-inflation can be attributed to the driver’s negligence to regularly check air pressure. Under-inflated tires result in tread and sidewall flexing more due to not having enough air pressure to carry the vehicle load. This puts too much stress on the sidewall that eventually leads to breakage and damage.
Factory defectsThere will be cases more prevalent on lower quality tires wherein they skimp on important tests before rolling off the factory. One of the classic examples is regarding the speed rating. Skipping the process of thorough checking for the proper speed rating, these poorly rated tires have the tendency to overheat and affect the sidewall integrity during sustained high speeds.
OverloadingOverloading your vehicle beyond its prescribed limit puts too much stress on your suspension system and ultimately on your tires. Too much weight causes them to flatten, or even explode as air pressure builds up on the sidewall plus the heat generated by friction while moving. Not to mention, overloading is also one of the culprits of compromised handling as this prompts the vehicle to wobble or wiggle from side to side of the road.
Tires that have significant wear on them are more likely to overheat faster than normal, and this overheating can result in a blowout. Additionally, the worst thing that could happen is when the reinforcement that maintains the shape of the tires was already showing up at the sidewall, and accidental hitting to the curb will definitely end up with a damaged sidewall.
Can I Still Drive with a Sidewall Tire Damage?If you notice that your tire has any sign of sidewall damage, you should have it replaced right away! Throw in that spare tire sitting on your trunk and proceed to the nearest tire shop to purchase a new one. You might want to consider calling for roadside assistance if you have concerns with your spare.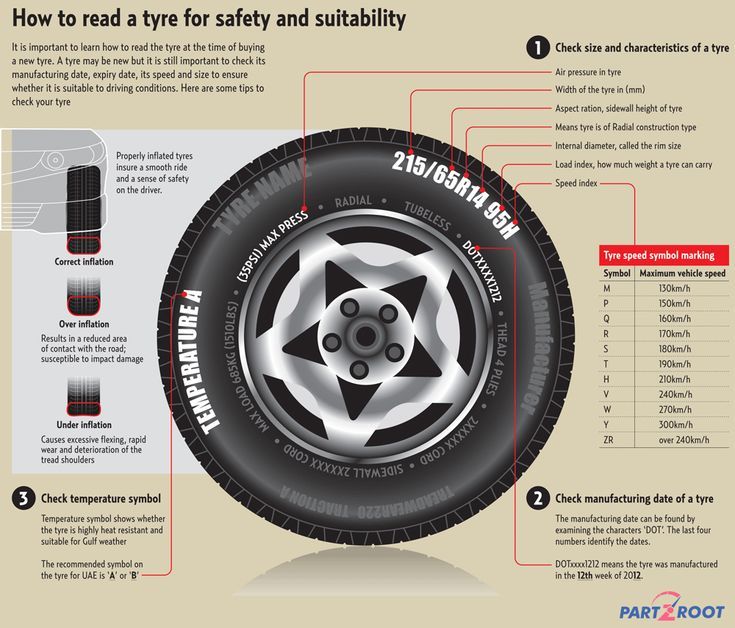
You may argue, “It still seems sturdy enough, why need to be in a hurry?”. Just because you can still drive with it doesn’t mean you should. Remember, safety is a priority the moment you turn on the ignition. Sidewall tire damage could cause a blowout at any second and can put you and everyone on the road in a dangerous situation.
Can a Tire with Sidewall Damage be Repaired?Whether the damage is just a shallow scrape, a bulge, or a chipped-off part of the sidewall, you should not attempt to repair sidewall damage as these are beyond repair. Also, don’t ever think of bringing them to any tire technician as there is an unwritten rule in the industry not to repair, patch, or plug any damage that occurred within the tire sidewall.
How to Avoid Sidewall Tire DamageYou can reduce the likelihood of having your tire’s sidewall end up with damage by following the basic instructions. These include regular checking of air pressure at least once a month, avoiding road hazards, only driving with recommended load limit and speed rating, and lastly, having them checked by tire experts should you feel something is not right with your tires.
You should have them check at least once a month or if you see any visual cues that they may be deflated. Additionally, you should conduct a cold tire pressure reading since the air pressure varies with temperature changes.
A good practice is to always have a tire pressure gauge paired with a portable inflator that can be powered by your vehicle’s power outlet. These tools don’t take up too much space and can even be stored along with your basic repair tool kit.
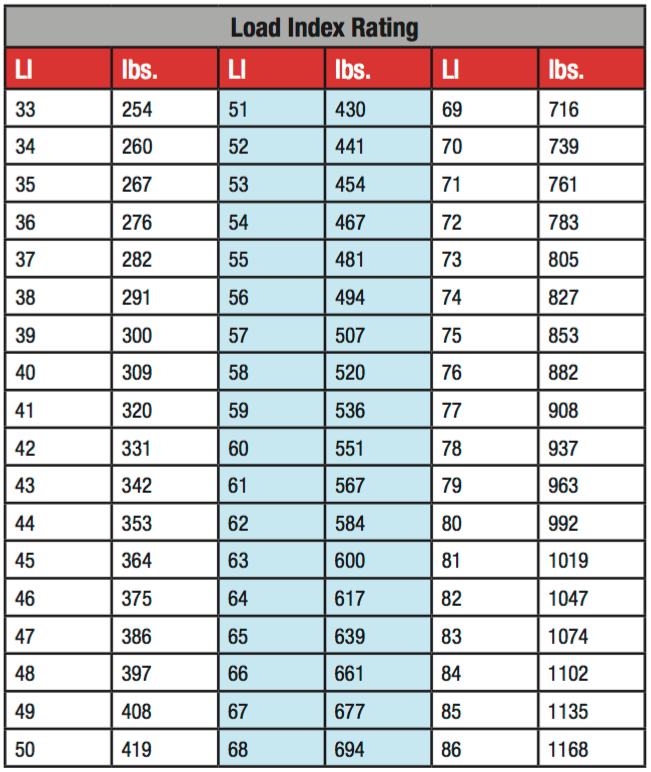
Match the vehicle load and speed ratings to the vehicle’s recommendationsIt is essential that you also know the basics of tire information reading. The code embossed on your tires does not only mention the size itself, it also indicates the speed rating recommendation. Additionally, the tire information sticker on your vehicle door frame clearly states the load limit with the recommended tire air pressure in psi.
Avoid road hazardsIt is best to plan your route ahead of time.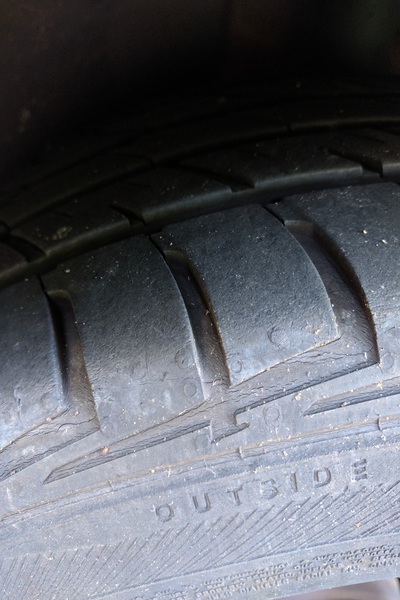 Steer away from areas with ongoing road rehabilitation or repair since these are home to a lot of construction debris such as nails and other pointed metals, as well as sharp stones that may cause abrasions in the sidewall of your tires.
Also, take a look ahead for potholes, and be careful when maneuvering near a curb not to draw too close or you’ll scratch your tire’s sidewall.
Have your tires checked by expertsTire technicians and experts have a wide experience dealing with such concerns over the course of their expertise. They may also look for other concerns on your tires that you may miss on inspecting.
Final thoughtsSidewall tire damage should not be treated the same way we fix punctures within the tread via patch and plugs. If you see that the sidewall damage already exposes the threads or cords of your tire, it is time to replace them at all costs.
90,000 table for repairing tires ROSSVIK| 9000 |
018 | 65x95/1 | |||
| 10x20 | 10 | 12x12 | 12 | 70x120/ | |
| 12x15 | 8 | 12x12 | 13 | 75x90/1 | |
| 18x15 | 8 | 14x14 | 15 | 90x105/1 | |
| 20x30 | 12 | 15x15 | 14 | 85x130/1 | |
| 15x20 | 12 | 15x15 | 18 | 75x110/2 | |
| 30x25 | 14 | 15x20 | 19 | 105x120/2 | |
| 20x40 | 15 | 15x15 | 20 | 90x135/2 | |
| 30x35 | --- | --- | 201 | 90/160x135/2 | |
| 30x45 | --- | --- | 202 | 90/160x170/2 | |
| 10x60 | 16 | 18x20 | 22 | 80x175/2 | |
| 25x30 | 16 | 18x20 | 22 | 80x175/2 | |
| 30x70 | 18 | 20x20 | 23 | 110x185/2 | |
| 45x50 | 18 | 20x20 | 23 | 110x185/2 | |
| 40x50 | 18 | 18x18 | 231 | 110x155/2 | |
| 45x40 | 20 | 18x16 | 251 | 115x145/2 | |
| 55x55 | 25 | 25x20 | 252 | 125x165/2 | |
| --- | --- | 20x20 | 33 | 100x125/3 |
| tire (mm/inch) | BOK 9000 9000 9000 9000 9000 9000 9000 9000 9000 9000 9000 9000 9000 9000 9000 9000 9000 9000 9000 9000 9000 9000 9000 9000 009 | Cunning |
Plate | 9000 patch | --- | 4x4 | 10-11 | 55x75/ 65x95/ 1 |
| Cargo | 6x8 | 4x4 | 6x6 | 9000 9 9000 9,00070x120/1 | ||||
| Transport | 8x10 | 4 | 8x8 | 13 | 75x90/1 | |||
| 8x12 | 6 | 10x10 | 15 | 90x105/1 | ||||
| 10x25 | 10x10 | 12x12 | 9000 -1010x20 | 8 | 12x12 | 18 | 75x110/2 | |
| 215.85 - | 20x20 | 10 | 15x15 | 19 | 105x120/2 | |||
| 265.75 | 15x25 | 8 | 10x15 | 20 | 90x135/2 | |||
| 15x50 | 10x10 | 15x15 | 22 | 80x175/2 | ||||
| 20x30 | 10x10 | 18 | 22 | 80x175/2 | ||||
| 30x40 | 15 | 16x16 | 23 | 110x185/2 | ||||
| 30x35 | 14 | 16x16 | 231 | 110x155/2 | ||||
| --- | --- | 20x20 | 25 | 115x145/3 | ||||
| 35x25 | 15 | 16x16 | 251 | 115x145/2 | ||||
| 40x50 | 16 | 18x18 | 252 | 125x165/2 | ||||
| --- | --- | 16x16 | 33 | 100x125/3 | ||||
| 20x60 | 18 | --- | 24 | 80x220/2 | ||||
| 25x80 | 20 | --- | 26 | 85x260/3 | ||||
| 25x70 | 20 | 25x25 | 40 | 105x200/3 |
9000
Shoulder
Running
Number
Plastic
9000
 50 - 12.00
 The table of damage limits is compiled on the basis of research by the world's leading manufacturers of repair materials. Additionally, changes have been made regarding patches developed by ROSSVIK for Russian conditions. The maximum dimensions given in the table are not recommended to be exceeded when repairing with a “cold” method and in cases of using imported patches with a smaller area.
| For radial tires | For bias tires | |||
| Tire size (inches) | Non-repairable area | Tire size (inches) | Non-repairable area | |
| Cars | 40 mm | 7 - 8.75 | 80 mm | |
| Light trucks | 60 mm | 9 – 14 | 100 mm | |
| Passenger | 60 mm | 16 – 18 | 125 mm | |
| Truck 7.5 - 16 | 75 mm | 21 - 29.5 | 150 mm | |
17. 5 - 23.5 5 - 23.5 | 90 mm | |||
| 24 - 29.5 | 125 mm | |||
| 30 - 33.5 | 150 mm |
The non-repairable area is measured from the bead edge down the inside of the tyre. Users of this table should take into account local road and operating conditions, ensure that the recommended safety limits are adequate and modify them if necessary. To repair damages larger than those given in the table, only one-stage tire repair technology should be used, and for maximum results it is recommended to use ROSSVIK thermal patches.
Repair of metal cord tires with textile cord patches is limited to the size of the damage in the tire no more than 2 carcass cables.
All large damages should only be repaired with special patches reinforced with metal cord. When repairing using the one-stage “TERMOPRESS” technology, the dimensions of the limiting damage are allowed to be 10% higher than the tabular ones, and when repairing with ROSSVIK thermoplasters - 20% higher than the tabular ones, without reducing the quality of the repair.
Main
WDS
WDS
Back to WDS list
Step-by-step work instructions:
Inspect the tire for damage and suitability of repair.
Mark the damaged area wax chalk.
damage development with outer side it is recommended to use cap cutter No. 15004. Sharpen cutter before each use.
Using an abrasive pencil type RN-626 or abrasive cones RH-611, RH-613, round off tears damage to prevent its further increase in the process of operation.
Sand the damage with RH-304 abrasive and bring the edges at an angle less than 120°. Perform a mechanical cleaning of 15-20 mm from funnel edges.
Inspection pin TRT208AP inspect the carcass of the tire (tire) in the area of damage on no delamination. If a there is a bundle, then it is necessary delete.
Measure the maximum length or the width of the damage. Determine the actual number of layers of cord for further selection of the patch according to the table D-series patches.
According to the D-series patch selection table, select the patch for this damage. How to work with the table: 1. Find the number of cord layers in the table (vertical left). 2. Find the size of the damage (horizontal top). 3. At the intersection of the two columns, determine the required plaster.
Inside the tire (tire) under right angle swipe axial lines through the center of damage.
lines, apply a plaster to the center of damage so that the arrows on the patch were directed to the tire beads (tires).
Mark the area with wax chalk more mechanical cleaning patch dimensions by (10-15 mm).
Apply to marked area buffer cleaner.
On a wet surface, remove dirt with an HXT-14 scraper.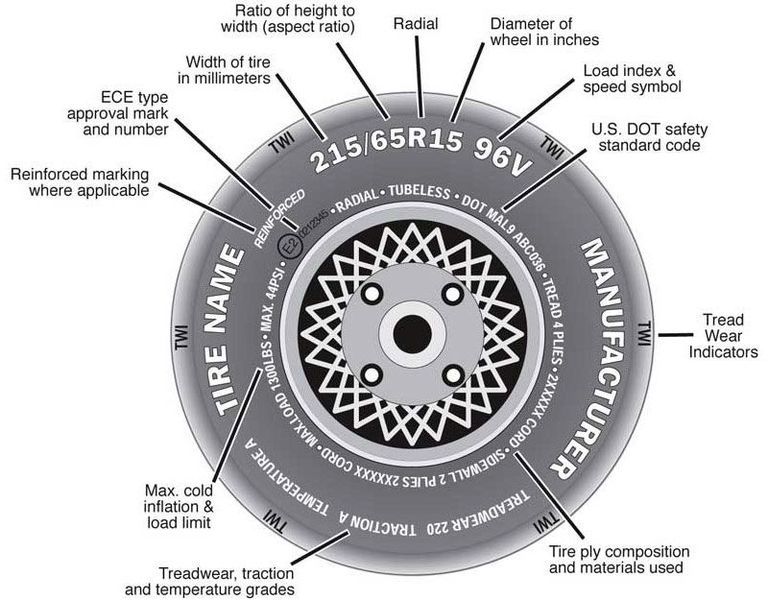 This procedure will allow avoid clogging the abrasive tool with dirt and give surface a certain softness, which increases the duration tool service.
Clean marked area abrasive hemisphere RH-107 without leaving technological bumps.
At the final stage stripping roughen with a textured brush S-892 to give the surface a microtexture.
Pneumatic vacuum cleaner XC-54V Clear Rubber crumb formed after roughening.
Apply to prepared surface hot melt adhesive two layers with an intermediate drying 10-20 minutes. If a refurbished area for installation the patch is processed to cord threads, increase the drying time of the adhesive by 10 minutes.
Prepare the patch for installation.
1. Make a cut on the protective transparent film with sides of the adhesive layer.
2. Carry out a preliminary removal protective film.
3. Pull film from center to edge patch and return.
marking lines, place the patch on the center damage and fix it with hand pressure in the area of the open adhesive layer.
Gradually remove the protective film from under patch, maximum apply patch tightly to the tire (tire), displacing air. When installing the tire bead patch must be free.
To increase quality adhesion of the patch to tire (tire), it is necessary to pierce it with an AT-2010R-1 pneumatic hammer, creating an emphasis with outside in the repair area.
Roll on HXT-15 the edges of the damage to the patch, forcing out air, and measure the maximum funnel depth to determine post-vulcanization time.
Apply a thin layer rubber mixture into the funnel so that the adhesive patch layer and open carcass threads were covered.
Through the center of the damage lay drainage cotton thread and bring out its ends beyond the edges of the funnel by 5-10 cm. Fix the ends. These drainage threads are laid to divert air during vulcanization repaired area.
Cut into small pieces rubber compound strips it is recommended to warm up up to a temperature of 60-70°C to give plasticity. blunt fill the damage as tightly as possible with the object and, applying a layer by layer, roll with a roller.
Extruder application BS-30H or BS-40HN with operating temperature 70-90°C and corded rubber compound speeds up the process filling damage.
the center of the damage to be filled by 5-10 mm, floating but coming to an end. Depth of damage to be filled rubber compound was 12 mm. The height of the transferred layer is 8 mm. Rubber compound curing time at a temperature of 140 ° C = 1 mm x 4 min., at ambient temperature below 18°C = 1 mm x 6 minutes. How to calculate curing time. Depth of damage - 12 mm + height shifting layer - 8 mm = 20 mm rubber compound x 4 min.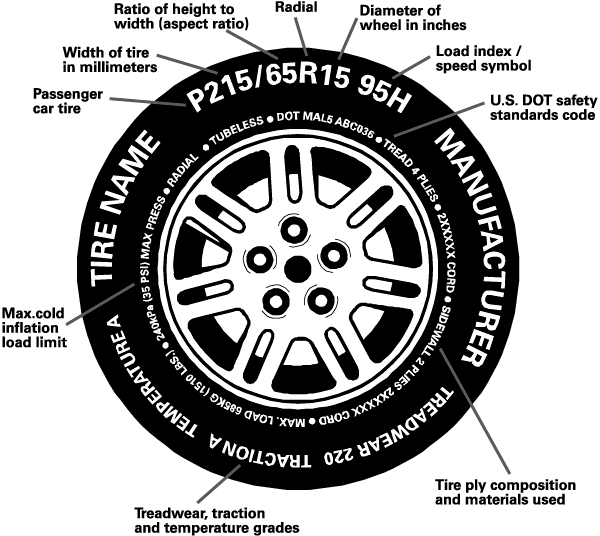 = 80 minutes - vulcanization time. We also take into account warming up the repaired area tires up to operating temperature of 140°C. It is necessary to calculate the time to get the most out of the process. vulcanization.
Fill in the area between lugs to create a flat surface in flexible laying area heating element. Attach small filler bags filled with fine-grained sand on 60-80%.
Install the tire on the vulcanizer according to the instructions for this equipment. After vulcanization is complete, remove the tire, make sure quality of repair and give it time for cooling down.
When repairing a tubeless tires apply sealant tubeless layer patch perimeter and remaining cleaned surface sealing layer.
then the place of repair is needed sprinkle with talcum powder to prevent sticking to the pneumatic chamber.
Remove the remaining threads. If necessary, remove with abrasive cutters excess rubber from the outer side of the tire.