Changing tyres is a fact of life for any cyclist, be it worn out treads or simply the inevitable punctures we all encounter at some point.
But changing a tyre or inner tube doesn’t have to be a major chore. As the video above shows, learning some simple techniques means saving all the struggle and you don’t even need tyre levers for the majority of setups.
Follow our steps and you can have your flat fixed, or tyres swapped, in no time.
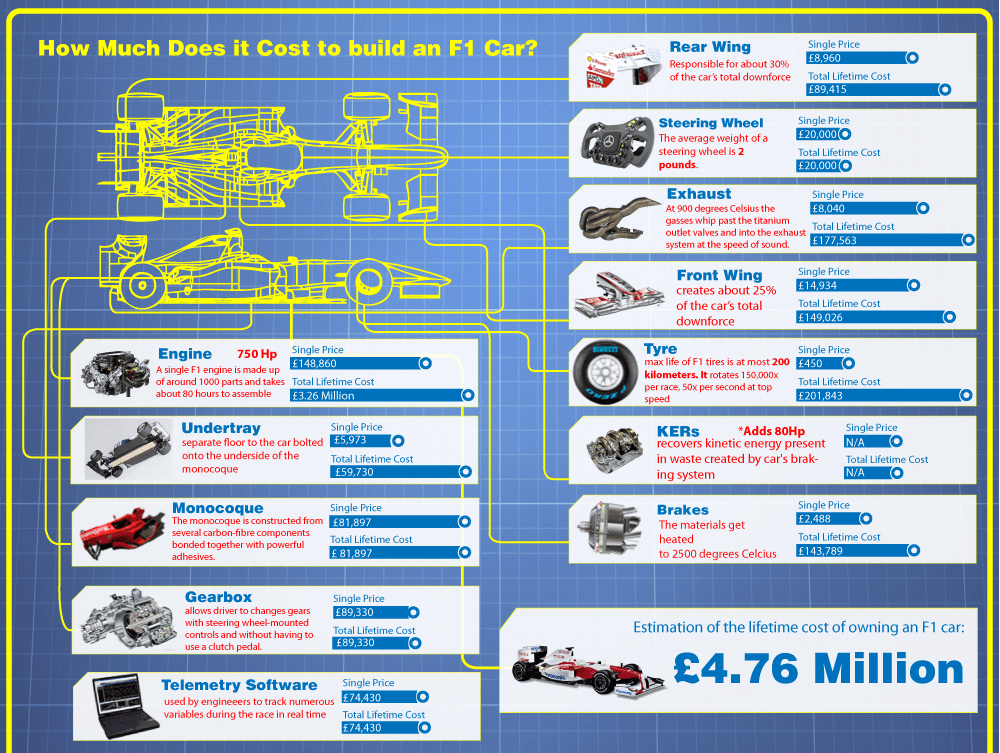
The key to being able to remove a road bike tyre quickly and efficiently is getting all the slack that exists between the rim and the tyre into one place.
The technique is to work around the bead of the tyre systematically, unlocking it from the rim (as often you’ll find it stuck) and then gripping and pulling with your fingers and thumbs working towards a single point; ending opposite the valve works best.
Note: If you end up at the valve you won’t be able to push the tyre off.
With a ‘slack’ point established, hold onto it as you support the wheel between your feet on the floor, and then starting with your thumbs begin to push the tyre bead sideways off the rim. Once you’ve got it started you can use the palm of your hand, in an outward rolling motion, to be a more effective lever.
Note: Sometimes this requires a fair amount of force and good technique, which will only come with practice.
Also note: some tyre and rim combinations are tougher than others. It’s a good idea to try your particular setup at home first, so you are not doing this for the first time on the side of a busy road in the pouring rain.
Once you’ve got a section of the tyre over the edge of the rim it should be fairly straightforward to continue and push it all the way off.
At this point, if you’re at the roadside due to a puncture, now is the time you need to thoroughly check inside the tyre carcass for the offending thorn/flint/shard of glass or whatever has caused the flat.
Beware: sharp bits of glass poking through can also cut fingers!
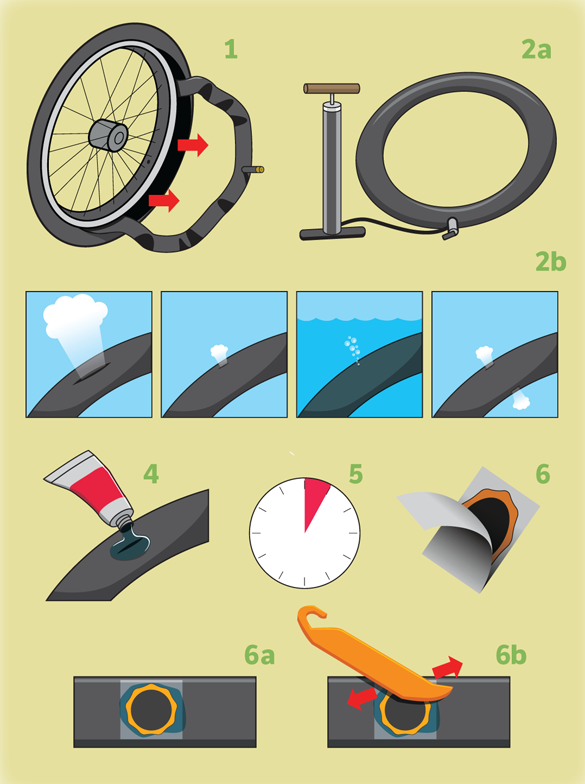
To refit the tyre: start with pushing on just a single bead so the tyre is held in place. It’s a nice touch to align your tyre logos with the valve and it can make locating future punctures easier. Details count.
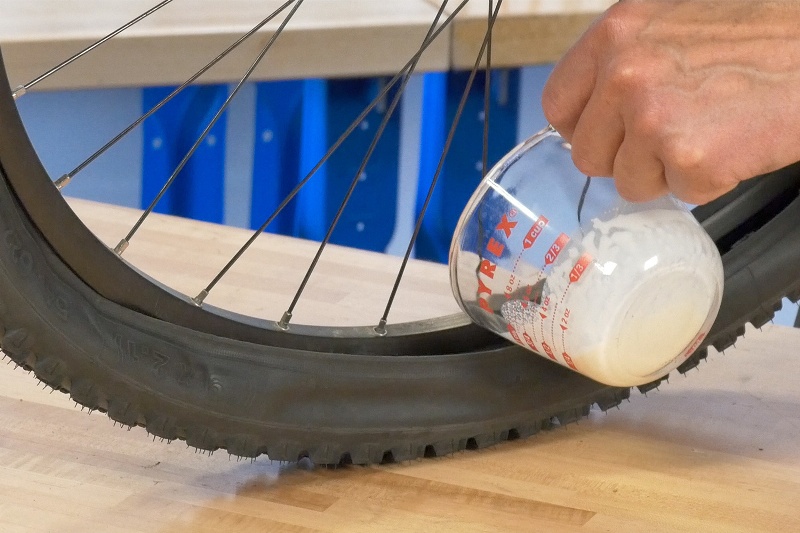
Before trying to fit the new tube, the best tip I can offer is to inflate it slightly.
It’s really important the tube has some air inside as this will make it hold its 'roundness' and shape which makes fitting it so much simpler, and significantly reduces the chance of pinching the tube during fitting.
Pop the valve in first and then guide the inner tube into the tyre carcass. Immediately you will notice how much easier this is to achieve with the partially inflated tube, rather than a dead flat one.
Check the inner tube is completely within the rim bed all around.
Place the wheel on the floor once more, valve at the bottom, and begin opposite (at the top) working the bead of the tyre back into the rim bed with your thumbs.
As per the tyre removal technique, try to work the slack around with you as you push the tyre bead in. With practice this will become second nature.
At the end point (try to finish at the valve) it may look like the tyre will not fit, but trust me it will. It just needs a good shove.
Strong thumbs are helpful, but it’s good technique not brute strength that makes this easy. Again, practise!
If necessary go back a few more times, working the slack around once more and pushing a little more of the tyre on each time.
Tip: Little bites are helpful – ie, push a bit on at a time, don’t try and push a huge chunk over in one go.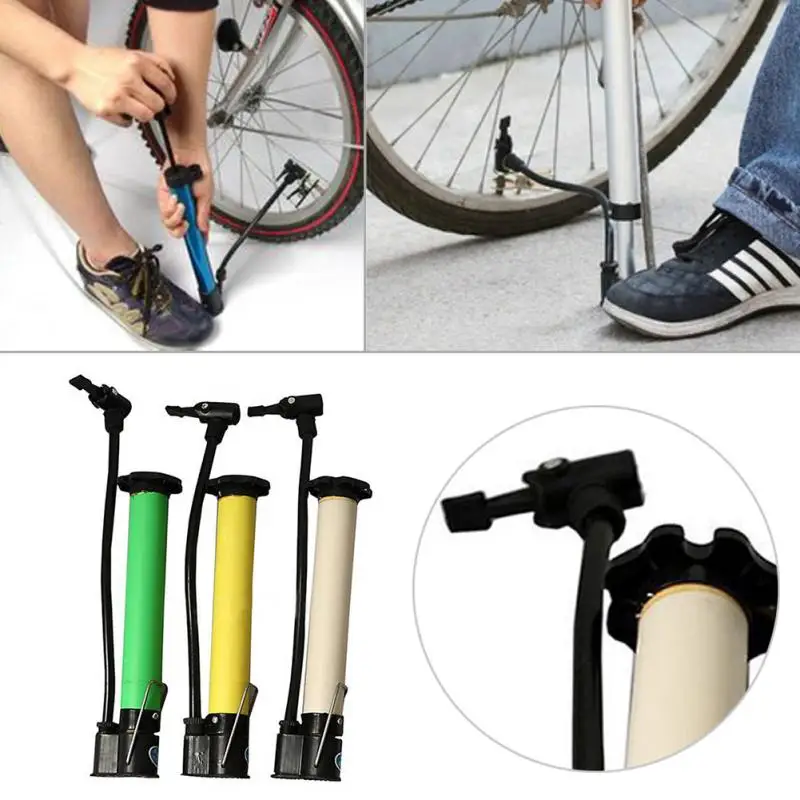 You’ll just end up frustrated and with very sore thumbs.
Why you should finish at the valve: Once the final part of the tyre is seated end by pushing the valve stem upwards (into the rim) to ensure the tube is not trapped here (where it is usually thickest).
I’d advise one final visual check around the entire bead to check no part of the inner tube is trapped before inflation. But this should never be a worry if you have put sufficient air/shape into the tube in the first place, as it won’t lie flat.
Now you’re ready to inflate, using your mini pump or CO2 inflator if you’re at the roadside, or your track pump at home.
Ready to attempt something tougher than changing an inner tube? Read our guide on how to build a home workshop
Biketoworkday is supported by its audience. When you buy through our links, we may earn an affiliate commission.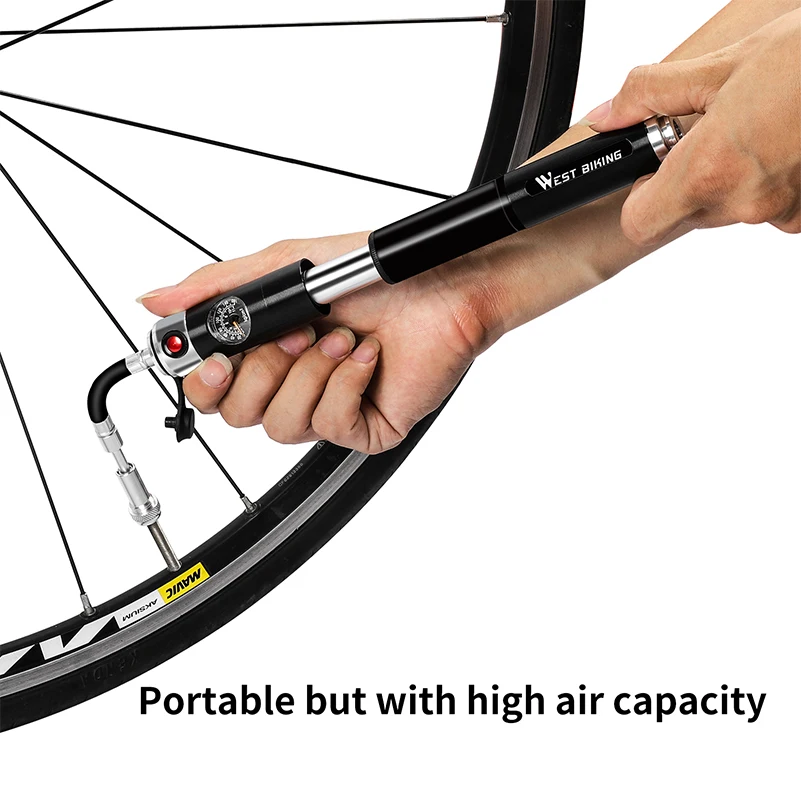 Learn more
Written by Gary Johnson / Fact checked by Henry Speciale
One of the worst things that could happen to a cyclist is having a flat tire during long-distance biking. There are times when you mistakenly forget to bring a bike repair kit, and you have nothing to use to fix it.
Thus, it is vital to build up some repair skills to prepare you for this kind of cycling scenario. So, how to fix flat bike tire without tools?
Well, you have to learn how to remove the tire from the rim, inflate the tire tube, and put it back to the bike rim. The procedure is easy once you read our guide below:
Table of Contents
 Remove the tire
No one likes a flat tire that keeps going flat. It is a major hindrance on the road and can eventually compromise your safety. Having a flat tire means having to slow down, and taking time to inspect and repair your bike.
There are several reasons why your bike tire goes flat. Here are the top culprits of your flat bike tires:
1. Glass shards
Glass shards are hard and strong materials that can easily puncture any object. They cause a lot of damage, especially to pedestrians or bikers because they are often not visible on the road. You can easily pass through it without even noticing. The next thing you know, the material punctured your tire, and now it’s starting to deflate.
Thus, it is essential to be very observant when biking. If there are any shiny material on the lane, it’s probably broken glass that has the potential to damage your bike tire.
2. Goatheads and thorns
Thorns and goatheads are also culprits. Goatheads are plant-born spike balls that can easily penetrate your tire. They are caltrops that stick to your tires, and eventually puncture them.
Like broken glasses, goatheads are not very visible on the road. Their color easily blend with the environment, and it would be hard for you to see them while biking. Thus, avoid riding on the edges of the trial, where more goatheads are located.
3. Pinch flats
Pinch flats or snake bites are little punctures on the edges of your bike tube. They are the result of the tube constantly being pinched between the road and the bike rim. It usually happens when you are riding at a speed. Most pinch flats start from underinflated tires given the lack of pressure to keep the rim off the road.
4. Tire wear
Excessive use of your bicycle also causes flat tires, and you need to change a bike tire without tools in the process. You might not notice, but your tire develops tumors due to wear. Bike tires that are ridden down to the cords will lack rubber to protect the tube within. As a result, sharp objects can easily penetrate through the material.
In case you unluckily encounter these things, especially during long-distance cycling, you might need knowledge on how to fix a flat tire bike without using any tool:
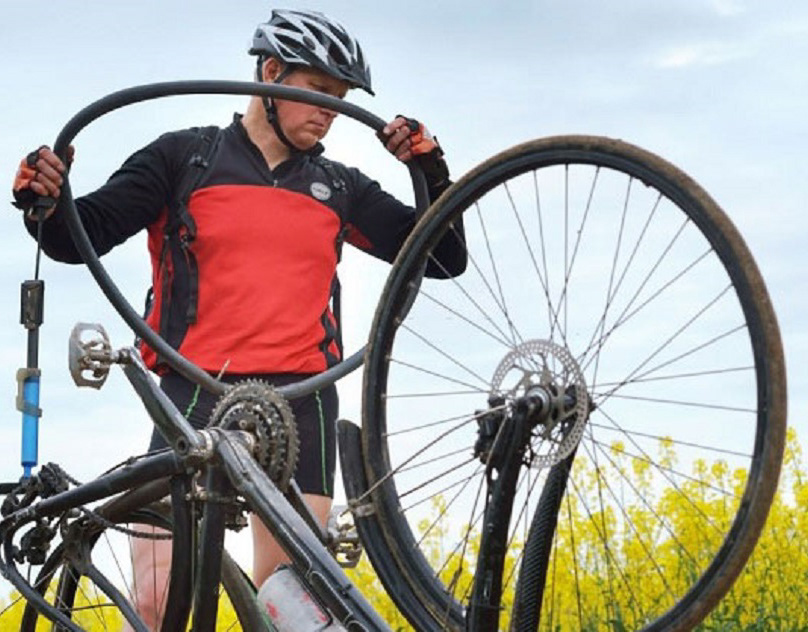
The first step to fix a bicycle flat tire without tools is detaching the tire from the bike wheel. You have to remove it slowly and carefully and avoid pulling it out from just one side. It is necessary to use both hands, so you can pull the wheel from the two sides.
You have to apply pressure when removing the tire from your bike given that you are not using any tool. Use the same amount of pressure from both sides of the tire to pull them at the same time.
The tire bead is the reinforced section of your bike tire that touches the rim. If you have a clincher road bike tire, it will probably have a tire bead. When you repair a flat bike tire, it is crucial to remove the tire bead by crouching down and placing the wheel in front of your knees.
Then, you need to grasp and pinch it from both directions to break the bead on the two sides. Afterward, roll it down as you follow the circumference of the rim.
To do this, you need to place both of your hands at the top andposition your thumbs on the rim. You have to pull the tire together with the tube towards the direction of your body. Apply pressure on your thumbs that are placed on the rim, so you can easily pull the tire from it.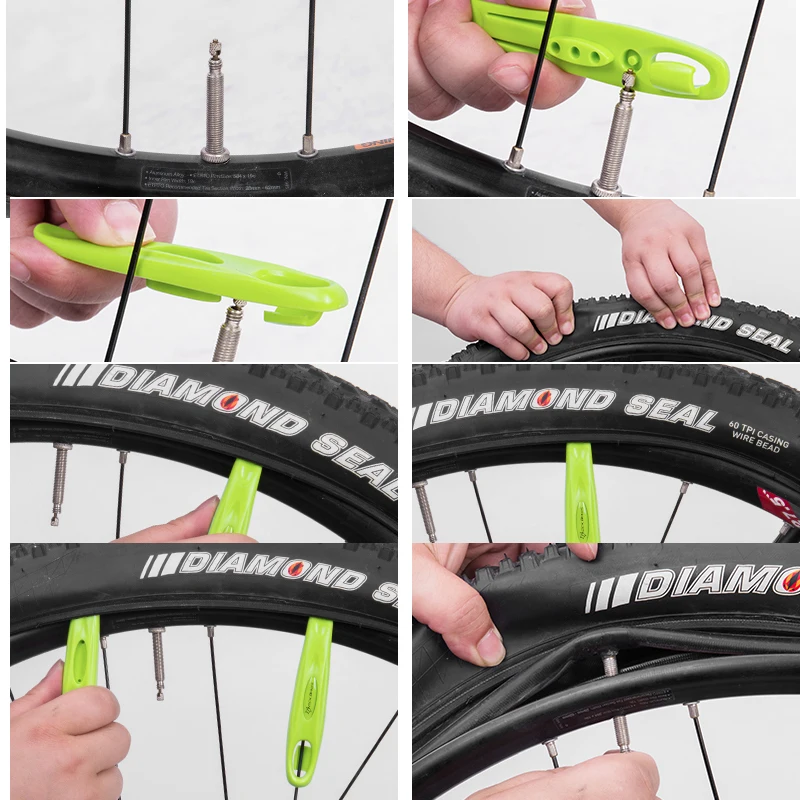
If it is not starting to come off, add more pressure on both of your hands. By this, you will notice the tire starting to come off, and it would be easier to remove it entirely. Inspect the source of damage and remove it.
Then, inflate it by opening the Presta valve and blowing air into the tube until you are confident there’s enough air inside. Ensure that the tube is in right shape, so you can put it back into the tire easily.
At this point, you should have already fixed the damages and inflated the tire tube. You are now confident to place the tire back to the rim. To do this, you have to push the back over the rim using your thumbs. Add pressure, and do this gradually until it is easier to roll over the rim.
You will notice that the tire pop back into the bead after it passes over a tight edge. Ensure that the tire is back in the rim. Finally, test drive your newly inflated tire and check if it has enough air.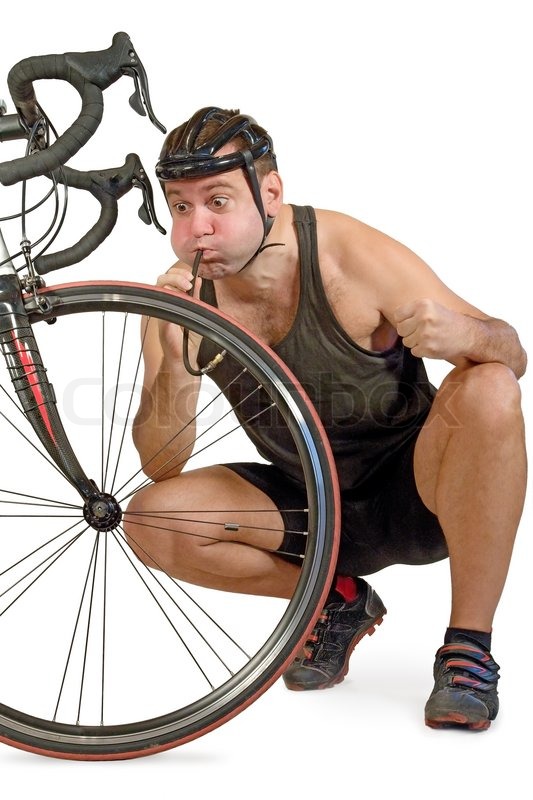
Fixing a flat bicycle tire without tools is easy if you are creative and have the proper knowledge. You will only need some patience, a good amount of energy, and enough skills to be able to remove the tire from the rim, inflate the tire, and place it back to the original location.
May this tutorial on how to fix flat bike tire without tools help you with your flat dilemma, especially in situations where you have no tools to rely on. The steps are very simple, and with just a few tweaks, you will have the tire back up again.
Gary Johnson
“I ride my bike to work for years, but is that enough? Our carelessness towards our surroundings has taken a toll on the environment. And now, everyone is responsible for changes; even the most minor contribution is counted. With this hope and spirit, I started with my partner to establish Biketoworkday to help more individuals commute to their work sites on their bikes.”
Contents
You can remove the tire from your bike yourself. But in order to cope with this matter without problems, you need to know the sequence of actions for dismantling parts. It will also be useful to familiarize yourself with the list of necessary tools and understand in which cases the tire must be removed.
Under certain circumstances it is necessary to remove the tire from the bicycle rim.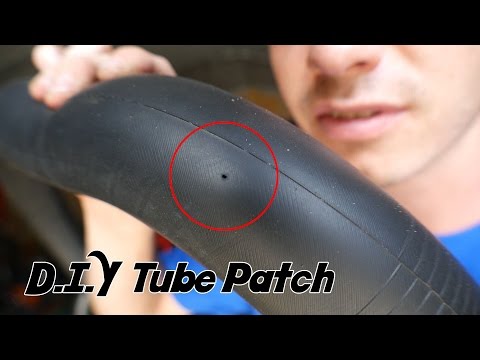 Sometimes this part needs to be replaced.
There are several reasons:
Removing a tire from a disc has its own algorithm of actions. It will require a few special tools. It is important to remember: it is undesirable to press too hard on the sidewall of the tire when removing. Also, the tool should be free of burrs and sharp edges.
The dismantling steps must be followed strictly, accurately and carefully.
To do this, you will need the following tools:
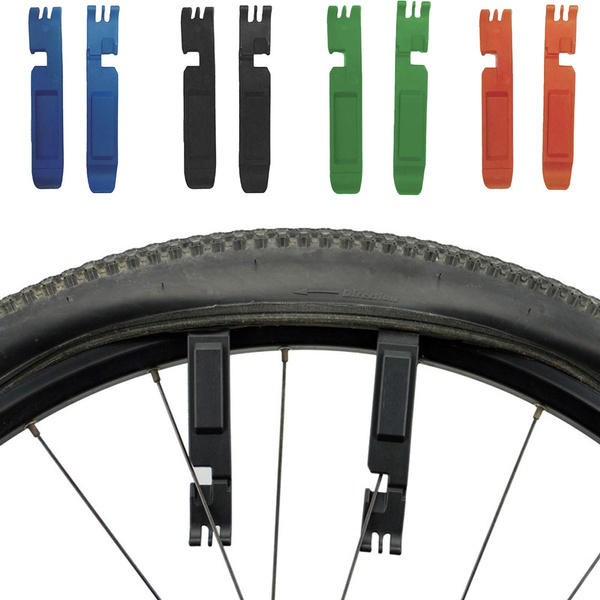
 Reminds me of plates made of plastic. Equipped with hooks on the sides. Needed to hold the edges of the tire when it is just beginning to be dismantled. Helps to remove the part without much effort.
 Once you have the necessary tools ready, you can start removing the tire from the rim.
Work steps:
 You can buy a special "shovel". She looks like a shoe.
 Anyone can pierce the camera while driving. And such an unpleasant situation, requiring the removal of a tire, usually takes you by surprise. Often a cyclist does not have the necessary tools with him. To replace a tire, you need to have at least a spare set.
Procedure:
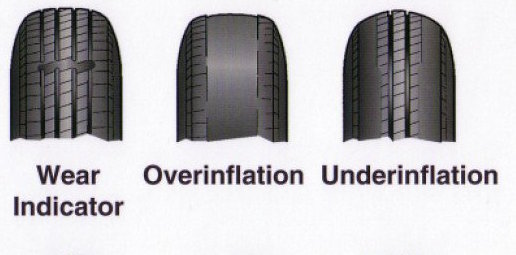
Comfortable riding requires optimal tire inflation. In case of lack of air in the tires while riding, the cyclist has to exert more effort.
Tire life is reduced. If the amount of air exceeds the optimal threshold, grip becomes worse. And, as a result, a tough ride and an increase in the possibility of a camera puncture.
In order to avoid punctures, scuffs and other problems, experts advise you to follow the rules for using bicycle tires.
General recommendations:

 Cracks need more minor repairs. It is important to remember: for long-distance journeys, it is better not to use refurbished tires because of their unreliability.
 Removing a tire without the help of specialists is easy. Many cyclists succeed right away. Accuracy, attention and the availability of suitable tools are all necessary conditions for a positive result. And so that the process of dismantling or replacing tires occurs less frequently, it is advisable to follow the rules for their operation.
Unfortunately, the violation of the integrity of tires and bicycle chambers is not a rare phenomenon, so the topic of our article today is how to remove a tire from a bicycle wheel and put it back on. To successfully cope with this task, you need to at least superficially know the design of a bicycle tire and know the special terminology. So let's get started.
Bicycle tire includes 4 elements:
Its purpose is to securely fasten the tire to the wheel rim of the bike. The materials for its manufacture are Kevlar (most often), synthetics or steel wire. Steel beading cable - the most budgetary. The cost of Kevlar cables is much higher, they have less weight, they are easy to store when rolled up. Kevlar cable can be taken with you on a trip as a backup. It won't take up much space.
This is its carcass or foundation. This element largely determines the strength of the tire. This is a diagonal weave of nylon threads. Weave density is determined by the number of threads per 1 inch. This figure is in the range of 24-130. Naturally, the higher this figure, the better the strength qualities of the tire.
This is a rubber cover. There are two varieties.
 It is used in tourist and city models of bicycles;
 This is the part of the tire in direct contact with the road. The performance of tires depends on the tread depth and type of pattern.
Bicycle tires are made from conventional rubber or polymeric materials. Rubber has a better grip on the surface, but in terms of wear resistance it is inferior to the compound. The cost of the compound is lower, but when driving off-road, it has proven itself better than rubber. By type, 4 main types of tread can be distinguished: slick, semi-slick, mountain, winter. Each of them behaves better in the environment for which it was created. Slick on the road, semi-slick off-road, dirt road, the winter tread has a spike for ice.
You may need to remove a bicycle tire in the following cases:
If desired, the tire can be removed and replaced without the use of tools (this will be discussed in detail). But, if you follow all the rules, you may find it useful:
To remove a tire from a bicycle wheel, proceed as follows:
 At the same time, try, if possible, to remove the air as completely as possible so as not to touch or damage the bicycle chamber;
 To mount, proceed as follows:
It remains to mount the wheel and apply the brakes. When working with a tire, do not forget that the camera is made of soft and thin material. All actions must be carried out so as not to damage the camera.
The possibility of a tube puncture always exists. The situation when you need to remove a tire can be taken by surprise, so that you do not have any tools with you. It's almost impossible to do this without tools. To replace it, you must have a spare kit if you took it and what kind of tool you still have. By default, we will assume that you still took the wheel repair kit for a bike ride. So, if you don't have montages, how can you deal with this problem?
For a comfortable ride on a bicycle, an important point is the optimal tire inflation. With insufficient inflation, the cyclist has to exert more force while riding, the bicycle tires wear out faster. Over-pumping reduces traction, makes the ride harder, and increases the risk of tube puncture.
To minimize the risk of punctures, look for tires with good side coverage when purchasing. Another indicator is cord weaving. The denser it is, the better the product. A useful device is a special anti-puncture tape located between the tire and the chamber.
Be sure to take a tire repair kit with you when you travel. This will allow you to quickly deal with the trouble.
To repair tubeless tyres, bikers typically use:
The most common repair tool is a cord harness. This is a nylon strip impregnated with an adhesive compound.