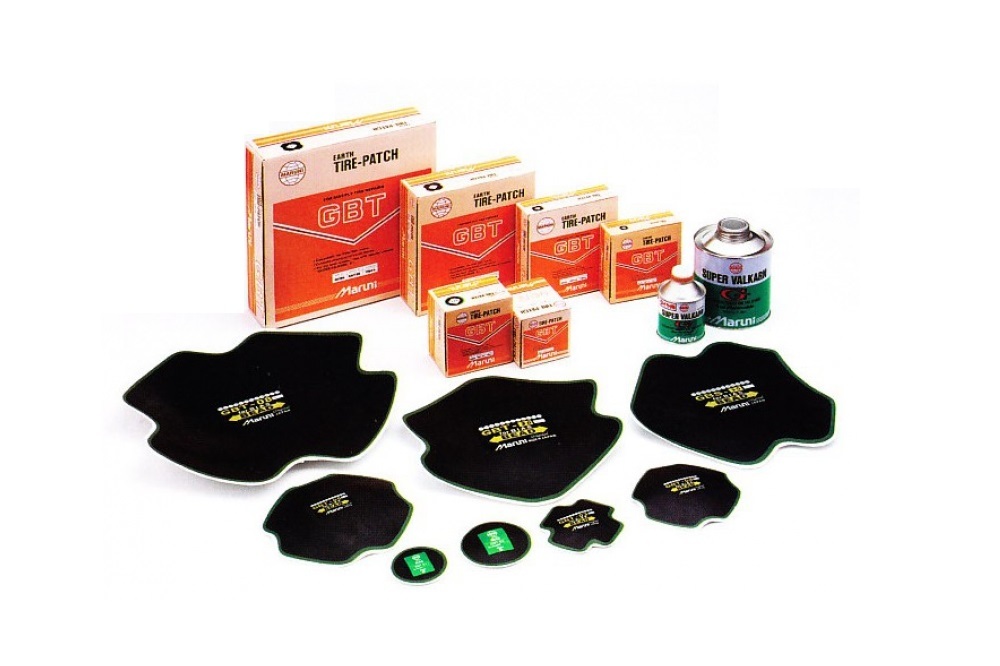
One of the problems you can encounter when traveling by car is a punctured tire. Using a patch is a fairly common option to work around this issue.
Yet, if the hole is in a position like a tire wall, the problem becomes much more complicated because it is likely that the defensive position will not be patched.
So, how close to the sidewall can a tire be patched? A distance of 6 mm or more from the tire shoulder is required to fit a patch. In other words, if a crack is closer than 6mm, there’s almost nothing you can do about it!
Tire Sidewall OverviewFirst, let’s learn about sidewalls and how to identify them on your tires.
The wall is the rubber part from the outer edge of the rim to the road surface. This part also has the largest area, is the most flexible, and continuously deforms under loads when moving.
How Close To Sidewall Can A Tire Be Patched?As you know, the car’s wall is in a particular location, so it is pretty challenging to troubleshoot the hole here.
Manufacturers also recommend that you not choose the patch option if the spot is on the side of the vehicle or too close to this position. Then, how close to the sidewall can a tire be patched.
You cannot use the patch if the hole is close to the wheel with a gap of less than 6mm. In addition, you should note that if the hole is more significant than ¼ inch, the patch should not be used. In this case, if the patch is small, it cannot cover the hole, causing the wheel to deflate still when moving.
On the contrary, using a large patch can make the wheel more bulky, difficult to move, and unsafe.
Fix Sidewall DamageOther Related QuestionsTo better understand the problems that occur with the tires and how to overcome them effectively, you can refer to the following information.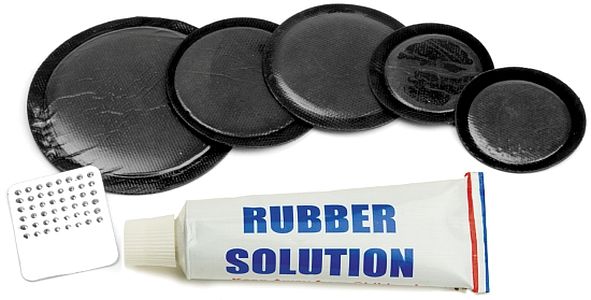
We’ve put together some frequently asked questions that may help answer your questions on this topic.
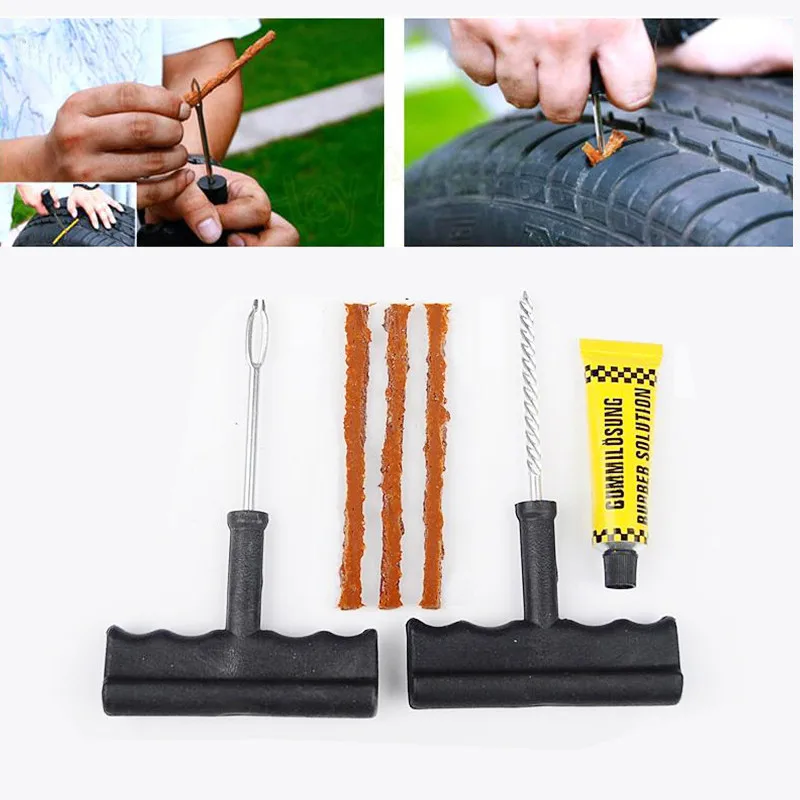
Plug a flat tire: Is it possible?People are often concerned about whether it is safe to plug or patch a flat tire.
These two options are pretty standard in repairing or overcoming the problem of flat tires caused by rolling nails or other sharp objects.
The manufacturer still recommends that you better replace the tire with a new one when there is a problem because repairing with a plug or patch when a flat one is not a safe solution.
Yet, the cost of new tires is not cheap, and if you have this problem often, it is a big problem. So, many drivers use a plug or patch when a wheel is punctured.
There is a limit to the number of nails or patches on a product. You can use this option to temporarily fix the problem if you find a few small holes. If the wheel has many large holes or previous patches, it is best to replace it with a new one.
For a detailed guide, check out this video:
How close can a tire patch be to another patch?The gap between patches is also a topic that people are very interested in. When traveling on the road, you may encounter a flat one many times.
As you know, when the tires have had previous patches or punctures in close locations, it is better to replace them. In case
Can you patch a tire on the side of the road?In the case of a puncture on the tire side, the use of stickers is unlikely to have as much effect as you think.
The reason is that its wall adhesion is so thin that relatively few materials can adhere. More specifically, damage to the sidewall will seriously damage the structure of a wheel.
The solution to this problem is to insert an extra tube inside the wheel to ensure that you can still turn the whole thing.
How fast can you drive on a patched tire?A patched one will not achieve the same speed and performance as it once was. Therefore, the optimal level you can expect from such a version will not be more than 85 mph. Of course, this is just the limit that many manufacturers recommend, but you should not overdo this limit.
Can you patch a tire with 2 nails in it?The answer is yes! It’s just that the gap between the two punctures is at least 16 inches, and you might seal them with two large patches.
According to many manufacturers, the maximum number of times performed is two times. If more than that, it’s time to get a new one.
ConclusionAs such, a puncture in the side of the vehicle is a unique location where patching is not an optimal solution in this case. It would help if you changed to a new tire to ensure safety when traveling.
Thank you for following this post!
This post was last updated onPatching is a measure to be taken when the tire has a flat condition. The causes of the above damage are due to being punctured by a sharp object, or the wall is not well resistant to friction from both sides of the body and the road surface, causing the thing to be worn away.
In such cases, instead of replacing a new one, many people choose the economical repair and still ensure good quality.
So, when can a tire not be patched?
The article will analyze each case in detail.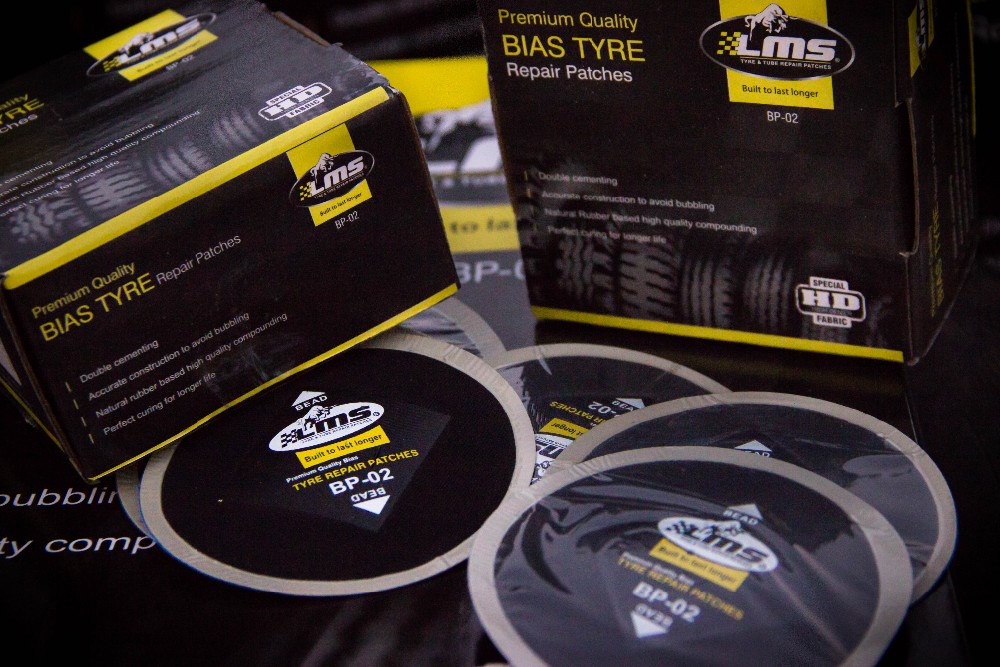 Let’s check it out!
The damage often is a hole, a leak of air, these are all minor injuries, and most are thriving. A common way to finish them is to thread a gas carrier wire inside through the leaks found.
If the gap does not fit the hand, the worker will expand and stretch the wound with hot crude oils. Although the repair technique is quite simple, if the artistry of the mechanic is not good, the fixation is not in the correct position, it will affect the life of the whole wheel.
The plugs and straps support many risks of breakage during the airflow leading to bulging and misaligned conditions in the product.
So the correct way to repair the process is:
Depending on the case, the repair method is also different, but your tire cannot be patched anymore when you encounter the following conditions.
If the hole exceeds 6mm, you can never patch it. The larger the wound length, the higher the expansion problems; besides, the body structure is also gradually breaking down when the tearing of the air outlet is prolonged.
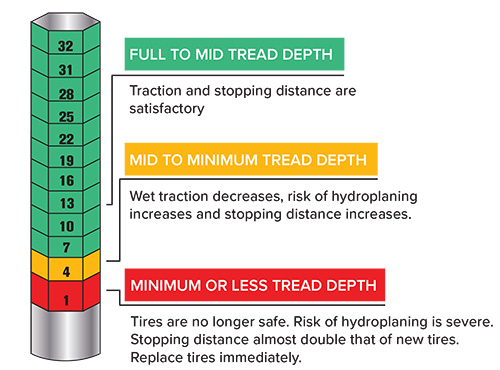
Next is the wear indicator that touches the 2/32 inch; danger will happen at any time because the traction is no longer adequate when you drive.
Your puncture is in the shoulder area.The tire’s sidewall is flexible and can be to a certain extent. When moving, the wheel is impacted by many objects such as gravel, etc.
So in terms of structure, the internal body design is more solid. When cracks appear in the tire’s sidewalls, the stickers during the move will peel off, weakening the air cushion between the repair contact surface, causing air to continue to leak.
It got stuck by a meteor.Damage from hitting a meteorite is actual. It was through the owner of the car. It looks pretty similar to commonly worn rocks, but the areas around the impact are melting because of the meteorite’s heat. So patching the damage is not possible.
With this type, the process of releasing air pressure at the beginning of a puncture is slow, so you can continue to run to the repair shop.
But this is not too recommended because while moving, the body pressure has inadvertently eroded the wheel’s surface, solving the problem by multiplying.
Other problemsBesides the signs we have outlined above, there are many other reasons why you can not repair the wheel. Specifically:

There are many reasons given, but the main one is that the damage occurs too severely, or lasts a long time, causing many other tire factors.
If you try to patch it up to repair, the air seal will not hold because the running wires will push the rubber sheet away from there, returning to the original condition.
When Can You Repair Tires?When the tire has damaged problems such as holes or wear on the wheel, it’s time to have it repaired. For common punctures, depending on the location determines the injury’s severity.
Regardless of exceptions, the hole is in the center of the tread, and the diameter exceeds 6mm; it is easy to fix. The patching method is also quite simple, but it requires an experienced professional to determine the correct position and force of the glue in the most accurate way.
Ideally, the tire should be complete from the rim for easy viewing, and the air outlet must fill, the wound mouth fixed from the inside.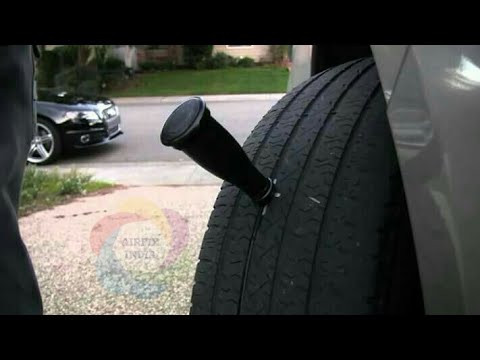
Besides, you should regularly pay attention to the condition of the wheel to control the wear rate most surely. Driving to a service center is an effective way to protect both the tires and the body. Note that if the wear reaches the threshold of ⅔ inch, do not try to patch it but choose a new one.
For details, let’s see the video:
Can Bubble Tires Be Repaired?Bubbles in tires can be caused by many factors such as road conditions, lack of air pressure or weight overload, or manufacturing defects. The result of bubbles is the stretching of the layers in the wheel wall.
This situation can be re-filling it with air, preventing the delamination process. If you want to be sure, you should go to the center for effective maintenance.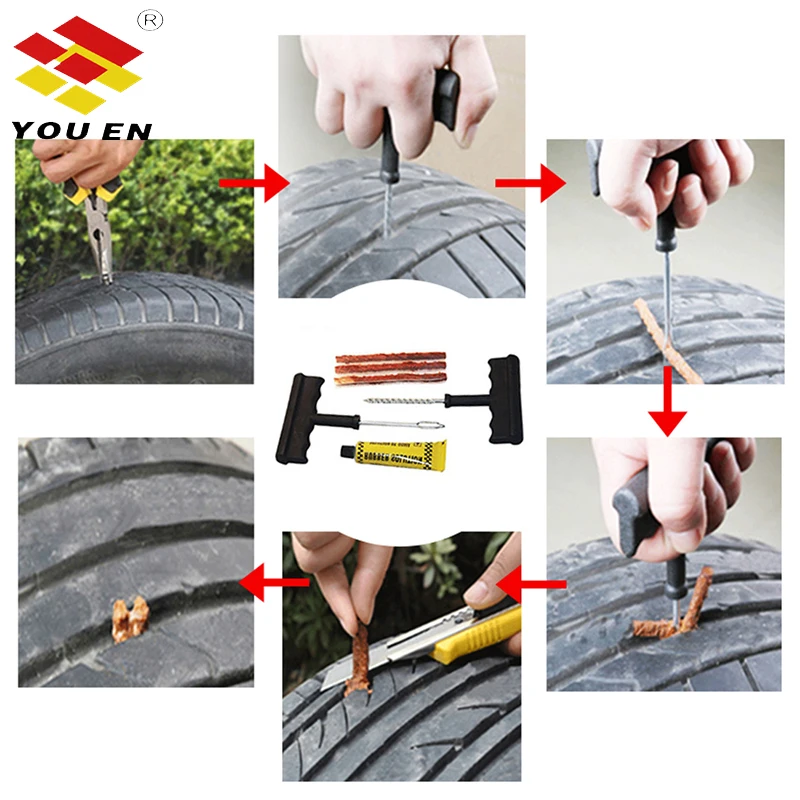
Detecting a wheel in trouble is relatively easy, but determining the tire’s extent is quite tricky. Although this problem occurs quite often, it also has aspects to pay attention to avoid, such as unrepairable cases to help save time and money.
In this article, we have given specific knowledge related to this issue. If you have any questions, don’t hesitate to reach us to solve them as soon as possible.
First tires and first punctures
Historically, tires have always - from the moment of their appearance to the present day - easily succumbed to damage. Even despite the fact that the first tires were quite thick, there were always a lot of various sharp objects on the roads, collisions with which would certainly end in serious tire damage - breakdowns.
Both the car and the tires have improved over time. Designers have always been interested in the optimal ratio of their strength and weight, but these requirements often contradict each other.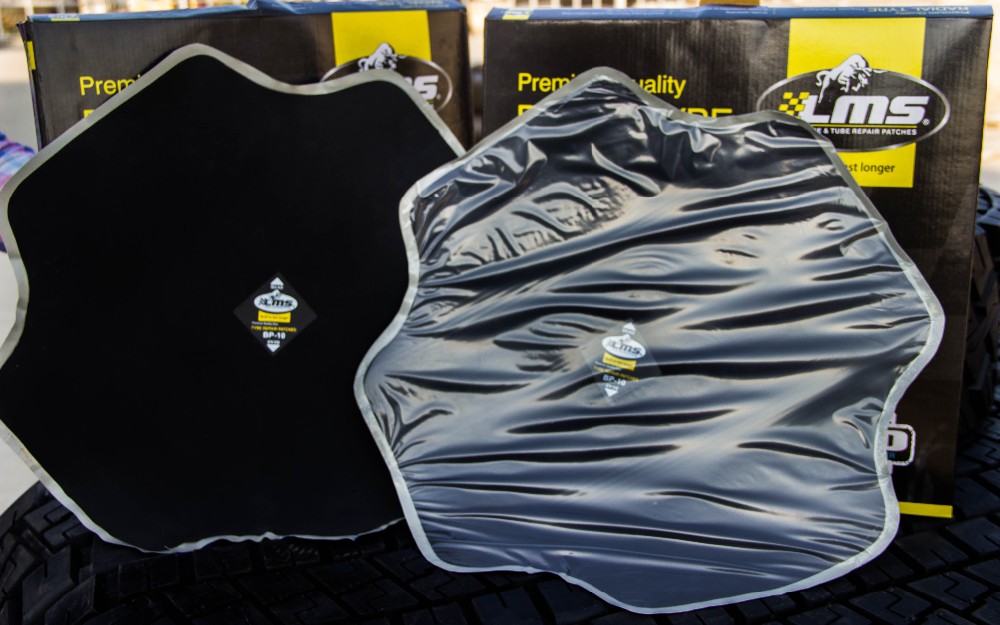 On the one hand, an acceptable margin of safety and resistance to defects was necessary, and on the other hand, it was necessary that they copy the road surface with extreme accuracy.
The first tires were bias-ply and their surface was resilient. In bias-ply tires, the cords in the carcass plies run diagonally from bead to bead. Elasticity must also be maintained for the repair patch, as the main repair material for tire breakdowns. The repair patch for diagonal tires must be elastic and have the ability to change its size depending on the load.
At one time, the bias tire was the most popular among car enthusiasts due to its elasticity and ability to "soften" surface irregularities. And yet, it is quite heavy, voluminous and expensive.
In the 1960s, bias tires replaced radial tires, which were more resilient. For radial tires, the cords in the carcass plies do not cross like bias tires, but have a radial arrangement, i.e. directed from side to side. The tread of a radial tire is backed by a shock absorber that looks like a rigid ring. Accordingly, the repair material - a patch for repairing holes in radial tires, must be reliable under stress and withstand severe loads. At the same time, such a repair patch must be very thin, flexible and not lose its properties when heated while driving. It is also important that it be light in weight so as not to cause an overall imbalance in a light radial tire.
Repair patches as a base
Fungi, cords, pegs and sealing solutions can be used to repair minor damage. However, to repair more serious damage - breakdowns, a repair patch with a cord thread is needed. A puncture is considered to be a serious damage to the tire carcass if its diameter exceeds 6-8 mm and the carcass carrier cords are torn. In the course of repairing such damage, it is necessary to restore the integrity of the cord threads lost due to a break. To do this, a repair patch is applied to the breakdown site. It is very important that the damaged cord threads are completely covered with new patch threads. That is, the new cords of the patch should be tightly attached to the ends of the damaged threads, following their direction.
Bias Repair Patches
Bias Repair Patches are used to repair bias tire punctures. A feature of diagonal tires is that the cords are located crosswise, mainly at an angle of 90º. The cords of large tires for agricultural machinery are located at a large angle - 120º. In a similar way, the cord threads are located at the repair patches, which are superimposed on the damaged areas of the punctured tires. Patches for regular tires have 8 ply cords, for large tires - 16 plies.
Bias patches are used for repairs in the shoulder (fig. 1) or side (fig. 2) area of the tread. Bias constructions are currently used in the production of tires for agricultural machinery and trucks.
Radial Tire Repair Patches
Radial Tire Repair Patches are used to repair radial tire punctures. In a radial tire, the cord threads of the carcass have a radial arrangement.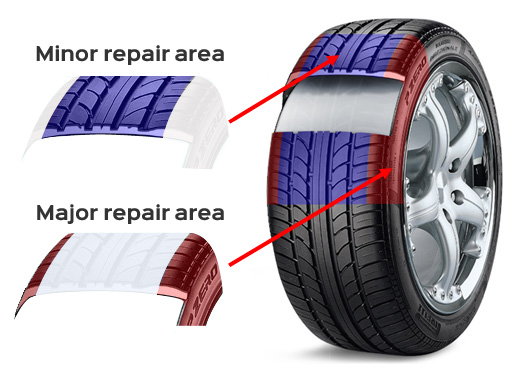 In the same way, load-bearing cords are made for repair patches for radial tires. They are used to repair serious damage - breakdowns. In this case, a repair patch for the radial structure is placed in the tire, thus restoring the integrity of the damaged cords in the tire carcass.
Since all sizes of radial tires can be repaired today, there are several types of radial tire patches:
• Universal radial tire patches that are used on all parts of a radial tire (fig. 3)
• Radial tire sidewall repair patches, which are used in the event that one or two cord harnesses were broken due to tire damage (Fig. 4)
• Radial tire tread repair patches (Fig. 5).
If a radial tire repair patch is used to repair a puncture, it is very important that deformation processes do not occur at the point of damage. First of all, it is necessary to avoid the occurrence of swelling. Although, to be honest, it will never be possible to completely avoid bloating. Firstly, this is impossible due to the fact that the tire material is always slightly stretched at the point of breakdown. Moreover, after thermal exposure and subsequent vulcanization, it will stretch even more. Secondly, the slight bulge is due to the fact that the repair patch cords cannot be directly connected to the tire cords, and the flexible rubberized connecting layer between them provokes slippage and leads to a slight shear. However, when using patches with a carefully thought out design and the right material, bloating can be significantly reduced.
Standard patches for radial tires
Viscose or polyester cords are used to make standard patches. To increase the reliability of these patches, several layers of these threads are used during their manufacture. Regular patches have four layers, while larger patches have eight. These layers have a gradation according to the size and are interconnected by rubber. When the tire is loaded, the force from the tire carcass is gradually transferred by sliding stress to the individual layers of the patch, so there is practically no stress concentration at the ends of the patch and the load on the patch is distributed along its entire length.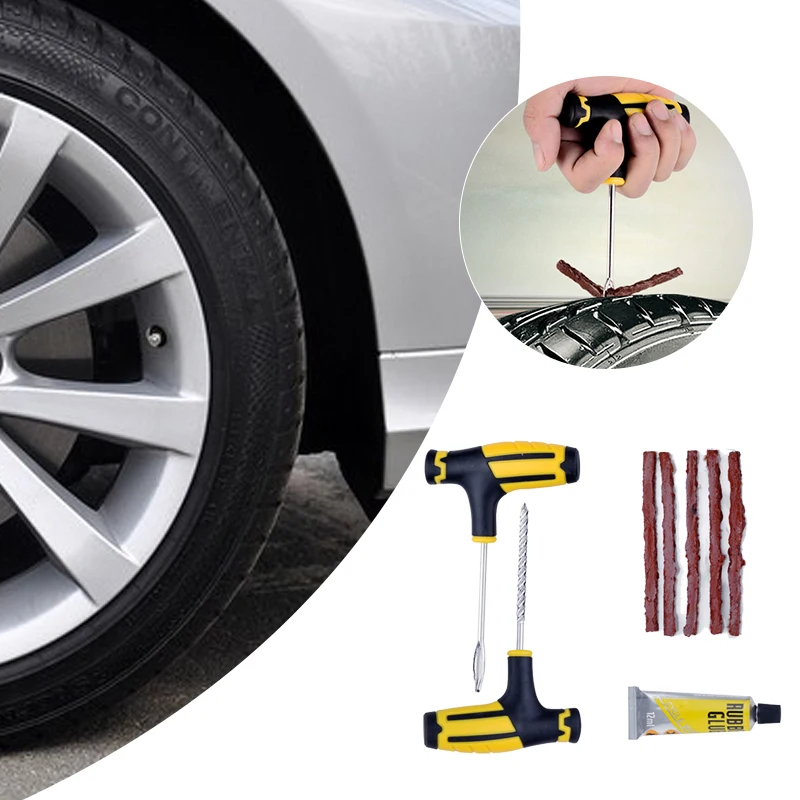 This is a significant advantage of standard radial tire patches, which is why they are constantly in high demand.
Among the disadvantages of such patches is greater elasticity, which is caused by the movement of forces between the individual layers and leads to more bulges on the side of the tire.
Steel Cord Radial Tire Patches
Steel cords are also used to make truck tire patches, which provide higher reliability and lower elasticity.
Their advantage is that they are more reliable and can only be in one or two layers. But there is also a reverse side of the coin, since at the junction of new and damaged cord threads there is a high concentration of stress on the ends of the patches. Therefore, quality patches with steel cords have an additional inner lining textile layer, which helps to more evenly distribute the impact of forces. Another advantage of these patches is the slight bulge when they are applied to the side of the tire.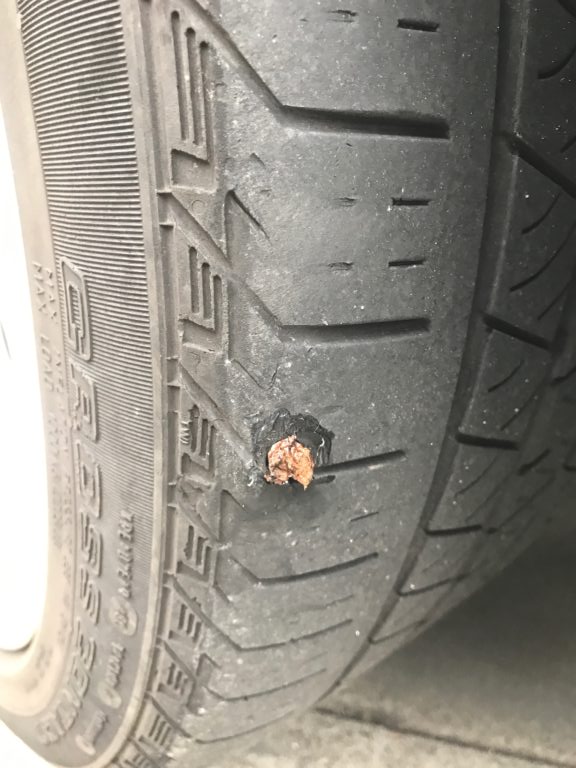
But there is also a significant drawback - poor flexibility. Therefore, steel cord patches for radial tires are not suitable for repairing punctures in low profile tires.
Aramid patches for radial tires
Similar results to steel cord patches for radial tires can be achieved by using patches with aramid cords. This material is as strong and reliable as steel, but much lighter. In addition, the individual fibers in aramid yarns are much thinner compared to steel wire. Therefore, patches with aramid cord have much more flexibility.
However, aramid cord patches have the same end stress concentration problem as steel cord patches. Therefore, it is necessary to place another layer in such patches, which will distribute the stress along the entire length. From this, of course, the thickness of the patch will increase and its initial advantage will be lost. But still, even in this version, aramid patches are quite flexible, so they are great for repairing the sides of low profile tires. The disadvantage of such patches is, of course, the high cost.
Crossbelt Patches
These patches are the newest product on the market and are distinguished by the fact that they significantly limit the occurrence of blisters during repairs on the side of the tire (fig. 6). The main material for the manufacture of patches with a transverse belt is high-quality polyester, distributed in several gradation layers, as in standard pads. Therefore, there is no need for a special layer for stress distribution.
The good resilience and effect of steel cord patches is achieved by using a narrow transverse belt. Due to the shape and material of the patches, which are concentrated exactly where it is needed, the cross-belt patches have increased flexibility and reliability. Therefore, they are excellent for more loaded low profile tires. And, undoubtedly, a significant advantage of patches with a transverse belt is their lower cost than patches with steel and aramid cords.
Breakthrough Repair Development
In the 1960s and 70s, a great deal of agreement was finally reached on how to repair breakouts. At that time, the cold vulcanization method was significantly improved and repair patches began to be produced on an industrial basis by large enterprises. Large manufacturers were able to accurately determine the technological foundations of repair, after which they summarized them in basic rules and tables.
According to these principles, the repair of tire punctures is carried out in various ways today. Therefore, manufacturers can guarantee that if the master follows the established rules, he will be able to repair most damage. In this case, the repair will be quite successful.
In the past, when tires were expensive and manual work was cheap, there was an opinion that puncture repairs were always successful. Currently, it's the other way around. Before repair, it is already necessary to calculate the residual value of the damaged tire and the cost of the repair.
Owners of personal vehicles sometimes find it cheaper to get new tires than to repair serious damage. Moreover, the requirements for driving comfort are increasing, which requires stability and increased tire balancing from the car. But since the tire loses its original qualities after repair, this method of repairing holes is less and less suitable for passenger car tires and is gradually moving into the category of truck, tractor, agricultural and special tires. This trend will become more pronounced in the future.
Nevertheless, today we can safely say that modern hole repair technologies are well developed and in most cases convenient. On the other hand, there are no other more convenient alternatives on the horizon. Therefore, in the future, only materials will be improved, especially repair patches, and the vulcanization system.
Repair does not end with patches alone
In this article, we have described in detail the types of patches for repairing breakdowns - cord patches, which restore the integrity of damaged cord threads in the tire carcass. But to be honest, the application of a repair patch is only one part of the technology for repairing breakdowns. Moreover, this is the least problematic way to repair damage.
Another, more complex method, involves welding the tire at the point of breakdown. Performing such repairs requires a higher level of professionalism, skills and decency from the master.
This work, often dirty, but responsible and creative, is still shrouded in mystery for many specialists even today. Therefore, we will talk about this repair method next time, so that for any master it turns from a mystery into a logically consistent and easily understandable process.
Pavel Ferdus
1. Mark the place of damage with waterproof chalk.
2. If the damage is in the form of a cut, round off the edges to prevent further tearing. To do this, use scissors or a hole punch. For convenience, the repair site should be located on a flat surface.
3. Select the correct patch size. It must cover the damage by 15 mm in all directions.
4. Degrease the repair area with ROSSVIK Buffer Cleaner, and clean the wet surface with a scraper.
5. Clean the repair area without leaving burrs, 10 mm larger than the patch. For this operation, it is better to use a low-speed pneumatic drill 2500-5000 rpm. and a fine-grained carbide hemisphere. Such a cutter provides a soft cleaning and does not leave bumps.
6. Apply a thin layer of ROSSVIK adhesive with a soft brush and dry for 3-5 minutes until slightly sticky.
7. You can use a hair dryer to speed up drying. Using a hair dryer is especially effective in winter - it not only reduces the drying time, but also heats up the repair site, increasing the chemical activity of the heated glue.
8. Drying the adhesive with compressed air is not recommended, because of the possibility of condensate and oil getting on the repair surface.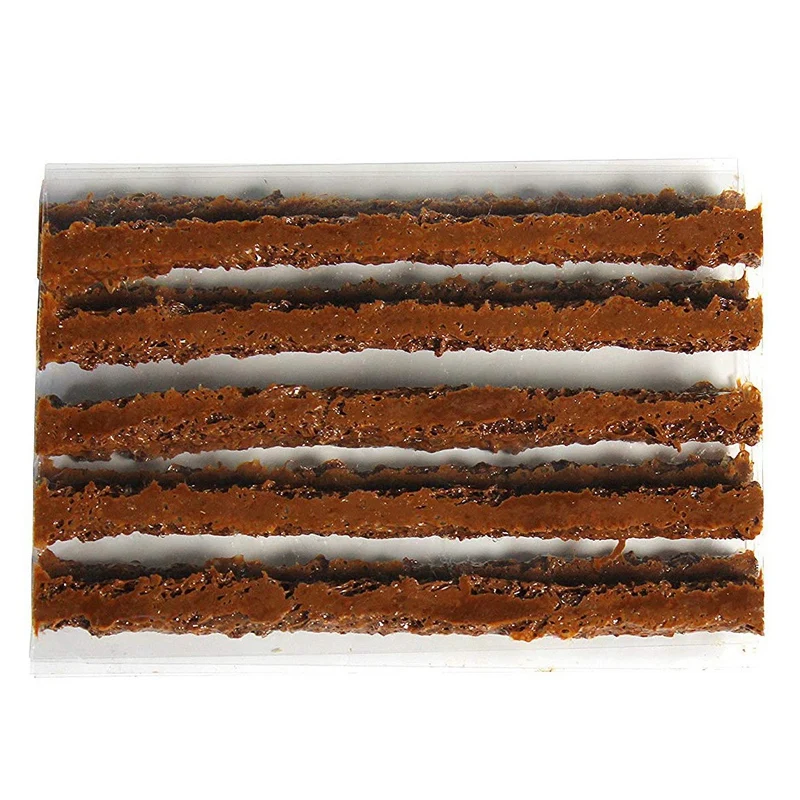 The quality of the repair will depend on the ability to correctly determine the drying time.
9. Remove the lower foil from the patch by folding back (180°) the upper foil together with the patch. If the patch is stuck on the bottom film, then repeat this action from a different angle. For a better separation of the films, you can lightly blow on the cut. Do not allow dirt to get on the chemical layer of the patch.
10. Apply the patch to the center of the damage, straighten and press lightly. Squeeze out air from under the patch with your finger, preventing talc from getting under it through damage in the chamber. To reduce the likelihood of such a marriage, the air from the chamber must be pumped out before repair.
11. Roll the patch with a narrow (3 mm) roller in 2 directions crosswise from the center to the edges.
12. Remove the top film and powder the repair area with talcum powder. The camera is ready for use.
1. Mark damage with waterproof chalk.
2. Remove dirt and remove foreign objects that caused the puncture. Choose a universal patch of the right size, taking into account the type of tire, the location and size of the puncture. For truck tires, the thickest Umax patches should be used. A treadmill repair requires less patching than a shoulder repair.
3. Draw center lines through the center of the damage with chalk. Focusing on them, apply a patch and circle with chalk the place of mechanical cleaning 10 mm larger than the diameter of the patch.
4. Degrease the repair site with ROSSVIK Buffer Cleaner, and while the surface is wet, remove the dirty rubber layer with a scraper.
5. Sand the repair area 10 mm larger than the patch without leaving burrs or breaking cords. For stripping, it is better to use a low-speed (up to 5000 rpm) pneumatic drill and a carbide hemisphere. The use of abrasive stones and high-speed turbines is undesirable, because. at a high rotation speed, they melt the rubber, which can cause the patch to lag during operation.