Posted by Jefferson Bryant Know How
Flat tires tend to happen at the worst time in the worst places. If you are on the road or outside of normal business hours when your vehicle has a flat and the spare is missing or no good, you might feel stranded, but there is an option—a tire plug kit. This is something that anybody can do, you just need the right parts.
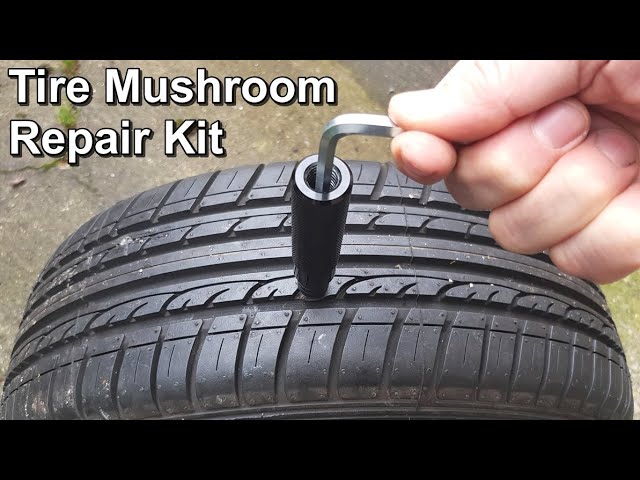
Liquid tire repair might get you down the road, but it could make your tire repair difficult and possibly damage the TPMS (Tire Pressure Monitor System) unit inside the rim itself depending on the formula. The best solution for an emergency tire repair is a tire plug. Made from cork and a gooey adhesive that keeps it place and seals the tire, a tire plug repair is an excellent way to get your car back on the road until you can get to a tire shop for a proper internal patch.
Installing a plug in your tire works for pierced tread area only. You cannot fix sidewall damage, compression breaks (from potholes, gravel roads or curbing) or any other type of catastrophic tire damage. The most common road hazards you will find are punctures from nails and screws. Fixing these issues are perfect for the good old fashioned tire plug. If you are wondering how long does it take to plug a tire, then the answer is just a few minutes. Most of the time is spent preparing to perform the plug itself. Here’s how to plug a tire with a plug kit.
You will need the following to make a tire plug repair:
There are all kinds of tire plugging kits, but you want the most complete tire repair kit which comes with the plugs, the installation tool, and the reamer tool.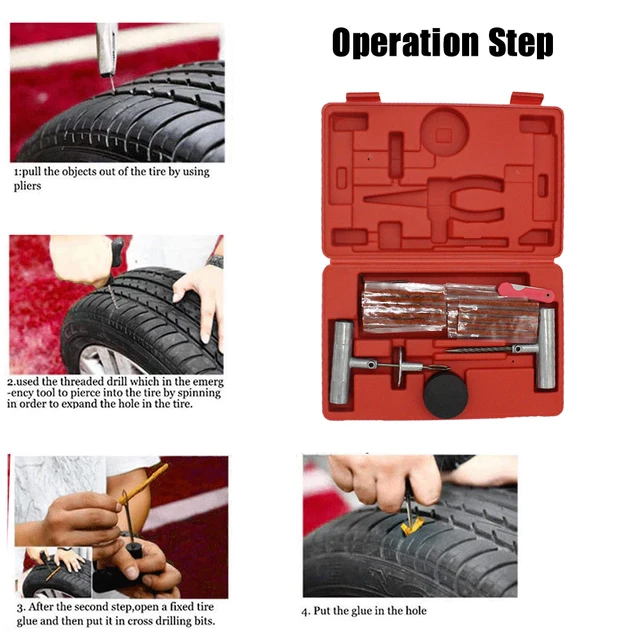 Some flat tire repair kits just come with the plugs and installer, but the reamer tool is a necessary component to a good repair. Some tire plugging kits also come with liquid cement. You can use it or not, but the cement helps make a more permanent repair.
Locate the puncture. If you don’t see or hear the puncture, spray some soapy water on the tire and look for bubbles.
This is a small staple that was dropping tire pressure by 20 psi in about 12 hours. It needs to go.Remove the offending item. This is usually easy, but sometimes the nail or screw is worn down, making it hard to get a bite on it. This is where the side-cutters come in really handy. You will want to position the tire where you get the most leverage.
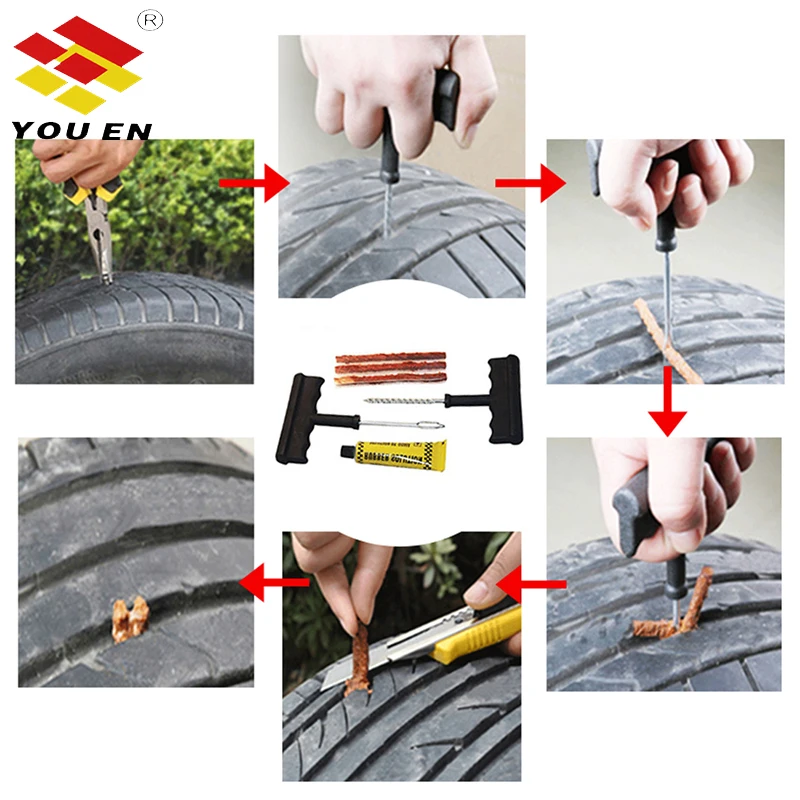
Side cutters work best for removing these items, as they can grip small round objects better than regular pliers.Insert the reamer.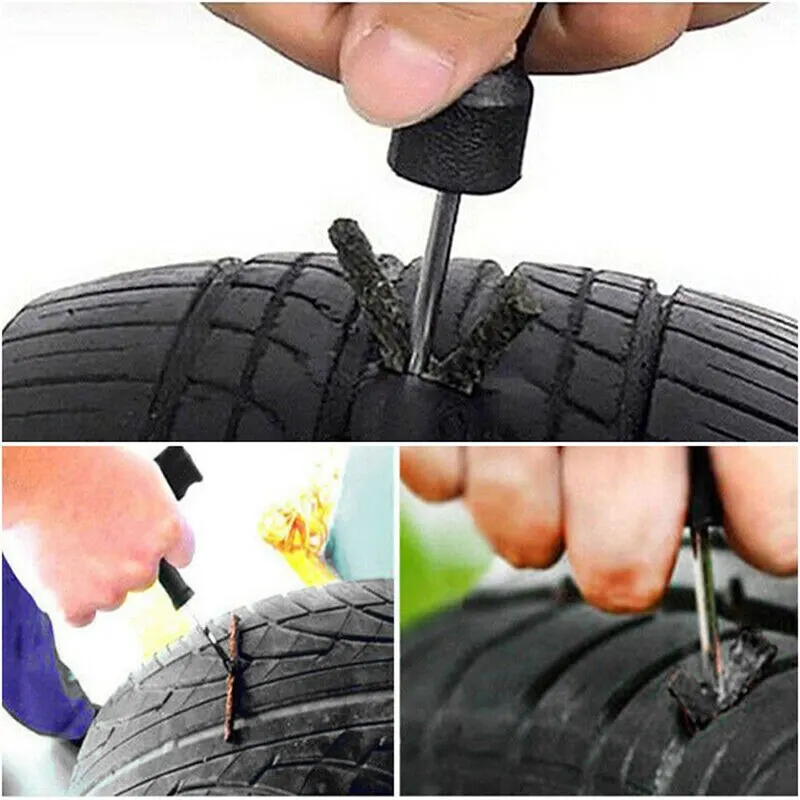 This will take some effort, as you have to push it through the steel belts. Use a twisting motion and push it into the tire. Once the reamer is through, saw it in and out of the tire a few times to really make a nice hole for the plug. Yes, it is counter-intuitive, but it is necessary.
Push the reamer all the way and then saw it in and out a few times to make a clean hole.
Prep the plug and installer. Pull a plug off the strip and push it through the eyelet of the installer tool. The pliers will make this easier. Push a little through, grab it with the pliers and pull the plug halfway through the eyelet.
Pull a cork strip from the tire plugging kit and grab the installer tool, which looks like a large needle with a slit in the eye.Threading the sticky cork tire repair plug is not easy, but if you can get it squished into the hole, you should be able to pull it on through.
 The side cutters might help.
Insert the plug into the tire. If the kit has liquid cement, apply some to the plug before inserting it into the tire. Simply push the installer into the hole in the tire until the plug is about 3/4 of the way in. Twist the installer tool 90-degrees and pull it out. The plug will stay in the tire and the tool will come out nice and easy. You may trim away the excess plug or leave it to wear away as you drive.
Push the tire plug into the hole. Don’t twist the plug as you push it in, just go straight down and stop when there is about a 1/2-inch exposed.This is what you should see when the tire plug is installed.
Once the tire repair plug is in you can now twist the handle 90-degrees and pull the tool out.
Fill the tire to the proper PSI. If you have a portable air compressor, this will make things easy. However, if you do not, you need to get air very soon.
All done.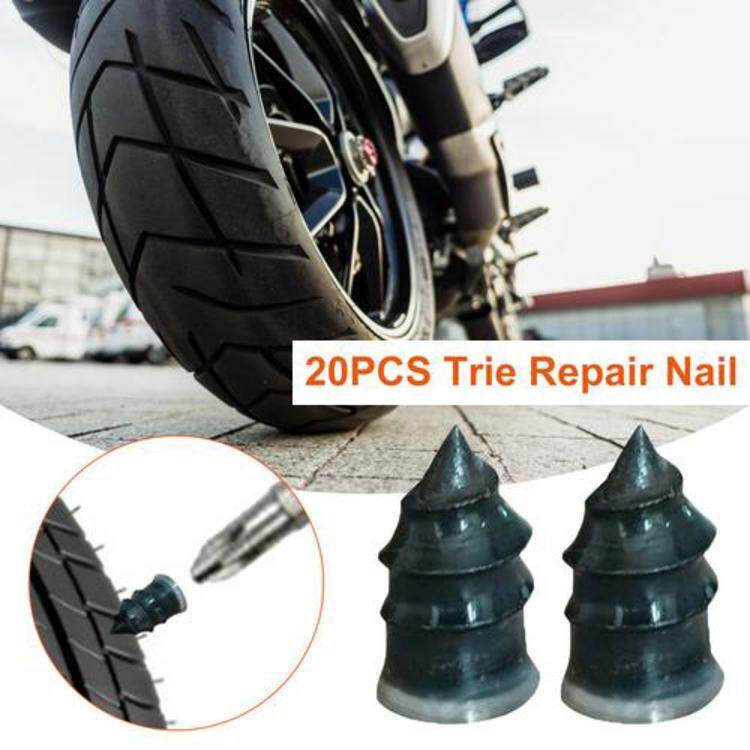 You can trim the tire plug or leave. You will need air, so don’t go driving until you have the tire aired up.
Every automobile you own should have an emergency tire plug repair kit in the tool box, along with a portable air compressor. These emergency repairs are quite good, but for a long term repair, you should take the vehicle to a tire shop for a proper repair as soon as possible. They will know the best way to patch a tire for your type of damage.
Check out all the steering & suspension parts
Categories
Know How
Tags
emergency repair, flat tire, flat tire repair, patch flat tires, sealant, tire maintenance, tire plug kit, tire pressure, tire safety, tire wear, tires, wheels
A life-long gearhead, Jefferson Bryant spends more time in the shop than anywhere else. His career began in the car audio industry as a shop manager, eventually working his way into a position at Rockford Fosgate as a product designer. In 2003, he began writing tech articles for magazines, and has been working as an automotive journalist ever since. His work has been featured in Car Craft, Hot Rod, Rod & Custom, Truckin’, Mopar Muscle, and many more. Jefferson has also written 4 books and produced countless videos. Jefferson operates Red Dirt Rodz, his personal garage studio, where all of his magazine articles and tech videos are produced.
Every editorial product is independently selected, though we may be compensated or receive an affiliate commission if you buy something through our links. Ratings and prices are accurate and items are in stock as of time of publication.
Modern vehicle tires are tough, standing up well to rough terrain and thousands of miles of driving. Trouble is, tires are not invincible. Every so often car tires spring leaks. Air can start leaking from anywhere on a tire, and the location of the leak determines whether or not you can fix it yourself. And if you can't fix it yourself, the location of the leak will also tell you if you need a professional repair or a new tire.
Whether or not your tire is tubed or tubeless affects things, too, because only tubeless tires can be repaired using the technique of plugging that we'll show you here. The good news is that modern vehicles always have tubeless tires, and this means that repairing with a rubber plug is often an option.
Plugging a tubeless tire is only a possibility when your puncture is in the tread area. If the air leak is where the sidewall of the tire meets the rim — this is called a "bead leak" — you'll need to visit a mechanic with a tire machine to dismount the tire from the rim and remount it with sealing liquid applied to the bead. If your sidewall has been punctured, you need a new tire, because damage there can lead to a blowout at highway speeds, even after repair.
Learn exactly how to plug a tire so next time you spring a leak between your treads, you'll be able to get up and running again in record time.
Total time completing the repair is about 15 minutes. Doing the work yourself will save you about $20 and the time spent driving to the garage and waiting.
Steve Maxwell for Family Handyman
Complete DIY projects like a pro! Sign up for our newsletter!
Do It Right, Do It Yourself!
Originally Published: August 27, 2020
When a wheel is punctured on the way, it is always a disaster for the driver. Especially if you don't have a spare. If you're determined to fix the tire yourself, you'll need to learn about wheel resuscitation beforehand. There are usually two of them - a plug and a patch. But how exactly to close a hole in a tire, read below.
Plugs are the cheapest and easiest tire repair option, making them ideal for roadside emergencies. It will take you a few minutes and a ready-made set of plugs to get the tire in order and back on the road. You won't even need to remove the tire from the wheel as all repairs are done from the outside.
The high quality plugs available on the market today can actually seal a puncture well, especially when you use a special vulcanizing agent to "bond" the plug material to the tire rubber. However, if the hole is close to the side wall, or if it is uneven, the plug may not close it completely. In these cases, this fix may only be a temporary measure.
In addition, you must understand that when you drive, your tires heat up and the rubber expands. As good as the plug is, it has different chemical properties, so it won't heat up as much as the rest of the tire. Patches, unlike plugs, are applied from the inside of the tire, so it takes more time and effort.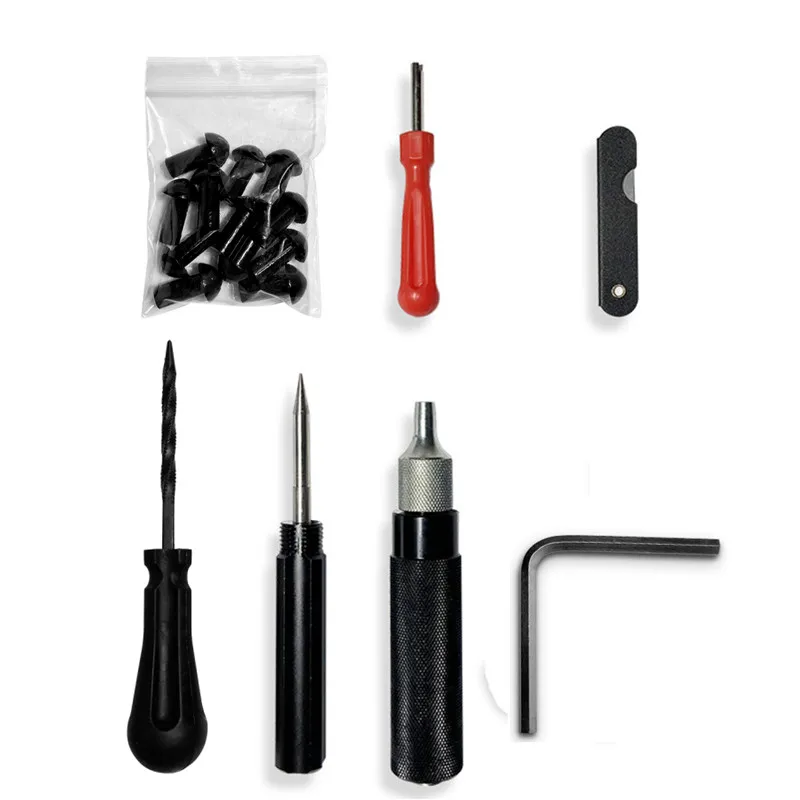 You may not be able to do this by simply parking on the side of the road. But in the end, patches are more reliable.
Daughter Anya and son Volodya: what is known about the children of beloved Malvina USSR
Not a flower bed, but a fountain of flowers: the craft will become a landmark of the yard
When your tire is safely off the wheel, you can begin to repair it properly. First of all, you need to determine exactly where the hole is. This will be easy to do if the nail or whatever that pierced it is still there. In this case, you will need to put a piece of tape right under it. This way you won't lose the hole when the item is removed.
Then take pliers and remove what caused the damage. In case there are no hole indicators, you will need to cover the tire with soapy water while it is still on the wheel. Then press it down a little and look for bubbles. Remember and mark where the hole is.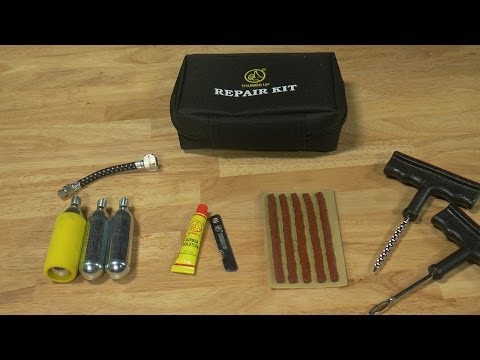
You can use different tools for this. If possible, use a low speed drill and a carbide cutter to widen the hole first from the outside and then from the inside. After that, carefully clean the area with a scraper and a special cleaning fluid. You need to remove all dirt and rubber particles.
You need to cover the pointy part of the mushroom spot with this and also cover the polished surface of the tire itself. Remove the plastic from the flat side of the patch. While the cement is still wet, push the pointed side of the patch through the hole and use pliers to adjust it properly.
The tour operator told which rooms Russians prefer to stay this year
76.5 minutes versus 62.8: REM sleep is longer in married people
Three reasons why we dream of people with whom we have long lost contact
Be careful not to over-tighten.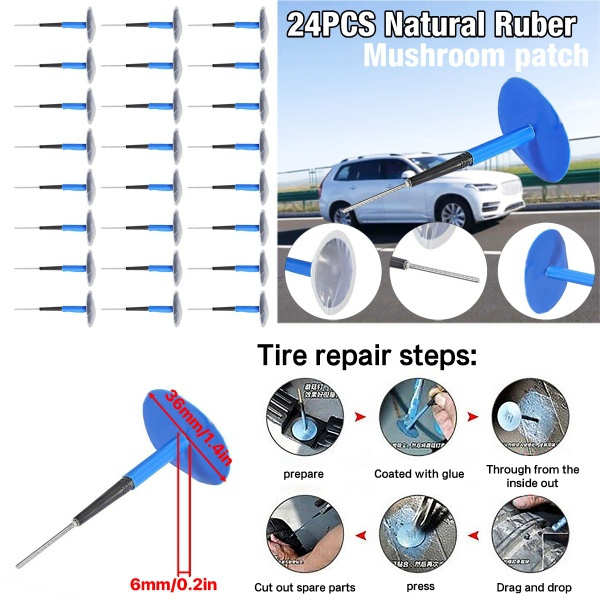 The patch should not have dimples. Polish the area around. If you are able to do this, you can use a low power buffer to polish the patch and the surrounding area. However, be careful not to rub the inner lining!
Clean the area with cleaning fluid and cover everything with cement to seal every gap. Complete the procedure by applying a special repair sealant to the polished area. Put the tire back on and inflate it. Once the tire is inflated, take a pair of scissors or a knife and cut the plug flush with the tread.
If the tire manufacturer's safety regulations allow repairs, you'll be fine. Please note that this is only true if you have used the proper procedure to secure the puncture correctly. However, a patched tire should not be used for driving at high speeds for an extended period of time.
No matter how well a tire has been repaired, it will not perform at 100% of its original capacity. Keep this in mind and be careful on the road. And remember that not all tires are repairable. Sometimes you just need to admit that the damage is too great and replace the wheel.
You cannot repair a tire if:
Regardless of tire type, damage severity, etc. , only a limited number of repairs are allowed. This information should be included in the manufacturer's recommendations. Remember that patches and plugs are a temporary measure and soon you will still have to replace the tire with a new one.
Found a violation? Complain about content
A flat, damaged wheelbarrow tire with slow leakage of pressure is sure to lead the user to frustration.
When such common problems arise, we rush to fix them and choose a solution that is not the cheapest, just buy a tire, a complete wheel, and even better, a new car. Yes, it's not a typo! Often there are discarded carts in landfills, which still serve and serve. But you can simply repair a flat tire. This is not a complicated, completely doable method for everyone, solved by oneself.
The fact is that there are two main types of wheelbarrow tires. And each of them offers different repair methods, tools, precautions.
In today's blog, we have developed a very handy step-by-step kit that will lead you to the successful retreading of both types of wheelbarrow tires. It includes a list of tools and steps for repairing tubed and tubeless tires.
Let's try together to deal with this sore point and continue to make repairs on our own. Go!
Before proceeding with the repair, we need to evaluate all the damage in order to decide whether to retread an already used tire or not.
Symptoms that can be repaired:
In most other cases, a replacement process follows. The new kit will always make your manual inventory more efficient and easier to manage.
As you know, the tire is contained from the outside, and the tube is inside. In order for the wheel to work, you need to inflate the chamber.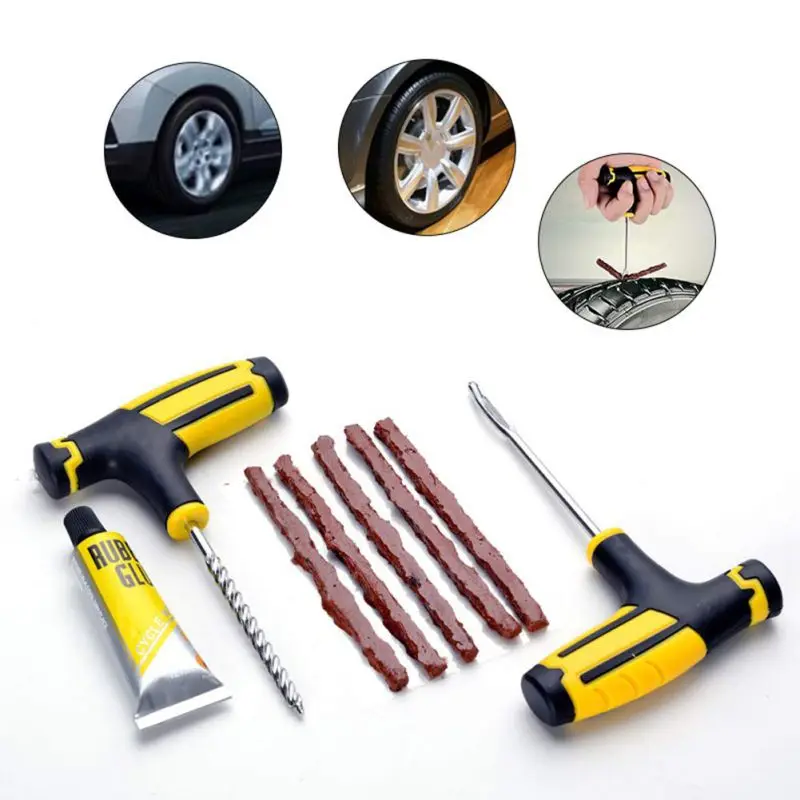
The situation is reversed with a tubeless wheel. Essentially, it is an all-purpose tire without a tube. The compressed air inside is retained by the single-body tire itself.
Of course, fixing a wheelbarrow tire, no matter how tubeless, is not a manual job. Therefore, here we need a set of tools:
If everything is available, let's start doing the steps:
1. Remove the wheelbarrow wheel with a wrench
To do this, you need to do two things: 1) - turn the wheelbarrow upside down, 2) - use a couple of wrenches. One will hold the nut and the other will unscrew it. Finally, after a few turns, the wheel will come loose, put the wheelbarrow aside and move on to the next steps.
2. Find the cause
It is probably the leak that is causing all the problems in the wheel.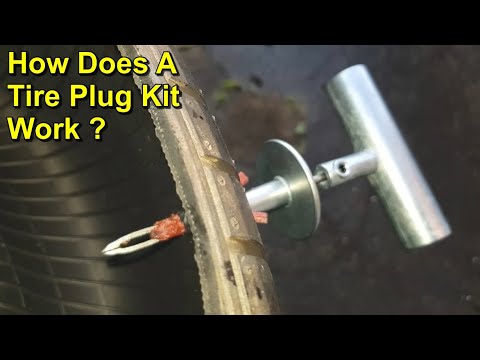 It can exhaust all the air from the inside, which will put the cart out of action. How to discover?
Take the air compressor, prepare the compressed air hose. Open the tire air valve and start blowing compressed air into it.
Once the tire is firm enough, you may hear a whistling noise. After examining the tire a little, you can determine the hole in the rubber body.
There are two tips at this stage:
Just in case you can't find an air leak, you can spray the rubber with a few splashes or soapy water. This will show the exact leak point through the bubbles.
3. Fix the puncture
We assume that you have found the puncture site and are trying to repair it immediately. Here you will need a tire puncture kit. This kit contains things like a rubber stopper, an applicator and a dilator.