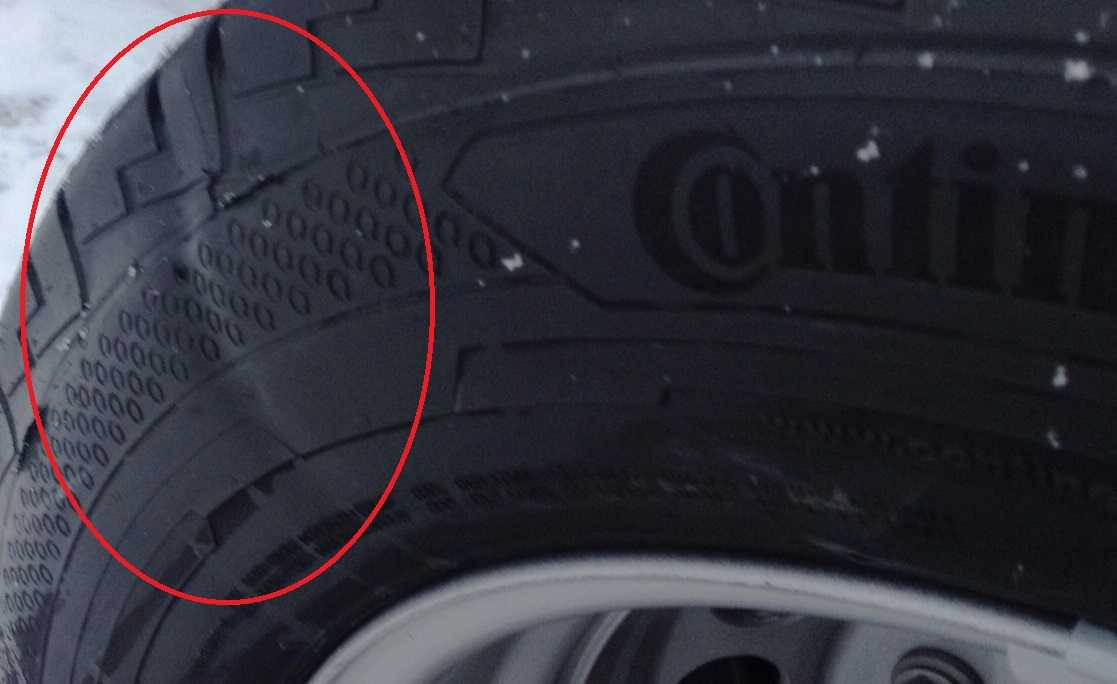
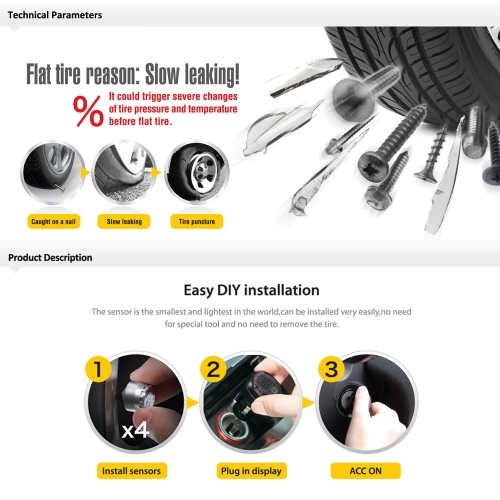
A slow tire leak is more than just a nuisance. A leak can lead to low tire pressure. Not to mention, prolonged running on an underinflated tire can lead to more extensive tire damage or even cause a dangerous blowout.
If you’re experiencing a slow leak, here are some things to look for:A tire puncture: It is a common misconception that a puncture will cause the tire to immediately go flat. However, in many cases the object that caused the puncture remains lodged in the tire and prevents the air from leaking out quickly. As with all tire leaks, it is important not to ignore a puncture. Eventually the object will either wear down and/or work its way out of the tire. For more on this read our article How to Repair a Tire with a Safe, Permanent Fix.
Wheel damage: Another common cause for slow tire leaks is damage to the area where the tire bead meets the rim. This type of damage is typically cause by the driver hitting the curb, taking a speed bump at high speeds OR those dreaded potholes! The impact deforms the wheel’s metal surface which may cause the tire to pull away from the mounting surface of the wheel.
Valve stem damage: The third most common cause for slow tire leaks is worn out or damaged valve stems. Time, use and exposure to elements can cause your valve stems to wear out and cause leaks.
Diagnosing your tire leak:
If your vehicle is equipped with TPMS, you will know right away if you have a leak. If the sensor light on your dashboard goes off, you inflate all the tires back to proper pressure and the light goes back on a few days later – you likely have a leak. If your vehicle does not have TPMS, its important to check your tire pressure regularly.
Once you’ve identified that you have a leak, use TECH Chek to locate the source of your leak. Simply spray the product all around the tire.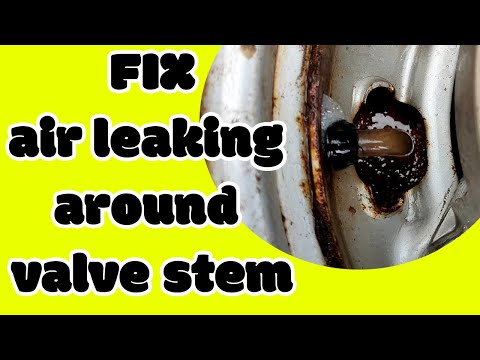 Where the surface of the tire begins to bubble is likely the source of your leak.
It’s important to have your tire diagnosed by a professionally trained tire shop or mobile tire repair service as soon as possible. In the case of a puncture, you may want to use a tire repair kit to keep your tire properly inflated until you can have it serviced. The leak should then be permanently fixed using a proper tire repair consisting of a cured rubber stem and repair unit.
If the leak is caused by a damaged valve, a trained tire technician can typically replace the valve at a minimal cost. In some cases, however, the tire may need replaced.
If the leak is caused by a damaged wheel, a tire technician may be able to reseat and seal the tire using a bead sealer. However, if the damage to the wheel is significant, unfortunately that means you may need to replace the wheel itself.
To read more about the types of damage that can and cannot be repaired, click here!
So, you have a flat tire or one that’s leaking air.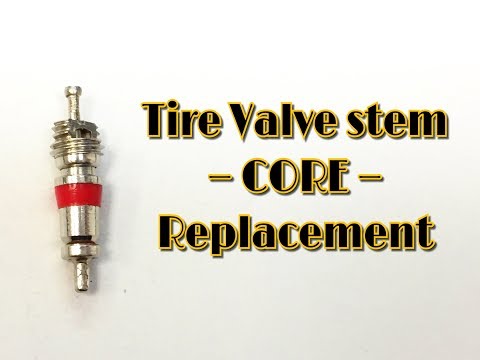 It’s not the end of the world. Luckily there are safe and cost-effective ways to properly repair most tire punctures. The purpose of this article is to show you the difference between a safe, permanent repair and a temporary string, plug or patch repair.
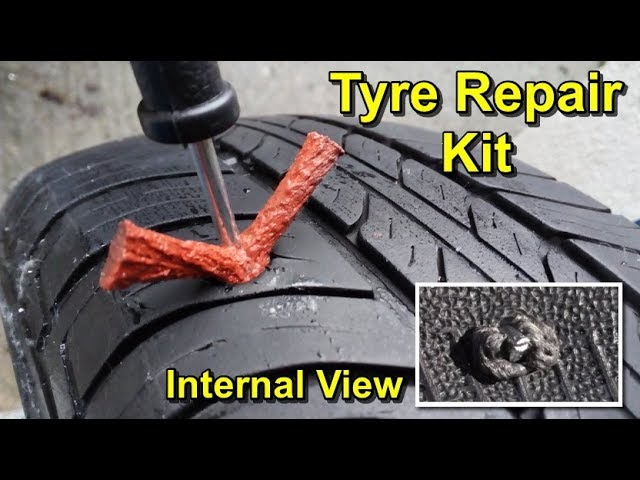
According to the National Highway Traffic Safety Administration (NHSTA) and the Tire Industry Association (TIA), the only method to properly repair a tire puncture is to fill the injury with a repair stem and back the stem with a repair patch. This is commonly known as a combination repair or a patch/plug repair.
Patch/plug repairs are most often performed using a one-piece repair unit that combines the repair stem and cap (or patch) into one unit. However, special circumstances may require the use of a two-piece combination repair (ex. If the angle of the puncture exceeds 35 degrees). The repair is then permanently bonded to the inside of tire and through the injury channel using a cold, chemical vulcanizing process. The repair essentially becomes part of the tire, creating an air-tight seal that keeps air in and moisture and contaminants out (more on this procedure below).
Emergency roadside plug repairs are NOT intended to be a permanent tire repair. Plugs and string repairs are designed to get you back up and rolling long enough to get home or to the nearest service center to perform a proper tire repair.
The common misconception with plug and string repairs is that because they hold air, they are safe to use. While it is true that many plug repairs do a great job of keeping air in the tire, that’s only part of the equation. Because they’re not completely sealing the injury, plug repairs may allow air and moisture to penetrate the body of the tire. Over time, this could lead to a dangerous (or even deadly) blowout.
A Patch-Only Tire Repair Leaves Your Tire Susceptible to DamageA tire repair that uses only a patch is also NOT considered proper or safe. A properly installed patch will do a great job of allowing the tire to hold air. However, similarly to the plug-only repair, the patch does not fill the injury channel. Therefore, air and moisture could seep into the tire from the tread surface and eventually damage the tire.
Only a proper patch/plug repair completely seals the puncture from inside the tire and through the entire injury channel. There are a few extra steps necessary to perform a proper tire repair in accordance with industry guidelines. We’ve developed a simple acronym to help organize and remember the steps: R.E.P.A.I.R.
 First, the injury is drilled out using a carbide cutter to strip away and damaged cords or belts. Next, the inner liner is cleaned and buffed to a slightly rough texture. This also helps maximize adhesion of the patch/plug repair.
There are a number of factors that may determine whether or not your tire is safe to repair. These factors fall into three main categories:
The occasional flat or leaky tire is an unavoidable part of life. But, taking shortcuts to repair it can be dangerous to you and your passengers. Take the time and do the research to do the job right and/or find a reputable tire repair shop trained in proper tire repair procedure.
There is not always a way to call a tow truck, and driving on a flat tire, “chewing” the rubber and killing the rim is at least uncomfortable.
The very first replacement of rubber on a motorcycle or scooter gives reason to think - what is better in terms of quick repairs: tubeless ones that do not require wheel disassembly to eliminate a puncture, but leave the rider helpless if, along with damage, it “led” and flattened the edge of the disc? Or chambers - allowing sealing almost ring breaks (if only there were enough patches), but requiring the removal of rubber from the rim for this? The unequivocal answer is no. Few classics, straights or tourers today remain "loyal" to tube rubber models: tubeless tires are lighter, softer, warm up and cool down faster thanks to simplified heat transfer. In sports, more precisely - enduro and motocross, chamber - on the contrary, prevail: only spoked wheels can "play", withstanding strong alternating loads during landings and impacts.
The nuance is that a tire with a chamber can be put on any spoked or cast disc, and a tubeless one can only be placed on a cast one, because only it can ensure tightness. Tube – can be installed in a tubeless tire as an emergency measure. In case of major damage to the sidewall, cracks or curvature of the edges of the rim, this will make it possible, after pumping up the wheel, to reach the nearest tire service (and there already - straightening, balancing and other maintenance according to the rules). True, for such a focus, it is advisable to take a camera with a face value one less than the diameter of the disk, otherwise it will create folds inside that will rub for a couple of hundred kilometers. The resource of such a “treatment” is large - until the next puncture, like a new one.
It depends on the magnitude of the damage whether it will be possible to eliminate it on your own, or whether you will have to “surrender” to the motorized tow truck.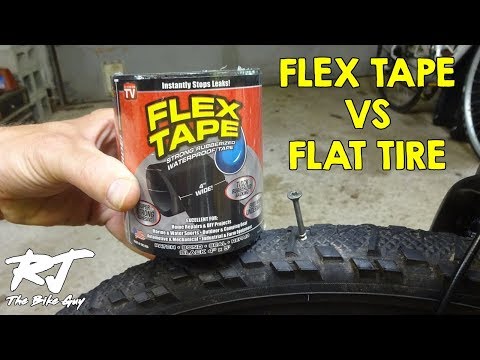 In tubeless - holes up to 5–6 mm are patched, in chambers - as much as there is enough glue and patches, the main thing is the condition of the tire. To determine the extent of the disaster - find a place where you can safely stop without violating traffic rules (where it is prohibited - you will have to sacrifice tires and drive on).
If the wheel deflates slowly, and the object that pierced it is still inside, you can try to carefully drive to the tire shop. A completely deflated "pancake" will have to be resuscitated on the spot, or - remove the wheel and take it to the service.
To find a hole in a tubeless tire, if it is very thin and not immediately visible, the wheel must be pumped up, slowly pouring water - bubbles will go. In place, tubeless tubes can be “harnessed”, or filled with sealant inside, without removing from the motorcycle.
With the second type of tires - more difficult. A torn balloon must be removed from the tire to detect a defect and seal. In a good way, the wheel must be removed from the motorcycle and disassembled on a clean, flat, hard base. Suppose such a “patch” can be provided even off-road, but how to remove the wheel on a motorcycle if it does not have a central stand? And shooting is not required. The motor must be carefully laid on its side, after making sure that the faucet is closed, gasoline does not flow out through the tank cap (antifreeze does not flow from the tank if the motor is “dropsy”), and removing the plastic or wardrobe trunk with fragile contents (if any).
You will have to unscrew the wheel from the motorcycle only if you need to replace the tire, or it is decided to patch the tubeless tube with a “fungus”. In the absence of a central stand, this will also have to be done on a lying bike, or - make this stand from improvised materials (bricks, stump, car jack), placing them under the crankcase protection from below, the central tube of the frame, the duplex jumper (but not under the plastic, itself engine crankcase or attachments!), under both footrests - if they are not folding, or - under the pendulum. Before removing the rear wheel on a motorcycle, the front fork must be loaded with something, or an even higher lining is made.
In a motorcycle tire fitting shop, tubeless tubes are repaired by cold vulcanization. They are removed, disassembled, the puncture site is cleaned from the inside, degreased, lubricated with glue and a calibrated “fungus” patch is inserted into the hole from the inside. The fungus itself is a thin plate of rubber with a “leg” tube in the center. The leg - by the guide wire is dragged through the hole of the damage, and the "hat" seals it.
After half an hour - you can put the tire back. The reliability of such a repair is high, the patch does not cause a significant imbalance, the service life of a sealed tire does not decrease.
This method is also applicable on the road, the main thing is to have the necessary equipment and materials with you:
The fungus repair procedure does not require much experience. The main thing is to keep it clean, fully clean the place where the patch fits, let the glue dry slightly to a dull finish and press (roll) the surface of the fungus with high quality, expelling all the air between the layers. If necessary, you can degrease the place before gluing with gasoline, but without the rest of the above, it will not be possible to fully carry out repairs.
The compressor is sometimes replaced by a small cylinder of compressed air or carbon dioxide. Unlike a mechanical pump, it will immediately create a “throw” of pressure, pressing the tire beads against the rim flanges (in emergency cases, even a fire extinguisher was used to pump flat tubeless wheels). When connecting the compressor, start the bike's engine before you start inflating the tire - let it idle.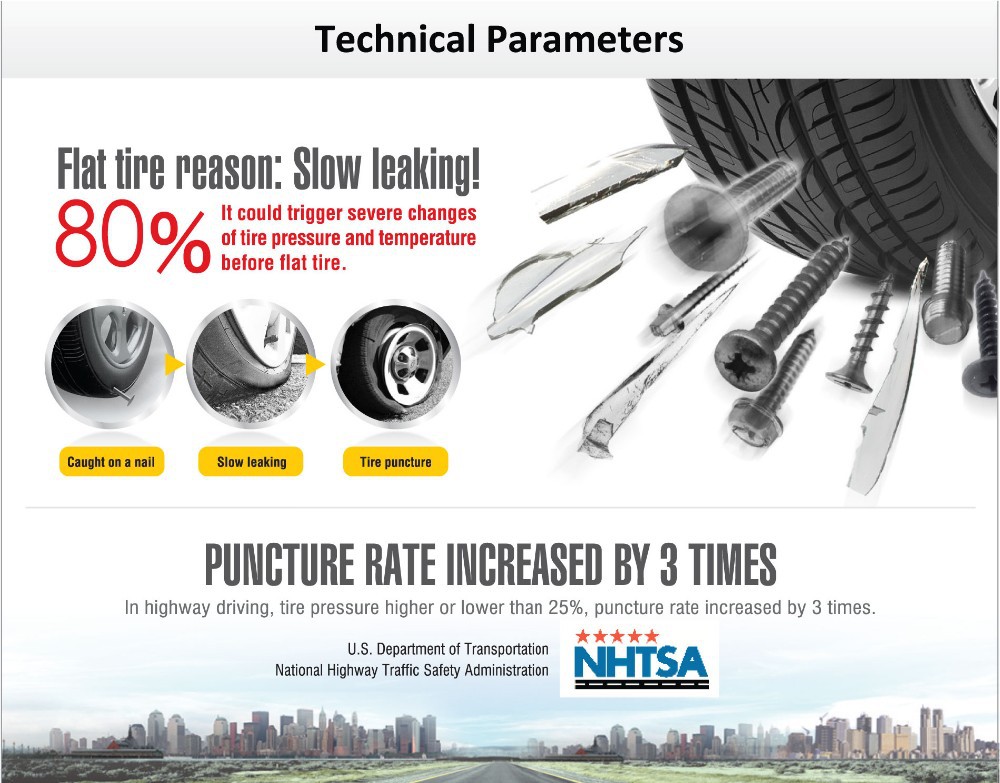 Otherwise, the motor can "land" the battery, and you will not start.
Manometer - needed for control. It is undesirable to pump over the repaired tire. It is recommended to "inflate" 0.2 atmospheres less than the nominal value. Inflating too little is also bad: a flat tire has a larger contact patch with the road, so the place of a fresh patch will deform more.
“Burning” a tubeless tube and sealing its internal cavity through a nipple are quick, simple methods that do not require special skills. To repair the damage, you only need the materials themselves, and how to pump up the wheel.
Now in Moscow, and not only, 6-5 varieties of cans with a sealant are sold - a quickly hardening "liquid rubber", with a volume of 800 to 250 ml.
Applying "Anti-Puncture" is simple: put a tube with a fitting on the nipple of the camera, turn the can over, and hold the button according to the instructions.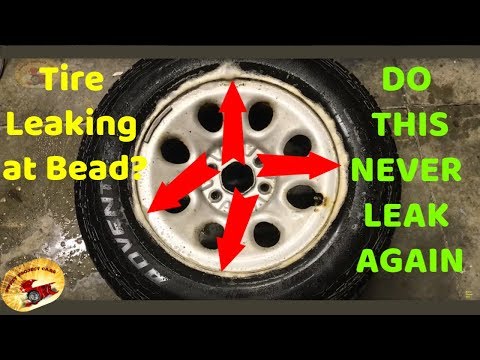 Then - pump up the wheel, cleaning the nipple from the foam, roll it, making a full turn to distribute it.
The sealant is blown out with air into the puncture hole and clogs it, solidifying. After 20 minutes - you can go. Reliability of repair is high. Resource - until the next puncture.
If you have a compressor, start immediately pumping up the wheel, so it will be easier to work with a puncture, insert a patch, and it will swell faster.
Procedure:
You can go in 5 minutes, you just need to make sure that it doesn’t descend anywhere else.
Outwardly identical, repair kits for harnessing wheels can differ in price by almost half. This variation is explained by different configurations - one will have only three items, the other - six or seven.
A complete tubeless tire repair kit contains:
Regardless of the cost, you need to choose a kit in which the harnesses will be reinforced, and the awl - with a deep spiral winding (notch), and not a “needle file”.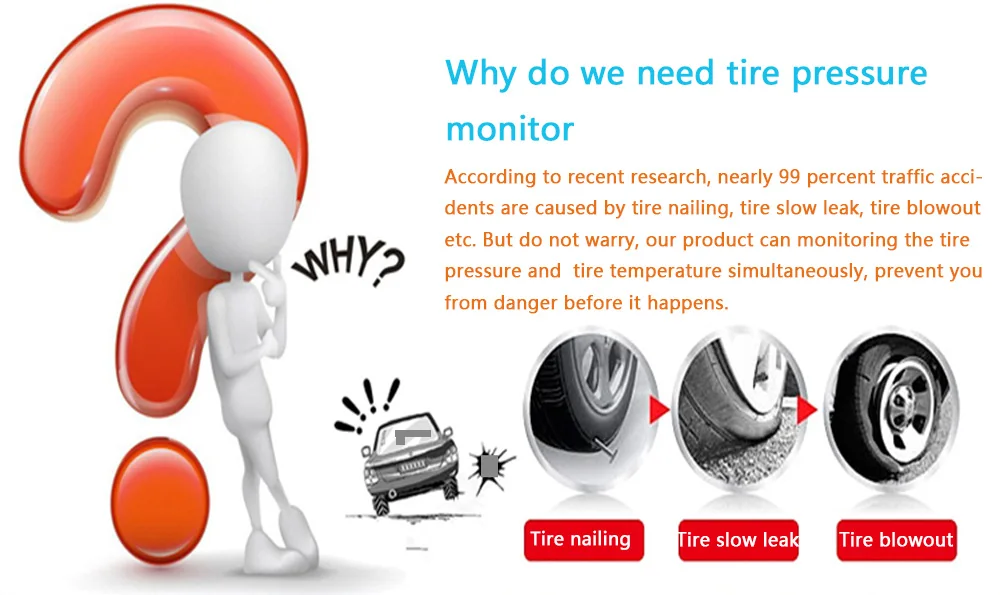 Inserting a flagellum is sometimes easier with a regular thin screwdriver. If there is no glue in the kit, or it has dried up, the flagellum is moistened with gasoline.
At motorcycle service stations and car services, holes in the chambers are closed by hot vulcanization: a layer of raw rubber is applied to the cleaned, fat-free puncture site and, after squeezing it well, it is heated with a special “iron”. Iron - burns, layers - are fused into a single whole. Reliability of repair is high. The resource will be almost like a new one.
Cold vulcanization (patching) - used if the workshop is not equipped with a vulcanizer. In this case, the quality of the service and the reliability of the repair will depend on the accuracy of the master. For the convenience of gluing, the camera is completely removed in the service, but, I repeat, this is not necessary. It can be repaired on the spot in the same way (there are no other options except for replacing the camera), but without removing it from the motorcycle.
This can only be done if you have two metal mounting blades. At least one, the second can be replaced with another flat tool. You can still disassemble the wheel with a wide screwdriver and a “family” key wrapped with electrical tape. But this is only as a last resort, otherwise you can damage the cord.
Sequence of work:
 Let the glue dry for a minute.
 The fencing must be carried out twice as carefully and more slowly than dismantling, lubricate the side with water or soap, “help” more with your hands, otherwise there is a risk of picking up the edge of the chamber with a spatula and tearing it.
Important! If the wheels of the motorcycle are equipped with tow bars - before pressing the tire bead from the rim, you need to loosen this tow bar! But do not unscrew the nut completely, do not disassemble to the end.
A standard “first aid kit” (a set for repairing classic motor rubber) contains only patches and glue, so it is advisable to supplement it yourself with a piece of “skin” or a needle file. You can degrease with gasoline, or apply a little glue first and wipe off immediately, rolling up the dust with it.
Now there is no shortage of specialized motorcycle workshops not only in Moscow - in all major cities there are motorcycle helpers who help motorcyclists directly on the track, or tow to where you can quickly change the camera, or patch the tubeless correctly, so that there is no trace left. Where there is a guarantee.
Self-replacement of a tire on a motorcycle requires a certain physical condition, and for the first time - a “kilometer of nerves”. At the service station, instead of you, automation will “sweat”, which will not lock up the board and will not scratch the disc coating with a spatula. The main thing is to do it quickly (if you need to go urgently, the price sometimes does not matter).
Repair at the service - may be the only possible one if, due to driving on a flat tire, the tire nipple is turned and torn off. Especially if he flew off and got lost, but there is no spare. In mototiremontazhke - there is always a set of consumables for any wheel diameter. In the same place, in extreme cases, you can buy a new tire, or a used dokatka.
In addition to the patch, for normal operation of the wheel, balancing must be ensured. This is generally a useful procedure during any change of rubber, otherwise if there is a strong imbalance, the wheel bearing will inevitably break due to vibrations, and the hands will quickly get tired and “buzz” after long rides.
The first couple of tens of kilometers - do not drive, go at the speed of the stream.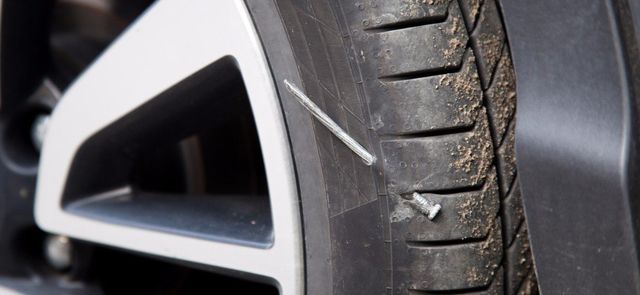 Stop, check for a flat tire. If the patch is not of high quality, it will manifest itself almost immediately. Parking will tell about the long-term perspective: if the cylinder has not lost volume in the first day or two, then everything is in order, you can drive as before.
Knowing what to do if a flat tire is on the road is important not only “for yourself”. To help a newbie or a fragile girl is to earn an important “plus in karma”, which will later return at the right moment. But, I hope, this knowledge will be useful to you only in theory. Good luck on the roads, no nail, no wand!
Photo https://www.roadandtrack.com
Many experienced drivers have probably met with such a situation when a tubeless tire deflates, but a tire specialist did not find visible punctures, cuts or other damage to the rubber. What could be the reason for the depressurization of the wheel in this case, and how to determine it, the AvtoVzglyad portal figured out.
Ivan Flyagin
The vast majority of modern cars are equipped with tubeless tires, which allow maintaining pressure in the wheel for some time with a slight puncture. That is why, unlike tires with a chamber, which, if damaged, can instantly go down or even burst at high speed, such rubber is considered the safest.
Most often, tires deflate due to a puncture or side cut, but sometimes the driver does not find visual damage on them, and in order to determine the cause of depressurization, he contacts the tire shop. Even if it happens on a trip, far from home in an unfamiliar area, it is still better to replace a flat tire and not hesitate to diagnose and repair it. The use of various tire sealants in this case will give a temporary effect. But, first of all, it is necessary to establish the cause of tire depressurization.
What does the specialist do in this case? To begin with, he usually pumps the wheel 1-1.5 atmospheres and tries to catch by ear where the air comes out.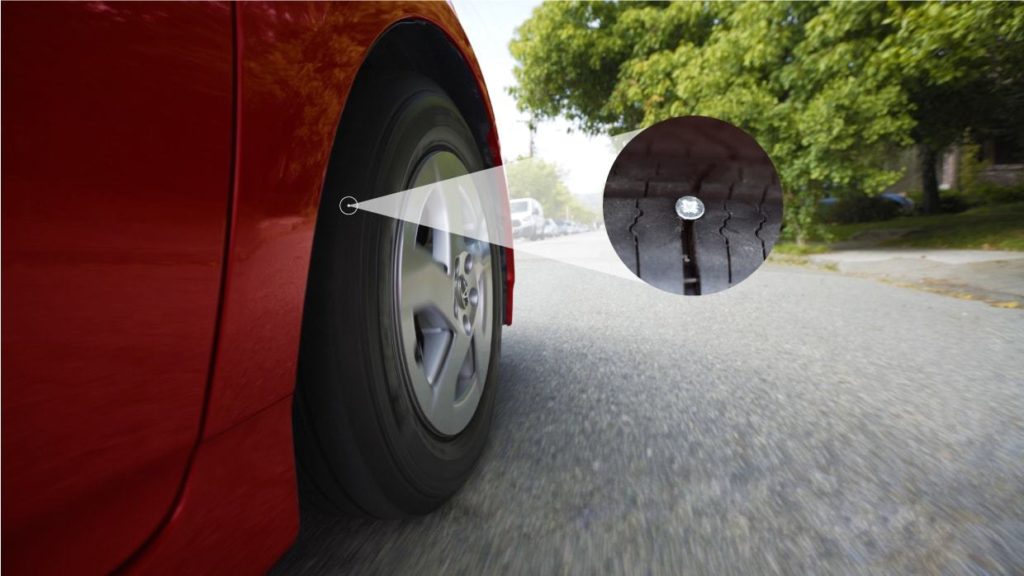 If there is no result, then most likely, he will moisten the surface of the tire with plenty of soapy water and determine the location of the damage by the emerging air bubbles.
But even this sometimes does not help, and then the wheelmaker will dip the entire wheel into a tank of water. Alas, even in this case, there may be no bubbles, since it happens that the removed wheel holds air, and if you install it on the car, it lets it through. This is mainly due to an object stuck in it - a self-tapping screw, a nail, a piece of wire. One effective way to solve the problem in such a situation is to disassemble the wheel and run a rag over the inside of the tire. If the rubber caught some sharp object, then it will definitely stick out from the inside, and the rag will catch on to it anyway.
If the master has not been able to find damage to the rubber, then the wheel can be lowered only in two cases - due to a disc failure, or due to depressurization of the spool (nipple).