Valve stems are a crucial part of any tire. Well, they are not part of a tire per se, but they are an auto part designed to ensure the tires’ safety and performance. Therefore, valves are important!
Valves keep air pressure from escaping tires. From valve cores to caps and versatile valve types, we will walk you through everything you need to know about valves and how said valves function.
The small tube system that you can use to fill your tires with air is called a valve stem. This system is basically a one-way door used to transfer gas (in this case air pressure) into a chamber (tire). Different valve types are available.
Valves are located on most pneumatic tires, from automobile to bicycle models. Tire valves are used to add or remove air pressure inside the tire. Once air pressure enters the tire, tire valves do not let it escape on their own.
A tire stem helps tires keep their optimal pressure levels, by using its different components. Valves consist of a valve stem body, a valve core, and a valve stem cap. These work together to keep the correct pressure levels inside the tires.
The various components of valves work together to enable the tire’s secure performance. Air pressure loss can occur if the valves are damaged. But, as long as they properly function, valves will hold air and guarantee the tires’ performance.
There are versatile types of tire valves available for purchase. The type you need greatly depends on various components: mainly what type of tire the valves are used on.
There are three different tire air valve stems manufactured:
These have various applications! Let’s talk about them in more detail.
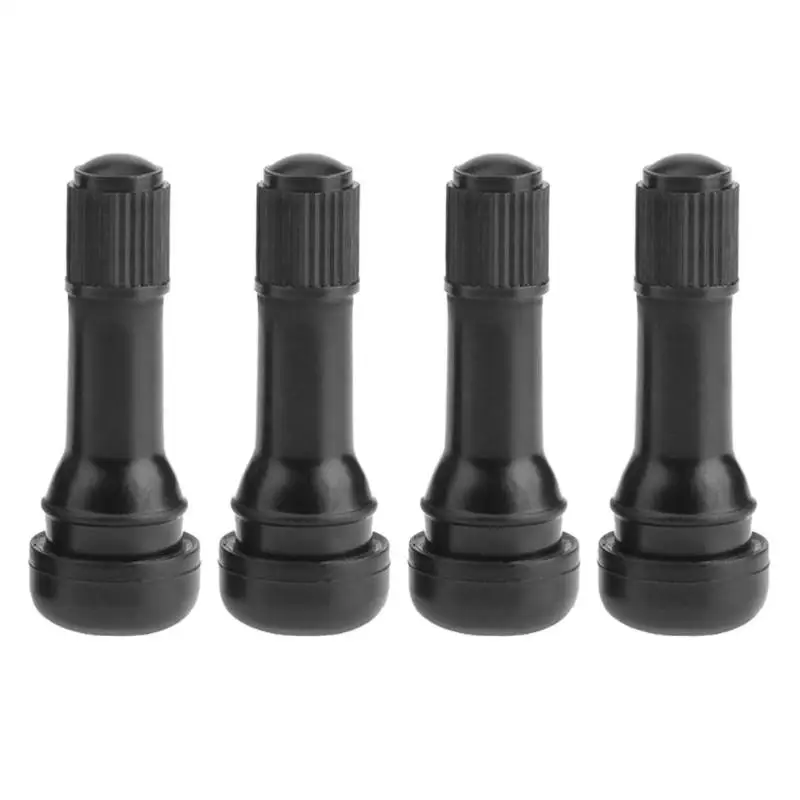
Probably the most common valve type is the tubeless rubber snap-in tire valve, as they are suitable for passenger cars, light-duty trailers, and various light trucks. Additionally, they can be used in autocross competitions as well.
These tire valves hold a maximum of 65 psi, as a cold tire inflation pressure. This valve stem size usually ranges between 0.7″ to 2.5″ and it can fit 0.453″ or 0.625″ diameter rim holes. Often they sport plastic valve stem covers, but some can be purchased with chrome sleeves or a metal tire pressure cap. However, this is merely for aesthetic purposes.
Check out this valve stem sizes chart:
The tubeless snap-in high-pressure tire valves function in the same manner as the previous type does. However, they are used for applications where the maximum pressure is above 65 psi. In other words, they are for medium- to heavy-duty trucks and trailers, that use pressure to handle larger weights.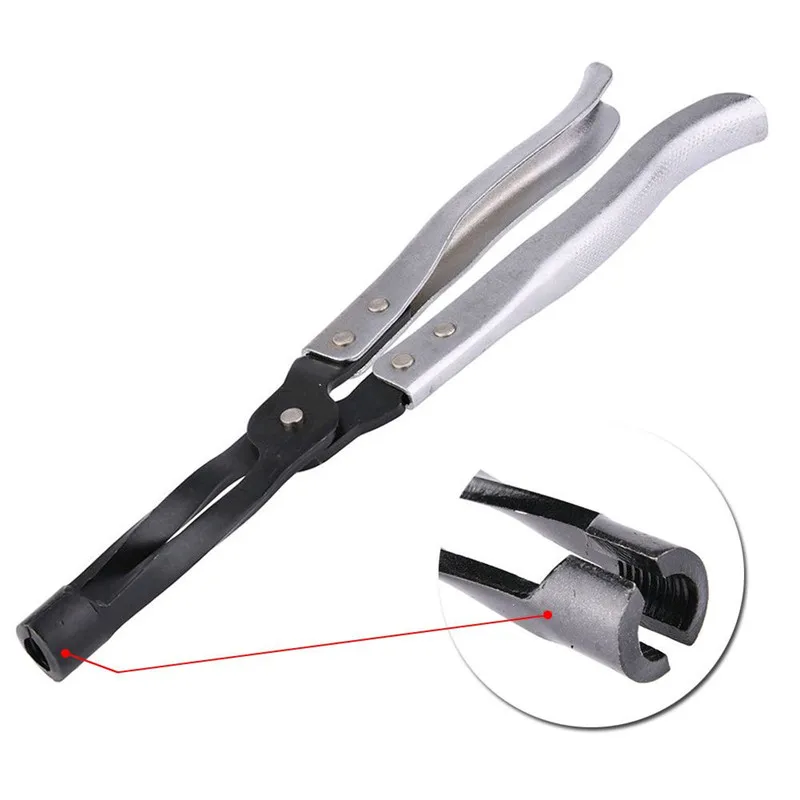
These tire valves are made in two rim hole fittings: 0.453″ for tires with a max cold inflation pressure of 80 psi, and 0.625″ for those with 100 psi. Due to the vehicle applications, these valve stem sizes range between 1.25″ to 2″. High-pressure valve stems are designed for steel wheels. They are equipped with thick rubber snap-in bases, metal barrels, and plastic pressure caps.
Size chart of high-pressure, tubeless snap-in valves:
High-pressure metal valve stems are clamp-in models that use a rubber grommet, which seals the valve against the wheel when you tighten the holding nut. These valves are generally manufactured for high speed, racing vehicles, or for vehicles exceeding 130 mph.
Most metal clamp-in tire valves are available for 0.453″ and 0.625″ rim holes. However, some special applications are available for 0.236″ and 0.315″ rim holes. Additionally, they come in straight or bent styles to accommodate even unique wheel shapes. These valves hold maximum cold tire inflation of 200 psi.
These valves have two fitting types: with the retaining (holding) nut inside or outside of the rim. For aesthetic reasons, many drivers prefer it to be hidden inside the rim. However, outer placements allow you to tighten the nut whenever it is necessary.
We have talked about the types of tire valves you can purchase for different vehicles. Now, let’s see their components.
Like most auto parts, valves also consist of multiple parts, which are:
These individual parts of valves work together to hold air in the tires. Some are crucial and some don’t have to be used. However, these parts working together will guarantee the vehicle’s secure drive.
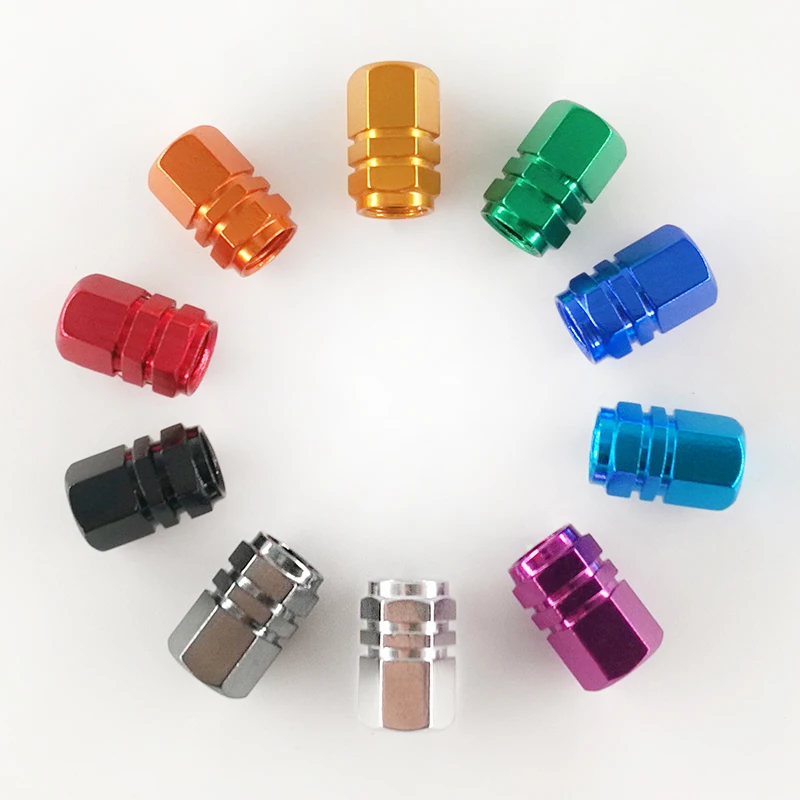
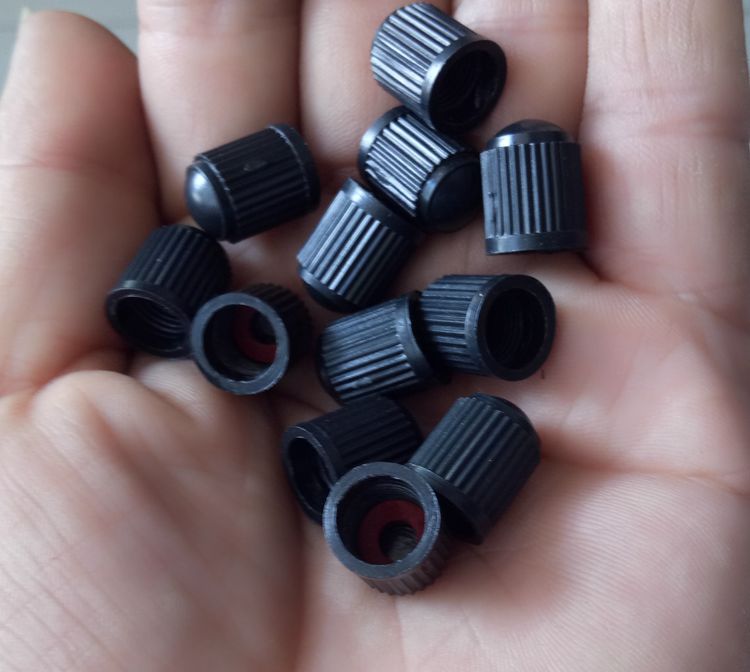
A valve cap should be used on all valve stems. There is a good reason for this! Moisture contamination and loss of air pressure at high speeds can cause problems. They can damage the valve core or cause the tire to do flat. However, a valve cap will help prevent these issues.
Tire valve caps are available to be manufactured from plastic, metal, or metal with a special screwdriver design. When these caps are used greatly depends on which vehicle they are on. When it comes to everyday driving, a plastic tire pressure valve cap should be enough. However, for racecar applications, a metal one is better. Tire stem caps are either knurled or hexagon-shaped to make them easier to remove.
While missing tire valve covers are not the end of the world, it is advisable to replace them. For one, it is a second seal that prevents pressure from escaping, in case valve core damage occurs. On the other hand, it also makes sure that sand, dirt, and moisture does not enter the stem and damage it.
A valve core is the main seal inside the stem. This part of the stem seals tire pressure inside the tire, preventing it from escaping. It should be tightly screwed into the valve core chamber. They are manufactured with shorter (for high speed applications) and longer lengths, and nickel-plated and brass valve cores are available.
It is important that you only use a nickel-plated valve core with an aluminum tire pressure sensor valve stem. This is due to brass valve cores in such applications experiencing corrosion that can transfer and affect the aluminum wheel as well. This is to protect the wheel and its integrity.
These valve cores basically consist of a spring-loaded pin that is moveable. This allows air pressure to inflate and deflate the tires. This valve stem seal prevents pressurized air from escaping the tires when the caps are off. The valve stem core is durable, but dirt, moisture, and sand can damage it. Dirt and sand will prevent valve cores from sealing properly, while moisture will freeze and damage the valve cores.
If you fit wheel covers on your car, you can use valve extensions to make the inflation process easier.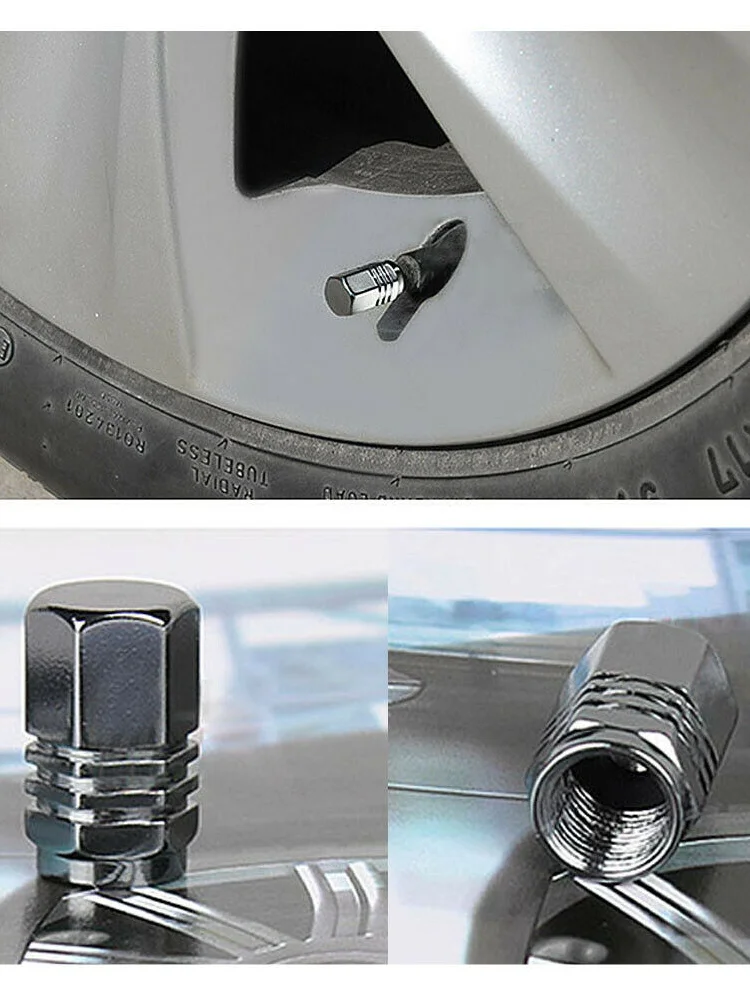 These nylon or metal extenders are available in sizes between 0.5″ and 2″.
It is important to select the ideal extension length or to purchase durable, preferably metal, ones. Road and weather conditions and driving habits can easily damage these extensions, which will leave to other issues.
If your vehicle uses direct TPMS sensors, then the valve stems also hold the sensor inside the tire. Mechanics do this with metal clamp-in or rubber snap-in valves. These TPMS sensor tire valve stems work together to transmit information to the TPMS monitor.
The two different TPMS stem types function a bit differently. Let’s see how!
A clamp-in valve stem-sensor combination fits the sensor with a rubber seal and a retaining. These two parts, along with the valve cores and caps, need to be tightened correctly, in order to prevent pressure loss.
These TPMS rubber valves need nickel-plated valve cores to prevent damage. Galvanic corrosion can damage brass cores, which will transfer onto the aluminum barrel with time – leading to even bigger damage.
The other type of TPMS sensor tubeless tire valve is the rubber snap-in version. These accept TPMS sensors can be different, and purchasing valve stems that accommodate them in crucial.
If the TPMS stems are not compatible, it will lead to air pressure loss. Using the correct combination of valves and TPMS sensors will ensure a safer driving experience.
Have you ever noticed a vehicle with green valve stem caps?
Well, there is a reason for their distinct color! These valve stem seals keep the pressure inside of nitrogen-filled tires. Many believe that adding nitrogen in tires improves their performance, durability, fuel economy, etc.
Therefore, nitrogen valve stem caps are green!
Are Valve Stems Replaced with New Tires?
Usually, when mounting new tires on a vehicle, it is advisable to get new valve stems for tires as well. However, when you purchase new tires, the tire valve stem is not included.
The valve stem sizes you need depend on the rim size. Low-profile rims (up to 0.9″) will need a 1.5″ stem while a 1.3-1.7″ rim should have a 2.3″ valve stem. Anything taller than 1.9″ needs at least a 3.1″ valve stem to properly function.
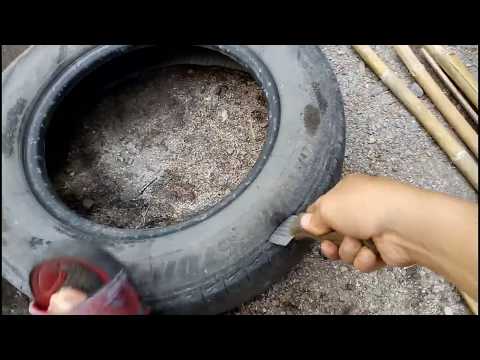
To find a slow leak in a tire, you will needs a spray bottle and soapy water. Mix liquid soap and water in a spray bottle and spray the entire tire (sidewalls, tread area, along the rim, and the valve stem). The slow leak will be there the soapy water forms small bubbles with the escaping air.
Air pressure escapes the tire when the valves are open because of the different pressure levels inside the tire and in the atmosphere. The high pressure of the tire flows out until the tire features the atmospheric pressure. This causes the tire to go flat.
“A tire only loses air if it’s punctured.” This is a common misconception that we have all had or heard and yet the reality is quite different. Indeed, a tire can lose air even without a puncture, as for example in the case of a crack in the valve that is used to inflate your tires. A punctured valve is difficult to detect, and not taking care of it in time can have real consequences for your tire, but also (and above all!) for your safety. Blackcircles Canada, your online tire specialist, offers below a complete guide to the causes and consequences of a punctured valve, and how to repair a leaking valve stem.
A valve is a pin located on the outside of the tire, through which the tire can be inflated/deflated. It has a mechanism consisting of a spring-mounted valve that closes tightly with the air pressure inside the tire.![]() Over time, the stem valve may become brittle and cracked, which may increase the risk of air leaking through it.
Over time, the stem valve may become brittle and cracked, which may increase the risk of air leaking through it.
When the stem valve leaks, the affected tire is no longer able to retain air. Depending on the extent of the damage, the air will leak out slowly or more quickly. In both cases, the valve must be replaced.
If the air leakage is slow, you will be subject to the problems encountered by drivers driving with underinflated tires. Internal damage that can shorten the service life of the tire by up to a quarter, increased fuel consumption due to higher rolling resistance: the tire will damage faster, and your energy-efficiency will be significantly lower. The tire will also have poorer traction and the stability of your car will be reduced when cornering, not to mention the more pronounced deformation of the tire that increases its internal temperature, which can cause it to burst. Finally, an under-inflated tire increases the risk of hydroplaning. Tire pressure is thus very important!
 Here’s how to do it!Step 1: Make sure it’s your valve stem that’s leaking.
First of all, make sure it is the tire valve stem that is leaking. To do so, there’s a very simple trick! Apply a mixture of water and dishwashing soap to the valve with the cap removed. If bubbles start to appear, your valve is leaking. If this is not the case, and there is a definite air leak, it will be located elsewhere on the tire.
Step 2: Gather the right tools before you start!Before you begin, make sure you have all the necessary equipment to complete the replacement of the faulty valve stem.
For this, you will need the following:
You are now ready to start the process!
Step 3: Loosen the nuts on the wheel you are going to work on.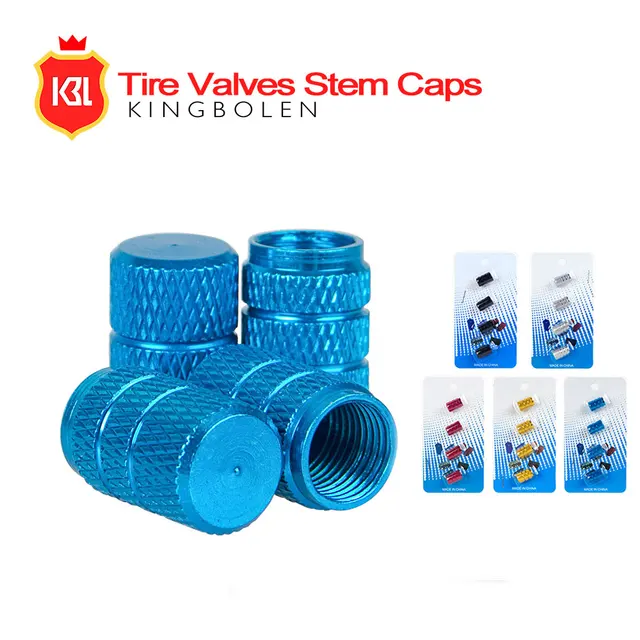
To do so, use the wrench mentioned in the previous step to loosen each of the lug nuts holding your wheel in place. Do this while the car is still on the ground.
However, for certain models of vehicles, it is possible that the wheel nuts have an anti-theft ring. If this is the case, you’ll have to use the appropriate special key to remove the locking nut(s).
Step 4: Raise your vehicle with the jack and then remove the wheel.First and foremost, make sure the handbrake is applied so that your vehicle is completely immobilized. Then, use your jack to lift your car. Be sure to position it on the right part of the chassis so that the car is properly supported. This will prevent any damage to the car and any bodily injury. Once your car is lifted, secure it on jack stands. Unscrew the wheel bolts completely, then remove the wheel. Finally, place the wheel on the ground flat, with the outside of the wheel facing up.
Step 5: Remove the valve stem core with the removal tool and let the tire deflate.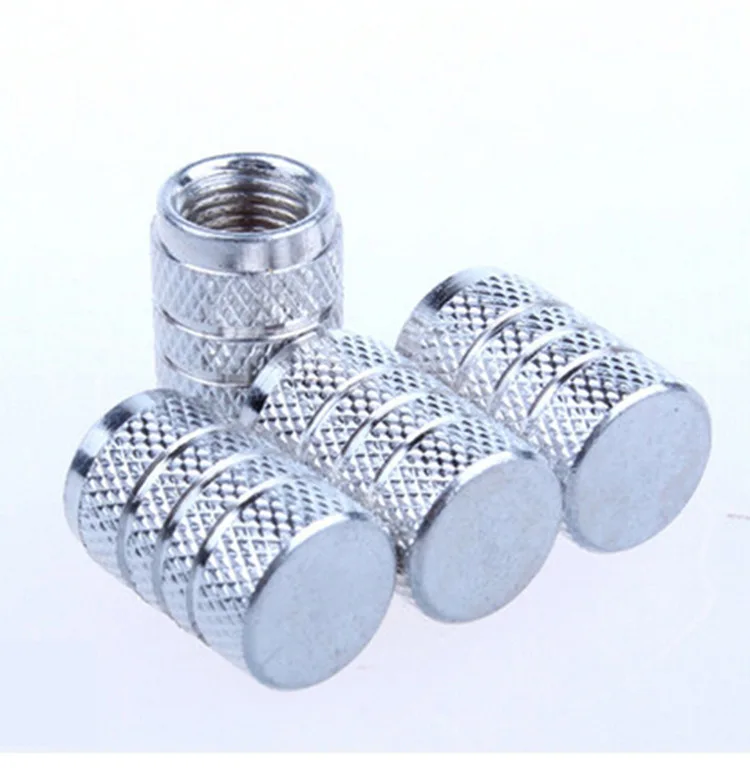
If you have not already done so, remove the valve cap. Then remove the valve stem core using the valve stem removal tool to release the air from the wheel, which should normally deflate completely on its own.
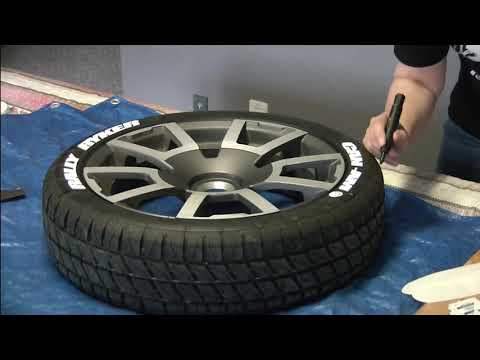
Step 6: Separate the tire’s bead from the wheel.For this step, use the sledgehammer in the following way: hit the tire sidewall with the sledgehammer in the same spot until you hear a crack or popping sound, and see the inside lip of the tire visibly break loose from the rim. This means that the tire has been successfully detached from the lip of the wheel.
Once the tire bead has been broken, continue hitting with the sledgehammer around the tire to detach the sidewall around the entire circumference of the wheel.
Step 7: Remove the tire from the rim.Once the sidewall of the tire is separated from the outer edge of the rim around the entire circumference of the wheel, insert your tire iron between the edge of the rim and the inside lip of the tire, and then pry upward to pull the lip of the tire over the edge of the wheel.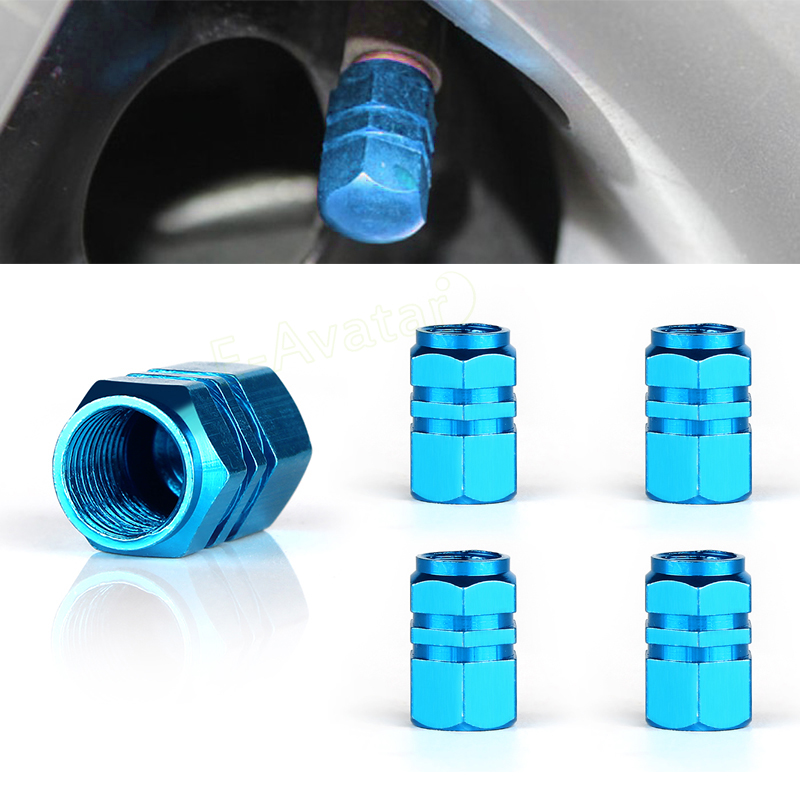 Once you have pulled the lip of the tire over the edge of the wheel, work the tire iron around the rim until the entire lip of the tire is off the rim.
Once the sidewall of the tire is completely above the wheel, grab it by its removed lip and pull it upward so that the opposite lip that was at the bottom of the wheel is now touching the top edge of the rim. Use your tire iron again by inserting it between the tire’s lip and the edge of the wheel and pry upwards to pull the lip over the edge of the rim. As before, work the tire iron around the edge of the wheel until the tire is removed from the wheel.
Step 8: Remove the defective valve stem and replace it with the new one.Once the tire is separated from the rim, it is time to remove the valve stem. To do this, first pull out the valve stem free from the wheel using the needle-nose pliers. Once this has been done, install the replacement valve stem from the inside of the wheel. Once it is in position, use the needle-nose pliers again to pull it through into its right place on the wheel.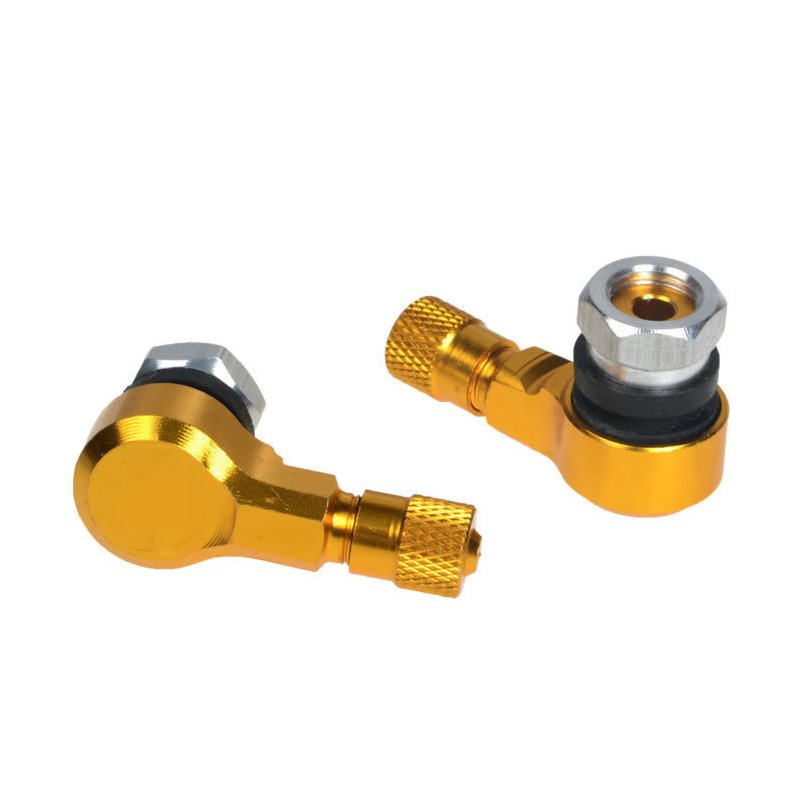
Once the stem is in place, it is time to put the tire back on its rim. To do this, start by pressing the tire down over the rim until the bottom bead clears the edge of the rim. The aim here is to return the lower sidewall of the tire to its original position on the wheel.
Then press the upper sidewall of the tire down underneath the edge of the wheel. Then tuck your tire iron between the tire sidewall and the rim edge and use it to make the opposite movement to the one you used to pull the tire sidewall out of the rim. Once the bead clears the lip of the wheel, use the tire iron to work your way round the entire wheel until the tire is completely installed on the wheel. Then inflate it to the correct pressure using the air compressor.
Step 10: Make sure there are no other leaks, and mount your wheel back on!Once the tire is inflated to the correct pressure, check for other leaks.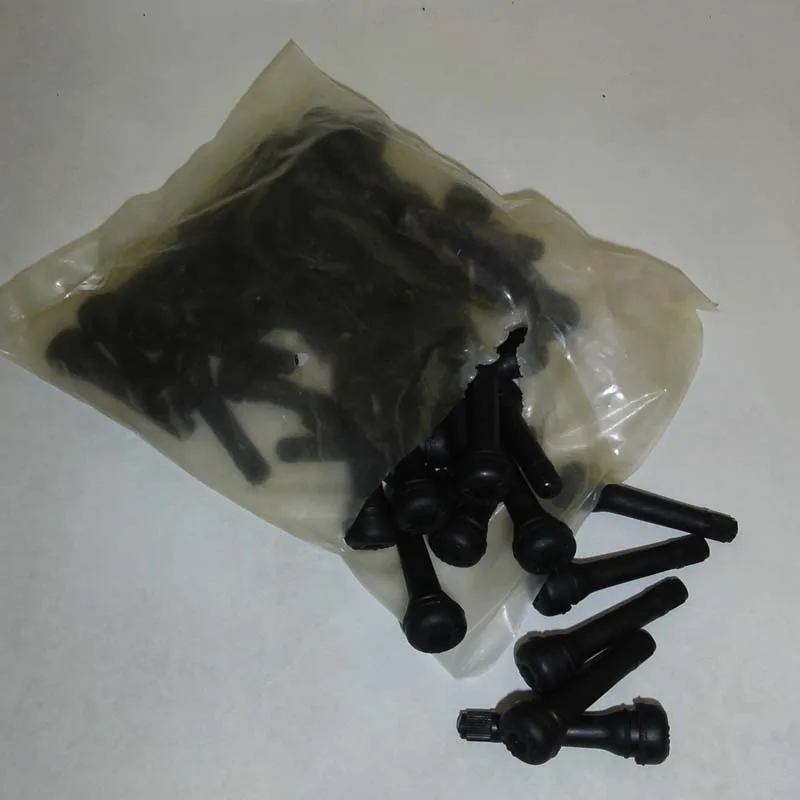 If all is well, mount the wheel on your vehicle and bring it down by lowering the level of the jack stands until the repaired wheel touches the ground and you can safely remove them.
Ultimately, it is very important to make sure your tires are free of air leaks to maintain proper air pressure at all times. In the case of a slow air leak, the consequences can be dramatic. If the air leak is due to a faulty tire valve, you will definitely need to replace it. You can either follow the above procedure on how to repair a leaking tire valve or take it directly to a specialist. If, on the other hand, you need to change the entire tire, consult our selection of tires adapted for your car directly online on our website!
Tire Installation 101: When and how to change your tires?
Author: Mikhail Balandin
We often hear the phrase that, they say, "he eats oil - it is necessary to change the valve stem seals." If a person has not seen what this very cap looks like, different pictures may form in his head. What is this cap, what is it on, what does it close, why is it to blame for the fact that the motor eats oil? Is it difficult to replace it? And is it his fault? Today we will try to understand all these issues. Some things here seem very simple, and some things are more difficult than they seem.
So, from the very beginning: what is a valve stem seal? This cap, which is correct to call the oil-slinger, and not the oil scraper, is just a valve seal. If absolutely correct, then “the sealing element of the gas distribution mechanism of an internal combustion engine with an overhead valve arrangement; rubber cap mounted on the valve guide and valve stem to allow engine oil to enter the combustion chamber. In general, from this definition, the task of the cap is also clear: to prevent oil from entering the combustion chamber along the valve stem.
If, for simplicity, we neglect all sorts of rockers, pushers, hydraulic lifters and some other parts of the block head, then we can say that at one end the valve rests on the camshaft cams. The other (the one that ends with a plate), it goes into the combustion chamber. That end, which is in interaction with the camshaft, is constantly in the engine oil. And the task of the cap is to prevent this oil from leaking down to the valve plate. This is the very simple thing that I promised at the very beginning. Now let's move on to the more difficult part.
The slinger cap works in very difficult conditions. First, because of the very high temperature. Secondly, the valve stem is still a fidget. In just one minute of running the engine, it can run up and down more than a thousand times. Of course, it is difficult to work in such conditions. Friction, heat, and engine oil can kill anyone, and a cap is no exception. You must have heard something like "the caps are numb". Indeed, being in such an aggressive environment, caps lose their properties, primarily elasticity. The “hardened” caps cannot fit snugly against the valve stem, which means they cannot perform their function.
It must be said that caps now last much longer than before. The owners of the classic Zhiguli were doomed to change these penny (but at one time scarce) parts often. The reason is in the material of the caps. Old-school car enthusiasts probably remember the products of the Kursk Rubber Products Plant (now Kurskrezinotekhnika OJSC), which produced caps for the VAZ. Those caps were made from 51-1537A-2 acrylate rubber compound.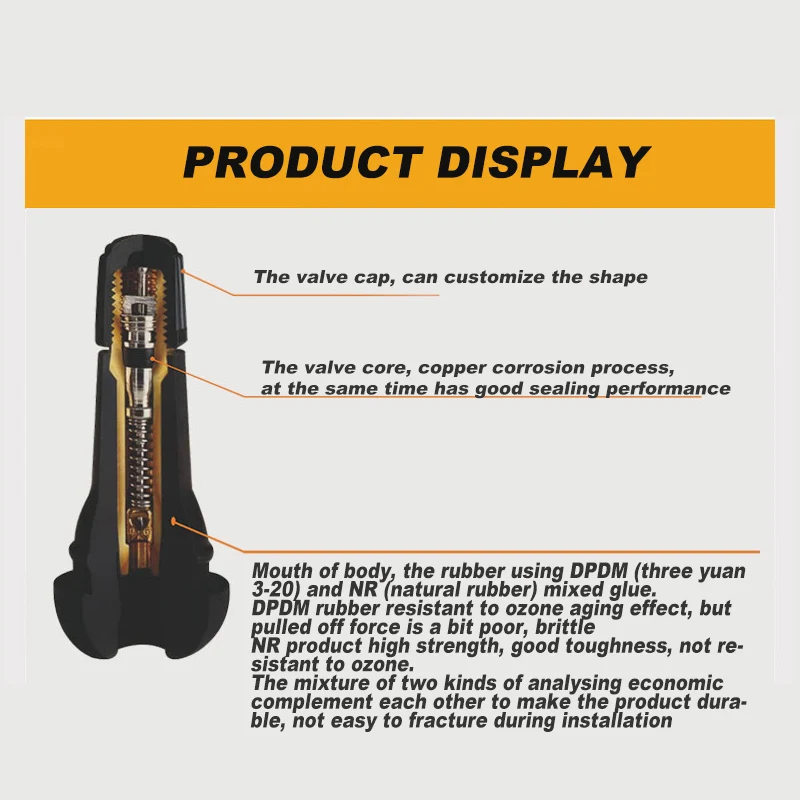 The heat resistance of this mixture is up to 150 degrees, and the temperature to which a working cap can be heated is 180 degrees. It is clear that such caps could not serve for a long time.
Interestingly, on the engines of the early VAZ-2108, the caps lasted longer than on the "classic". The fact is that we did not have caps that would fit the "chisel" motor, so at first there were German products "Goetze" and "Elring", and then, in the early nineties, domestic caps appeared that could work in these motors. And they were made not from a mixture of 51-1537A-2, but from the then-new IRP-1287 composition based on SKF-26 fluororubber (they were produced at the Reserve NPK in Samara). Domestic caps became better, but at the same time they could still “slide” off the valve guide, after which the engine began to eat liters of oil.
By the way, why can the cap slide off the sleeve? Theoretically, some caps can do this easily, and some cannot, with all their desire. The reason is in the different design options.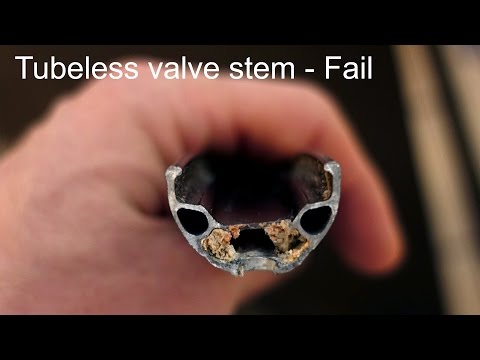
The main parts are more or less the same. The cap is a sleeve of variable diameter. The lower part is wider - it should fit snugly on the valve guide. The upper part of the cap is narrower, it should tightly wrap around the valve stem. To do this, outside the cap in this narrower part, there is usually a coil spring ring, which provides a tighter fit of the cap rubber to the valve stem. In the lower part, the one that covers the valve sleeve, there is also a metal element - a steel ring, thanks to which the cap must be fixed very securely on the guide sleeve.
The difference between collar and flange caps lies precisely in this lower part of the cap. If the collar is simply put on the valve sleeve, then at the flange the steel ring at the bottom expands and ends just with a flange. When such a cap is installed, the valve spring rests against this flange, and thus the flange cap sits in its place more securely than the lip cap. The cuff can still fly off, but the valve spring will not allow this to be done.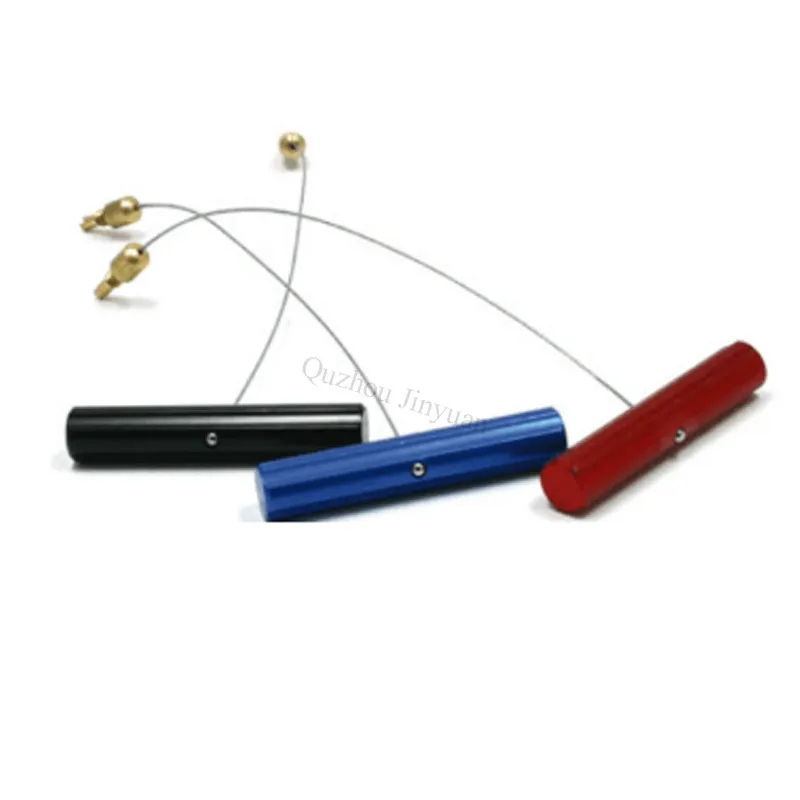
However, lip caps are now also very reliable, and there is no problem with their exodus from their place on the valve sleeve. But other problems on used cars occur regularly.
What can go wrong, I already said: due to aging, the cap cannot ensure a good removal of oil from the valve stem, and it begins to seep into the combustion chamber. In this case, the consequences are varied, but all as one are unpleasant: carbon deposits form on the valve plate, compression may drop, the dynamics will become worse, smoke will pour out of the pipe. Well, the main thing is oil consumption. Actually, caps are usually remembered only because of the oil. And that's just because changing them is considered easier than getting into the cylinder-piston group and dealing with rings or liners. Often this happens, and replacing the caps can solve the problem of "oil burner".
The main thing is to understand whether it is worth contacting them. There are fairly simple ways to find out if they are the cause or not.
The most effective method is to try to press the gas sharply with a warm engine. It is important to observe two conditions: first let the engine idle for at least five minutes and press the pedal sharply. The point is that at idle, leaking oil accumulates, and when pressed sharply, it, together with a large amount of the mixture, burns out and flies out into the pipe. So someone is revving, and someone is looking at the exhaust. The blue club flew out - these are the caps. At the same time, after this club, the smokiness can be normal.
To check everything again, you can try to brake the engine. Smoke will fall - these are also caps. Smoke during regassing is also a sign of the death of caps.
On the one hand, these methods are quite reliable. On the other hand, there are some subtleties that make such a simple diagnosis meaningless. The subtleties lie in the fact that a similar ingress of oil into the combustion chamber may be for another reason. For example, due to valve stem wear. It gradually becomes thinner, and in advanced cases, even the newest cap will not save the situation. Or the valve stem may be worn. Rarely seen, but it does happen. After all, the cap is able to work only with the longitudinal movement of the valve, as it was intended by the designers. Its axial movement due to wear of the rod or guide cannot be compensated by the cap, and the oil will still get inside the cylinder. And there may also be problems with ventilation of the crankcase gases, which give similar symptoms.
It is useless to measure compression to find diseased caps. If she fell, the cause is more likely to be in the compression rings.
It turns out that the only absolutely reliable method for diagnosing oil seals is the mandatory disassembly of the cylinder head. And everything described above should only encourage you to do this not the most exciting thing.
There were times when these caps on "kopeks" were changed in garages for beer with roach. It was possible there. Hypothetically, they can also be replaced on a modern machine. But of course there will be more complexities (if only due to a more compact layout and more stringent assembly requirements), so I don’t think that anyone wants to mess with it on their own. Who wants to - he does not read all this, but has long been removing the valve cover and looking at the camshaft. And if someone still thought that he would do such nonsense with his own hands, I can recall the following.
It is pointless to put new caps on valves with dead stems - the oil will still leave in liters. It will also go away if you mix up the caps and put caps from the intake valves on the exhaust valves, and from the exhaust ones on the intake valves. The valves are different, their caps are too. The slightest loose fit - and hello, "maslozhor." Maybe even more than it was.
In a good way, for this work it is better to completely remove the cylinder head. At the same time, you can assess the condition of the CPG (maybe the reason is not at all in the caps), check the head of the block (for example, by crimping), assess the condition of the mating planes (the head can lead) and the valves themselves. Of course, in some cases a very handicraft replacement will help, but disassembling the motor twice because of your own laziness or craving for economy is very disappointing. And it is also very important not to save on the caps themselves: a “singed” cap made of bad rubber will live very little, so the savings will not pay off.
Poll
Have valve seals failed?
Your vote
Total votes:
practice
Articles / Popular questions What is an electronic PTS, why is it needed and how does it work Electronic PTS in the EAEU countries were approved back in 2015, actually appeared in Russia in 2018, and from November 1, 2020, all new PTS began to be issued only in electronic form. One... 590 0 11/28/2022
Articles / Used cars 5 reasons to buy and not to buy Volkswagen Passat CC "King of the track, but in the city he tears everyone"; "does not go at all"; "model of reliability"; “is pouring, without waiting for 100 thousand”; “great interior, quality materials”; “the interior is miserable, like in Polo”; ". .. 744 eleven 0 11/27/2022
Articles / Tests Taxi fleet test: check what you know about the first generation Renault Logan "Citizen of the World", known to us under the name Logan and produced in the world under several different brands, this year celebrates its 18th anniversary. In honor of the "coming of age" of this involuntary love... 2642 0 2 11/26/2022
Test drives / Test drive Haval Dargo vs Mitsubishi Outlander: the dog is barking, the stranger is coming In the Haval dealership in the south of Moscow, life is in full swing: buyers look at cars, communicate with managers and sign some papers. While I was waiting for the test Dargo, the same cross... 17661 7 205 13.09.2022
Test drives / Test drive Motor from Mercedes, emblem from Renault, assembly from Dacia: test drive of the European Logan 1.0 It would seem that what's new can be told about the second generation Renault Logan, known to every Russian taxi driver, as they say, up and down? However, this car has... 14228 ten 41 08/13/2022
Test drives / Test drive Geely Coolray vs Haval Jolion: Free Cheese? If! Do you want to buy a car today with a full warranty, on credit at an adequate rate, without wild dealer markups? Now this is still a task, because a full-fledged chain of "representation - s.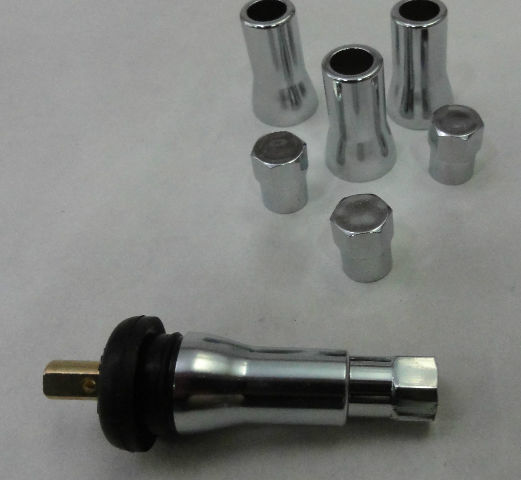 .. 11388 26 thirty 08/10/2022
Valve stem seals are elements in the engine gas distribution system that are subject to heavy and rapid wear. Many call them “consumables”, in fact they are spare parts that are very difficult to access. Their replacement causes certain difficulties for car owners and auto mechanics.
Oil seal - a metal part with a rubber “cap”. Inside the case there is a bushing and a spring, which tightly covers the annular rubber seal of this part. It is needed to fix the metal and rubber part of the cap and press it against the valve. This mechanism also prevents oil leakage.
If we talk about the durability of “consumables”, then the materials from which they are made are evaluated.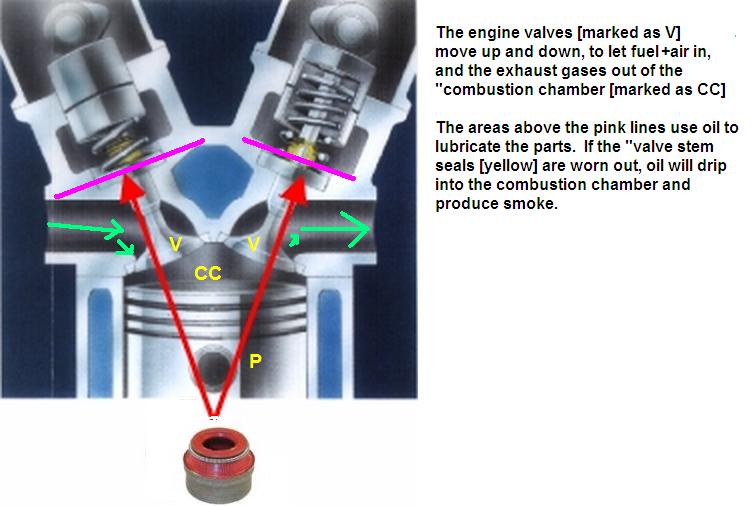 If fluororubber or acrylic was used, the parts will have a fairly high seal and wear out more slowly, and if they are made of fluoroplastic, the parts will be less efficient to use. You can consider them as an alternative if there is a shortage of funds for quality materials or as a temporary solution.
If we talk about the direct purpose of these parts - they are responsible for the good operation of the camshaft and for the lubricant to enter the combustion chamber. If there are no problems, the valve is actively moved and the excess is removed.
Replacing oil seals for many cars is carried out according to the same principle. This is necessary when the rubber element is worn out, due to poor quality materials or the influence of engine temperature conditions. It is worth noting that all spare parts are immediately replaced, even if only one is out of order. This will protect you from further work and allow the car to work in the usual mode.
Rubber caps tend to wear out, they lose their elasticity, so oil begins to flow into the combustion chamber and disrupts the operation of the candles. After that, difficulties begin with starting the engine.
Cheap and low-quality materials, accelerate wear by almost two times.
The wear of the caps cannot be checked visually. They are located in the engine and in order to replace them, you need to know the device of the machine well and how to remove them correctly so as not to hurt other parts.
There are only two types of caps. This is very important to consider when replacing them. Therefore, you need to know what they look like. The first gland is a lip valve. There is a very simple device - the rubber element is located on the metal part, which is responsible for the direction of movement. Due to the ease of manufacture and low cost of materials - this type is the most common among valve stem seals.
Of the minuses, it is worth highlighting only that they are quite difficult to replace by yourself and professional tools are needed.
The second type of oil seal is installed under the spring. It is responsible for stabilization and allows you to seal the joint, oil does not enter the combustion chamber. Of the advantages of the stuffing box, the following are distinguished: there is no heating of the head, high wear resistance, ease of installation. But they are more expensive than cuffs.
To replace the valve stem seals, you will need the following set:
All this is desirable to prepare in advance, and most importantly be able to use them.
Remove the air filter first, then the fuel pump and ignition distributor. After that, you also need to remove the valve cover and camshaft. Then you need to correctly remove the above parts and remove the valve lifters and shims.
Many parts will need to be returned in the correct order.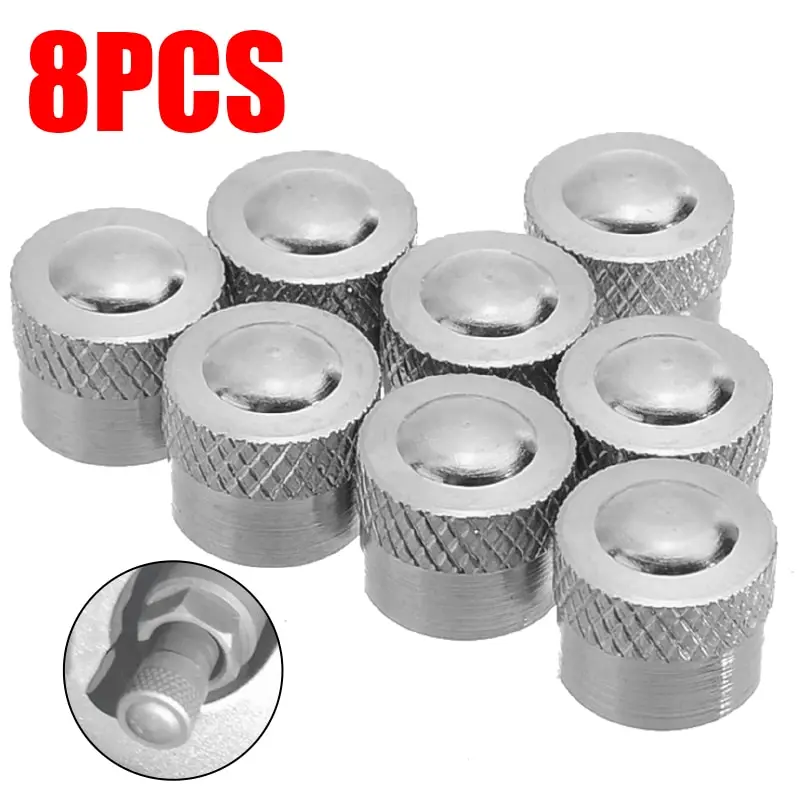 Therefore, with spare parts you need to be as careful as possible. This approach will allow you to install the part and not disrupt the engine in the future. If you install them in the wrong sequence, you will break the thermal gaps and ruin the working parts.
Next, use a spark plug wrench to unscrew the necessary spare parts. The choice of candle depends on the cylinder. After that, they need to be wiped and checked for soot, set aside the candles and crank the crankshaft until the piston is placed at the top point. Then you need to insert a tin rod into the candle hole. If it is still not there, use a thin rope. It must be inserted into the hole so that it fills the entire space inside.
Then you need to install the valve cracker. To do this, you need to fix the support rail with nuts on the extreme bolt studs so that you can position the adaptation lever and drown the valve.
After secure fixation, press the handle of the cracker and compress the valve spring. After long-nose pliers or metal tweezers, two valve crackers must be removed.
Next, you need to remove the upper valve plate and all springs. Only after these steps you will see the valve stem seal. Its dismantling is carried out using a special puller. It should be noted that the puller is needed mainly for caps with a rubber cuff.
Dismantling is carried out as follows:
In this way we obtain a pressed cap and remove it calmly.
It is possible to remove the caps without pullers and even without the cylinder head. This is necessary if you do not need to change the gasket or remove the intake and exhaust manifolds.
The following set of tools needs to be prepared:
To get started, the valve stem seals must be accessible. To do this, remove the negative terminal from the battery. After you need to remove the V-ribbed belt. To do this, put the head on the tension roller bolt and turn it clockwise until the spring is compressed. Then you need to remove the belt from the pulley, lower the tension roller and remove the belt completely.
Remove the spark plugs after the belt. To do this, you need to remove the cover of the ignition coil, but before that you need to move it towards the passenger compartment and lift it a little. After disconnecting the ignition coil terminal, unscrew the 2 mounting bolts. After carefully remove the ignition coil and unscrew the candles.
Next, remove the timing belt guard. It is necessary to disconnect or cut the ties of the wire casing, which is attached to the top of the protective casing, and then pull out all the wires. Next, unscrew the fastening nuts and completely remove the belt. Then remove the protective cover.
To remove the timing belt itself, unscrew the 4 bolts securing the V-ribbed belt to the crankshaft. After putting the piston of 1 cylinder to the top point. The mark must match the mark on the engine. If you remove the protection from the crankshaft, there is no need to match the marks from below, then you need to loosen the belt tensioner bolt and the hexagon and turn the eccentric counterclockwise. Remove it, and then the timing belt.
The camshafts must then be removed. To do this, unscrew the mounting bolts, disconnect the pipes and remove the valve cover. After you need to loosen the bolts of the pulleys and camshafts. They do not need to be removed if they are in good condition and do not need to be replaced.
After you need to remove the camshaft mounting caps or as they are also called yokes. It is worth noting that each cover has its own serial number, so you need to keep a close eye on this. To properly remove the covers, you need to unscrew them in this order:
The hydraulic lifters must then be carefully removed. You can do it by hand or use a suction cup to wipe the valves.
After that, it is necessary to dry out the valves and further remove the valve stem seals.
If you did not turn the crankshaft while removing the timing belt, the pistons of cylinders 1 and 4 are in the BMT. But it is best to check the correspondence of the marks and only then proceed to the replacement of the oil seals. It is necessary to start with these cylinders because when they are dried out, the piston will not allow them to fall inside.
It is important not to damage important parts and camshafts during this process. But with 4 cylinders you have to tinker. Its location does not allow the cracker to be well fixed, so you need to carefully wrap the end of the device with a rag or rag and rest it against the wiper motor. So you can crack the valve of 4 cylinders. After cracking, you need to remove the plates and springs of the cylinder valves.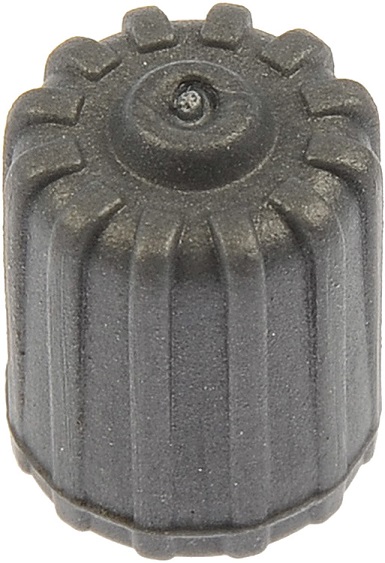
Then you need to take the pliers and remove the valve stem seals. This method is suitable for those who do not have a special puller. But there are seals that can be removed with your fingers.
Also, when working with pliers or pliers, you need to remember that the force must be applied correctly in a certain direction, without allowing the cap itself to turn. It is also necessary to follow the technique of performing work, this will exclude damage to the sleeve inside the valve. It is necessary to remove the springs, there is a risk of damage to the part inside.
The valve must then be checked for end play. It is necessary to take the valve leg and shake it a little to the sides. If there is no backlash, then everything is fine, if there is, then the valve guides need to be replaced.
Only professional tools should be used to repair the machine. They can all be purchased from the ELM327RUS online store.
The following should be considered:
Puller. This is an integral part in the repair of valve stem seals. It is necessary to correctly remove the parts. Therefore, their choice must be treated very carefully. In our online store you can purchase the following items:
Oil deflector cap remover 217mm JTC-1243
Article: JTC-1243
3 400 ₽
Available Article: JTC-1716
1 600 ₽
Available
Valves Equipper 275 mm JTC-1949
Article: JTC-1949
1 700 ₽
In stock
rationalist of valves. If you can still do without a puller, then you can’t do without this tool. It is necessary for compressing the valve spring and then extracting the crackers. We suggest that you consider a clamp-type cracker:
Valve cracker, working stroke 45-145mm JTC-1711
Code:JTC-1711
In stock
Valve cracker universal, working.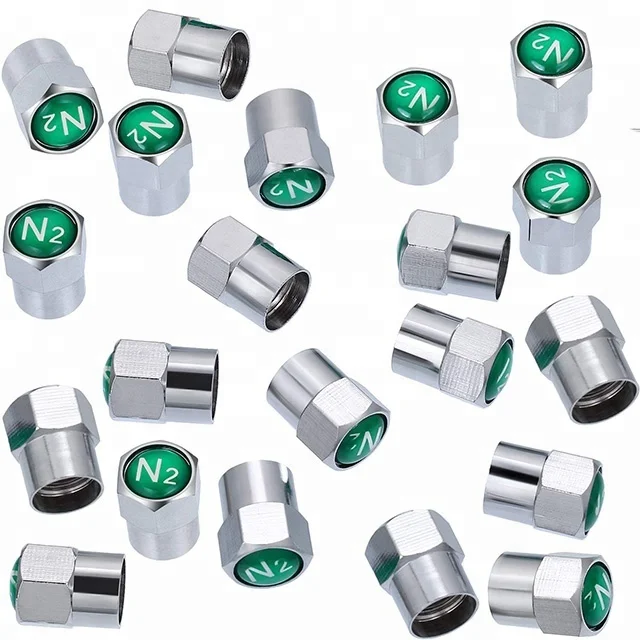 Toward 55-175mm JTC-1731
Article: JTC-1731
7 300 ₽
Available
Calves reasonable with interchangeable captures JTC-4621
Article: JTC-4621
9450 ₽
9Universal valve cracker (clamp) JTC-1304
Code:JTC-1304
The peculiarity of such models is that they can only be operated on the removed cylinder head.
There is also a variety of crackers with hooks on the lower coils of the spring:0011
Valve cracker (CITROEN, PEUGEOT) JTC-4851
Article: JTC-4851
All our tools have been tested and passed quality control:
Set for repairing the thread of oil drain holes 14mm JTC-2045
Article:JTC-2045
2 300 ₽
In stock0011
Article: JTC-4771
8 050 ₽
Available
set of tools for restoring and cleaning seats JTC-4262
Article: JTC-4262
18 850 ₽
cup dismantling/mounting of valve springs JTC-4294
Article: JTC-4294
31 350 ₽
In stock
Replacing the caps does not always solve the problem with oil.