Ask a question, get an answer ASAP!
GET A QUOTE
Check Tires Cost
Service Location
Upfront, Transparent Price
(171,627)When you have nice, new rims on your car, you won’t be the only one admiring them. Good-looking wheels draw the attention of car aficionados and thieves alike.
Wheels are an easy mark for thieves. When you leave your car parked anywhere accessible, a thief can come remove your wheels with a simple set of tools like a lug nut wrench and a floor jack. In just a few minutes, they can make away with your wheels and tires, leaving you thousands of dollars out of pocket.
Wheel locks, or locking lug nuts, can be installed to prevent wheel theft. The lug nut or wheel stud is installed in the place of one of your original wheel nuts or studs on each wheel. The new locking lug nut has an abnormal shape that only fits with its wheel lock key.
The wheel lock must be tightened and removed only with the specific wheel lock key, so a standard socket or lug nut wrench will not be able to remove the wheel locks.
How do you remove the wheel locks from your car? What happens if your wheel lock key breaks or is lost? Follow these instructions to remove your wheel locks from your car.
Materials Needed
Your car’s lug nut wrench
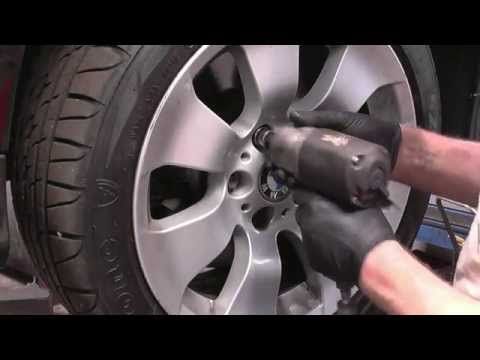
Warning: Never use power tools to remove the wheel lock from your car. The power tools exert too much force and can damage or strip the wheel lock of wheel lock key, rendering them useless.
Step 1: Make sure your vehicle is in park. Engage the parking brake for extra security.
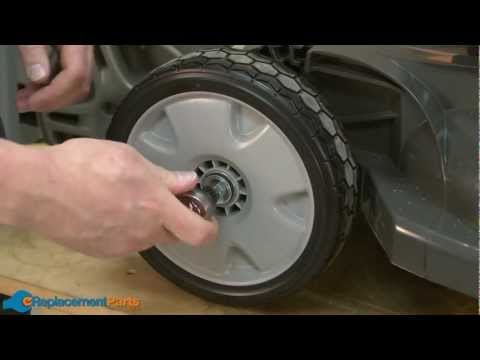
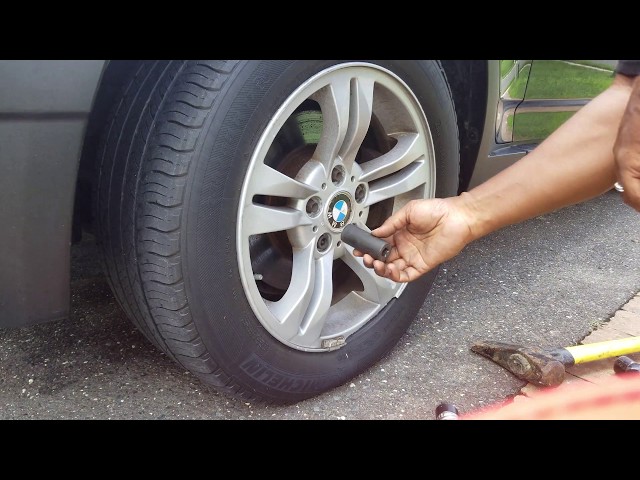
Step 2: Align the key with the nut. Line up the splines on the wheel lock key and the wheel lock on the wheel.
This is achieved by placing the wheel lock key on the wheel lock and turning it slowly until the tabs or design lines up. The wheel lock key will drop into place on the wheel lock.
Step 3: Place your lug nut wrench on the wheel lock key . It is a six-point hexagonal head, and it should match the same size as the wheel nuts on your car.
Step 4: Turn the lug nut wrench counterclockwise. This will loosen the wheel lock and may require significant force to loosen the wheel lock from the wheel.
Step 5: Turn the wheel lock off by hand. Once the wheel lock is loosened, you should be able to turn the wheel lock off by hand easily.
If you are installing the wheel lock again, perform this procedure in reverse.
Materials Needed
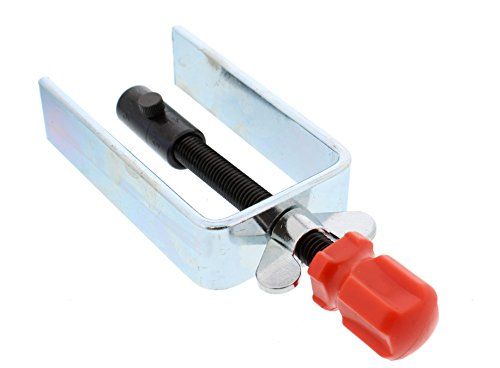
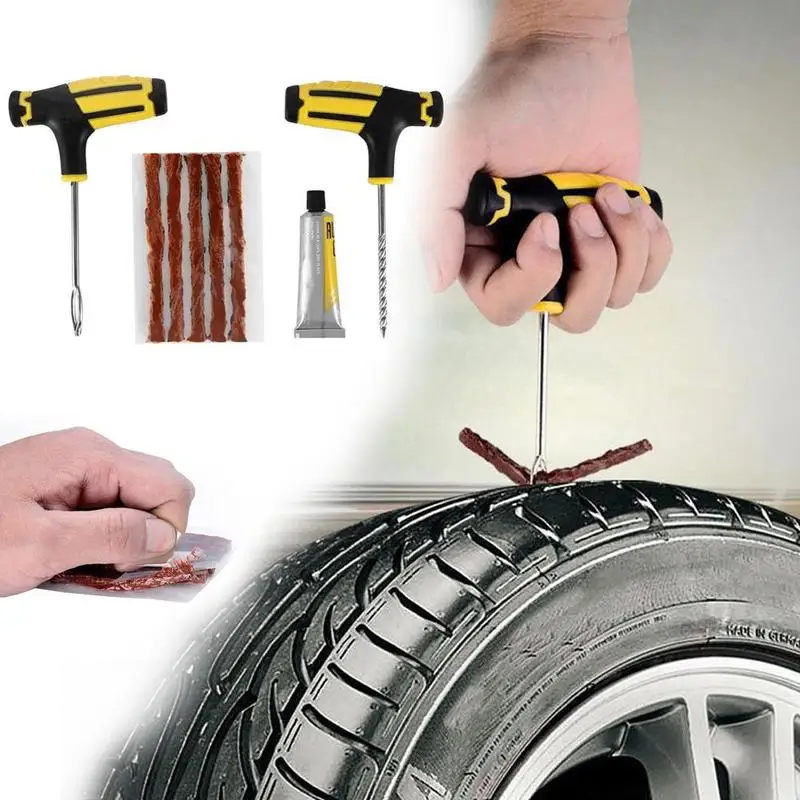
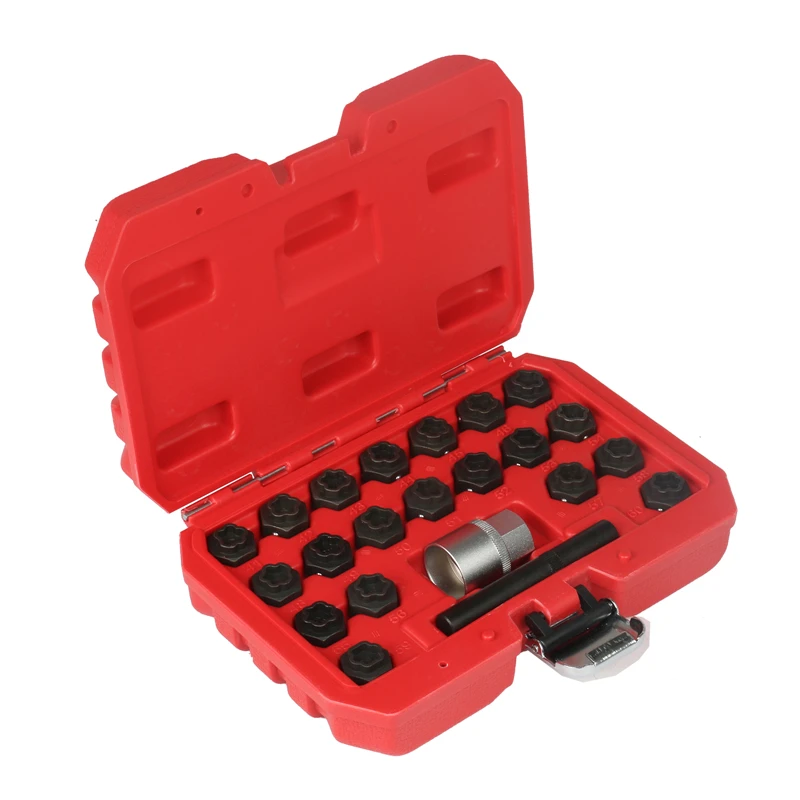
In this procedure, you’ll use a universal wheel lock removal tool to take the wheel lock off. It will most likely damage the wheel lock which you won’t be able to reuse. Be sure you don’t have the wheel lock key somewhere before using the universal kit.
Step 1: Put car in park. Engage your car in park and apply the parking brake.
This prevents a rolling motion when you try to loosen the wheel lock.
Step 2: Find the right wheel lock removal tool. Test-fit the tool overtop of the wheel lock you need to remove.
It needs to fit snugly, and the teeth on the inside of the removal socket need to bite into the wheel lock.
Step 3: Hit the tool with a mallet. Firmly hit the end of the wheel lock removal tool with the rubber mallet.
You need the wheel lock removal tool to be firmly stuck on the wheel lock.The teeth inside the wheel lock removal tool are now digging into the wheel lock itself.
Step 4: Loosen the wheel lock. Loosen the wheel lock by turning the removal tool counterclockwise with your lug nut wrench.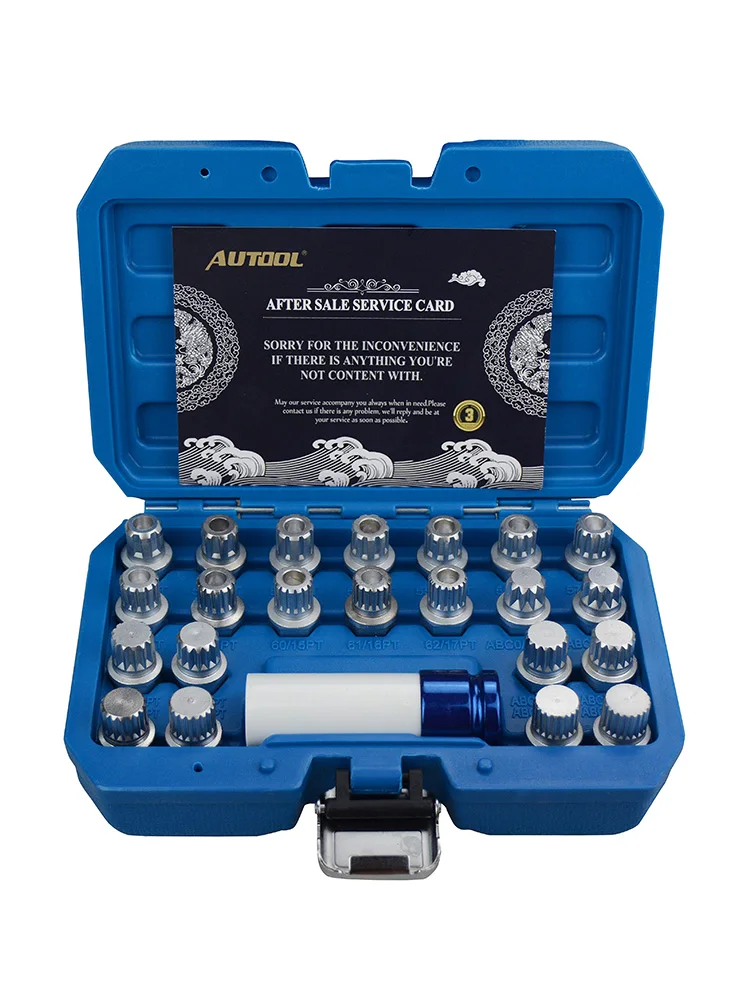
Expect that it will take significant effort to loosen the wheel lock.
Step 5: Finish turning by hand. Once the wheel lock is loosened, you should be able to turn it off the rest of the way by hand.
The wheel lock will be stuck in the removal tool.
Step 6: Remove the lock from the tool. Put a punch or screwdriver through the hole in the wheel lock removal tool against the wheel lock and hit the punch with your mallet.
After a few hits with the hammer, the damaged wheel lock will pop out.
Step 7: Repeat for the remaining wheel locks. Perform the same process on any other wheel locks as needed.
If you are installing a new set of wheel locks, be sure to put the wheel lock key in a place you will be able to find it. The glove box, center console, or with your tire jack are good places for the wheel lock key.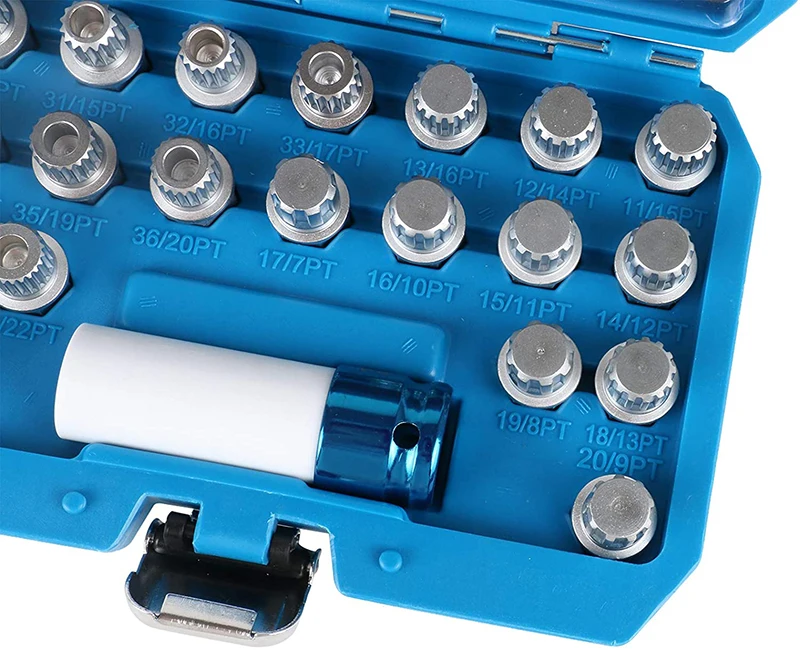 This way, the process will be as easy as possible. If you think you need a wheel bearings replacement or need help tightening the lug nuts, have one of YourMechanic’s mobile technicians give you a hand.
The most popular service booked by readers of this article is Check Tires. YourMechanic’s technicians bring the dealership to you by performing this job at your home or office 7-days a week between 7AM-9PM. We currently cover over 2,000 cities and have 100k+ 5-star reviews... LEARN MORE
SEE PRICING & SCHEDULING
anti-theft
Rims
lug nuts
The statements expressed above are only for informational purposes and should be independently verified. Please see our terms of service for more details
4.2 Average Rating
Service Hours
7 AM - 9 PM
7 days a week
Phone Number
1 (855) 347-2779
Phone Hours
Mon - Fri / 6 AM - 5 PM PST
Sat - Sun / 7 AM - 4 PM PST
Address
We come to you at no extra charge
Guarantee
12-month/12,000-mile warranty
Our certified mobile mechanics perform over 600 services, including diagnostics, brakes, oil changes, scheduled mileage maintenances, and will come to you with all necessary parts and tools.
Get a fair & transparent quote instantly before booking.
(
171,627
)
161,099
161,099
SEE REVIEWS NEAR ME
11 years of experience
43 reviews
Request James
James
11 years of experience
Request James
by Emma
Subaru Outback h5-2.5L - Check Tires - Upper Marlboro, Maryland
They called to advise their eta to my home. They were professional, informative, polite and helped me with my car quickly. I was very comfortable around them
11 years of experience
98 reviews
Request Michael
Michael
11 years of experience
Request Michael
by Stacey
Cadillac SRX V8-4.6L - Check Tires - Newark, New Jersey
Michael was great. He arrived on time, was very nice and provided great advice.
12 years of experience
230 reviews
Request Eric
Eric
12 years of experience
Request Eric
by Stephanie
Toyota Highlander V6-3.0L - Oil/Fluid Leak - Apex, North Carolina
Eric was great! He was prompt and really took the time to explain the issues with my vehicle. I highly recommend this service and Eric!
18 years of experience
115 reviews
Request Joseph
Joseph
18 years of experience
Request Joseph
by Andy
Hyundai Sonata L4-2.4L - Brake Pads Replacement (Rear) - Bel Air, Maryland
This is the 2nd time Joseph has worked on our car. He is an outstanding mechanic and a super nice guy. I'd HIGHLY recommend him!
Our certified mobile mechanics make house calls in over 2,000 U.S. cities. Fast, free online quotes for your car repair.
GET A QUOTE
GET A QUOTE
How to Reset a Car Alarm
A A car alarm that is not working at all or not working properly can be extremely annoying to you and your neighbors.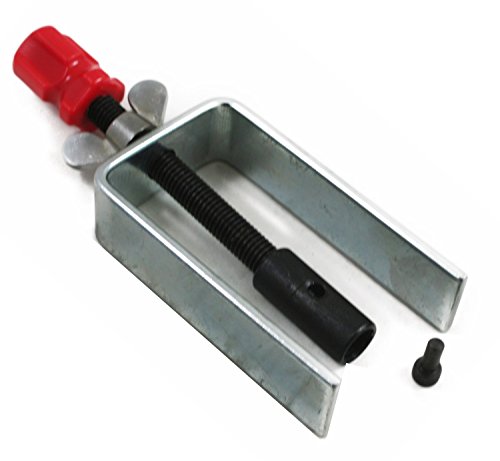 It may also put your vehicle at an increased risk for theft (https://www.yourmechanic.com/article/how-to-keep-your-vehicle-safe-from-theft) or vandalism. Almost all...
Top Automotive News & Stories: July 27-August 3
Each week we compile the best announcements and developments from the world of cars. Here are the topics you can’t miss from July 27 to August 3. Most Stolen Cars List Released most stolen cars...
How to Tighten Lug Nuts
Lug nuts, or wheel locks, hold the wheel onto the car. Missing lug nuts can cause the car to wobble so it's important to keep lug nuts tight.
question - broken ignition after car attempted to be stolen
I'm sorry to hear that someone attempted to steal your car (https://www.yourmechanic.com/article/how-to-keep-your-vehicle-safe-from-theft). Unfortunately, there is no temporary solution for this. The car will continue to act this way until the ignition switch (https://www.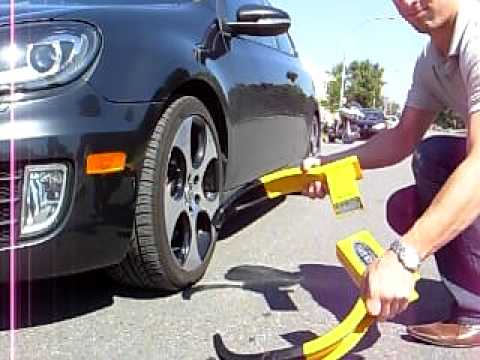 yourmechanic.com/services/ignition-switch-replacement) is repaired or replaced. With the ignition...
What is the torque setting on my tire nuts? - 2017 Subaru Legacy
Your lug nuts should be torqued to 80-90 foot pounds. This is fairly standard on most cars. You may want to check the torque after the first few hundred miles as well since lug nuts sometimes back off a bit...
my 2012 ford explorer wont start it say no key detected i got a regular key not no push button start
This can be caused by the key itself is not recognized by the theft system and you may want to try another extra key to see if it works. If extra key does not work then you have a fault...
Services
Cities
Maintenance
Estimates
Our service team is available 7 days a week, Monday - Friday from 6 AM to 5 PM PST, Saturday - Sunday 7 AM - 4 PM PST.
1 (855) 347-2779 · hi@yourmechanic. com
com
Read FAQ
GET A QUOTE
Written By: Hesham Annamer (and one other contributor)
Difficulty
Moderate
Steps
6
Time Required
30 minutes
Sections
1
Flags
0
If you have a wheel lock (wheel nut lock) on your car or truck wheel and do not have a wheel lock key, use this guide to remove the wheel lock.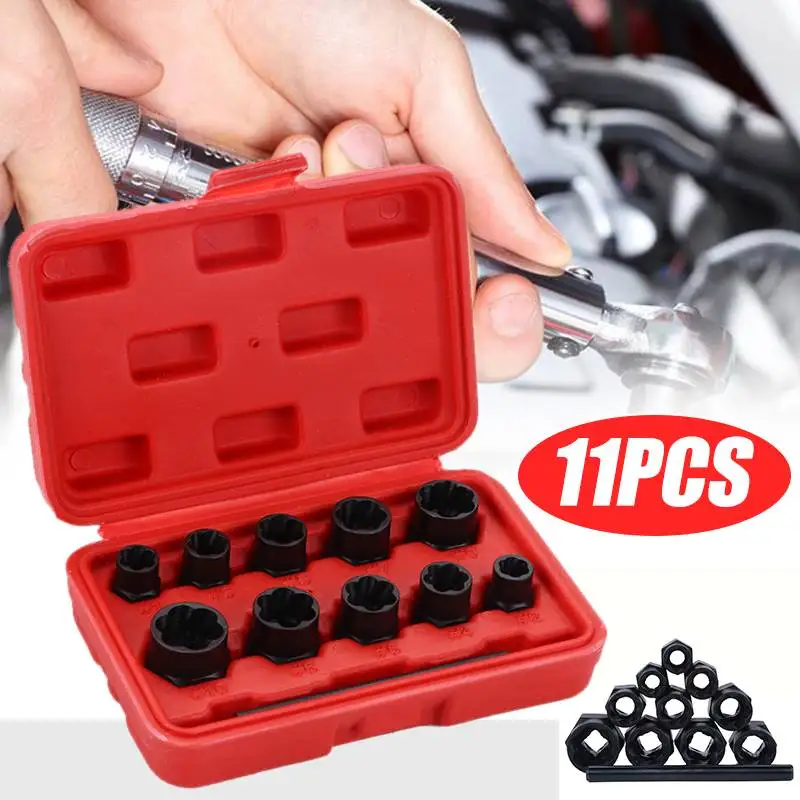
A wheel lock is used to fasten the wheel on your vehicle, as a regular wheel nut would, but uses a part-specific key to unlock it. It is common to lose a wheel lock key. The wheel lock key can be removed manually.
Before beginning, make sure your vehicle is on a flat surface and all wheels are level. Make sure to have your emergency brake (parking brake) on as well.
No parts specified.
Hold the socket in place.
Use a hammer to hit the socket until it is tight around the lock.
Gloves are recommended to prevent hand injury.
Edit
Now that the wheel lock is off, it will be stuck to the socket.
Insert the screwdriver into the square-opening on top of the socket.
Hit the top of the screwdriver with the hammer a few times until the lock falls out of the socket.
Edit
Grab a regular wheel nut.
Screw on the wheel nut by hand.
Use the tire iron to tighten the wheel nut.
Edit
Almost done!
Finish Line
Cancel: I did not complete this guide.
3 other people completed this guide.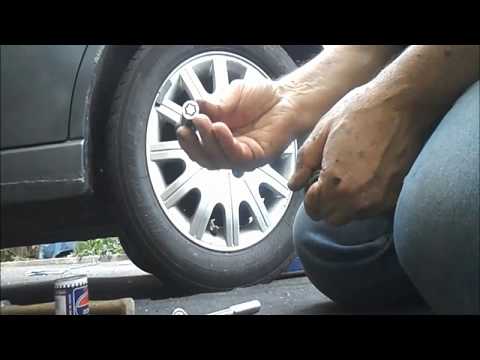
with 1 other contributor
Badges: 5
+2 more badges
Author: Evgeny Balabas
You went down to your car in the morning to go to work or on business, and the usual padlock and a note with a phone were attached to the wheel, to which extortionists offer to transfer money in order to find out the place where the key is hidden, or a digital code . How to act in such a situation? Can I drive with a lock and how can I safely remove it later?
A lock on a wheel or a doorknob is a relatively common (although, fortunately, not too common) scheme of scammers, which has supplanted the recently popular theft of license plates. To be honest, the topic is not new - I remember at least a couple of "parishes" of this fad in previous years.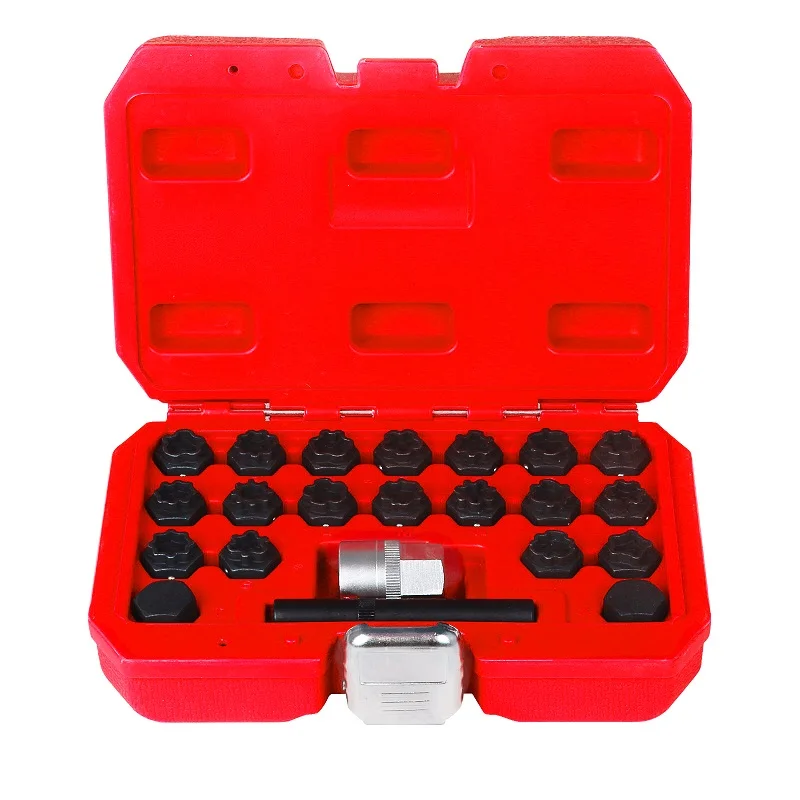 However, having found several articles in automotive online publications and a couple of recommendations from crooked bloggers on YouTube and Yandex.Zen, we were horrified by the illiterate nonsense offered there, such as the idea of sawing the lock shackle with a manual hacksaw or breaking it with leverage, such as wedging two open end wrenches. All this usually leads to scratches and dents on the body and disc. There is only one competent option - to cut off the lock with a cutting abrasive disc. This can be done on your own, in any car repair shop or garage cooperative for a symbolic amount. The main thing is to decide: is it possible to drive with a lock on the wheel or will the problem have to be solved on the spot?
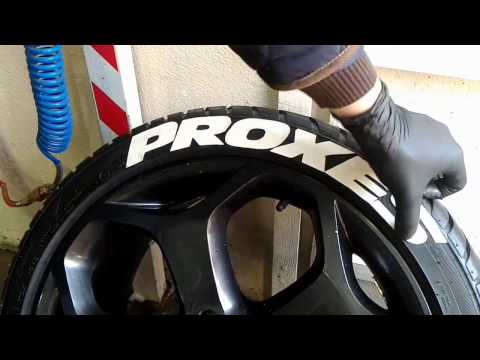
First and most important, we find out whether the free rotation of the wheel is possible in principle, or is the wheel blocked from engaging the disc with the lock on the fixed brake caliper? Both options are real - it all depends on the type of lock and the shape of the rim and its spokes.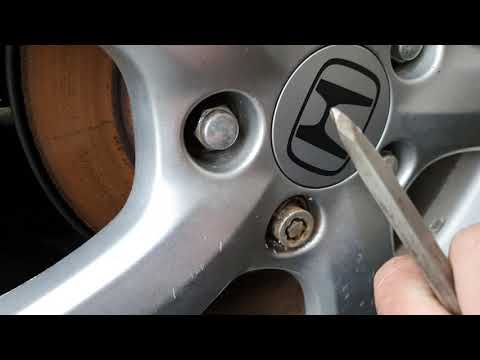 You can be absolutely sure only by jacking up the car and turning the wheel with the lock manually in order to understand whether it is able to make a full turn without touching the brake caliper lock with the shackle. At the time of checking, the lock should be slightly pulled towards you - that is, choose a slack in the shackle covering the spoke of the disk:
If the wheel catches, then, of course, it is absolutely impossible to drive! Both the caliper and the disc will be damaged. If it does not cling, then movement on its own is not forbidden. The fact is that by itself, driving with an imbalance caused by a heavy lock is not dangerous at low speeds (up to about 30 km / h) and at a distance of several kilometers to the nearest car service or garage. At this speed, 200-250 grams of imbalance is completely invisible and does not cause beats in the wheels and steering wheel. And they do not cause any damage to either the wheel bearing or other components of the car.
If you do not have a tool to cut off the "enemy" from the wheel directly on the spot, and decide to go to a car service or garage, then the lock dangling and jumping on the wheel can reach the caliper with its shackle, damaging it, or at least quickly cover it with scratches and dents in the spoke of the disk - probably beautiful and expensive.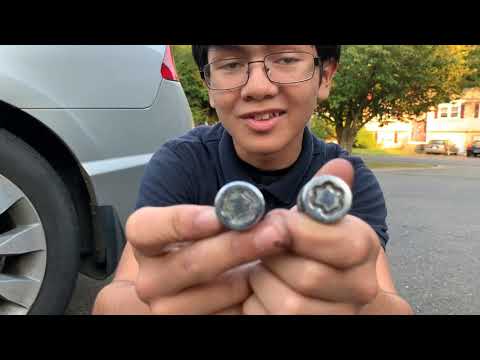 But this can be avoided - you just need to lay protective pads under the lock and pull it tightly to the wheel. For this, an ordinary PET water bottle, cut with a knife or scissors, and plastic tie-ties or a simple rope are perfect.
We slip a rectangle of plastic under the shackle of the lock, covering the wheel spoke with it, wrap the lock itself with another piece and pull it tightly to the disk with zip ties or a rope.
If a trick from intruders caught you on a business trip or at work, then it may turn out that the only solution to the problem is a trip to a car service or garage. But if the trouble caught near the house, and in your tool arsenal there is a wireless rechargeable angle grinder (angle grinder), then the problem is solved in just a couple of minutes on the spot: the shackle is easily cut off. This option is definitely the best, fastest and easiest!
We just have to admit that a wireless cordless angle grinder is not yet the most common tool in the household of home craftsmen .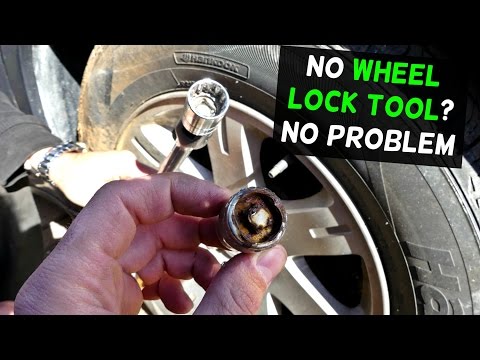 .. In its absence, you will have to look for a much more common wire grinder, collect extension cords around the entrance, from which you will have to build a long electric tail, and knock on your neighbors on the lower floors to throw the wire out the window.
Unlike a cordless grinder, a cordless screwdriver is already in almost every home today. Some also have an adapter for grinder discs to it, and those who don’t have it can be made from a regular M8 bolt, nut and a pair of washers. At first glance, everything seems simple and self-explanatory - I clamped the attachment for fixing the grinder disk (from Aliexpress or home-made) into the Shurik cartridge and drank! But there are some nuances that are important to know.
The grip of a screwdriver in grinder mode and a normal full-fledged grinder is completely different. The latter has it correct, the “Shurik” has no. Sawing with the help of a "shurik" held with one hand constantly tends to warp the disc, which, coupled with the low speed of the disc, creates a constant risk of breaking it.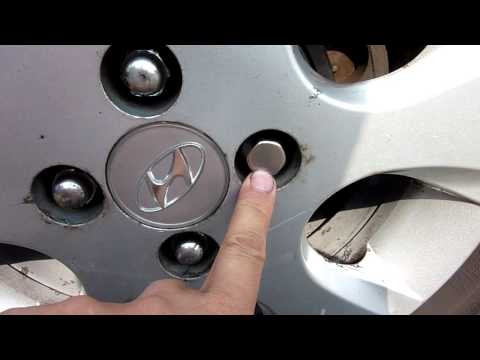 The skew is obtained from an incorrect (for the cutting mode) load on the hand from the L-shaped screwdriver and from the need to strain the brush to hold a sufficiently tight key.
You can compensate for this with a two-handed grip - not by the handle, as usual in drilling mode, but by the body and battery, while (important!) fixing the start key! In no case should the key be held with a finger - it must be fixed in the pressed state with a plastic clamp, adhesive tape, electrical tape, rope. You will have to turn on the screwdriver by installing the battery in the handle slot, and turn it off by removing it.
Only cut a well-locked lock, not a loose lock. Otherwise, the cutting disc is at risk of breaking - much more than in the case of a much higher-speed grinder. Do not use the cores of old discs - only new ones: the smaller the diameter, the lower the angular speed of the cutting surface at the same speed. And don't forget eye protection!
P.S.: We sawed the shackle with a diameter of 10 mm with a screwdriver in about 3 minutes.
Poll
Have you ever had a wheel blocked?
Your vote
Total votes:
practice
Articles / Interesting 5 reasons to buy and not to buy Daewoo Matiz I Perhaps Matiz in Russia became the third car in terms of the number of ridicule after Zaporozhets and Oka. But are these caustic chuckles in the direction of a pretty car fair? Maybe it's just bra... 521 one 0 06.11.2022
Articles / Supercars Scary, very scary: why the US banned drag on the Dodge Demon and other production cars Fast cars are bought in order to drive fast. And to drive as fast as possible, you need to drive in a straight line. These common truths are especially well understood in America - a country that, with ... 946 0 four 05.11.2022
Articles / Practice Frozen: why the car can not warm up for a long time "Winter! The peasant, triumphant…” warms up the car for half an hour. And sometimes not a peasant, but quite a boyar in an expensive car still warms it up, freezes and thinks: well, why is it so ... 1155 2 3 04.11.2022
Test drives / Test drive Haval Dargo vs Mitsubishi Outlander: the dog is barking, the stranger is coming In the Haval dealership in the south of Moscow, life is in full swing: buyers look at cars, communicate with managers and sign some papers.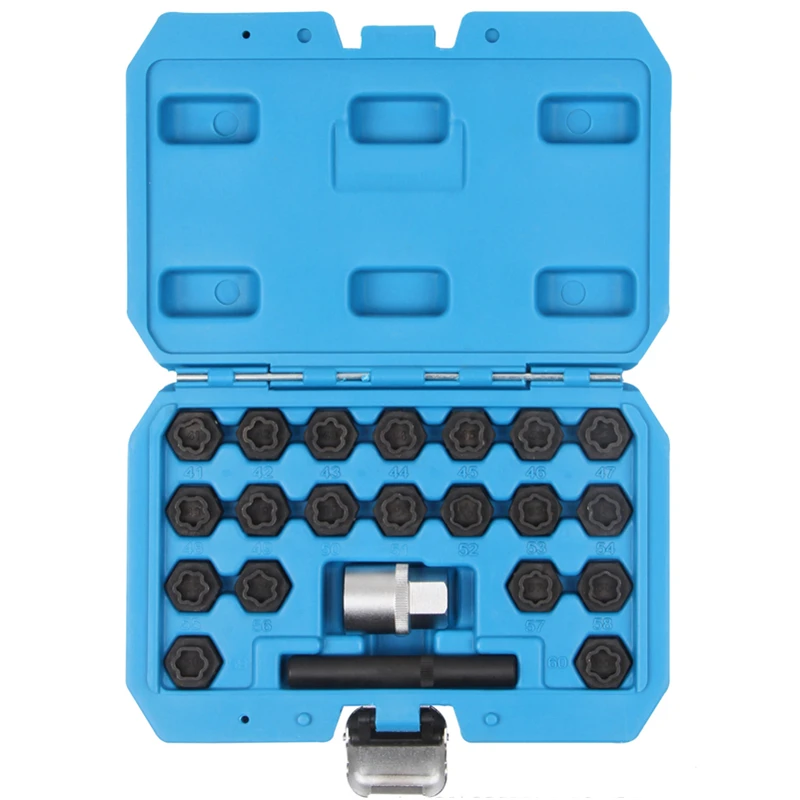 While I was waiting for the test Dargo, the same cross... 15339 7 205 13.09.2022
Test drives / Test drive Motor from Mercedes, emblem from Renault, assembly from Dacia: test drive of the European Logan 1.0 It would seem that what's new can be told about the second generation Renault Logan, known to every Russian taxi driver, as they say, up and down? However, this car has... 13008 ten 41 08/13/2022
Test drives / Test drive Geely Coolray vs Haval Jolion: Free Cheese? If! Do you want to buy a car today with a full warranty, on credit at an adequate rate, without wild dealer markups? Now this is still a task, because a full-fledged chain of "representation - s.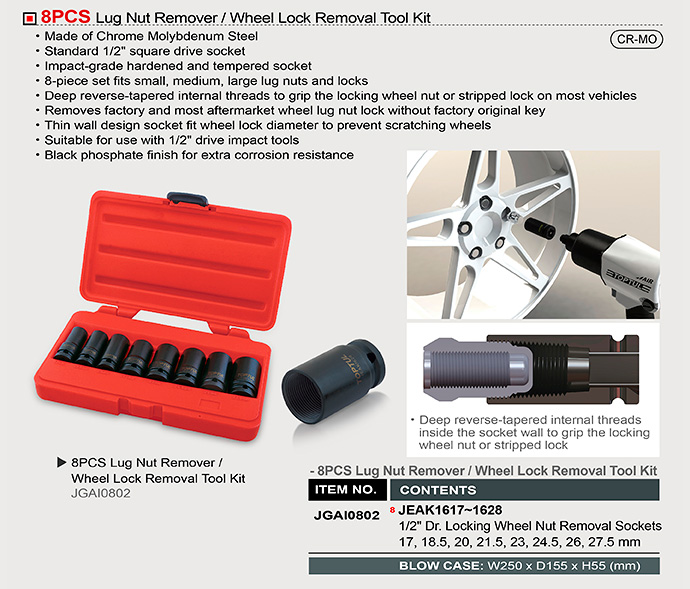 .. 10076 25 thirty 08/10/2022
Removing and installing door lock
Removing
| ||||
Download information from page
1. Cars Opel Corsa B, Tigra and Combo - abstract
1. 0 Cars Opel Corsa B, Tigra and Combo - summary 1.2 Vehicle identification numbers 1.3 Purchase of spare parts 1.4 Service technology, tools and equipment of the workplace 1.5 Jacking and towing 1.6 Starting the engine from an auxiliary power source 1.7 Vehicle readiness checks 1.8 Automotive chemicals, oils and lubricants 1.9Troubleshooting
2. Controls and operating procedures
2.0 Controls and operating procedures 2.1 Dashboard 2.2 Information display 2.3 Additional electronic devices 2.4 Access, protection 2.5 Interior lighting 2.6 Elements of vehicle security systems 2.7 Interior equipment 2.8 Comfort 2.9 Operating techniques
3. Vehicle settings and maintenance
3.0 Vehicle settings and maintenance 3.1 Routine maintenance schedule 3.2 General information 3.3 General information about settings and adjustments 3.4 Fluid level checks 3.5 Checking the condition of the tires and their inflation pressure, rotating the wheels 3.6 Changing the engine oil and oil filter 3.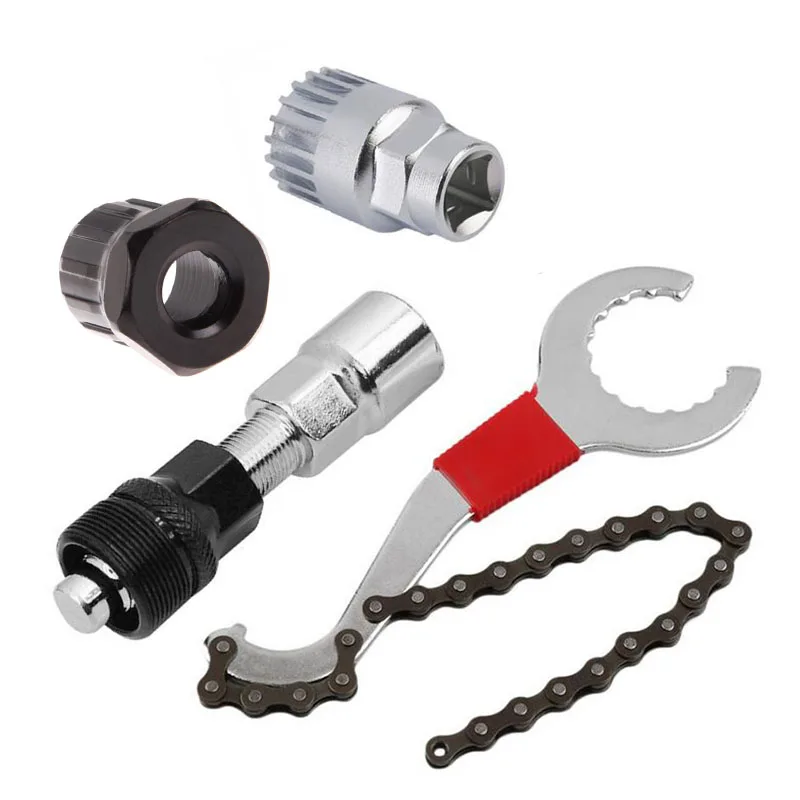 7 Checking the condition and replacing the accessory drive belt 3.8 Removal of sludge from the diesel engine fuel filter 3.9Check of a condition and replacement of the hoses located in an impellent compartment 3.10 Checking the status of components 3.11 Checking, maintenance and charging 3.12 Checking the condition and replacing the brushes 3.13 Checking the exhaust system 3.14 Checking the brake system 3.15 Checking the electrical equipment 3.16 Monitoring the condition of the anti-corrosion coating of the car body and bottom 3.17 Checking and adjusting idle speed and maximum speed 3.18 Replacing the filter element 3.19 Inspection and maintenance 3.20 Changing the fuel filter 3.21 Checking the composition of the exhaust gases 3.22 Lubrication of locks, hinges and stops 3.23 Inspection of suspension components 3.24 Checking and adjusting valve clearances on a diesel engine 3.25 Replacing spark plugs 3.26 Checking the clutch pedal adjustment 3.27 Changing the brake fluid 3.28 ATF replacement
4. Engines
4.0 Engines 4.1 General information 4.2 Checking the compression pressure in the cylinders and the parameters of the impellent oil 4.3 Diagnostics of the engine condition using a vacuum gauge 4.4. Procedures for repairing SOHC gasoline engines without removing them from the vehicle 4.5. In-Vehicle DOHC Gasoline Engine Repair Procedures 4.6. Procedures for repairing diesel engines without removing them from the vehicle 4.7. General and overhaul of the engine
5. Engine cooling, interior heating and air conditioning systems
5.0 Engine cooling, interior heating and air conditioning systems 5.1 General information and precautions 5.2 Antifreeze - general information 5.3. Engine cooling system 5.4. Ventilation, interior heating and air conditioning systems
6. Supply, exhaust and emission control systems
6.0 Supply, exhaust and emission control systems 6.1. Supply system 6.2. Fuel injection system for gasoline engines 6.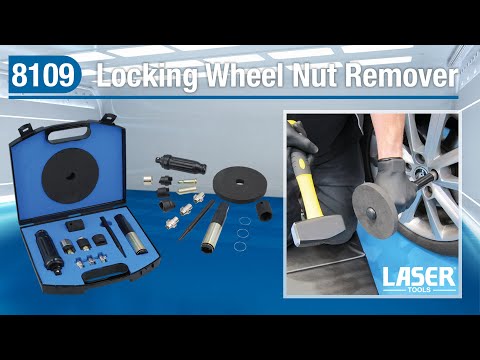 3. Diesel fuel injection system 6.4. Systems of release and decrease in toxicity of the fulfilled gases
7. Engine Electrical Systems
7.0 Engine Electrical Systems 7.1 General information and precautions 7.2. Electronic control system for ignition (and injection) of gasoline engines 7.3. Diesel engine fuel preheating and heating systems 7.4. Charge and launch systems
8. Manual 5-speed gearbox
8.0 Manual 5-speed gearbox 8.1 General information 8.2 Adjustment of the shift actuator 8.3 Removal and installation of manual transmission 8.4 Manual transmission repair - general information
9. Automatic 4-speed transmission
9.0 Automatic 4-speed transmission 9.1 General information 9.2 Gear selector adjustment 9.3 Removing and installing the gear selection cable 9.4 Removal and installation of assembly of the lever of the selector АТ 9.5 Removal and installation of АТ 9.6 AT overhaul - general information
10. Clutch and drive shafts
10.0 Clutch and drive shafts 10.1 General information 10.2. Clutch 10.3. Drive shafts
11. Brake system
11.0 Brake system 11.1 General information 11.2 Anti-lock brake system (ABS) - general information and fault codes 11.3 Bleeding the brake system 11.4 Checking the condition and replacing the brake lines and hoses 11.5 Replacing the front disc brake pads 11.6 Removing and installing brake shoes 11.7 Replacing drum brake linings 11.8 Checking the condition, removing and installing the brake disc 11.9 Removing, checking the condition and installing the brake drum 11.10 Removal, refurbishment and installation of front wheel disc brake calipers 11.11 Removal, maintenance and installation of wheel cylinders of rear wheel drum brakes 11.12 Checking the correct functioning and tightness of the vacuum brake booster 11.13 Replacing and checking the brake booster servo vacuum pump (diesel models) 11.14 Adjusting the parking brake actuator 11. 15 Removing and installing parking brake cables 11.16 Replacing the brake light switch 11.17 Pressure control valve in the hydraulic circuits of the brake mechanisms of the rear wheels
12. Suspension and steering
12.0 Suspension and steering 12.1 General information 12.2. Front suspension 12.3. Rear suspension 12.4. Steering
13. Body
13.0 Body 13.1 General information and precautions 13.2 Caring for body and underbody components 13.3 Caring for vinyl trim 13.4 Upholstery and carpet care 13.5 Repair of minor damage to body panels 13.6 Repair of severely damaged body panels 13.7 Maintenance of car hinges and locks 13.8 Replacing windshields and other fixed windows 13.9Removal and installation of a lining and a bearing beam of bumpers 13.10 and installation of a decorative grille (models from 03.1997 of issue.) 13.11 Removing and installing the wheel arch locker 13.12 Removing and installing windshield fairing panel 13.13 Removing and installing the hood 13.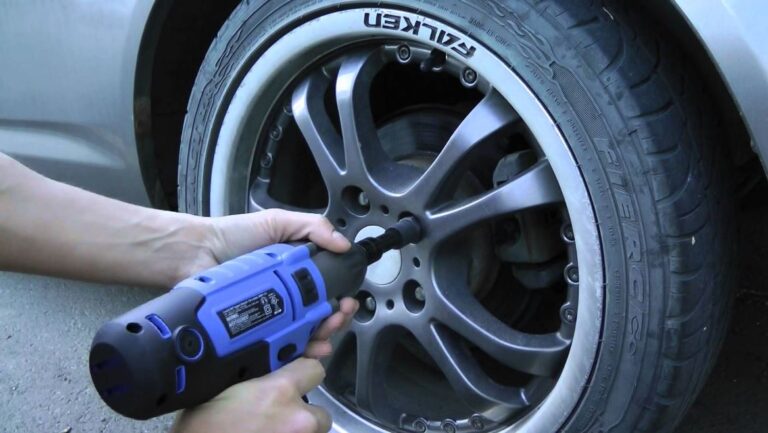 14 Replacing the hood hinges 13.15 Removing and installing the front wing 13.16 Replacing the rear wheel arch lining (Corsa and Combo models) 13.17 Removing and installing door trim 13.18 Removing and installing front door glass 13.19 Removing and installing rear door glass (Corsa model) 13.20 Removing and installing power window 13.21 Removing and installing the outer door handle 13.22 Removing and installing the front door lock cylinder 13.23 Removing and installing the door lock 13.24 Frost protection of locks and seals 13.25 Removal and installation of an external mirror and the e/motor of its drive 13.26 Removing and installing exterior mirror housing 13.27 Removing, installing and adjusting the door 13.28 Removing and installing tailgate (Corsa and Tigra models) 13.29Removal and installation of the tailgate lock (Corsa and Tigra models) 13.30 Removing, installing, disassembling and assembling the outer handle and tailgate lock cylinder (Corsa model) 13.31 Seat belt tensioner 13.32 Precautions when handling the emergency seat belt pretensioner and side airbag 13.
 33 Removing and installing the front seat 13.34 Removing and installing the rear seat 13.35 Removing and installing the center console 13.36 Removing and installing the side trim of the front passenger's footwell 13.37 Removing and installing the glove box 13.38 Removal and installation of an internal mirror and installation of a plate of its fastening 13.39Removal and installation of the instrument panel 13.40 Sliding roof panel
14. On-board electrical equipment
14.0 On-board electrical equipment 14.1 General information and precautions 14.2 Finding the causes of electrical equipment failures 14.3 Fuses - general information 14.4 Relay - general information and function check 14.5 Removal and installation of the single lock e/motor 14.6 Light beam adjustment 14.7 Removal and installation of the switch and the electromotor of adjustment of range of light (Models Corsa and Combo) 14.8 Removing and installing the seat heating switch 14.9Removal and installation of a horn 14.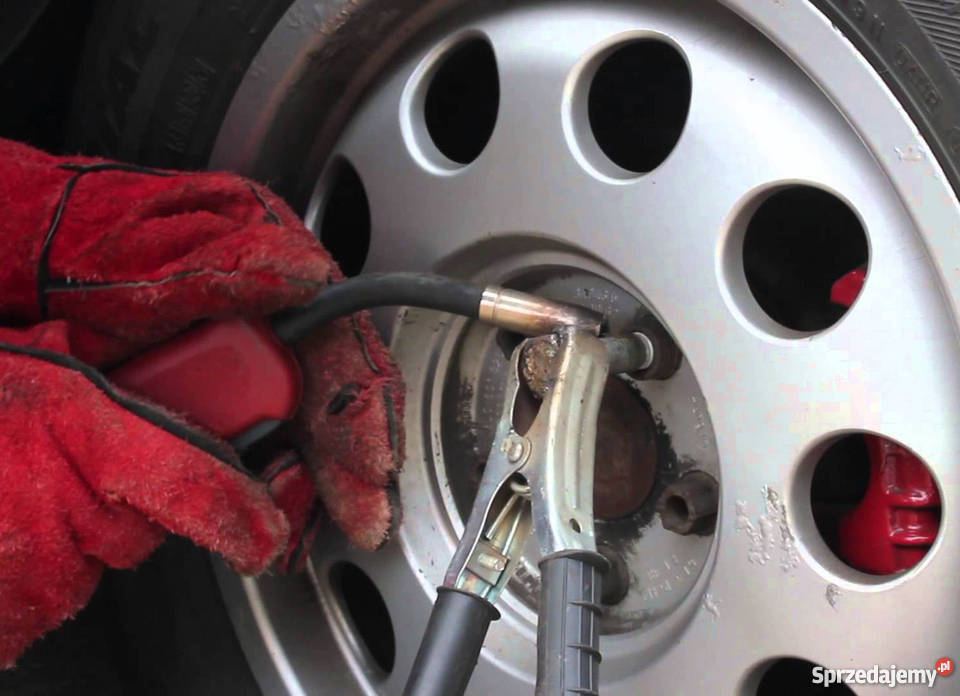 10 Anti-theft device and alarm 14.11 Replacing bulbs in headlights 14.12 Replacing incandescent lamps in outdoor lighting devices 14.13 Replacing the bulbs in the headlights, parking lights and front indicators of the Tigra model 14.14 Replacing bulbs for interior lighting, luggage compartment and glove box 14.15 Removing and installing the headlight 14.16 Headlight adjustment 14.17 Removing and installing the rear combination lamp 14.18 Removing and installing the fog lamp 14.19Removal and installation of a combination of devices 14.20 Removal and installation of measuring instruments and indicators 14.21 Removal and installation of control lamps and printed circuit board of the instrument cluster 14.22 Replacing the backlight lamp of the panel of the heating control unit 14.23 Removing and installing steering column switch 14.24 Removal and installation of rear fog lamp (fog lamp) and seat heating switches 14.25 Removal and installation of the switch of external and internal lighting 14.