As a car owner, you need properly working tires for a seamless driving experience; however, your tires could still develop problems despite the introduction of the more advanced tubeless tires.
Tire leakage is one of the most common issues for most drivers because it happens unexpectedly. If your tire has a leak around the rim, how do you fix it? Here’s all you need to know!
Tires leak air around the rim because of punctures, tire bead damage, ripped tires, rim problems, or deteriorating valve systems. To fix the leak, drivers have to remove the tire to reseat the bead and reseal, which can be done at home if you have the appropriate equipment or with the help of a mechanic if the inner-tube tires need fixing.
For more information about what causes the tire to leak around the rim, how to fix and prevent it, and how much it will cost to repair your tires, read on!
Identifying a rim tire leak can be difficult to notice at first if your car has a slow leak; however, if your vehicle has a built-in tire-pressure monitor system or TPMS, you’ll get a low-pressure notification because the leak causes the PSI )pounds per square inch) to decrease.
If your tire is leaking, here are the reasons why this could be happening.
Tire Puncture
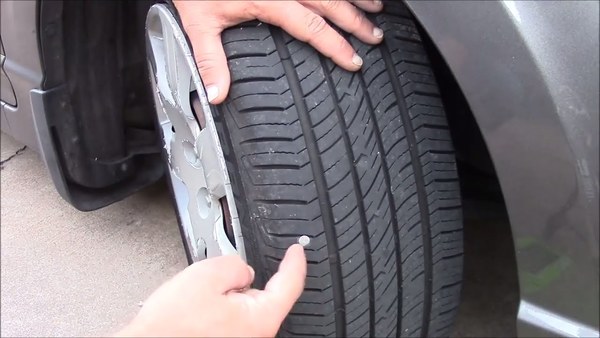
Once you run over a sharp object, you could puncture your tire. While most drivers assume that the puncture will cause the tire to go flat immediately, this is not usually the case, and the hole might cause a slow two-to-three PSI leak per week.
In some cases, the sharp object like a nail can remain lodged in the tire, which prevents the air from leaking out quickly.
Whether it’s a minor damage or not, you shouldn’t ignore the leak as this may lead to extensive tears and tire damage.
According to The Inflator, approximately seven tire punctures occur every second in the U.S. alone; therefore, this is the first thing you should check for when there’s a leak.
Valve Stem Damage
Valve stems are critical parts of the tire system, and they come in different forms and sizes depending on the tire.
These stems are the tiny protrusions on your tire that you unscrew during inflation; therefore, they need to be in good shape, without any damages or dirt-clogged.
Additionally, when valve stems get exposed to elements over time, they become worn out or corroded, which can cause the air to leak around the rim.
Bead Leak
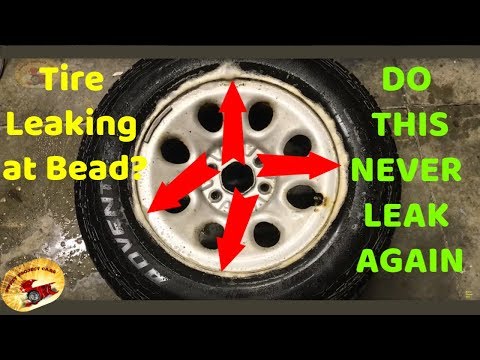
Tire leaks can also result from bead damage, where the tire seals itself to the rim.
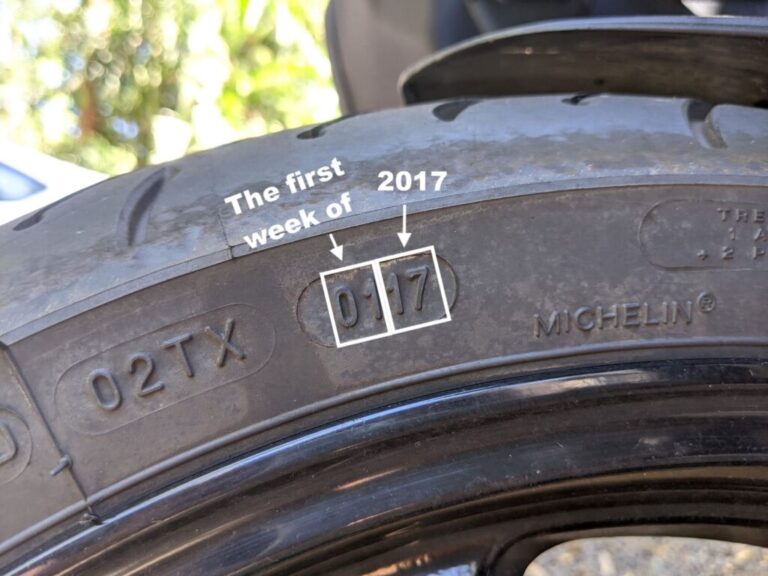
To know whether the bead is the problem, you’ll need to determine how old the tire is because if your tire has dry rot or is older, it may no longer seal properly and have reduced elasticity.
Additionally, beads also get damaged because of a corroded rim or when the tire is mounted or removed using a tire lube.
Your entire wheel gets this type of damage if you regularly hit potholes or bumps at high speed, deforming the wheel’s metal surface, which may cause the tire to pull away.
Keep in mind that if the bead is damaged and you can’t seal the tire to the rim, you have to replace the tire.
Rim Issues
If you are using aluminum or magnesium alloy wheels, your wheels are more susceptible to corrosion, which affects the part where the rim meets the tire bead.
Rim damage can be caused by several causes, especially if you are constantly driving on bad roads with many potholes.
Before installing new tires, ensure your technician checks the bead seal and wheel correctly to confirm that the rims are not corroded.
Furthermore, check for wheel porosity that causes air to leak from the rim due to corrosion, incorrect wheel weights, or poor casting. To fix the leaking issue, avoid injecting a tire sealant and fix the rim first.
Once you discover that your tire is leaking air around the rim, what next? Here are some steps to guide you.
1. Remove The Tire
To identify the cause of the leak, you’ll need to remove the tire and place it on a flat surface with the valve stems facing up.
2. Fill The Tire And Rim With Soapy Water
Add soapy water to your tire; around the outer edge of the rim, the area of the leak will be identifiable through bubbles from the leaking air.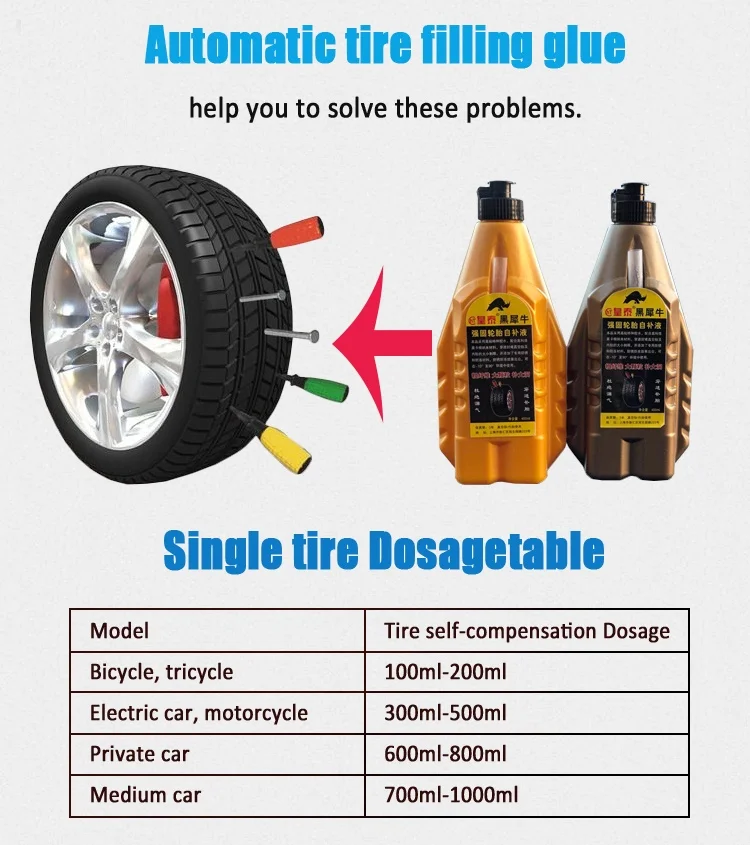 Mark the area and move to the next step.
3. Release Air From The Valve Stem
After you’ve marked the area, empty the air from your tire by pressing inward on the valve system using the valve removing kit in your car or unscrewing it from the stem.
4. Separate The Tire and Rim
Since the tire and the rim are attached with a seal, you’ll need something heavy like a wood board to separate them.
Use a hammer to hit the wooden plank until the tire’s bead breaks free from the rim.
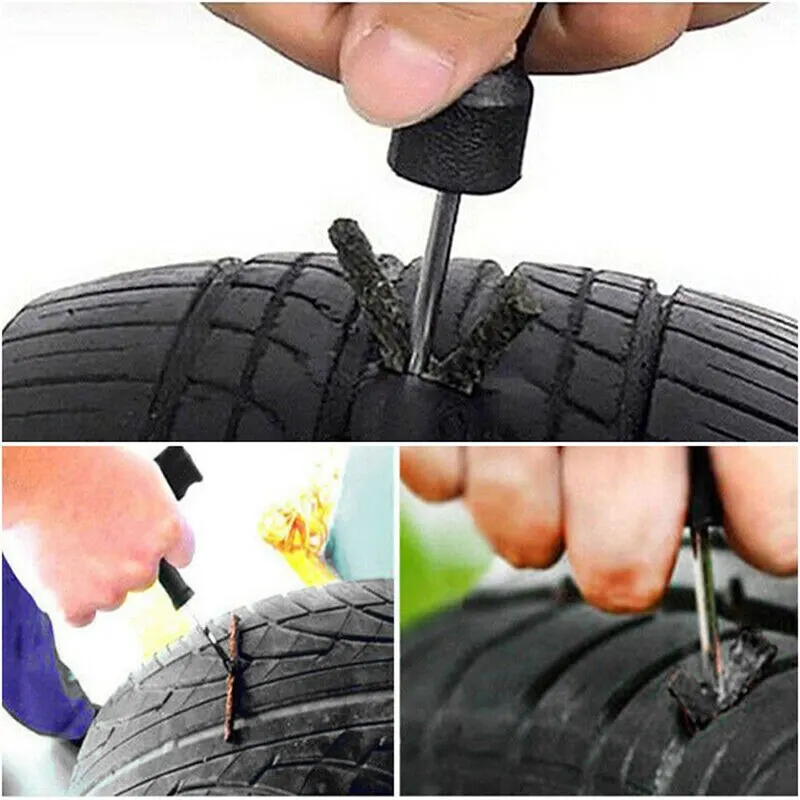
5. Clean The Tire and Repair
Once the two parts separate, you can stop the leak around the rim by cleaning the tire’s edges with a cloth to remove loose debris and dirt.
After the cleaning is done, you can add some repairing solution to the leakage and start filling the air.
Once you fill the tire with the desired air pressure, you can check again for any leakages using the same process with soapy water.
Fixing a tire rim leak can be expensive or affordable, depending on the leak’s cause and where you get the service done.
According to customer reviews, if you get the leak repaired at the shop you bought the tire from, you are more likely to get this service for free, but if you go to a different dealer, expect to pay $10-$20.
However, if the leak is because of a damaged rim, you’ll incur more costs which vary greatly depending on the brand.
If you check popular online sites, rims’ prices range from under $25 to $200; therefore, it will cost you more to repair the leakage if you have to replace the rim or entire tire.
To avoid this tire leak, there are some preventive measures that you can take.
Regular Maintenance
As mentioned above, tire leakage can result from valve stems or rims that are dirt clogged; therefore, you need to check your tires regularly.
With more accidents connected to tire blowouts and issues, it’s safer to have your tires checked for any potential problems to prevent leaking around the rim.
Drive Carefully
We have already established that punctures are the number one cause of tire leakage; therefore, if you can, it’s best to avoid situations that could cause punctures.
To achieve this, you should drive more carefully and at recommended speeds, especially on roads with potholes or speed bumps.
Avoid Overinflating Tires
Overinflating tires doesn’t solve a tire leakage problem. Once you identify that air is leaking around the rim, follow the above steps I shared to fix the issue.
However, if you choose to overinflate, the tires will become unstable, rigid, and lose traction when you are driving.
Use A Professional Mechanic
According to the U.S. Tire Manufacturers Association, drivers should supplement their monthly inspections with regular professional tire care.
The check should include wheel balancing, alignment, and tire inspection to protect your tires from leaking air.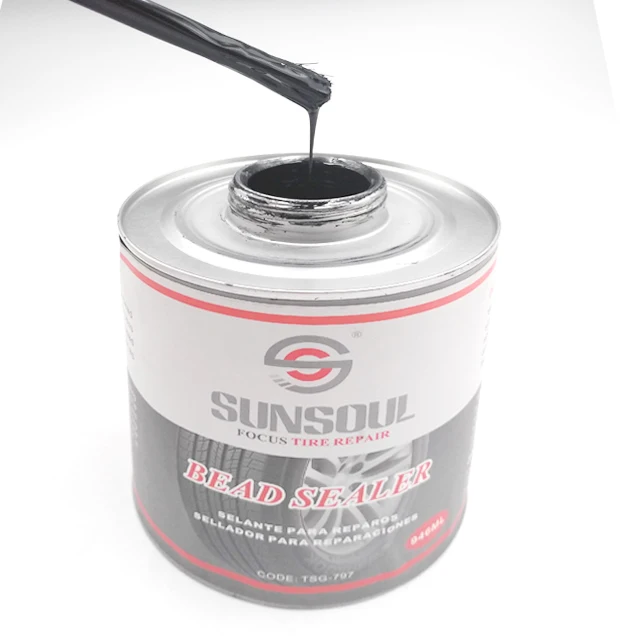
To find out more, you can also read our posts on how common are flat tires, underinflated tires, and how long will tires last with bad alignment.
Tires leak air around the rim for several reasons, but luckily this problem can be fixed and prevented.
While it’s possible to fix a leak at home using the kit from your car, you can also enlist the services of a professional mechanic if you spot extensive damage.
I have shared some simple steps that you can take to fix the leak, especially if you are doing it at home.
To avoid these tire problems, regularly check your tires for air pressure and damages at least once a month, consult professional mechanics, and drive carefully to avoid incurring extra repair costs.
by Damon Hildebrand
Aaron Fink/Demand Media
Tubeless tires hold air better, and last longer, than old fashioned tires with an inner-tube. With the exception of punching a hole in the tire by running over an object, or jumping the curb at the mall, tubeless tires generally hold up well. There are times, however, when a tire develops a leak between the wheel and rim. In this case, remove the tire to reseat the bead and reseal the tire.
Remove the tire from the car and lay it on a flat, hard surface with the valve-stem sticking up.
Fill the tire with air and spray soapy water around the outer edge of the rim where the tire meets it. The area of the leak is indentifiable by bubbles generated from leaking air. If one side of the tire shows no sign of a leak, turn the tire over and repeat the soapy water leak test.
Mark the leaking area of the tire with chalk.
Release the air from the tire by pressing inward on the valve-stem. If a valve-stem removal tool is available, remove the valve-stem needle by unscrewing it from the stem.
Turn the tire so the leaking side of the rim and tire face up.
Place one end of the 2 by 4 board on the rubber part of the tire, right next to the steel rim's edge. While holding the board in position, hit the board with the shop hammer to break the tire's bead loose from the rim. Once the seal breaks, the entire side of the tire will release from the rim.
Press the tire downward, away from the rim. Clean the inside edge of the rim with warm soapy water and a shop rag. Dry the area with a clean shop rag. Also, wipe the inner edge of the tire to clean any loose debris or dirt.
Place the needle back into the valve-stem and begin filling the tire with air. While air is flowing into the tire, pull up aggressively on the sides of the tire to mate the inner edge of the tire back onto the rim. When the tire touches the rim, air will fill the tire and continue seating itself along the rim.
Fill the tire to the desired air pressure. Recheck the tire for leaks with the soapy water.
References
Tips
 Avoid these products if possible.
 Things You'll Need
Writer Bio
Damon Hildebrand is a retired U.S. Navy veteran. He has more than 15 years within the oil and gas industry in both technical and managerial positions. Hildebrand has been a technical writer and communicator for the last four years. He is a certified specialists in lubrication and tribology, as well as a certified maintenance and reliability professional.
The search for solutions on the topic: what to do if a flat tire between the disc and the tire should be timely and fast. It means that you need to notice the regular descent of the slope when it is slowly poisoning, and obviously until the moment when you have to leave the track on a long journey.
It's easy to do: since almost all cars now have tubeless tires, the air from them descends slowly with small defects.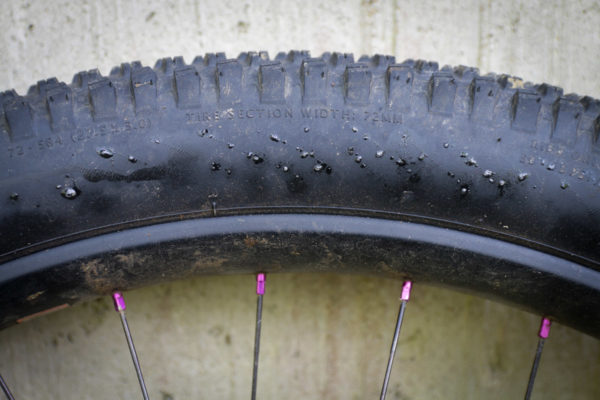 You can drive, noting only a slight pull towards the flat tire. But in the morning, sitting behind the wheel, it is absolutely easy to pay attention to the fact that the wheel has sunk.
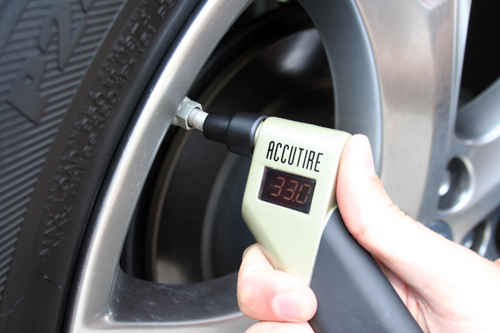
Even inexperienced drivers quickly begin to carry a pressure gauge in the trunk with them. And on a number of models (Opel, Skoda, some representatives of the Hyundai family), a pressure gauge is even included in the package of on-board instrumentation. A primary school student will also be able to use it, and measurements will not take much time. Clarify the causes of blown wheels and take action as soon as a problem is detected. Otherwise, it will stand up to its full height and turn into an unpleasant sideways somewhere far from the centers of civilization, and even outside the mobile communication zone.
What to do if a flat tire is between the rim and the tire? First of all, find out what caused this phenomenon. And in the second - to save the existing ramp or buy a new one.
Confident replacement of old tubeless tires with tubes inside is explained by several of their advantages at once.
Tubeless tires maintain pressure by sealing the rubber-to-rim interface. It is achieved by applying a special composition around the entire circumference of their contact. However, in some cases, with the visual integrity of the tire, there is a clear bleeding of air from it. And it happens exactly at the junction.
Apart from the wear of the tire itself, everything else can be repaired.
What you do depends on both the situation and the condition of the individual tire components.
 Again: the goal is to get to the base;
 So you can decide what to do if a flat tire between the disc and the tire is possible only if you know the outgoing conditions. In the open field - by any means to get to the places marked by civilization, in the home - to deal in detail with the causes and eliminate them.
Traps air between disc and rubber. Tires 2054018 on 8.5j wheel. Who will advise what?
Thank you all for your comments and advice. The disk was smooth, without oxidation and the rubber board was intact. Why poisoned is understandable. It seems that the tension is not strong.
In the morning they smeared it with sealant, collected it, while it holds.
vnutryanka erased due to insufficient pressure.
We stuffed the sealant in advance, I think we need to humps, clean the edges, well, so that the rubber would be good.
even the sealant didn’t help me, it still poisoned, as a result I cleaned the disc with a sandpaper, also sanded the rubber slightly, and sprayed with high-gear, conditioner for drive belts, the rubber softened very much, and after the beading it stopped etching, and there were no sealants necessary.
There were 255 old tires on a 12.5 disk. It poisoned because the cord was shredded. I bought a new 245 !, pulled it, everything is fine.
Sealant decides. ) And is there enough pressure?
why soar the brain, in tire shops there is such a service: bead sealing. solves all problems with bullying!
I have 205/35/18 poisons, I thought the rubber turned out to be a hole on the edge of the disk, 10 minutes with friends with argon and the problem is solved;)
sealant solves tightly
if the discs are crooked, then of course it needs to be corrected
nankang tires?
only parsing
checking the condition of the edge of the rubber (so that there is no damage)
and the cleanliness of the fit on the disk
no sealant!
if everything is whole and clean, then the air seal should be
but if nankang ...
then the second question :)
nankang rubber?
parsing only
checking the condition of the rubber edge (so that there is no damage)
and a clean fit on the disc
no sealant!
if everything is whole and clean, then the air seal should be
but if nankang .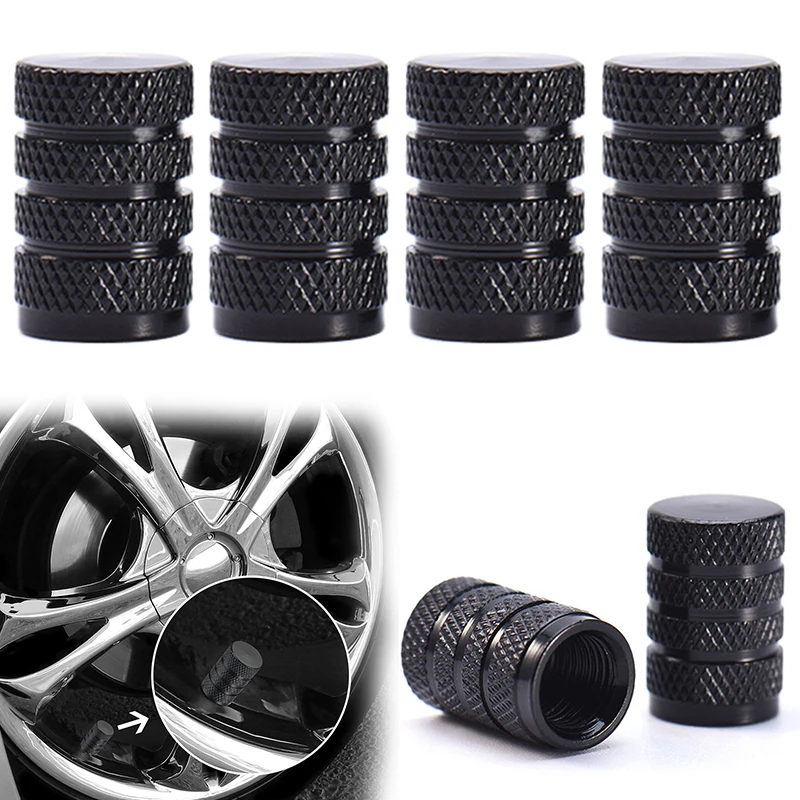 ..
..
then the second question :) He had a wild stretch there and it was also descending, he disassembled the side along which it was lowering, smeared glass sealant on the hump, then pumped it up so that the rubber sat down and immediately let it down - the sealant went down for a day and said all the rules. But just in general, I have the same problem -205/40 at 8.5 poisons, all the time there is no time to do the above ...
The only thing - there were questions about what will happen with the pain when removed ...) it remains a secret)
Buy Khaigir's tire sealant in a cylinder (with such a hose) and blow it in there. and that's it. the problem should go away.
You have a direct road to a normal assembly shop! Everything has already been said above. I’ll add on my own — I bent the rims like hell (205/35 on 8j) A month later, I started to poison the rim, I had to level the disk — in the end everything is ok.
Doesn't the rim stick out much on the 8j?
Not much, but this is enough to lose wheels on broken roads.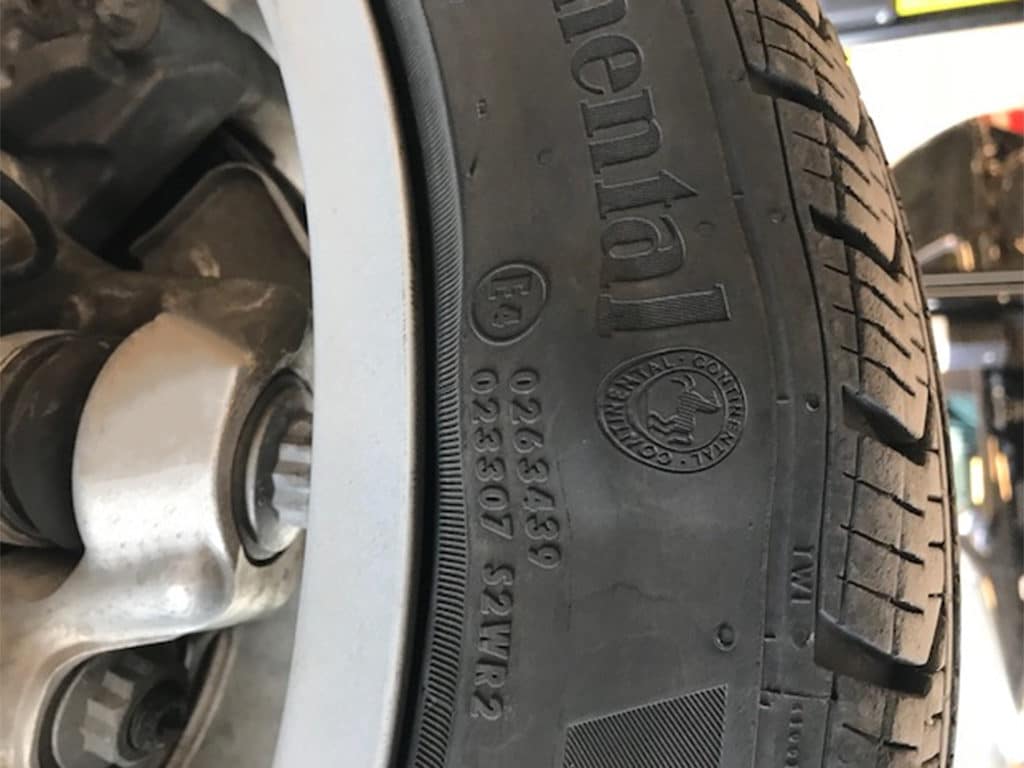
Already thinking of taking 215)
What width?
Finally there will be no tension
I looked at a lot of photos on the Internet, everyone looks different depending on what disk and rubber!
many people use glass sealant. It lowers 215/40 18x9.5 on its own.0003
consider it doesn’t poison at all)
whether it’s every morning)
In connection with the transition to winter tires, the question arose in my head, how to achieve complete and long-term sealing when landing tubeless!? It is known about corrosion on humps from the inside, but I specially in the spring peeled off these places with a drill and a brush, primed, painted, made sure that the installer smeared it with black when landing with this compound (by the way, what is it?). but still had to pump up at least once every two weeks. What can I say — I even have a new car with forged wheels and tires Bridge — half the atmosphere goes in two weeks!
And in winter the situation will be worse, apparently.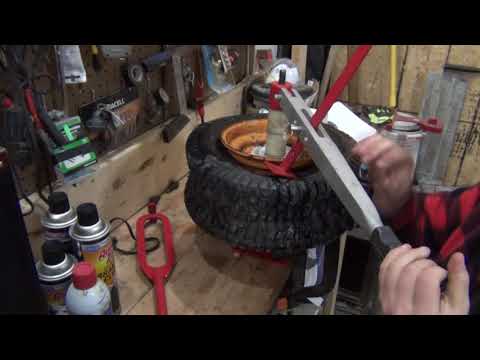
You can, of course, smear the gap in a circle with transparent silicone, but. smacks of a collective farm and finally I want to solve the issue in the bud! :hysteric:
Who has any ideas?
How often do you pump?
if the edge of the rim is evenly sanded and painted, then the rest is in the sealant. It’s not the white soap that is usually used in tire fitting, namely the special sealant, the installers have it, but they save it and smear this bullshit soap-mastic. I warned the sealant at different times, from afar I observe and they, as if on purpose with soap, I force them to wipe everything with a rag and then smear it with sealant, the sealant is like thickening a transmission with lithol, black-brown, gradually dries and sticks.
You also need to look and change the nipples completely, nipple, there are Chinese rubbish, dangerous, but there are good ones. Its hole on the disk can also be smeared with sealant.
On soap, even branded factory l. disks from soap begin to descend in 2-3 weeks.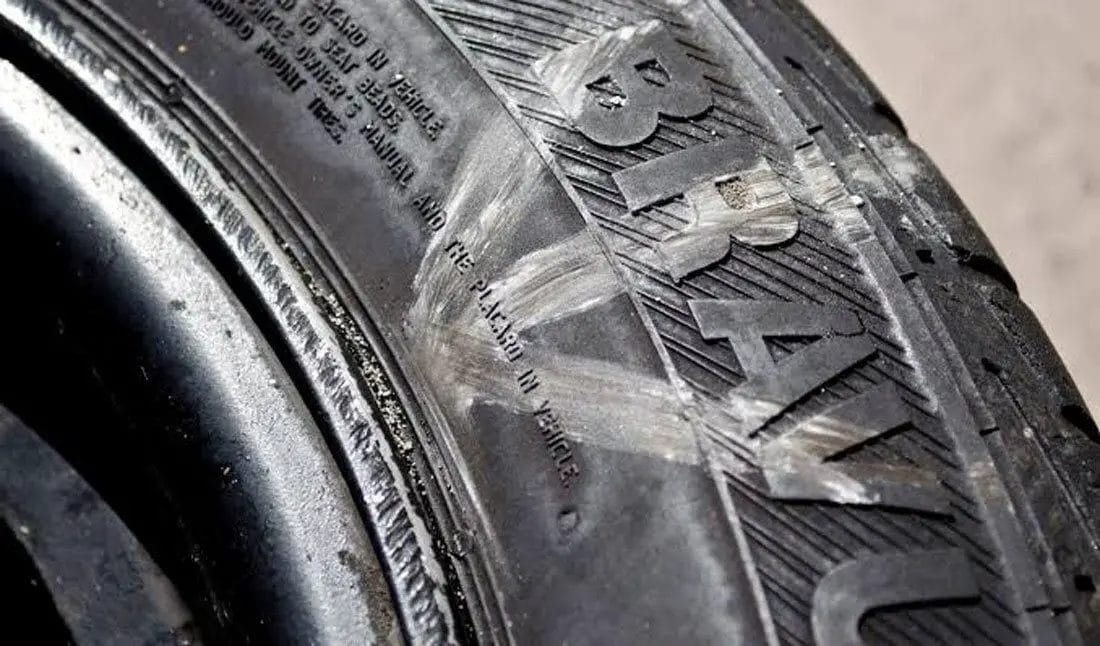
A sealant for a very long time, pressure control once every half a year.
@lelik, the paint on the hump most likely peels off. Before putting on all the humps on the old disks, I rubbed it with a knife so that they would blam, and then assembled it with a sealant. Pah-pah 2 years left, the 3rd went.
One even bubbled with the sealant, let it down, stuffed another abro there with a strip of cardboard, but there was no way to pump it, it snorted from both sides. I felt it with my hands, pressed it, it pumped up, it stopped poisoning. There, in Hakka, the inner belt is very narrow and there is an entry to the outer edge of the disk, which does not enter everywhere. Previously, they stood without this mound. And it bubbled under the weight, I pulled it a little, a millimeter, it stopped. I think it's the same tires. Because the kama is ancient, it didn’t poison, the bridge was also all cracked, it held.
Added after 6 minutes 0 seconds
I'm shocked in short. Either try to rearrange them for casting, or get rid of them.
I will add to this topic some of my thoughts and what I encountered while preparing tires.
In my automotive life, it so happened that I drove most of it on diagonal tube tires, and even when in 98 the 29th appeared for personal use, which has tubeless tires in its design. There were chambers in her tires and I did not take them out, because up to a speed of 130 km / h they can be operated for quite a long time, and my cruising speed has always been somewhere around 100 km / h. But on those disks, on a 14 "hump - a locking collar for the tire bead - for some reason there was one and only on the outside.
In the fall, my son brought me an almost new studded wheel from 3110 KAMA-EURO, but on a rusty and native 10-shnoy forging. Pumped up. A day later it went down to "0". I looked through the entire treadmill - there are no punctures, which means it poisons the rim. It’s a long way to go from the garage to the tire shop, but I must say that all my life I’ve always overboarded myself on personal cars “once” — my grandfather taught me since childhood. Therefore, I decided to overboard myself and what came of it:
1. The tire beads sat very firmly and to tear them off the rim flanges without damaging the inner surfaces of the beads - it is simply impossible, although both assembly lines were correct - they were still from my first car - VICTORY GAZ M20 1946 years old - Properly drawn and polished over 40 years of service with all four edges.
Therefore, I welded an appropriate stop to the garage box - three tons of separation - under the hydraulic jack and slowly and easily removed both sides of the tire from the humps. In the first photo.
2. But then the most interesting thing began - how to remove the tire without damaging the rim flanges - the rubber on them is soft and very tender, and it's clear why. And the seating surfaces of a tube bias tire just look like oak compared to them.
Each movement of the crowbar along the edge of the rim strove to wrap the rubber and pull out a piece! But there was a way out here too - neutral ordinary silicone grease was sprayed on every movement of the mount and things started to work.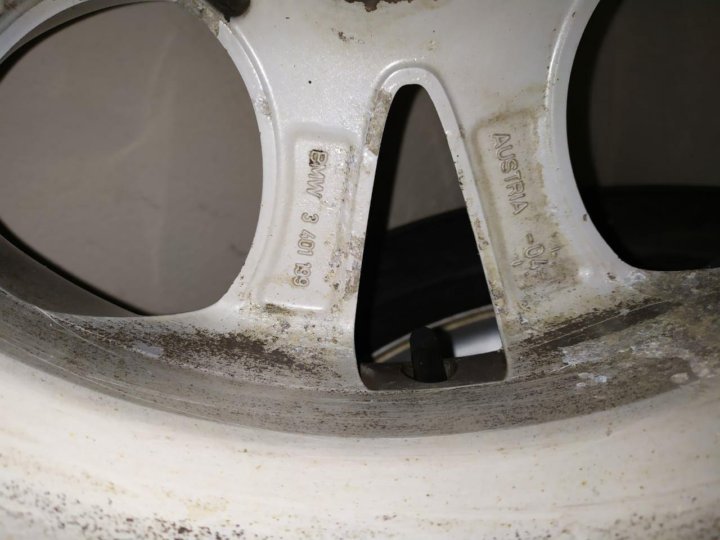
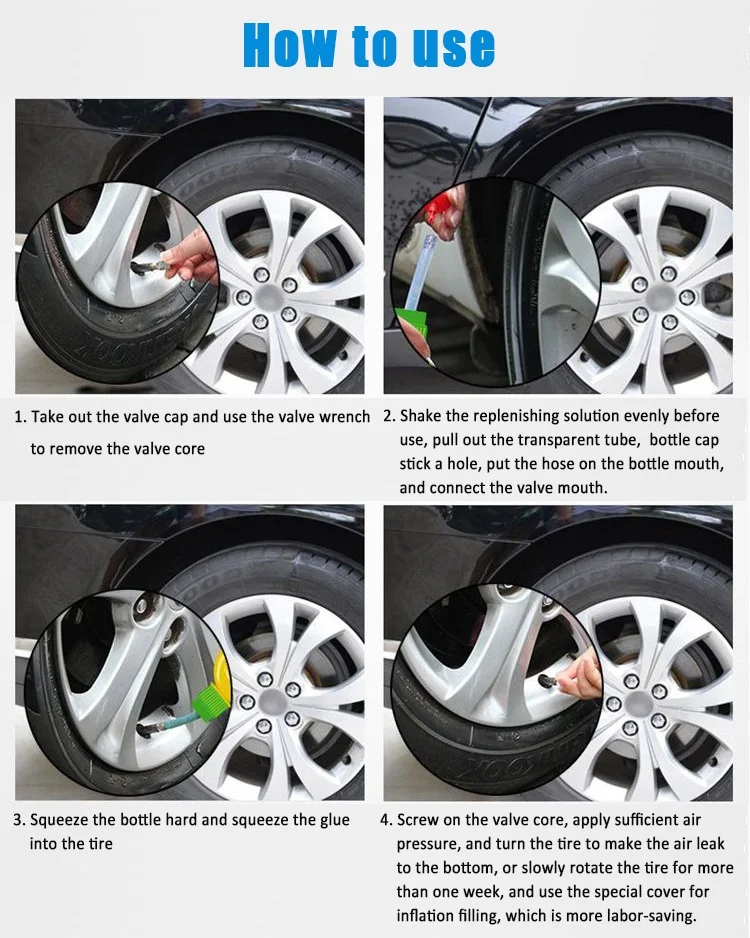
3. The valve of a tubeless wheel is simply not inserted into the disk by hand - it was transported for more than an hour, but never installed. I had to buy an installer key, and having lubricated the hole in the disk and the valve seat with bead sealant for tubeless tires, in one motion quickly and easily installed the valve in place. Photo 2.
4. Having prepared the disk, having carefully sanded the landing shelves and humps, galvanizing, priming and painting the disk, proceeded to the assembly. And again, a can of silicone grease came into play. The slightest movement was lubricated - rim - mounting - tire. After the tire was put on the disk, the main thing was to put the tire on the rim shelves hermetically evenly and without distortions.
When 2410 went to the people in 1985, they already had tubeless tires, but the sealant for the bead of tubeless tires at that time was in great short supply and many owners and taxi drivers instead used the usual BSK alcohol-castor liquid, mainly the color of red wine, consisting of butyl alcohol and castor oil.![]() And this connection worked and sealed perfectly! Even today, this sealing method can be recommended to those who have had to re-bead the tire themselves, far from civilization.
And this connection worked and sealed perfectly! Even today, this sealing method can be recommended to those who have had to re-bead the tire themselves, far from civilization.
Well, I bought a can of ordinary tire bead sealant - photo 3- (320r. - enough for 4 wheels, if not spilled) and painted the surface of the rim with it from the hump to the edge of the rim. Then you need to pump up, that is, put the board on the shelf immediately, and not go for a smoke - after 20 minutes it hardens and sealing may not work, because the excess sealant immediately squeezes the board out, and apply with a brush - it is attached from the inside to the lid (photo 4) perfectly evenly impossible. Therefore, do not yawn!
5. There is a compressor in the garage and put the beads on the rim shelves, inflating the tire until it is fully seated, then release the pressure completely, inspect it, and pump it up to 2 kg. - not difficult.
Yes, the sealant itself looks like ordinary liquid rubber, I had a Barnaul chemical plant, which polymerizes well under the action of oxygen in the air, i. e. hardens and turns into a rather elastic, but tenacious rubber - you can’t tear it off the tire with your fingernail.
6. The Voronezh degreaser was used as a silicone remover and surface degreaser - it is the most neutral of all solvents of the toluene group, and the least toxic and degreases any surface very well, without dissolving the paint. After that, the wheel stood for a day in the garage against the wall for non-descent and gladly took the place of a full-fledged winter spare tire in the trunk.
CONCLUSION: 160 re for changing shoes for one wheel and half an hour of time are undoubtedly cheaper than:
- all installation tools,
- half a day of time,
- and there is no guarantee that you will not damage the tire bead.
If there is a large and non-adhering shell from accidental tearing out of the bead rubber, where will the new tire go? That's right - OUT! Or in extreme cases - on the chamber version. Therefore, before deciding on this perversion, you should think carefully - whether you can and need it. I just wanted to try. Happened. And I hope that I will not be perverted in this way any more. But for some reason I’m now looking at a summer tire and a disk - I also need to assemble it by summer - and something tells me (more precisely, my favorite organ) that now this is not the last. an act in this area - unless, of course, you make a simple and reliable bead dismantler = you turn the drive handle through the bike chain with your hand, the blade goes in a circle and easily lifts the bead from the wheel rim mounted on an unnecessary and worn hub. But I didn't tell you that.
The search for solutions on the topic: what to do if a flat tire between the disc and the tire should be timely and fast. It means that you need to notice the regular descent of the slope when it is slowly poisoning, and obviously until the moment when you have to leave the track on a long journey.
It's easy to do: since almost all cars now have tubeless tires, the air from them descends slowly with small defects.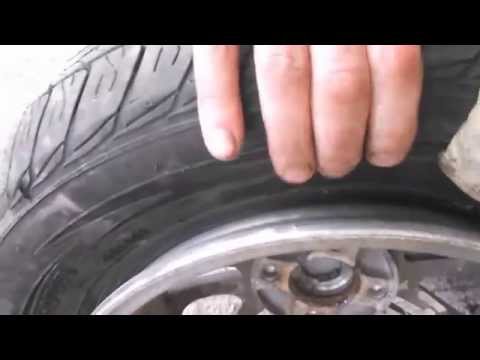 You can drive, noting only a slight pull towards the flat tire. But in the morning, sitting behind the wheel, it is absolutely easy to pay attention to the fact that the wheel has sunk.
Even inexperienced drivers quickly begin to carry a pressure gauge in the trunk with them. And on a number of models (Opel, Skoda, some representatives of the Hyundai family), a pressure gauge is even included in the package of on-board instrumentation. A primary school student will also be able to use it, and measurements will not take much time. Clarify the causes of blown wheels and take action as soon as a problem is detected. Otherwise, it will stand up to its full height and turn into an unpleasant sideways somewhere far from the centers of civilization, and even outside the mobile communication zone.
What to do if a flat tire is between the rim and the tire? First of all, find out what caused this phenomenon. And in the second - to save the existing ramp or buy a new one.
Confident replacement of tubeless tires with tubeless tires is explained by several of their advantages at once.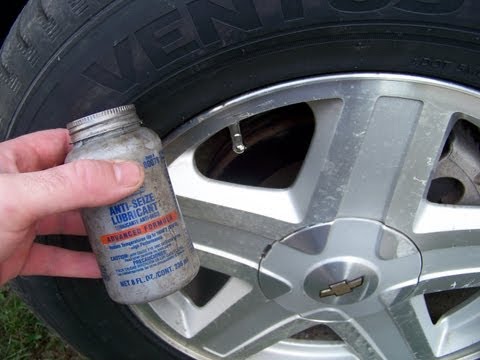
Tubeless tires maintain pressure by sealing the rubber-to-rim interface. It is achieved by applying a special composition around the entire circumference of their contact. However, in some cases, with the visual integrity of the tire, there is a clear bleeding of air from it. And it happens exactly at the junction.
There may be several motivating reasons:
 The simplest situation requiring only inexpensive and independent restoration;
 Apart from the wear of the tire itself, everything else can be repaired.
What you do depends on both the situation and the condition of the individual tire components.
 Some use this method for everyday trips. Not the best idea - one fine day, the pumping moment may be missed, and your rubber will be chewed to the “ejection” state;
 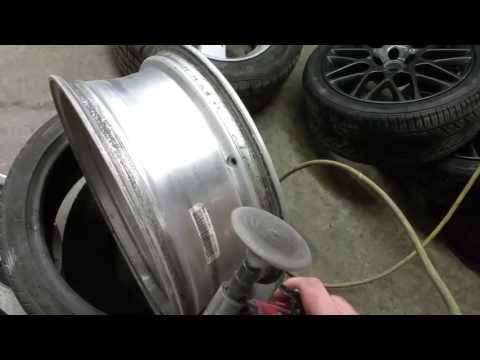 If the first one is bad, throw it away; a rusted disc can be brought back to normal, its geometry restored;
 So you can decide what to do if a flat tire between the disc and the tire is possible only if you know the outgoing conditions. In the open field - by any means to get to the places marked by civilization, in the home - to deal in detail with the causes and eliminate them.
If a close inspection of the flat tire does not reveal a puncture, it is likely that the leak is caused by a pinhole in the tread or sidewall. However, the problem may not be in the tire. The air valve stem may be leaking and must be replaced, otherwise the tire bead (when it meets the wheel) may be pressed tightly against the rim (a common problem in areas where road salt is used, which can corrode the metal surface).
Soap and water or water alone can help find the source of the leak. Mix liquid soap with water in a spray bottle. Spray all parts of the tire - tread, sidewalls, valve stem and bore (with cap removed), and along the rim on both sides - until you find a spot where there are bubbles. This is where the air comes out. This is easier to do with the wheel off, but you might be able to find the leak without removing the wheel, especially at the front when turning the steering wheel exposes the inner sidewall somewhat.
Another method is to remove the wheel and soak it in a bath of water. Bubbles form at the leak. If the tub is not large enough to wet the entire tire, do the procedure several times.
Small holes in the tread can be repaired. Large punctures cannot, and minor damage to the sidewalls (where the tread and sidewall meet) will usually require tire replacement. Leaks and valve stems (the tiny valve itself inside the tube) can also be replaced.
If the leak is due to the tire not being completely seated, sometimes removing the tire and applying bead sealant can stop the leak.
Possible solutions for leaks from the wheel seat are to remove the tire, de-corrosion and apply ball sealant before remounting the tire. Some mechanics also suggest inflating a tire with nitrogen instead of air because its molecules are larger than oxygen, potentially making them less able to slip through the smallest holes. Perhaps this is the solution, since nitrogen contains less moisture - this will prevent rust if the wheel is made of steel.
When a wheel leaks air, it will be decided whether it can be repaired or should be replaced. For example, pitting a wheel can make the metal porous and allow air to seep through. This probably justifies a replacement.
Contents:
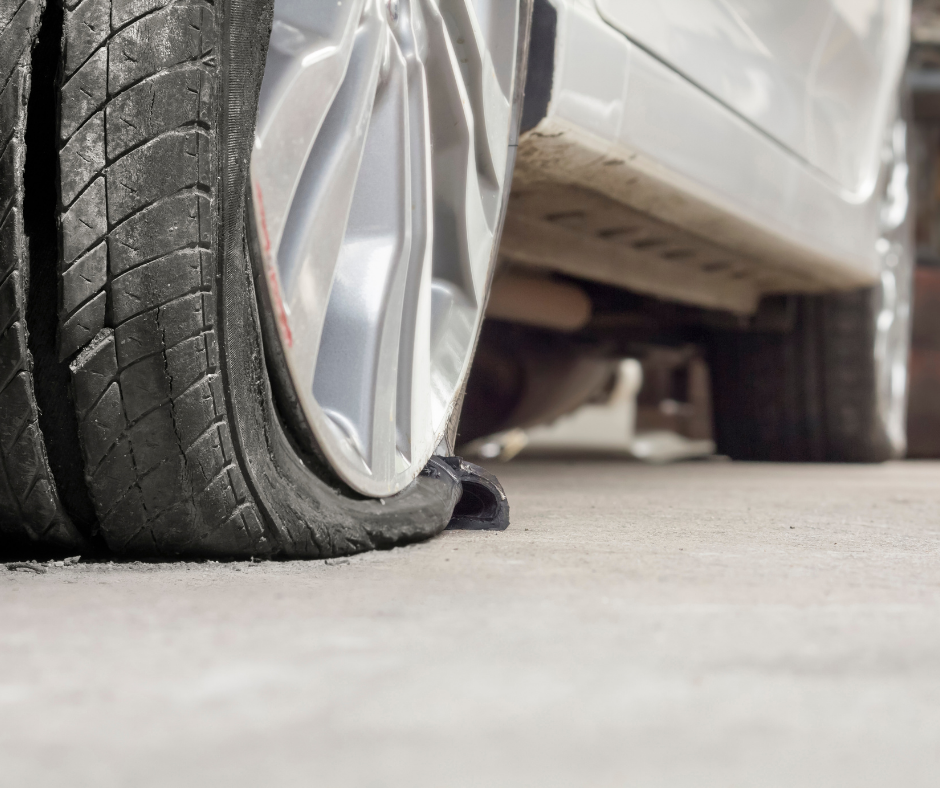
A flat tire on a car is always a nuisance, especially if the loss of pressure caught the driver not in the garage, but on an empty highway.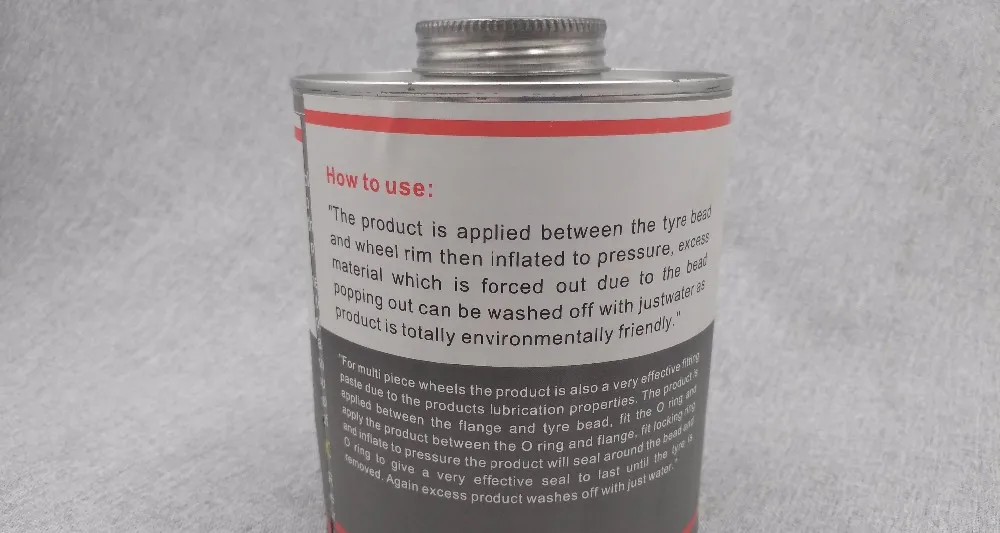 And it's not always a puncture, because the bleeding of air can occur along the disk. Why the wheel is lowering along the rim and what to do about it, we will analyze in the article.
This problem is quite common with tubeless tires, where the rubber adheres to the disc due to internal pressure. At the junction of the disk and tire, the seal is sometimes broken and air is bled, which ultimately leads to a complete loss of pressure. In chamber tires, the situation is more unambiguous: if the wheel is flat, then look for a puncture.
Deformation is the main reason. Disc geometry is an extremely important thing for full-fledged work, sometimes even a dent in an insignificant place can be fatal. The car drove into the pit - the disk bent, the tightness of the cord was broken and all the air came out. Low temperatures outside the car, which causes the rubber to harden, is a common cause, especially if tightened with a tire change. Also, due to poor maintenance, improper storage of the prefabricated kit, or constant driving on roads sprinkled with reagents, the disc begins to rust, as a result of which corrosion eats away the metal, forming micro-holes through which air will be gradually etched. Blowing off the wheel can also occur through a faulty nipple.
In the end, the reason that the wheel is going down is the most banal - the rubber is already old and deformed over time, which means it is physically unable to provide the desired density at the point of contact. There is nothing to prevaricate here: the tire urgently needs to be replaced.
It would seem that since such a disaster does not happen with chamber tires, isn’t it better to give preference to them? Maybe in this sense this is true, but in fact, tubeless has more than one advantage. Here they are:
They have no friction between the tube and rubber, which means that the tire heats up less during long rides.
It is lighter and more reliable, since the chamber version can burst at high speed.
It balances better and holds pressure longer after a puncture.
A hole in the tread may not interfere with the ride at all - a stuck nail will simply not allow air to escape. With a chamber tire, this is impossible, it will be blown away pretty quickly.
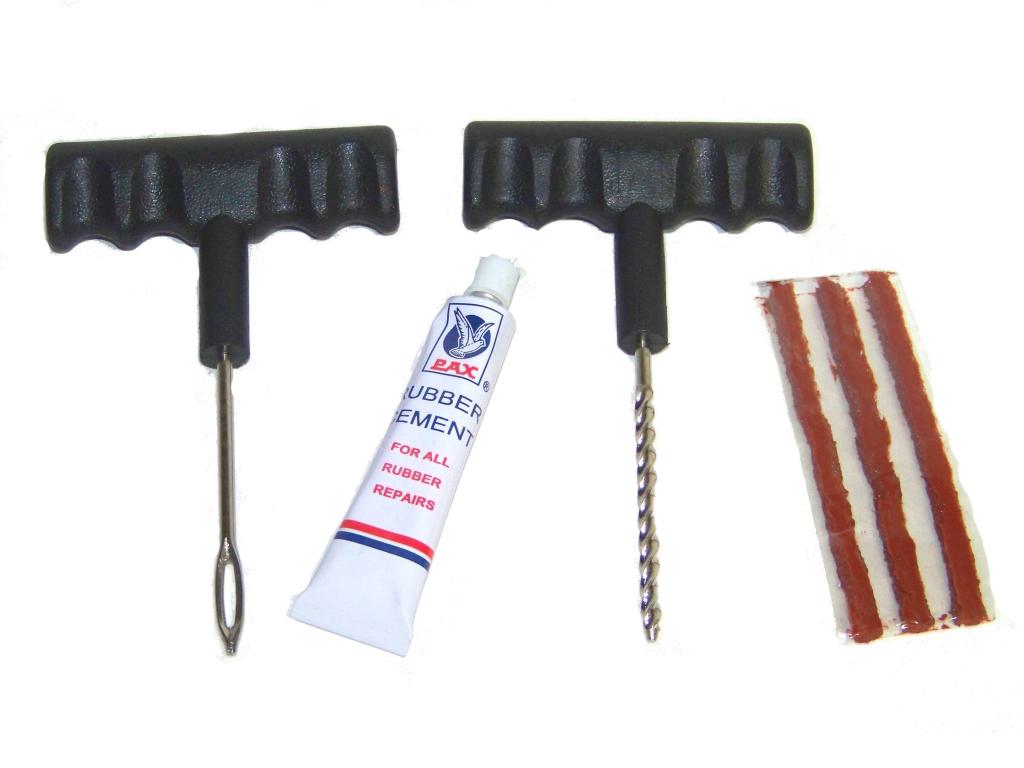
Damage to the tread can be urgently repaired with a repair harness. This is quite enough to get to the nearest tire center and change tires.
First, make sure that you do not have a puncture in the wheel or that the cause of the trouble is not in the nipple. It is elementary to notice a protruding nail, but it is not always necessary to pull it out immediately and immediately. As we wrote above, a foreign object can simply get stuck in the tread and the air will have nowhere to go. An open puncture is repaired with a tourniquet.
The valve must be smeared with soapy water or simply slobbered - if there are no bubbles anywhere, then it has nothing to do with it. A defective nipple will have to be replaced with a new one.
If the valve is in order, fully inflate the tire and smear the edges of the cord with soapy water. You can do this with a brush or use a sprayer. Air bubbles will tell you that the source of the trouble is in the detachment of the cord from the disk surface, i.e. in violation of the tightness of the tire seat. Metal edges should also be carefully examined - any cracks and welding defects can be the cause of a pressure drop.
You can eliminate the descent from under the rim like this:
We poison all the air and remove the wheel from the car.
It is best to disassemble it, so it will be much more reliable to fix the problem. In order not to do the balancing again after the procedure, it’s a good idea to mark the position of the nipple with chalk first.
The disk edges will have to be properly sanded with fine sandpaper in places of rust damage and covered with a new layer of paint.
After the paintwork has dried, we put the tire back on and spread the rubber on the places where the cord touches the disk with a special sealant or mastic. Or you can use the soap solution again, but this time cook it much thicker so that it resembles glue in viscosity. And with the help of a simple brush, we go around the entire circumference of the cord on both sides of the wheel.
We inflate the tire with a compressor, pressing the cord against the disk.
So we will eliminate the damage and provide a tighter fit on the seat. The sealing compound must penetrate all micropores and prevent new bleeding of air.
If there is absolutely no time to remove the wheel, and trouble overtook you on the road, it is enough to bend the edge of the cord and also smear the rubber with sealant or soap. This is quite enough to reach the garage or car service.
The described methods are suitable if there was no serious deformation and there are no cracks in places near the mounting holes or there is no damage to the tire cord. In the worst case, you can’t do without rolling a disk in a tire fitting or replacing it. If you have an alloy wheel, then you can fix it, but this is an extremely expensive business, comparable to buying a new one.