A slow tire leak is more than just a nuisance. A leak can lead to low tire pressure. Not to mention, prolonged running on an underinflated tire can lead to more extensive tire damage or even cause a dangerous blowout.
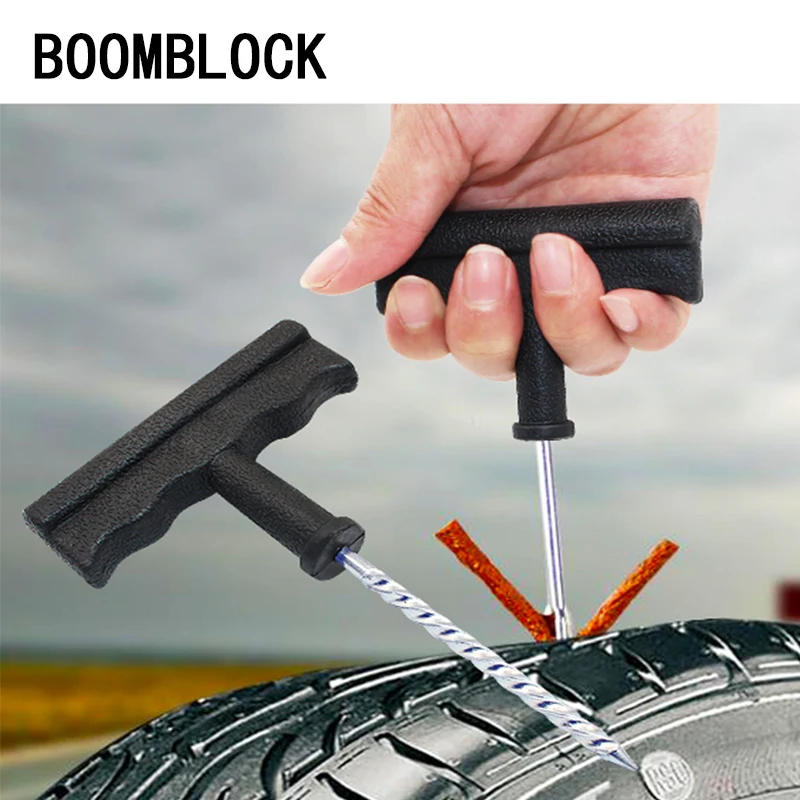
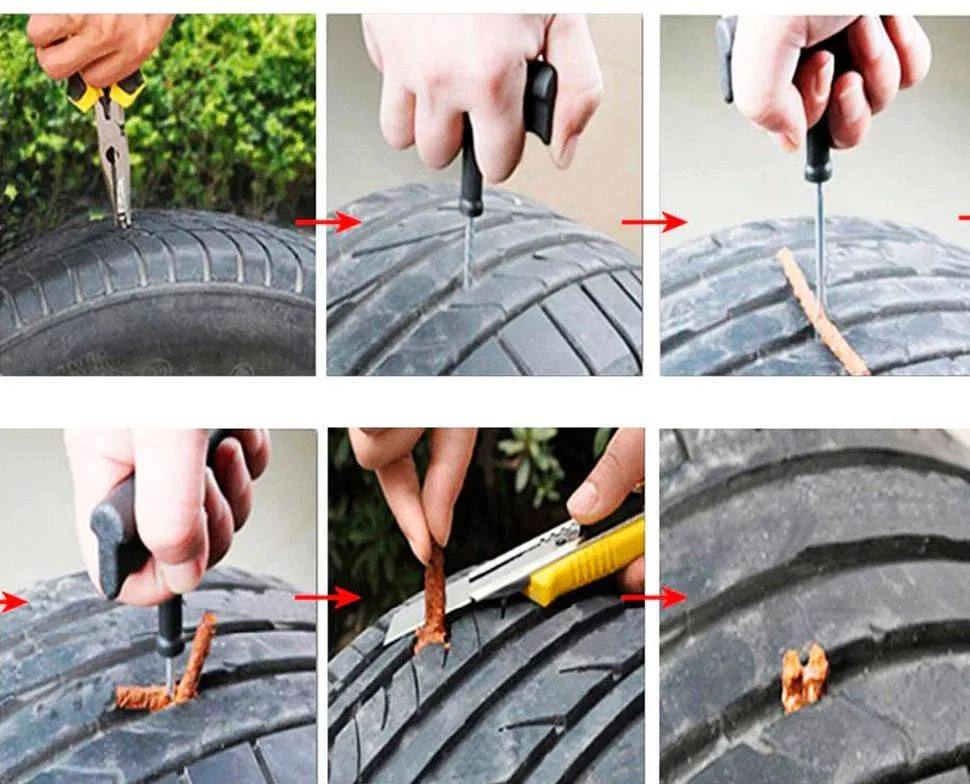
If you’re experiencing a slow leak, here are some things to look for:A tire puncture: It is a common misconception that a puncture will cause the tire to immediately go flat. However, in many cases the object that caused the puncture remains lodged in the tire and prevents the air from leaking out quickly. As with all tire leaks, it is important not to ignore a puncture. Eventually the object will either wear down and/or work its way out of the tire. For more on this read our article How to Repair a Tire with a Safe, Permanent Fix.
Wheel damage: Another common cause for slow tire leaks is damage to the area where the tire bead meets the rim. This type of damage is typically cause by the driver hitting the curb, taking a speed bump at high speeds OR those dreaded potholes! The impact deforms the wheel’s metal surface which may cause the tire to pull away from the mounting surface of the wheel.
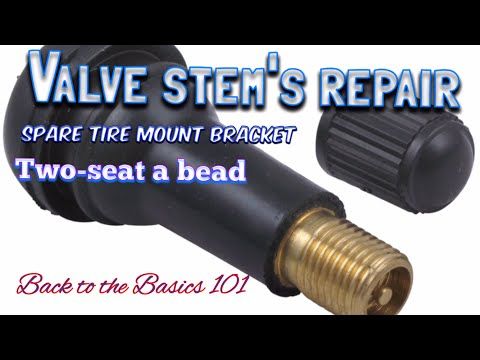
Valve stem damage: The third most common cause for slow tire leaks is worn out or damaged valve stems. Time, use and exposure to elements can cause your valve stems to wear out and cause leaks.
Diagnosing your tire leak:
If your vehicle is equipped with TPMS, you will know right away if you have a leak. If the sensor light on your dashboard goes off, you inflate all the tires back to proper pressure and the light goes back on a few days later – you likely have a leak. If your vehicle does not have TPMS, its important to check your tire pressure regularly.
Once you’ve identified that you have a leak, use TECH Chek to locate the source of your leak. Simply spray the product all around the tire.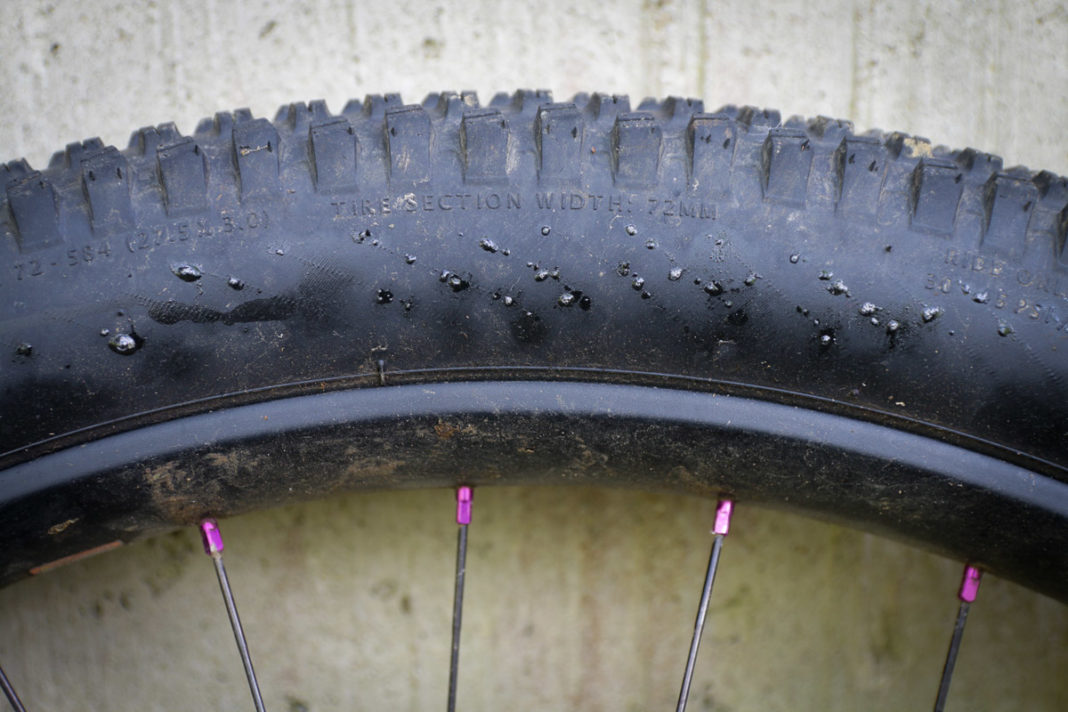 Where the surface of the tire begins to bubble is likely the source of your leak.
It’s important to have your tire diagnosed by a professionally trained tire shop or mobile tire repair service as soon as possible. In the case of a puncture, you may want to use a tire repair kit to keep your tire properly inflated until you can have it serviced. The leak should then be permanently fixed using a proper tire repair consisting of a cured rubber stem and repair unit.
If the leak is caused by a damaged valve, a trained tire technician can typically replace the valve at a minimal cost. In some cases, however, the tire may need replaced.
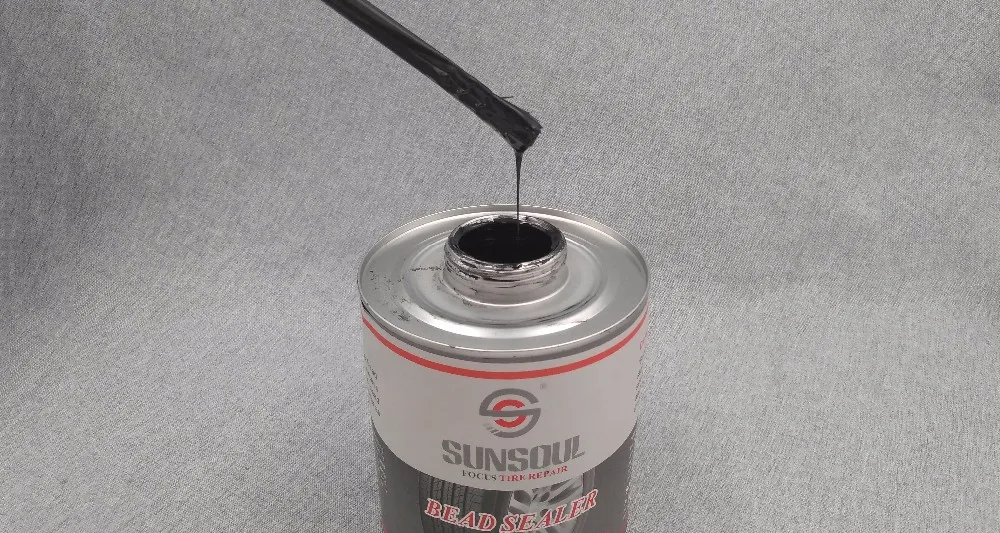
If the leak is caused by a damaged wheel, a tire technician may be able to reseat and seal the tire using a bead sealer. However, if the damage to the wheel is significant, unfortunately that means you may need to replace the wheel itself.
To read more about the types of damage that can and cannot be repaired, click here!
When you purchase through links on our site, we may earn a commission at no additional cost to you.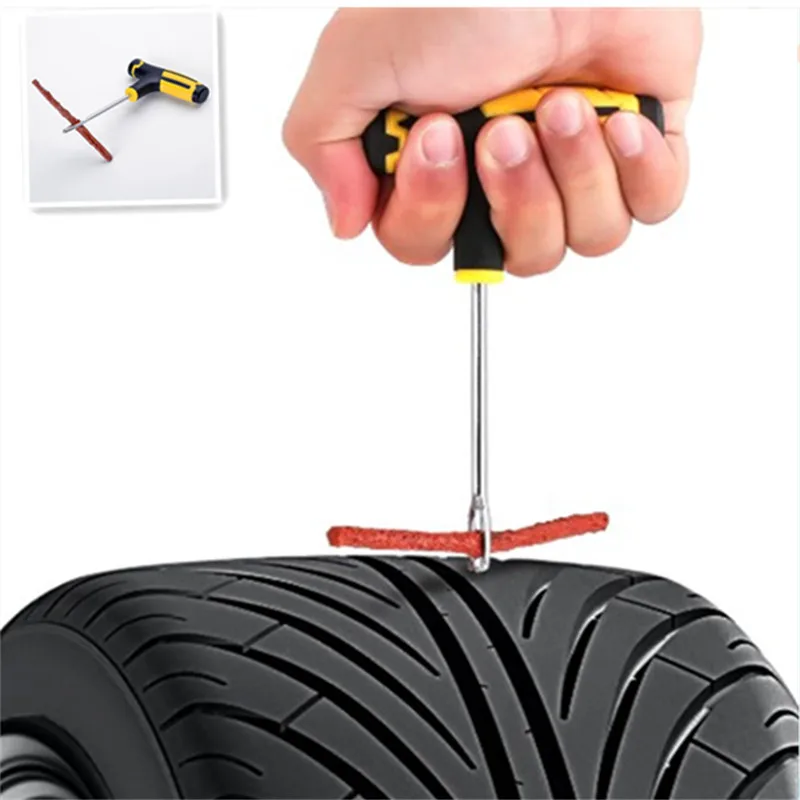 Learn More
Leaks along the tire bead are relatively common in ATV tires regularly run in mud, sand, and rough and rocky surfaces. This type of leak is typically relatively small, allowing the air to seep out overnight or over a few days.
To fix a leak at the tire bead on an ATV tire, you have several alternatives where these are the most common:
Each of these methods has its pros and cons to consider. Depending on your specific situation and what is causing the leak, one approach may be better suited over the other. We’ll cover each of them in detail in this post.
Bead leaks happen when the tire does not seal properly against the rim’s bead in a tubeless wheel. The bead area of the rim needs to be completely clean and undamaged for the rubber to make a tight seal against the rim.
Typical causes of bead leaks on an ATV tire:
Disassembling the tire from the wheel and addressing the issue causing the leak should be your primary alternative if you have the required time and tools. If performed correctly, it will provide a permanent repair without any of the cons that come with the other alternatives.
Pros:
Cons:

You may or may not already know where the tire is leaking. Even if you suspect that the leak is near the bead, it’s a good idea to verify exactly where the leak is located and make sure there are no additional leaks before moving on.
Use a valve stem removal tool to remove the valve stem. This will completely deflate the tire in just a few seconds. Alternatively, you can use an air-down tool to remove all the air. However, this method is more time-consuming than removing the valve stem core from the tire valve.
Depending on what is causing the leak, you may or may not have to break the bead to address the issue adequately.
If the leak is caused by dirt caked in between the rim and tire, but the rim is otherwise undamaged, you may get away with pulling back the tire slightly for cleaning. You can do this by finding a way to apply weight to the tire’s sidewall until there is a small gap between the rim and tire.
Cleaning without breaking the bead is easier on larger tires such as car tires or tractor tires. On smaller ATV tires, it’s less fiddly if you manage to break the bead completely. The result should be better as well.
If the rim is corroded or damaged, you are better off removing the tire from the rim entirely for proper access to the affected area.
There are several ways to break the bead of a tire at home. My personal favorite is using a portable tire changer tool. These are readily available, relatively cheap, and work well on most ATV tires.
I recommend bolting the tool to the floor if possible. I installed threaded concrete bolt anchors to remove the device when not in use. A bolted-down tool ensures more control of the process and better leverage.
Tip: To boost the success rate and reduce the risk of tire sidewall damage when using this type of tool, leaves a tiny amount of air still in the tire before you break the bead. This will prevent the tire sidewall from giving in, causing the tool to slide out of position as you apply pressure.
As a cheap alternative to a store-bought tool, you could consider making a DIY bead breaker like the one I used before buying a dedicated tool.
Two pieces of wood and a couple of strong hinges give you a decent bead breaker in no time. Remember to cut the short piece of wood at about a 15 degree angle for better grip by the rim.Check this post for a few other ways of breaking the bead on an ATV tire.
This is how you break the bead:
A bead-breaking tool can be worth the investment, particularly for ATV owners who struggle with tire issues regularly.
After breaking the bead, you need to find out what issue is causing the leak. Use a flashlight for a good view. Look for dirt, corrosion, or rim damage; Sometimes, you may even find more than one issue that needs to be addressed.
Continue as described below according to your observations.
When you ride in dirt, mud, or sand, small particles and debris may begin to work their way in between the rim and tire. As more dirt builds up, it creates space for even more dirt until it eventually breaks the seal and causes a leak.
Both steel and aluminum rims may rust or corrode, but steel rims are particularly prone to leaks caused by rust.
Dirt and sand trapped between the rim and tire may wear down the paint over time, eventually causing the exposed metal to rust. Metals expand when they rust, creating gaps and an uneven surface that lets out air.
To fix a corroded rim, you need to remove the corrosion and apply a coating to prevent further corrosion issues.

Consider sandblasting and powder coating the rim for an even better and more professional result. I won’t detail how to do this in this post as it requires tools that typically only enthusiasts or professionals have access to.
The same method applies if the paint on your rim is flaky and starts to come off. Sand down all of the affected areas and apply fresh paint.
If you hit a rock a bit too hard or scrape the side of your rim against a hard surface, the rim may become damaged, preventing a tight seal.
You can repair minor nicks and dents by removing the tire from the rim and smoothing out the damaged part with a Dremel tool or fine-grit sandpaper.
Larger dents or cracks that may affect the rim’s structural integrity should only be addressed by a professional. Visible cracks left unattended may expand gradually until complete failure down the line. While tire sealant or installing an inner tube may keep a cracked rim airtight, it should only be considered a temporary fix.
Before you seat the tire back onto the rim, please take note of the maximum air pressure the tire can safely handle. Never, under any circumstances, exceed the specified max air pressure.
Bead sealer is specially designed to seal troublesome bead leaks that otherwise are hard to repair. It also helps prevent leaks, making it a good option for those that regularly find themselves with bead leaks.
Pros:
Cons:
 You also need to clean up the rim by scraping off the old bead sealer.
 Bead sealer is applied as a thin coat to the inside of the rim where it touches the tire. Follow the supplied instructions carefully for a good result.
Another option to try if you don’t have access to bead-sealer is a quality silicone sealant, applied the same way as the bead sealer.
Ensure not to inflate the tire before the bead sealer or silicone has completely set, as it will force out the sealant.
When you’re out on the trail and don’t have the tools or time to fix the leak properly, or if you’re simply looking for a quick fix, consider using a tire sealant such as Green slime.
Pros
Cons

Another option to fix a stubborn leak is installing inner tubes in a tubeless tire. However, tubes in low-pressure off-road tires are not always the best option.
Pros
Cons
Check out this post if you want to learn more about the pros and cons of installing tubes in ATV tires.
Sadly, there is no way to prevent bead leaks altogether. But, by applying one or more of the actions below, you will significantly reduce the risk of it happening.
If you know that you ride in a way that dirt will build up and eventually get a leak, it is better to clean when you have tools and time. Implement cleaning the bead into your maintenance.
How often you should do this procedure depends on how much and under what conditions you ride, but once a year could be a good starting point.
Bead sealer does not only help seal current leaks, but it also helps prevent new leaks down the line. The sealer keeps the gap between the rim and tire shut, so that dirt cannot begin to build up.
Inner tubes not only fix current leaks but will also help prevent upcoming leaks from causing any issues.
There is not always a way to call a tow truck, and driving on a flat tire, “chewing” the rubber and killing the rim is at least uncomfortable.
The very first replacement of rubber on a motorcycle or scooter gives reason to think - what is better in terms of quick repairs: tubeless ones that do not require wheel disassembly to eliminate a puncture, but leave the rider helpless if, along with damage, it “led” and flattened the edge of the disc? Or chambers - allowing sealing almost ring breaks (if only there were enough patches), but requiring the removal of rubber from the rim for this? The unequivocal answer is no. Few classics, straights or tourers today remain "loyal" to tube rubber models: tubeless tires are lighter, softer, warm up and cool down faster thanks to simplified heat transfer. In sports, more precisely - enduro and motocross, chamber - on the contrary, prevail: only spoked wheels can "play", withstanding strong alternating loads during landings and impacts.
The nuance is that a tire with a chamber can be put on any spoked or cast disc, and a tubeless one can only be placed on a cast one, because only it can ensure tightness. Tube – can be installed in a tubeless tire as an emergency measure. In case of major damage to the sidewall, cracks or curvature of the edges of the rim, this will make it possible, after pumping up the wheel, to reach the nearest tire service (and there already - straightening, balancing and other maintenance according to the rules). True, for such a focus, it is advisable to take a camera with a face value one less than the diameter of the disk, otherwise it will create folds inside that will rub for a couple of hundred kilometers. The resource of such a “treatment” is large - until the next puncture, like a new one.
It depends on the magnitude of the damage whether it will be possible to eliminate it on your own, or whether you will have to “surrender” to the motorized tow truck. In tubeless - holes up to 5–6 mm are patched, in chambers - as much as there is enough glue and patches, the main thing is the condition of the tire. To determine the extent of the disaster - find a place where you can safely stop without violating traffic rules (where it is prohibited - you will have to sacrifice tires and drive on).
If the wheel deflates slowly, and the object that pierced it is still inside, you can try to carefully drive to the tire shop. A completely deflated "pancake" will have to be resuscitated on the spot, or - remove the wheel and take it to the service.
To find a hole in a tubeless tire, if it is very thin and not immediately visible, the wheel must be pumped up, slowly pouring water - bubbles will go.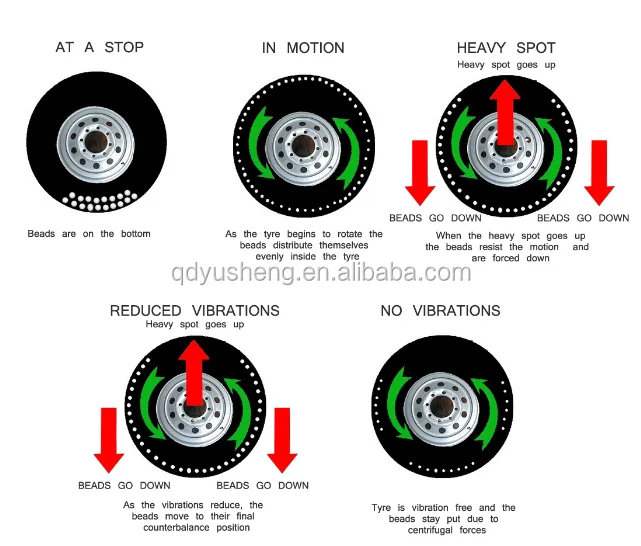 In place, tubeless tubes can be “harnessed”, or filled with sealant inside, without removing from the motorcycle.
With the second type of tires - more difficult. A torn balloon must be removed from the tire to detect a defect and seal. In a good way, the wheel must be removed from the motorcycle and disassembled on a clean, flat, hard base. Suppose such a “patch” can be provided even off-road, but how to remove the wheel on a motorcycle if it does not have a central stand? And shooting is not required. The motor must be carefully laid on its side, after making sure that the faucet is closed, gasoline does not flow out through the tank cap (antifreeze does not flow from the tank if the motor is “dropsy”), and removing the plastic or wardrobe trunk with fragile contents (if any).
You will have to unscrew the wheel from the motorcycle only if you need to replace the tire, or it is decided to patch the tubeless tube with a “fungus”. In the absence of a central stand, this will also have to be done on a lying bike, or - make this stand from improvised materials (bricks, stump, car jack), placing them under the crankcase protection from below, the central tube of the frame, the duplex jumper (but not under the plastic, itself engine crankcase or attachments!), under both footrests - if they are not folding, or - under the pendulum. Before removing the rear wheel on a motorcycle, the front fork must be loaded with something, or an even higher lining is made.
In a motorcycle tire fitting shop, tubeless tubes are repaired by cold vulcanization. They are removed, disassembled, the puncture site is cleaned from the inside, degreased, lubricated with glue and a calibrated “fungus” patch is inserted into the hole from the inside. The fungus itself is a thin plate of rubber with a “leg” tube in the center. The leg - by the guide wire is dragged through the hole of the damage, and the "hat" seals it.
After half an hour - you can put the tire back. The reliability of such a repair is high, the patch does not cause a significant imbalance, the service life of a sealed tire does not decrease.
This method is also applicable on the road, the main thing is to have the necessary equipment and materials with you:
The fungus repair procedure does not require much experience. The main thing is to keep it clean, fully clean the place where the patch fits, let the glue dry slightly to a dull finish and press (roll) the surface of the fungus with high quality, expelling all the air between the layers. If necessary, you can degrease the place before gluing with gasoline, but without the rest of the above, it will not be possible to fully carry out repairs.
The compressor is sometimes replaced by a small cylinder of compressed air or carbon dioxide. Unlike a mechanical pump, it will immediately create a “throw” of pressure, pressing the tire beads against the rim flanges (in emergency cases, even a fire extinguisher was used to pump flat tubeless wheels). When connecting the compressor, start the bike's engine before you start inflating the tire - let it idle.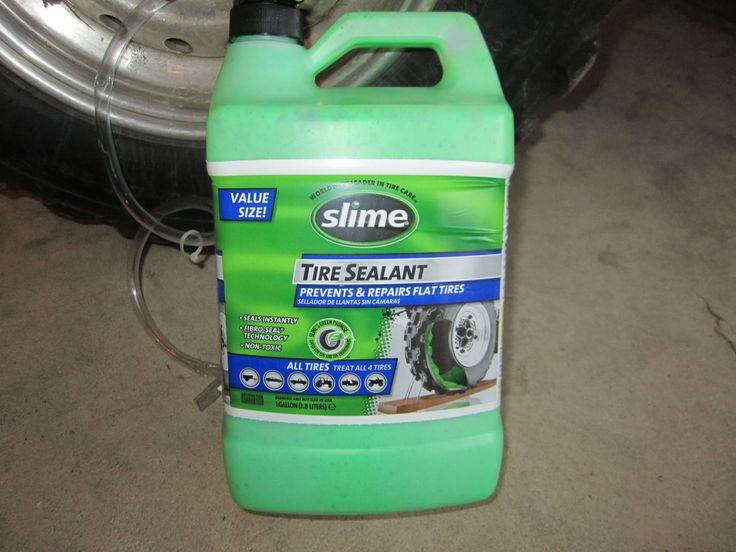 Otherwise, the motor can "land" the battery, and you will not start.
Manometer - needed for control. It is undesirable to pump over the repaired tire. It is recommended to "inflate" 0.2 atmospheres less than the nominal value. Inflating too little is also bad: a flat tire has a larger contact patch with the road, so the place of a fresh patch will deform more.
“Burning” a tubeless tube and sealing its internal cavity through a nipple are quick, simple methods that do not require special skills. To repair the damage, you only need the materials themselves, and how to pump up the wheel.
Now in Moscow, and not only, 6-5 varieties of cans with a sealant are sold - a quickly hardening "liquid rubber", with a volume of 800 to 250 ml.
Applying "Anti-Puncture" is simple: put a tube with a fitting on the nipple of the camera, turn the can over, and hold the button according to the instructions.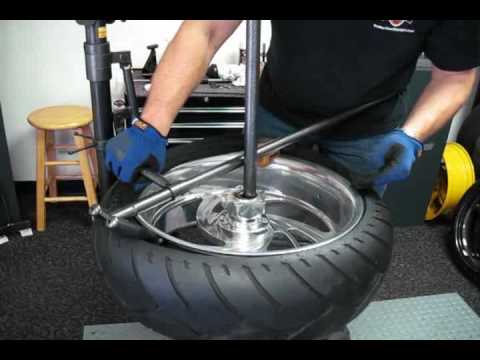 Then - pump up the wheel, cleaning the nipple from the foam, roll it, making a full turn to distribute it.
The sealant is blown out with air into the puncture hole and clogs it, solidifying. After 20 minutes - you can go. Reliability of repair is high. Resource - until the next puncture.
If you have a compressor, start immediately pumping up the wheel, so it will be easier to work with a puncture, insert a patch, and it will swell faster.
Procedure:
You can go in 5 minutes, you just need to make sure that it doesn’t descend anywhere else.
Outwardly identical, repair kits for harnessing wheels can differ in price by almost half. This variation is explained by different configurations - one will have only three items, the other - six or seven.
A complete tubeless tire repair kit contains:
Regardless of the cost, you need to choose a kit in which the harnesses will be reinforced, and the awl - with a deep spiral winding (notch), and not a “needle file”.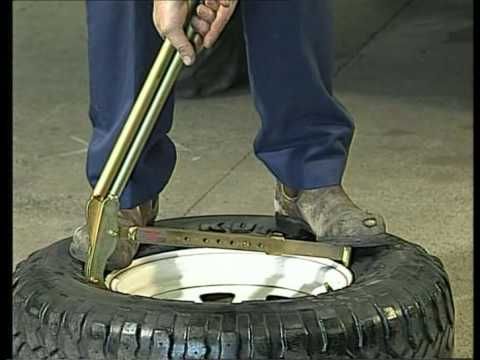 Inserting a flagellum is sometimes easier with a regular thin screwdriver. If there is no glue in the kit, or it has dried up, the flagellum is moistened with gasoline.
At motorcycle service stations and car services, holes in the chambers are closed by hot vulcanization: a layer of raw rubber is applied to the cleaned, fat-free puncture site and, after squeezing it well, it is heated with a special “iron”. Iron - burns, layers - are fused into a single whole. Reliability of repair is high. The resource will be almost like a new one.
Cold vulcanization (patching) - used if the workshop is not equipped with a vulcanizer. In this case, the quality of the service and the reliability of the repair will depend on the accuracy of the master. For the convenience of gluing, the camera is completely removed in the service, but, I repeat, this is not necessary. It can be repaired on the spot in the same way (there are no other options except for replacing the camera), but without removing it from the motorcycle.
This can only be done if you have two metal mounting blades. At least one, the second can be replaced with another flat tool. You can still disassemble the wheel with a wide screwdriver and a “family” key wrapped with electrical tape. But this is only as a last resort, otherwise you can damage the cord.
Sequence of work:
 Let the glue dry for a minute.
 The fencing must be carried out twice as carefully and more slowly than dismantling, lubricate the side with water or soap, “help” more with your hands, otherwise there is a risk of picking up the edge of the chamber with a spatula and tearing it.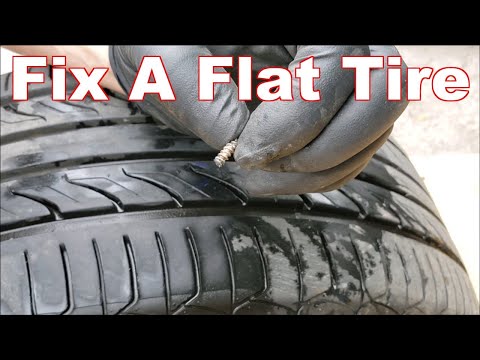
Important! If the wheels of the motorcycle are equipped with tow bars - before pressing the tire bead from the rim, you need to loosen this tow bar! But do not unscrew the nut completely, do not disassemble to the end.
A standard “first aid kit” (a set for repairing classic motor rubber) contains only patches and glue, so it is advisable to supplement it yourself with a piece of “skin” or a needle file. You can degrease with gasoline, or apply a little glue first and wipe off immediately, rolling up the dust with it.
Now there is no shortage of specialized motorcycle workshops not only in Moscow - in all major cities there are motorcycle helpers who help motorcyclists directly on the track, or tow to where you can quickly change the camera, or patch the tubeless correctly, so that there is no trace left. Where there is a guarantee.
Self-replacement of a tire on a motorcycle requires a certain physical condition, and for the first time - a “kilometer of nerves”.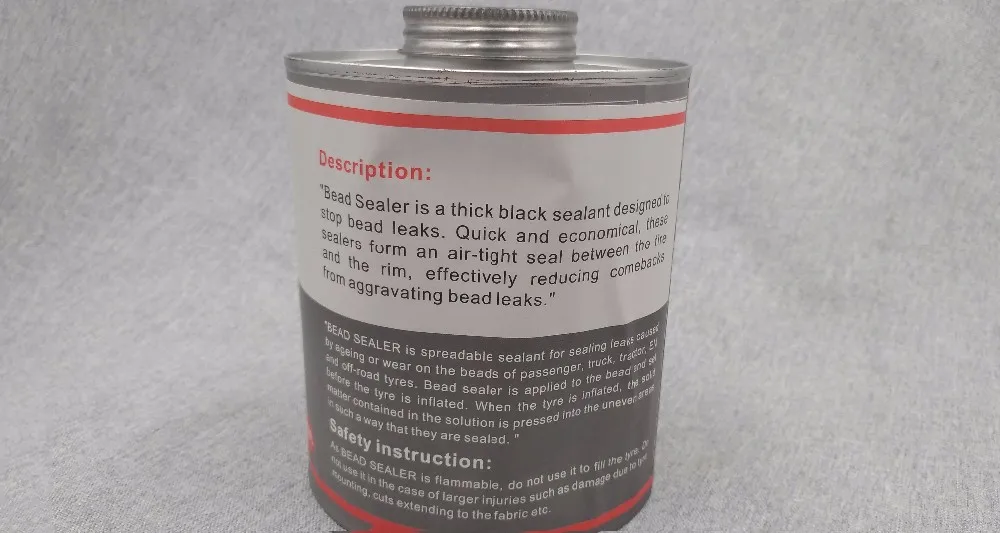 At the service station, instead of you, automation will “sweat”, which will not lock up the board and will not scratch the disc coating with a spatula. The main thing is to do it quickly (if you need to go urgently, the price sometimes does not matter).
Repair at the service - may be the only possible one if, due to driving on a flat tire, the tire nipple is turned and torn off. Especially if he flew off and got lost, but there is no spare. In mototiremontazhke - there is always a set of consumables for any wheel diameter. In the same place, in extreme cases, you can buy a new tire, or a used dokatka.
In addition to the patch, for normal operation of the wheel, balancing must be ensured. This is generally a useful procedure during any change of rubber, otherwise if there is a strong imbalance, the wheel bearing will inevitably break due to vibrations, and the hands will quickly get tired and “buzz” after long rides.
The first couple of tens of kilometers - do not drive, go at the speed of the flow.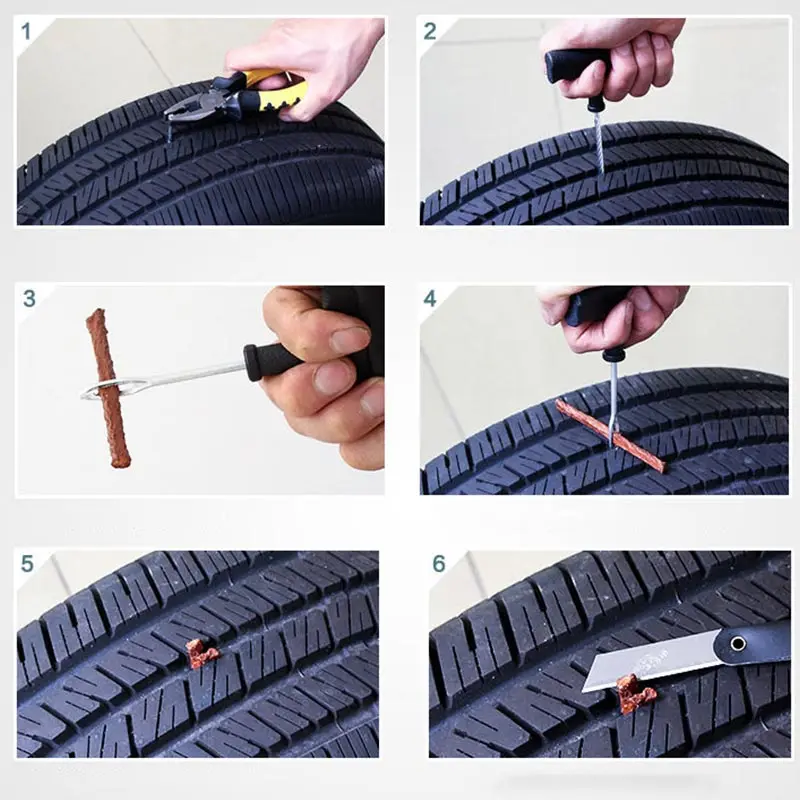 Stop, check for a flat tire. If the patch is not of high quality, it will manifest itself almost immediately. Parking will tell about the long-term perspective: if the cylinder has not lost volume in the first day or two, then everything is in order, you can drive as before.
Knowing what to do if a flat tire is on the road is important not only “for yourself”. To help a newbie or a fragile girl is to earn an important “plus in karma”, which will later return at the right moment. But, I hope, this knowledge will be useful to you only in theory. Good luck on the roads, no nail, no wand!
In order to effectively eliminate possible damage to tires (tires) of car wheels or quickly, by eye, independently assess their condition and the possibility of continuing their further operation, you need to know how they are arranged.
Just using the example of wheels of the 14th diameter with Michelin tires of the Renault Logan car of the first generation, we will understand their device.
The carcass, that is, the tire itself, consists of several layers of rubberized cord (steel, fabric or fabric-steel). The cord threads stretch from one side of the tire to the other, along the radius (hence the type of tire - radial). parallel to each other.
Tire tread is a thick strip of wear resistant rubber fitted over a tire. The inner part of this strip is solid, and the outer part has a certain relief - the tread pattern. According to the type of tread pattern, tires are divided into summer, winter, all-season, sports and racing, off-road, designed for the installation of anti-skid studs.
The Michelin tire of our Renault Logan is pure summer. It has a certain marking that says about it.
The breaker is a padding cushion layer (belt made of rubber fabric or metal cord) located between the tire carcass and its tread.
The thin layer of rubber on the sides of a tire is called the sidewall. Its thickness is 1.5 - 3 mm. The sidewall performs a bearing function (together with the frame), and also serves to protect the frame from mechanical damage, penetration of dirt, dust and moisture.
This is the part of the tire that secures it to the wheel rim. The bead consists of a layer of cord wrapped around a wire bead ring and a rubber filler cord.
The beads of the tire prevent stretching and provide rigidity.
Here are basically all the elements of the tire (tire) of the wheel of a car.
Notes and additions
— A tube can be inserted into the inside of the tire, which, at a certain air pressure inside it, creates the necessary rigidity and elasticity of the tire.