The Drive and its partners may earn a commission if you purchase a product through one of our links. Read more.
BYNoelle Talmon/ LAST UPDATED ON June 3, 2022
Most car owners will find themselves by the side of the road with a tire failure at some point due to a screw, nail, or other sharp objects. These punctures often lead to a loss of air, which can make driving unsafe and/or impossible. If you don't have access to a spare tire and you're stranded on the side of the road due to a flat tire, there is a solution that doesn't involve calling a tow truck for help.
Tire sealants are a great way to quickly repair a slow-leaking tire, and they can also be used for preventative measures. You can easily store this product in the trunk or other area of your vehicle for emergencies. The best tire sealants are affordable and easy to use, but they're not all created equally. We did the research and found some of the best options, so you'll be prepared the next time the unexpected occurs.
Best Overall
Slime Emergency Tire Repair Sealant
SEE IT
Summary
A strong and fast-acting tire sealant capable of filling 1/4-inch punctures.
Best Value
Fix-A-Flat Tire Sealant and Car/SUV Tire Inflator
SEE IT
Summary
Designed for cars and SUVs, this tire sealant is 24 ounces and can be used on extra-large tires. It fixes punctures up to 1/4-inch.
Honorable Mention
TireJect Tire Sealant Kit
SEE IT
Summary
This formula is available in 10, 20, or 40 ounces as well as a one-gallon container.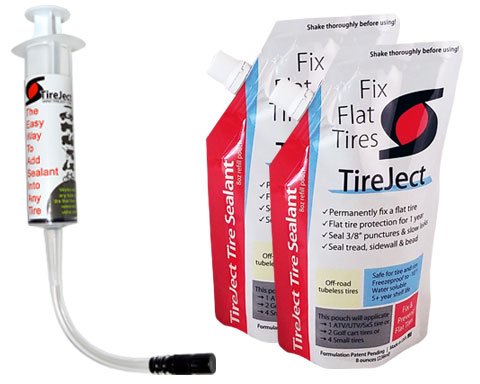 It can fill punctures up to 3/8-inch.
Our reviews are driven by a combination of hands-on testing, expert input, “wisdom of the crowd” assessments from actual buyers, and our own expertise.![]() We always aim to offer genuine, accurate guides to help you find the best picks.
We always aim to offer genuine, accurate guides to help you find the best picks.
Learn more
I took several factors into consideration when choosing the best tire sealants. First, I focused on well-known brands that have a reputation for producing high-quality products. I also looked at the effectiveness of each item. Using user testimonials as a reference, I compared how each sealant performed in real-world conditions in order to determine how well they functioned overall.
I included products that are both solutions to a puncture and I made sure to pick products that can be used on a variety of different tires, from passenger cars to larger pickup trucks. I also included items in a wide range of prices to suit a variety of budgets. For more information on our methodology, go here.
Slime Emergency Tire Repair Sealant
SEE IT
While the name may be gross, Slime tire sealant is one of the most effective sealants on the market. It is capable of filling punctures up to 1/4-inch, which is around the size of a normal screw or nail. It’s a great preventative measure to help fight against the possibility of full tire blowouts.
This small and powerful formula is fit for cars, trucks, SUVs, ATVs, trailers, and RVs. Plus, it’s compact enough to take with you, no matter where you plan on driving. One of the best features we found is that the bottle comes with its own valve core removal tool, giving you easy access to prevent leaks in your tires.
However, if you are using it for a car or trailer, there is a restriction on how fast you should drive. It’s only effective at speeds up to 65 mph, and should only be used as a quick fix if you tend to drive at speeds around this mark.
Fix-A-Flat Tire Sealant and Car/SUV Tire Inflator
SEE IT
This simple small yet effective tire sealant is capable of making sure a large tire holds its air until you get it properly taken care of. Its compact bottle means you can take it with you and quickly use it in case you have a tire emergency. You can easily check what tires Fix-A-Flat fits by checking out the guide on their website.
It is able to fully block a puncture up to 1/4-inch. While it isn’t a permanent fix, it will last long enough for you to drive it to the shop or back home. It’s easy to attach to your tire nozzles as well, giving you more time to get back on the road and less time worrying about how much air you’ve lost. It’s nontoxic, noncorrosive, and nonflammable as well, making it safe for the environment. It’s also safe to use on cars with a TPMS monitoring system.
While it may be fast-acting, you will have to move the car to the right position in order for the compound to take hold effectively. That means you have to make sure to park where the puncture is at the six o’clock angle, which can be difficult to do by yourself.
TireJect Tire Sealant Kit
SEE IT
When ordering this tire sealant, you have the option of choosing 10, 20, or 40 ounces. You can also choose to order a one-gallon container. The sealant is a liquid rubber mixture that contains tire particles and Dupont Kevlar fibers. Every 10 ounces of sealant comes with one bladder bag and one injector tool. You can use this repair kit to repair punctures in your tires from screws, nails, thorns, or anything else. The sealant only works on punctures that are up to 3/8-inch.
You’ll find this sealant system is easy to use, thanks to the included injector tool. You connect it to your valve stem for a mess-free installation. You can even install this sealant on all four of your tires and prevent future flats for the next year.
Ride-On Motorcycle Tire Balancer & Sealant
SEE IT
This tire sealant is meant for use with motorcycle tires. It will balance and seal your tire by evenly coating the inside surface of your tire. If your tire suffers a puncture while you’re riding, the centrifugal force of your rotating tire and the internal air pressure will move the Ride-On sealant into the hole. This will instantly seal it. This will work on punctures that are up to 1/4-inch in tubeless tires and 1/8-inch in tube tires.
You’ll like that this sealant turns your tires into self-sealing tires. They’ll also eliminate the need for ugly wheel weights. This sealant is specifically designed for use in high-speed tires. It’ll improve the performance of your motorcycle tires by dampening road vibration and noise.
Berryman Products Seal R Tire Sealing Compound
SEE IT
This tire sealant comes in a variety of sizes based on your needs: 8, 16, or 32 ounces or a one-gallon container. It will instantly seal your pneumatic tires and tubes. It protects against thorns, screws, and any other sharp objects. To use, extend the included hose and attach it to your tire valve. Then use the reliable pump action nozzle to dispense the sealant into your tire.
What’s nice about this sealant is that it specifically states that it’s safe for use with a variety of metals. This includes chrome, steel, and alloys used in wheel making. You can confidently use this sealant without worrying that it will ruin your wheels. It also stays liquid and won’t corrode or cause rust.
Slime Smart Spair Emergency Tire Repair Kit
SEE IT
The Slime 50107 Kit contains two distinct elements: a powerful tire inflator and the emergency tire repair sealant. Instead of having to use a jack to change out the punctured tire, leave that hassle behind. The sealant is tire sensor safe and works well with standard car tires. The Slime tire sealant repairs tread area punctures up to 1/4-inch in diameter. Along with the kit’s included inflator, you can repair and inflate the tire within 15 minutes. Simply plug the tire inflator into your vehicle’s 12-volt accessory power outlet to get it started. It features a quick connect air hose and a built-in tire pressure dial gauge. The 16-ounce bottle of the emergency non-toxic tire sealant instantly seals punctures. The process is simple and hassle-free.
However, some users have experienced issues with the product going dead and not working when they needed it. Some actually lost more air after using this sealant.
STP Car Tire Fix Sealant and Tire Inflator
SEE IT
Whether you drive a car or truck or ride a motorcycle, STP Tire Fix Sealant and Inflator works well without any tools required. The non-flammable formula seals punctures that are up to 1/4-inch in diameter, it is easy to clean up with water, and it will hold air for as long as three days.
The product is also safe to use with tire pressure monitoring sensors. We like that this product is so easy to use: just fill up the tire to seal and inflate it, and go. Sixteen ounces fills a standard-sized tire, while 20 ounces fills larger tires. Overall, it's great for emergencies and is a short-term solution. The company recommends going to a repair shop for inspection and a permanent fix within a couple of days after application.
Slime Emergency Tire Repair Sealant is well-known in the industry and can repair screw or nail punctures up to 1/4-inch long. It can be used on cars, trucks, SUVs, ATVs, RVs, and more. It includes a valve core removal tool to make the process easier. For a slightly more budget-friendly option, consider the equally effective Fix-A-Flat Tire Sealant and Car/SUV Tire Inflator.
Aerosol tire sealant is one of only two types. A single-use product, aerosol sealant is for emergency repairs that will allow you to drive short distances on a punctured tire. It comes in a bottle that sprays, allowing a simple application to fill holes in the tire with great accuracy. When you spray the product into the valve, the punctured tire will inflate. The formula coats the inside of the tire to plug any leaks or holes.
The second type of sealant for a punctured tire comes in the form of a thick gel.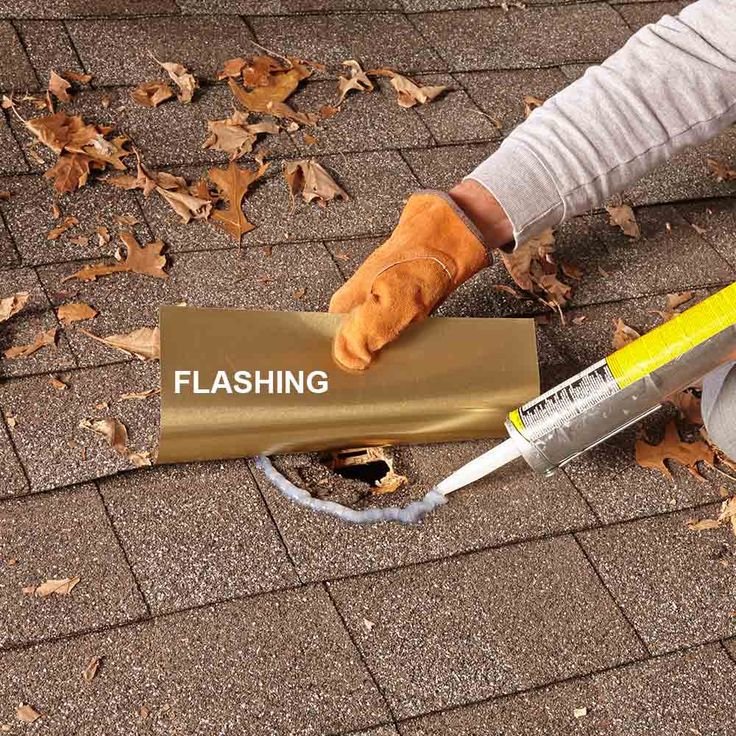 Using the gel option can be a bit more difficult than the aerosol tire sealant, as it is harder to put in place. Plus, it can be messier due to its slimy substance. To use the gel sealant, you will usually need tools or equipment to make sure the tire is properly sealed and no longer leaking air.
Many tire sealants are very affordable and cost between $10 and $20. These products are often at least 16 ounces in size and work as promised. They are no-frills, but they get the job done. If you spend upwards of $60, you will often find much larger sealant containers or those that are part of a kit, which can include items such as tire inflators. If you have room in your vehicle for a kit, it may be worth storing one in your trunk due to the added features, such as accessories for inflatable and carrying bags.
You’ve got questions. The Drive has answers.
Tire sealants are for temporary use and not a permanent solution. The tire sealant’s purpose is to get you to the nearest gas station, automotive shop, or dealership to fix the tire. Depending on the amount of damage to the tire, you may need to get a brand-new tire put on the vehicle.
Tubeless tire sealant should last an average of two-six months. However, the life span depends on several factors, such as temperature, humidity, driving frequency, tire casing thickness, and the number of punctures.
This depends on the type of tire sealant and the brand. Each product should state how long they last, but generally they can last up to two years before needing to replace the tires.
A: This varies on the size of the tire you are trying to fill the puncture in. A lawn mower tire is smaller and therefore doesn’t need that much product. However, a Jeep tire is larger and will typically need an entire bottle of tire sealant.
A: You inject the tire sealant through the valve or tire nozzle. After completing that step, you then fill the tire with air until it is at the required amount.
Statistics show that on average every driver will experience up to 5 flat tires in their lifetime. To make matters worse for when you do have a flat tire, you just might discover that that new car you bought recently does not come with a spare tire. In fact, Torque News writer John Goreham recently posted how that vehicle makers are stealing the spares from EV owners.
The reasons for lack of a spare tire range from they weigh too much for the newer EV vehicles where range anxiety is a concern of green car enthusiasts, to unsubstantiated claims that today the chances of ever having a flat are too remote to justify the continued practice of providing all vehicles with even a smaller temp spare for emergencies. Codswallop!
According to multiple sources listed about flat tires, in the United States alone, approximately 7 tire punctures occur every second, resulting in 220 million flat tires per year.
Your Options For a Flat Tire Problem
So how can you prepare yourself for those times you will have a flat, but your car did not come with a spare tire? You basically have 4 options:
1. Buy your own spare from a company that deals in spares designed for your model of car.
2. Outfit your car with tires designed to run even when flat so that you can make it to a service station or tire center for repair or replacement.
3. Buy into a roadside assistance program that will send a service truck to your vehicle that will either repair the flat on the spot or provide a spare tire.
4. DIY with a flat tire sealant that will keep your tire adequately inflated until you can make it to a tire service center.
In this article we will look at option number four.
What Consumer Reports Has to Say About Flat Tire Sealants
Sealant Kits
Sealant kits are designed for flat tires that result from a puncture wound to the tire such as running over a nail or some other relatively small and narrow sharp object. If the damage is much bigger than that such as a crack or larger hole, sealant kits don’t work.
Typical sealant kits most motorists think of consist of just a pressurized can containing a gooey sealant that can temporarily seal a hole as the pressure within the can partially inflates the tire and forces the sealant into the puncture. However, other kits are more involved and include a small compressor for inflating the tire fully. As such, compressor kits are the more expensive option running anywhere between $24 to $80, whereas a pressurized can of sealant usually runs between $7 and $20.
There is also a third type of sealant system that consists of a liquid sealant squirted by hand through the valve stem of a flat tire and then inflated with a compressor; however the compressor is not included. The price range of a bottle of this type of sealant runs between $9 to $14.
Cons of Sealants Regardless of Repair Kit Type
• They are messy and can add to the cost when the tire is eventually repaired.
• Sealants can gum-up your tire pressure monitoring system.
• Limited to puncture holes 6mm or less is diameter.
• Might not work if multiple holes are involved.
• Limited distance of travel after sealing.
• Have to drive relatively slowly after sealing.
• May have a limited shelf life.
• Pressurized cans of sealant are at risk of exploding in a hot car.
Despite the cons of sealants, Consumer Reports recommends that choices that include a compressor are the ones more likely to result in success. Depending on how bad the leak is and how well (or not) it seals the hole, repeated use of a compressor can help you limp your way back home or to help.
Flat Tire Repair Testing Procedures
Tests were done using brand new tires with both 2. 4 mm and 5.8 mm diameter nails welded to a flat metal plate with the car lowered by a lift so as to puncture all tires equally. After the punctured tires became flat, the sealant and sealant kits were used separately, with the tires inflated to 35 pounds of pressure and driven a short distance to ensure the insides of the tires were adequately coated with the sealant.
If there was no loss of air pressure, the tires were then put on the road for 50 miles, parked overnight, and the tire pressure rechecked the next day.
Tire Sealant Product and Kit Reviews
Pressurized Can Sealants
Super Tech Tire Sealant & Inflator ($7 at Walmart) ---available from Walmart and the least expensive product tested, the analysts from CR found that this one did not work---even with the smallest puncture of 2.4 mm. Similar to the Fix-a-Flat product, a compressor was needed to top off the tire pressure to the car’s recommended pressure.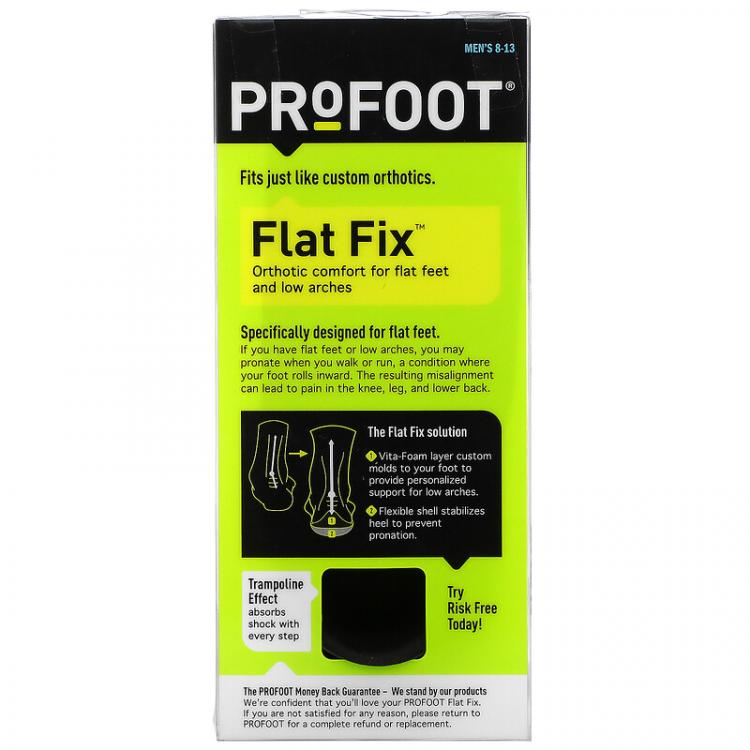 But, because of its poor test performance, the analysts recommend considering any of the other products evaluated over this bargain-priced sealant.
Fix-a-Flat ($8 to $20 at Walmart, AutoZone, Amazon, Home Depot, Target and Fix-a-Flat)---in spite of being a common name in pressurized-can sealants, it’s tested performance is quite poor, which greatly offsets the convenience of being the among the easiest to use. According to CR, “Fix-a-Flat was able to seal the smaller 2.4-mm puncture with a minor loss of pressure in a 24-hour period. However, it could not seal the 5.8-mm puncture, and it could not inflate the tire without topping off with a compressor.” Another mark against it is that if you drive a truck or SUV you will have to buy the more expensive larger can size.
Liquid Tire Sealants
Slime Tire Sealant Thru-Core Technology ($9 to $14 found at Ace Hardware, AutoZone and Walmart) --- Like the Fix-a-Flat pressurized can, this non-pressurized sealant was able to seal a 2. 4 mm hole, but it failed on the 5.8 mm puncture. Plus, it requires a portable tire inflator, making the Fix-a-Flat pressurized can a better (but tire pressure limiting) inexpensive solution.
Tire Sealant Kits (Compressor Containing)
airMan ResQ Pro + ($80 found at Grainger)---a kit that has the compressor doing the hard part for you by feeding the sealant directly into the tire, this kit was found to easily seal the large 5.8-mm puncture with the added plus that it inflated flat tires quicker than the other products tested. A no-assembly, easy-to-use, self-contained and complete kit, this was the favorite among the analysts.
airMan ResQ Tire Repair Kit ($55 at Amazon)---this little brother to the airMan ResQ Pro + has similar performance to its bigger brother, but it requires assembly of the sealant container to the compressor as well as disassembly afterward. The opinion of the analysts is that spending the extra $25 makes the Pro+ a better choice of the two.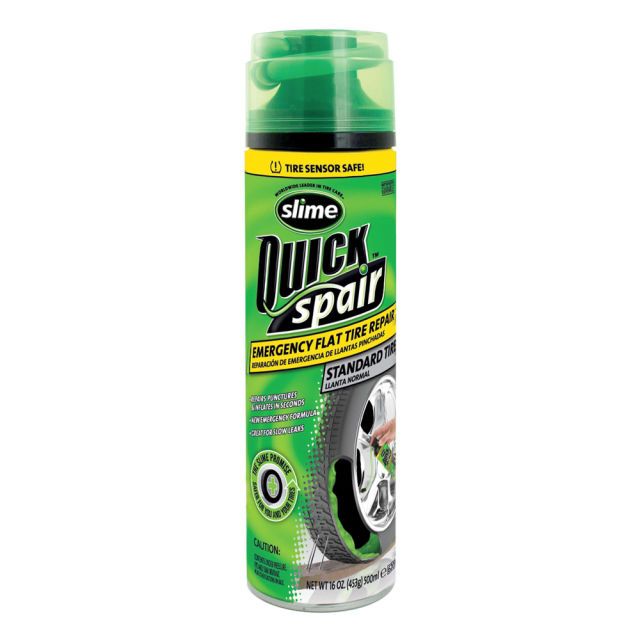
Slime Smart Spair Emergency Flat Tire Repair Kit ($24 to $40 found at Walmart, Amazon, Ace Hardware, Advance Auto Parts, Sportsman’s Warehouse and Slime)---this is a less-expensive compressor kit that was successful in sealing a large 5.8-mm puncture with ease. However, the sealant is not self-feeding via the compressor and thereby requires removing the valve stem and then squirting the sealant into the flat tire by hand. Being more cumbersome to use than the two aforementioned airMan products, the analysts did not view the cost savings worth the added bother.
Slime Flat Tire Repair Kit Digital Series ($35 to $55 found at Walmart, AutoZone and Amazon)---although containing a built-in pressure gauge and feeding the sealant into the tire via the compressor like the airMan kits, the analysts reported mixed reviews of its performance: it would seal both 2.4 mm and 5.8 mm punctures---but not always, and air loss after sealing was not the best. They determined that either of the two previously listed airMan products would be their preferred choice over this tire repair kit product .
Final Determination
The analysts recommend kits containing a compressor over just sealants in either bottle form or pressurized cans. They observed that:
• Tire sealant kits were far superior to pressurized-can sealants.
• The kits were able to seal a larger puncture and included a compressor to inflate the flat tire to the recommended tire pressure.
• Pressured cans of sealant will not inflate tires adequately enough for safe road travel.
• With the exception of the Super Tech Tire Sealant, both the Fix-a-Flat and the Slime Tire Sealant do seal at least the smaller of the puncture holes, but without a compressor handy (and because of the cons listed with pressurized can products) they are not recommended by the analysts of Consumer Reports.
Be sure to watch for additional future articles about saving on car repairs and tire repair and used car savings recommended from consumer testing services, as well as some DIY tips on fixing your car.
Coming Up Next: Consumer Reports Goes After Tesla and Beta 9 FSD.
Timothy Boyer is Torque News Tesla and EV reporter based in Cincinnati. Experienced with early car restorations, he regularly restores older vehicles with engine modifications for improved performance. Follow Tim on Twitter at @TimBoyerWrites for daily Tesla and electric vehicle news.
Photo by Kenan Reed on Unsplash
The hardest thing is to start. In order to survive the repair with the least loss of time, effort and money, it is important to know what to do and in what sequence
Photo: Neva Towers, project of the INRE studio
We figure out together with an expert how to repair an apartment, especially if you have not done this before, whether to hire a designer and what issues to discuss with him.
The material was checked and commented by Evgeny Nedoborov, partner of the author's design studio INRE
adv. rbc.ru
It is necessary to assess the condition of the premises and its capabilities. In many cases, old apartments undergo major repairs with the replacement of electrical wiring and windows, but are often limited to new windows, doors, and wall alignment. Sometimes it is enough to carry out cosmetic work: to scrape the parquet or lay a new carpet, remove the wallpaper and paint the walls.
Overhaul includes:
If you find it difficult to estimate the extent of the repair and the necessary actions yourself, contact a specialist. It is not necessary to order a design project; You can choose the style and content of the interior yourself. But if the basic parameters are not fully developed, then a situation is not ruled out when a new cosmetic repair will be spoiled due to cracks in old windows or leaks in pipes. The duration, complexity and costs of the upcoming repairs depend on the number of works. The latter should be given special attention: the more plans, the more money will have to be invested in their implementation.
How to sell an inherited property: documents, taxes, nuances
With the help of cosmetic repairs, you can completely transform an apartment. If the budget is limited and a professional designer is not included in your plans, practice "watchfulness". This is best done by collecting examples on interior sites. Think about what you like: bright colors or restrained minimalism, or maybe the brick walls of the house are ideal for creating a loft or you want to bring the design closer to cozy boho-chic. Save the selected photos to a separate folder on your computer or phone, highlight the characteristic features of the selected examples.
Photo: Neva Towers, project by INRE studio
Designers recommend focusing on interiors created in similar conditions: pay attention to the size of rooms and their functionality, window arrangement. Consider the architecture of the space - in a modern house it makes no sense to make stucco and bas-reliefs, but these details can be beaten if they already exist. If several people live in the apartment, coordinate the chosen styles with them so that everyone is comfortable in the renovated apartment.
Photo: Neva Towers, project by INRE
You can use special applications and online services for apartment design to choose the right combinations and further arrangement of furniture. Explore trends and anti-trends: these lists often show innovative ideas that you'll love.
Apartment design project: how to create interiors and start renovation
Many tasks can be done on your own, but if you have no experience, it is better to entrust especially complex processes to specialists. Ultimately, this will save on rework and troubleshooting. You do not have to buy materials, expensive equipment and tools yourself.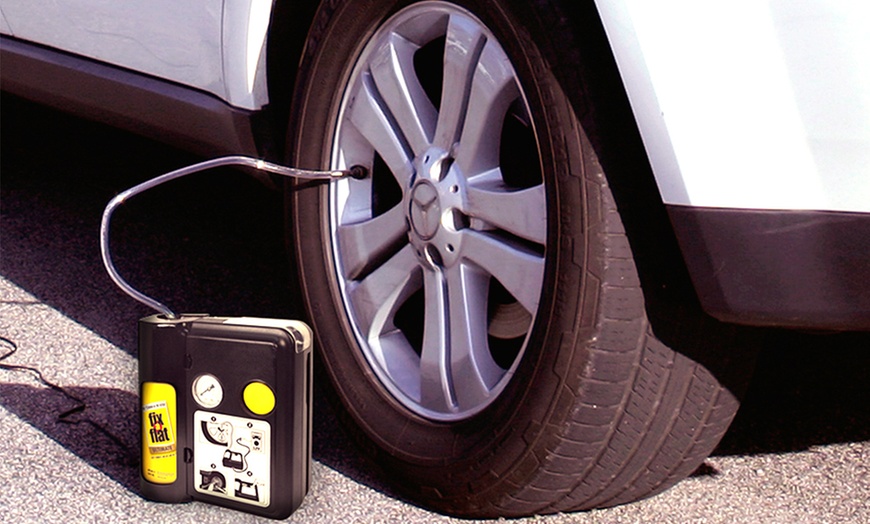 In addition, the work of a professional team is a great guarantee that cracks will not appear on the new ceiling due to non-compliance with the rules and painting technologies, and fresh tiles in the bathroom will remain intact.
It is better to entrust the installation of doors and windows, floor screed, electrical and plumbing work to specialists. You can paint the walls and arrange furniture yourself - this is a matter of desire, effort and time.
Photo: Shutterstock
When you decide on the design and content, you can proceed to the calculations and create a list of necessary building materials and consumables. It is best to buy them with a small margin. So, if part of the wallpaper is damaged during unsuccessful pasting, you can replace it from a spare roll. In addition, the store may not have the selected tile left, and half a meter of plinth will have to be searched for and ordered with overpayments - bulk purchases are always cheaper. If it is difficult to make calculations on your own, contact professionals. Many companies provide a service for allocating the budget and purchasing everything necessary for repairs, even if you decide to do it yourself.
In addition to building materials and furniture, try to include small things and details in the list: lamps, additional shelves, carpets and decorative elements.
The estimate is useful even at the repair planning stage. You can use online calculators, build a shopping cart in online stores, and rely on your designer's advice. To make the correct calculations, you need to know the exact parameters of the room: the footage, the height of the walls, the location of windows and doors. The contractor can make an estimate, but in any case, you must provide him with a measurement plan and agree on specific wishes for future repairs. Be sure to announce, or rather document, the types of work, technologies used, categories of building materials, deadlines and desired costs.
The desire to save money is understandable and understandable, but try to turn to professionals when it comes to security. It is better to entrust these repairs to specialists:
On average, a major overhaul will cost twice as much as a cosmetic one. But it's a long-term investment in occupant comfort and safety, and it's not worth skimping on.
After the development of the design project and the purchase of materials, you can proceed directly to the work. The repair plan should reflect all measurements, layout, location of sockets, switches and lighting. It is best to start work with the most difficult and dirty: replacing windows, pipes, installing window sills. A lot of dust is generated during the rough repair process, so it is incompatible, for example, with tinting the walls in the next room. Often they start with redevelopment and erection of walls, and after laying the tiles in the bathroom, they move on to the kitchen. If you stay in the apartment for the duration of the renovation, make sure that dirt and debris do not spread throughout all the rooms. Be sure to pack your belongings and transfer them to storage from the room in which the work is being done.
Photo: Shutterstock
Try to stick to the work plan; step-by-step instructions will help you not to miss important points:

Repair mistakes: how to avoid fines and not lose your apartment
Expert comments space and interior design. First, all the “subtleties of life” of a person are clarified to the details: the number of children, the presence of animals, habits. For example, does the owner cook himself, what time of day does he spend more time at home, does he like to gather guests, does he or family members have hobbies, do customers collect art, who in the family is the first to start getting ready for work, and much more. Based on the set of scenarios, a further visual image is thought out.
The next stage of work is to identify preferences in interior design. This is followed by development and delivery in stages:
Planning decisions.
Styling solutions based on client references. It is important to remember that absolutely everything is impossible to “make friends”. Therefore, designers take into the project only key techniques and color solutions.
Working documentation becomes a drawing for builders. It includes: planning decisions; top, middle and bottom electrics; floor covering with height marks and joints; ceiling with knots and cuts; water supply and sewerage; furniture with basic overall dimensions; list of premises in square meters; wall sweeps indicating the types and types of application of finishing materials.
Design project.
The document is transferred to the customer and builders, which simplifies communication between all parties and significantly saves the budget. An approved design project allows the client to control costs, and it is more difficult for builders to confuse the client, since all the work is calculated. At the same time, the design project is a business plan for the client: he understands what he paid for and how the stages are closed.
Also, the design project allows you to make an estimate for the cost of materials and furniture manufacturing. We even have a special service in our studio, thanks to which you can predict expenses for a month, for six months. In any interior, there are background things that you can save on, for example, finishing materials (wallpaper, paint). But accent elements - chandeliers, furniture, handles - give the interior an individuality, make it unique, so we always explain to the client that high quality justifies the high cost.
If you want the interior to fully comply with the design project, be sure to use the service of architectural supervision. Only in this case, the quality implementation of the project is guaranteed. All those who work on the site - architects, designers, planners, engineers and electricians - solve only their own task. None of them pays attention to the connections and details that arise when solving work issues during the construction process. And only the architect has a complete idea of how the interior should look like. In order for the project to turn out, you need to understand the nuances for which the author himself is responsible.
Difficult construction work should be carried out by professionals. They have a "hand full", and the speed is higher, and the tool is appropriate. An inexperienced self-taught person will ruin the most expensive tile by laying it out at random. The same applies to leveling walls, laying flooring and everything else. Experience and qualifications in the matter of repair are crucial.
So, you have conceived a global renovation of your apartment or become a happy owner of a new living space without fine finishing. Who better to hire to make your dreams come true without overpaying? There are several options.
This is the cheapest option available. The customer pays money to a specific master-professional solely for the amount of work performed. You do not pay the salary of the superintendent and other overheads inherent in teams or larger structures.
Keep in mind that the qualifications of such masters are very heterogeneous. Among them there are experienced experts in their field - classy tilers, masons, carpenters, etc., but you can also run into amateurs who take on any job (as long as they get paid). Photo: Depositphotos
Therefore, you should not trust the first ad that catches your eye. Word of mouth is the best assistant in such matters. Ask your relatives, neighbors and acquaintances, for sure someone has already encountered a similar problem and can recommend someone.
Ask on the Internet about the cost of upcoming work in order to be in the know. Too cheap prices (per 1 sq. m), as well as the willingness of the hired hard worker to start work tomorrow (without clarifying questions) should alert you. For example: the work schedule of a classy tiler is usually scheduled several months in advance, and his phone number is passed from mouth to mouth.
Solo craftsmen have their pros and cons:
Pros:
Cons:
Photo: DepositphotosImportant! There are exceptions - “handymen of all trades”, who alone can perform a “turnkey apartment renovation”, inviting only their partner for some work.
![]()
The cost of such station wagons is higher - comparable to the rates of the brigade. But in this case, your troubles will also be significantly reduced - you do not need to look for a contractor for each type of work. In the vast majority of cases, the cost of repairs will be agreed in advance (the price multiplied by the square meter of the area of the apartment) and will remain unchanged unless force majeure occurs. This is a huge plus.
But there is a downside. Due to insufficient education in the construction industry (“golden hands” do not always know the rules and regulations), such craftsmen can make significant “blunders” when redeveloping an apartment: equip a pantry without ventilation, lay a sewer with the wrong slope, etc. In this case it is better to have a redevelopment project or a knowledgeable consultant.
Small firms for the repair of apartments or the construction of private cottages are now widespread. The Internet is full of ads and sites for the provision of comprehensive services in this area. The company (team) consists of a manager with whom you will communicate, and several like-minded people who perform basic construction work: dismantling and installing partitions, electrics, plastering walls, etc. Sometimes an accountant, designer, etc. are included in the staff. Photo: Depositphotos
For finishing or some other work, the company hires third-party contractors - the same single masters. It is clear that in this case the repair will cost more, since an intermediary will appear between you and the direct contractor.
But not only this factor affects the increase in value. Most of these firms work on the so-called "estimates". In fact, this is a set of prices taken “from the ceiling” for the main types of work (they are dozens of times higher than the state ones and have nothing to do with regulatory documents).
The "estimate" is attached to the contract, which necessarily stipulates the possibility of adding additional, supposedly unforeseen, work to the estimate. As a result, the initial cost under the contract by the end of the repair increases significantly. This is common practice. The initial estimate deliberately does not include related work. Photo: Depositphotos
Despite all these nuances, this option also has its undoubted advantages and disadvantages.
Pros:
Cons:
Photo: Depositphotos
This option is suitable for very busy people who have no time to bother with developing their own project, purchase materials themselves and control the progress of work. Most often, these are equity holders who order a fine finish at the construction stage.
Pros:
Cons:
And the last practical advice. Beware of scammers! The presence of an advance payment before the start of work (with the exception of large developers) is a bad sign. Craftsmen and repair companies that respect their customers never take an advance payment. Pay only for the amount of work performed, making sure of its quality.