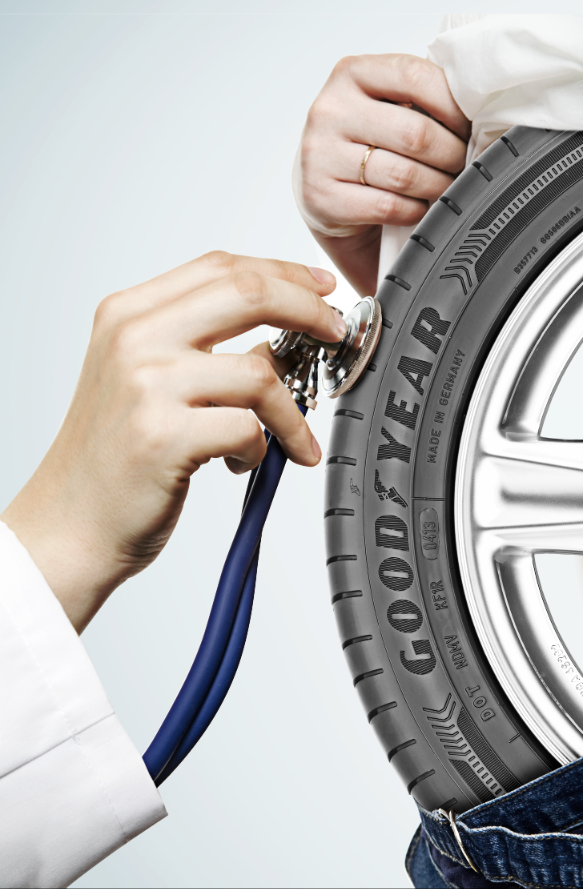
Out of all the tyre hazards, the most common is a tyre puncture.
Not only do they happen at the worst possible times, but if a tyre puncture is deep enough, it causes air to leak out, resulting in a flat tyre.
What's useful for many drivers is that you can repair your tyre punctures safely, especially if the damage isn't bad.
So check out Tyroola's handy tyre puncture repair guide and find out how you can get your flat, punctured tyre back on the road again.
Professional Tyre Puncture Repairs
At Tyroola, we recommend that your get professional tyre repair specialists to repair your tyre punctures to ensure your safety and to determine if repairing your tyre is still legal instead of replacing them.
When not to repair a Tyre Puncture
Before starting any DIYs, remember that NOT ALL TYRES CAN BE REPAIRED. You need to check what the repair and warranty policy is of your tyre's manufacturer. Some run-flat technology and commercial tyres, for example, can't get repaired.
It is also illegal to repair tyres that have the following conditions:
Tread depth is below 1.6mm
Tread punctures are greater than 6mm
Compromised structural integrity
Deteriorated rubber or worn-out tyre
Top Three Causes of Tyre Punctures
1.Road debris, including nails, screws, sharp rocks, and wires.
2. Worn down tyre tread
3. Incorrect tyre pressure making them more vulnerable to sharp objects on the road
Signs you are driving with a flat tyre
Booming Sound
Many drivers report hearing a booming sound before their tyres go flat. This is usually the case with a blowout
Sluggish vehicle
If your car is struggling and sluggish despite heavy acceleration or stops abruptly like someone stepped on the brakes, check your tyres to see if you are already running flat.
Veering off
When your car starts to veer off to one side, it means you have a flat in one of your tyres up in front.
What you need to repair your tyre's puncture
How to repair punctured tyres
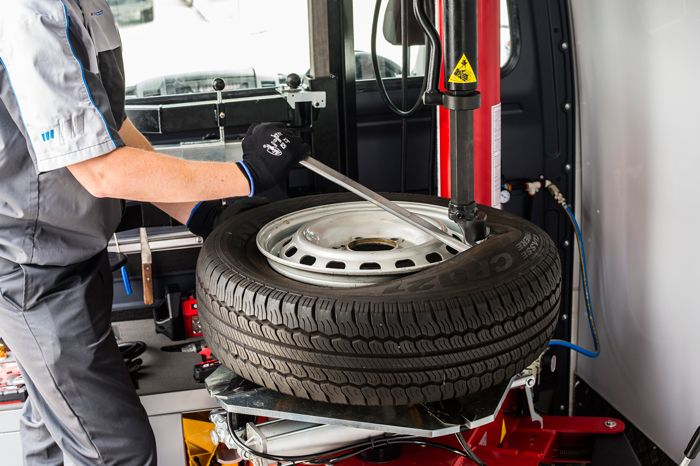
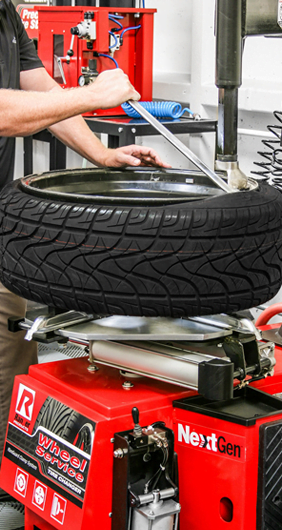
1. Take the tyre off the car.
Never repair a tyre while it is still attached to your vehicle. The tyre needs to be removed from the car and from the wheel to access its inner surface.
2. Examine both inside and outside the tyre
If you don't check inside the tyre for hidden damages, your repair might be incomplete. Checking inside of your tyre can also show where you can seal the puncture from both sides.
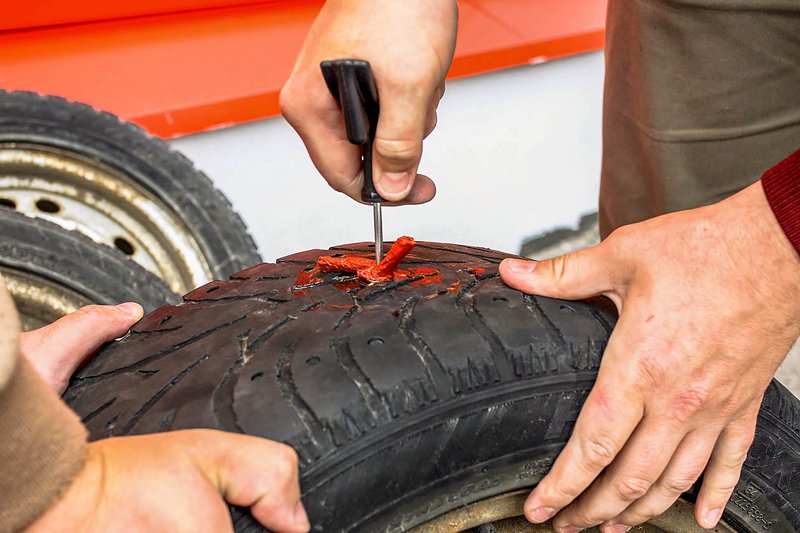
3. Remove what caused the puncture.
Find the spot where your tyre was punctured and remove the nail, wire or other foreign objects that pierced the tyre with a pair of pliers. Do this carefully to prevent further tyre damage.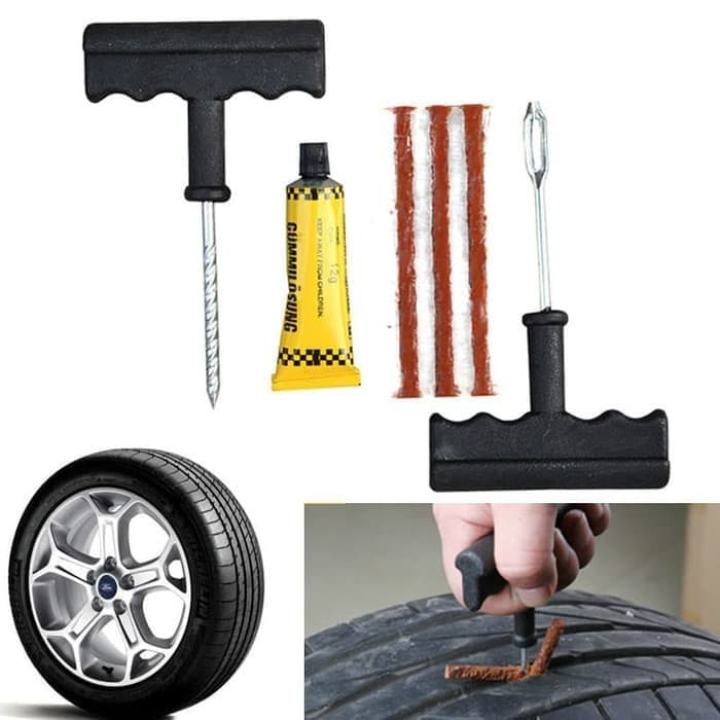 The hole needs to be entirely cleaned, so nothing gets left behind.
4.Fill the hole or puncture path.
Use a suitable vulcanising material or rubber stem to fill and seal the puncture to keep moisture out completely.
5. Treat the inner tube.
The tyre's inner-liner needs repairs as well. It should be cleaned, buffed, cemented, patched and coated and sealed to prevent air loss.
6. Do a final check on the tyres.
Before returning the tyre to the wheel and vehicle, make sure that the patch is thoroughly dry.
What are the different tyre patching methods?
1. Plug-type
This method does not require you to check inside the tyre.
2. Patch-type
You'll have to remove the tyre from the wheel for this method to check inside the tyre.
3. Plug-and-patch
This is a combination of the two methods.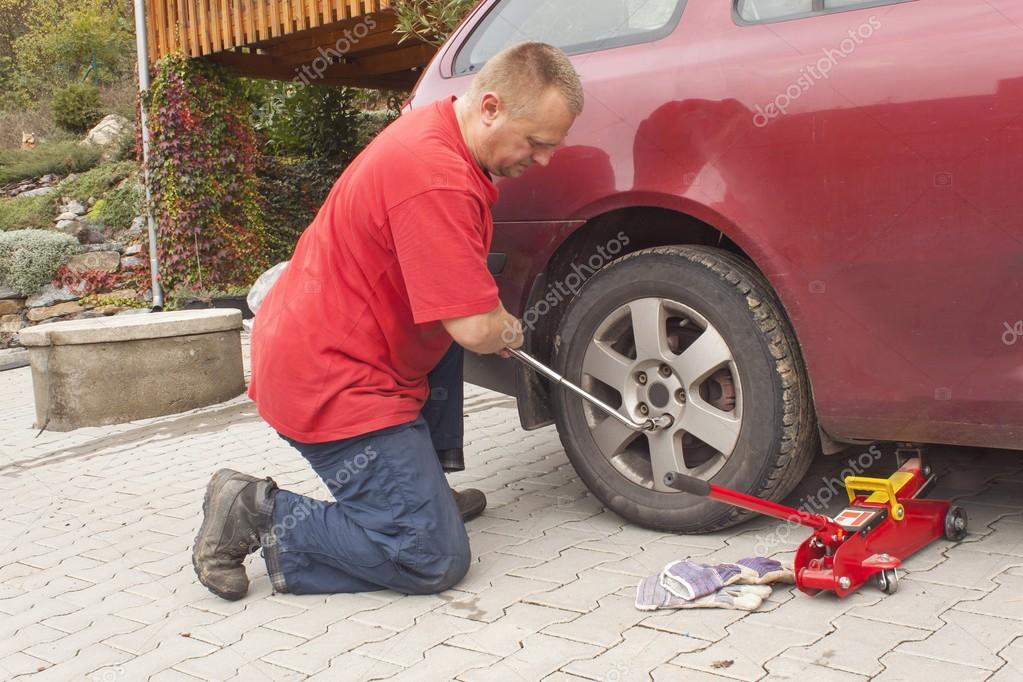 Use a mushroom-shaped patch and plug combination kit to make your repairs. You should also have a tyre repair kit handy.
TYROOLA SAFETY REMINDER:
Any repair work on a punctured tyre is a temporary, stop-gap measure. We recommend you bring your tyre to a professional repair service centre as soon as possible.
Need New Tyres?
If you can no longer repair your current tyres, replace them and get a new set at Tyroola.
Click Here For Your New Tyres
Prevention is better than a cure, everyone knows that, but sometimes things simply happen. In the world of off-roading, tyre punctures are a definite possibility. You might be the most vigilant driver around – checking your tyres' condition, inspecting them for wear and tear, cracks, splits, cuts but your tyres may still cop an errant nail, screw or stick in the tread or sidewall; and that's puncture time.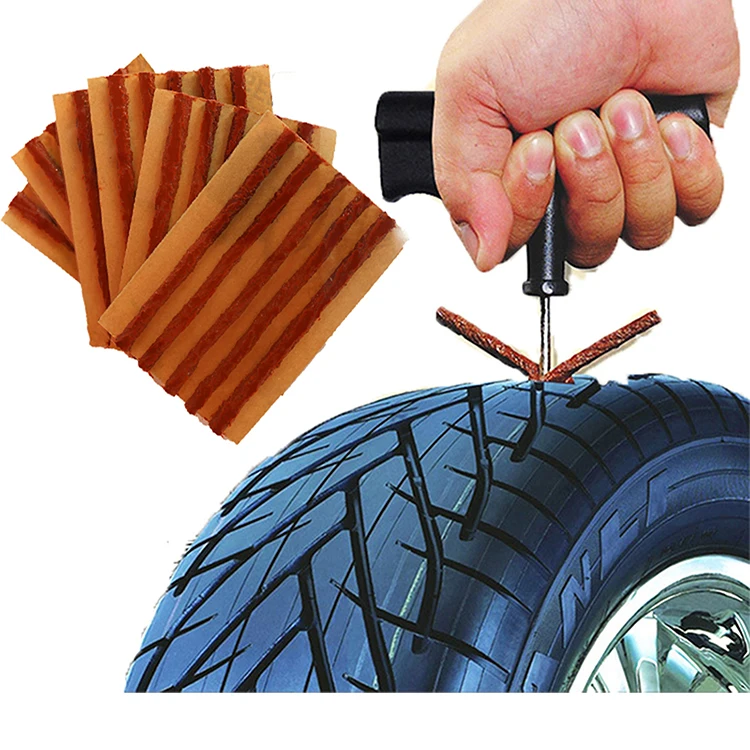
Your tyres are your points of contact with the ground, so never drive for any great distance when you know one or more of your vehicle's tyres are punctured. The simple solution is to fix the puncture, so you can drive the, hopefully, short distance to reach a tyre professional who will then properly fix the tyre or replace it.
Be prepared with a good tyre-puncture repair kit, know how to use it and then you'll be ready for action when the time comes.
Note: Only use a tyre-puncture repair kit on tubeless-type tyres. Also, and this is a great tip from aftermarket supplier ARB: "Never attempt a repair on a tyre that shows signs of internal or external structural damage such as exposed belts, sidewall bulging, ply separation, cracks etc."
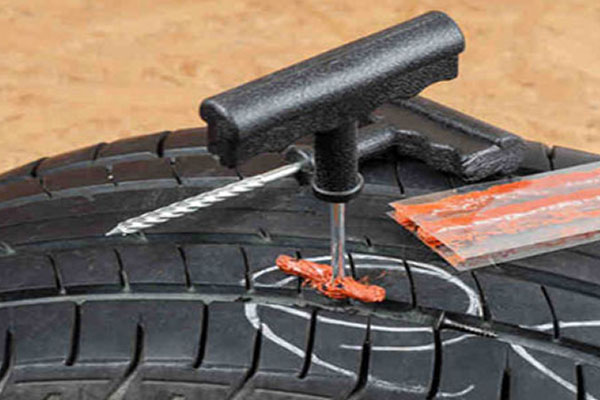
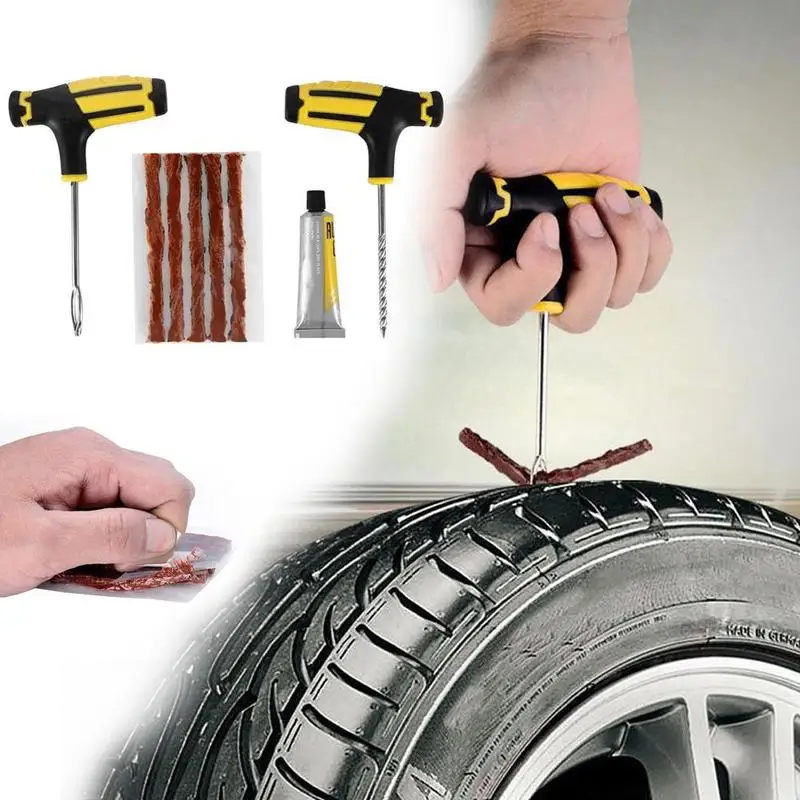
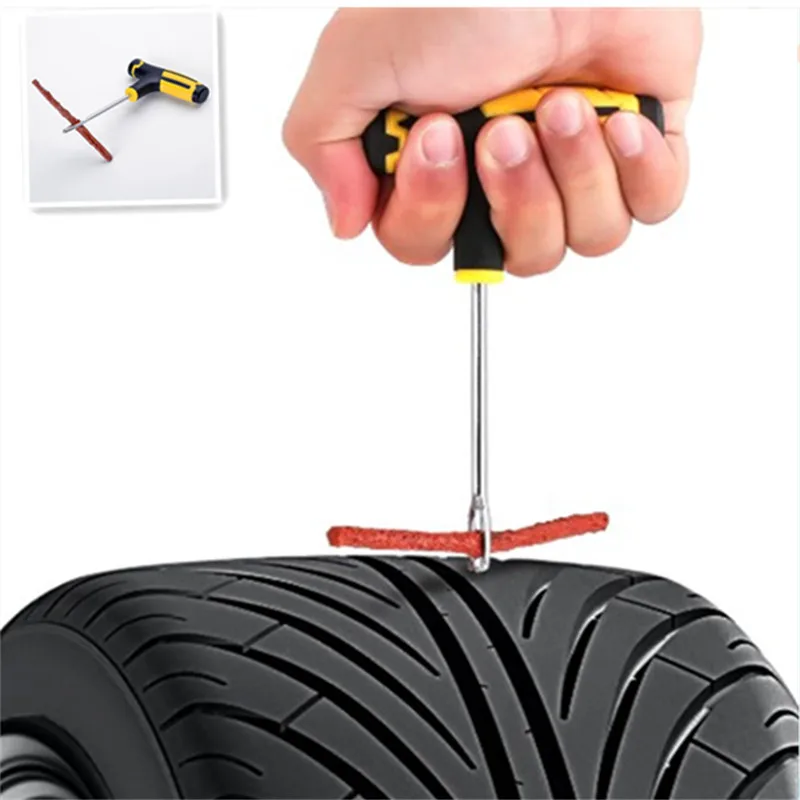
A tyre-puncture repair kit.
A tyre-puncture repair kit should include a carry case and all of the gear you need to achieve a temporary fix of a puncture, which will give you enough leeway on that repaired tyre to safely reach a tyre-repair professional in order to have it properly fixed.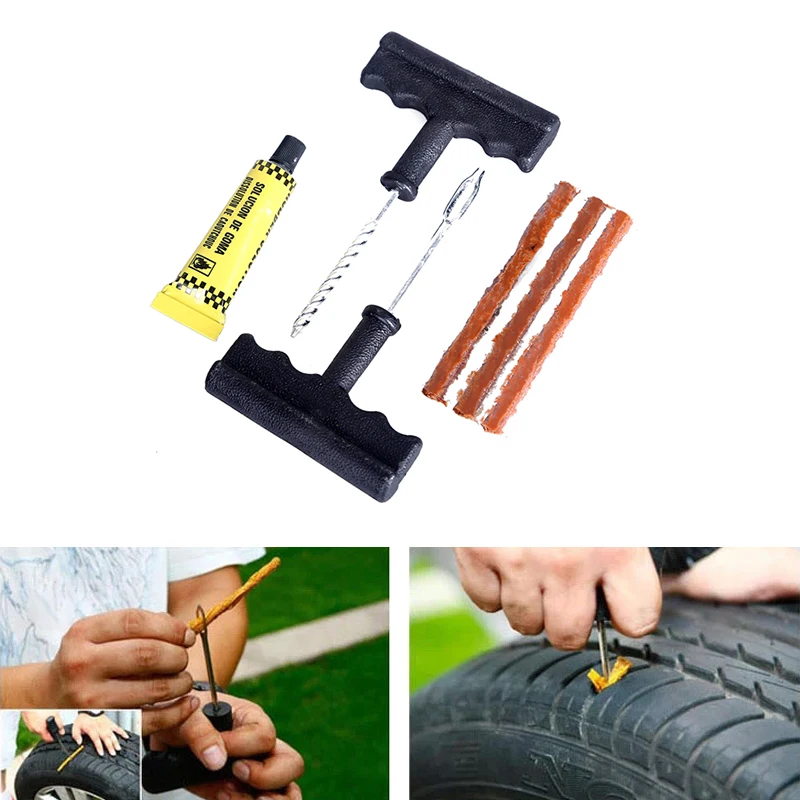
As with any gear, you get what you pay for so when it comes time to buy a tyre-puncture repair kit, spend as much as you can afford because that way you'll ensure you have the best quality equipment onboard. In this yarn, we're using an ARB Speedy Seal Mk2 kit ($49).

The tools and materials in a tyre-puncture repair kit include:
A pair of pliers: Use these to remove the cause of the puncture (i. e. the nail, stick etc).
Lubricant: Use this on the reamer to ease its way into the hole.
The reamer: It looks like a cross between a short ice pick and a drill bit with a handle. The reamer is used to probe the puncture, clear away any remaining debris and temporarily separate the tyre's steel belts without damage, helping to smooth the way for the repair cords/plugs.
The cord-insertion tool: Looks like a cross between a sewing needle and an ice pick. You use this to, you guessed it, insert the repair cord into the puncture.
Repair cords: Thick strings of spongy cord that you insert into the puncture to fill the hole and make the tyre temporarily safe to drive on.
Some kits, like this one, include valve accessories, a blade (to trim the repair cords) and more.
Make sure your vehicle is on as flat ground as possible, is switched off, in gear and the handbrake is engaged.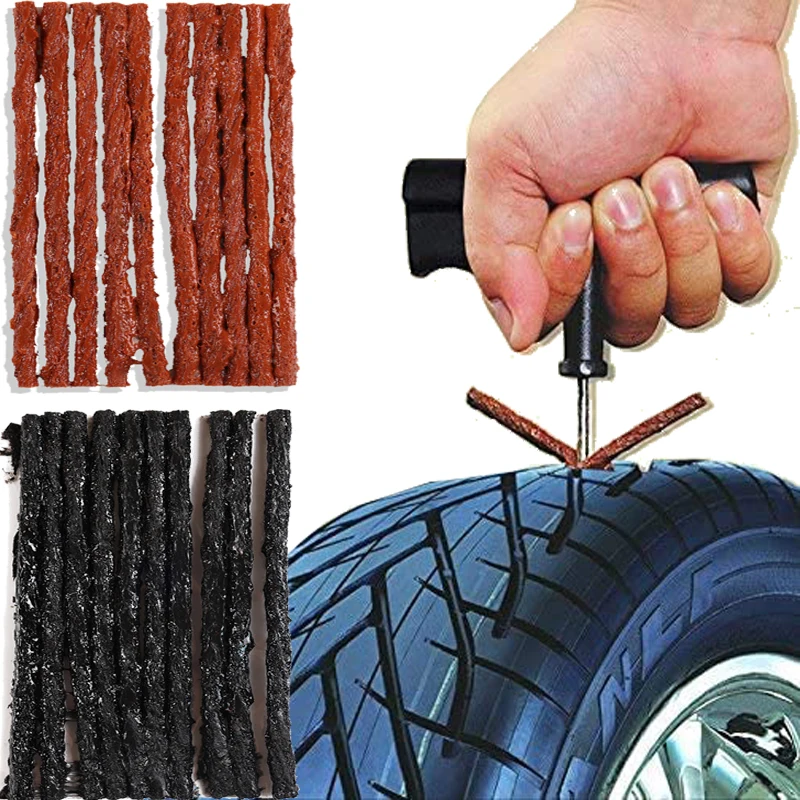 If possible, do all of your repair work while the tyre is still on the vehicle, that way its weight will help you maintain a stable working area while you fix the puncture.
Find the punctured spot, and pull the offending object (stick, nail etc) out of the hole with a pair of pliers, as provided in the ARB Speedy Seal Mk2 kit.
Use the reamer tool to clear out the puncture hole.
Then you need to clean the hole as best you can so no left-over material can cause any further problems and your repair cord has a clear hole in which to adhere.
Smear the kit's lubricant on the reamer – this is the tool with the spiral, drill-bit-like shaft – then insert the reamer into the puncture to clear the hole. Move the reamer around in the hole, in circles, in order to make the hole a bit bigger, separate the steel belts, then pull the reamer out. Now's the time to reinflate the damaged tyre to help wth insertion of the cord.
Thread a length of repair cord through the eye of your insertion tool.
Next, thread a length of repair cord through the eye of the insertion tool so there are equal lengths of cord protruding from either side of the tool. Then smear a bit of lubricant on the insertion tool if necessary and push it into the hole until only a little bit of the repair cord is visible.
Hold the tool's metal hilt against the tyre, and pull the insertion tool out. Do not twist the insertion tool's handle. Trim the ends of the repair cord so they aren't protruding too much, inflate your tyre back to the suitable pressure and away you go.
Make sure you have the fixed tyre repaired by a professional as soon as you possibly can.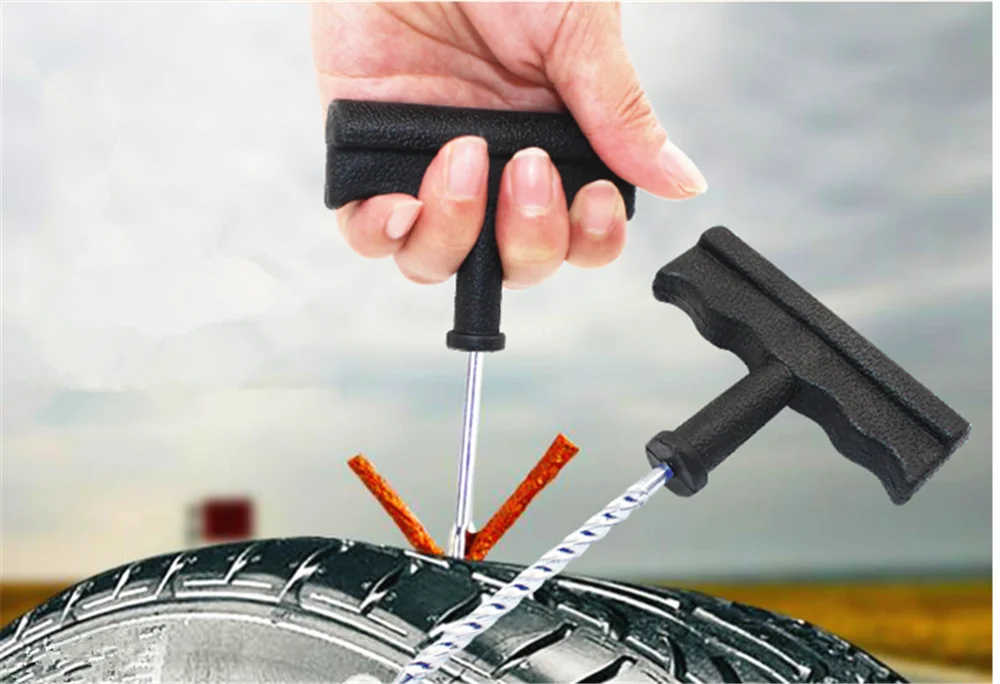
I've been on desert trips where some fellow travellers have been forced to drive for hundreds of kilometres over sand dunes and corrugated dirt tracks on tyres repaired with a kit such as this, but it's better if you avoid doing that if you can.
Our recommendation is to have the fixed tyre repaired by a professional as soon as you possibly can.
This helpful tire repair guide describes the basic repair methods for a punctured tyre, tires that cannot be repaired, and problems that can lead to a puncture. There are several repair options available when you hit a nail or other debris that punctures your tire.
A specialist workshop must have everything for tire repair in its arsenal. The quality of the tire repair performed will depend on the quality of the consumables available. For high-quality tire repair, you will need high-quality REMA TIP TOP materials. Everything for repairing REMA TIP TOP tires can be bought on the website https://fenix-market.com/ru/ of the Phoenix-Market company. Over the years of successful activity, Phoenix-Market has established itself in the car service market as a reliable supplier of equipment for service stations and tire fitting, as well as tire repair materials.
repair, and problems that can lead to a tire puncture.
Tire Repair Options
There are several tire repair options when you hit a nail or other debris that punctures your tire. While all of these repairs cover a puncture, they are not equal in quality, safety, or durability.
 Some sealants even have enough bottle pressure to inflate a tire. There are also tire repair kits that include sealant, a portable pump, and other useful tire repair tools. Some new cars even include these kits instead of a spare tire.
 Tire Sealants are for emergency use only and should never be considered a permanent repair. After sealing the tire, immediately go to a repair shop to have the tire inspected and properly repaired or replaced.
When you get to the tire shop, be sure to tell the technician that there is sealant in the tire. Without this warning, the technician could end up with a huge amount of sealant on the floor.
 Finally, pull out the plug tool slightly—just enough to free it from the plug—and remove the plug tool from the plug, leaving the plug behind.
 As soon as you drive the car, the heat vulcanizes the rubber and seals the hole. A busbar has several advantages. Firstly, this is a quick repair that does not require dismantling the tires from the wheels. It's also generally cheaper and you can do it yourself in a pinch.
However, a tire plug is not a permanent repair. Plugs are for temporary use only because they tend to leak and can slowly come out of the hole at high speeds. Also, plugs can allow water to seep in and cause rust on the wheels and steel bands that hold the tire in place.
 The technician then glues the patch over the puncture, smooths it out with a small roller, and applies the sealant. Due to the self-vulcanizing properties of the tire patch, it will permanently attach to the tire once it has warmed up under normal driving.
 A tire patch is better than a plug because there is no risk of it flying out at high speed. In addition, it creates a more secure seal as it closes the hole and its surroundings. However, patches tend to be more expensive because they take more time and require the technician to balance the tire. The standard patch also does not fill the puncture, which can lead to leakage in the future.
Not every tire puncture can be repaired - patches and plugs have their own design limitations. Here are a few cases where a tire is simply beyond repair.
Large punctures
Regardless of which type of tire fitting you choose - plug or patch - the maximum diameter of a puncture that you can safely repair is 6 mm.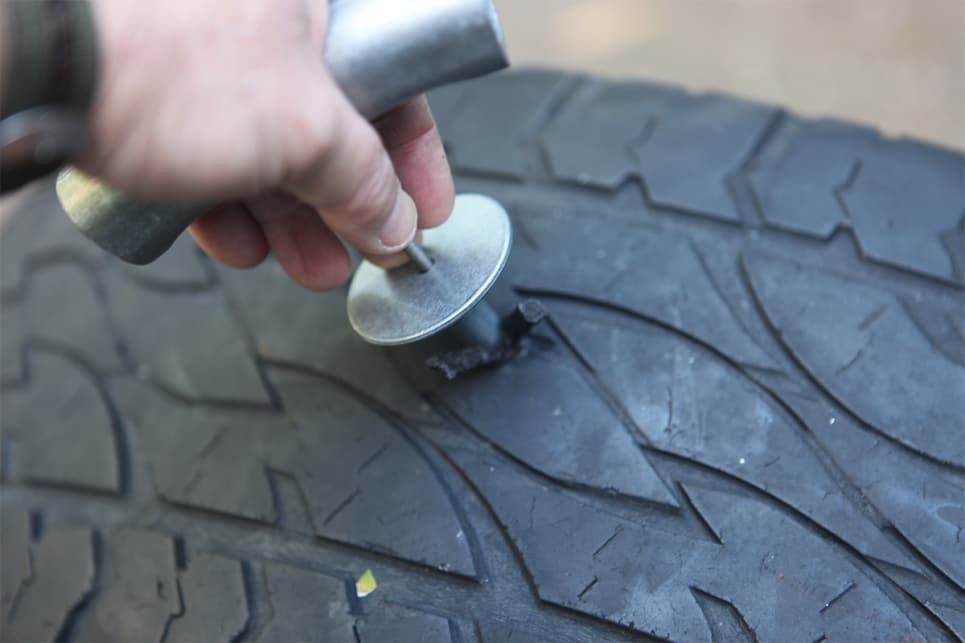 Anything larger can cause a leak, which could lead to bigger problems down the road.
Shoulder punctures
All tires have two main tread sections. The tire contact patch is the most central part of the tread between the outer tread channels - circumferential grooves in the tires. The shoulder of a tire is the area between the outermost channels and each sidewall.
The shoulders of the bar not only carry a large load, but also have a slight bend, which makes them unsuitable for patches or plugs. If you have a puncture in your shoulder, the tire is beyond repair, so a new tire is your only option.
Sidewall punctures
The sidewall of a tire—the vertical surface on each side of the tire—is not stiff enough to support a plug or patch. This section flexes and flexes to improve comfort and handling, but this flexing will cause any patch or plug to come loose. For this reason, sidewall punctures cannot be repaired.
Tires with insufficient tread depth
Although you can repair a tire with almost any tread depth, liability is an issue that most auto repair shops take seriously.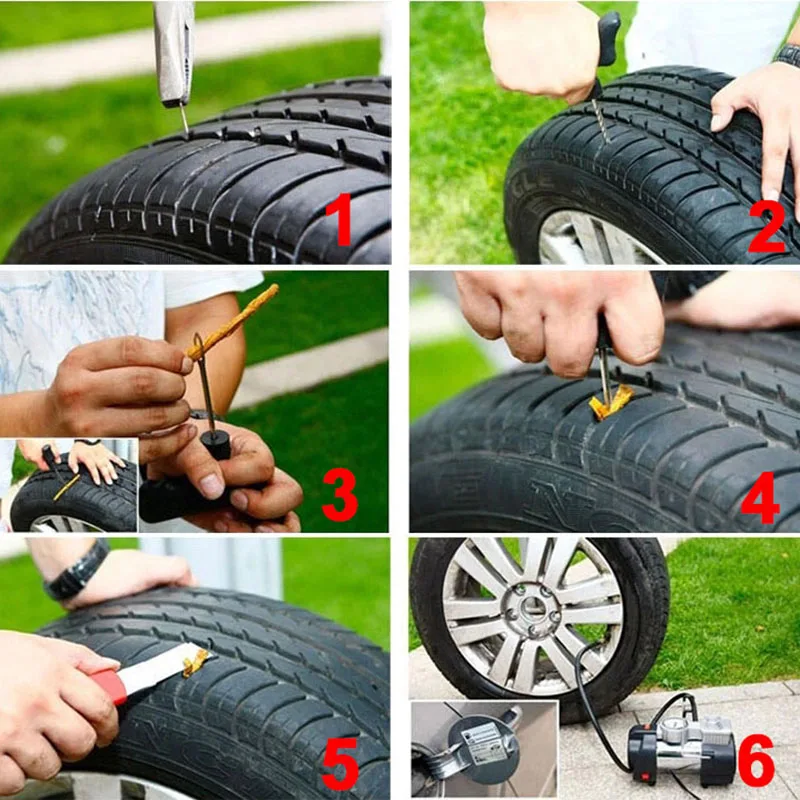 If they repair a tire with a tread depth of less than 1.6mm and your tire blows out the next day due to low tread, the repair shop could be held liable. Thus, many car services in such cases recommend a new tire.
Special Purpose Tires
While a tire patch works great on most tyres, even winter and high speed tyres, special purpose tires cannot be repaired. These include special racing tires or drag slicks.
It is possible to do minor repairs of tubeless tires (puncture up to 0.5 cm) with your own hands without even removing the tire from the disk. To do this, follow the instructions below. 9Ol000 tubeless tires are allowed. It will be possible to determine what type of tires is installed on the car by the shape of the nipple. Structurally, in products with a chamber, the nipple has a shape in the form of a cone or a cylinder. Tubeless tires are equipped with a nipple, the base of which has a rubber seal with a small rim to prevent air from escaping the wheel.
It is possible to check the presence of the chamber in the wheel by pushing the spool inward, if it is possible to perform this procedure, there is a chamber inside the product.
Finding the puncture site of a tubeless tire can be difficult: the air comes out slowly through the hole. To determine exactly where the tire is damaged will allow a soapy solution. To make it, dilute any foaming agent in a small amount of water. Then apply a soapy solution to the surface of the tire, bubbles form at the place of air leakage.
There are situations when, having processed the surface of the tire, the puncture site was not found: bubbles did not appear anywhere. Apply a soap solution around the nipple and along the rim of the fit of the tire to the rim. Causes of air leakage:
We recommend watching a video about tire repair with a harness:
Before starting repair work, make sure that the tire is tubeless. Then purchase a special repair kit for tubeless tires at a store or car market. It consists of:
Please note that the tools included in the set are equipped with special handles that come in various shapes: round or rectangular. Performing repairs, you will have to make an effort, so it is better to use a file and an awl with a specially shaped handle (shown in Figure 1).
You may also need:

Having decided to repair tires yourself, follow the sequence:
 You can smear the tourniquet with glue.
 Tubeless tires can be repaired with sealant. To do this, having found a foreign object on the surface of the tire, do not rush to remove the foreign material. Take a bottle filled with sealant, connect it to the valve, then pump the sealant into the wheel. After these procedures, remove the object that punctured the tire. At the same time, the air inside the tire will begin to come out, carrying the sealant with it, which will clog the hole formed.