It’s one of the worst feelings when your ATV won’t start because of a dead battery. That’s why I recommend you always hook your battery up to a charger if it’s going to be sitting for more than a couple weeks.
There are a few reasons I hook my battery up to a charger.
1- The battery died because I left the key in the on position.
2- During the winter or long periods of no use.
The battery could die from leaving the key on or maybe a power wire is shorting somewhere draining the battery. I hook my battery up to a smart charger throughout the winter to keep the battery fresh, that way my ATV will start right up in the spring.
To charge your ATV battery. Pop off the side panel protecting your battery from the elements, and then connect your smart charger to the battery terminals. To fully charge, leave the charger connected for about 4-5 hours.
Once you have your ATV and riding gear, the very next thing you should get is a smart charger. If you have a kick start or pull start, this won’t be as important. But for me, my ATV is electric start and having a good battery is essential.
The charger I use and recommend is a Ctek Smart Charger found here on Amazon. It’s sold at a good price (around $60-70) and has all the connections for any brand of battery your ATV has. I chose this battery because of its price and how easy to use it is. This charger will turn itself off when the battery is full saving you costly damage that can occur from leaving a battery on a charger for too long.
There are plenty of cheaper options you can find for ATV battery chargers. But, most of them are simple trickle chargers that you have to make sure you unplug as soon as the battery is done charging. I found it to be a big hassle having to set an alarm and run out to check on the battery all the time. With this charger I was able to set it and forget it. Which I love for leaving the battery on the charger all winter.
Getting a good charger will save you money in the long run anyways.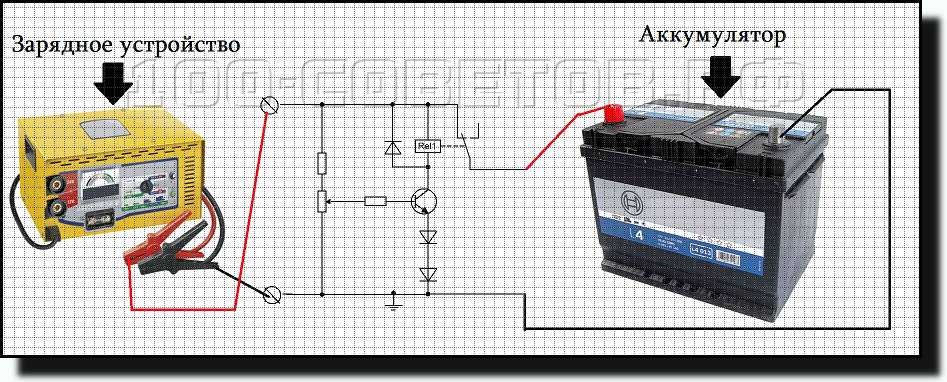 If it saves you even one dead battery it basically paid for itself already. It’s definitely worth the money to get a decent charger, and you’ll be glad you have it when you need it.
Some people prefer the Battery Tender 1.25 amp found here on Amazon, which is fine, they work great too. But I’ve had no problems with my Ctek Smart Charger and I would buy another one when the time comes.
This part is easy and can be done with a few simple tools. Take a wrench or screwdriver and remove the side panel of your ATV. Some ATV’s require that you remove the seat first, sometimes when you remove the seat, the battery is easily accessible right from there. You should be able to easily see where the battery is at this point.
Once you know where the battery is and can access it easily, you will just remove it from the ATV. To remove the battery just unhook the wires connecting the battery to the rest of the ATV, and sometimes there is a strap that holds the battery in place that can be easily removed.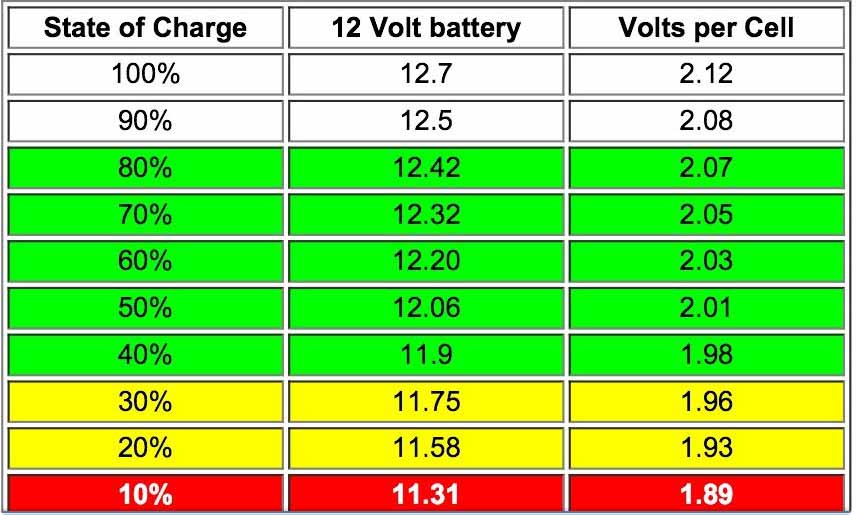 If you don’t want to remove the battery from the ATV to charge it, that is fine, just make sure you unhook the wires from the battery to the rest of the ATV.
To make leaving the battery on the ATV a little easier I got this Ctek Comfort Connector found here on Amazon. This has made charging the battery so much easier for me. And, it has a fuse to protect from power surges. Now I don’t even unhook the battery, I just plug the charger right into the connector and it’s done. I also got a similar setup for my motorcycle I liked it so much.
If you don’t get the quick connector, that’s ok, the smart charger has clamps that will connect to any style battery like jumper cables would. Simply connect the charger to the battery terminals and plug it in to charge the battery.
Here’s a helpful video to show you how to charge the battery.
The quickest easiest way is to try charging the battery and see if it takes a charge. If it does, great! If not, you might need a new battery. If they battery was left out all winter, you probably need a new one. It is worth seeing if the smart charger will charge it, but it’s not likely.
I don’t recommend getting a battery from a local parts store unless they have multiple options to choose from. A lot of the time the price is just too high. Our local parts store was selling a simple ATV battery for almost $100. After looking around online I found the same exact battery for half the price. If you can wait a couple days for shipping, just get yourself an ATV battery on Amazon.
It is always a better idea to charge the battery slowly. Charging slowly will extend the life and quality of your battery. When you charge a battery too fast, it could damage the battery and affect the retention rate. What I do I charge my ATV batteries at .8-1 amps, which takes longer, but ensures my battery will last longer.
A normal charge time should be around 5 hours to get a full charge. If you have a smart charger you can just leave it overnight and not have to worry about it.
If you don’t charge your battery throughout the winter, you will likely have a dead battery come spring time. Simply take your battery out of your ATV and hook it up to a decent smart charger throughout the winter. This way you won’t be buying a new battery every year.
You could use trickle charger for this as well, just make sure you get one that shuts off when the battery is charged or you could damage the battery.
Getting a good charger and taking care of your ATV’s battery will save you more money in the long run, and you will be happy you did.
Sharing is caring!
No matter how big, strong, and capable your all-terrain vehicle’s battery might be, it still needs a recharge every once in a while.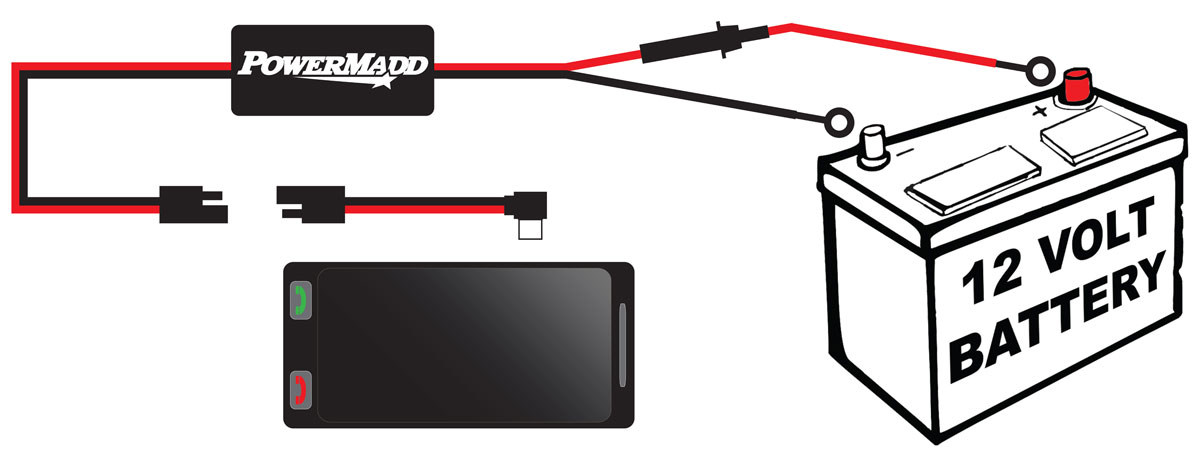 Now, the most popular questions online are “how long to charge ATV battery” and “how can I charge the battery on my own”. Well, that’s exactly why I decided to write this post – to guide you through the process of charging. This isn’t rocket science, but there are still some rules to follow.
Unless you do it properly, you can end up damaging the battery and even the entire powertrain (mostly, the engine). Yep, you heard it right. So, without further ado, let’s get right to it. We’ll start by learning the ideal charging time for ATV batteries and then talk about the actual charging process in more detail, including smart chargers, voltmeters, and more.
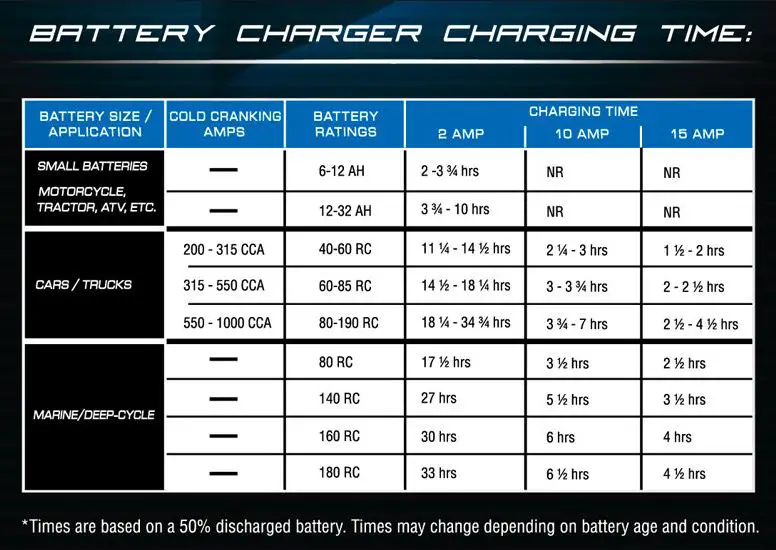
The big question is – are there any ideal charging times for ATV batteries, or not? Here are the facts: a full charge usually takes between three to ten hours. This depends on the battery (how old it is, how well you take care of it) and the charger. If you’ve got a high-grade charger, it will need very little time to recharge the battery.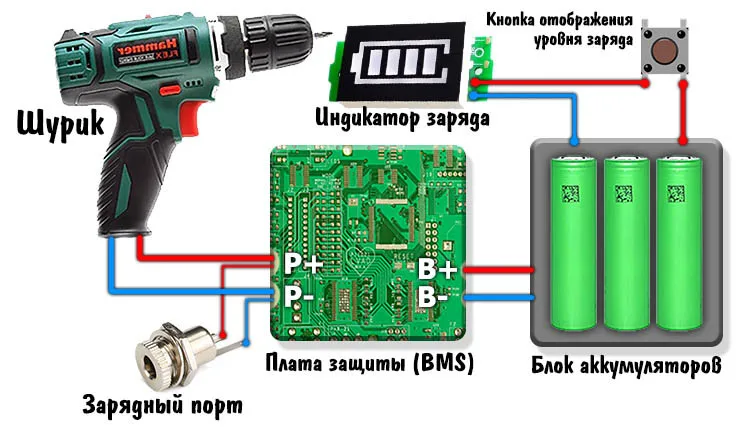 Now, it’s important to understand that a “high-grade” unit isn’t the one that transmits a strong current.
It’s actually the other way around. Say, you’ve got a charger that puts out 2 amps. That device will fully recharge an ATV battery in less than four hours. In contrast, a 5-amp charger will get the job done in 9-10 hours. Some chargers have different operating modes. By switching to the float/drip mode, you can expect the battery to reach a full charge in 4.5-5 hours.
The most important thing to remember when dealing with ATV batteries is to make sure you’ve got the right device for charging. I’m talking about voltage, of course. Keep in mind that four-wheeler batteries are pretty fragile. So, if you were wondering – how to charge an ATV battery with car charger – here’s my answer. You shouldn’t really use a regular car charger to “fire up” an ATV battery.
The reason: it usually has a rather high power output (up to 10 amps, or more). That kind of charge will, most likely, cause a quad vehicle’s battery to overheat, which leads to permanent damage and maybe even a malfunction in the engine. Only consider using a car charger if it’s a customizable device that allows limiting the output. If that’s the case, put the threshold/limit at 2-3 amps, and give it a try.
Again, this largely depends on the quality of the battery unit and your maintenance routine. If you want to know the average lifespan, it’s 3 to 4 years. There is little point in buying some of the more expensive batteries because their life expectancy won’t be significantly higher compared to the cheaper options. Some experts claim that the more you charge a battery, the less reliable and durable it becomes.
That doesn’t mean you shouldn’t charge it at all, of course. What I would recommend is to constantly check on the charge levels. There are actually pretty clear instructions for this: only consider charging the battery when its voltage drops below 12.4 volts. If it’s higher, there will be little use in “refilling” the charge. I also want to say that the quality of the charger affects the lifespan of the battery as well.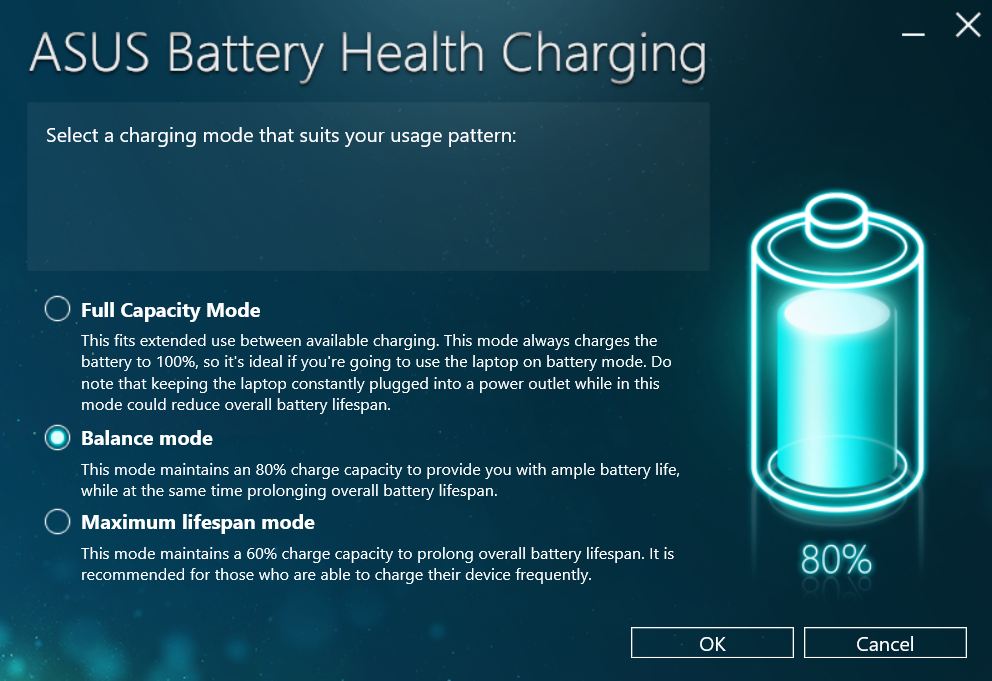
Alright, so, by now, we’ve talked about the right charging times for quad batteries, learned how long the average battery lasts and familiarized ourselves with some safety precautions. We still have one “stop” to make. With the basics out of the way, let’s go ahead and learn how to charge ATV battery. The best way to do this is to invest in a decent-quality smart charger. These are available for 70-80 US dollars and last for many years, if not decades.
The best thing about smart chargers is that they are compatible with a long line of four-wheelers and have wires-connections for pretty much every single ATV battery on the market. Another big pro: most reasonably-priced smart chargers have a built-in system that stops the charging process once the battery reaches a full charge. That prevents it from damaging the battery (yes, overly long charging times are known to cause overheating, among other things).
The less expensive chargers don’t have this feature, and you’ll have to turn them off manually.
Don’t worry: there’s nothing hard about using a smart charger. You will, however, need a screwdriver (or, at least, a wrench) to remove the plastic side panel and access the “insides” of your quad vehicle. In some cases, the seat will have to be removed as well. At this point, you’ve got a choice to make: either leave the battery where it is or remove it. I recommend taking it out completely.
That way, it will be much easier to disconnect it from the ATV. This is important: make sure every single wire is disconnected before charging the battery! Next, use the clamps provided with the charger to connect to the battery unit. The positive lead is colored red and should connect to the positive terminal of the ATV battery. The negative lead, in turn, is usually black and is used for grounding.
A clean, bare metallic surface will do just fine. I usually connect the negative to my all-terrain vehicle’s frame. The connectors should always be sparkly-clean – even the tiniest dust particles can cause some trouble. Plus, don’t forget to get a pair of protective gloves and eyewear. The acid inside of batteries is pretty toxic for the human skin.
Once you’re done, disconnect the charger and give the battery a try. I always let it sit for at least a couple of hours before using a voltmeter to measure the charge. If the battery can’t hold the charge properly, chances are, you’re dealing with a dead unit that needs to be replaced.
Ok, that concludes my guide into the world of ATV batteries. If you don’t want to spend big bucks on a new battery or pay a mechanic to charge it, you need to at least know the basics of proper charging. As we learned today, all-terrain-vehicle batteries are pretty fragile and sensitive, which means they need chargers with a specific power output to work correctly. Once you get to know the basics, it will be much easier to do everything on your own.
It’s all about following the rules and using the right equipment and techniques for charging. And if you still have some questions left, don’t hesitate to reach out to me! Or, use the comments section to share your thoughts, tips, and tricks for the less experienced readers. Take care of your ATV, and happy travels!
Electric ATVs are rapidly gaining popularity due to their efficiency and environmental friendliness. But many riders still do not know how to charge an ATV on a battery. Improper charging reduces the battery life or the battery loses its capacity quickly. Therefore, let's figure out how to charge a children's ATV and consider the key recommendations of experts.
There are two ways to recharge the ATV battery. The first and easiest is to connect the charger to the appropriate connector.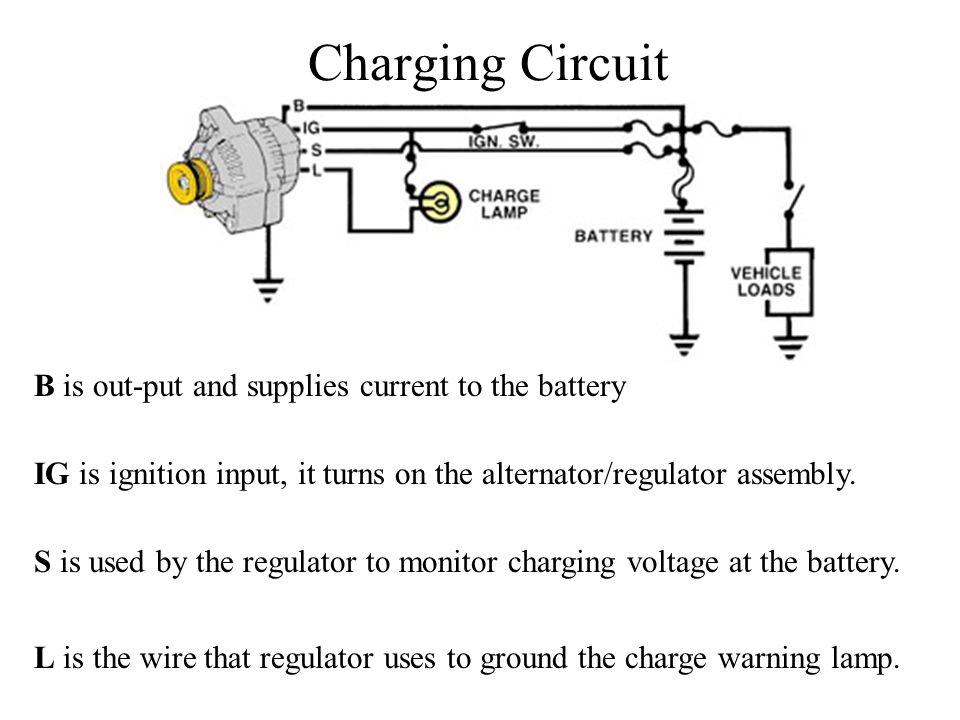 All electric cars and scooters are charged in a similar way, although not all quadrics have a similar socket.
If the ATV does not have a charging port, the rider will have to connect the battery directly to the charging station. To do this, you need:
It is important to note that lithium batteries have a charge control board. This means that after a full charge, the process stops. Although overcharging the battery is still not recommended.
Another important question many riders are wondering is how to charge an ATV battery with an in-car charger. Yes, such a procedure is possible, but you need to properly configure the charger.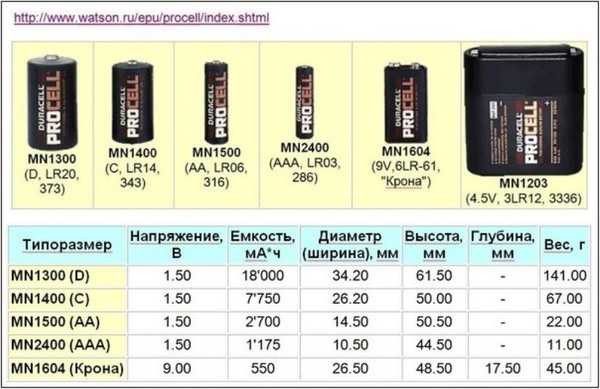 For recharging, you can only use devices with adjustable charging current and the ability to set its minimum level (0.5-0.7 A).
Important : The optimal current for charging the battery is 1/10 of the battery capacity (in Amps).
Each vehicle's user manual lists the optimum battery charging time. On average, this figure is 6-12 hours. The charging time depends on the generation of the battery, its capacity and the characteristics of the charger. Don't forget to charge the battery, though. If the battery has 30-40% capacity left, the recharging time should be reduced.
But what if you don't know how long to charge your ATV battery? In this case, you need to almost completely discharge the battery and charge it for 8 hours. After that, the battery should be installed on the quadric, and the charge level should be assessed. If the indicator shows 100%, next time you need to charge the battery for 6-7 hours. In this way, you can determine the optimal recharging time.
Also remember that overcharging is the main enemy of batteries. It is strongly not recommended to leave the battery connected to the network for 15-20 hours. This leads to a decrease in battery capacity and, accordingly, a decrease in the operating time of the quadric.
Knowing how long it takes to charge an ATV, you can make a schedule for recharging it. For example, the battery can be connected to the network in the evening or after each trip. You can also purchase a replacement battery, thereby increasing the riding time on the ATV.
The battery of any electrical equipment must be properly maintained. Violation of the recommendations may lead to a decrease in battery capacity or damage to it. To avoid such problems, it is recommended:

Separately, it is worth mentioning the "buildup" of the battery. Immediately after purchasing the equipment, you will need to fully charge and charge the ATV several times (2-3 times).
Most riders store their bikes before winter. And in order for the device to be ready for operation in the spring, it must be properly preserved. Preparing an electric quad bike for wintering is quite simple, you just need to find a warm and dry place to store the quad.
Another important conservation point is battery preparation. Before wintering you need:
Note : If you leave the quad battery in the cold, the battery will simply "leak" and stop working.
11/16/2020 7790
Buying a children's ATV or its adult counterpart is not just about being a rider. This technique requires special attention. As a rule, the owners of this motorcycle often do not pay enough attention to charging the battery, which can cause it to fail almost every season. Remember, if you charge your ATV battery correctly, it will last you many times longer.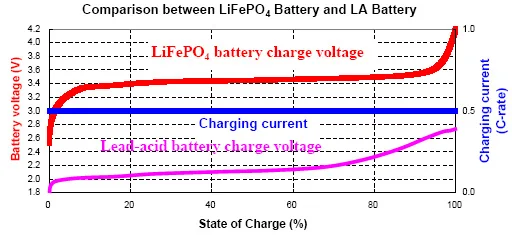
To avoid premature battery failure and reduced capacity, follow these guidelines:
Always follow the connection diagram when installing the battery in the ATV. You need to start by connecting the positive terminal. Be careful not to reverse the polarity as this can cause both the fuse to blow and the battery to explode.
If the vehicle battery suddenly stops charging, there may be several reasons for this:
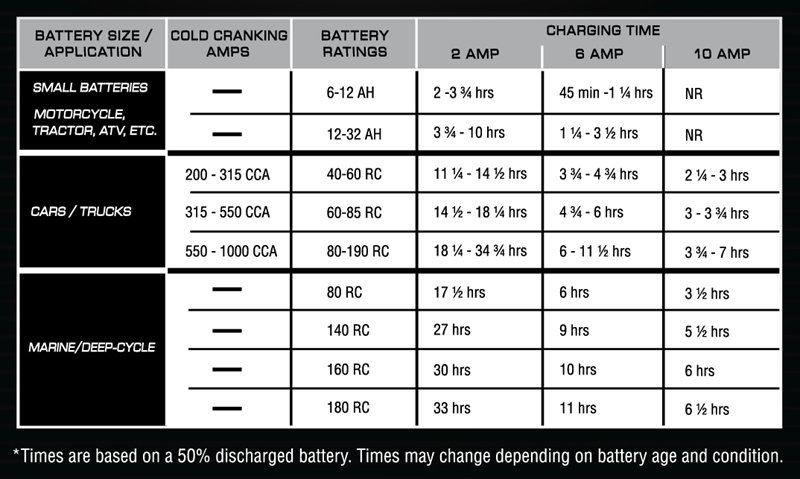
The first signs of regulator relay failure are when the ATV battery starts to drain too quickly. Diagnosis of such a breakdown is carried out by measuring the resistance with a voltmeter at the battery terminals. Repairing any electrical equipment of an ATV is a rather complicated process that a true professional should perform.
Often the best solution when a battery or regulator fails is to replace it with a new one. It is much easier to prevent this kind of breakdown than to fix it later. That is why it is necessary to charge the battery of motor vehicles in strict accordance with the requirements of the manufacturer.
There are two ways to charge the child's ATV battery with the charger. The easiest of them is to connect the charger to the appropriate connector on the motorcycle. True, such a nest is not available on all models of ATVs. If there is no such connector, then the battery should be connected directly to the charger.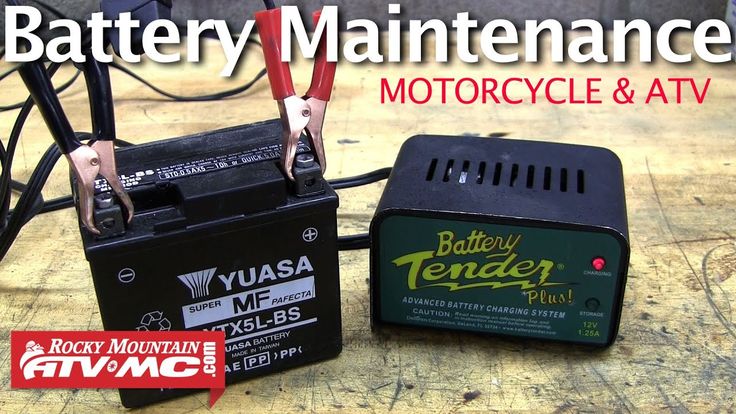 The battery is charged as follows:
Lithium ATV batteries usually have a board that monitors the battery level. But even in this case, it is strongly not recommended to charge the device longer than necessary.
Each ATV gel battery manufacturer provides detailed charging instructions. It is very important to choose the right charger with the ability to adjust the amperage in order to avoid overcharging the battery. On sale you can find specialized chargers for ATV gel batteries.
It is necessary to charge such a battery as follows:
