Do you feel hopeless when your bicycle tires are punctured in the middle of riding your bike? Bike owners like us have been there.
This nerve-wracking situation is worrisome, especially when we have a busy schedule ahead or when we’re on the side of the road. But learning how to change a bike inner tube doesn’t have to be complicated and stressful.
Replacing your bike inner tube is easy if you have the right tools and follow the correct process. This tutorial will help you navigate when you have a flat tire.
Table of Contents
These are some of the essential tools needed when you want to replace the inner tube of your bike.
Follow through these simple steps, and you can replace your bike’s inner tube in no time.
To begin, place the bike upside down and take the bike wheel away from it. If the tyre isn’t already completely deflated, free the air pressure of the internal tube by slightly loosening and then pressing the little barrel above the Presta valves if you have them. Loosen and take out the knurled nuts at the valve’s base.
If you’re dealing with a child’s bicycle or an MTB having car-style Schrader valves, press down the pin in the middle of the valve to free the air.
When the inner tube is already flattened, push the tire inwards to force the tyre bead to the rim’s midpoint. Apply this step on the two sides of the tire until the wheels feel baggy.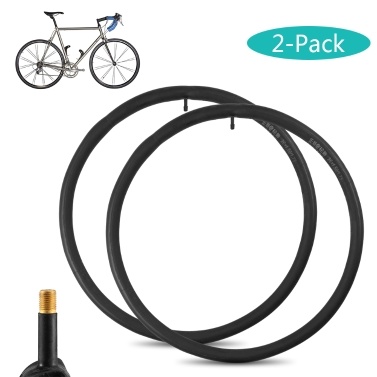
If the tire is loose, shake it to get the slack to one place, or else, you’ll have to move the tire around the wheel in opposite directions at the same time, aiming for as much slack as possible when your hands get close to each other at the bike wheel’s bottom part.
If there is a lot of slack or you feel kind of strong, depress the tire’s edge off the bike rim using your thumb.
This eliminates the possibility of trapping the internal pipe between the bike edge and the tire lever and perforating it.
Be cautious when you use a tire lever. Remove the dust cap from the valve stem, then remove the fastener. Place both levers about 2 centimeters or 1 inch apart under the bead, with the ladle part underneath the tire’s bead.
To avoid punctures, ensure that you haven’t trapped the inner tube valve against the rim with the other side.
Apply pressure to one of the levers to elevate the tire over the rim, then do this again on the other lever to clear a larger area of the tire.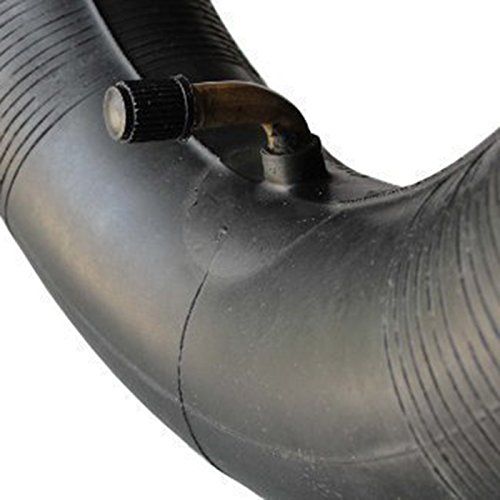 To avoid the tire slipping back onto the rim, hook a single part of the tyre lever around the nearest spoke.
If the tire is extremely tight, you may have to use two levers at the same time to pry the bike tire over the bicycle rim.
Be careful if you use two levers to deal with an extremely tight tire, as there is usually a hazard of flying components.
Go around the wheel, removing the tire’s edge from the rim. Take note that you are not removing the tire entirely. Only one side of the tire must be removed (keep the far side where it is).
Work the tyre lever around the entire tire until the inner tube is entirely off the bike tire. Gradually draw the inner tube out after pushing the valve back through its hole.
With the internal tube detached, inspect the tire for any disfigurations or tread ruptures. Partially fill the inner tube. You should be able to hear or feel little air escape from the hole. Once you’ve located the hole in the tube, match it with the tire.
Inspect for spikes, nails, and other objects that may have infiltrated the tyre and take them away. Or else they will puncture the new internal tubing. Check the wheel rim for sharp edges and splits as well.
A pinch puncture is most likely if the hole is on the inner border of the tube. When the tire caught the tube, the rim tape was either not in the proper place or not present at all. If this is the case, use extreme caution when re-inserting the tube.
Be cautious when you examine the inner tube. You don’t want to puncture yourself as you run your fingers around the tire’s internal area. Make this step easier by wearing gloves.
Remove the objects by hand from the tube if you see something obvious such as glass or a nail. If it’s particularly stubborn, use the screwdriver to pull it out. Then, use the towel to rub around the inside of the tire to see if it sticks on anything else.
Once you’re satisfied with the tire’s condition, place the tire label over the valve hole. It’s time to insert a new tube into your bike.
Purchase a bicycle inner tube replacement, making certain that it’s the correct size.
Fill the internal tubing enough to give it shape. Take out the threaded collar and slide the internal tube valve into the rim.
Knead the internal tubing into the wheel’s belly, so it doesn’t protrude over the rim’s edge. Take care not to twist or pinch the inner tubing when you do this.
Starting from the opposite part of the valve, start coaxing the tire over the rim with your thumbs. When dealing with close-fitting tires, recall how you shifted the tire’s slack into one place. Try to repeat that step when you press the tire to the back of the bike rim.
It’s good to have as much slack as you can for the final stage of the procedure. Take extreme caution not to make a hole in the inner tubing.
When it’s hard to get tyres on any farther by hand in replacing bicycle inner tube, carefully place the tyre levers beneath the tire edge (roughly an inch or 2. 5 centimeters apart from every end that requires fitting). Place one lever against the tire to prevent it from slipping back, then pull the tire on the edge with the other.
Once the tire is installed, double-check for any portions of the internal tubing poking out. Move the valve back into the tire to ensure it is not stuck, and then put back the lock ring on the bike’s valve.
Pump the tire gently once the tire is locked behind the rims. Carefully spin the wheel to look for any bumps.
If everything appears to be in order, proceed to pump to the desired pressure. Get the wheel in the dropouts, then tighten the quick release skewer and brakes.
Put away the hand pump and spin the tire to recheck the alignment vertically and on both sides. If you notice anything unusual, deflate and knead the afflicted part before you re-inflate.
On the initial few rides using your new tube, carefully inspect the tires regularly in case something is amiss.
Now that you have a concrete idea on how to replace bike inner tube, you can quickly replace the inner tube of your bike in no time. In case you have questions regarding the whole process, you can also check out this video tutorial.
Pro Tips:
Mark the hole with a pen or chalk once you’ve located it.
Dry the surface and gently massage it with sandpaper. Then, press and smooth the glue around the hole, allowing it to sit.
Remove the patch from the foil and press it firmly against the glue to remove any bubbles.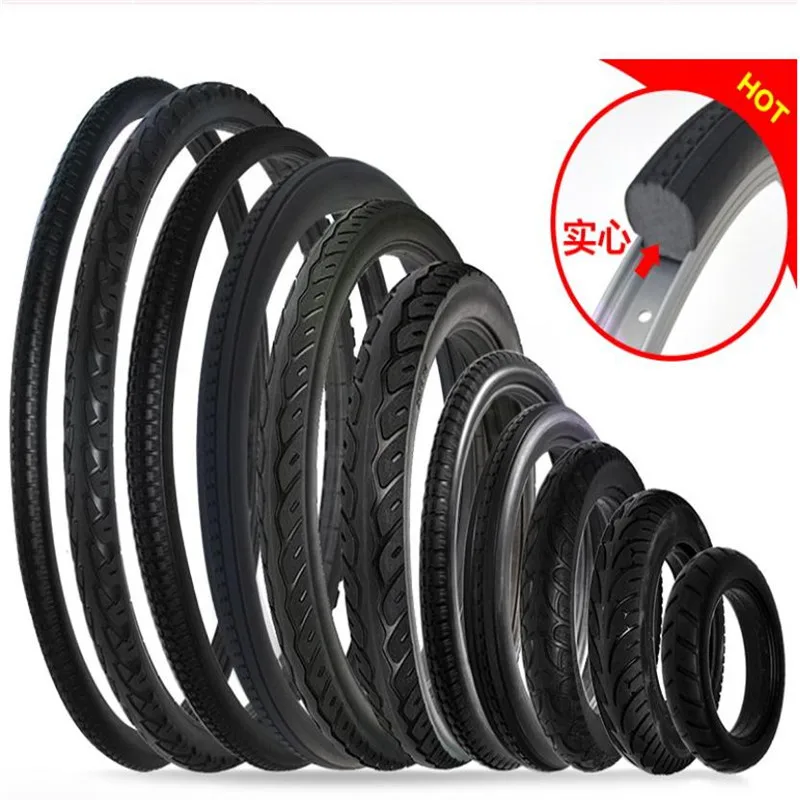 It’s always better to do this on a flat surface.
After the adhesive has dried, sprinkle the chalk over any exposed glue to prevent it from sticking to the interior of the tire.
Did you enjoy following the simple steps above?
As long as you know how to change a bike inner tube, nothing can stop you even if your tire gets punctured on your next bike ride.
Keep in mind that replacing bike inner tubes isn’t rocket science, and everyone can do it entirely on their own.
We’d also love to hear from you! So, let us know how changing your bike’s inner tube went. If you have any suggestions for other bike owners, share them in the comments section. Sharing this article can also help us a lot, so we’d greatly appreciate it.
Gary Johnson
“I ride my bike to work for years, but is that enough? Our carelessness towards our surroundings has taken a toll on the environment.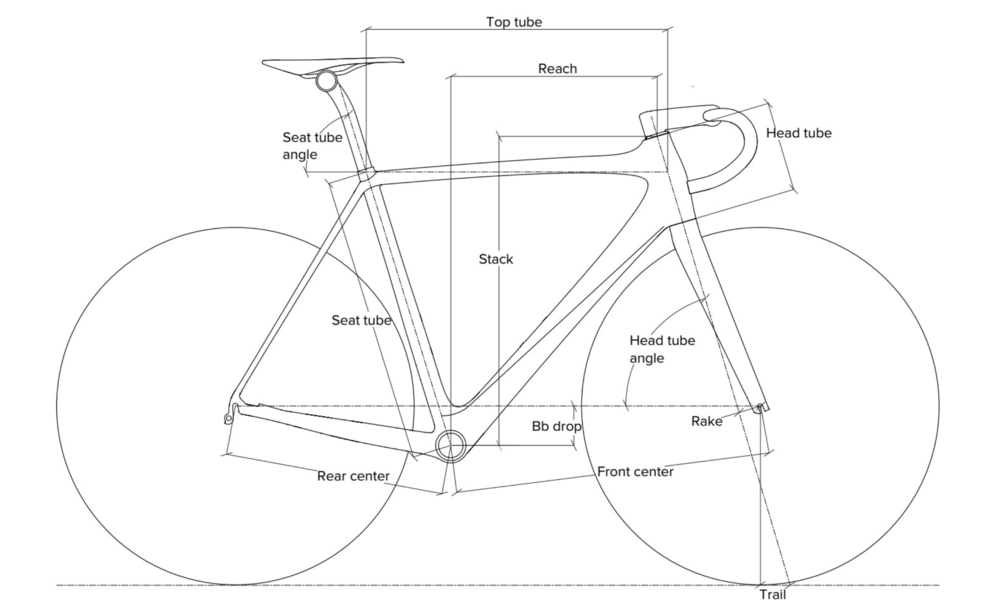 And now, everyone is responsible for changes; even the most minor contribution is counted. With this hope and spirit, I started with my partner to establish Biketoworkday to help more individuals commute to their work sites on their bikes.”
Staff, Courtesy of Vittoria
Most avid cyclists—whether mountain biking, commuting, road biking, or gravel biking—have punctured a tube or run into a flat tire somewhere on the road or trail. Carrying a spare tube—and knowing how to change out a damaged one—is an important part of bike safety and maintenance. These are our picks for the best bike tubes in a variety of sizes and for different styles of riding. Before you buy, make sure you know what type of valve your wheels are compatible with, as well as the dimensions of your tires.
1
Best Overall Road Tube
Latex Road Tube Vittoria
$14 AT BACKCOUNTRY
Read More
$14 AT BACKCOUNTRY
2
Most Durable Mountain Bike Tube
SV21 Bicycle Tube SCHWALBE
$13 AT AMAZON
Read More
$13 AT AMAZON
3
Best Do-it-All Bike Tube
Schrader Tube 700c Co-op Cycles
$9 AT REI
Read More
$9 AT REI
4
Best Lightweight Road Tube
Road Superlight Presta Tube Teravail
$15 AT BACKCOUNTRY
Read More
$15 AT BACKCOUNTRY
5
Best Spare Gravel Tube
Tubo-CX Gravel Tube Tubolito
$36 AT AMAZON
Read More
$36 AT AMAZON
6
Best Budget Road Tube
Sunlight Premium Bicycle Tube Street Fit 360
$13 AT AMAZON
Read More
$13 AT AMAZON
7
Best Innovative Tube Material
Smartube Presta Valve Tube Pirelli
$40 AT BACKCOUNTRY
Read More
$40 AT BACKCOUNTRY
8
Best Fat Bike Tube
Ultra Light Fat Tube Surly
$34 AT AMAZON
Read More
$34 AT AMAZON
9
Best Budget Fat Bike Tube
Fat Bike Tube RoadUp
$26 AT AMAZON
Read More
$26 AT AMAZON
10
Best Race Day Tube
S.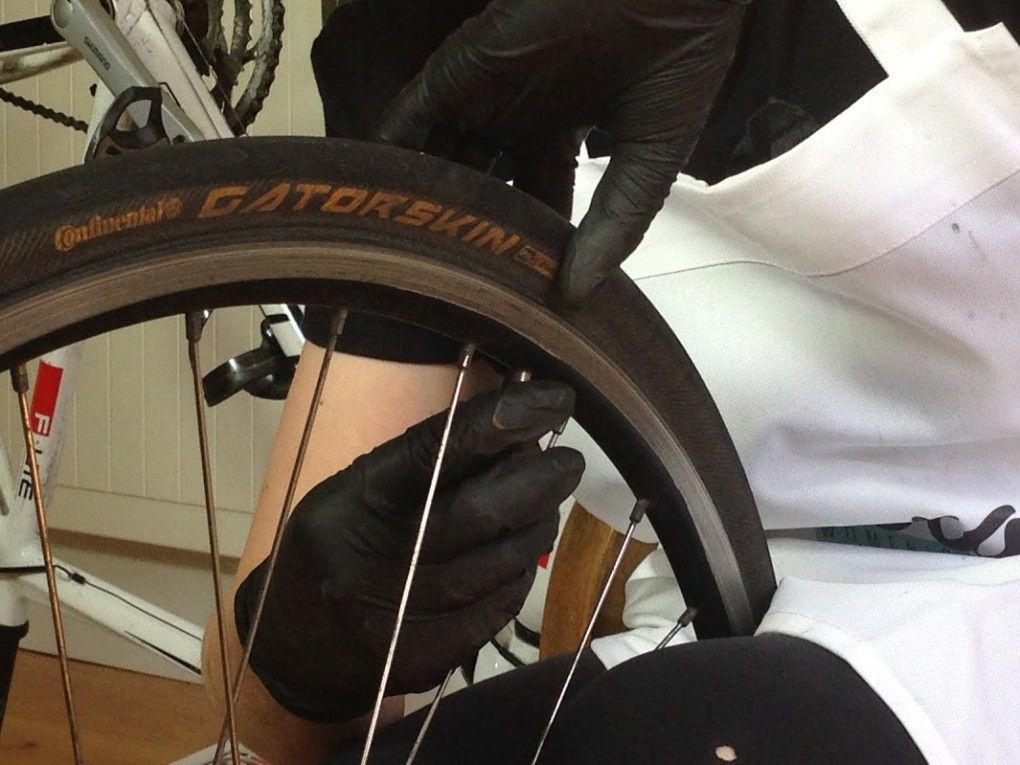 C. Latex Tube Challenge
$14 AT BACKCOUNTRY
Read More
$14 AT BACKCOUNTRY
Load More Show Less
Valves come in two different types—Presta and Schrader—and varying lengths. Presta is more common, so we’ve listed more of those options. Presta valves are longer and thinner, with a screw at the top that you can adjust when you inflate them. Schrader valves are shorter and wider, and look more like car tire valves.
Make sure you know which one your bike is compatible with before purchasing. The wider Schrader valve won’t fit through a wheel rim built for a Presta, and a Presta is too narrow to fit tightly in a Schrader hole.
→ No matter what you need to improve in your riding life, find it with Bicycling All Access!
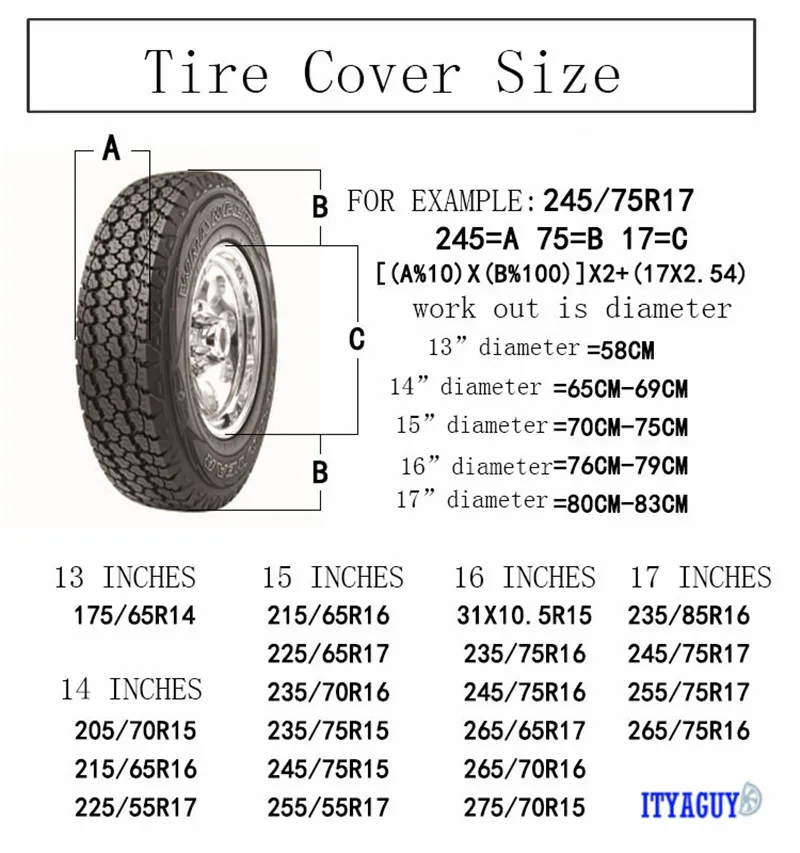
This can be confusing as there are a lot of metrics and numbers to keep track of.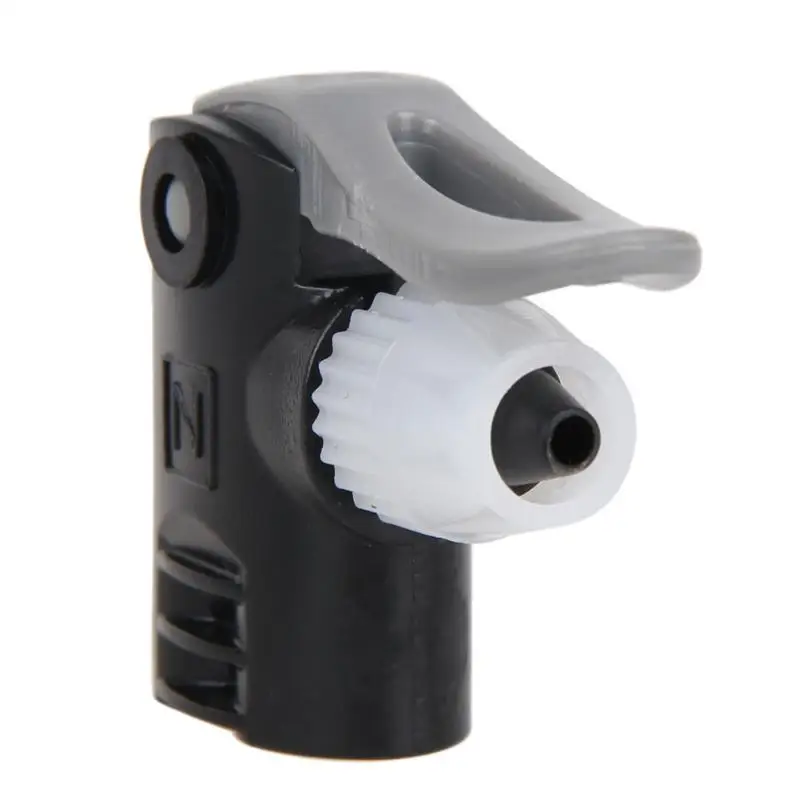 Be sure to read all widths and diameters, and remember there are several ways of measuring (650b or 700c versus 27.5- or 29-inch models). Know what metric you’re using so you don’t wind up on the side of the road with a tube that’s the wrong size for your tire.
Road bike and gravel bike wheels will usually be listed as 700c, so you’ll need 700c tubes. Conversely, mountain bike and commuter bike wheels are typically referenced in inches. Common sizes include 26-, 27.5- (also listed as 650b), or 29-inch wheels.
To make it even more confusing, 27.5-inch wheels are the same diameter as 650b, and 29-inch wheels are about the same size as 700c, though they’re usually wider, so it’s harder to use that measurement interchangeably.
Bike tubes come in a few different materials. The material or materials used will impact price, durability, and weight. Butyl rubber tubes are the most common and most affordable. They’re a bit heavier than latex, but also easier to repair.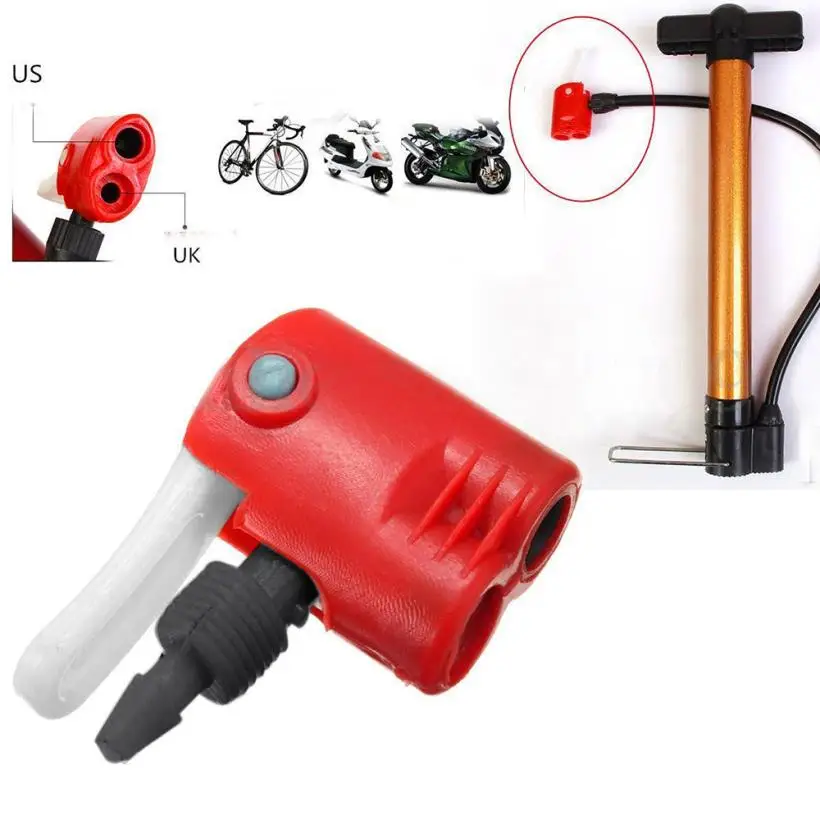
Latex tubes are lighter and can be more puncture-resistant than rubber tubes, and the material creates less friction against the tire itself, so you'll have more efficiency during long rides or races. It’s important to note that latex is more porous, so these can leak more air and you will have to inflate the tubes more frequently.
We looked at the different types of bikes, sizing, and riding, then narrowed down the categories to find the best options at a variety of price points and for different intended uses. We checked with bike shops, road cyclists, mountain bike riders, and casual bike commuters for their recommendations, then chose our options based on first-person use, specs, and reviews. There are a variety of sizes, weights, price points, and materials, and purposes in our picks.
1
Best Overall Road Tube
Vittoria
Latex Road Tube
Now 13% off
$14 AT BACKCOUNTRY
2
Most Durable Mountain Bike Tube
SCHWALBE
SV21 Bicycle Tube
$13 AT AMAZON $15 AT WALMART
3
Best Do-it-All Bike Tube
Co-op Cycles
Schrader Tube 700c
$9 AT REI
4
Best Lightweight Road Tube
Teravail
Road Superlight Presta Tube
$15 AT BACKCOUNTRY
5
Best Spare Gravel Tube
Tubolito
Tubo-CX Gravel Tube
$36 AT AMAZON
6
Best Budget Road Tube
Street Fit 360
Sunlight Premium Bicycle Tube
$13 AT AMAZON $16 AT WALMART
7
Best Innovative Tube Material
Pirelli
Smartube Presta Valve Tube
$40 AT BACKCOUNTRY
8
Best Fat Bike Tube
Surly
Ultra Light Fat Tube
Now 15% off
$34 AT AMAZON
9
Best Budget Fat Bike Tube
RoadUp
Fat Bike Tube
Now 13% off
$26 AT AMAZON $25 AT WALMART
10
Best Race Day Tube
Challenge
S. C. Latex Tube
Now 19% off
$14 AT BACKCOUNTRY
Maggie Slepian Maggie Slepian is a full-time freelance writer in the outdoor industry and has tested gear professionally for almost ten years—she is an avid backpacker, trail runner, bikepacker, and horseback rider and has thru-hiked thousands of miles on the Appalachian, Colorado, and Ouachita trails, along with backcountry travel on terrain including coastal trails, the desert, and high alpine peaks.
Without air-filled tires, bicycles would ride much slower and harder. And the jargon that is present in the topic around the wheel can turn your head, so let's deal with it in order.
The vast majority of bikes around the world use the standard tire/tube combo that we're all familiar with, but when the eye turns to high-performance and niche bikes, the eye is drawn to completely different types of tires.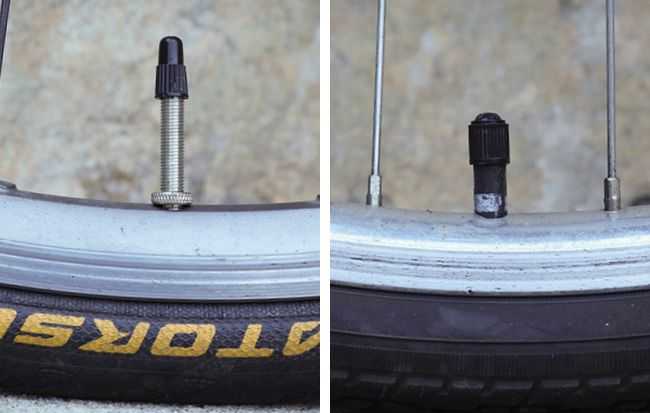 In this article, we will try to cover this topic and clarify the differences. By the way, tires are not the only ingredient for a “delicious” bike. We understand this, and therefore we wrote an article where we choose wheels for a road bike. Don't thank)
And now some historical background.
At one time, bicycles had solid rubber tires, which made riding on different surfaces very hard and uncomfortable. In 1887, John Boyd Dunlop, a Scottish veterinarian living in Belfast, was the first to install pneumatic tires, experimenting on his son's bicycle before moving on to larger racing bike wheels. Dunlop's key discovery was the observation that air-filled wheels were not only more comfortable, but also made it possible to drive faster. The inventor conducted an experiment in which he ran two wheels across his yard. The hard rubber wheel stopped and fell, while the pneumatic tire kept moving until it hit the gate and bounced off. Deformed by the relief of the road surface, the air-filled tire had less rolling resistance.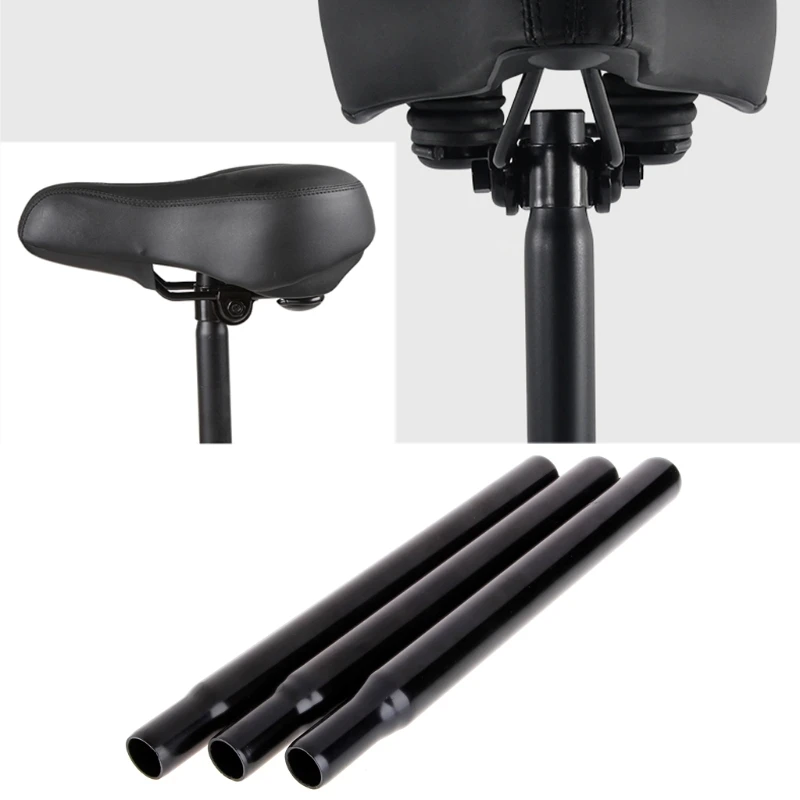 Yes, it also has rolling resistance, but this value cannot be compared with a solid tire. Dunlop received a patent for the invention in 1888, but it turned out that another Scot, Robert William Thomson, had patented pneumatic tires as early as 1847, invalidating Dunlop's claim to discovery.
The unsung hero of the inventor's story is the president of the Irish Cycling Association, Harvey Du Cros. After his sons were run over by a pneumatic tire racer in a competition, Du Cros approached Dunlop and they formed a company that used the invention. The withdrawal of the patent was a big blow to Dunlop, but after flooding the market with an interesting product, Du Cros merged and obtained other related patents that allowed Pneumatic Tire to survive.
Dunlop himself retired in 1895, at the age of 55, while Du Cros remained at the helm of the company after a subsequent change of ownership. Subsequently, the name of the company changed to Dunlop Pneumatic Tire, although the inventor himself was no longer involved in the management process.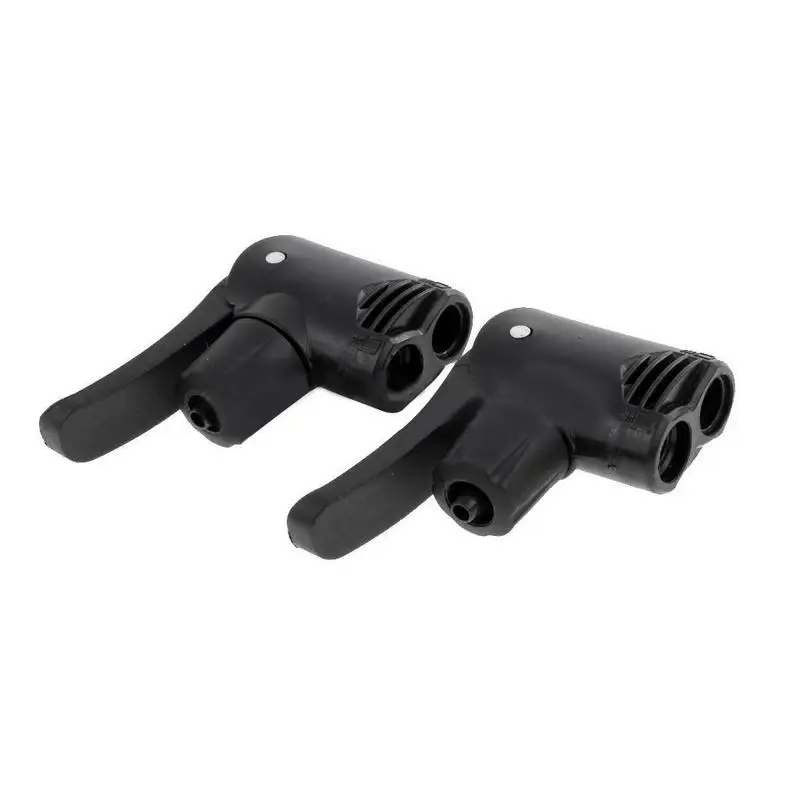 Soon, the production diversified and began to occupy the market of automobile tires along with other rubber products, which allowed the brainchild of Dunlop to become one of the largest brands and the largest company of the twentieth century.
The familiar Dunlop name hasn't appeared on bicycle tires for decades, but the inventor is still remembered as the father of the pneumatic tire. Probably, in modern wheels, he would see the descendants of his discovery, made for the comfort of his own son.
Dunlop's first prototypes consisted of a rubber tube made by gluing the two ends of a strip of rubber attached to the wheel with linen tape, which was nailed or bolted to the wheel. Today's tires are much more complex.
However, rubber is still used to this day to keep the air in the wheel. Usually this function is taken over by a chamber inside the tire, which can be replaced or repaired in the event of a puncture. The tubes are made from synthetic butyl rubber, obtained from petroleum products or from natural rubber, which is found in the sap of the rubber tree. However, where are these environmental hooligans with their hydrocarbons... Continental plans to produce tires from dandelions! This is where the guys are stuck!
The chamber is located inside the tire, and the fabric cord does not allow it to inflate more than necessary, thus creating excess pressure in the wheel. Cord, which typically has non-woven fibers at an angle to each other, can be made from nylon, polyester, cotton, or silk. As a general rule, the denser the cord - measured in threads per inch or tpi - the better the quality of the tire. Base tires are 15 or 33 tpi, and the cord used in the best examples is usually 120 tpi, or even 320tpi. Larger numbers indicate that the manufacturer is adding up the thread count in multiple layers.
Between the bead (it lies on the rim) and the tread (it is also a treadmill) there are side walls. They are often coated with a reflective layer for visibility at night, a solution most often found on city bikes.
The tire, among other things, must have good grip, and for this it has an outer layer of rubber - a tread. Tread rubber is made by mixing with various additives, including carbon black and silica, to improve traction and durability.
Many tires are equipped with an additional anti-puncture layer under the tread to reduce the chance of punctures.
The main goal of a tire manufacturer is to reduce rolling resistance to an absolute minimum. To this end, high-quality tires have thin walls and tread. Almost all tires have these characteristics, but their assembly details may vary. Below we will look at the different types of tires and their features.
Not only tire manufacturers, but also attachment manufacturers are fighting for low rolling resistance. We wrote an article where CeramicSpeed presents the innovative drivetrain DrivEn. Everything is for you.
An off-road clincher like the Specialized Trigger Pro has a raised tread pattern for good traction on loose surfaces.
The Clincher is the standard tire we all know, love and curse when it goes flat. It has a U-shaped profile in cross section, formed into a circle on a special machine. The bead with a ledge at the ends of the profile is hooked to the rim, which has reciprocal ledges. The cord, in turn, passes through the entire tire, including the beads. The tread is formed during the manufacturing process of the tire.
The big advantage of this design, and the reason it dominates, is that its installation and replacement is very simple and does not require a high level of skill, so the tube can be replaced quite easily and quickly if the wheel is punctured. Combination of lug on rim and bead on tire provides protection against disassembly when inflated; Usually, the manufacturer provides a double pressure margin, so that the tire is disassembled only if critical values \u200b\u200bare exceeded. The recommended pressure of the company is always indicated on the side surface of the tires. If the tire is inflated with less pressure, it may spin on the rim when braking or actively spinning, which will most likely lead to a replacement of the tube; can get sidewall damage on uneven roads, thereby destroying the chamber and wheel rim; driving on a tire with a pressure less than the recommended one is simply difficult, since it has a high rolling resistance due to the large amount of deformation; it can be disassembled on the way; low pressure promotes punctures.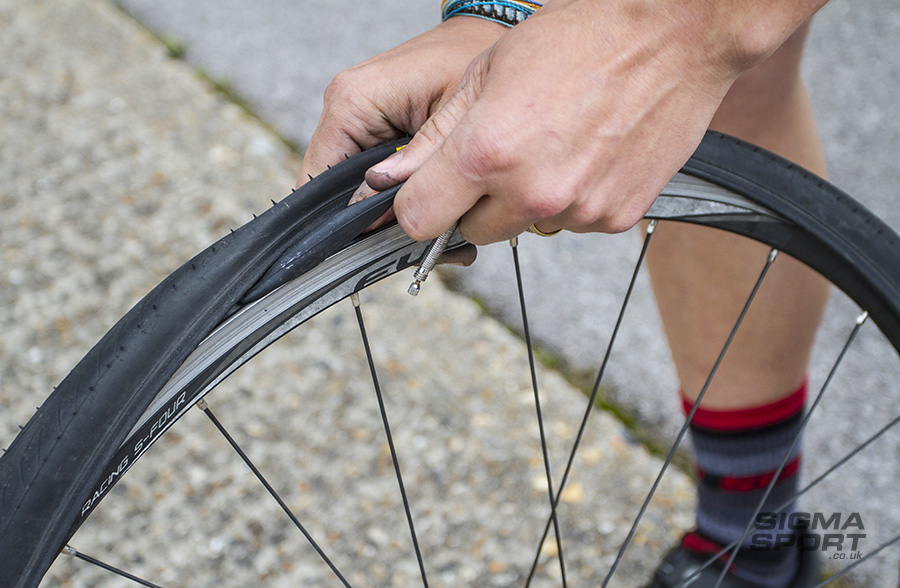 Increased pressure entails disassembly of the wheel, tire rupture, and driving on such a wheel will be very, very uncomfortable; by the way, as in the case of reduced pressure, increased pressure also has a negative effect on rolling resistance, as it ceases to deform on the surface of the coating.
Both of these extremes can negatively affect both the comfort of movement and the safety of the trip. After all, if the wheel goes down completely or disassembles at a decent speed, then the loss of control is guaranteed.
The disadvantage of clincher/conventional tires is that they are inherently heavier than road tubulars because the rim gets taller to form lugs and the tire has a bead. Budget products are made with a steel bead, expensive ones are made with Kevlar or similar material, which allows them to be reduced in weight and compactly folded for storage or transported as spares.
A drawback, not inherent in design but rather in the slightly anarchic nature of the bicycle industry, is the lack of rigid standardization, which results in a run-up in size between identical wheels.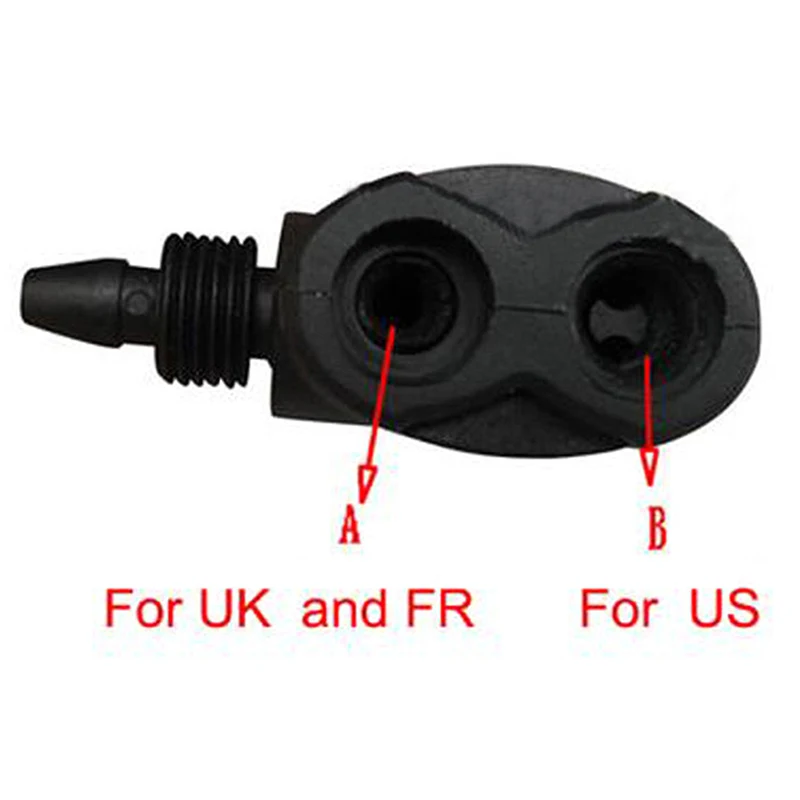 The most common tire size for road bikes is known as 700C, a value that comes from the now defunct French wheel sizing system. All 700C rims and tires measure 622mm bead according to the ISO system for sizing.
We assume that in the process of reading you often come across a mention of road bikes, we also assume that this aroused your interest in this type of bicycle. It's still possible. So, it is precisely on this occasion that we suggest that you familiarize yourself with the article, where the geometry of a road bike is described and explains the numerous questions that beginners have.
And once again - the standard does not impose strict restrictions on the size of the wheels. It's natural for some tire and rim combinations to be quite easy to match, while others are extremely difficult or even impossible. When assembling new wheels, everything becomes clear when the tire begins to tight into place. If they are hard to install, they will be just as hard to remove, which can be a big problem if you try to patch a tire on your way to work on a dark, cold, wet January morning.
Tubular road tyre, Vittoria Corsa, has a cord attached around the inner tube and no retaining bead. Instead, the tire is glued to the rim.
This design is most similar to tires sold by Dunlop in the 1890s. The cord is wrapped around the inner chamber and secured with tape for a secure fit. All this is then glued to the rim.
The biggest advantage of this tire is that it is light in weight. Without a bead and a seat for it on the rim, tubular wheels will always be lighter than an equivalent clincher, although the difference is so small today that it no longer matters.
If the tube is punctured while riding, you will have to replace the tire. This implies a spare, traditionally tied to the saddle rails. In addition to the tire itself, you will need glue so that it is properly fixed on the rim.
The status quo is both an advantage and a disadvantage of tubes. It is necessary to replace the entire tire, because on-site repair is not possible, but the replacement process is faster than replacing the tube on a regular wheel. To repair the tube, you need to find a puncture, remove the protective tape, push the cord and pull out the chamber section. After repair, the process is reversed to return everything to its place. This feature of tube repair is the main reason why they have almost completely disappeared outside of big-time sports. Although, again, they are also slowly being replaced from professional competitions by another type of tire, which penetrates deeper and deeper into the cycling industry and everyday rides. But more on that later.
Just in case you're wondering, we wrote an article about the bikes of the 2019 Tour de France participants, where the technical parameters of each of them are listed. The tires on which they storm the most important race of the year are also indicated there. We wrote about some bikes, such as Wilier Zero SLR, Specialized S-Works Shiv TT, Cube Litening C: 68X, Scott Addict RC separately and in detail, although they are also in the article a couple of lines above, in case you are interested.
The tubular tire is easy to fold and store or carry as a spare.
Tubular wheels are still widely used in professional racing, because even with a puncture, the movement can be continued until the support car arrives, and, of course, the racers do not repair them themselves and do not wear them anywhere for this.
However, some athletes claim that quality handmade tubes in particular provide better performance than clinchers and are less prone to punctures. Tires get their qualities from thin, flexible cords, which can be made from cotton, polyester or even silk, and thin layers of tread on the tread. Instead of the tire being vulcanized into a single unit, as with conventional wheels, the tread is mounted at a lower temperature during the production of tubes. This technology is said to allow the treadmill to remain elastic, as the process does not increase the hardness of the rubber, as vulcanization does.
The " Tubeless " logo is the only way to visually tell if a tire has no tube.
Hint in the name: These are clincher tires that don't have a tube. Instead, the tire is hermetically sealed to the rim and the air is held in either by a rubber layer on the inside of the tire or by a liquid sealant.
The main advantage is that these wheels are immune to a certain type of puncture known as snakebite. A snakebite occurs when the tube hits the crease in the tire between the ground and the rim, creating the characteristic pair of holes in the tube. If it is not, then there can be no such puncture.
The puncture described is a headache for mountain bikers who typically run tires at low pressure for maximum grip, so they are enthusiastic about tubeless. Snakebite is less common on road bikes, although due to deteriorating road conditions, in the last decade cyclists have been using thicker tires at lower pressures to improve riding comfort.
Tubeless tires require a matching rim, either without spoke holes or with a special rim tape that seals the spoke holes. The tubeless bead is shaped to create a good seal on the rim, and its dimensions are much more precise than conventional clinchers.
Tubeless tubes are divided into two types: fully tubeless and suitable for tubeless use. Fully tubeless have a layer of rubber on the inside to hold air. Tubeless-suitable tires have the required bead shape to seal on the rim, but have a conventional tread to save weight without the extra layer of sealing rubber. By adding 30-60 g of sealant, this problem is completely solved and the whole structure, as a rule, is lighter than a clincher with a chamber.
There are likely to be instructions on the Internet for installing regular tires on regular rims using rim tape and sealant. Great idea, but not for road bikes. Road tire pressures are much higher, requiring a high precision fit of the wheel on the rim, and this is a determining factor for successful operation. Otherwise, the tire runs the risk of being disassembled in motion and failing. By the way, disassembling the wheel at speed entails damage to the rim, which can be made of carbon fiber. In this scenario, the tire becomes the least of the problem. Well, if the situation is considered from the point of view of personal safety, then the damaged tire and rim are nothing at all.
Hutchinson and Shimano have created special Road Tubeless tires and rims, while others have developed their own take on the concept. Most recently, Mavic announced the Road UST wheel and tire series and submitted technical information to the International Organization for Standardization and the European Tire and Rim Technical Organization for ratification as a standard that any wheel manufacturer can use.
In the article we mention either road bikes or cross-country direction. However, there are also gravel bikes, which are a transitional option between these two extremes, where the topic of tubeless tires is very relevant. The recently introduced Cannondale Topstone is a very good example to explore this variety of bikes.
With thin tread and only two plies.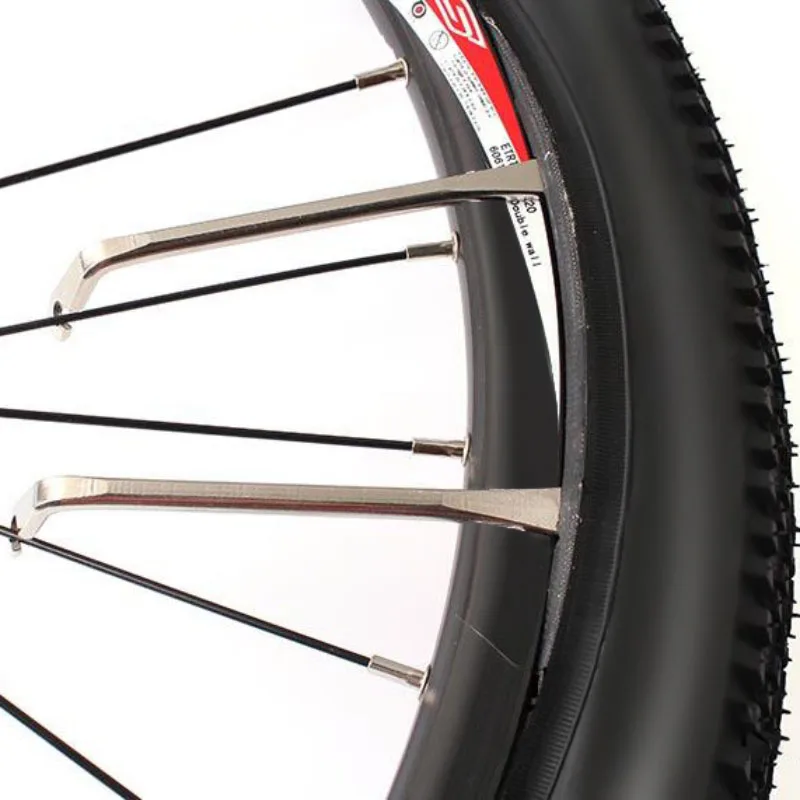 The tubeless road tire uses the same lightweight construction as the traditional tube.
Tubeless Road Tire (Tubeless) is a clincher made using the same technology as the handmade tube. The terminology used here is marketing terminology, partly to explain the high cost of some tubeless tires.
Fans of tubeless road wheels say they roll like tubes, which is to be expected since they use the same high thread count cord materials and thin, hand glued tread. Cannondale's new SuperSix Evo road bike comes equipped with this type of wheel from the factory, and we talked about that as well.
A few years ago, manufacturers assumed that tubeless road tires would be among the fastest and most sought-after - which is confirmed literally today, as the Tour de France is carefully switching to this type of rubber. We wrote about the technologies of the future at the 2019 Tour de France and the main trends that go deeper every year.
By the way, tubeless road racing is not the only point of tension. Not so long ago there was a lot of heated discussion about the use of hydraulic disc brakes on road bikes, and the same Tour de France shows us today that this type of brake is taking root well. We already wrote about road bike trends back in 2018 and we recommend that you read it, this topic is covered there and the article is still relevant. The UCI approval of disc brakes became the basis for their further development in the road world.
Tannus tires are made from lightweight foam. The holes are for attaching to the rim.
Various manufacturers have made many attempts to market with anti-puncture tires that fit regular rims. They can be a solid piece of rubber or a thick layer of rubber around a hollow core, as well as foam materials that take up the entire volume of the wheel.
Without compressed air inside, these wheels tend to be very stiff. To stay on the rim, they must fit snugly, which makes mounting them much more difficult.
Solid and foam tires are often made from polyurethane, rather than the regular rubber found on any other type of wheel. This is where their second drawback manifests itself - insufficient grip on the roadway.
The only manufacturer that seems to be able to overcome some of these problems is Tannus, a Taiwanese division of a chemical company that, among other things, makes cushioning soles for sports shoes. Tannus has a patented foam they call Aither 1.1 and claims tires made from this material are as good as high quality city bike wheels.
Cyclists who have used Tannus tires agree. Reportedly, the rolling resistance is only slightly higher than the pneumatic counterpart, and the grip is quite tolerable.
However, Tannus only partially solved the installation problem by using plastic rods that go through the tire to hold it in place. This makes the installation process a labor intensive process that is best done at a bike shop that stocks Tannus specific tools.
Full name
Borik Vladimir
Passionate cyclist since 2014. He could not stand it when the bike made extraneous sounds in motion, which made him go over everything, re-grease and renew it many times. He likes to delve into the subtleties, therefore, numerous bulkheads of his bike later turned into a job as a bike mechanic. I went from Shimano Acera to Comance Tomahawk through SLX to XTR to Specialized S Works, and then just switched to a budget road bike on Campagnolo Xenon 10 equipment. Kuyalnik 2019 bike marathon (MTB) behind-year, where Light took 5th place on the route. Currently remains an active bicycle user and continues to deepen his knowledge in this area.
Tue, 08/06/2019 - 03:51
Differences between road, cyclocross and gravel
Vuelta a España 2020: all-stage route
Canyon Grizl: gravel for tourism and adventure
We welcome cyclists of all ages!
In this most interesting section of our site you will find articles about bicycles, carefully collected and written by us.