Home »
Misc »
How to start a flooded atv engine
How to start a flooded atv engine
ATV Flooded With Gas – Here’s why and the fix – ATVFixed.com
A constantly flooded ATV is a real pain in the ass, not to mention it’s bad for engine health. Flooding causes gas to dilute the engine oil and that over the long term can be terminal. Anyhow you are in the right place, I’m a mechanic and I think we can get this puzzled out right now.
ATV gas flooding is a symptom closely associated with the following common ATV issues:
- Clogged air filter
- Spark plug fault
- Soft battery
- Bad gas
- Coil fault
- Carburetor fault
In this post, you’ll learn why your ATV floods with gas, you’ll learn how to diagnose the root cause and how to un-flood your bike quickly. In addition, you’ll learn some mechanics tips for avoiding flooding in the future.
Page Contents
- Symptoms of ATV Gas Flooding
- What Causes ATV Flooding?
- Diagnosing The Cause Of ATV Gas Flooding
- How To Un-Flood ATV Engine
- Mechanics Tips To Prevent ATV Gas Flooding
Symptoms of ATV Gas Flooding
I think you have this one covered.![]() The symptoms are obvious to most but there may be a few in the list below that are tangential to flooding.
The symptoms are obvious to most but there may be a few in the list below that are tangential to flooding.
- No start
- Long crank
- Stink of raw gas
- Gas leaking under the engine
- High oil level
- Hydro-locked engine
What Causes ATV Flooding?
In many cases, an ATV floods because the engine needs a tune-up, and so if you haven’t serviced your ATV in more than twelve months. A full tune-up now is a great place to start.
Generally, a flooded ATV is a symptom of an underlying problem, it is not the root cause. In this section, we’ll look briefly at some of the more likely root causes of ATV flooding.
They include:
- Poor maintenance – An ATV should be serviced every twelve months.
- Incorrect start procedure – Using excessive choke while starting especially when the engine is warm can lead to flooding.
- Faulty choke – A choke manual or auto, that’s sticking in the “On” position may also cause hot start flooding.
- Clogged air filter – A dirty air filter is close to the top of this list for good reason. A blocked filter causes a rich fuel condition and flooding.
- Bad gas – Old gas goes stale and loses its ability to ignite. This may result in flooding of the cylinder and spark plug fouling.
- Fouled spark plug – A spark plug that doesn’t fire won’t ignite the gas and the most common cause of a nonfiring plug is fouling.
- Battery fault – While many bikes will run with a low battery, starting may cause some issues. A strong battery is required in order to achieve at least 400 rpm. That’s important for two reasons, sufficient RPM is needed to generate a strong spark, and secondly, a min of 400 rpm is required to create sufficient compression in the combustion chamber.
-
Faulty carburetor – A common carburetor over-fueling fault is caused by an incorrectly adjusted float height. Another common issue is a worn and leaking carb needle valve.
 These types of carburetor faults are associated with hydro-locking.
 - Mechanical issue – Low compression will result in a no-start, and a no start means gas is flooding the engine.
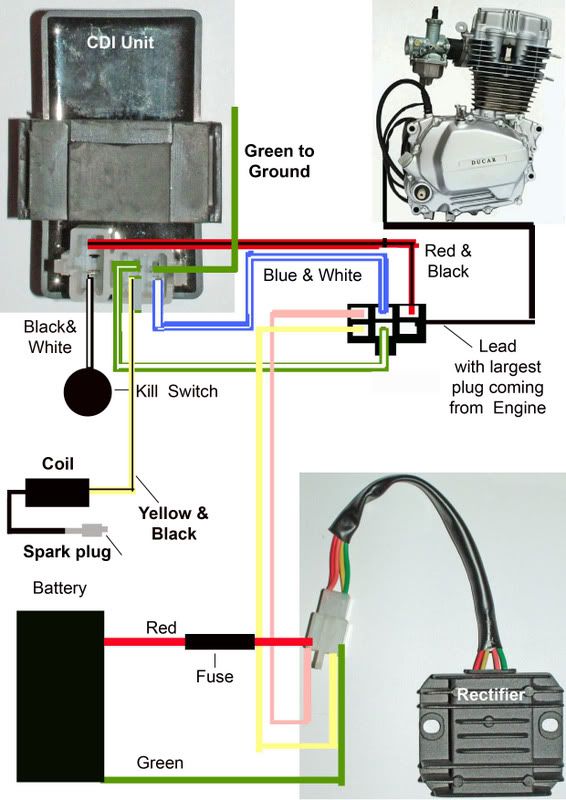
- Electrical issue – A bad plug cap, coil wire, coil, Stator, CDI module, and pickup are all possible causes of flooding.
Diagnosing The Cause Of ATV Gas Flooding
As we’ve seen in the previous section, the list of possible causes is wide-ranging. In this section, we’ll attempt to diagnose the root cause. It makes sense to check the most common and also easy to check items first, before checking the less likely issues and harder to test. And so that’s what we’ll do next.
Go ahead and check the following:
- Starting procedure – This may seem insignificant but if the bike is new to you, the starting procedure may be different. The fix – check your owner’s manual for the correct ignition system and choke use (if manual choke fitted).
- Air filter – A choked-up air filter will prevent airflow and conversely will flood the cylinder with gas. The flood of gas compounds the problem by fouling the spark plug. The fix – remove, check and clean the air filter. It is common to oil ATV foam filters, but air filter oil should be used not engine oil. Never wash or oil a pleated paper air filter.
- Spark plug – The spark plug should be cleaned and gap checked every three months. The plug should be changed every two years and check your plug type is correct. Spark plugs are specific to your engine. The fix – remove, check the gap, and clean or fit a new plug.
- Check fuel quality – Poor fuel quality is a very common cause of no starts, likely the most common cause. If your gas is older than a couple of months, there’s a very good chance your fuel is stale and is fouling the plug causing a no start and flooding. The fix – drain the gas tank, carburetor bowl and use fill with fresh gas.
 Adding a gas stabilizer helps keep gas fresh for twelve months.
 - Check compression – Low compression is bottom of the list as it’s less likely, harder to diagnose and fix. To diagnose successfully, you’ll need to run a compression test and you can check that procedure here.
How To Un-Flood ATV Engine
When it comes to clearing a flooded ATV engine, we have three options:
1 Open throttle – Fully open the throttle, but leave the choke off, now crank the motor over. The open throttle increases airflow to the engine and helps dry out the cylinder. If the engine doesn’t clear and start after two or three attempts, I’d try one of the other strategies below. Excessive cranking will run the battery down.
2 Wait – Simply walking away and allowing time to dry out the cylinder usually works. Waiting anywhere from fifteen minutes to a half-hour does the job.
That said if there is an underlying problem causing the flooding then you may be visiting this problem again before long. Remember when starting a flooded engine, don’t add any choke.
3 Clear cylinder – Clearing the cylinder will require a few tools and a little effort. You’ll need a plug wrench and a shop rag.
The process is as follows:
- Go ahead and remove the spark plug
- Disable the coil by removing the coil power feed. (failing to disable the coil risks fire and also risks overloading the coil)
- Place a shop cloth over the plughole
- Crank over the engine to expel the raw gas
Now go ahead and clean, gap the spark plug, and refit.
Mechanics Tips To Prevent ATV Gas Flooding
Here are my top tips for keeping your ATV in great shape and free from flooding
- Tune-up your engine
- Turn off Petcock (gas tap) when bike not in use
- Use a gas stabilizer
- Clean and gap spark plug regularly
- Check spark plug is correct heat range
When storing your ATV, it pays off handsomely to pay particular attention to the fuel system.
- Use gas stabilizer – Fill the gas tank before winterizing your ATV and add a gas stabilizer to the gas tank. Run the engine a while to distribute the mix throughout the fuel system.
- Use battery maintainer – use a smart battery charger to keep the battery in top shape.
- Turn off the petcock when the ATV is not in use
- Park bike undercover and but use a breathable cover
You may find the following posts helpful:
ATV carburetor flooding
ATV won’t start after washing
ATV won’t jumpstart
Start A Flooded 4 Stroke Dirt Bike (Mechanics hack) – ATVFixed.com
Flooding the engine is easy to do. Sure it’s a pain, but it’s an easy problem to solve, and before long, you’ll have her humming.
To fix a flooded bike, follow these five steps:
- Allow bike sit for ten minutes
- Choke off
- Ignition on
- Throttle held wide open
- Crank the engine
By the end of this post, you’ll learn two ways to fix your flooded bike. You’ll know why it happens and how you can prevent it from happening.
Page Contents
- What Is Flooding
- How To Dry The Cylinder Quickly
- Plug Removal & Crank Method
- Step 1
- Step 2
- Step 3
- Step 4
- Step 5
- Why Dirt Bike Engine Floods
- How To Prevent Flooding
What Is Flooding
When fuel enters the combustion chamber and for various reasons doesn’t ignite, the result is a nonstarting engine, and this condition is known as flooding.
The fuel, instead of combusting, saturates the cylinder and soaks the plug-in gas. The plug, being an electrical component, struggles to operate when soaked in fluid. The situation is quickly compounded by continuous attempts to start the engine.
Symptoms of flooding include:
- Non starting
- Strong smell of raw gas
- Gas in the air box
- Gas leaking from the carburetor
- Gas leaking from the exhaust
- Black smoke on start-up
In very severe cases of flooding, the cylinder may fill with gas, causing the piston to lock inside the cylinder. It’s a condition known as hydro locking. Symptoms of hydro locking include a kick start that won’t move, or if when cranked by battery power, the engine won’t start it just clicks.
How To Dry The Cylinder Quickly
The easy way to dry out a bike is first to allow the fuel time to evaporate. Ideally, you could leave the bike sitting for an hour, and the problem would mostly be repaired.
For most, this isn’t a real option. You want action more immediately. That said, letting the bike sit for even just 10 minutes will help start the motor.
- Allow some time for evaporation
- Turn choke off – Choke adds more gas for cold starts, but we have plenty of gas already. Some bikes may have Auto choke. If that’s the case, you can’t turn it off, instead jump to the plug removal & crank method.
- Turn ignition “On” Kill start to “Run” as we’re expecting the engine to start.
- Open the throttle fully, but slowly and hold it wide open. This increases airflow through the engine and helps evaporate the raw gas. Removing the air filter helps to improve airflow even more.
- Hit the start button, or kickstart, if not equiped with starter and battery.
Holding the throttle open but without twisting it on and off, doing so activates the pump and that adds unwanted extra gas. The engine won’t fire immediately but will after a few cranks.
If it doesn’t catch and run, go ahead and jump to the next method, removing the plug.
Plug Removal & Crank Method
This method is reserved for those that need immediate action, or the previous method didn’t work. This is simple and is guaranteed to dry out the cylinder. It’s more work than the previous method, but not much.
You’ll need a plug wrench and a shop towel.
Step 1
Go ahead and remove the plug wire and the plug. You’ll need to refit the spark plug and ground it away from the cylinder plug hole. If you don’t ground the plug in this way you risk damaging the coil. Problem is, grounding the plug causes it to fire, and as you know spark and raw gas aren’t a good mix outside the engine.
I ground the plug as far from the cylinder as possible and I place a shop towel over the plughole to catch the raw gas.
IMPORTANT TO GET THIS CORRECT. SPARK AND GAS COULD IGNITE, CAUSING DAMAGE AND INJURY.
As an alternative, unplug the primary coil wires if easily located.
Step 2
Remove the plug, examine, clean, and gap. The plug will likely be soaked in gas. Clean it with a shop towel and wire brush.
Check the plug gap as you have it out. It’s a simple process of measuring the plug electrode gap with the gauge and adjusting it with pliers if needed. An average gap spec is about .028 – .032 in (.7 – .8 mm).
Step 3
Crank over the engine, with the plug removed. This should be done in a well-ventilated area as raw gas will spray into the atmosphere from the plughole, cover the hole as said with a shop rag.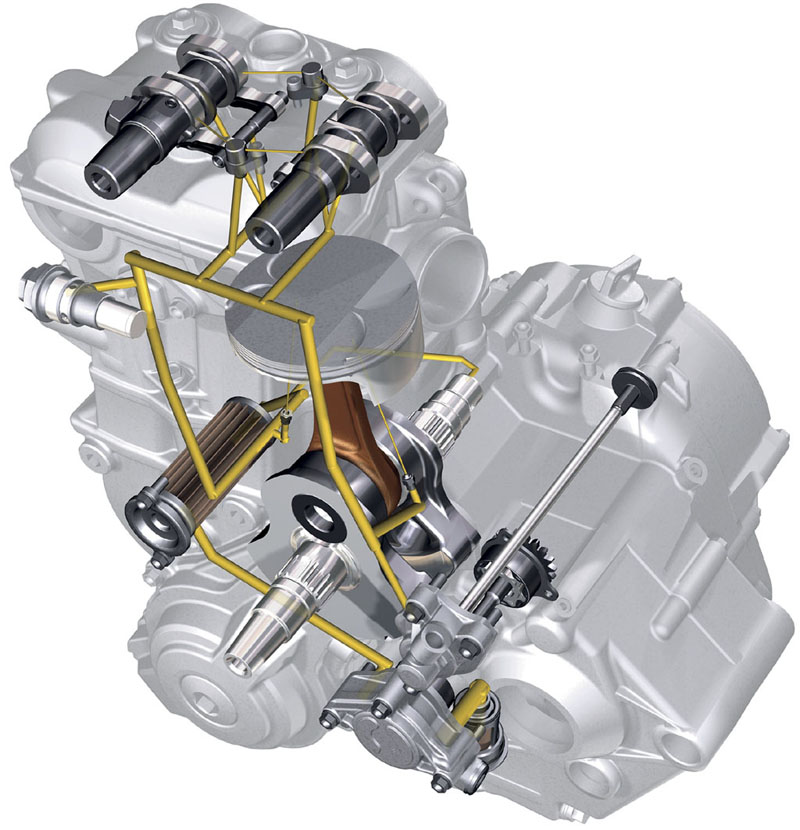 Be sure to locate the covered plug wire as much as possible, away from the plughole.
8 to 10 full cranks should do the job.
Step 4
Refit your cleaned and gaped plug or fit a new one. Tightening an old plug (washered) – tighten 1/4 turn after it seats.
New plug (washered) – tighten 1/2 turn after it seats.
Step 5
Plug wire on, crank over the motor without choke first. If it fails to start, apply 1/2 choke and try again. If the bike fails to start, you may have an ignition system fault, and the flooding is merely a symptom.
Why Dirt Bike Engine Floods
The reasons engine floods are wide and varied from operator error to mechanical. In this section, we’ll try and list all the most common ones.
- Operator error – applying choke when the engine is hot
- Laying the bike on its side – may flood the engine
- Water-soaked electrics – storing bikes outside can cause flooding indirectly
- Dirty air filter – chokes off air and floods engine with gas
- Bad gas – old gas won’t ignite and instead floods the plug
- Bad plug – a dirty or poorly gaped plug will struggle to ignite the gas
- Engine modifications – changes to how the engine breaths
- Carburetor faulty/too rich – carb supplying too much gas
- Carburetor float bowl sticking – floods engine with gas
- Carburetor float needle leaks – floods engine with gas
- Faulty petcock – floods engine with gas
- Bad coil – prevents good spark
- Bad CDI box – causes misfiring and flooding
- Bad CKP sensor – causes misfiring
- Bad stator – causes misfiring
How To Prevent Flooding
You already know flooding is very often caused by an underlying problem. The flooding may be a symptom, not the root cause. The best way to prevent flooding is good maintenance and proper storage preparation. How your bike is stored will have the greatest effect on performance and reliability. And both directly affect the chances of flooding.
Storing your dirt bike
Bikes, while weatherproof, aren’t impervious to moisture, and moisture is the killer of all machinery. Maybe your bike won the lottery and lives in a dry state. But for most, we have to deal with rain, cold, and moisture. A bike should be stored indoors if possible and always covered using a breathable cover. Plastic will only serve to lock moisture in.
The bike should be stored dry and clean with a full tank of treated gas. Gas goes stale and needs to be treated to keep it fresh. A gas stabilizer will help gas keep its Zing for up to one year.
Spraying the electrics with WD40 will help keep moisture out. In fact, coat the whole bike (brakes excluded) if you’re storing long term. You’ll find gas stabilizer here on the Dirt bike parts page.
Here’s a list of the most important storage practices:
- Use a gas stabilizer in the fuel
- Fill as tank
- Wash, dry and Teflon coat the bike
- Remove the chain and bag it with oil
- Turn of Petcock
- Seal exhaust
- Store indoors and under breathable storage cover
For those that truly love their bike, there are a few extra steps to complete the storage preparation like a pro and you can check them out here “Dirt bike not starting after winter”
A full service at the end of every season and a good routine maintenance schedule will all but eliminate flooding:
- Oil and filter (screen clean) every 300 miles or 3 months
- Air filter clean and oil every 100 miles or 1 month
- Carburetor bowl drained monthly and filter yearly
- Carburetor mix adjustments as needed
- Plug clean & gap every 3 months and changed yearly
- Spark arrestor cleaned twice a year
- Coolant strength checked yearly and changed every 2 years
- Valve lash checked and adjusted yearly
You may also find the following posts useful:
How often should I start a motorcycle?
Dirt bike parts
Bike won’t start, no click?
Can I ride with choke on?
How to quickly dry flooded spark plugs without unscrewing them - Life hack
Photos from open sources
Various miracles can happen to a car in severe frosts. That expensive "washer" freezes, then the battery does not pull, then the solarium turns into jelly or the pressure in the tires drops. And it happens that the starter turns, but the engine does not start. As a result - flooded candles. And it takes a lot of precious time to dry them. However, there are ways to do everything faster and without special tools.
Efim Rozkin
During a cold start, especially in severe frosts, the car's electronics try to help the engine by enriching the air-fuel mixture due to the greater supply of fuel to the combustion chamber. And if new engines with good compression, new spark plugs and a battery can easily cope with the task with such stimulation, then used cars may experience some difficulties.
The reason for flooding the candles is simple - fuel enters the combustion chamber, but is not ignited. Candles drown in gasoline, after which it is, alas, impossible to start the engine. However, this is just a consequence. And problems can lie not only in the engine itself. A spark does not occur due to a battery that is more than half discharged - its power is simply not enough for anything. If the candles have not been changed for a long time, then this can also be the reason when the fuel does not ignite - they could have worked out the time allotted to them, or they were damaged during replacement (for example, they were pulled during installation). The problem can also be hidden in faulty high-voltage wires. But the result is the same - after several unsuccessful attempts to start, you can not even try further - the candles are guaranteed to be flooded.
As soon as it becomes clear to the driver that he has a problem, he grabs his head and the candle wrench, and reaches under the hood to unscrew the candles and dry them using a rag, lighter or other improvised means. But what if the car did not have the right tool?
Photo from public sources
There are several ways to solve the problem. The first, perhaps, is suitable for most cars, where an injector is responsible for supplying fuel to the combustion chamber. The method allows you to dry, or, in other words, blow out the cylinders. To do this, before starting the engine, it is necessary to drown the gas pedal to the floor and hold it. In this case, by turning the ignition key, you should “turn” the starter. At this moment, the electronic brain of the engine activates the purge, eliminating the supply of fuel to the combustion chamber. The whole process will take no more than 10 seconds, after which you need to release the gas pedal - the fuel supply will resume and the engine will come to life.
In order to start the engine successfully in cold weather in domestic cars, a Plasmer was given to help the driver. This is a mode in the ignition system, in which a pulse is applied to the candles for 30-90 seconds, due to which they warm up and condensate is removed.
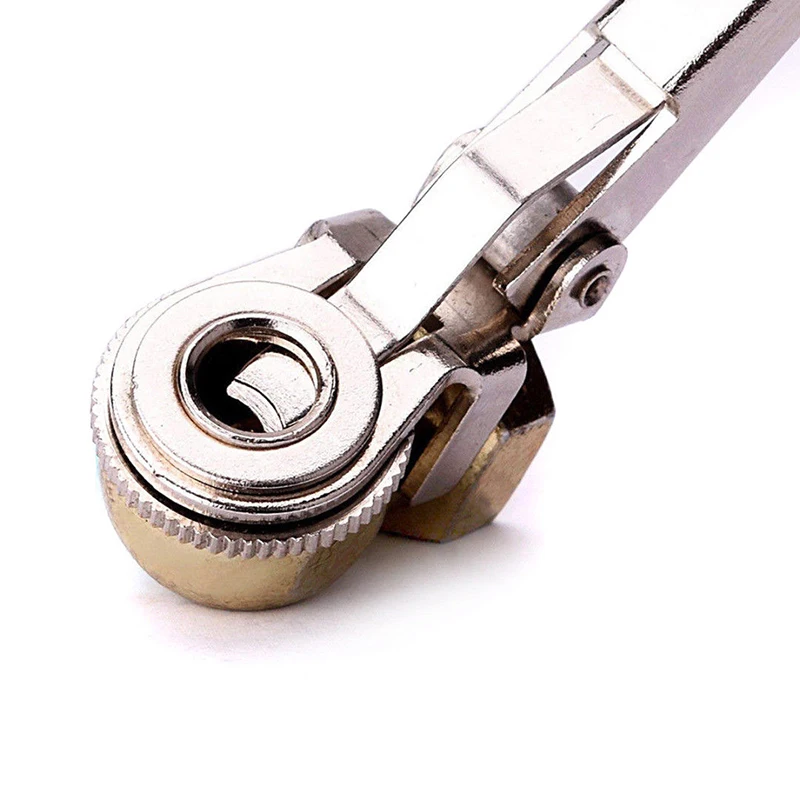
However, both methods do not eliminate the need to carry a candle key with you. When all else fails, it is the ring tool that can become the very golden key, thanks to which your car engine will breathe with all its cylinders.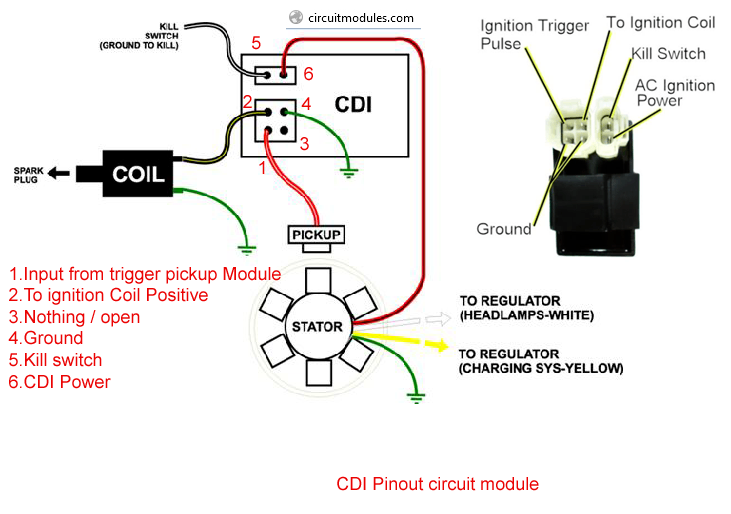
The rebellious is punished not only by the ruble of
13027
Weightless is punished not only by ruble
,000 13027 000
Yandex.Zen Maintenance, car service, spare parts, components, accessories, maintenance, life hack
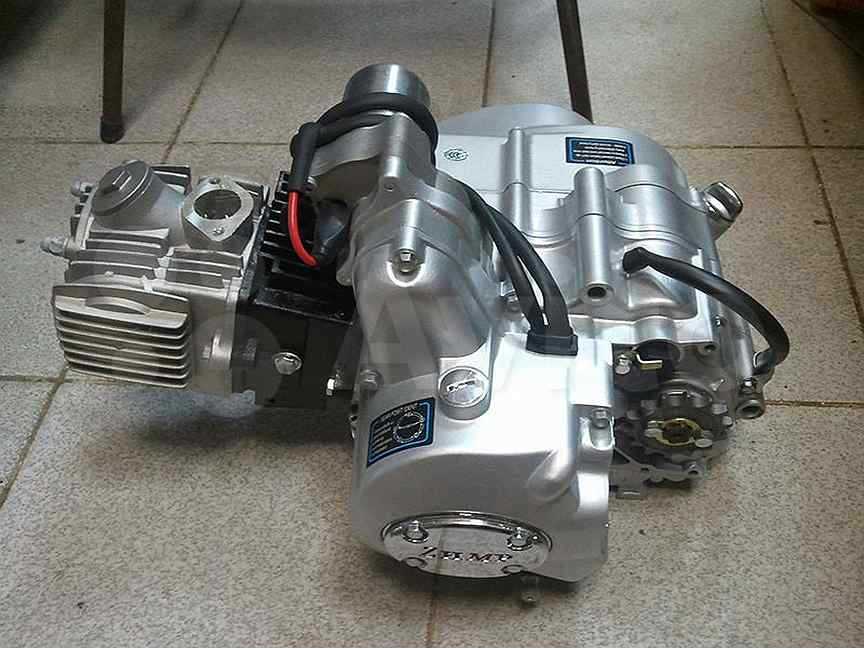
What to do if the ATV does not start
You left your ATV in the garage on a trip or out of town, and when you return a few weeks later, you can no longer start it. Familiar situation? Even after adding a spark and fresh fuel, the engine only stops for two to three seconds. What could be the effect? After all, before the ATV, he had no problems: it was enough to pass a periodic thorough inspection.
Don't panic: in this case, you can say with almost 100% certainty that the problem is only in gasoline, and not in ATVs. Like any hydrocarbon gas, petrol mixture is volatile and should not be relied upon for a long time.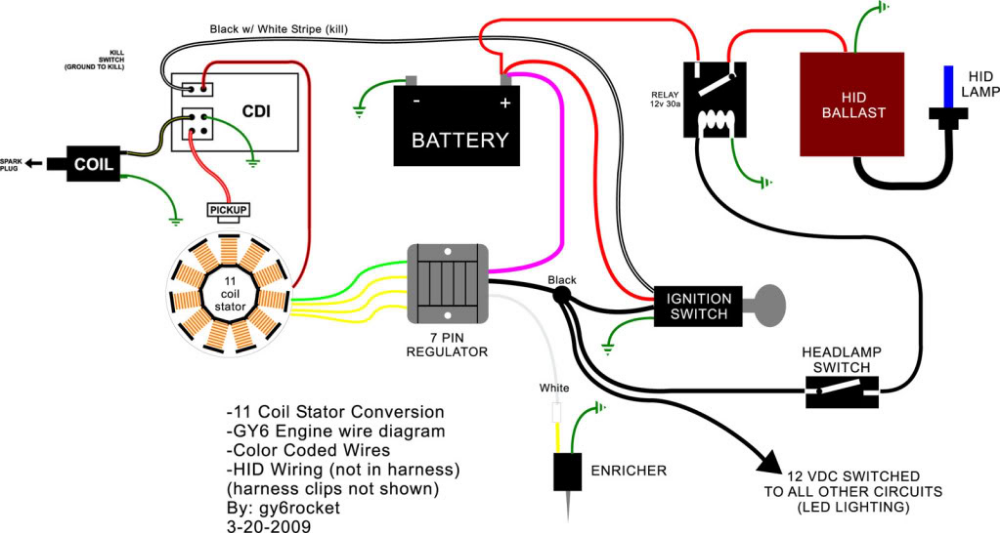 Some of its fractions evaporate, and the remaining gasoline liquid loses its ability to ignite and is no longer a fuel mixture. So your ATV didn't want to ride after a long break.
Causes of ATV failure and troubleshooting
No response starter after turning the key
- Shut-off valve closed: open it or set it to the “reserve” position. There is old and/or contaminated fuel in the tank: empty the float chambers (small screw at their bottom), check if necessary if they are dirty and top up with new fuel.
- The fuel vacuum valve does not open: remove the hose from it and crank the engine. If fuel is not flowing, the vacuum diaphragm in the cock or the suction vacuum line is probably to blame. Turn the valve to the PRI or Reserve position.
- Clogged pipe or fuel cock filter: Remove the pipe from the cock and see if fuel flows when you open it. If so, the secondary fuel filter is clogged and needs to be replaced.
 If not, remove and clean the faucet.
 - A flooded engine: remove the spark plugs and dry them, turn off the fuel cock, turn off the lights if you can. Fully turn the throttle and engage the starter - the spark plugs should be on the wires and on the engine. Don't touch the candles. Put them on and start the engine.
Why won't
start ATV - Air filter clogged: clean or replace.
- No spark at spark plugs: install new spark plugs, check sockets, wires and ignition coils.
- Fault in the ignition system or engine electrical equipment: check the connection and charge of the battery. Try to see if the bike starts on a different battery. Check the ignition system: the contacts are dry, the cables are in order, the ground is secure.
- Compression ratio too low: Fault in loose spark plugs, worn piston rings, worn valve seats, or damaged cylinder head gasket. Check the tightness of the spark plugs and, if necessary, the engine compression.
 If it's still too low, check the heads, pistons and cylinders.
ATV does not start
: Electric starter does not turn
- Engine off - red light on the right side of the steering wheel.
- Battery voltage is too low, i.e. characteristic chirping of the starter relay is heard: charge or replace the battery.
- Dirty contacts in the ignition switch or starter button: turn the switch out and clean the contacts, use a special spray for electrical installations.
- Main fuse or ignition relay blown: check and replace if necessary.
- Starter failure, e.g. due to burnt stator or armature coils: contact a qualified technician.
Why won't start
ATV: Starter turns engine slowly
- Battery is low or cables are not connected correctly: charge or replace battery, clean clips and terminals, check cable connection.
- The oil is too thick: you bought an ATV in the fall and did not have time to change the oil? It's time for this.

ATV won't start
: Starter works but engine is quiet removing it from the motorcycle).
ATV stalls : Starter relay clicks but engine does not start
Loose starter cord or short circuit due to broken wire: check connection, remove rust, check current with multimeter.
ATV
stalls : Engine starts hard, chokes, runs erratically and stalls frequently
- Dirty fuel, rust in the tank, dirt in the fuel lines, in the carburetor: Drain gasoline, clean tank and carburetor, fill with a fresh bottle.
- Idle speed too low: increase it with the speed control knob.
- Clogged fuel tank vent: Clean vent (plug) or vent tube at engine outlet.
- Stuck line or choke lever causing engine to run too rich: Remove and clean this item.
- The engine is sucking left air due to damage to the carburetor nozzles: tighten the rubber nozzles and check for cracks.
- Battery too weak: charge it, check all connections, remove tarnished cables, replace spark plugs if necessary, check ignition pipes or cables.
- Incorrect electrode gap or ground connection with spark plug: check the type of plugs and their condition, set the distance between the electrodes, replace the spark plugs if necessary.
- Open/broken wire or connector of ignition coil and spark plug tubes, incorrectly installed tube: Pull or unscrew the ignition wire, cut off a small piece and reinstall/screw. Make sure the tube is not rusted and the hoses are properly installed. The engine starts reluctantly, at low speeds there is little power.
- Wrong valve clearance, worn valve levers; Broken valve springs or worn camshafts: check valve clearances and adjust them correctly, evaluate the wear condition of valve clearance adjustment bolts, valve springs and camshafts.
- Burnt valve seats, worn valve guides, stuck valve: check compression.

- Damaged cylinder head gasket, bent or cracked cylinder head: Check cylinder head for oil leaks, note the color of the exhaust gases. On a liquid-cooled engine, white indicates damage to the cylinder head gasket.
The engine is weak and consumes a lot of gasoline
- Air filter dirty, air intake system clogged: clean / replace the filter. Make sure that all air intake holes are not blocked and that air flows freely into the engine.
- Ignition or electrical system failure: check that the battery is charged and properly connected, the ignition contacts are dry and the wiring is in order.
- The voltage in the ignition system is too low: charge the battery, check the condition of all connections, remove rust.
- Faulty candles: check the condition of the candles; Check the gap between the electrodes, adjust if necessary, screw in new spark plugs.
Engine idling rough
- Valve clearance too large or too small: Set valve clearance correctly according to motorcycle owner's manual.
- Incorrect mixture ignition timing: adjust.
- Spark plug sockets or wires not touching the spark plugs properly: pull/unscrew the spark plug wires, cut them piece by piece and reinstall/screw.
- Ignition module failure: you will find if you try how the equipment talks to a properly working module from another motorcycle of the same type; make sure the ground connection is correct.
- Out-of-timing carburettors: Adjust the carburettors with a vacuum gauge.
- Incorrect idle adjustment: adjust.
Engine not running, exhaust gases black
- Mixture too rich, carburetor out of adjustment, carburetor nozzles worn out and fuel level in float chamber too high: install new nozzles, install float, adjust carburetor.
Engine not running, exhaust gases blue
- Too high oil level causes oil to enter the combustion chamber, the crankcase ventilation system transfers oil drops to the air filter container, from where it is sucked back into the engine: check the oil level with a dipstick or eyelet, clean air filter.

- Worn cylinders and/or pistons, worn or broken piston rings: measure compression ratio; if it is too low, remove the pistons and piston rings and check the installation dimensions, replace, repair the engine.
- Worn valve guides or stems: disassemble cylinder heads, check valve and guide mounting dimensions; replace if necessary. Insert new valve stem seals.
Engine not running and overheating
- The mixture is too lean due to clogged carburetor nozzles: drain all gasoline from the tank, disassemble and clean the carburetor, fill with fresh gasoline.
- Mixture too lean due to improperly adjusted carburetors or injectors: adjust carburetors.
- Carburetor catching left air: Carburetor not installed/tightened, intake manifolds cracked or porous.
- Pinched, seized or kinked fuel line: check its condition along its entire length.
- Oil level too low: add oil as needed.
- Oil pump failure or oil circuit clogged: stop the engine immediately and contact a workshop.