Be Back On the Road in Seconds with Fix-A-Flat® Bikes Only
San Luis Obispo, CA (January 2013)—Hardcore cyclists and leisure riders alike have all had it happen to them: the dreaded flat tire. The pros will fix it on the spot with a cumbersome kit while the rest of us walk our bikes home. There is a much faster and easier solution for everybody though: Fix-A-Flat® Bikes Only, from the leader in quality, convenient DIY tire repair.
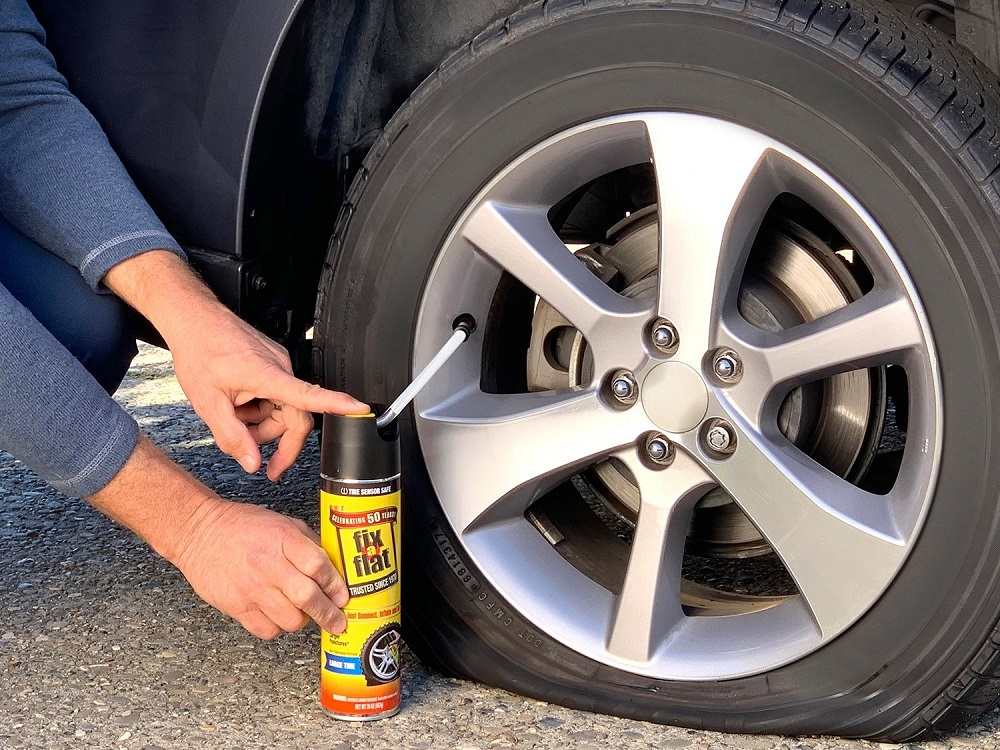
Fix-A-Flat Bikes Only instantly seals punctures in bicycle tires with tubes and inflates in seconds allowing you to finish your ride without having to change the tube. No tire levers or patches required. Inflates a 26 inch bicycle tire to 36 psi in seconds.
“Cyclists with any level of experience can now be on their way quickly and easily,” said Patrick Mallon, Brand Marketing Director for Fix-A-Flat®. “Gone are the days of having to replace a tube on the fly or trying your hand at a repair kit.”
Fix-A-Flat® Bikes Only comes in a convenient 6 oz. can for easy onboard storage and retails for $9.99 at K-Mart. For more information, please visit www.fixaflat.com/products/aerosol/fix-a-flat-bike/
Product Features
Since 1970, Fix-A-Flat® has been the #1 brand in tire repair in the United States. Their aerosol tire inflator products have helped millions of people safely repair flat tires and get back the road for more than 40 years. Their new upcoming product line, Fix-A-Flat® Ultimate Repair kits, will provide consumers with state of the art technology in flat tire repair.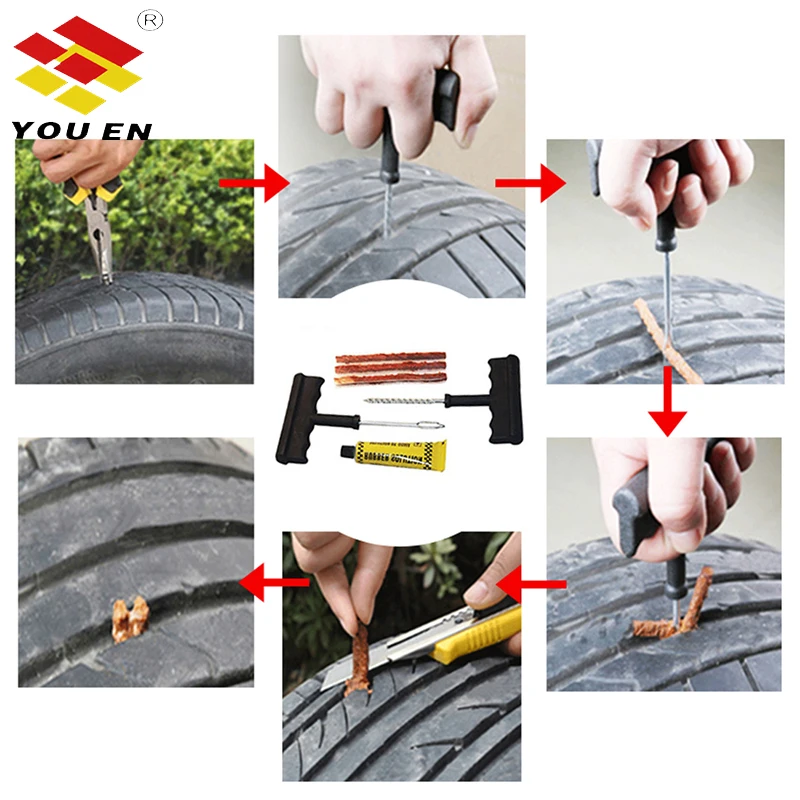
For more information, please visit www.fixaflat.com.
Car Coach Reports combines leading industry expertise with the best in new car tech, care care tips, driving safety, car news, business, lifestyle, test drives and car reviews. Our Car Coach reporters travel around the globe to report on the very latest issues surrounding cars, technology and the automotive industry. Our style is fresh and engaging with the everyday driver in mind.
Having a flat tire is no fun, especially when it happens while you’re out riding your bike. Hopefully, you’ve already brought a patch kit with you to fix your tire, but if not, here are some things you can do. After reading this article, you’ll be able to get back on the road in no time! And once you’ve done that, you can practice using a patch kit to repair your bike’s tube.
If you’re a cyclist, you’re probably wondering how to repair a flat tire on your bicycle. While you’re riding, you can try to find the leak yourself by looking through the tire‘s casing. Using your fingertip, you can feel for foreign objects and remove them. Make sure you inspect the damaged area and remove any objects that might be in the way. By doing so, you can avoid getting a punctured finger or tetanus shot.
The first thing you need to do is remove the old tube from the flat tire. While you’re at it, make sure you clean and dry the cut area. Then, use the patch kit to patch the cut. Once you’ve done this, you can ride your bike as usual. You can then attach the new tube and try the same process again. If you have any problems, don’t forget to clean the cut area first!
If you plan to fix a flat tire on the road, keep a repair kit with basic supplies like a spare tube and a patch kit. This kit should also include a lightweight air pump and tire levers, which are sometimes called “tread irons” because they are made specifically for bicycle tires. It’s a good idea to have a spare tube on hand as well, though it’s not a necessity.
Changing a flat tire on bike tires can be a challenge, but it’s not as hard as it sounds. With some preparation and tools, changing a tire on a bike is a breeze. The skills learned from a flat tire will serve you well no matter what terrain you’re riding on.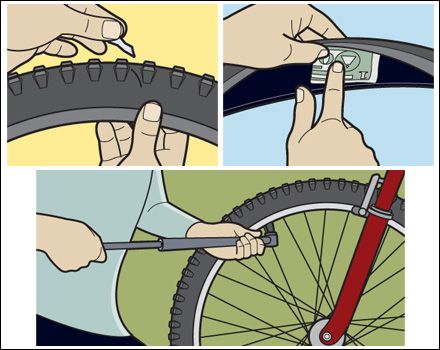 And if you’re a beginner, it’s a good idea to practice on a bike before an emergency occurs.
First, remove the tube from the tire. It’s important to push the valve stem upward and away from the rim. If the valve stem is leaking slowly, a valve cap can help keep the air inside. Once you’ve done that, you’ll be ready to put on the new tire. You’re back on the road in no time. The first step to tire repair is to check the valve stem to make sure that it’s in the right position.
Bringing a patch kit for fixing bike tires is essential if you plan to bike around town or use your bicycle for errands. While it won’t fix a flat completely, it can offer you temporary relief. A good kit should include different size patches, a tube of glue, and sandpaper. It’s important to tighten all bike nuts according to manufacturer specifications.
If your patch kit does not include good-quality tape, you can use a piece of tape to secure the patch to your tire.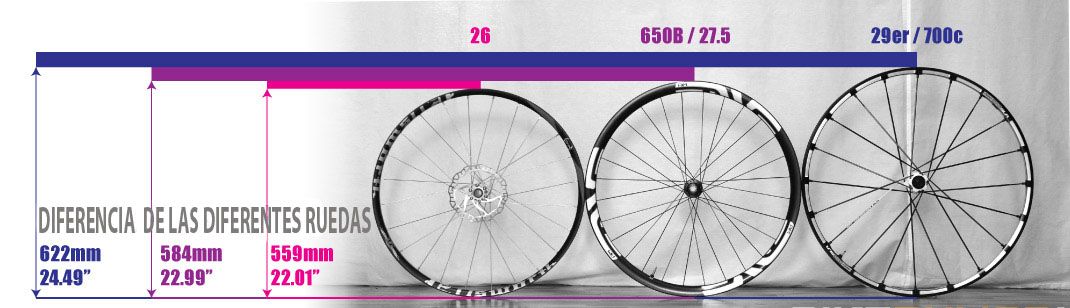 It is essential to apply the patch evenly, as any wrinkles will allow air to escape. Wait about 60 seconds for the patch to stick to the tire. Once applied, it should remain secure. You can reuse the patch for several years. If you’re not sure if it’s the right size, you can cut the old tube into a bungee cord for easy application.
Before applying patch glue, make sure the puncture is dry. Often, a tiny leak will only escape under water. If you’re not confident in your ability to identify the exact location of the puncture, you may need to look for a nearby ditch or water body before applying the patch. To repair a bike tire puncture, clean the puncture area and make sure it’s clean and dry.
In addition to sandpaper, a patch kit should be carried with you when using a tube. Patches can be applied to small cuts in the sidewall or tread. Patches can be applied to tire tears, but some tire tears are too severe to be fixed with a patch. If you don’t have a patch kit, you can convert your tubed bike tire into a tubeless tire.
You should bring a patch kit to fix a bike tire in case you have to remove the wheel. If the tire is tubeless, you can skip this step if the puncture isn’t serious. Usually, you can repair a tire without removing the wheel. If the puncture is extensive, however, you might need to remove the wheel. If you don’t want to remove the wheel, simply turn it upside down.
Changing a flat tire on a bike tire requires basic knowledge of how bicycles work. A flat tire can result from a variety of factors, including a nail, thorn, chuck-hole, railroad track, or glass. While most tire repairs can be accomplished with simple hand tools, some flats are too severe to patch. Before trying to fix a flat tire, make sure you’ve located the source of the leak.
Start by placing the flat tire on the rear wheel. Next, position your finger around the outer casing of the tire to detect any sharp debris.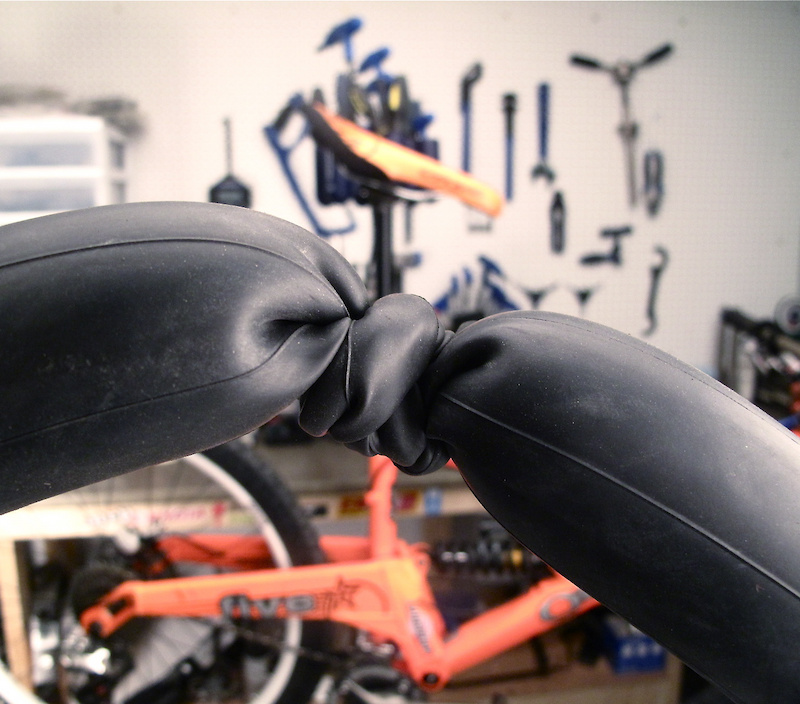 Never try to force the wheel into the frame by grabbing it by the edge. A sharp object can puncture the tire‘s seven layers and cause it to flatten again. To avoid this, purchase a new tube. If the wheel will not fit, try again later.
Once you’ve located the location of the flat tire, remove the tire from the rim. Next, find the tire‘s valve stem. Slide the two levers into the hole. You’ll need to pry the tire off the rim with some force. You’ll need a tool to remove the tire, so that the valve stem can’t get stuck in it. Make sure the levers are straight so they won’t pinch the tube.
Depending on the type of bicycle tire, it may be necessary to pump or blow air in the tire. The tire may be soft in the spring, but a slow leak may mean it’s impossible to seat it evenly on the rim. In addition, the inner tube may be leaking slowly, making it difficult to get the tire to seat evenly on the rims. When this happens, the bicycle should not be left lying on a flat tire for long.
If you cannot identify the source of the leak, you can try to reinflate the tire and check it for a hole.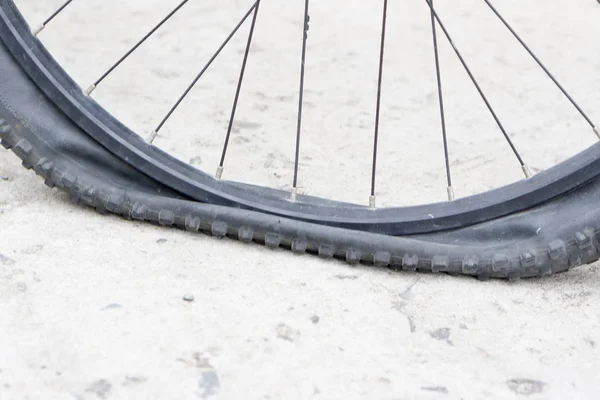 If the hole is not visible, you can use a pointed tool to push out an object lodged in the tire. If you’re unable to find the culprit, you can attempt to repair the tube by using a patch kit. In some cases, you’ll need a new inner tube.
The best way to deal with a flat tire is to have a spare inner tube on hand. Although replacing a flat tire is easier, patching a tube can be a good idea as well. While it is not ideal to change a tube on the road, you can easily patch your bike tire at home. You can also add the patched tube to your spare kit. If you use vulcanizing glue, the patched tube will perform just like a new tube. You should learn more about the importance of vulcanizing materials.
Before patching a bike tire, you should clean the punctured area. Some punctures are small and can easily go undetected. Mark the area with a silver sharpie or a ballpoint pen. Chalk is easier to see on black rubber than blue. Then, take your patch and stick it over the puncture.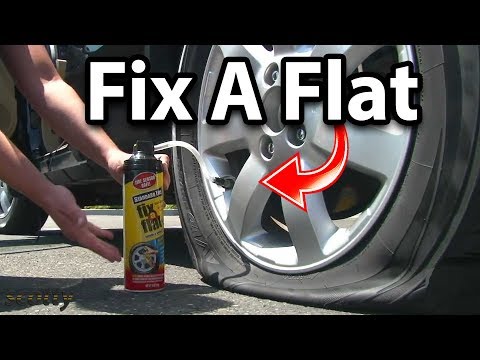 Do this until the glue has dried.
Before applying the patch, you should carefully sand the area around the hole. You should avoid applying heavy pressure to the patch because it may cause it to crumple. Use wet/dry paper for this, and avoid coarse paper because it can scratch the inner tube. If the patch isn’t glued properly, it may come off. In addition, you should also use a sanding block or other piece of sandpaper to clean the area.
Using a patch kit to repair shattered bike tires is much easier than putting it on your bike. It includes different-sized patches, a small sandpaper, and a tube of vulcanizing agent. Vulcanizing agent is an elastic compound that bonds the patch to the tire in a reliable manner. It is recommended to use vulcanizing agent instead of normal glue.
A decent patch will fuse with the inner tube. This will ensure that the patch and the tube are permanently fused. Other patches may be faster, but they won’t be as durable. Once applied, vulcanizing patch kits will guarantee that your tire will last just as long as a tube that is unpatched.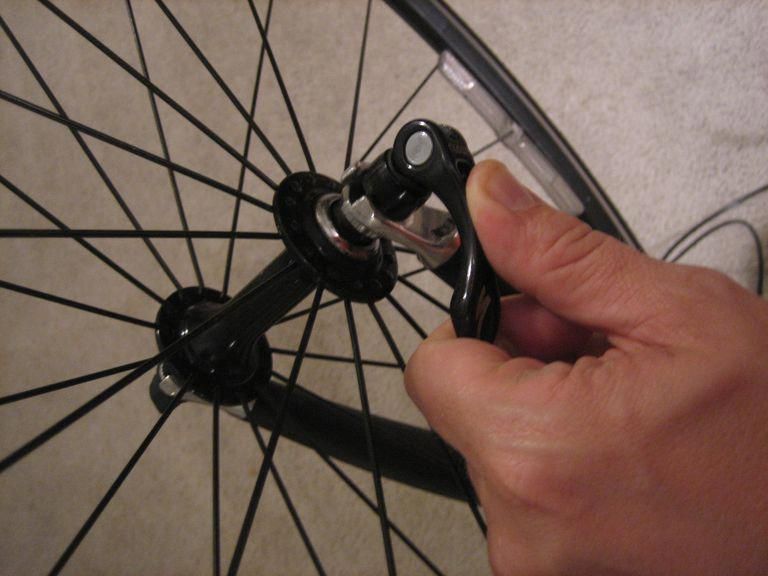 So, if you’re ever in the same situation, a patch kit will be your best option.
For All Motorbike Tires
Click Here For Tire Prices
The average cyclist doesn't need to have a huge amount of dedicated cycling tools, as complex bike repairs are usually done in the workshop. But most adjustments and minor repairs, such as changing and inflating tires, adjusting brakes and gears, changing saddle position and angle, adjusting handlebars, and changing chain, sprockets and cables, are easily done with standard tools and just a few specialized tools. for bicycle.
You can go to an ordinary hardware store and buy wrenches, hex keys and other tools, but there is a principle: "buying a quality item, you do not have to pay twice", and this also applies to bicycle tools.
Good specialized bike tools are easier to work with, last longer and are less likely to damage bike parts.
Contains all the most necessary screwdrivers and wrenches.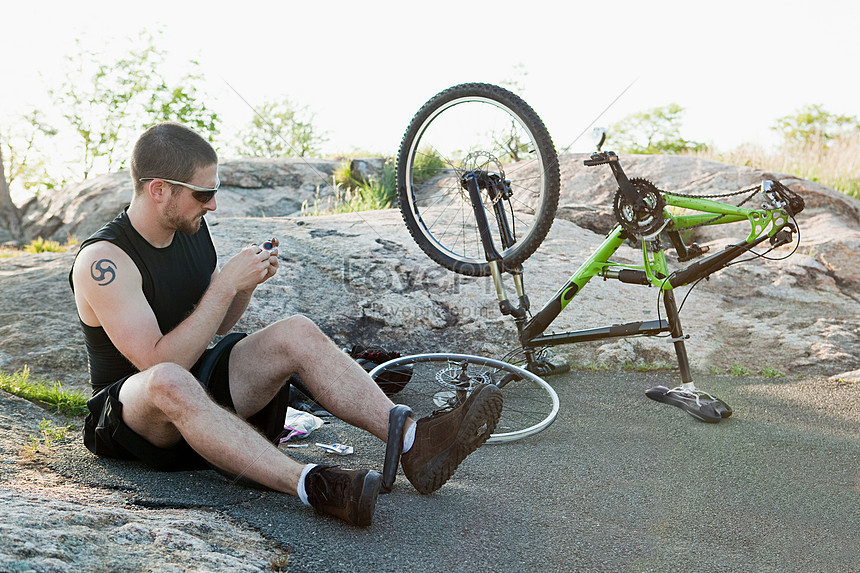 Perhaps this is the first thing that any cyclist acquires to set up his bike. There is a wide choice: from the simplest kits with a minimum set of screwdrivers and keys BBB PrimeFold S to universal ones, equipped even with a chain squeezer - BBB PrimeFold XL.
Which one to choose? To answer this question, you need to decide where and what kind of repairs you plan to make. First of all, the multitool is convenient on the road - it is compact, all the tools are at hand, they will not crumble out of the bag and will not be lost. And when you pedal, the less you carry, the faster you roll. It makes no sense to be weighed down by extra grams and kilograms. But how often, for example, might you need to replace a chain somewhere along the road outside your home or workshop, and is it worth carrying a heavier set for that? Athletes who regularly travel to various competitions and training, who service their bike in the field, will need the most versatile multitool. But if you can only make minor adjustments on your own - adjust gears, turn the steering wheel when transporting the bike - then a minimal set is enough - BBB MiniFold S or BBB MaxiFold M, which also includes a knife and a pry bar for disassembling the wheels, which may be required to remove the tire when piercing the camera.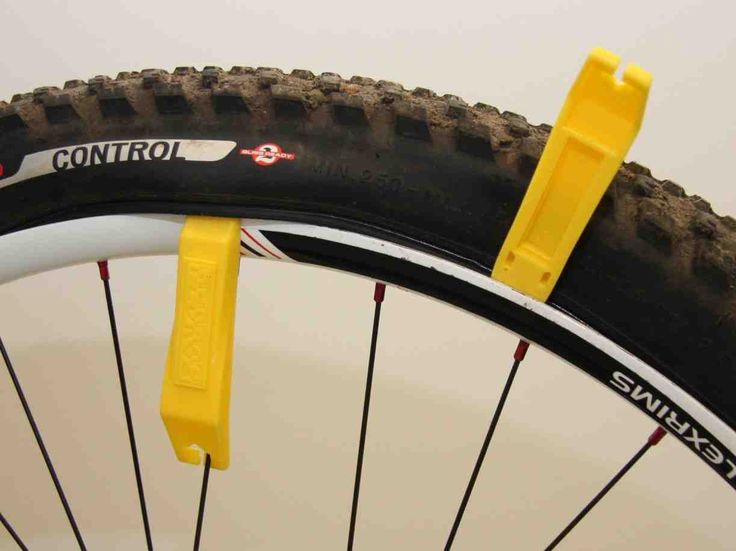
Recommended models:
Multitool BBB primefold s blue/silver
2490
Buy
Multitool BBB maxifold l black/silver
3 190
Buy
Multitool BBB maxifold s black/silver
2090
Multitool BBB primefold xl blue/silver
3 790
Buy
Multitool BBB microfold s
1090
Buy
Multitool BBB primefold l blue/silver
3 490
Buy
Multitool BBB primefold m blue/silver
3090
Buy
Multitool BBB torxfold black/silver
2090
We recommend useful articles on cycling on the Kant website:
- Children and cycling: when to start, with which bikes, why is it useful for children to ride bikes?
- How to choose the right child seat? Models for traveling with parents
- Comfort whatever the conditions.
cycling clothingReview of BBB
- 2021 Alpina Cycling Helmets & Goggles Collection Review
- Oakley® Sunglasses. Brand history and 2021 collection review
- Classic cycling or bikepacking? How to choose the right
- How to choose the right bike for your child
- Planning to buy a bike backpack? Review of the best models in Kant
- How to choose the right bicycle accessories for the city?
Don't skimp on hex keys, they are the most commonly used tool. The multitool is compact and ideal as a road repair kit, but with the help of special professional wrenches it is more convenient to work, they can tighten the bolts more tightly. Therefore, at home it is desirable to have a set of high-quality ball-head wrenches, which have a narrower neck in the area of the ball-shaped tip. They can be manipulated at various angles - up to 30 degrees, which makes it possible to tighten screws in hard-to-reach places.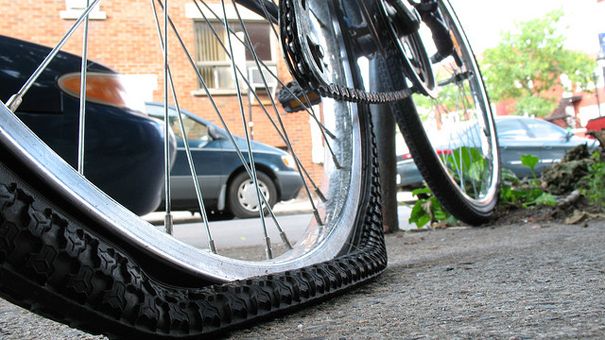 The BBB Hex T wrench is easy to operate with one hand without undue bending of the wrist. The design allows you not to rearrange the key every time after a full turn, which you have to do when working with a classic L-shaped hexagon, in which the long power end at some point begins to rest against the details of the bike. Of course, one hex is not enough, as some bike mounts can use nuts of different diameters, including Torx-type hex slots, which have recently been increasingly used on fasteners. A set of BBB Hex T hexagons in sizes 3, 4, 6 and 8 mm, and torxes - T25 and T30 will allow you to unscrew 90% bicycle parts.
Bicycle key BBB hex t 3mm black/silver
790
Buy
Bicycle key BBB hex t 4mm black/silver
890
Buy
Bicycle key BBB hex t 6mm black/silver
990
Buy
Bicycle key BBB hex t 8mm black/silver
1290
Buy
Bicycle key BBB torx-t t25 black/silver
1090
Bicycle key BBB torx-t t30 black/silver
990
Buy
In addition to hex and torx, you will need a pair of flat and Phillips screwdrivers. Screwdrivers of different sizes are useful not only for repairing a bicycle. Dakine Torque Driver is a versatile and very convenient set with interchangeable nozzles, an indispensable thing in the household.
Another essential tool in the repair kit. They allow you to conveniently and effortlessly remove the tire from the wheel rim. Of course, this can be done with any tool at hand - a screwdriver, wrenches - at the risk of damaging the rubber or the rim. With proper skill, you can disassemble the wheel even with your bare hands, if you have strong hands. But the need to remove the tire arises quite often when you have to change the chamber in case of a puncture or change tires from summer to winter, from city slicks to mud. It is much more convenient and often safer for the wheel to do this with two plastic pry bars. Insert one under the bead of the tire, hooking it with the opposite end to the spoke, start the second disassembly 10-15 cm further from the first and start moving it along the rim until the bead is completely out.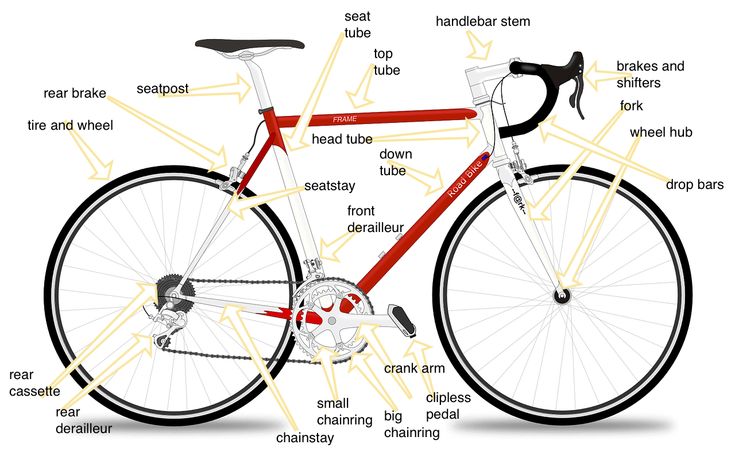
BBB EasyLift's wide range of fun colors will make this chore easier.
More cutters:
BBB easylift red/white/blue
490
Buy
BBB easylift red/white/green
490
Buy
Crowbar BBB tire levers easylift 48x 3 pcs (black-blue-red-green) black/blue/red/green
390
Buy
Crowbar Maxxis tire lever
890
Buy
Tip. To tuck the tire back into the rim, don't use spudgers, as is sometimes advised in the articles. The whole process is best done by hand, tucking the rubber into the rim with your fingers.
Otherwise, you run the risk of puncturing the new tube or touching and sliding the protective pad on the rim.
If you have a bike, you need at least one simple pump. But the ideal is to have two.
Lightweight and small hand pump to carry around. After all, if a camera is accidentally pierced along the road, it is necessary to seal it or replace it right on the spot. Otherwise, you will face the problem of bringing yourself and a bicycle home, which will become impossible to ride. You will have to look for transport, taxis, call family members, friends. Mini pumps such as the BBB NanoRoad Black are only 11cm long and weigh 75g. – super light, ideal for long journeys where every gram of weight matters. But the longer the pump, the more stroke it has, and the easier it is to inflate the tire. The 25 cm BBB WindWave hand pump is a reasonable compromise between weight, size and efficiency. It can be mounted on the bike frame and always carry with you.
Stationary floor pump. It is much harder and longer to inflate tires with a hand pump, especially small ones, so its use is justified only in the field. It is much easier to achieve the required tire pressure with a floor pump, which is desirable to have at home. BBB AirBoost with a pressure gauge will allow you to control the degree of tire inflation.
Recommended models:
Floor pump SKS air-x-press 8.0 black
3 390
Buy
Bicycle pump SKS injex t-zoom silver
3 790
Buy
Bicycle pump SKS infusion tt black
1290
Buy
Bicycle pump SKS injex lite zoom black
2490
Buy
Floor pump BBB 2020 airboost gray
4 490
Buy
Bicycle pump BBB samurai gray
4 390
Buy
Bicycle pump BBB windgun s gray
2690
Buy
Floor pump BBB floorpump airwave composite dualhead 3.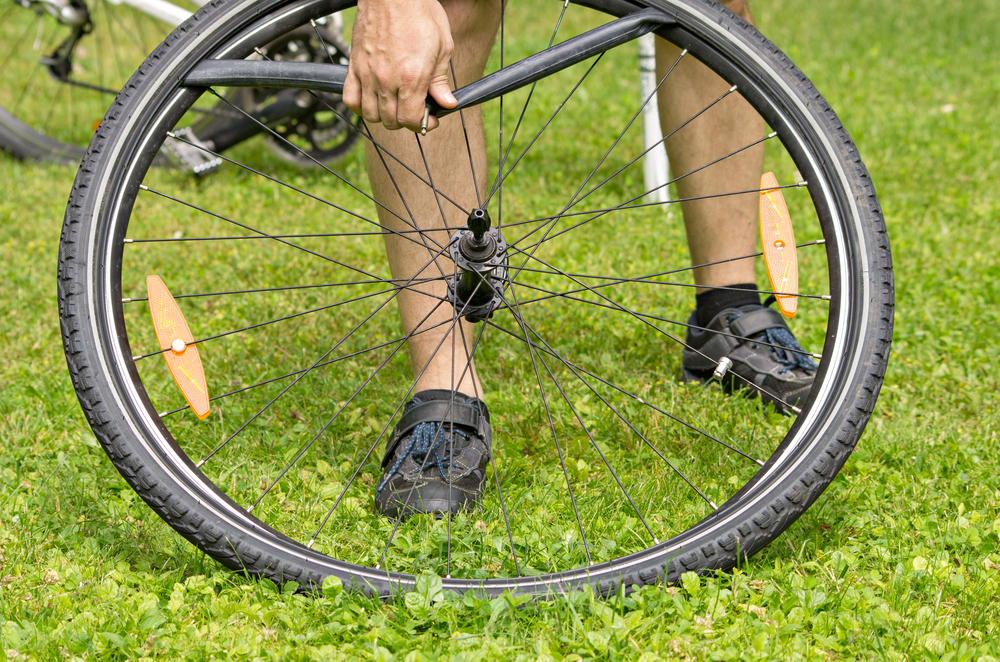 0 black
3690
Buy
All bike pumps in Kant
Generally, wrenches are not needed for general bike tuning and minor repairs. They are required for servicing bushings or steering columns. The only wrench that every cyclist should have is a “15 wrench”, that is, a 15 mm wrench for removing pedals in order to clean and lubricate them or replace them with new ones. This is a simple task that even a girl who is not very tech savvy can handle, so there is no need to call a bike master. Pedaling is also necessary when transporting a bicycle on an airplane. Even those airlines that allow you to check it in unassembled luggage require you to remove the pedals and attach them to the frame with cable ties or screw them on the other side of the cranks, with the pedal inward to the frame.
Despite the fact that there is nothing complicated in this process, it happens that the pedal jams, because dust, sand, dirt gets inside the threaded connection of the pedal axle with the connecting rod, and all this is tightly compressed with grease.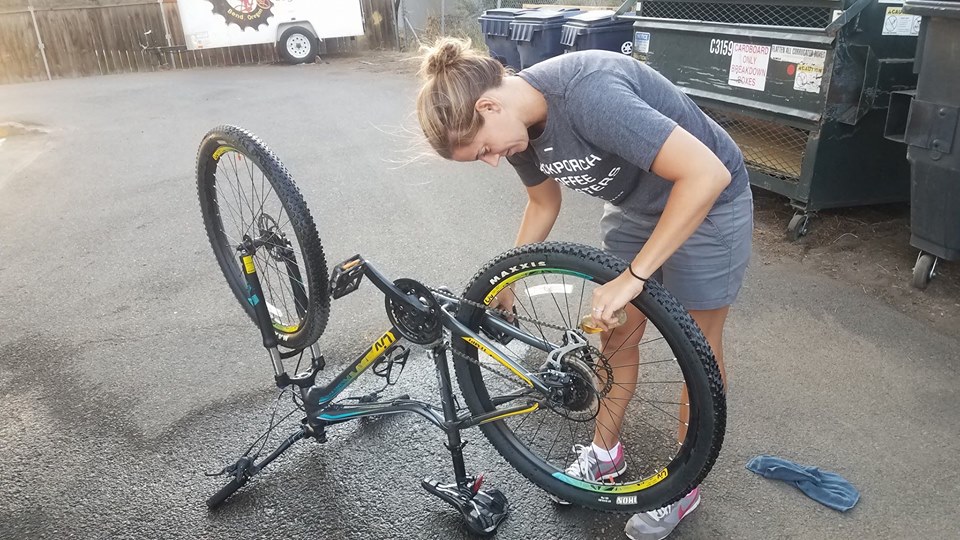 The less often the pedals are removed, the more difficult it is to unscrew them. You can use a regular 15mm wrench, bought at a hardware store, but it is more convenient to work with a special bicycle pedal wrench, such as BBB Hi-Torque L.
It has a smaller thickness of the horns, so it is easier for them to unhook the pedals from the cranks even with small gaps. The long handle (34 cm) lined with a rubber anti-slip coating provides an effective stop, due to which the force on the key is increased. Of course, any large wrench 30-40 cm long will have enough leverage to effectively force, but the tool itself will be heavy. You can use it at home, but on bike trips you hardly want to carry it with you. Professional bicycle keys with the same size have less weight due to a thinner plate of metal from which they are made, but at the same time they are not inferior in strength, as they are made of hardened steel. In other words, a 34 cm long BBB Hi-Torque L wrench will have the same weight and strength as a regular 15-20 cm wrench.
Please note. Most pedals will fit a standard 15mm wrench, but sometimes some bikes have custom nut sizes.
This is another useful tool to make bike maintenance a comfortable and dust-free experience. Cleaning the chain is a regularly necessary, but the dirtiest procedure, so much so that you don’t even want to do it at home, and you have to take the bike somewhere to the stairwell or to the street. Then mess around for a long time, cleaning all the links with solvents or WD-40, rags and a toothbrush. Someone prefers to remove the chain altogether and soak it, for example, in kerosene. In order to remove the chain with a lock yourself, you will need pliers or a BBB LinkFix chain lock tool, and to remove the chain without a lock, you will need a special tool for riveting and riveting the chain links (BBB ProfiConnect chain tool). But if you buy a special machine BBB Bright & Fresh, everything becomes much easier. With this machine, you can easily clean the chain without removing it.
Every morning you get up and brush your teeth and wash your face. Your bike's sprocket teeth also need regular cleaning, and you need to not just wipe the top with a rag, but penetrate into all the joints. The main problem is not the external dirt on the bike, but the dust, sand and used grease that accumulate in the rotating mechanisms.
The MUC-OFF Individual Drivetrain Brush with hard bristles can reach all parts of the transmission, and the special scraper on the MUC-OFF Individual Claw Brush 70, designed to clean the chain and sprockets, can remove old dried grease from the links.
If you really love your bike and want it to always shine like new, then get a set of five brushes at once: Muc-Off 5 x Brush Set.
We have listed the basic "gentleman's" cyclist's kit, which is necessary in the process of bicycle operation. More advanced users may need additional tools.
For example, the BBB BleedKit hydraulic brake bleed kit, the BBB Turner II spoke wrench to correct wheel deformations, or the BBB bottom bracket puller.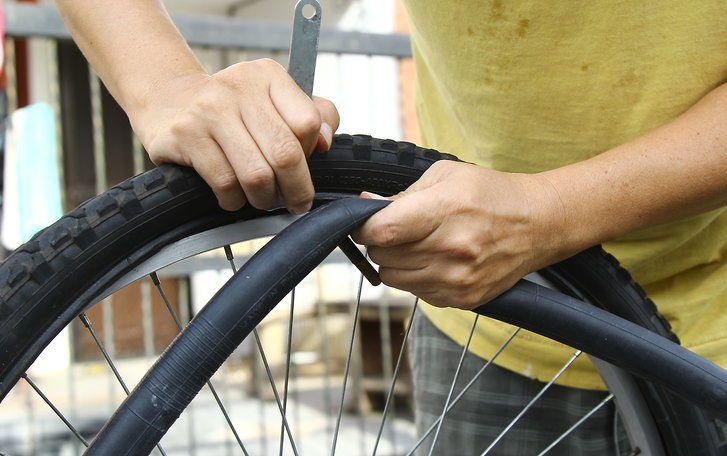 And someone, on the contrary, does not want to mess with his bike on his own, and some of these tools (or even all) can be replaced with one device - a credit card, with which the repair and tuning of the bike at any time is solved with one call to the service center.
If you live in a city where there are no our stores, then this is not an obstacle to obtaining what you need. Simply, when making a purchase through our online store, please note that we have delivery by couriers and transport companies
You can also use self-delivery, if you prefer
When buying online, we have different payment systems:
- cash to courier
- bank transfer
- by card
- by installments
- with gift certificate
All details on different forms of payment
 Review of summer collection Picture Organic
 Upon purchase, you can apply accumulated or welcome bonuses for the first purchase. To do this, you need to register in the new bonus program "Kanta" and receive welcome bonus rubles to your account only for registration.
Author: Irina Morozova
When buying a bike, many do not even think about the fact that the convenience and comfort when riding it is achieved by properly selected tire pressure. The service life of the bicycle, the speed of riding, the degree of tire wear, safety, control of the two-wheeled friend depends on how the wheels are inflated.
Many cyclists believe that inflating the tires is only necessary for a good bike ride.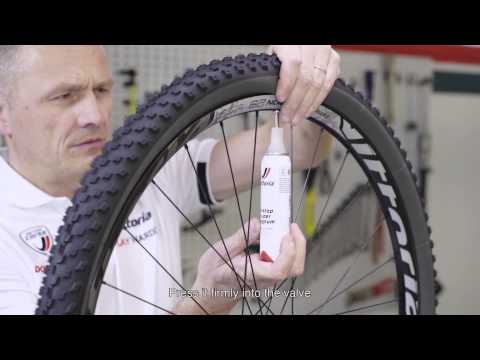 However, flat tires have a wider area of contact with the road, which means that grip will be better, but it will be very difficult to accelerate to a speed of 30-35 km / h on such tires.
When inflating your tires, you should always consider the type of terrain or surface you will be driving on. If the walk is supposed to be on an asphalt road, the tire pressure of the bicycle should be close to the maximum allowable value. Elastic wheels on a flat surface will provide a smooth rolling and high speed of movement.
For cross-country riding with unpaved paths, it is better to set the tire pressure to medium tolerable, so that you can ride long distances in comfort and convenience. At high pressure, the grip of the wheel with the road will be minimal, respectively, all holes, pebbles, and bumps on the road will be sensitive. And with flat tires, the likelihood of damage to the wheel or puncture of the chamber increases.
In order to protect yourself on the road, as well as to keep the bicycle or its individual parts intact, you need to know exactly the lower and upper limits of permissible values, to what pressure the bicycle wheels can be pumped.
Information about tire pressure gives you an advantage when cycling:
Forget the old "grandfather" way to check the wheel with your fingers. No need to rely on tactile sensations, trying to feel with your hand the degree of rubber penetration on the tire. The air leaves the wheel gradually, through the pores in the rubber. Within 2-3 weeks, the pressure decreases by 0. 1-0.2 atmospheres, but you cannot determine this with your fingers. The exact value at any time will help determine the pressure gauge that every cyclist should have in his arsenal. With its help, it is simple, with a minimum error, the level of pressure in bicycle tires is measured. A pump with a pressure gauge (floor or manual) will become an indispensable tool for cyclists.
There are three standard values in which bicycle tire pressure is measured.
kPa = 14.504 PSI
All these units are used to some extent - in different countries, by different manufacturers. For residents of Russia and the post-Soviet space, the change in bars is more familiar, since this unit is clearly associated with the pressure of the 1st Earth's atmosphere at ocean level. In America and Western Europe, a popular unit is PSI, as they actively use pounds and inches in measurements. Pascals are the least used unit of measurement, but the most modern. Some bicycle manufacturers write data on the wheels about the allowable pressures in all three systems.
Manufacturers indicate on the sidewall of the tire how many atmospheres to pump the bicycle wheels. Specifies the range within which the owner of the "iron horse" determines the desired values, depending on the specific factors of riding his bike. Values in the range are labeled from min to max, in two or all three dimensions. Numbers up to 10 are atmospheres (or BAR), tens-hundreds are PSI, and six-digit values \u200b\u200band with the prefix “k” / kilo are Pascals.
When inflating a tire, you must strictly follow the manufacturer's recommendations and try not to go beyond both the minimum and maximum pressure levels indicated on the tire. Moreover, it is better to leave a small margin of 0.2-0.5 BAR, both in one direction and in the other, so that the tire does not burst.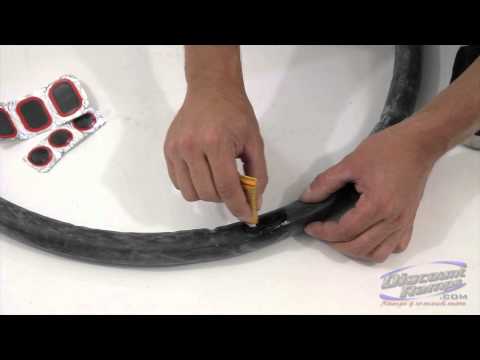
The pressure in the wheel is kept by the tire, not the tube, so there is no single standard for its value. There are several significant factors that determine how much you need to pump the wheels on a bicycle.
The type of tire is determined by the surface of the track on which the cyclist will predominantly ride. Accordingly, the level of inflation of the bicycle wheel will be different. There is a direct dependence on the roughness of the tread and the width of the wheel - the more lugs and the wider the wheel, the lower the pressure should be. Empirically, cyclists quickly determine how many atmospheres should be in the tires of their bike
Many cyclists do not realize that air temperature affects the pressure level in bicycle tires. From the course of school physics, we recall that when heated, bodies expand. This means that in hot sunny weather, the pressure inside the air chamber will increase without additional pumping. Conversely, on cold winter days, a decrease in tire pressure is quickly felt due to low temperatures. So, when going for a bike ride in the cold season, the pressure indicators need to be adjusted a little higher than usual, and in the summer heat, let the air out a little. It is worth noting that when going on a bike ride, you should always take into account the weather conditions.
It is important to take into account the load on the bike created by the weight of the rider, especially the fact that most of it is on the rear wheel. Therefore, the degree of its pumping should be slightly higher than the front, the optimal difference is 10%.
To calculate the optimal tire pressure for a bicycle, given the weight of its rider, you can use the table:
Rider weight (kg) Pressure (atmosphere) Pressure (PSI)
| 50-60 | 2.4 – 2.9 | 34.81 – 42.06 |
| 60-70 | 2. 9 – 3.2 9 – 3.2 | 42.06 – 46.41 |
| 70-85 | 3.2 – 3.7 | 46.41 -53.66 |
| 85-100 | 3.7-4.0 | 53.66-58.02 |
| 100-120 | 4.0-4. | 59.47 | 907
 The likelihood of a tire coming off a wide rim is much less than a narrow rim, because a wider rim will hold the tire better than a thin one. Mountain biking already by its name suggests the presence of a difficult surface on the track, with possible obstacles and bumps. The driving style is more aggressive than on a smooth, calm trajectory, it obliges you to increase the tire pressure to a level slightly less than the upper limit.