A kill switch, although small in size, can make the difference in saving your ATV or UTV, and potentially some lives. Kill Switches are especially useful when you have children riding, but it can be a useful tool for anyone with an ATV or UTV.
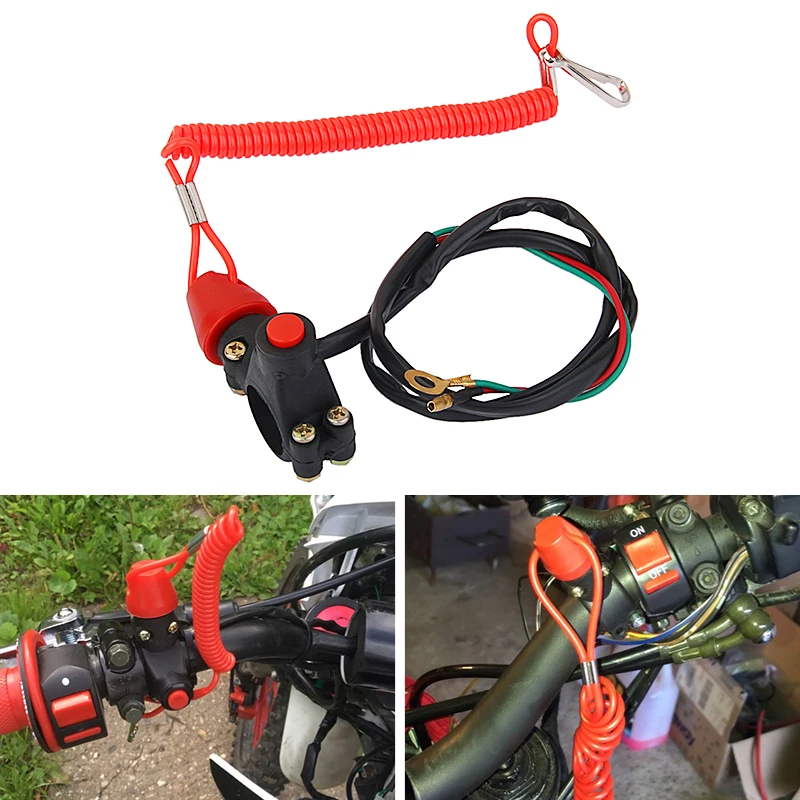
An ATV kill switch causes the engine to shut off whenever it is triggered. It usually attaches to the rider and can be pulled in an emergency or triggers automatically if the rider falls.
In this article, we will look at the kill switch, its importance, and, more importantly, how to use it.
Generally, the kill switch is used to kill the engine of a vehicle. The Kill Switch can have many uses. One is to reduce your risk of vehicle theft. In fact, one of its most crucial and important components is that you, as the owner of the ATV, UTV, or car, will be the only person who knows where the switch is and how to operate it.
It won’t stop someone from hauling your ATV away on a trailer, but it will stop them from riding it out.
The kill switch deters crime since without finding it, a thief cannot start the vehicle. Many thieves will leave a vehicle alone and move on when there is a kill switch. With an ATV, this is very important. Although you may not have a lot of belongings within the vehicle itself, its open model is very enticing. Without a kill switch, someone can easily hijack the vehicle and take it for themselves. Although it sounds a bit far-fetched, a lot of ATVs are stolen; in fact, there has been a huge rise in stolen ATVs over the past few years.
The more common purpose of a kill switch on an ATV or UTV is to shut off the vehicle in an emergency situation. It is extremely beneficial for you when you want to shut it off immediately. Depending on the kill switch, you can arrange for it it shut the engine off immediately if you fall from the ATV or UTV.
Another perk is that some insurance companies offer a discount for those owners whose vehicle does have a kill switch.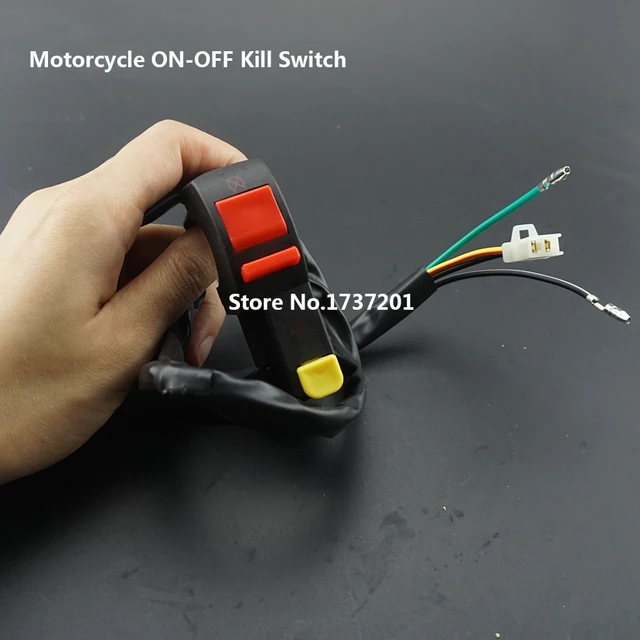 This is often an overlooked aspect of having one. Insurance companies are well aware that these features prevent theft and also provide a safety measure that protects the driver and vehicle.
Other than understanding its benefits, you must learn how a kill switch works on an ATV or UTV. It is in the vehicle for a reason and understanding that can help you a lot as an owner.
The kill switch is usually wired to the ignition coil. The ignition coil is part of the ATV or UTV that sends a spark that ignites the engine.
The kill switch breaks the ground circuit so that the coil no longer has a positive and ground. Because of that, the ignition coil is no longer firing. Without that, the ATV or UTV cannot run.
A kill switch can come in different forms, such as the push or pull style, which have different ways of functioning, but their key differences are essential.
In an ATV/UTV, there are two ways or systems that a kill switch is used, either an NC or NO, or “Normally Closed” or “Normally Open.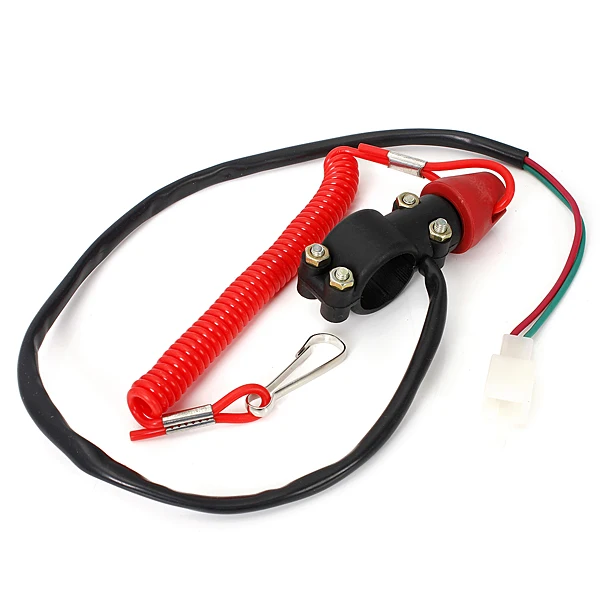 ” An NO switch is the open type, hence the name Normally Open, and functions by grounding the primary ignition lead when the tether is pulled away from the bars.
When the tether is removed from the NO, it will end up closing itself. This, in turn, creates a short to the circuit to which it is wired. It is important to note that this function should not be used to ground the high voltage. An NO system is not used as often as the NC system, but you still see them frequently enough.
An NC switch, on the other hand, works in the opposite way. It is Normally closed and is connected to the 12V input to the ignition. When the tether is removed, it will disconnect or open the circuit from the negative to a positive voltage, turning on the ignition.
Usually, NC kill switches are used in battery type ignition systems that have a clear Run/Stop switch with a key identifier. While it is typically known that newer models are NC, but you will want to double-check the manual at all times to confirm.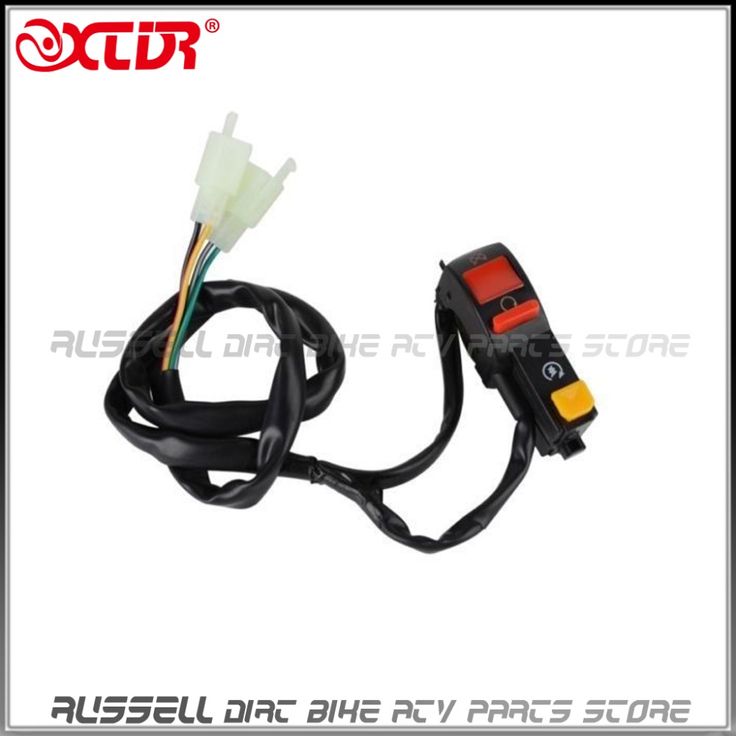
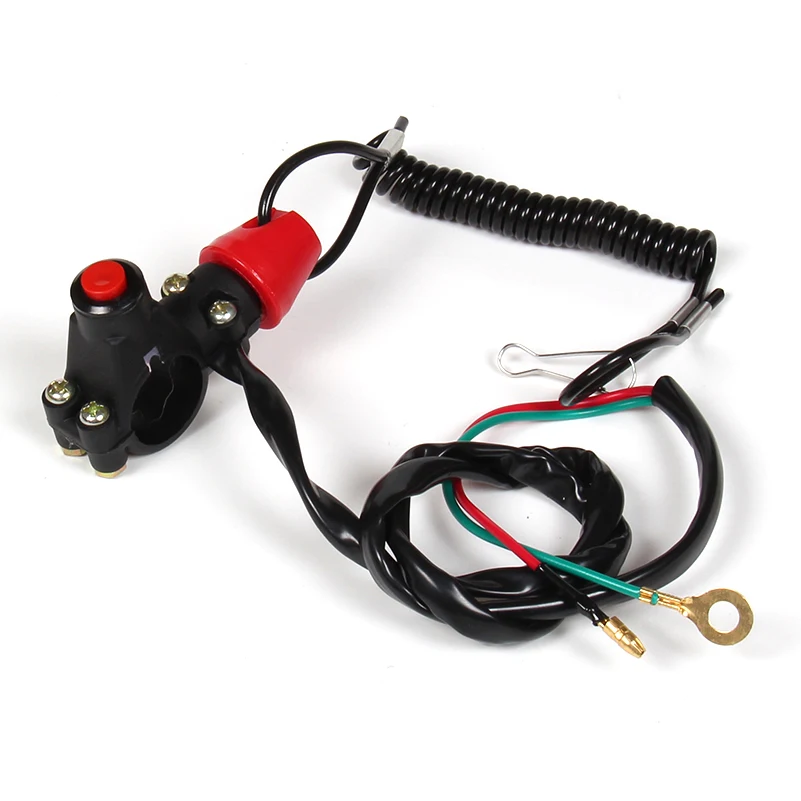
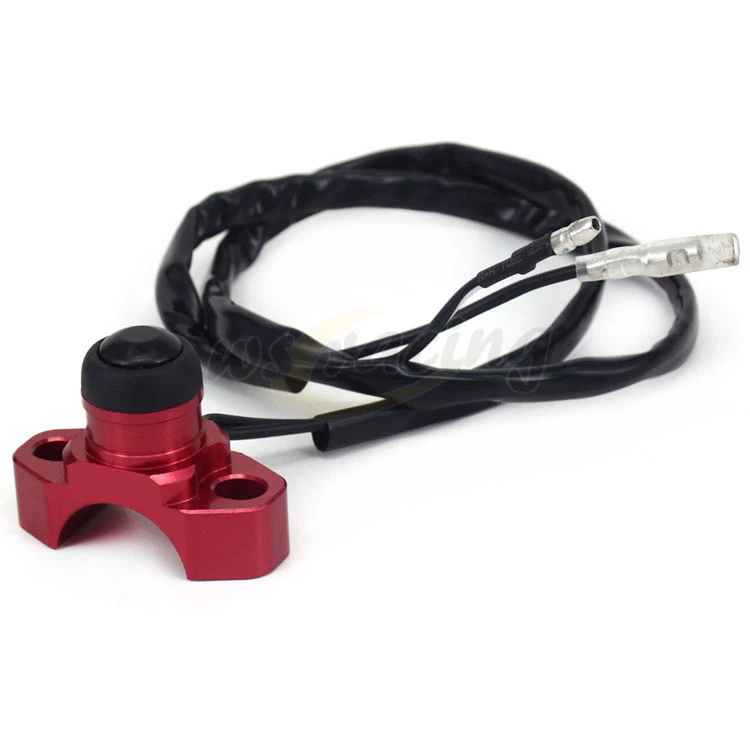
In general, the ATV kill switch is usually easy to install and uses wire plugins that ease into the OEM stock designs. Most of the kill switches for ATVs are designed to mount on the handlebars, but there are other option.
Most of the time, the kill switch will activate the same as a kill switch in any other vehicle. Essentially, you either push or pull the switch and the engine should shut off. You will want to remember to shut the ignition off if you are not going to start the ATV back up.
Typically, you only want to use the kill switch when needed, but some riders like to use the kill switch whenever they shut down their ATV.
This isn’t the end of the world, but it isn’t a best practice. You can cause serious damage to your alternator if you regularly try to start your ATV without reengaging the kill switch. Your manual should have clear instruction about whether you can use the kill switch routinely, but most recommend only in emergency situations.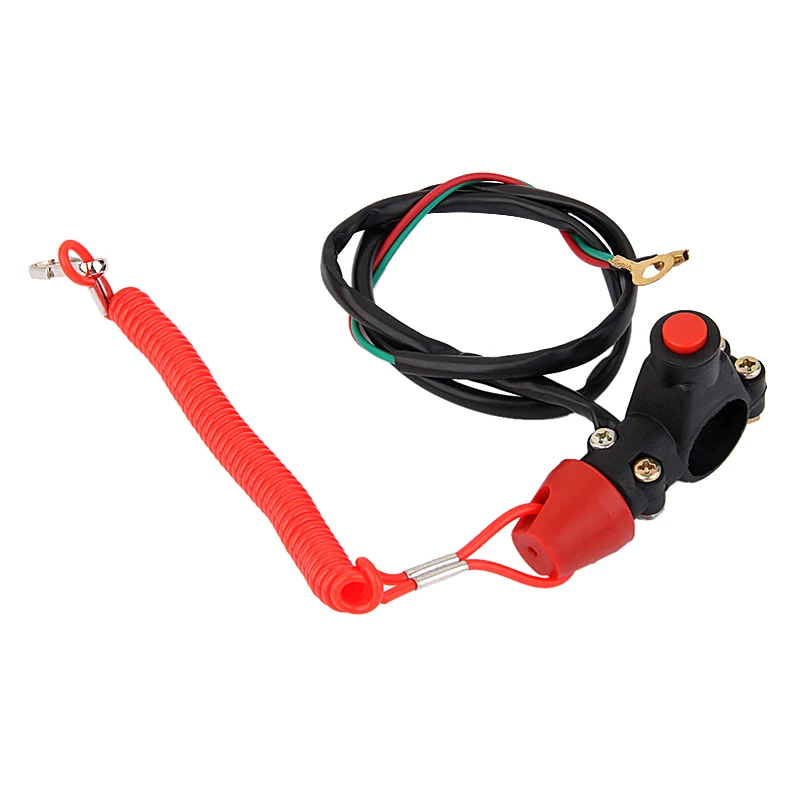
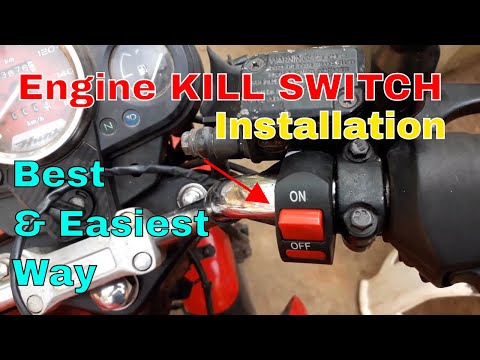
Most of the time, an ATV kill switch is mounted to your handlebars, or to a handlebar clamp designed for the switch. You also want to install the kill switch where it can be easily reached, but won’t get in the way during normal operation.
Once you have determined where to mount the kill switch, simply tighten the screws using a 3mm Allen wrench in most cases. You will want to be careful not to overtighten the screws, while still ensuring the switch is mounted securely and wont slide or come loose during aggressive riding.
In terms of wiring, most kill switches are universal and will work with almost any ATV. However, the wiring inside ATVs is not universal.
Regardless of the type of ATV you have, the kill switch can never be directly on the on/off panel if the ATV already has one. In most ATVs, one lead from the switch will be wired to the ground, and the second wire will splice between the stator and ignition coil.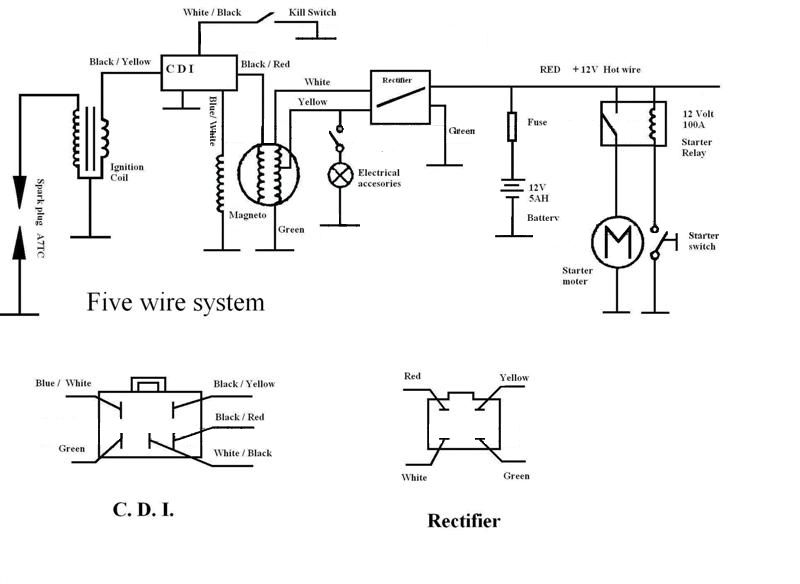
When the stator wire is grounded, it will cause the engine to shut off. Make sure to consult the instructions of your particular model to ensure you wire it correctly.
Once you have installed the kill switch on your ATV, test the switch by pulling the clip while the ATV is running.
The kill switch, regardless of where or which vehicle it is used in, is one of the most imperative and essential assets you can have for safety purposes. From its anti-theft design to its last-second emergency usefulness, a kill switch can do you wonders.
Regardless if you have an ATV or UTV, this kill switch can save your life. Whether that be on the off-road when you are going too fast or when the engine seems to malfunction, the kill switch is known to be the last resort and for good reason. It is both efficient and easy to use, either through a push or pull motion, and can be easily found by the owner of the vehicle.
Furthermore, it can protect your vehicle from being stolen.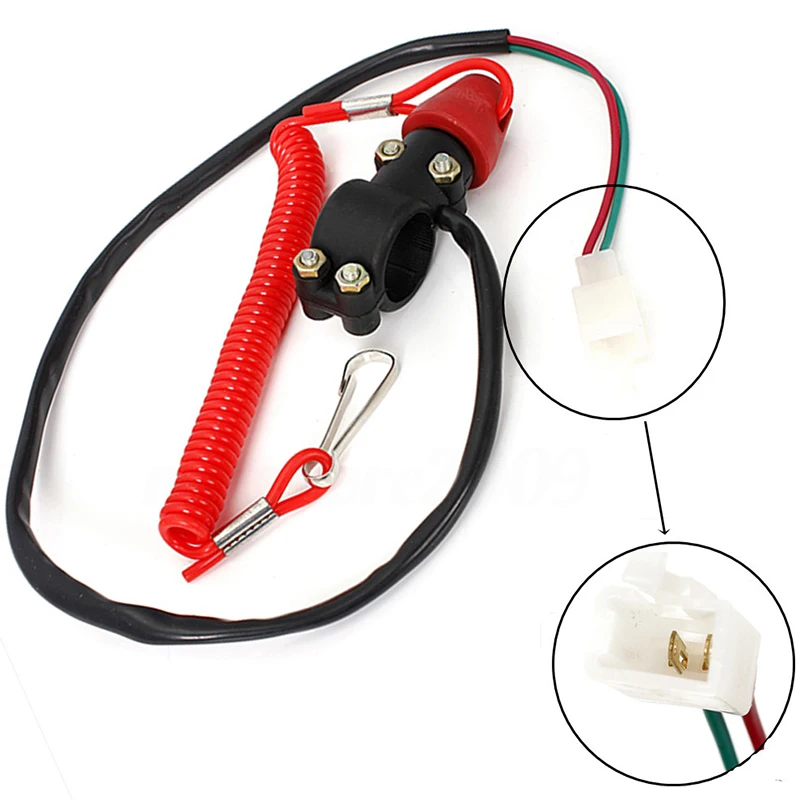 A ton of ATVs and UTVS have been stolen through the years and having a kill switch has been one of the most effective protection against thieves. This is important in cars, but even more so in an open-model vehicle like an ATV. With a kill switch, you can turn off the engine from being used unless you yourself are utilizing the vehicle.
In terms of its installation, know where and how to activate the kill switch. It will be useless unless you know exactly where it is at all times and how to use it. Usually, this place would be accessible and easy to activate. In an emergency situation, you do not want to be looking for a kill switch. Instead, you want it to be an instant instinct that comes from experience. So, when installing, try to even practice or simulate what it would be like to use the switch. Furthermore, when attaching to the handlebar, make sure that the lead from the switch will be wired to the ground, and the second wire will splice between the stator and ignition coil.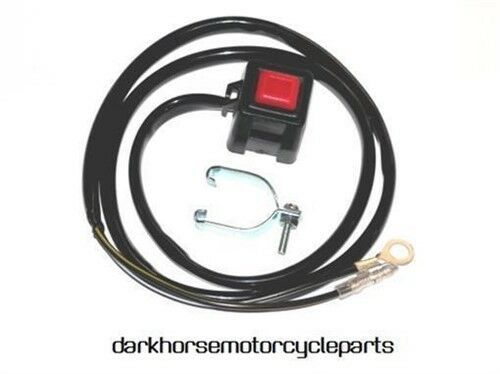 If not, you can cause serious damage to yourself and the ATV or UTV that you are operating on.
Finally, there are a lot of automotive insurance policy benefits for having a kill switch. Make sure you check to see if you insurance carrier offers a discount when you are considering whether to install a kill switch.
However strange it may seem, having problems shutting off the engine on an ATV is more common than you may think. The bike may run as usual, but when you turn off the key or hit the kill switch, the engine keeps running. What may be causing this strange and potentially dangerous behavior?
When faced with an issue like this, the problem is more often than not electrical. To support this presumption, let’s have a look at what the ignition key or kill switch does to turn off the engine.
Any gasoline engine needs three components to run; fuel, air, and spark. When you take away any of these elements, the engine will shut off.
When you turn off the ignition key or hit the killswitch, the ATV should take away the spark. The spark plug will no longer ignite the fuel, effectively shutting off the engine.
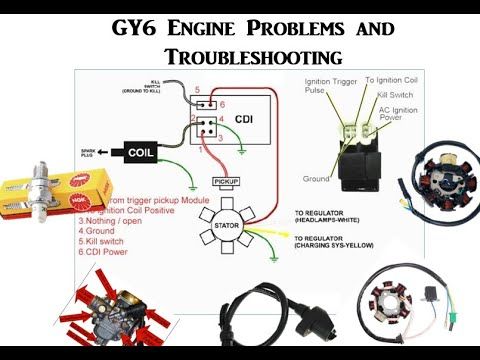
The Ignition key and killswitch are both parts of an electric circuit that, when active, sends an electric signal to the CDI or ECU, telling them to power the coil that then sends a high voltage charge to the spark plug.
When you turn off the key or press the kill switch, it is no longer supposed to send a signal to the CDI or ECU. In a case where the engine won’t shut off, there is usually an issue somewhere in this circuit that causes an electric signal to be sent regardless of the switches’ position.
Here are the basic principles of how the ignition key stops the ATV and what components are involved in the circuit.
Please note that these are general guidelines. Your ATV may be wired differently. Your user manual’s wiring diagram will always be your best source of learning how your bike is built.
Focus your troubleshooting on these components, and you have a good chance of finding the cause of your issue.
Look up an exploded parts diagram on a site like partzillla.com. This will help you get an overview of what the different components look like and where they are located on your machine,
In some cases, you will be able to identify the problem without any tools. Still, to make troubleshooting a bit easier, it is recommended that you have the following tools and resources at hand:
Now, let’s begin troubleshooting by having a closer look at typical issues that may prevent your ATV from shutting off the engine.
It’s a good idea to start your troubleshooting by inspecting the ground wires and connectors. They are relatively easily accessible, easy to repair, and do not require expensive spare parts.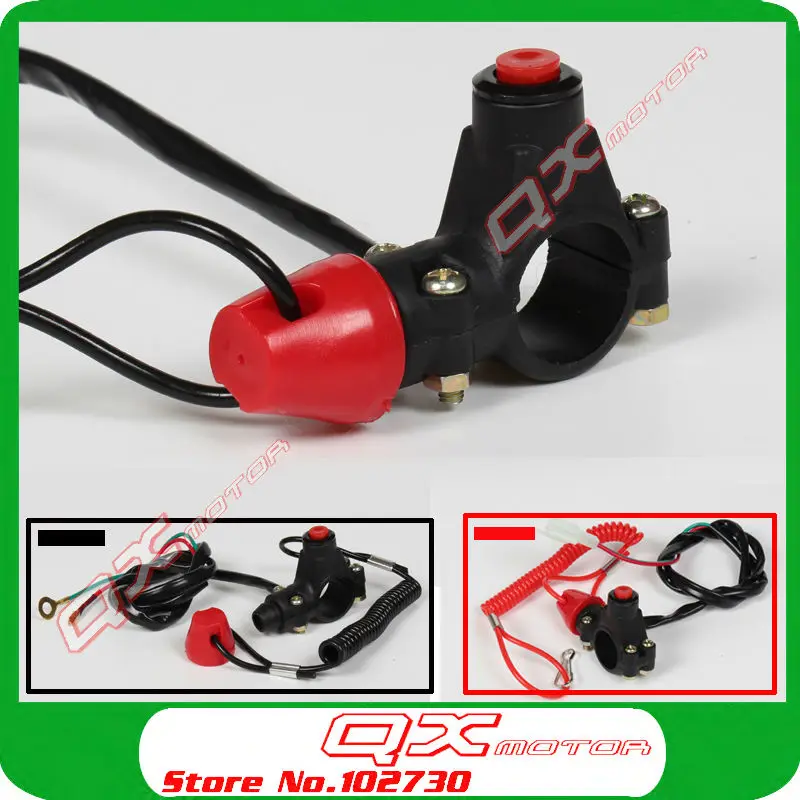
When the grounding in the ignition system is bad, the ignition switch or killswitch aren’t able to short the signal to the CDI to ground as it should.
Start by your ignition switch and trace the ground wires via the kill switch, the CDI, and the ignition coil.
Make sure all connectors are correctly fastened to their grounding spots and have proper contact with bare metal. If you notice any corrosion sign, disconnect the wire and clean both the connector and connection point with some sandpaper to ensure a solid connection.
Please make sure no pins in the connector plugs are loose, causing them to back out when you connect the plugs. It can be a bit hard to see whether the pins are in place or not. By gently pulling on each pin from the back of the plug, you can verify that they are correctly seated.
Also, inspect the main engine ground connection as it’s a commonplace for corrosion, causing a bad ground.
You can use a multimeter to verify that there is ground present at both the ignition, kill switch, and the CDI box.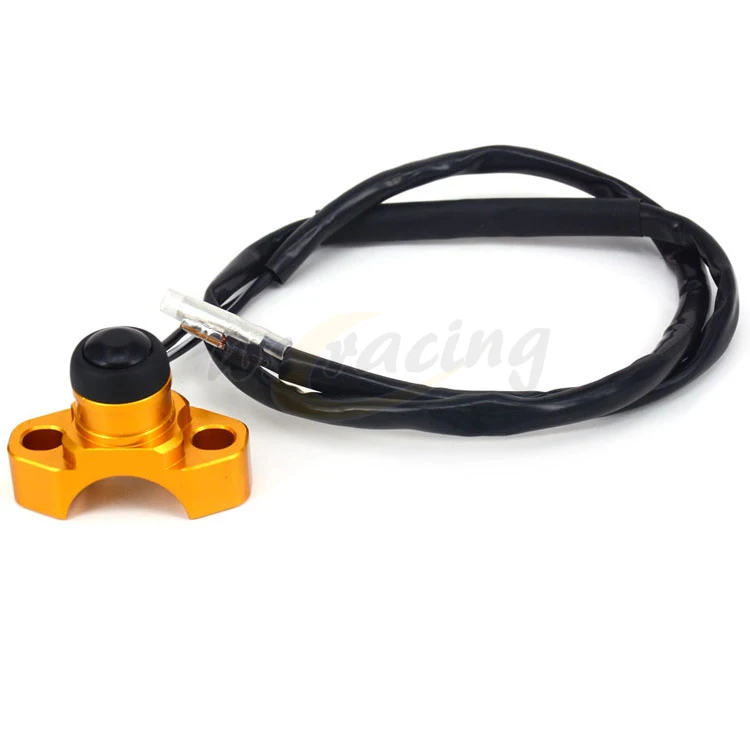
Another way of testing if the grounding is good is by connecting a piece of wire from a bare spot on the frame and directly to the ignition or kill switch Caution! This tip should only be performed with extreme caution as there is a chance of getting electrocuted if you are not careful. Never touch bare metal parts and use a pair of insulated pliers to hold the wire as a precaution.
If the ignition wires become pinched or otherwise get damaged so that a hot wire comes in contact with either a ground cable or a grounded portion of the ATV, you will have a so-called ground fault.
This may prevent the ground cables from shorting to ground as they should.
A previous owner may have tapped into the wiring to install accessories but didn’t do a proper job either when installing or when removing the accessory before selling the ATV. It’s quite a common mistake just to wrap a couple of rounds of electrical tape around a hot wire or connector. While this may work as a short term fix, the tape may eventually come loose due to dirt, water, and vibrations.
Trace the wires coming from the ignition switch and kill switch to see if there is any visible sign of damage or tinkering, such as damaged insulation, DIY electrical tape patch jobs, or burnt wire.
Repair any damaged wiring or replace the whole switch and cable assembly if you are not comfortable with your wiring skills.
If your wiring seems to be in good condition, your next best bet will be to look at the ignition switch / key cylinder or killswitch.
An ignition switch or kill switch can fail due to internal wear or corrosion. If there is an internal short inside the switch, the CDI-wire may be hot at all times, continuously telling the CDI to run the engine.
Typical signs of a bad switch are when:
Disassemble the switch to look for corrosion. Note that not all ignition switches can be opened without ruining it.
If you notice only a slight corrosion sign, it may be worth a shot to clean the contact points and spray the whole assembly with a proper dose of electrical cleaner. Pack the unit with di-electric grease to protect the internals from further corrosion.
If you have access to a multimeter, you can test the switch for continuity. Depending on your ATV’s wiring design, you should get a positive reading when the key is off, and no reading when it is off or vice versa.
If all else fails, you can replace the whole switch assembly. A complete ignition switch assembly will set you back around $20 to $50.
When you are positive that the ignition wiring and switches are ok, it’s time to address the CDI or ECU/ECM module.
The ECM on my Polaris Sportsman Xp1000 is hidden in front of the ai filter box.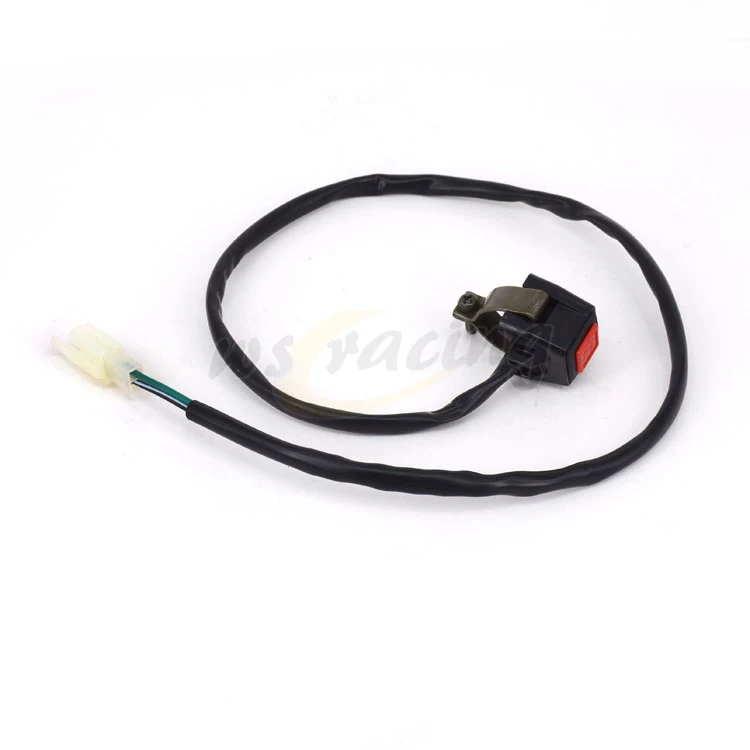 Some disassembly is required to reach it.
The CDI stands for Capacitor Discharge Ignition and controls the spark.
An ECU (Engine Control Unit) or ECM (Engine Control Module) does a lot more than just controlling the spark such as controlling fans, power steering, lights, transmission, and more.
These boxes may fail due to water exposure, heat, or old age, but they are not easy to troubleshoot. They are not something you replace unless you have to, as they can be quite expensive.
Before you spend your hard-earned cash on a new unit, there are a couple of things you can do to look for signs of damage.
Disconnect the connectors from the box to see if there is any sign of water or corrosion. Make sure the seals are undamaged and seated properly. If you see any sign of water getting into the unit, it’s a good chance it is failing.
If you shut off the ATV, but the engine keeps running for a few seconds after turning the key, you are likely experiencing a phenomenon known as “overrun” or “dieseling.”
What happens is that the cylinder and spark plug is still hot enough to ignite any fuel that is still present, even after the ignition is turned off.
This may happen on carbureted ATVs as there is no effective way to turn off the mechanical fuel pump and carb.
This problem may be caused by the timing being off, the bike running too lean, or not using the right spark plug.

Launch
- Before starting, it will be convinced of the correct position of the reverse lever
- Do not hold the Start button more than 15 networks
- when starting, do not press the accelerator lever
,0002- it is important that it is important that it is important that the engine is normally warmed up before being used. Allow the engine to run for at least 3-4 minutes until stable idling. In particularly cold conditions, the engine takes longer to warm up and the warm-up time increases. Cold seizing (cold seizing) and piston wear (when seizing), otherwise known as “four-way scuffing”, caused by operating the ATV with a slightly warm engine, is not covered by the warranty. After warming up, the engine should be warm
MANDATORY BEFORE DRIVING
- check: brake operation, auxiliary engine switch, electrical equipment, suspension mounting bolts and nuts, tires, front suspension elements, steering systems, engine and transmission oil levels, passages and operation cooling systems
- remove dirt, and in winter from snow and ice, drive shafts and steering rods, check their free play
DO NOT ALLOW
- prevent overheating of the engine and running gear; to prevent overheating, regularly drive into mud (wetlands), in winter - deep snow
- heavy load (high speed, intensive acceleration, etc.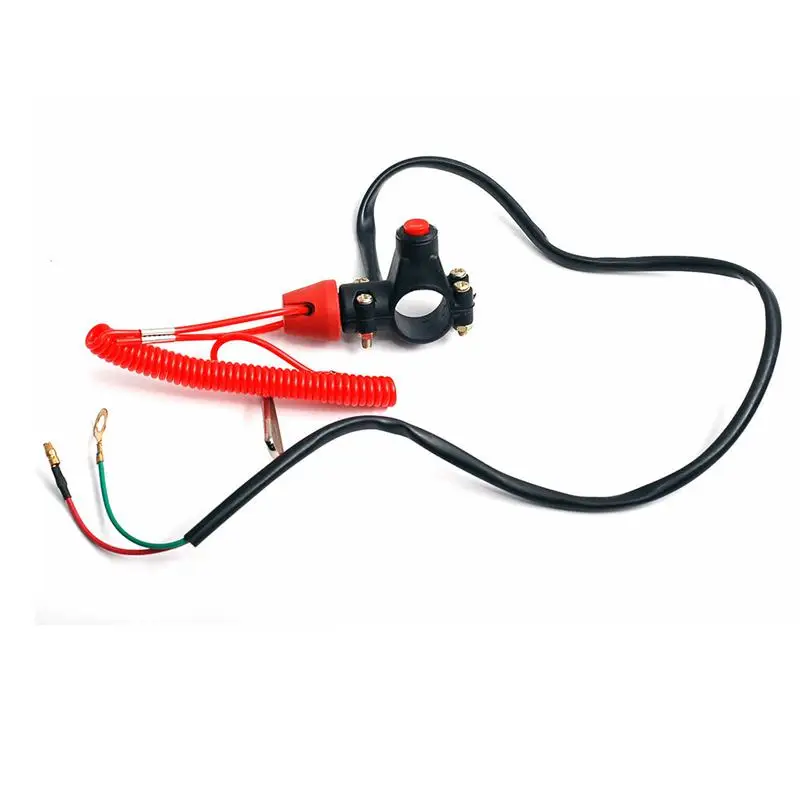 ) on the engine immediately after starting it and insufficient warming up
- long operation in difficult conditions
- long driving in mud, sand
- turning off the ignition at speeds above idle, this can lead to a flash of the fuel mixture in the crankcase, which leads to isoflex grease being squeezed out of the engine and its failure
- engine overheating.
The main features of overheating
1) The engine does not develop speed and power
2) ATV does not develop a maximum speed of
3) high engine temperature, extraneous smells, noise
Bkatka
- duration of 500 km
- it is not allowed to fully open the throttle valve (more than ¾), it is necessary to make short accelerations and move at different speeds
- do not carry trailers or loads
- do not drive at high speed for a long time
- do not allow the engine and chassis to overheat
- regularly check the oil level in the oil tank; for reasons and contact your dealer
- during the first 50 km the drive belt is run in (every time a new one is installed). During this period, intensive acceleration and deceleration, long movements at a high speed of more than 60 km / h should be avoided
In the event of a malfunction, call (3412) 75 08 08, 8963-541-41-11
| ATV Model/Conditions |
|
| Petrol | unleaded with min. 95 octane
|
| Engine oil |
|
| TO | TO1 after 10 hours or 500 km - TO2 annually, 100 hours or every 3000 km - subsequent yearly, 100 hours or every 3000 km |
| Preservation | - it is necessary to add an antioxidant to gasoline (as recommended by the owner's manual or dealer) to prevent possible engine failure - seasonal conservation, re-preservation
|
Modern ATVs are equipped with two-stroke and four-stroke engines. As a rule, two-stroke engines are installed on light, children's and teenage models, and four-stroke engines are installed on utility and powerful sports ATVs. The engines of all CFMOTO ATVs are four-stroke. Consider the principle of operation of 4-stroke engines and their advantages over 2-stroke ones.
The name speaks for itself - the engine sequence is divided into four cycles:
Consider the step-by-step sequence of actions for starting the engine on an ATV and note some features of operation.