An ounce of prevention is worth 100 psi of cure when it comes to your tires and their lifespan. Unfortunately, flats are part of riding and bound to happen to every cyclist at some point—but there are precautions you can take to reduce their likelihood.
Here are nine expert tips to prevent a flat tire from slowing you down on your next ride.
Join Bicycling now for the latest cycling tips
A little bit of talcum powder goes a long way.
Trevor RaabLiberally dusting a new inner tube with talcum powder before installation reduces chafing on the tube’s rubber surface. This keeps the tire and tube from sticking to each other and lessens friction that can possibly wear a hole in the tube.
“I have always had a quart-sized zip-lock bag with the talc in it and simply dropped the tube in and given it a good shaking,” says Matt Eames, a World Cup downhill mechanic for Giant Bicycles. “It seems to keep the mess to a minimum as well as not wasting unnecessary talc.”
Trevor Raab
Keeping your tires inflated within the correct psi range will help keep flats at bay, specifically what’s known as a “pinch flat.” A pinch flat occurs when the tire compresses and pinches the tube against the wheel rim. It’s often caused by an under-inflated tire or a hard impact against an obstacle, like a curb, manhole cover, or pothole. You can identify a pinch flat by the two, side-by-side holes it creates in the tube.
The recommended psi range for your tires will be printed on their sidewall. That’s a good starting pointing. Otherwise, check out our guide for getting your psi dialed in.
Many tire manufacturers make more durable versions of their popular models.
Trevor RaabNot all tires are created equal. If you find yourself the victim of frequent puncture flats, perhaps due to debris-laden roads, try using a more durable tire such as Continental Gatorskin or Schwalbe Marathon Plus.
Trevor Raab
It can be a bit more expensive than some other options, and it depends on your bike and rims, but buying a tubeless conversion kit or switching to Universal System Tubeless (UST) tires altogether can be very effective ways to bring down your number of flats and improve a bike’s overall control. With no tubes, pinch flats become a non-issue, and less air pressure is required to inflate your tire, allowing for better shock absorption on rough terrain. The sealant used in tubeless tires will also prevent flats from minor punctures.
If you can’t bring yourself to get rid of your tubes, you can still try using tire sealant. When looking for a sealant, be sure to check if the inner tube requires a certain type, and how long it lasts before it needs to be replaced. Tires and tubes can be purchased with sealant already in them—Slime brand products are marketed this way—but are more expensive and are typically heavier than those without it.
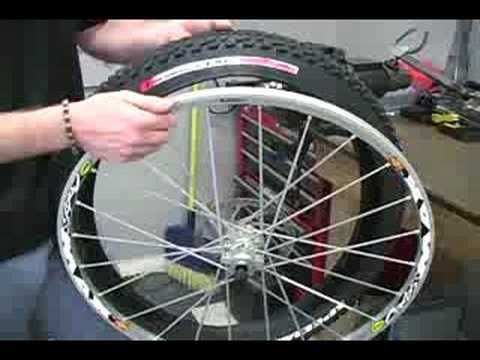
Both rim strips and tire liners guard the sides of the tube from its neighbors, the rim and the tire. As the name implies, rim strips protect the tube from the holes in the rim, and the ends of the spokes. These are as simple as a rubber strip or a cloth tape and fit inside the rim bed. Tire liners are similar to rim strips in their function but protect from objects attempting to penetrate from the outside. Both are inexpensive to purchase, making them cheap insurance against flats.
Eames says you should pay close attention to the overlap of the liner when it is installed; otherwise, it can prove ineffective and may cause more flats than it prevents. “Take care during installation that the liner stays center relative to the tire’s tread,” he says.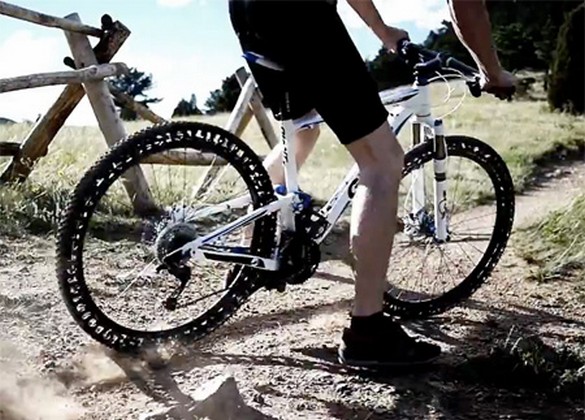 “You can end up with a really protected sidewall and little help under the tread.”
While it’s tempting to get the most mileage that you can out of your tires, pushing the limits of their lifespan will inevitably end in a flat. Mileage can range from 1,000 to 5,000 miles and varies by tire type. Even if you don’t track your mileage, you should replace a tire if it has dry rot or if the threads are visible.
Now 15% Off
$7 at Amazon
Credit: Slime$7 at Amazon
Credit: Kenda$17 at Amazon
Credit: Johnson and JohnsonNow 42% Off
$35 at Competitive Cyclist
Credit: ContinentalThis might be an obvious tip, but many don’t take the time to do it. If you think you’ve ridden over a patch of glass, grit, or any other sharp objects that litter the road, just stop and inspect your tires for foreign objects.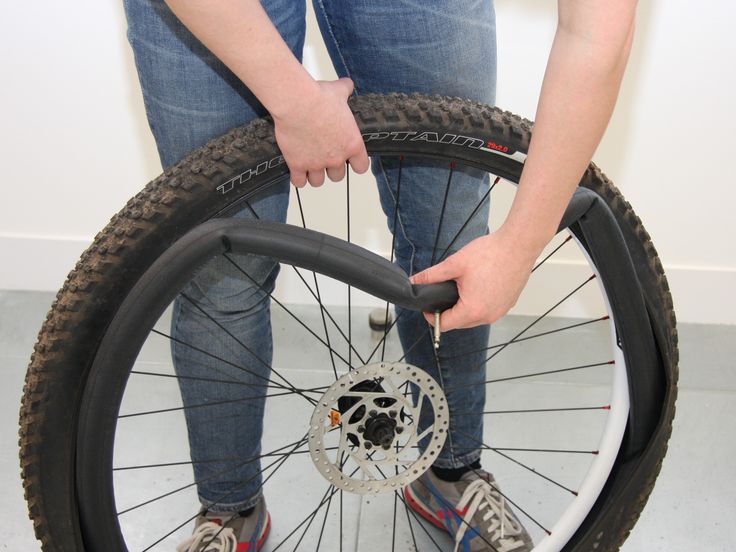 If you see anything embedded in the tire, gently pry it out. If you have a handkerchief, bandana, or glove, use it to protect your hand while you gently spin the wheel, and see if anything gets caught on the cloth.
Trevor Raab
This step can prevent an embedded object from causing a puncture later if it hasn’t already pierced the tire’s casing. It’s good practice to inspect your tires after each ride, too.
They’re harder to find as their popularity has dropped off, but tire wipers are still a great way to prevent punctures (though they only work on tires with minimal tread). Tire wipers attach to your rim brakes or fenders and consist of a rubber-coated metal bar that lightly rubs the tire as it rotates to wipe away debris before it has a chance to puncture the tire.
Trevor Raab
That spare tube in your saddlebag could be a lifesaver on a long ride, but wouldn’t it be a bummer if you changed a flat, only to discover that the tube was no longer good? Make sure your bike’s inner tubes are in good shape when you need them by avoiding these common mistakes.
Maybe you’ve been fortunate enough to evade flat tires for a while. If that’s the case, the spares in your saddlebag might need to be replaced. Storing tubes inside a saddlebag for long periods of time can lead to weakness or cracks where the tubes are folded. The tubes can also be damaged by jostling against other items in the bag. Unpack your tubes occasionally to prevent them from cracking or splitting. If in doubt, inflate them to look for leaks.
This is especially important for Presta-style valves, which are particularly pointy. Make sure the valve is capped when you fold up the tube for storage so the valve doesn’t poke a hole into the tube.
Over time, rubber bands could react with the rubber of the tube and cause a hole to form. The rubber band could even fuse to the tube and create a tear when you try to separate them. It’s best to keep your tubes in their original cardboard box or in a plastic bag.
Heat degrades the rubber, making it brittle and less elastic. If you have tubes you’re not planning to use for a while, keep them away from direct sunlight and especially from a heater.
Jessica CoulonService and News Editor
When she’s not out riding her mountain bike, Jessica is an editor for Popular Mechanics. She was previously an editor for Bicycling magazine.
This content is imported from OpenWeb. You may be able to find the same content in another format, or you may be able to find more information, at their web site.
Bike flats are a common problem. Here, on one comprehensive page, are five ways to thorn-proof your bike, from the simple to the hilariously expensive–or, if you want a faster answer, here’s the one solution we’ve already standardized on:
Thorn protection for existing tubes & 27. 5″ MTB tires: now in stock at Flatbike.
A few weeks ago, I got a call from Russell, a private pilot who likes to fly his CHANGE folding mountain bike into remote places for exciting adventures in his private plane. He wanted tips on how to avoid thorn flats.
How remote? And what kind of vegetation are we talking about?
Cacti in West Texas can have some awfully long thorns…
Those are some serious spikes. And West Texas cacti aren’t the only problems. Blackberries, devil’s club, goathead thorns, ‘wait a minute’ vines…nearly all parts of the country have some species that are unfriendly to inflated tires.
Basically, if you know you’re headed into thorn country, there are five different ways to address the issue of puncture flats.
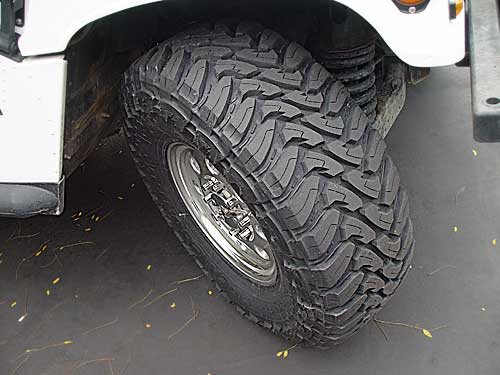
Tires and inner tubes come in thicker, thorn-resistant versions, which are tougher for thorns or broken glass to puncture. Why don’t all bikes come like this? Because extra rubber results in extra weight. How much do you want to free yourself from flats?
Using a set of these in the 80’s, I once went over 2,000 miles between flats; when I finally got one, it was from a thumbtack inserted in the sidewall at a bike rack. Even the best intentions won’t stop everything…
The Specialized Armadillo tire series has different levels of rubber thickness, with more thickness protecting more, but also offering a bit stiffer ride. The Continental Gatorskin, on the other hand inserts a layer of Kevlar clear around the tire to protect against anything–perhaps even sidewall thumbtacks.
Kevlar: If it can stop bullets, it can stop thorns.
You can also protect against thorns at the inner tube level. But thicker tubes are becoming harder to find in recent years.
Kenda owns a large portion of the thorn-resistant tube market.
FLATBIKE ASSESSMENT: Good, easy plan.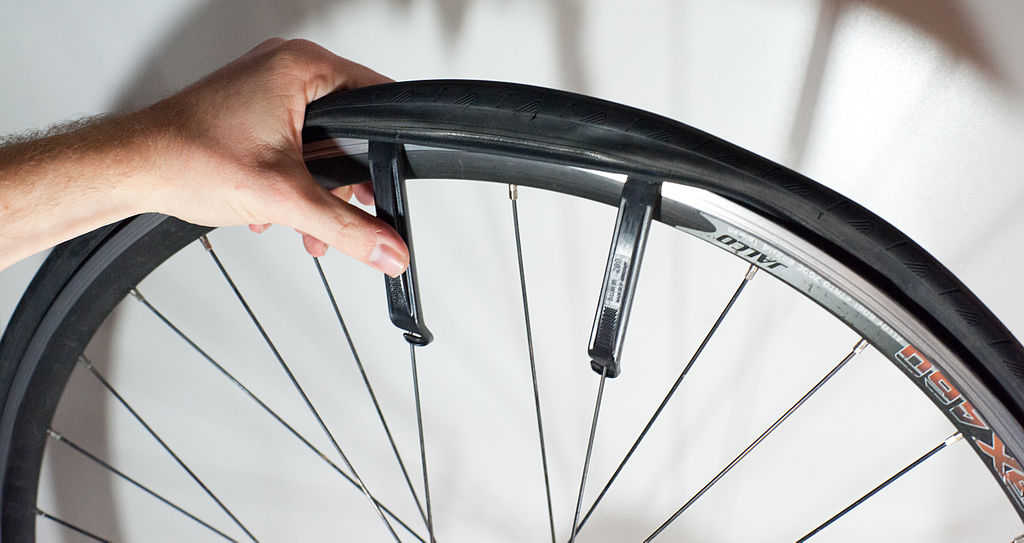 We include Continental Gatorskin flat-resistant tires standard on our Flatbike Century folding road bike.
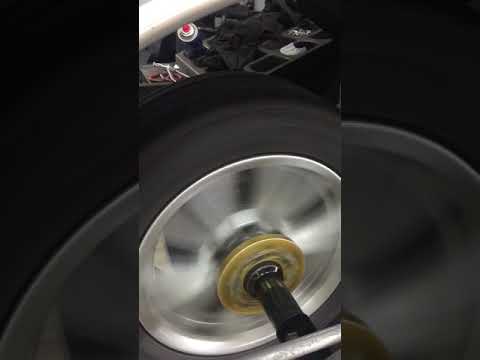
The idea is simple. A small amount of liquefied goo stays inside your tire. When you get a puncture and the air starts leaking out, the goo rushes to the opening and clogs it.
In practice, this often works, especially if the hole is small enough, the hole is on the bottom of the tire, and the self-sealing compound in your tire is recent enough to be still liquid.
Otherwise, you end up with this inside your tires (The “tire coral”, not the money).
If you go with this approach, you probably want a tubeless tire, because there’s simply no way to change the liquid inside an inner tube. Notable self-sealing solutions are Slime and Stan’s. The website MBAction has a great review of these and other sealant solutions, with the wonderful testing warning, ‘All tires were harmed during the testing process. ’
’
FLATBIKE ASSESSMENT: Wait & see. Some folks swear by the tire sealant approach, and we’re interested to hear from you. But a tubeless tire works best with a compatible rim. Useful extra aids are a bucket of soap water, a sponge, and an air compressor. And after that, we wonder if the time previously spent fixing flats on the road is simply transferred to garage maintenance, installing and removing old filler.
For a while, before my thorn-resistant tires, I rode a 1980’s technology, solid rubber tire. Potholes were memorable on my spine, but traction was good and I never got a flat.
On the surface, an update to this approach sounds appealing. Flat tires are the #1 maintenance issue bringing customers into many bike shops.
That said, compressed-air tires distribute a shock across the entire rim, while solid tires distribute stress only locally. And some bike shops charge a premium for replacing a solid tire. Has advanced technology made a difference?
With today’s advanced polymers, there are more options and better options than ever.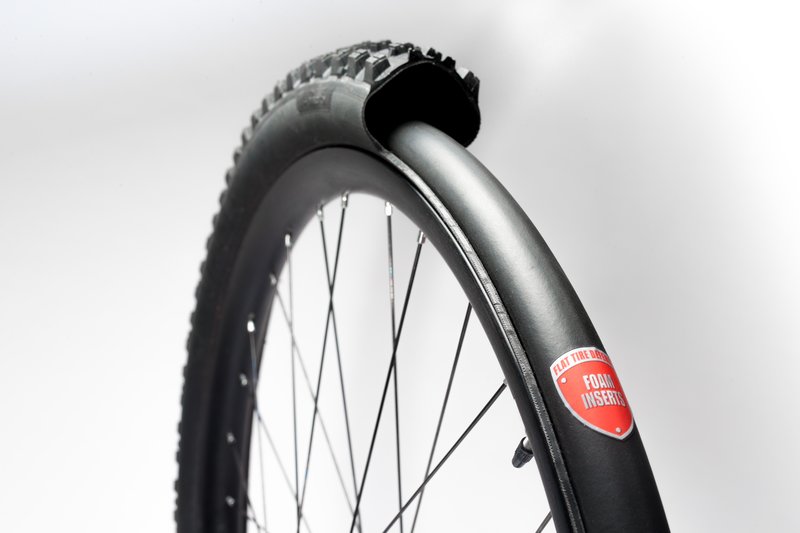 One example is the Tannus Airless Tire. Made of closed-cell polymer foam, it is reportedly as light as most tire/tube combos, good for over 5,000 miles and comes in 12 stylish colors. Tannus even claims equivalent rolling resistance to inflated tires.
No more flats. Ever.
During Bike Expo NY 2018, a Tannus rep offered to put a set of Tannus airless tires on a CHANGE 702 folding commuter bike, which I then rode in the 40-mile Five Borough Tour, plus another 20 riding to and from the event.
After a 60-mile day, I must say that the difference between the solid rubber tires of the 1980’s and the carefully calibrated polymer tires today could not be more stark. Even a cobblestone road was possible at 15 mph–still not fun on narrow tires, but the choice of tire composition was never in question after the first few wheel rotations.
Among the joys of that 10-mile pre-ride was a surprise section on this road.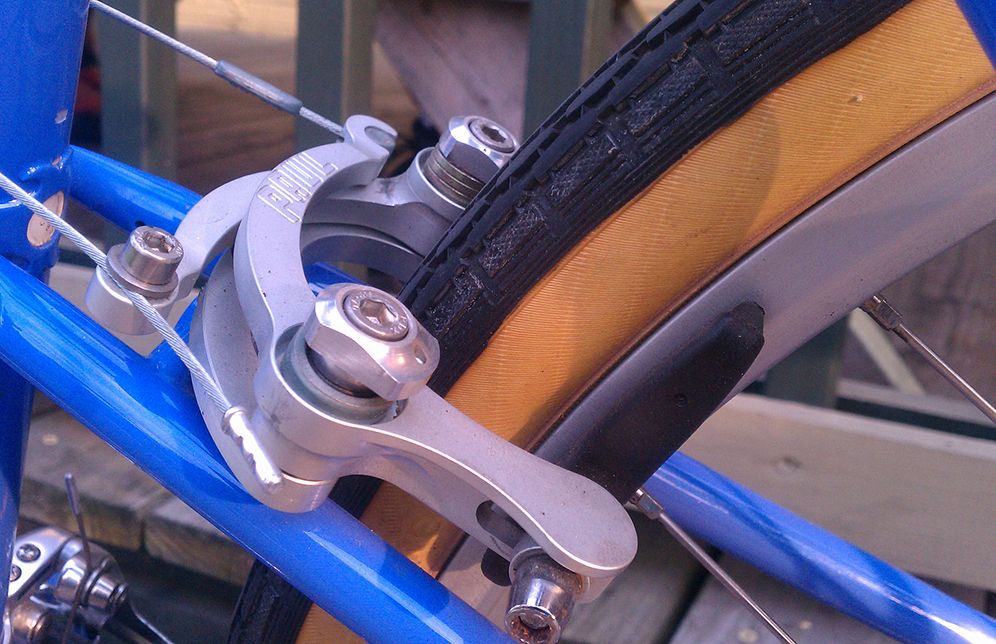 It felt just like a regular air tire!
FLATBIKE ASSESSMENT: Airless tires will remain more difficult to install/uninstall than inflated tires. But not by much, with the right tool. And it’s a one-time deal.
We’re sold, for selected audiences. And we’ve already put it to use. The Tannus-enabled bike below is a prototype of the low-maintenance Flatbike Road Scholar ultimate campus bike — a 23-lb, quality 11-speed that never gets flats, never needs the rear wheel locked up, never needs front derailleur adjustment… and quickly folds in half to fit easily in any apartment.
We’ve sold a few of these to happy customers, but want to do more research on solid-tire efficiency before making this a widely-available option.
4. Like solid tires, but not.We got this tip from a reader–thanks, Donny–and it has developed into a brilliant idea that’s worth a category all its own. But first, let’s take a step back and look at what riders (road and MTB) actually do with their tires.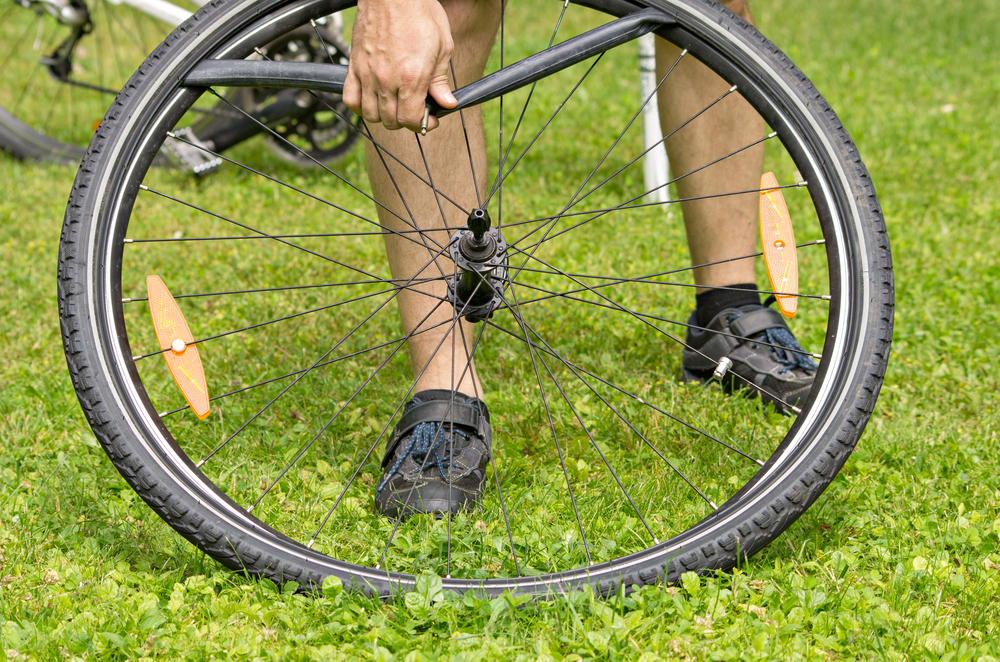
Road riders have a preferred pressure that must be maintained over time for maximum efficiency. They rack up many miles on pavement that may occasionally have a pothole, broken bottle, or goathead thorn. Under low pressure, ‘pinch flats’ may also occur, without any obstacle in the way.
Goathead thorns: Nasty stuff.
MTB riders vary their terrain–one day dirt trails, another day lots of bumps and big jagged rocks–so their tire pressure varies accordingly. The rockier the terrain, the more pliable you want your tire to avoid punctures. Broken glass isn’t usually an issue, but goathead thorns and cactus thorns are worse.
So while an airless tire might make sense for a road bike rider, it would take away the ability for MTB riders to adjust pressure for different terrain. Enter a new category: the tire liner.
A tire liner goes between your tire and innertube, protecting against puncture.
A tire liner is inexpensive. The one shown here from My Tuffy is just ten bucks, with a 70% satisfaction rating. Folks have ridden over 1000 miles with it, and even ‘successfully’ run over broken glass. (And “Ed” in the comments has an even cheaper solution that may be more reliable.)
But it’s still not flat-proof. And you can create your own flats, both from semi-inflated tires (pinch flats) and from having your rim liner slide to the side and rough edges puncture your inner tube (anyone have a name for that?). And tire liners are no match for goathead thorns.
Now here’s where it gets really interesting. Suppose you took the inflated tire idea, and the foam solid tire idea, and the liner idea, and melded them together into a single product that inflated but was thick enough for goathead thorns?
The Tannus Armour: an MTB-focused liner that’s finally designed for goathead thorns.
The Tannus Armour is a liner–the red part–with 15 mm of the Tannus solid-tire material under the tread of the tire, and 2mm on the sides.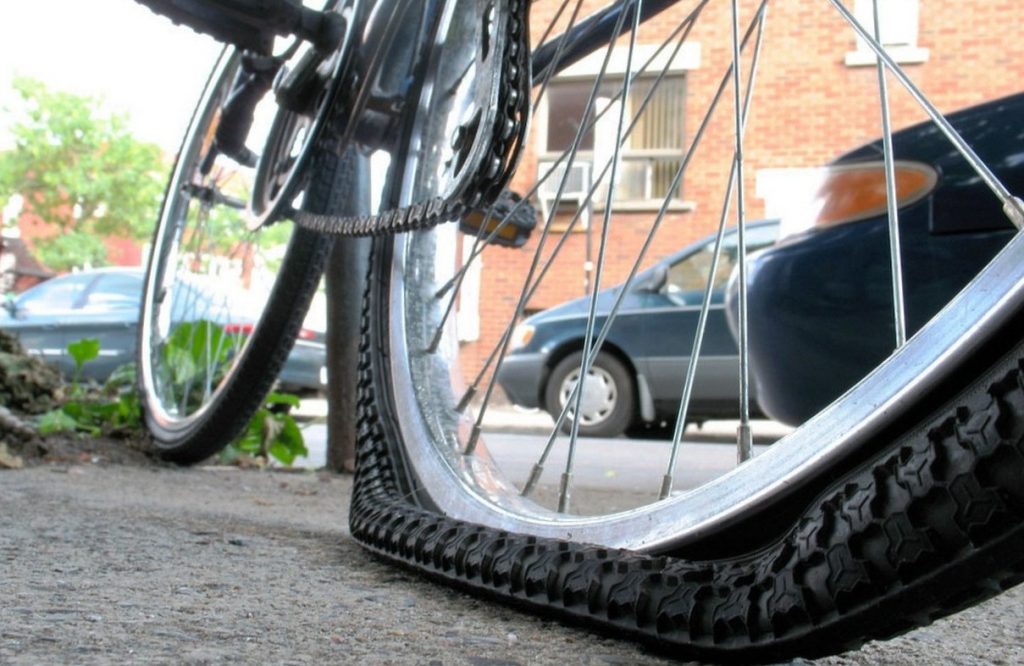 It’s like having most of the advantages of an airless tire, plus the ability to adjust pressure to your terrain.
Even in the worst case scenario, with a random goathead thorn doing a stealth insertion from the side that goes through tire, 2 mm liner, and inner tube, giving you a flat…you still have 15 mm of solid tire to ride back on, protecting your rim from rock damage.
FLATBIKE ASSESSMENT: We cannot pass this up. We are now offering Tannus Armour at Flatbike, both as an add-on and as a standard equipment on our full-size folding mountain bikes.
Tannus Armour: Now available for 26″ and 27.5″ MTB tires.
5. And now for something completely different…What if price were no object, and you could just optimize for the ride on your own wheel? This is the idea behind the Energy Return Wheel.
According to company literature, not only does this completely flat-proof option perform as well as a standard mountain bike wheel, but it outperforms a standard wheel, particularly on uphills. Available for the low, low price of just $2,699 from EnergyReturnWheel.com.
FLATBIKE ASSESSMENT: Hmmm. That’s…different. Can we still afford the rest of the bike? And do we have to clean the insides of the tires after a ride?
Overall, that’s five different ways to solve the flat-tire problem. Which one works best for you?
See you on the trails!
Bob Forgrave
President, Flatbike.com
425-985-6219
Tired of flat tires while riding? Tube punctures are almost inevitable, but if you experience tire punctures often, here are some simple tips you can take to significantly reduce their frequency.
Pay Attention to Your Bike Tires
If you prefer cycling to walking long distances, you should definitely pay attention to your tires. Take care to inspect them after every ride, repair or replacement of a damaged camera.
Watch out for sharp objects
When driving on the road, try to avoid debris. Glass, nails, wire, small sharp stones, etc. - all this can cause punctures. In particular, be careful when you see shiny objects ahead. Small shards of broken glass and other sharp small objects can get stuck in the tire and eventually pierce the tube during movement.
“Whenever I see broken glass on my way, I will definitely get off my bike and walk through this dangerous section on foot,” says Alexander Vasilyevich, a 70-year-old cyclist from a suburb of Moscow. “If I could not stop and drove near broken glass, then I will definitely stop and carefully check my tires. I manage to avoid punctures for quite some time.”
Clean your tires
When a sharp thing sticks to your tire, it can go deeper into the tire while riding and eventually puncture the tube. The sooner you identify and remove the foreign object, the higher the chance of avoiding repair problems. More often punctures occur in the future precisely because of sharp objects getting stuck in the tire and further movement with a foreign body, much less often the chamber is pierced immediately with an immediate loss of air.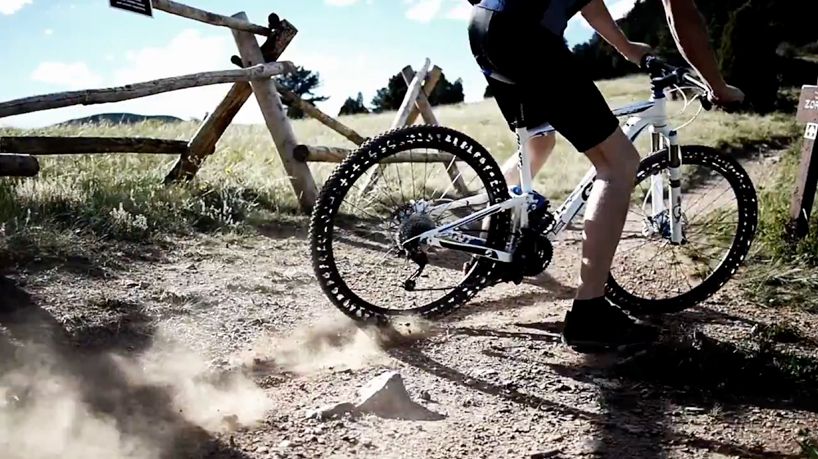
Of course, it is safer to check the tire for sharp objects by removing it. It's faster, though more risky, to do this check on the bike itself.
Check tires after riding
You can also try to avoid punctures by carefully checking your bike's tires after riding. This will take a couple of minutes and will save you a lot of hassle later. Place the bike in a well-lit area and take the time to slowly rotate each wheel looking for foreign objects or tire damage such as cracks, cuts or punctures on the sides and top.
Those minor cuts
If you see minor cuts or punctures during an inspection, simply clean up debris and seal the hole tightly with super glue or shoe glue. This action will protect the camera from further problems.
If the cut is beyond repair, the tire may need to be replaced. Pay attention to purchasing a decent puncture-resistant tire. We'll talk about it below.
Double Tire Method: Double Protection
Some cyclists have been successful in resisting punctures by adding an insert from an old bicycle tire to the tire. Of course, Tour de France riders don't do this as it can add a few grams of weight to the bike as a whole, but I personally don't care. I'm just interested in keeping my tires inflated and don't want buddies to stand by and watch me try to patch the tube while we could be driving. And this will certainly help reduce the number of punctures in the future.
All you need is an old pair of road bike tires. Cut the old tire along its entire length on both sides so that it fits snugly into your new tire, that is, make a kind of liner in this way. Insert the camera and pump up. Don't be afraid to cut the old tire, it needs to fit in the new one and not protrude.
Use tire liners
Instead of cutting old tires, you can also purchase special puncture liners that have been designed specifically for this purpose. Tuffy is just one company that makes good tire liners. They significantly reduce the chance of punctures by providing an extra layer to protect your camera from cuts and punctures.
Better buy good tires
Good tires will cost you money, but this is the best way to get rid of tube punctures from a bad tire. Many tires on the market today are specifically advertised as puncture resistant. They are thicker and reinforced, making them particularly resistant to cuts and punctures. I've been very happy with a pair of Continental Ultra Gatorskins on my road bike, which I've done over 1,000 miles on so far. They significantly reduced the number of punctures compared to the tires that came with the bike.
There are some very good knotted mountain bike tires called the Panaracer Xcs. This is another good brand to look out for if you're having puncture issues on your mountain bike or hybrid.
Watch a helpful video to what values to inflate a bicycle wheel: spoiled mood while cycling.
Fortunately, there are steps you can take to reduce the risk of a puncture. Our tips will help you avoid an unpleasant situation.
Bicycle tires are what protect your camera. The lightest and fastest tires are also the most prone to punctures.
Tough and durable marathon tires have a tough, puncture-resistant layer that helps prevent sharp objects from penetrating the belt and tube. Yes, they are heavier, but the repair of the wheel has a stronger effect on the results of the race in a negative direction.
Often the cause of a puncture, puncture or snakebite is under-inflated tires. "Snake bite" occurs when a sudden collision with something protruding (curb, stone). In this case, the camera breaks in two adjacent places. Due to the weak pressure in the chamber, the tire bulges, pressing against the rim, and the chamber is sandwiched between the rim and a solid object on the road.
To avoid this kind of trouble, make sure your tires are properly inflated before riding, especially if you're on a less than perfect track. Properly selected pressure gives less chance of deformation of the tire and its contact with the rim.
The tire must be marked with the values to which it should be inflated. Try not to go beyond both the minimum and maximum values. If you are going to ride on asphalt, bring the tire pressure to the maximum value, and if on an uneven surface, reduce it to the average allowable.
This simple tip is ignored by many, unaware that before and after every ride you need to spin the wheels and check for any sharp objects stuck in the tyre. If they are not removed, they will over time, under the influence of your weight, push into the inner chamber - and provide a puncture.
Most glass and debris collects on the edge of the road, so another way to protect yourself from camera repair is to choose a place on the road away from littered areas.
 Keep an eye on the road
 Don't just look under your wheel, otherwise you risk not noticing a pit, stone, broken glass and other dangers in time. Look a few steps ahead.
If you are traveling in a group, warn your comrades of the danger. There are special signs for this. If someone has a puncture, the whole group will have to wait on the side of the road until the injured cyclist is done with the repair.
If you cannot avoid a potential hazard, loosen your grip on the handlebars as much as possible and try to "slide" over the obstacle. When you tense up by squeezing the steering wheel and leaning on it, the force acting on the front wheel in the event of an impact increases.
In addition, you can use your cycling skills to literally jump over obstacles. This works well with potholes, rails, and narrow artificial bumps like speed bumps. Just don't show off your amazing skills when riding in a group.
If you do need to replace the tube, always check the inside of the rim and tire to make sure there is no debris.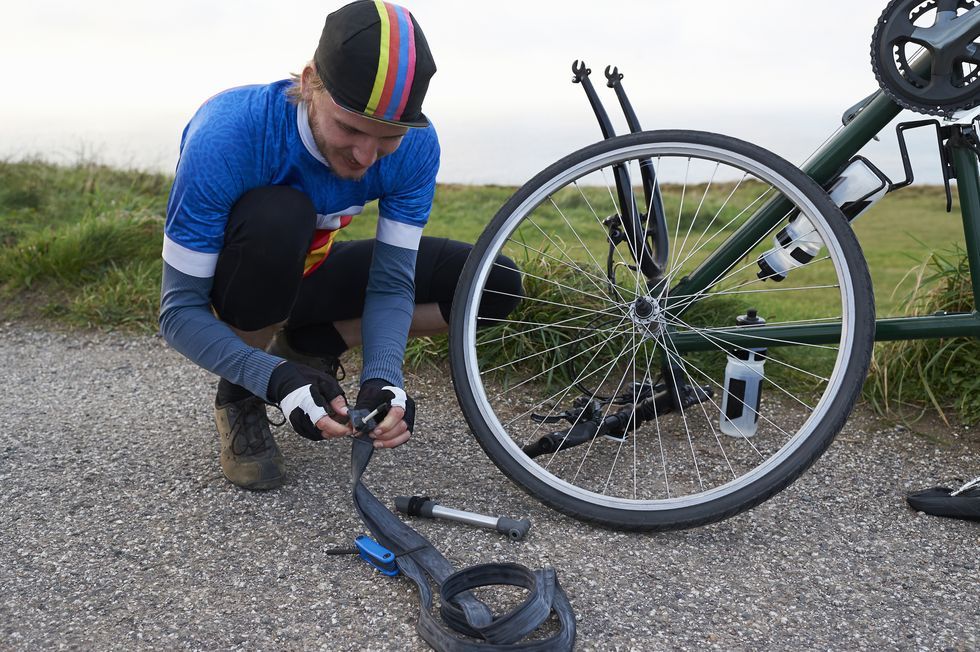 To do this, carefully run your finger along the inner surface and inspect.
Then inflate the inner tube a little, place it in the rim support and make sure that the inner tube does not get stuck between the rim and the edge of the tire.
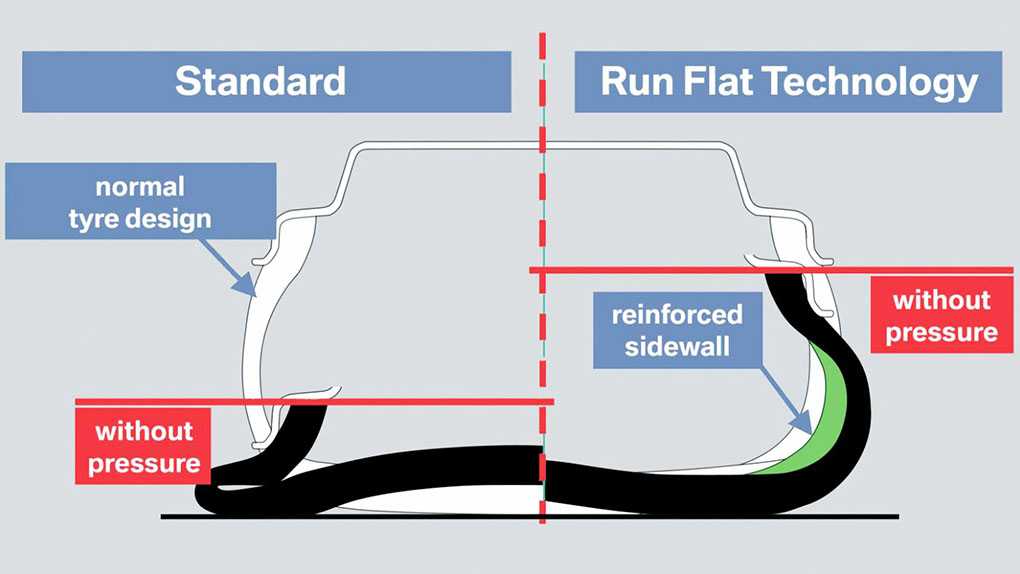
Tubeless tires don't have the usual tube underneath, hence the name. Tubeless technology has been around for many years, especially in the mountain bike market. Gradually, it is being introduced into the road cycling environment. "Tubeless" have increased resistance to punctures and here's why:
Tires don't last forever and wear out over time. Many of them have an indicator showing when it's time to replace. As soon as it shows up, get a new tire.
Indicators are usually two small holes a few mm wide in the tire tread. If they are no longer visible, then the tire has worn out, and it is time to change it.
There are no such indicators on the MTB, but you can watch the tread spikes. When they get rough and close to being level with the ground, it's time to install a new tire.
Sometimes the problem is not on the outside, but on the inside. For example, in the rim. So, the rim is surrounded by a rim tape, which can be damaged or move. This is the most innocuous of problems, and if you find worse faults, visit a bike shop where they will fix your wheel.
Of course, it is not expected that a puncture will be the fault of the old chamber, but it does happen. The inner chamber also wears out, and the rubber becomes more crumbly. If you haven't changed your camera for several years, check it before an important start.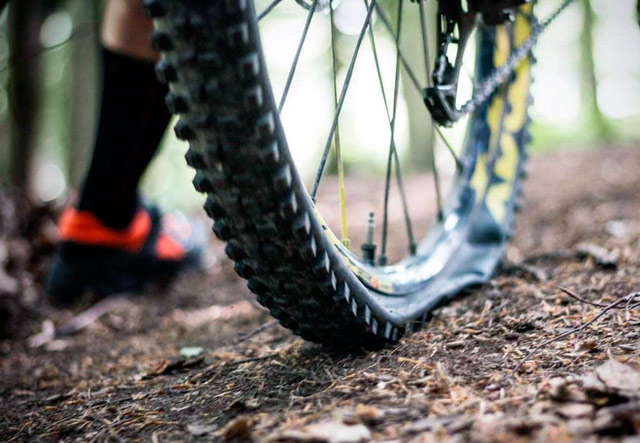
Although there is a belief among riders that with a new tube a puncture will happen literally on the same day.
Taping a punctured chamber is a cheap but temporary solution. With a camera that has a patch, and even more so more than one, the risk of a puncture increases. If it is not possible to install a new camera on the way and you have to patch a punctured one, we recommend that you replace it immediately after the trip.
This tip is for cyclists who ride without punctures for a long time. The chamber valve itself and the place around it wear out faster than rubber. During the year, you have to pump up the wheel countless times, so sometimes the culprit of a flat tire on a trip is a valve damaged from use.
The area on the tube around it can also tear and crack, because it is most subject to friction against the hole in the rim.
 Don't ride in the rain
 When it rains, you are more likely to get a puncture because the water acts as a lubricant and helps sharp stones and glass cut through the tire. And when it rains, there is more garbage on the road: it is washed from sidewalks, lawns and from the edge of the road to the part where you usually ride a bike.
Sealant can be used for more than just tubeless tyres. This tool is added to conventional cameras. It, of course, will make the wheel a little heavier, but it will create additional protection.
Adding sealant is easier if the chamber has a removable valve core, so you can fill it without risking clogging the valve. But before you follow this advice, make sure the sealant is compatible with your bike's inner tubes, especially if you're using latex ones.
Inner tube sealant works the same as tubeless sealant. It covers the inside of the chamber as the wheel spins, and if you puncture, the air escaping from the chamber sucks the sealant towards the hole.