ATV riding is becoming more popular among all groups of people. Compared to the enjoyment of doing a sport, ATV rides have become more fun and adventurous.
It is enjoyed for leisure as it provides thrill and fun for the rider. But if you are riding an ATV, there is an integral thing you shouldn’t miss — LED light bars.
1 Why Do You Need An LED Light Bar
2 Decide The Type Of Riding For Which The Light Is Needed
3 Check The Legality Of The Light.
4 Find The Perfect Spot To Install The Lightbars So You’ll Have Clarity On Style & Size
5 Measure The Available Space
6 What Are The Features Of An Ideal Light Bar
7 Plan Your Budget
8 Wiring & Installation
9 Select A Few
10 Go Through Reviews
11 FAQs
Why Do You Need An LED Light BarSo if you want to enjoy riding an ATV, you need the perfect light especially, during the night. An LED light bar will provide better vision for you at night.
These light bars are also energy-efficient, meaning they consume less energy and last longer. LED light bars can also be installed easily.
Selecting the perfect LED light bar for your ATV can be a tough decision, and this is why we have created this guide to help you make the right decision in finding the best-LED light bar for your ATV.
The availability of LED lights in the market has drastically increased.
Selecting the right LED light bar is even more challenging as the products look almost similar.
It won’t be easy for someone who has no knowledge or is not very familiar with LED light bars to select the perfect one for their ATV.
As you go through this guide and understand much better about LED light bars, you will be able to select the best-LED light bar for your ATV rather than getting one from the market without prior knowledge.
Here are a few things you need to consider before purchasing an LED light bar for your ATV:
Decide The Type Of Riding For Which The Light Is NeededUsually, people consider 10-15 inches lengthy LEDs covered in a billet casing for their ATV.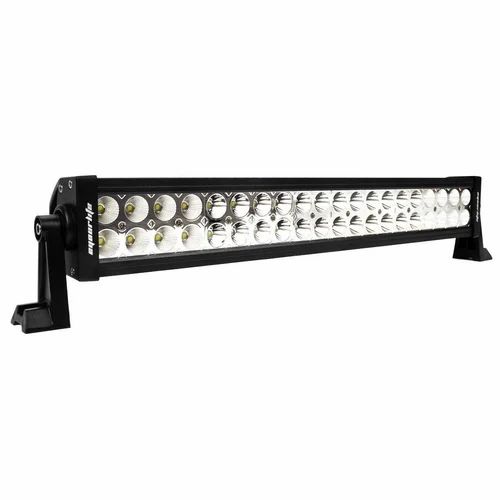 This is usually the common choice of most owners, so we will talk about it in this guide.
However, similar lights are related to the phrase “light bars.” We’ll discuss some of them below, and you might find them as efficient as standard light bars.
If you don’t have a particular need, we understand. Maybe you are looking for light bulbs for your ATV, and that’s alright.
You may find halogen headlights as one of the ideal choices for on-road requirements
But they might come off as a disappointment when you take your ATV on off-road rides in its familiar environment.
These are some of the instances that you cannot do without light. You’ll never feel as if it’s too much light when you ride your ATV in these instances.
So understanding your primary requirement will make things easy for you. Once you know the requirement, selecting the ideal light bar becomes easier.
Check The Legality Of The Light.Before you go ahead with your purchase, you must make sure that the legal aspect of installing LED light bars to your ATV is clear and out of problems.
There are laws and regulations for ATVs and light bars. So you need to check them to avoid legal issues.
Though ATVs are legal to use, some LED light bars may not.
As LED light bars are meant for off-road driving and not on normal roads, you need to check and make sure that the type of light bar you use is legal.
Different states have different legal requirements, and therefore, you have to make sure what it says in the area you live.
Usually, off-riding has no issues with the legal system, even if you plan to install LED light bars on your ATV.
Find The Perfect Spot To Install The Lightbars So You’ll Have Clarity On Style & SizeDo you know where you want to install the light bar on the quad?
If you haven’t decided it, you better pause your frantic search because it’ll lead you nowhere.
Once you decide on the spot, you’ll be able to make a clear decision on the purchase that you’re going to make.
The spot selected must be somewhere on top of your bike so that the light beam will not be impacted by deep snow, grass, or brush.
If you place the light bar low, it will not provide broader area coverage and will end up damaged.
Similarly, the place you decide to mount the LED light bar should be somewhere protective, and it should keep the light bar away from scratches and other accidents.
Most Brush Or Bull-guards Are Produced To Suit The Light Bars.
Therefore, they come with well-secured mounting spots, ideal for light bars to be kept in place.
Bull-guard will be a great place if your bike has it, and as it’ll keep the light bar protected.
But what if the bull guard is missing from your bike?
Well, if you have the budget for it, you can consider getting one as it’s essential.
Another good choice is the front rack of your ATV. You can find mounts and brackets that suit any bike. You can lift the LED light bar higher with the help of these, but you’ll leave them unprotected.
If you’re into aesthetics, then you’ll not be willing to install a fat LED light bar to kill the look of your bike.
Another suggestion is a customized grill, or you can consider an OEM grill cutout to suit the light bar.
If you consider this option, check the airflow because it restricts the radiator’s airflow.
If that happens, the light bar and bike might become hotter. These options don’t cause much of an issue most of the time.
Try to find a spot to mount the LED light to metal. Plastic fenders might not serve the purpose as much as metal does.
Attaching the light to the plastic might create light flicker and shake when you ride on challenging surfaces. Therefore, try to avoid it as much as possible.
Almost all LED bars are offered with mounting brackets. This is a universal thing and may not work well on any spot on your bike. So you have to provide an extra effort to find the right spot to fix it.
It’s vigilant to Google your bike’s model, make, and “LED bar mount” to find the available options.
Usually, you’ll come across extension brackets produced to work on sturdy spots of the bike’s front. This will let you install any LED light bar that you prefer.
Once you decide where you want to mount the LED light bar, you should check the mounting bracket that will suit the spot selected.
Measure The Available SpaceTo ensure that you don’t select an ample light that will not fit the mounting spot or be too small, you must check the available room you have to keep in mind.
It’s recommended to measure it using a measuring tape. Find the height, width (LED’s length), and depth.
If you plan to install the LED light bar on your grill or brush guard’s side, it’s important to measure without a doubt.
Make sure to find a light that is an inch smaller than the available space. The installation will be easier if you select this size, and you can enjoy proper cooling as well.
You can visualize installing different sizes of LED lights on your bike and see whether they look good.
The light bars differ in size, and you can find sizes from 6-50 inches of light.
But remember, the equation of more considerable the light, the better the benefit is not valid. Sometimes, big lights might not look appealing.
What Are The Features Of An Ideal Light BarYou must know the most and least essential features in a light bar if you want to settle for an ideal light bar.
WattageThere’s no unlimited power for ATVs, and any other extra accessory for power will pressure the battery and the charging structure if installed.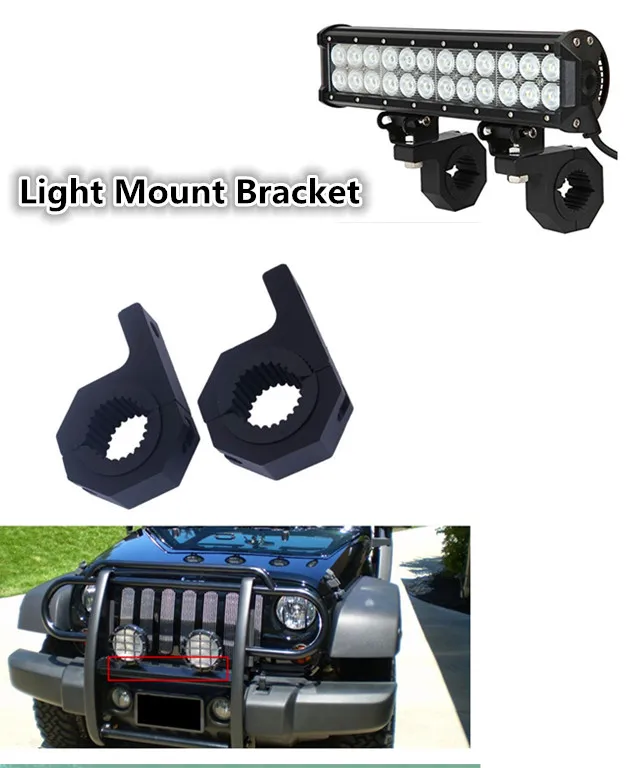
On the good side, too much power is not needed for an LED light bar to function. Usually, the wattage of an LED light bar is specified in the product’s spec sheet.
This would show the amount of power needed for the light bar to be used. You will find the right light bar without affecting the power budget unless you get a 50″ monster car.
If everything works fine, you will not face any issues, yet you can always check on the manual to confirm that the system supplies a higher power than the used light bar.
The capacity of about 100 watts can be saved if you replace a powerful stock headlight with an LED light bar.
No power is supplied to the light through the charging process while operating the engine.
If you do not want to drain the battery with long-term use of the light, then a light bar with reduced wattage will help.
If you tend to use the light even when the ATV is not operating, then it’s from the battery that the power should come off.
These are some of the usual reasons for the ATV battery to keep draining.
You should always choose a light with the least wattage, even if a couple of lights produce the same range of brightness.
The light with the lowest wattage contains better LEDs and highly effective ones.
VoltageEven though a high number of LED lights are designed to function at both 12V and 24V, ATVs usually operate on 12V. I
f you use a 24V light bar for a 12V ATV, it will not be used.
The LED will not ignite if it runs on a voltage lesser than its actual capacity.
WeightUsually, light bars are aluminum, which ensures lightweight. When it comes to light bars, weight should not be an issue, as light bars are all made in a manageable weight.
If you are into quad racing, you may consider the weight, but even the heaviest ones are quite practicable.
ShapeLightbars are available in many shapes. The most common types of light bars are straight and curved. Small round lights and even square-shaped ones are available
but they are considered ‘work lights. ’ Even though they are not light bars, some find them a good choice for ATV.
Both the bar shapes act in different ways. The curved light bar usually costs more than the straight bars,
and the light of the curved bar spreads more towards the sides and is often used for off-road riding.
Any light with the same effect focusing on effective deflectors is a much-budgeted option.
Life SpanAn LED light bar’s lifespan is considered an advantage as they last long. The most common being in the range of 50,000 hours.
Some low-quality LED bars may not last as long as they are supposed to. Never settle for a cheaper light bar option as it may have a much lower life span.
HeatsinksThe lifespan of any LED light bar will be affected by excess heat. A light with sufficient cooling will dispose of the heat of the LED’s thus resulting in a higher lifespan.
The ideal ones are those with beefy cooling fins at the rear.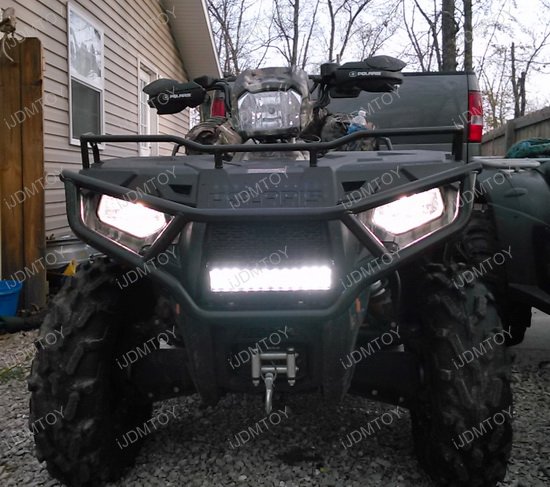 The heat of the LEDs and the circuit board will be disposed of by itself,
maintaining low operating temperatures, which ensures the long life of the light bar.
To keep the electronics of the light cool, select a metal core PCB type.
A light with a proper cooling system will last longer as the heat has a way to cool down.
The heat that builds up affects the lifespan of a lightbar.
LumensA unit called lumens is used to measure the intensity of light. The lumens range can
measure the brightness of light accurately.
Though watts are used to measure the intensity of traditional light bulbs, lumens are used for LEDs. LEDs are produced in various colors; lumens to measure brightness are more accurate than watts.
The effectiveness of an LED light bar varies from a standard light bulb. Even if the same amount of watts are used, one can light up more than another as the watts are used effectively.
The higher the lumens, the brighter the light will be. Lightbars for ATV can be found in a range of 1000 to 3000 actual lumens.
A much poorly made LED light may light up brighter initially but fade off within seconds of use.
Some manufacturers will sell these kinds of lights with the promise of a higher lumen value. Always stay on the lookout and stay away from such cheap light models.
The brightness of the light depends on how the eyes perceive it, based on its color.
So the brightness isn’t in correspondence to its amount of lumens as it is measured along with an instrument.
The light bars will often be listed as raw lumens without the actual one.
To calculate the effective lumens, the mentioned raw lumens should be multiplied by 0,8. (How to Measuring Light Output)
The Quality Of LED And Its EffectLED light bars for ATV vary in quality. A poor-quality LED light bar wouldn’t last long for years and burn out faster.
Even though some LED light bars are expensive, they are high in quality and can be used for an extended time.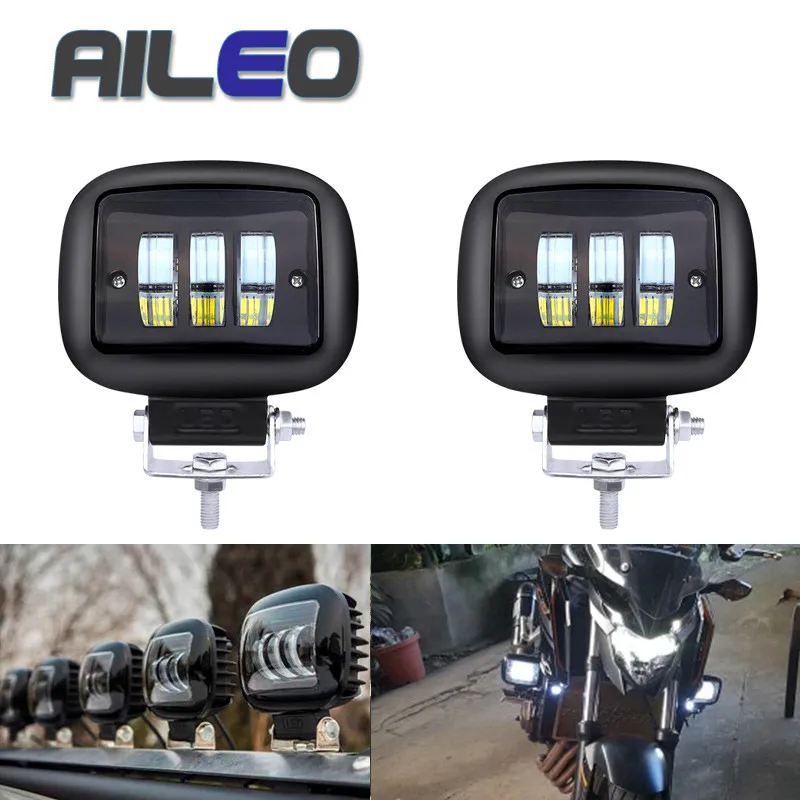
The expensive ones have more effective LEDs, producing more lumens for every watt.
The cheaper ones work harder to draw high watts, to sum up to the brightness range, making it too hot to run.
Always make sure to check the quality of the LED light bar and a well-known manufacturer before purchasing.
For good quality with an excellent output for each watt, Epistle and Cree are the best-known ones in the market.
An LED light bar uses the power to produce light while the usual light bulbs power is primarily used in heating, and this outstanding feature makes the LED the best option.
An ordinary 40 watt light bulb will produce about 450 lumens, while an LED with quality will produce 2000 lumens or even more with the same amount of lumens. LED lights have transformed the whole lighting market.
DurabilityThe durability of a light bar is essential to be considered when selecting the perfect LED light bar for ATV. LEDs need to be taken good care of since they are pretty fragile.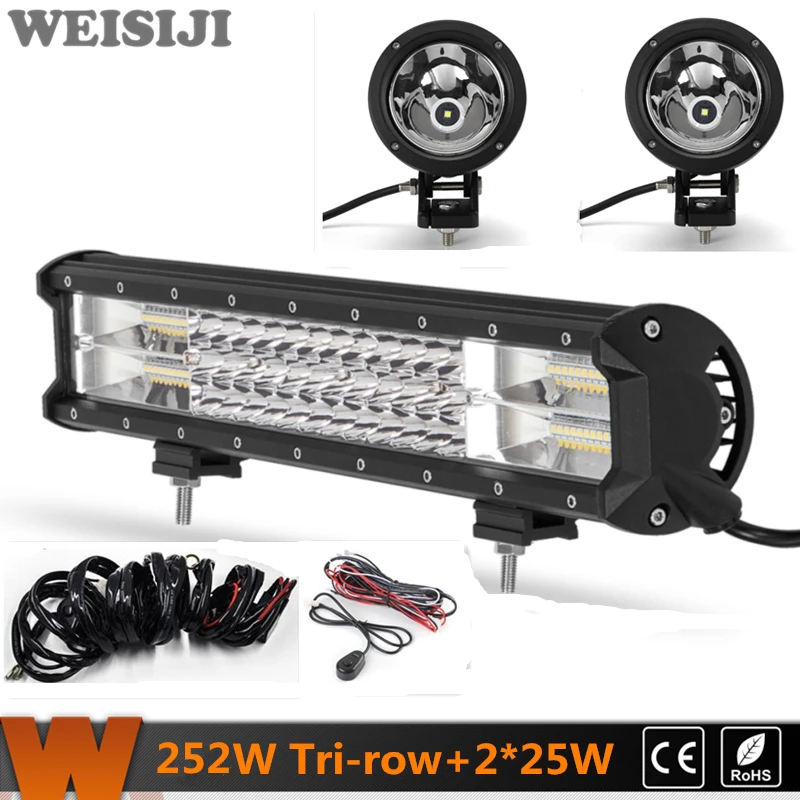
An LED’S casing should be built in a way it withstands the use when it is put in while riding an ATV; even in harsh conditions than a cast casing, an extruded aluminum is much more rigid.
A good casing of an LED light bar should keep away dust, dirt, and mud and should be waterproof, corrosion-proof, scratch-proof, shockproof, and withstand extreme temperatures, both hot and cold. The IP rating of the light indicates this.
The IP rating has two numbers, one for dust resistant and the other for waterproof.
The better option is the one with a higher number. Select the light which has an IP rating of 67 or even higher.
This range of lighting can handle any harsh conditions, even if it was down in 1m deep water or mud while using an ATV.
The wiring connectors are also a factor to consider. To prevent issues like corrosion, they must be waterproof, and a silicone or rubber gasket beefy connector with good quality will do.
Avoid getting cheap lights made with fragile mounting hardware.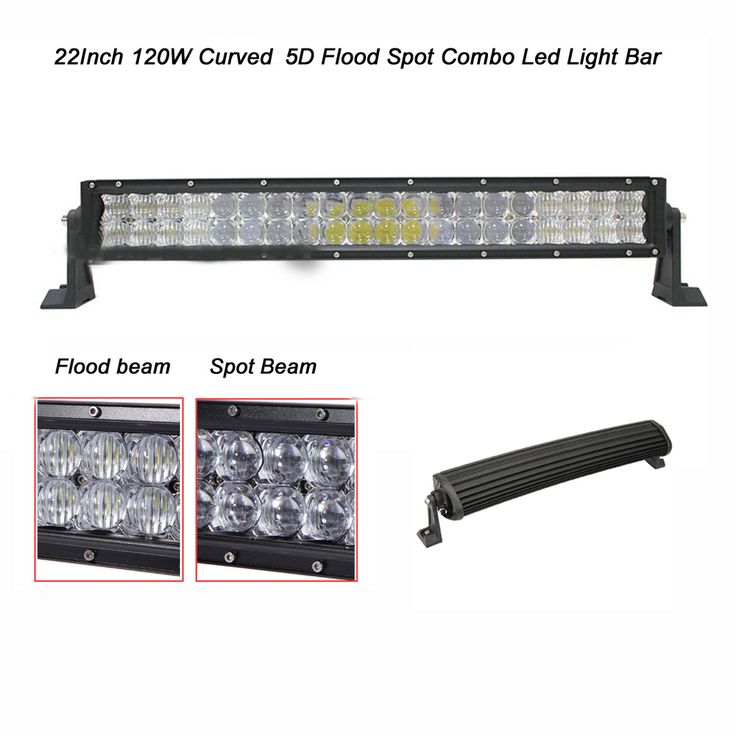 These tend to rust and make the ATV look worn out.
The mound should be adjustable and rigid even be suitable for various mounting circumstances.
Color TemperatureThe color temperature is used to describe the color output of a light, measured in the Kelvin scale.
One needs to understand that a higher color temperature of an LED does not mean that it heats more than one with less color temperature.
This scale indicates the scale in which the color of the metal in the light glows when exposed to certain levels of temperatures.
The LED light’s color temperatures usually range from 2700K to 6500K.
At lower temperatures, the light glows in color red/yellow.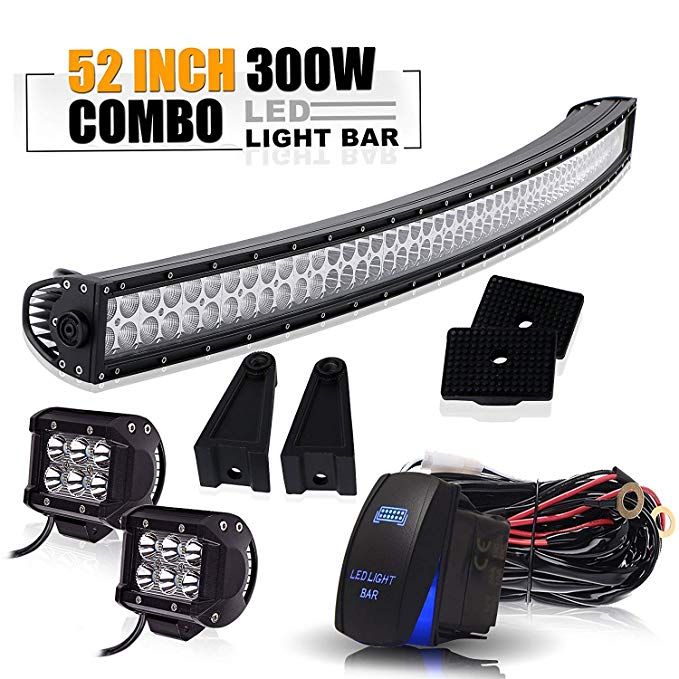 These warm yellow lights are found to comfort the eyes but are pretty unrealistic.
The light glows in white at higher temperatures, which looks almost blue. These bright lights may cause tiredness in the eyes.
This is why choosing a light within the 5000K range is ideal. This would be bright enough and still allow the colors of the light to pass with a natural flow.
Most people prefer a yellow light while riding on the snow as it is bright and shows well. A color lens cover is often offered to fit any type of riding.
Beam PatternLED light bars have different beam patterns for many types of uses.
The types of beam patterns include spotlight, floodlight, and available are beam patterns with a combination of the two, also called the combo beam pattern.
However, the most popular ones are the spotlights and floodlights.
The beam pattern of a spotlight is designed to throw light as far as possible and is relatively narrow.
This kind of light spreads at about a 30-degree angle from the direction point.
This kind of light is great for high-speed racing and driving down highways.
The floodlights beam pattern is designed for a broad light projection with a wide beam. This beam light spreads at about a 60 degrees angle and is great for low-speed riding.
If none of those above beam patterns seem ideal, another option is called the combo beam pattern.
The combo beam pattern is designed with both spotlight and floodlight features. This kind of beam pattern is becoming more popular as it is preferred when one is not satisfied with the spotlight and floodlight features.
A spot or floodlight usually comes in below 20″ length bars, and most common are those with a combination of the two for bars that are shorter.
Usually, many prefer the beam pattern of a floodlight for their ATVs.
However, it is not legal to use the light bar on the public roads of many countries.
A better light presence is needed when riding at much less speed and for any other work in the dark except for those who are only into trail-riding.
Spot VS Flood VS Combo: What’s the Difference?
WarrantyWhen purchasing light bars for your ATV, consider a warranty. This shows how long the product is good to use.
While some light bars come with a lifetime warranty, certain light bars only last up to 1 or 2 years.
Avoid purchasing light bars that do not come with a warranty. The manufacturers who do not produce a warranty are the ones that are highly doubtful about the product’s longevity.
It is better to avoid such products as they may not last long or are worth the price mentioned.
Reliability Of The Manufacturer
Many companies are on the rise in marketing LED light bars. Due to this reason, it may be difficult to figure out which ones are more reliable.
For this reason, it is better to always stick to brands that are well trusted among the larger crowd of people.
Sticking to trusted brands will ensure that you have a good product. Do your research and move ahead with a reputed company.
Plan your budget before you go ahead and make the purchase. It won’t be easy to select the best-LED light bar without a budget.
As many LED light bars are available with various types and prices, planning a budget will help you choose the right one you can afford.
The price ranges for LED light bars can range from relatively cheap from China to costly “military-grade” ones depending on what you plan to buy.
Yet, it’s all about the proportion of quality and the cost for many. Even though the cheaper lights work, they will fail faster in terms of corrosion.
It would help if you also remembered that the higher the price, the more significant the quality.
Wiring & InstallationTo install a light bar, you will need wires and connectors. Some packages include the things required for installing the light bar, like wires and relays.
Most packages do not include additional components, so you will have to purchase them separately.
Having the components ready before installation can be less stressful during the installation process.
Planning out the wiring way ahead will make it a lot easier to get the right components before you purchase the light bar.
Select A FewBased on all the knowledge you have gained from this guide in selecting the perfect LED light bar for ATV, you can now like a few that fit your category.
The most important thing to consider is durability and the color temperature according to your preference.
Go Through ReviewsBefore you make any kind of purchase, it is ideal to check the product reviews. The product reviews will give you better clarity and help you decide if the particular product is worth the price.
You Are Good To Go!This guide has provided you with all the necessary information about selecting the perfect LED light bar for your ATV.
Now that you are familiar with and have a clear understanding of LED light bars for ATV, you are good to go ahead and make the purchase.
The most common queries related to LED light bars for ATV
FAQsWhat Ideal LED Light Bar Should I Get For My ATVThe usual size of an LED light bar for ATV ranges from 7 to 20 inches. The consideration must be based on the space available to install a light bar; however, the most common size is 12 inches.
What Is The Cheapest LED Light BarThe price of an LED light bar ranges according to its quality. Those with a strict budget can get a light bar for a low cost of 10 dollars.
It is advisable to stay away from affordable options as the price range decides the quality of the LED light bar.
We help you avoid the pitfalls to deliver the quality and value your offroad and warning lights need, on-time and on-budget.
Contact New Vision
Views: 1,222
Toggle Sliding Bar Area
Page load link Go to TopThis guide was created to help you make an educated decision when choosing what light-bar to get for your ATV.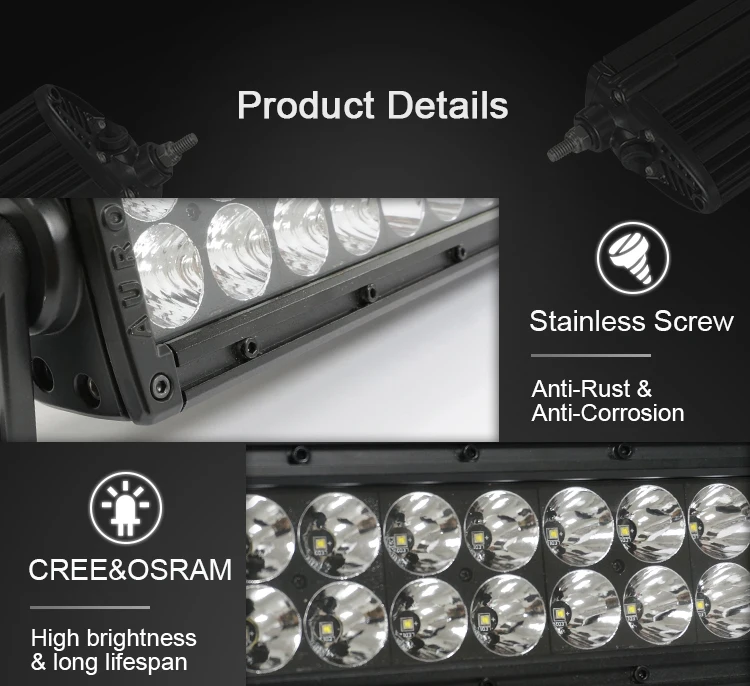 I’ve made some great and some terrible light-bar purchases for my personal power-sport machines throughout the years. Hopefully, you will benefit from some of the lessons I have learned.
In recent years, the market for LED lights has literally exploded. Many of the products available look very similar if you look at the pictures. For an untrained eye, it can be hard to separate the good from the bad.
As long as you follow the steps in this post, I’m confident you’ll be much happier with your purchase than if you pick up a random light bar from the dealer.
Page Contents
What most people think of when they consider getting a light bar for their ATV is a 10-15 inches long row of powerful LEDs encapsulated in a strong billet outer casing. This is the type we’ll be focusing on in this guide.
Other similar types of lights go under the slightly diffuse term “light bar” as well. Maybe one of these will fit you need just as good as a standard light bar:
You may not have just one specific kind of use in mind but want more light in general, and that’s fine as well.
While those stock halogen headlights are decent for on-road use, they often come short when you use the ATV in its more natural environment.
These are all situations where you basically can never get too much light. Knowing what your main usage will make it easier to pick the right bar for your need.
Before you go any further in your purchase process, it may be worth looking into whether or not any laws or regulations tell what type of light you are allowed to install.
My ATV is legal for on-road use, but I cannot use a LED light bar on-road. To be somewhat legal where I ride, I need to wire it to be turned off entirely when riding on the public road.
Other laws may apply where you live. As long as you won’t be riding on any public roads, you should be fine in most cases.
Before you begin looking at specific models, you need to decide where you want to install the new light bar on the quad.
The spot you choose should ideally be quite high at the very front of the bike so the light beam won’t be affected by grass, brush, or deep snow.
If you mount the bar too low, the light won’t spread as well, and you increase the risk of damaging it. Simultaneously, the spot you choose should ideally be somewhere the bar is protected from impact or from being ripped off by a stiff branch.
Many bull-guards (brush guard) on the market are made specifically with light bars in mind and have a well-protected mounting spot where the bar can be bolted in place.
This will be my recommended mounting spot in most cases. So if your bike has a bull-guard, it will be a good place to start looking.
Inside the bull-guard, the light will be protected from damage.But if your bike does not have a bull guard, depending on your budget, now could even be a good time to consider getting one.
Another option is to clamp the light bar to the ATV’s front rack if it has one. You should find brackets and mounts that fit almost any bike. This will lift the light even higher but leaves it less protected.
It’s also a matter of aesthetics. If you’re looking to keep the stock look of your bike, installing a big fat light-bar on top of the front fenders may not be on top of your list.
A third option is getting a custom grill or even making a cutout in your OEM grill to fit a light. Be aware that this option may restrict the airflow that goes to the radiator, making both the bike and the light-bar running a bit hotter. However, in most cases, these options should cause no issues.
It’s always best to find a place where you can bolt the light to metal, and not just to the plastic fenders.
Bolting the light directly to plastic may cause the light to shake and flicker when riding on uneven surfaces. It should therefore be avoided.
Most led bars come with a set of mounting brackets included. These are universal and may not fit directly to any good location on the bike.
It’s worth doing a google search on “led bar mount” + your bike’s make and model to see what’s available. Often you’ll find extension brackets that are made to be installed on a sturdy spot on the front of your bike and allows you to install almost any light bar to the bike.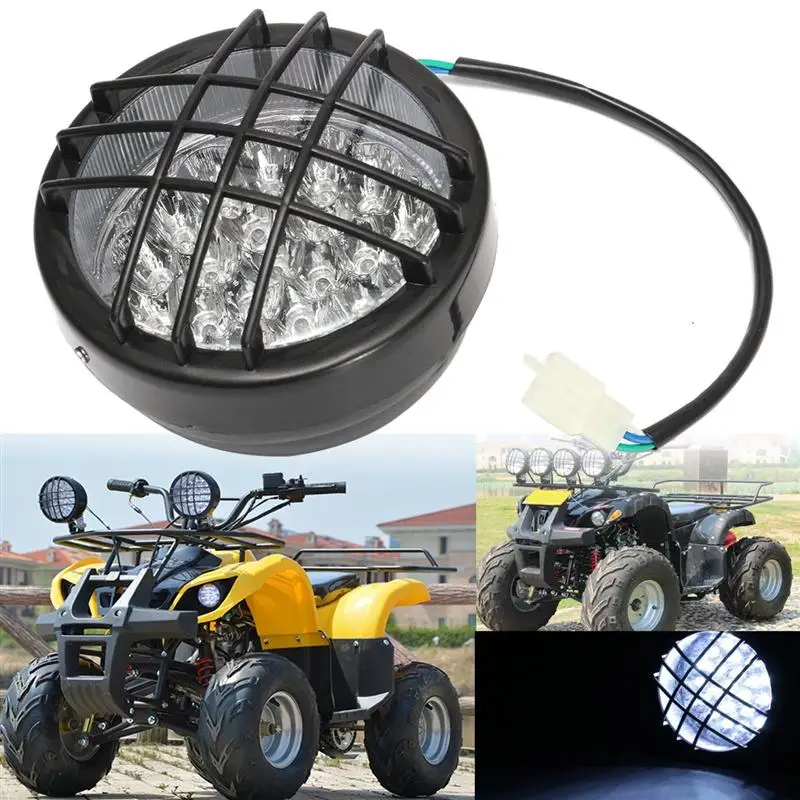
When you’ve decided where you want to mount the light, take note of what mounting bracket you will need to fit your chosen spot.
To make sure you don’t get a light that’s too big for your mounting spot or that will look completely out of proportion, you should find a tape measure and take note of how much room you have to work with.
Measure available width (LED light length), depth, and height.
Measure twice, buy once!This is especially important if you intend to install the bar on the inside of your brush-guard or grill. You need a light that is about one inch smaller than the space you have available. This will make installation easier and will allow proper cooling.
Visualize how different sizes of light will look like when fitted to the bike. You can get lights bars in sizes from 6 inches to over 50 inches, but bigger is not always better. A bar that is too big will not look good.
To choose the best light bar for your need, you must know what features matter and what’s less important.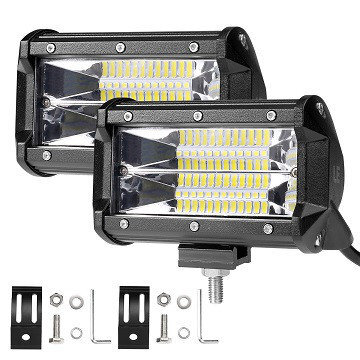
ATV’s don’t have unlimited amounts of power available. Any additional power-hungry accessory you install will put extra strain on the bikes charging system and battery.
Luckily, LED lights do not require much power at all. The wattage should be listed in the product’s spec sheet and tells how much power the light bar needs to operate.
Unless you choose a 50″ monster meant for cars, you should be hard-pressed to actually find a light bar that makes any serious impact on the available power budget.
To be on the safe side, you can always consult your owner’s manual to verify that the bike’s charging system delivers more power than the light bar uses. But as long as your system is working properly, you will likely have no issues.
Those who find out they have chosen a bar that’s a bit too powerful can compensate by replacing the stock headlights with LED. This should “save you” about 100 watts of capacity.
The charging system, however, does only supply the light with power when the engine is running.
If you plan on using your light a lot when the bike is not running, the power needs to come off the battery instead. Choosing a light with less wattage will allow you to use the light for a longer period of time without draining the battery.
In this article, I go through the most common causes if your battery keeps draining on your ATV.
If the choice is between two lights that produce the same amount of brightness, you should opt for the one that has the lowest wattage. This light is the most effective, usually due to better LEDs.
The bottom line is that you should not make witch bar has the lowest power draw be the deciding factor to which one to get.
Most ATV’s run on 12V. And most led lights are made to operate at both 12V and 24V. Just make sure you don’t get a 24V only led light for your 12V bike, as this will not work.
A LED running on a lower voltage than it is made for will not even glow as a traditional light bulb does. It will simply not ignite at all.
Most light bars are made from aluminum and won’t add any significant weight to the bike. Even the heaviest bars are manageable, so weight should not be a deciding factor unless you are into serious quad racing.
Lightbars come in many shapes, where straight and curved are the two most common types. You also get square or round smaller lights, but these are considered work lights and not light bars. For some, however, they may still be a good option for the ATV.
A curved bar will spread the light more to the sides and is ideal for off-road applications. But these tend to cost more than the straight bars. A cheaper option is to look for a light that focuses on effective deflectors to achieve the same effect.
LED lights last a long time. Usually so long that it’s other factors than reaching the end of their rated lifespan that puts them down.
Lifespan in the range of 50 000 hours is common, but be aware that some of the cheaper models out there can’t always back up their claims of forever-lasting lights.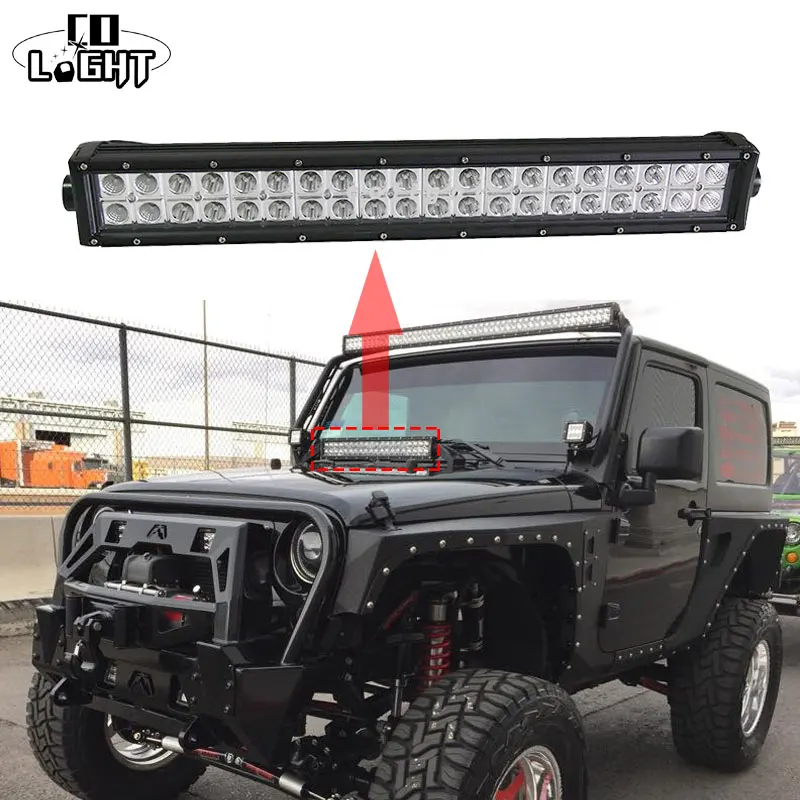
Excess heat will severely impact the lifespan of any LED. So look for a light that has proper cooling with some beefy cooling fins in the back.
The LED light bars from Rigid Industries feature some beefy heatsinks for proper cooling.This will quickly dispose of the heat created by the LEDs themselves and their circuit boards, keeping operating temperatures low and life expectancy high.
Also, look for a model with a metal core PCB as this will further help keep the light’s electronics cool.
Without proper cooling, the heat that’s created will build up with nowhere to go. And why is this bad? Well, except smashing the light to pieces with a rock, heat is the main factor to affect the light’s lifespan negatively.
A light with insufficient cooling may only last half as long as it would with proper cooling.
To tell how bright the light bar is, the manufacturers use a unit called “Lumens.” The unit is used to measure light intensity.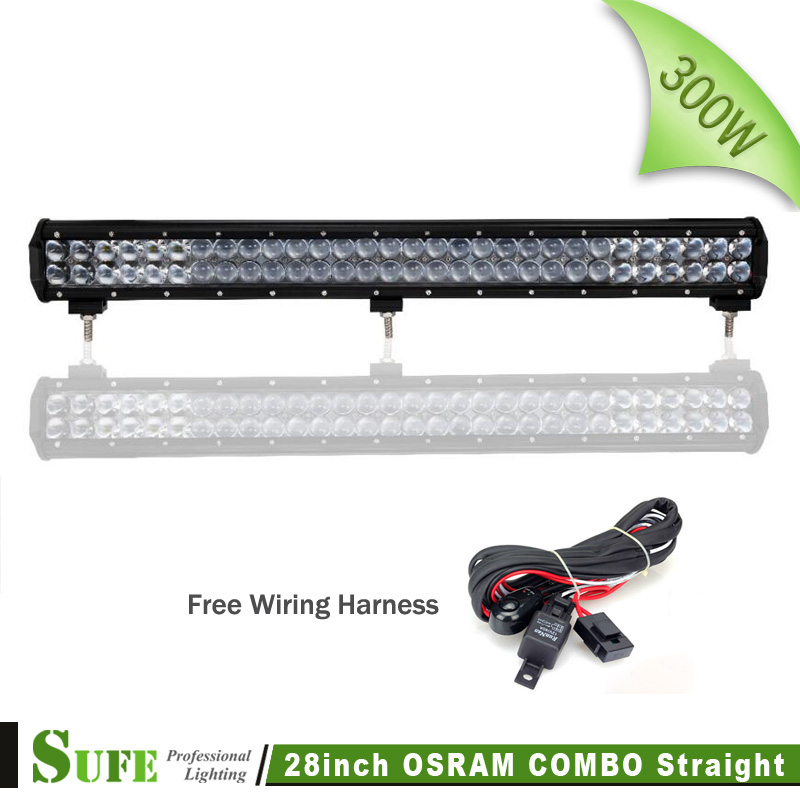
With traditional light bulbs, it’s common to use watts to tell how bright the light is.
But because LED lights come in such a wide range of colors, using lumens to tell how bright it is is much more accurate than how many watts it uses.
LED lights will also vary a lot more on effectiveness than a standard light bulb. This means that two different lights can use the same amount of watts, but one will be much brighter than the other because it uses the watts more effectively.
So more lumens indicate a brighter light. You can get ATV size light bars in the range of 1000 to 3000 real lumens.
Just be aware that many manufacturers, especially among the cheaper models, claim a lumen value that’s much higher than actual values with the hope of selling more lights.
A badly made LED may give the promised brightness at first when you turn it on but will quickly fade quite noticeably when left on for just some seconds.
To be a bit more specific, a light’s brightness is not necessarily proportional to its number of lumens.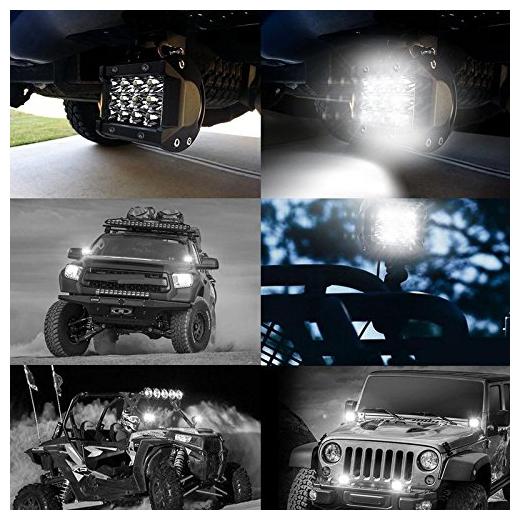
This is because brightness is used to tell how bright your eyes perceive the light, which will depend on many factors like the light color, while lumens are measured with an instrument.
Some manufacturers will list “raw lumens,” which needs to be multiplied by about 0,8 to find actual “effective lumens.”
A LED is not just a LED. There are quite significant differences in quality out there that you need to be aware of.
The more expensive light will often stand out by being made with more effective LEDs than the cheaper ones. A more effective LED will produce more lumens per watt you feed it, which is good.
The lower quality LEDs used in cheaper lights need to be pushed much harder to give the same amount of brightness. This means they will draw more watts, making run a lot hotter.
So by choosing a super cheap light, you may experience that it burns out in just months, and not years as you might expect.
To be on the safe side, you can look for lights that use LEDs made by a reputable manufacturer.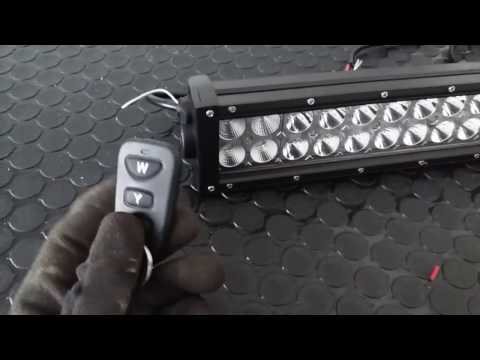 Both Epistle and Cree are known for their high quality with the highest output per watt.
Incredible effectiveness is what makes LED stand out compared to any traditional light bulb. While the “glow” bulb will use a huge part of the power to create heat, a LED will use most of it to make light.
To illustrate how effective LEDs actually are, a standard 40 watt light bulb will give about 450 lumens. A good quality LED will produce 2000 lumens or more, using the same amount of watts.
No wonder they’ve revolutionized the lighting market completely.
This one is essential. LEDs are fragile and need excellent protection from the elements.
A led bar intended for on-road use will not hold up long when put through some of the abuse it will have to face on an ATV.
Not only does the casing need to be waterproof, but it also needs to keep mud, dust, and debris from getting inside the light.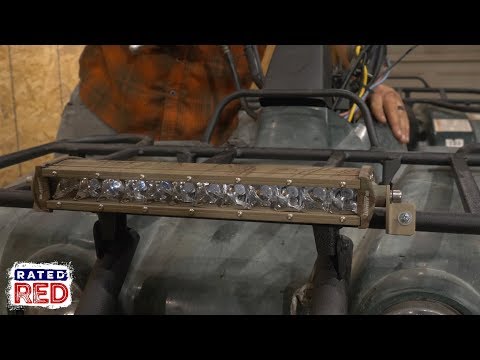
The lights IP rating is a good indicator of how well the housing does at keeping the elements out.
It will have two numbers, where the first tells how dust resistant the light is, while the second tells how waterproof it is. A higher number is better.
Shoot for a light with an IP rating of 67 or better. This means that it can handle almost anything that gets thrown at it when fitted to an ATV, including being completely submerged in 1m deep mud or water.
If you actually end up involuntarily turning your quad into a submarine, this article will tell you how to repair it and get it running again.
And don’t forget the wiring connectors. These should also be waterproof to prevent corrosion issues down the road. Look for a beefy connector with a good quality silicone or rubber gasket.
The casing needs to be made from a material that impact-resistant and won’t crack when smashing into trees and whatnot. Housings made of extruded aluminum are tougher than cast ones.
Ensure the glass covering the lenses is shockproof, scratchproof, and handle extreme temperatures, both hot and cold.
And everything needs to be corrosion proof.
You will often find that they’ve cut costs on cheaper lights by using flimsy mounting hardware that will rust. Avoid these unless you don’t want the bike to look 10 years older in just a few months.
The mound needs to be tough and adjustable to fit different mounting situations.
To describe what color output you can expect from the light, the manufacturers use a term called “color temperature,” measured in Kelvin.
This can be confusing because a LED light with a higher color temperature does not necessarily run hotter than one with a lower color temperature.
Simply speaking, the Kelvin scale indicates in what color a specific metal glows when heated to different temperatures.
It glows in a red/yellow color at low temperatures, where at higher temperatures, it will look white, almost blue.
LED lights are usually in the 2700K – 6500K range.
2700K – 3000K: By choosing a light in the 2700K – 3000K range, the light will have a yellow/white, almost warm color.
3000K to 5000K: When in the 3000K – 5000K range, the light is a bit brighter yellow, almost completely white, and from
5000K – 6500K: The light will be cool white, almost like daylight.
Lightbars in the higher end of the scale appear brighter but will not be rendering colors as good as the lights in the middle of the scale. Because of this, a bright white/blue light may increase eye fatigue.
At the lower of the scale, you find the warmer yellow lights that are comfortable for the eyes but will give an unrealistic representation of the scenery.
A good compromise is choosing a light with about 5000K. This will be plenty bright but still, render the colors of your surroundings naturally. For riding in the snow, a more yellow light will better show the contours of the terrain and is preferred by many for this reason.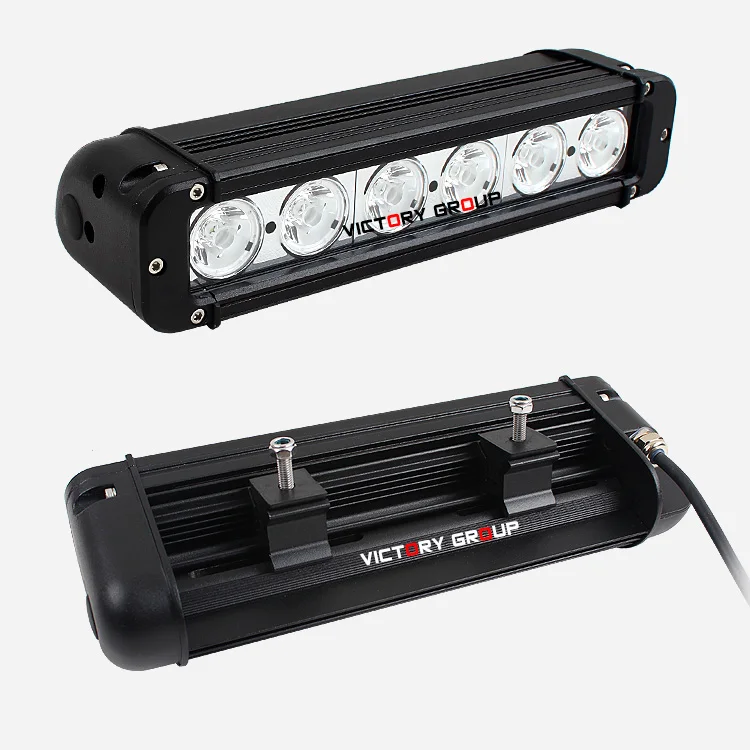
If you still cannot decide what color you prefer, some manufacturers even offer different color lens covers to fit any riding situation.
Lightbars come with different beam patterns intended for different types of use. You can get spotlights, floodlights, or bars that feature a combination of these two.
The spotlight has the most narrow beam and will throw the light the farthest. The light will spread at an angle of about 30 degrees in the direction it is being pointed. This type is great for riding at higher speeds, whether it be riding down the highway or even in racing.
Then you have the floodlight. This kind creates the wides beam, which will spread at an angle of about 60 degrees. The extra width comes at the expense of how far the light goes.
It is great for any utility work or riding at lower speeds, like technically challenging off-road riding.
Some feel that neither of these two is optimal for trail riding and other off-road ridings at medium speeds.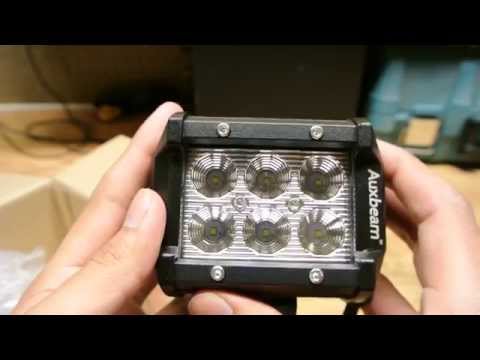 This is where the combo-lights come in handy. You will get decent floodlight for lower speeds and some longer ranging beams for when things speed up.
Most light bars below 20″ length will be either spot or flood, but even for shorter bars, a combination of these is becoming increasingly common.
Most ATV owners will be happy by choosing a floodlight beam pattern. In most countries, you cannot legally use the light bar on public roads anyway.
Most riders need better proximity lighting when performing technical riding at lower speeds or any utility work in the dark.
Racers or those that only use their bike for trail-riding may be the exception.
What warranty and support a manufacturer will give you will indicate how confident they are in their product’s longevity. Steer clear of the ones that don’t mention what warranty they give or if they have a warranty that will be voided for any number of silly reasons.
In a market overflooded by different brands claiming to have the best products, it may be a good idea to stick to the more trusted brands.
You may miss out on a potentially fantastic newcomer by doing so, but you have a better guarantee for making a good purchase.
You also want to make sure the dealer you are buying from has a good reputation. It’s often when things break you learn how service-oriented the company really is.
I recommend doing a quick google search on both brand name and dealer to reveal potential horror stories.
This is a power you, as a customer, have. Do not be afraid to use it!
Before you head over to the dealer or start browsing online for specific models, it’s a good idea to think through what your budget looks like.
For those with unlimited funds; It’s with light bars as with most other things: you often get what you pay for.
But for most buyers, it’s all about finding the ideal balance between cost and quality, giving you the best bang for buck deal.
The types of light available on the market range from the super cheap knock-offs from China to “military-grade” bulletproof bars that cost an arm and a leg and anything in between.
Even the cheapest models will work, at least for a while, before they fail due to internal corrosion. But as a general rule, the farther up you go in price, the higher quality light you get.
The light bar itself will not be enough the get your light up and running. You will also need wires, connectors, switches, and relays.
Some manufacturers include this stuff in the package, but not all.
If you plan the wiring layout before installation, you can make sure you get all the components you need so you have them ready when it’s time to install the light.
Trust me; this saves a lot of frustration through the installation process.
Now that you know what to look for pick about 3-5 candidates that fit your criteria.![]()
Durability and actual lumens should be your top priority. Ensure that the ones you pick have the color temperature you prefer and fit in the spot you plan to install the light.
Any of these will likely be fine, but if you want to be completely sure, move on to the next step.
Before making your final decision, I recommend you read a few reviews or forum threads about each of the candidates you have chosen. Combined with a manufacturer warranty, this will assure you’re getting the most out of your money.
Ensure the review discusses things like ease of installation and use, as this is hard to tell simply by looking at the spec sheets. Also, take note of any information about common mishaps or malfunctions.
Also, compare the models you have chosen by looking at the factors listed above and decide what fits your need the best.
Now you should be armed with all the knowledge you need to choose a light bar for your ATV that fits your needs the best!
ATV light bar sizes range from 7 to 20 inches, where 12 inches is the most common.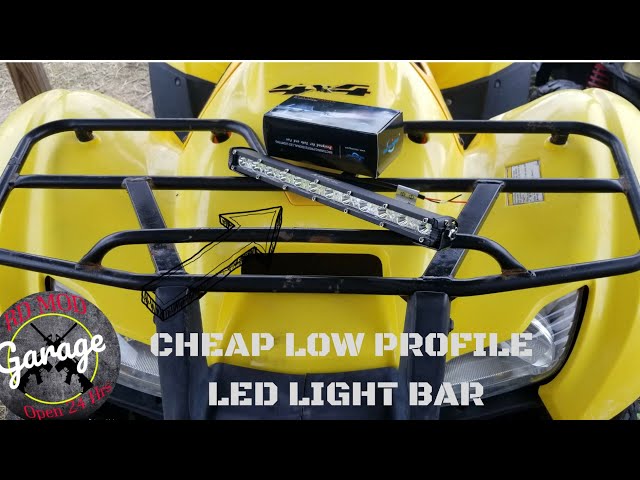 Available space and looks are often determining factors to what size to choose.
You can get ATV light bars for as cheap as 10 dollars for those with a tight budget. But you generally get what you pay for, so it may be worth steering clear of the cheapest options. This budget-friendly bestseller from Nilight is getting great user reviews over at Amazon.
LED lighting for interiors of apartments and houses is gaining more and more popularity. Lighting issues can be approached in different ways. Some prefer to turn to specialists for the selection of suitable equipment and its installation. Others decide to show their creativity and do it on their own. Due to the relative ease of installation of LED lighting, this is quite possible, but in order to achieve the desired result, it is necessary to take into account some features. The first question that arises is how to choose a tape that suits your desires among a large number of varieties of LED strips? We will talk about this in this article.
1) Location of the LED strip.
First you need to decide on the room where the LED strip will be installed. An open LED strip is suitable for LED lighting of the ceilings of rooms, kitchens, hallways and corridors. Due to high humidity, only sealed LED strip is used to illuminate bathrooms. To illuminate the working surface of tables in the kitchen, as well as when installing the LED strip at a low height from the floor, for example, illuminating stairs, lighting the floor, it is also recommended to use a sealed LED strip, because. during wet cleaning, water can get on it or it can be mechanically damaged. We will talk more about the selection of LED strip in specific rooms further.
2) Type, brightness and power of the LED strip.
The next step is to select the LED strip according to the required brightness. One of the factors affecting the brightness of the tape is the type of LEDs. The most common LED strips are SMD3528 and SMD5060 (sometimes also called SMD5050).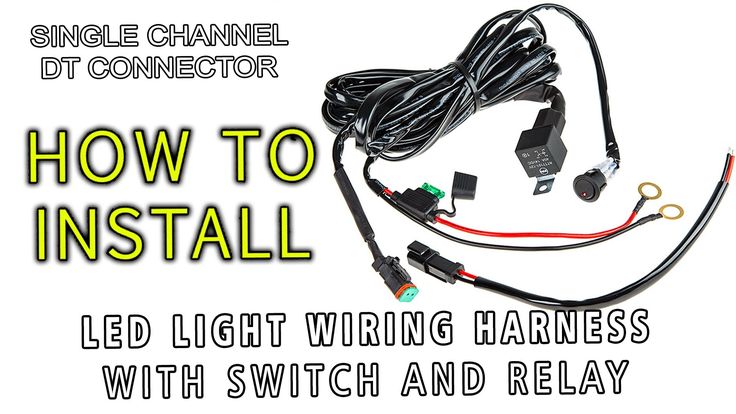 LEDs of the first type have a housing size of 3.5x2.8 mm and contain one semiconductor crystal. LEDs of the second type are larger - 5.0x5.5 mm - and contain three crystals in one package. Accordingly, SMD5060 LEDs are almost three times brighter than SMD3528 diodes. Also, the brightness of the LED strip depends on the density of the LEDs on it. There are LED strips of standard density, double (2x) and double-row tapes of double density (2x2). For strips with SMD3528 LEDs, these are 60, 120 and 240 LEDs per meter, respectively. For strips with SMD5060 LEDs - 30, 60 and 120 LEDs per meter. The table below shows the most common tapes in ascending order of power and, accordingly, the brightness of the glow.
| Power consumption of 1m, VT | Cable to reel | Type of LEDs and marking | The number of LEDs for 1 | The number of LEDs for the reel | multicolor (RGB) | SMD3528 | 60 | 300 | no0016 | 144 | SMD5060 2x2 | 120 | 600 | possible |
For backlighting, LED strips with a power of up to 10 watts per meter are well suited.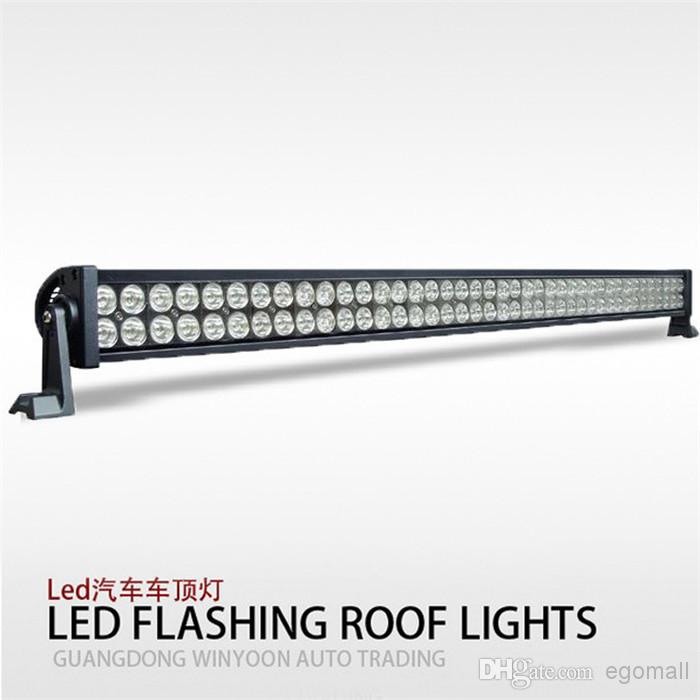 And LED strips with a power of more than 10 watts per meter are already suitable as a main light or for illuminating dark surfaces with low reflectivity.
3) The color of the LED strip, the type of its connection.
Decide on the backlight color - do we want the backlight to be white or some one permanent glow color. Or do we want to change the backlight color depending on current desires and preferences?
If we need a white backlight, then we also need to decide which one. The fact is that white light can be of different shades (with different, so-called, color temperature of the glow) cold white (10000K-6500K), white (6500K-5500K), day white (4500K-4000K) and warm white (3500K- 2700K).
For decorative lighting, a colored LED strip is more suitable, it can be monochrome (single color) or multi-color (RGB). Note that the RGB LED strip can only be with large SMD 5060 LEDs.
To connect a single-color LED strip, you only need a power supply and the strip itself.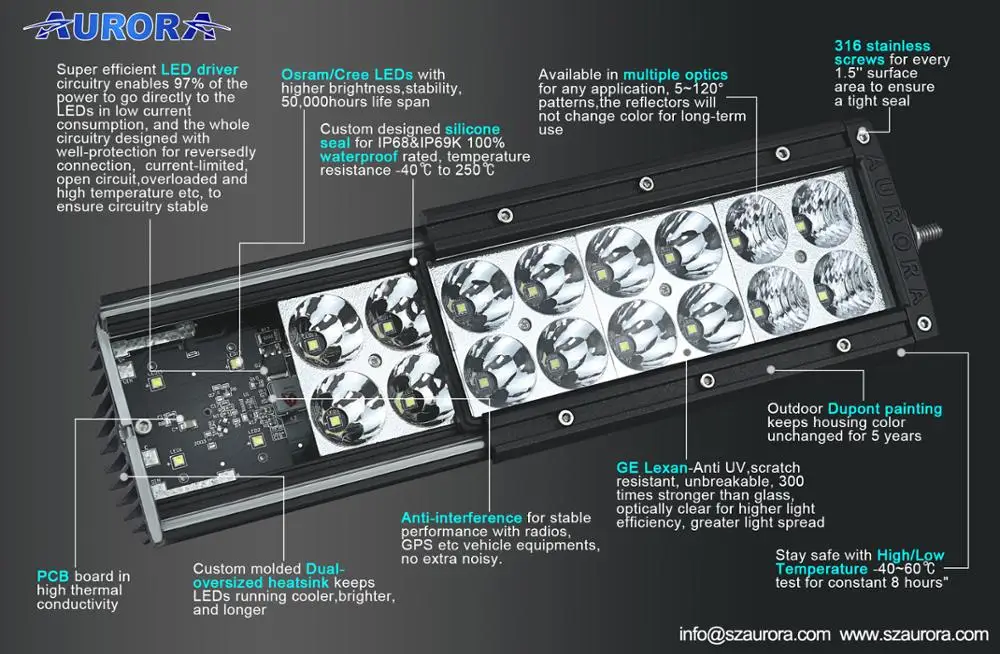 If you want to adjust the brightness of the glow, then you will need another additional device - a dimmer for the LED strip. To connect a multi-color RGB LED strip, you will need not only a power supply and a strip, but also an RGB controller that controls the color and brightness of the RGB strip.
The power supply must be selected in accordance with the supply voltage of the LED strip (12V, 24V, 36V), its power and length.
To calculate the required power of the power supply, you need to multiply the length of the tape connected to the unit by its power consumption per meter and add a power margin (10-25%). The reserve is necessary for the reliable operation of the system. For example, (10m x 7.2W) x 1.25 = 90W. Since there is no power supply for an LED strip with a power of exactly 90 W, a unit with a higher (but by no means less) power of -100 W will do.
How to choose an LED strip for a room.
Usually, LED lighting of different rooms in an apartment or house has different purposes, for example, room lighting is mainly decorative, and kitchen lighting is practical.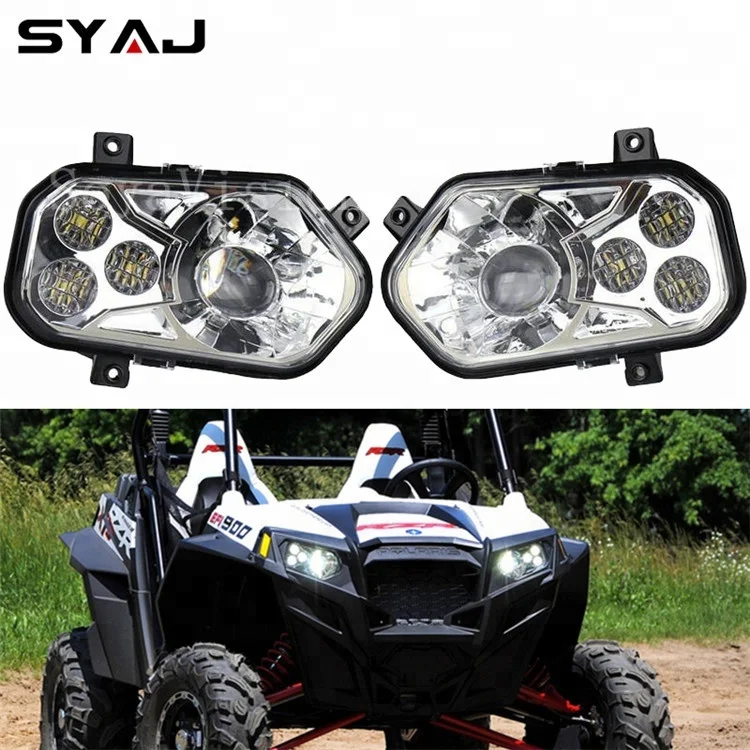
The most common use of LED strip in a room is for curtain or stained glass lighting of the ceiling, lighting of walls, floors, niches or curtains. Such rooms have normal humidity, so LED strip without moisture protection is used here. The purpose of such a backlight is most often decorative, so almost any type of LED strip can be used and the choice depends only on the required brightness and color. The backlight will look spectacular using an RGB LED strip and an RGB controller.
How to choose LED strip for the kitchen.
The use of LED lighting in the kitchen is quite wide. It is not only decorative, but also practical. In addition to all the applications in ordinary rooms, which we wrote about above, the lighting of cabinets and the working surface of the kitchen is used. An interesting and unusual option for using LED strip in the kitchen is LED lighting of the lower (floor lighting) and upper parts of the cabinets. Base cabinets are usually installed on legs, which are then covered with a panel or left open. The LED strip is attached to the bottom of the cabinet and illuminates the floor. For such a backlight, you need to use a sealed LED strip, because. water can get on it, for example, during cleaning.
An open LED strip can be used to illuminate the top of the cabinets, as it is mounted on the top of the wall cabinets and is practically not exposed to external influences.
Now let's talk about practical and functional LED lighting. You can highlight not only the space above and below the cabinets, but also inside them, which is not only beautiful, but also functional. The LED strip for illuminating cabinets from the inside can be connected so that it turns on together with the main kitchen lighting, or it can be used together with special sensors. There are several types of sensors, among them sensors that respond to the opening of the cabinet door, to touch and even non-contact ones - to turn on or off the light, you just need to move your hand next to them, which is very convenient if your hands are wet or dirty.
Illumination of the work surface is even more practical. Usually when cooking, the light source is behind your back, so the work surface is closed from light, so LED lighting of the kitchen work surface will come in handy. It is installed under hanging cabinets. It is important to position the LED strip so that the light falls straight down or at an angle and does not fall directly into the eyes.
There are several ways to organize work surface illumination:
1) Sealed LED strip that is simply glued to the bottom of the wall cabinet.
2) BAR prefabricated LED luminaires. They are simply mounted with clips or double-sided adhesive tape, have a touch switch and are easily joined together, forming a chain of lamps. Inside the lamp there is an LED ruler, on top it is closed with a plastic screen, which can be matte or transparent. We recommend choosing a matte screen, because with it, the LEDs are not so visible, the light is more diffused and will not irritate the retina.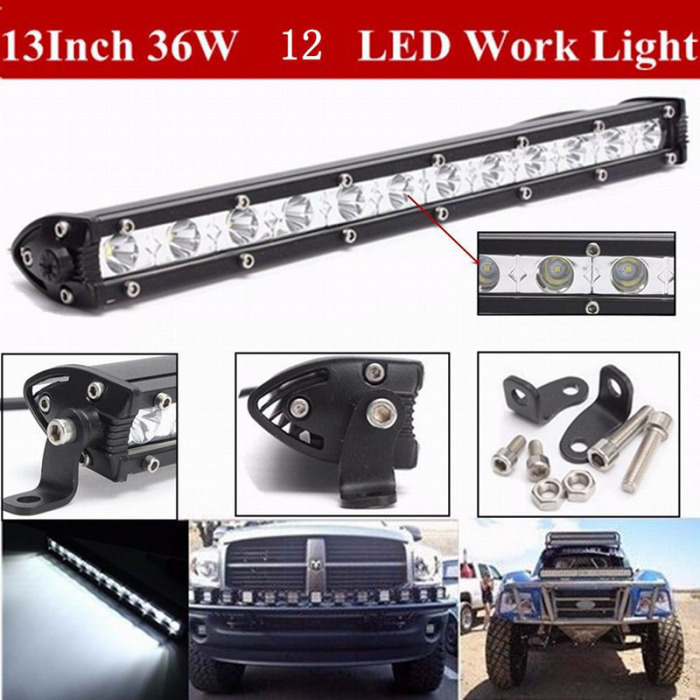
3) Do-it-yourself LED lamp assembly. To do this, you need an LED strip (or LED strips) and an aluminum profile. Our catalog contains a wide selection of aluminum profiles of various shapes and screens for them.
A white LED strip is used to illuminate the work surface. But keep in mind that products look as natural as possible when illuminated with daylight white light, and when illuminated with warm white, they look even fresher and better than they are. Food looks less appetizing under cold white.
How to choose a bathroom LED strip.
Due to the high humidity and the risk of water intrusion in the bathroom, a sealed LED strip is usually used.
LED lighting in the bathroom is most often used to illuminate the ceiling and walls. But there are other options, for example, highlighting niches and mirrors. The illumination of the mirror can be either background (backlight glow behind the mirror) or illuminating the space in front of the mirror. In the second case, the illumination made behind the mirror, on which the amalgam layer (reflective surface) is partially removed, looks spectacular.
How to choose LEDs for a nursery.
When choosing decor for a child's room, parents usually strive to create an environment that will bring an atmosphere of joy, warmth and comfort into the child's world. Much attention should be paid to the lighting of the nursery. Bright but soft light, psychologically comfortable and at the same time not harmful to the baby's eyes, is best suited for a child's room. And if you have chosen LED technologies for lighting your apartment, pay attention to white LED strips of warm and moderate tones. To adjust the brightness of the glow, you can use a dimmer - a regulator of electrical power. There are devices of both the classical model (a mechanical regulator mounted in the wall in the standard size of the switch), and modern dimmers with an electronic control system and remote controls.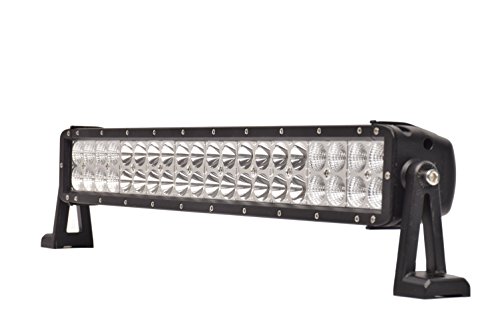
Colored LEDs can be a special joy for the baby. If instead of conventional white LEDs, multi-color RGB+W LED strips are used as the main lighting, the possibilities for decorative lighting of the room will be truly endless. By experimenting with the RGB controller remote, you and your child can create a variety of color combinations, turning the room into a children's fairy tale. And white LEDs, also present in the LED strip, will help to use it for its main purpose. Also in the design of children's rooms, monochrome colored LEDs are most widely used, which can be used to illuminate furniture and interior elements.
LED strips for corridors and entrances.
Such places in the house as corridors, vestibules, flights of stairs do not need constant bright lighting. After all, people are not in these places all the time. However, often residents of a house or apartment have to cross such zones in order to get into a particular room, kitchen or bathroom. And it’s rather inconvenient if every time an unlit corridor awaits you on the way.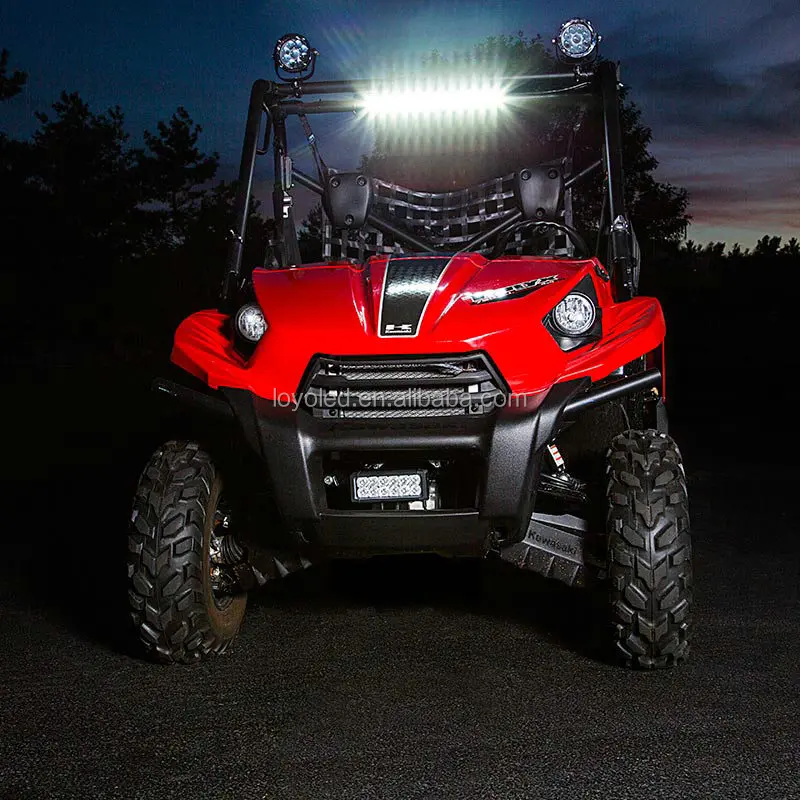 What to do in such cases? Some prefer to burn lights around the clock in walk-through rooms, while others usually leave these areas dark.
However, the best way to solve this problem is to use economical LED technology. LED strips are the most economical light sources, they consume several times less electricity than conventional incandescent lamps. Place a moderately bright LED strip along the corridor or along the perimeter of the walk-through room, creating uniform illumination of the entire area. And to save even more energy, use a dimmer. This device will help reduce the brightness of LED lamps up to a barely noticeable glow, which may be suitable for night lighting in an apartment.
Bedroom lighting with LED strips.
LED strips for bedroom lighting can be used both as additional lighting and as the main lighting. To create a cozy atmosphere, many use colored LEDs as wall lighting, backlighting mirrors and wall decorations, as well as to illuminate the ceiling area, hidden under the eaves or using a multi-level ceiling architecture. You can choose a variety of colors for backlighting, limited only by matters of taste - modern LED technologies today make it possible to produce light sources that operate in almost any spectrum. With the help of LEDs, you can also make original furniture lighting or built-in cabinet lighting.
A chandelier can be used as the main lighting in the bedroom. However, why not use super-bright LED strips for this purpose? Today, LEDs are able to create comfortable, natural lighting for the bedroom with flexible settings. These are both white LED strips and multi-color RGB LED strips. Using dimmers and advanced RGB controllers, you can control the light in your bedroom as you wish.
LED technology for the living room.
The living room is the heart of your apartment, the place where the family rests, relatives and guests gather. That is why many approach the design of the living room especially carefully. As a rule, this is the most spacious room in the house, so a variety of ideas for interior design find a place here. This also applies to lighting.
If you decide to use LEDs for living room lighting, know that you made the right choice! With their help, you can create a powerful stream of natural white light, and fancy lighting, hidden in the depths of a multi-level ceiling or under a system of cornices. Also, a good idea would be to design interior lighting using LED strips. And if you use the living room as a space for family celebrations, you should consider purchasing multi-color LED strips for this room, which, if desired, can easily create a party atmosphere in the living room, being controlled by the owner, which is carried out using an RGB controller. You can also use dimmers for white LED strips so you can control the brightness of the light by choosing your own comfort zone.
LED strip LED - a very successful product of modern technology. It is a simple yet striking design element that can add functionality, beauty and originality to spaces, furniture, cars and just about anything.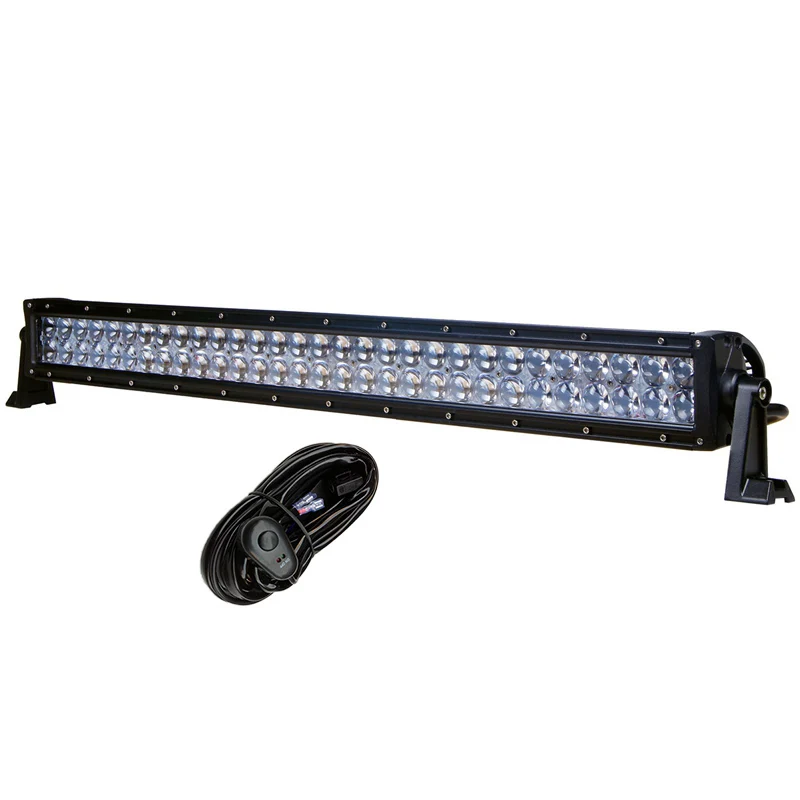 Have you seen cars passing by at night with multi-colored illumination below? And the beds, as if hovering above the floor, surrounded by a bluish halo? Or kitchens and living rooms with soft, pleasant lighting, as if flowing right from under the panels? LEDs do all this and more. They provide bright, colorful and in some cases customizable light, and buying them as a strip will save you a lot of time and effort in assembling the right designs.
It is not necessary to consider LED lighting only as a decorative item. It also opens up new possibilities because LEDs emit little to no heat and can therefore be placed in places where other lighting would be unsuitable. LED strips can be used both indoors and outdoors, depending on your imagination and the level of your protection. They are extremely easy to install and are great for residential and commercial applications. LED strips are thin, flexible and usually have double-sided adhesive tape on the back of the strip for easy installation.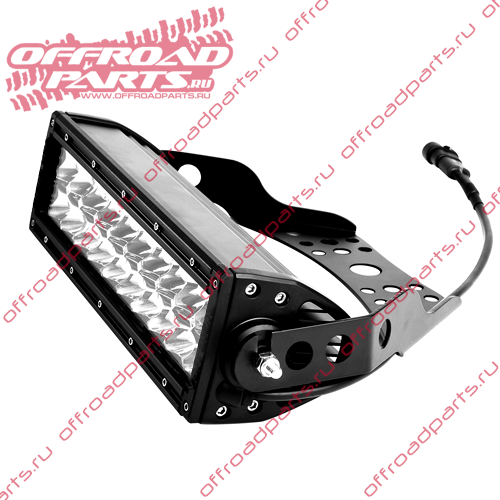 They are widely used for decorating furniture, shelving, room lighting, festive event decoration, exhibitions and shows.
There are many varieties of LED lighting strip on the market, but for the most part, they fall into three categories, namely: This is the main type of LED strips. They are sold in a variety of colors and are great for providing bright, solid color illumination in a fixed location. They are usually installed under wall cabinets or tables to provide a discreet soft glow or as an indirect light source for living rooms or shop windows. They are relatively inexpensive and you can buy them in a wide range of colors and intensities;
 In terms of functions, microcontrollers are simple, able to change only the color and brightness of the tape, and complex, smoothly adjusting the intensity and color of lighting (more than 10,000 colors). There are ready-made kits that include everything you need;
In addition to the lighting strip itself, a power source is needed. LED strips are powered by DC power supplies and their voltage requirements are different, so pay close attention to the specification when you buy the product and make sure you have the right power source.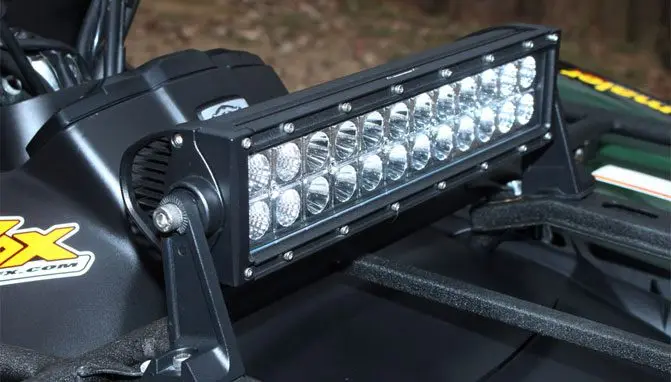 The power supply is selected depending on the voltage (from 12 to 36 V), as well as the power and length of the LED strip.
LED strips give natural light of all options, come in a variety of colors, are relatively cheap, can be of variable length, and don't take up much space. But there are a few things that can get confusing, and we'll help you dot the i's and pick the perfect device for your needs.
Determine the installation location
For decorative or basic lighting of the ceiling of living rooms, an open LED strip is well suited, while for rooms with high humidity or when installed on floors or kitchen surfaces, only sealed, protected from the penetration of moisture and liquids during cleaning, is needed. The IP class determines how much protection the LED strip has. Positioning is also very important. Hidden placement of the strip can absorb up to a third of the total brightness, experts say, so oblique lighting works better, although it also has some lumens loss due to reflection.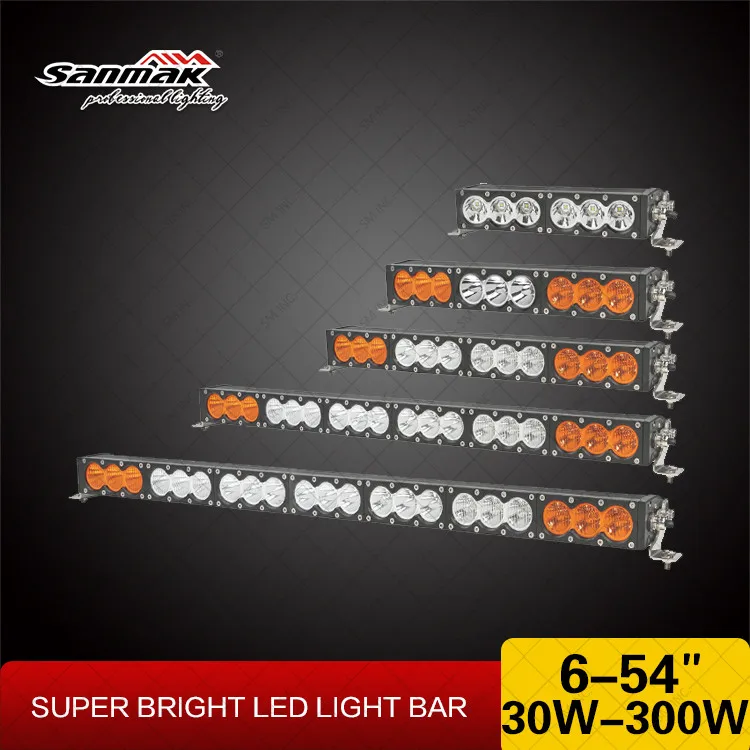
We select the brightness
Each band has a different brightness. Uneven light is produced by an unfiltered LED strip as the diodes are arranged in a dotted line. The general recommendation is to use diffuse filters, although they take up to 30% of the total brightness (measured with a lux meter). If you do not want spot lighting, buy a tape with maximum brightness, the filter will "dim" it, and the dimmer will allow you to adjust the intensity of the glow (dimmers must be of certain types to work with LED strips). The brightness of the glow directly depends on the LEDs installed in the tape, usually SMD3528 and SMD5050. The first type contains one crystal per chip, while the second type contains three, making it 3 times brighter than 3528.
In fact, SMD codes are a mystery to many. Some say they only define the dimensions of one LED and the corresponding socket on the conductive strip, others claim that the code determines the spectrum of light and the overall "life" of the strip. In fact, everything is simple. SMD specifies the dimensions of a diode in tenths of a millimeter. So, SMD5050 is a square diode 5x5 mm in size. The larger the area of the diode, the brighter it shines.
The brightness also depends on the number of LED elements. As a rule, 60, 120 or 240 SMD3528 is installed per 1 linear meter, and SMD5050 - 30, 60 or 120, that is, 2 times less. Naturally, the more LEDs are installed on one linear meter, the higher the cost of the tape. Strips with sixty SMD3528 and thirty SMD5050 LEDs work great as a soft backlight, and SMD3528 for 240 LEDs and SMD5050 for 120 - as independent lighting.
Choose color temperature
To begin with, we will decide whether we want a single-color backlight or multi-colored. "White" is a rather vague definition. In fact, it can have different shades - from cold (10,000-6,500 K) to warm (3,500-2,700 K). Day white is in the middle (4000-4500 K). We already know that the tape can be either single color (monochrome) or multicolor RGB. Look at CRI, Color Rendering Index. It determines how realistic colored objects will look in LED lighting.
Protect yourself
LEDs are quite durable, but if you plan to use them in wet or extreme conditions, you need to take care of the IP. IP is a tape protection rating that gives a rating of the product's resistance to dust and moisture (IP20, 23, 33, 54, 65, 67 or 68). The first part of the number determines the resistance to dust and solid objects, and the second - the resistance to liquids. For example, IP67 rating means that the tape will be protected from dust and any liquid that may come into contact with it, and can also be submerged in water up to 1 meter for 30 minutes. The protective shell is usually a plastic shrink wrap that does not affect installation or color: of course, it can make the color of the LEDs a little darker, but this will not be a problem, since these parameters are already measured, taken into account and corrected in the factory product.