Tire Education
byJames Updated on
Whether for proper tire disposal or for recycling into ornamental, farming, or gardening purposes, cutting tires in half is the most sensible thing to do with your old, scrap tires. However, tires are built with durable rubber to withstand extreme abuse and are wrapped inside with high-tensile metal belts, so you’ll need to be equipped with the right tools to get through them.
To cut tires in half, you can opt to choose between two easy-to-follow processes: First is by removing the sidewall with a knife or any sharp and pointed tool through the seam found in the sidewall just below the tread. The second is to reduce them into more manageable pieces with the use of power tools such as a jigsaw, circular saw, or Dremel tool equipped with metal cutting blades.
What You Need To Consider Before Cutting TiresBefore you proceed with cutting tires, you must first check with your community if there are specific regulations on tire handling and proper disposal. Because tires are made with man-made rubber, they are non-biodegradable and their chemical composition can seep into the ground. That is why some local ordinances are very specific on this aspect.
Since scrap tires or old tires are considered solid wastes, they are regulated primarily by state governments. As of writing, there are already 48 states that have specific laws or regulations in dealing with scrap tires management. While each state’s program is unique, proper delegation on handling, disposal, and recycling are the common themes.
Proper disposalIf you will cut tires just to easily dispose of them, without the consideration of reusing or recycling, you should also consider your local or municipal regulations. Some municipal ordinances have tire disposal guide requirements. For example, some specific guidelines mention that tires should be cut into a minimum of two pieces.
SafetyWhen cutting tires in half, you’ll be dealing with sharp and pointed tools for piercing through the sidewall and/or cutting through the tires’ tread. That is why safety must be observed at all times, keeping the tools away from the body is a good start.
Additionally, rubber fragments left after cutting tires vary in size, from considerable chunks to clouds of dust. This may have a chance to go through your nose or eyes which will cause irritation. On the other hand, the emitted fumes which resemble burning rubber can be toxic at moderate levels. Lastly, the exposed portion of steel belts is very sharp, so take extra precaution when handling cut tires.
How to Cut Tires In Half Method 1: Without The Use of Power ToolsTools you’ll need:The ‘sweet spot’ of the sidewall is the softer and smoother part about one inch near the tread. This is the weakest point in the tires with virtually no reinforced belts.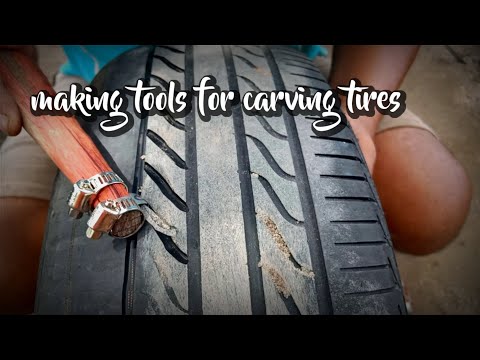 Having said that, avoid cutting too close to the tread nor too close to the rim as these portions are saturated with steel belts.
To do this, strike the sidewall with the tip of the blade forcefully. If you’re having trouble, or unsure that the blade will just slide through, an awl, ice pick, or any similar pointed tool will help.
Step 2: Secure the tire to prevent it from rockingThe tire will likely roll or move while you’re slicing through the sidewall. To prevent this from happening, lay the tire flat on the ground, then step on the opposite section of the tire, away from where you are cutting. Another way is to keep the tire upright, locking your foot or thighs to prevent it from rolling. However, you should practice extra caution in this position and make sure that you are cutting in the direction away from your body.
Step 3: Cut through with a sawing motionYou can gain momentum if you are cutting with a sawing motion. Some tires have seams running through the sidewall, one near the tread and another near the rim.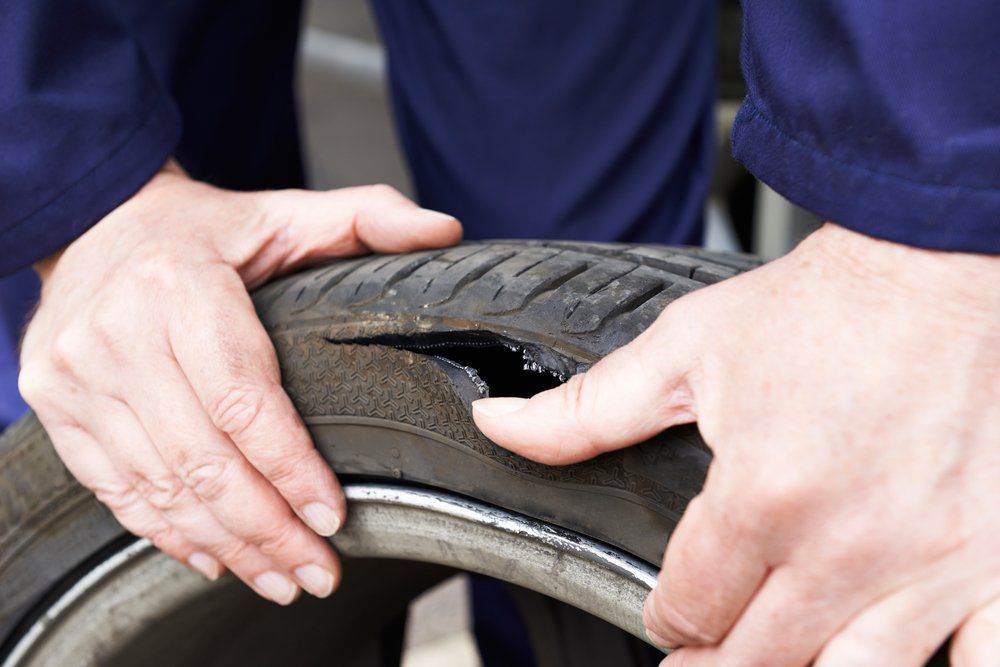 Make use of them as your guide while cutting through. When cutting along the sidewall, there will be a point that the blade will be harder to cut through the rubber. This is naturally brought about by friction, you can spray the blade with a lubricant and you’ll immediately notice the difference.
Wooden dowels keep the cut area open, making it easier to cut through the rubber. These dowels pry apart the rubber on both sides, preventing the blade from being stuck.
Step 5: Continue cutting until the sidewall detachesIf you’re already halfway through, rotate the tire a little half to get a new position to continue. This will make the process easier. You can also use your free hand to pull the other side of the sidewall to help you slice through.
How to Cut Tires In Half Method 2: Slicing into Small PiecesTools you’ll need:Cutting tires with power saws will leave behind lots of rubber and metal fragments, not to mention the fumes cut tire will emit during the process. Work in a secured location with proper tools and equipment to promote a safe, efficient, and neat tire cutting activity. If you will be working outside with no power outlets available, ensure that the extension cord you are using is rated for high-voltage applications.
Any tire, regardless of its size, is stuffed with high-strength steel belts, with larger tires equipped with more reinforced steel. This is why it is necessary that the blade you’re using has the capability to cut through metal. Ferrous-metal cutting blades or metal grinding wheels will safely and efficiently do the task.
Also, wear your personal protective equipment such as safety glasses and a dust mask. The use of protective arm sleeves and gloves is also recommended to protect your limbs against metal shards flying out of the tire.
Step 3: Cut widthwise through one sideAs your tire is laid flat on its side, press the blade laterally across the sidewall, working your way slowly from the tire’s inner lip to the edge of the tread.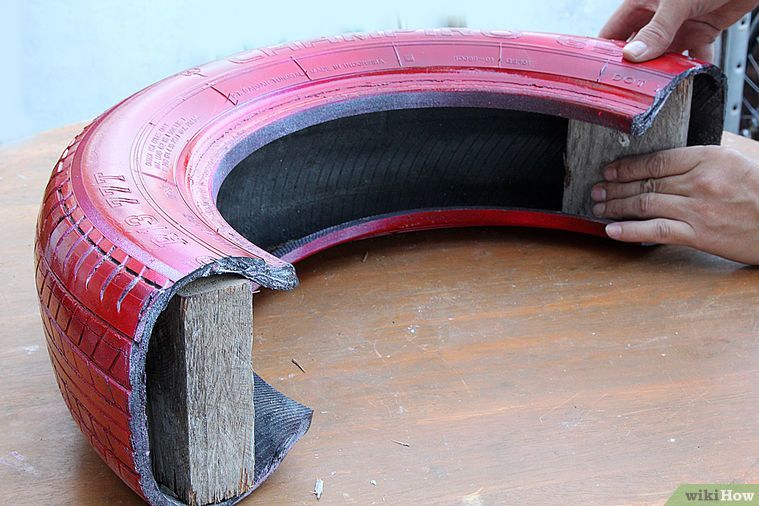
Keep in mind that the innermost tough part of the tire, called a bead, has a bundle of high-tensile steel wires wound into a rubber band. You may feel a slight resistance on this part but there’s nothing to worry about if you’re using the right type of blade.
Step 4: Complete the cut from the opposite sideFlip the tire over to cut on the second side, applying the same trick done in Step 3. Then, cut across the tread to completely separate each end of the tire. Next, turn the tire 180-degrees and repeat the process to have a tire neatly divided in half.
This technique will save you a significant amount of time and energy as cutting this way reduces strain brought by the resistance of inner steel belts holding the tire together.
Step 5: Continue cutting in halvesLike slicing a pie, continue cutting each pair of the tire equally into smaller sections until you’ve reduced it to quarters or eights. As the pieces become smaller, they’ll be prone to moving and sliding due to the reduced weight, keeping them in place with a vise or similar clamping tool will help.
Tire cutting, if not planned correctly, will entail additional yet unnecessary time, not to mention the extra effort that can be prevented in the first place. There are a few recommendations to consider such as starting the cutting process by piercing the sidewall with a pointed tool instead of the same cutting tool and avoiding cutting directly through steel belts manually.
Make a strong start by piercing a hole in the sidewall with a pointed toolUse an awl, ice pick, or any similar tool that can be used for poking into the tire. This way, you’ll reduce the pressure you’ll exert into striking the tire if you will be using a knife or box cutter.
Cutting directly through steel belts is time-wasting if done manuallyUnless you’re using a power tool, cutting directly through steel belts by hand requires too much effort, let alone your tool could dull or get damaged blades. Leave the cutting of tread and bead to a jigsaw, circular saw, or Dremel tool.
If you will be working with car tires, the process will be the same regardless of the size, as you will deal with the same steel reinforcements. If you don’t have any power tools in hand, you can use a good old hacksaw or a big pair of steel shears, though be prepared for a more tedious task, you’ll probably hurt your hands too.
Can I cut a tire off a rim?Yes, it is possible. In fact, with the right angle, you can cut through easily and as close as possible to the rim. However, the challenge is to keep the angle of the blade correct, as you don’t want the blade hitting the rim.
ConclusionThe tire cutting process may look intimidating at first. This thought may be brought about by the use of high-powered tools and patient dealings with tough tire rubber materials. However, if done correctly, and equipped with the right tools and equipment, you can get through with this process with ease. Just remember to put your safety first at all times.
You can use recycled tires as landscape borders, pier bumpers on a boat dock, swings, and so much more. But cutting them apart is another story.
Tires contain a mesh of steel belting, which makes cutting them a challenge but not impossible. We’ve created this handy guide to show you the best ways to cut tires and which tools to use.
| Rating | Image | Product | Details | |
|---|---|---|---|---|
| Our Preferred Method | Milwaukee 50-Piece Hook Utility Knife Blades |
|
CHECK PRICE | |
| SKILSAW 13 Amp Reciprocating Saw |
|
CHECK PRICE | ||
| SKIL 15-Amp 7-1/4-Inch Circular Saw |
|
CHECK PRICE | ||
| MulWark Heavy Duty Retractable Knife |
|
CHECK PRICE |
 A Utility Knife with Hook Blade – Our Preferred Method
We’re starting simple here since you’re most likely wanting to cut out the most reusable part of the tire: the sidewall. Even if you need to cut the steel-belted part in half, you’re better off cutting out the sidewall first to make it easier to pass through the rest. A hook blade is both simple and economical. You’ll only need to puncture the tire just below the tread and drag the tool in a circle around the side of the tire. You can complete this in seconds, though on the downside it will require some muscle. If you have a lot of tires to cut, this can be exhausting. But luckily for you, we’ve recommended the perfect hook blades below to install in your utility knife and get you started.
Milwaukee 48-22-1952 50-Piece Hook Utility Knife Blades
Milwaukee 48-22-1952 50-Piece Hook Utility Knife Blades
Pros
Cons
 Reciprocating Saw with Carbide Blade
If you’re wondering how to cut a tire, specifically a whole tire, a reciprocating saw will meet your needs. They’re fast, efficient, and a good carbide blade can zip right through that tough steel mesh. If you have a big project or a lot of tires to cut, you’ll probably want to purchase extra replacement blades, as steel belting can dull them quickly. Remember to protect yourself if you’re going to use a power tool on a tire. Wear a respirator to protect yourself from fumes (we recommend a Concrete Dust Respirator Kit ) and goggles to keep your eyes guarded from shrapnel. Lay the tire flat before cutting and work your way slowly through the tire. For best results, dispense with the sidewall first with a hook blade, then pass the reciprocating saw through the tread. This is more efficient and requires less effort. Below is our pick for a great reciprocating saw, and some carbide blades to go with it.
SKILSAW SPT44A-00 13 Amp Reciprocating Saw with Buzzkill Tech
SKIL 13 Amp Corded Reciprocating Saw with Buzzkill Technology - SPT44A-00
Freud DS0909CGP3 Diablo 9″ Carbide Tipped General Purpose Reciprocating Blade
Freud DS0909CGP3 Diablo 9" Carbide General Purpose Reciprocating Blade (3 Pack)
Pros
Cons
 Circular Saw with Carbide Blade
If you need to make straight-forward cuts across your tire, a circular saw can do the trick. You won’t get the same amount of control and dexterity as you will from a reciprocating saw, but if you need to cut the tire in half perpendicularly, it’s another fine solution. You will want carbide blades with this, as well, as they’ll stand up to the steel belting better. Don’t forget about respiratory and eye protection and remember to cut slowly and away from your body for safety. We’ve chosen a great circular saw below that will help you wrangle those steel belts.
SKIL 5280-01 15-Amp 7-1/4-Inch Circular Saw with Single Beam Laser Guide
SKIL 15 Amp 7-1/4 Inch Circular Saw with Single Beam Laser Guide - 5280-01
Pros
Cons
If you have a standard utility knife laying around and don’t want to fork over extra money for the hook blade, you can still use the regular blade to slice through the sidewall. You’ll need to apply extra effort, as you won’t get the same “grab” as you will with a hook blade, and you’ll still need a power tool to get through the steel belting. You’ll also want to have replacement blades handy, as the rubber will dull your blades quickly. But if you want a quick and cheap option, this will still work. We’ve listed our favorite utility knife below if you’re in the market.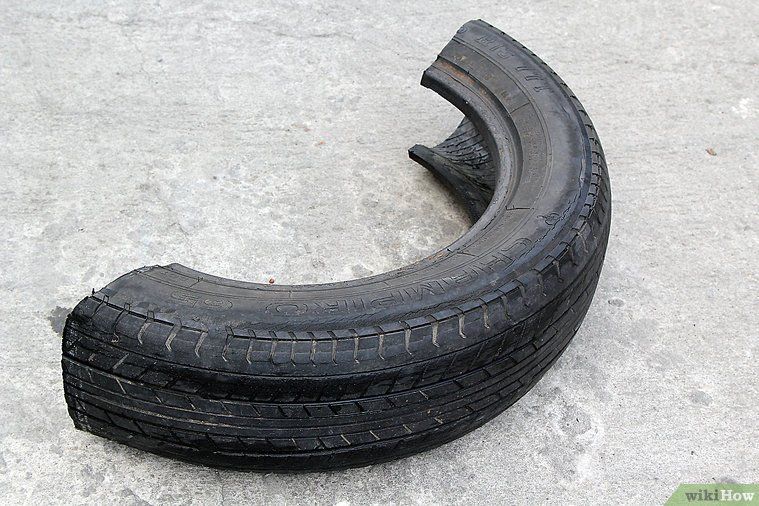
MulWark Heavy Duty Zinc-Alloy SK4 Snap-Off Easy Loading Retractable Razor Utility Knife
MulWark Heavy Duty Zinc-Alloy SK4 Snap-Off Easy Loading Retractable Razor Utility Knife Multi Box...
Pros
Cons
See Also:
 You should protect yourself from inhaling dangerous fumes but also your eyes and hands, so make sure to wear a respirator, goggles and gloves to protect your hands from sharp tire bits.
1. Use a workshop or an open space
You need to practice safety at all times, so it’s best that you have plenty of space around you to avoid worrying about hurting somebody close to you. Since you’re going to be using a power tool (easiest method), pieces can fly around and end up striking somebody in the face or eyes. Other people can trip over extension cords, so avoid a lot of hassle and choose a safe space. The other reason a workshop is useful is for the cleanup afterward. After you’re done, sweep up the unused pieces and dispose of in a dustbin.
2. Use a metal-safe blade
After you’ve placed the tire flat on a table or the ground, you need to fit a metal-safe blade into a power saw. As mentioned, most big tires have steel belts, so you’re going to need a blade that’s strong enough to penetrate metal. If you’re using Dremel tools, fit a metal grinding blade. Otherwise, you can use a ferrous-metal blade for circular or jigsaws. The other option is carbide-toothed saw blades.
3. The first cut should be widthwise
While your tire is flat on a surface, you can press the cutting edge across the sidewall or into tire’s surface. Then, you need to move the blade from the inner to the outer edge. Don’t be surprised to discover that the steel belts put up a fight but push harder. A strong blade shouldn’t have an issue with cutting the steel belt.
4. Cut from the other side
Once you’ve done all the cuts you want on the one side, flip the tire over and use the end of the cut from the first side to extend the cut on the second side. Cut the tire in half. That’s going to help you cut other pieces faster and more effectively because you’re not trying to cut through both sides at once.
5. Continue the other cuts
Use the two halves to cut smaller pieces. Cut through the center on both sides of the pieces and continue this process until you’ve got as many pieces that you want. Just remember that small pieces are more likely to shift and slide than bigger pieces, so you need to be more careful.
6. Cut through the tread
You’ll have to cut the tire from three different sides, so the best way to do that is to use an adjustable clamp. The first two cuts were from both sides, and the third cut will be through the thread. Use an adjustable clamp to pin the tire flat on a table so that the thread is facing up. The final cut will be through the thread, so you will cut right across it while the tire is placed horizontally. That’s when the three cuts will meet, making the rubber come apart with ease.
If you’re wondering how to cut a tire, it all boils down to how much of your tire you want to cut. To slice completely through, you’ll want a power tool with a carbide blade to tackle the steel belts. If you just want to get the most recyclable rubber out of the sidewalls, a manual tool works perfectly fine. Consider our top pick, the Milwaukee 50-Piece Hook Utility Knife Blades for the best efficiency. Keep in mind these are only blades, though. You’ll want a sturdy handle with a good grip, too, such as the Milwaukee Fastback 3 Utility Knife. Then you can switch out the straight blade for the hooked blade.
SKIL 5280-01 15-Amp 7-1/4-Inch Circular Saw has a 15-amp motor that delivers 5,3000 rpm. You’ll need that to get through the steel belt with ease. The other great feature of this circular saw is the 51-degree bevel capacity, allowing you a variety of cuts so that you can approach the tire from different angles. The SKILSAW SPT44A-00 13 Amp Reciprocating Saw has a variable speed trigger so that you can increase the pressure when you encounter steel belts. The powerful 13-amp motor produces controlled cuts through tough materials, and Skilsaw has designed the saw to direct debris and dust away from the user.
Don’t forget about protecting your lungs and eyes from toxic rubber fumes and cut in a well-ventilated area.
Whatever you choose, we hope this guide and our reviews have helped you narrow down the options for cutting tires efficiently and cleanly. Decide how you want to use your tire parts first, then you can take the dive into purchasing a product. If you already own one of the above tools, it’s probably worth giving it a try before you plunk down your hard-earned cash on a new tool. Any of the above methods work, despite the order of preference we’ve suggested. Good luck cutting those tires!
RELATED READING:
Which tool works best for cutting circles in wood?
What’s the most efficient way of cutting aluminum? We put it to the test!
Contents
 1 Safety Precautions
Cutting combs for shields with scissors
Hmm! Here in one of the posts I mentioned the method of cutting combs with plastic scissors, which was suggested to me by Baramych (ElectroMoscow). The next day after I had a chat with him, I drove to Leroy and bought the cheapest plastic pipe shears there and tried it on one of the shields. It turned out quite well, only the scissors failed: their ratchet mechanism broke after the first cut. Well, I did not want to buy good scissors, because I was still testing the method.
Before describing all this, let's sum up all the knowledge that is scattered around the blog. Correctly, the combs are called "Bus wiring" or "Connecting tires", but in the jargon everyone calls them combs and does not take a steam bath. The most IMPORTANT rule - ALWAYS choose combs from the same manufacturer as the module! Do not try to shove other combs - they may not fit into the machines normally, they can distort the shield wiring. For example, here people stuck what the hell kind of combs into the shield, and the machine guns there were distorted. Specifically, ABB has two series of modules: with the letter "H" - Sh300L , Fh300 , and complete without the letter "H" - S200 , F200 . And it is important to remember that the combs for these series are different! Here it was well described. Well, we are interested in such models of combs: PS1 / xx - for connecting automata, PS2 / xx for connecting RCDs or difavtomatov and PS4 / xx for connecting four-pole (“three-phase”) RCDs. Some of these combs were mentioned in the first post about them.
I was just assembling one shield today and I got the idea to take a picture of the whole process of how I cut the combs and put them together. In general, the same process was mentioned in the Master Class on a single-phase shield, so you can check with those pictures. What am I doing? When I place the module in the switchboard, I immediately put into the marking (here you can look at the posts about the Godex G500 printer, which I adapted for printing marking using WAGO consumables) the labels of the power sources of the machines: where (from which RCD) they are powered. I even included this case in the new instructions for the shield, about the printing method of which I also mentioned. I have the following notation: Lxxx, for example LQ14 - this will mean that “Line from Q14” is a line from Q14.
All these markings are printed and affixed together with the markings on the module itself. Moreover, I glue the marking of the module at the bottom contacts - the wires from the cables will just be connected there, and I glue the marking of the power supply of the machines on top of the module - just where this power is supplied. It was invented by accident, but you can say that the Universe led my hands: it turned out that the right markings are in the right places.
As a result, when the whole module is in place, then I can only visually separate the automata among themselves. For this I turn them on through one group of combs. As a result, the eye is not mistaken, and on the fly, even despite your own numbers, you can cut off the copper of the comb with metal scissors. This is how it looks. To make it clear that the copper of the comb is cut, I turned one of its pieces over.
Cut copper from ABB PS1/58 combs
Here's what to say. Initially, manufacturers expect that everyone will cut the combs as it is written in the instructions: saw with a hacksaw along with copper, and then put on the end caps. We all give a shit about this method, because it is not quite technologically advanced for the shields that we collect. Most often, no one will ever touch these shields in terms of machines, because the wiring will be walled up in a residential building in a screed or under the ceiling. Therefore, we can kill two birds with one stone if we make one common comb insulator for the entire length of the module (this will make our comb more durable, because it will consist, as it were, of a long piece, and not of short pieces for our machines) and if we cut the edges of the copper shorter inside the comb (then it will be inside the insulator, and the plugs will not be needed).
That is why, in the case of our shields, we tear the copper out of the comb and cut it separately, and the insulator separately. And if copper can be easily cut with scissors for metal and there are no problems with this, then there were just problems with cutting plastic. I tried to buy a trimmer with a plastic disc. The first impression was rosy, and the second was terrible, because the disk did not have time to cut through the plastic of the comb and broke it. As a result, it was easy to be left without fingers. And most importantly, there was always sawdust from sawing the combs, and I had to interrupt for a vacuum cleaner and cleaning. I even called this stage of the assembly of shields dirty and sought to finish it as soon as possible.
And now the solution to this case lay on the surface! Scissors for PLASTIC! Such scissors, for example, are produced for cutting boxes. But the most common - plumbing scissors for cutting plastic pipes ! It turns out that while I was stupid myself, people began to try the solution, and already from Baramych (ElectroMoscow) I learned that it was tested and works successfully. The next day I went to Leroy and bought the cheapest shears for metal-plastic there to see how things would go. Things went great, but the scissors failed: their ratchet mechanism broke, and in order for the blade to cut, I have to hold it with my hands. It does not bother me, because I checked the solution itself and I know that I will just buy good scissors later. The second feature of this method is to choose the position of the plastic of the comb in the scissors so that they do not strongly bend the plastic when cutting it. I am still deciding and experimenting, and I have not developed my own cutting style.
This is how it works. We take the comb PS2 / 58 (it was marked in advance where to cut) and shove it into the scissors and just CUT. The only thing you need to watch out for is that the comb fits into the blade evenly, and not at an angle.
We cut the PS2..PS4 comb with plastic scissors
The comb is a little wrinkled, and the cut is perfectly even! Everything is cut quietly, without noise, dust and a vacuum cleaner, which pleased me most of all. If you hold a master class, then you don’t have to be embarrassed, “Oh, guys, right now I’ll get drunk here, and then I’ll vacuum it.”
Cut comb PS2..PS4 with plastic scissors
And here is a cut after a hacksaw for comparison. Before, I sawed it all, littered it, and then processed it with a file.
Comb sawn off with a hacksaw
After the file (the photo is not quite high quality), roughness and uneven edges still remained inside the comb. Outwardly, this was almost invisible, but inside it was unpleasant for me, because everything ended again with dust and other fuss.
Hacksaw after filed comb
Next I cut the insulators for the PS1/60 combs. It’s a little more difficult with them, because the comb on the cut is not U-shaped, but slightly L-shaped, and the tail of the imaginary letter “G” tends to bend either outward or inward. I began to put the comb in the scissors so that this tail curved inside the cut.
Cutting the PS1 comb with plastic scissors
That's what a bunch of combs I got for one of the shields!
Sliced comb insulators
Next, since such a thing has gone, I'll tell you about the assembly of the combs! First, we finish things with copper: we cut off the protruding tails at the root. Then inside the insulator you will automatically get the desired distance between the edges of the copper of different bars. Well, outside of it, too, nothing will stick out (that's why plugs are not needed).
Trim off the excess metal at the comb
Here's what we got. Copper is cut and laid out in its place (we check by marking on the module), and the insulators of the combs are cut to the desired length. Here you can very well see the distance between the tires and the distance from the tires to the edges of the insulator.
All the copper parts of the combs are laid out in their places
After that, we take our insulator and insert copper into it from one of the sides. In this case, the main thing is not to make a mistake and correctly turn the insulator so that the copper stands up as we need. The copper inside can move, so we need to align it so that it does not crawl anywhere and stands evenly and neatly. Here you can see that now she has risen crookedly for me.
The copper parts of the combs are inserted into the plastic insulator
To align the copper, we simply insert our comb into the module, pushing the copper inside so that all the teeth fit into the comb contacts.
Trying on the comb and aligning its copper parts
And after that we move our plastic comb insulator from side to side. Then the copper inside will first move along with our insulator until it hits the edge of the contacts of the automata. As a result, all copper bars inside the insulator will stand along one border. After that, we can move the plastic of the insulator again so that it covers all the copper from the edges, and it stands in the center there.
The comb fits exactly into the module
And then I also glue the combs so that the plastic insulators do not go anywhere. Again, I can afford to do this, because the shield will not get over 99% of the time. And if something happens, it will be added, and no one will touch these combs. So I take super glue and glue the comb at several points. I glue wide combs (PS2 / and beyond) by spreading the copper with my fingers. Then the glue can be poured directly between the copper and plastic.
Glue the copper in the insulator of the comb
And for single pole combs (Ps1/xx) I pour glue under the place where the copper touches the insulator.
We glue the copper in the insulator of the comb
Then all these combs dry a little (about two minutes, just while I remove the tool for this part of the work), and they can be put in the shield.
Combs are ready to be installed in the panel!
Mastering YouTube. Recorded a video about this cutting method:
22.03.2020 02:43
We live in an ordinary high-rise building. The old benches at the entrance have long been in need of repair, some have frankly collapsed, but utilities are in no hurry to take action. And suddenly, one morning, a new unusual shop made of tires and boards appeared near the first entrance. It turned out that it was made by a retired neighbor. He happily shared detailed instructions, and now we want to make the same for the whole house.
Consumables (for bench 120x65 cm):
Take four tires of the same size. Be sure to have gloves ready because cutting tires will heat up the rubber and could hurt you. Make sure you have safety goggles.
Cut the bars to the same size. You will need 7 pieces of 120 cm and 2 pieces of 65 cm. Treat each bar with a grinder (if available) or sandpaper. The texture of the planks should be smooth.
After cleaning the tires with water, dry them in the sun to remove harmful bacteria. Then on each tire you need to make a mark to fix the height of the bench. Accurate labeling is very important in this case.
On the side rails, mark 15 cm from the floor with a measuring tape. Make a square mark on the right and left side of the tire at a height of 15 cm. The square should be with sides of 5 cm. Do the same process twice - with one and the other tire.
Now it's time to cut the marked squares with the cutting disc. Don't forget to wear gloves. Keep an extra bar under the one you are cutting to help support it. Make 5x5 cm square holes on the left and right sides of the side rails.
Always cut accurately because you need the exact size of the puncture to insert the wooden lath into. Tires always have a wire mast in their structure, so they are difficult to puncture. Use a chisel and hammer to make a hole.
Insert a piece of wood 65 cm long through the holes in the tires. Keep part of the strip outside of the tire to improve the texture. Save the extra blades for the tire cutter because after cutting two tires you will need to replace it.
Now to insert the rear tires, you need to make another hole in the side tires. It will be exactly on the top side of the wood lath (to create a circular joint) and on the left and right sides of the tire.
For better alignment, you can also remove a small section on the left and right side of the tire where the wood planks are assembled. Make the same punctures on the rear tires. Insert a wooden stick 120 cm long into the rear tires horizontally.