Modern tire technology blends a unique mix of chemistry, physics and engineering to give consumers a high degree of comfort, performance, efficiency, reliability and safety. Many tires are custom-designed to meet the stresses and performance needs specified by the maker of a particular model vehicle.
Every tire is carefully inspected, and random samples are pulled for additional safety tests. As part of these tests, tires are x-rayed, cut apart and examined, run on test wheels, or road-tested to evaluate handling, mileage and traction performance. If properly cared for, tires can last a long time – usually from 40,000 to 80,000 miles, depending on the application.
As many as two hundred different raw materials combine into a unique mix of chemistry, physics and engineering to give consumers the highest degree of comfort, performance, efficiency, reliability and safety modern technology and creativity can provide. Here are the basic steps:
Planning and Design
Many tires are custom-designed to meet the stresses and performance needs specified by the maker of a particular model vehicle. The process begins with a computer, which converts the mathematics of the car’s special needs into specifications. A prototype tire is then made to test the tire design’s ability to provide the desired characteristics. Custom-designing a tire for a particular vehicle typically takes many months of testing, inspection, and quality checks by the tire maker and the vehicle maker. Only then does the vehicle maker commit with an order.
Manufacturing
The production process begins with the selection of several types of rubber along with special oils, carbon black, pigments, antioxidants, silica, and other additives that will combine to provide the exact characteristics wanted. Separate compounds are used for different parts of the tire. A machine called a banbury mixer combines the various raw materials for each compound into a homogenized batch of black material with the consistency of gum. The mixing process is computer-controlled to assure uniformity. The compounded materials are then sent to machines for further processing into the sidewalls, treads or other parts of the tire.
Then the task of assembling the tire begins. The first component to go on the tire building machine is the innerliner, a special rubber that is resistant to air and moisture penetration and takes the place of an inner tube. Next come the body plies and belts, which are often made from polyester and steel. Plies and belts give the tire strength while also providing flexibility. The belts are cut to the precise angle and size the tire engineer specifies to provide the desired ride and handling characteristics. Bronze-coated strands of steel wire, fashioned into two hoops, are implanted into the sidewall of the tires to form the bead, which assures an airtight fit with the rim of the wheel. The tread and sidewalls are put into position over the belt and body plies, and then all the parts are pressed firmly together. The end result is called a “green” or uncured tire.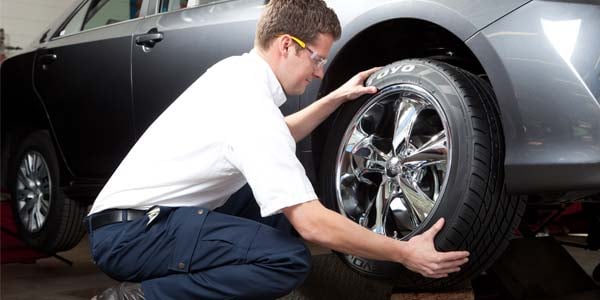
The last step is to cure the tire. The “green” tire is placed inside a mold and inflated to press it against the mold, forming the tread and the tire identification information on the sidewall. Then it is heated at more than 300 degrees Fahrenheit for twelve to fifteen minutes, vulcanizing it to bond the components and to cure the rubber. (FACT: This twelve to fifteen minute curing process is for passenger and light truck tires only, off-road and large tires may take up at a day to cure because of their size!) Every tire is then inspected, and sample tires are randomly taken from the line and tested. Some are x-rayed, some are cut apart to look for flaws, others are run on test wheels, or road-tested to evaluate handling, mileage and traction performance.
A tire is a complex combination of components made from numerous ingredients. But how do we get from the rubber tree to the road? Tire production is a multi-step process. Let’s follow a Continental tire through all five essential stages of tire manufacturing:
Various branches of industry supply the tire manufacturing industry with raw materials, which are used to create the necessary compounds.
Steel. The steel industry supplies high-strength steel. This serves as the starting material for the manufacture of steel belts (steel cord) and of bead cores (steel wire).
Chemicals. The chemical industry is a major tire ingredient supplier. In particular, synthetic rubber and materials used to reduce wear, increase grip, and extend the life of a tire.
Natural rubber. Rubber is extracted from special trees grown in large plantations. The milky fluid (latex) that flows out coagulates when acid is added to it. It is then cleaned with water and pressed into solid bales for easier transportation and storage.
Bales of natural and synthetic rubber are sectioned, cut into portions, weighed, and mixed with other ingredients according to precise recipes. Up to twelve different rubber compounds are used in modern passenger car tires.
Textiles. The textile industry supplies base materials (rayon, nylon, polyester, and aramid fibers) for the manufacture of cords that serve as reinforcement in tires.
Steel cord. Pre-treated steel cord supplied on wire spools is fed into a calendar, where it is embedded in one or more layers of rubber. The result is a continuous sheet of cord and rubber. This is cut at a defined angle to the correct length according to tire size and rolled up for further processing.
Tread. Kneadable rubber material that has been blended in a mixer is now ready to be made into the tread. A screw-type extruder shapes the rubber into an endless strip of tread. After extrusion, the weight per meter is checked and the tread cooled by immersion. The tread strip is cut to length for the tire size. Another unit weight control is then carried out.
Textile cord. A multitude of textile threads are fed into the calendar by a large roller device and embedded in a thin layer of rubber. This endless sheet is then cut to the desired width at a 90° angle to the direction of travel and rewound for further processing.
Steel bead. The core of the bead is made up of many ring-shaped steel wires. Each of them has its own rubber coating. This loop is then fitted with a rubber apex.
Sidewall. Sidewall sections cut to suit the particular tire size are turned out with the extruder.
Inner liner. A calendar forms the airtight inner liner into a wide, thin layer.
Now, the tire building can begin. The various semi-finished products come together on the tire building machine and are assembled into what is known as a “green tire.” This is done in two stages: the casing, and the tread/belt assembly. This “green tire” is then sprayed with a special fluid to prepare it for vulcanization.
Now we’re in the curing press. Here, the tire receives its final shape after being vulcanized for a certain length of time at a certain pressure and temperature. During this process, raw rubber becomes flexible, elastic rubber. Curing press molds are engraved with the tread pattern and sidewall markings.
Each individual stage of production – from the inspection of raw materials to delivery of finished tires – is subject to ongoing quality control.
A multi-layered process ensures Continental tires are thoroughly checked for quality. Finished Continental tires go through:
Once tires have passed all checks and inspections, they are sent to the distribution warehouse for shipment.
The fastest way to the perfect tire.
Select tiresize or Show results
Contents
Equipment: Beler tire.
A conventional hospital bed with a lifting headrest is inconvenient for traction fractures. The shield, without which traction is impossible, closes the headrest. To raise the torso and head, the patient needs to place 3-4 pillows that move, “slide”. It is rational to use wooden or metal headrests.
If the patient is placed on the board on a regular bed, then the board should be covered with two mattresses, it is better if the top one is foam rubber. To give the patient a functionally advantageous position on a regular bed, a triple folded mattress should be placed under the torso and head. In the treatment of fractures of the femoral neck and trochanteric region in elderly patients and the elderly, a roller is placed under the legs or the foot end of the lower mattress is folded in half. This ensures a bent position of both the injured and healthy legs. Straightening a healthy leg on a flat bed is a mistake, it is poorly tolerated by patients.
Thus, 3 mattresses are required for the treatment of skeletal traction fractures on an ordinary bed. For the treatment of patients with skeletal traction fractures (especially patients with polyfractures and associated injuries), a functional bed is convenient. It is easy to move (wheels on ball bearings), allows you to change the angles of lifting the torso and bending the legs. Its mesh is stretched on four frames, so it does not overstretch when laying the patient, which allows for skeletal traction without a shield. The low back of the functional bed does not interfere with the adduction and abduction of the leg with the Beler splint. A bed for trauma patients was created on the basis of a functional bed. In the trauma department, all beds must be functional.
Beller's splint is required for the treatment of fractures of the bones of the lower limb using skeletal traction. Before using the tire, it is covered with a cloth and a bar with blocks is attached through which the load is suspended.
Source
The video below shows Beller's tire disassembled:
The device consists of two frames, vertical and horizontal (providing stability). The surface of the frames is smooth, the presence of cracks is unacceptable. Frames form a combined tire, equipped with blocks for securing loads. The kit also includes springs, a cord, looped hammocks (not available in older versions), spacers, marked counterweights with fasteners.
For successful treatment of fractures of the lower extremities, modern medicine uses three methods:
The use of skeletal traction methods is justified in cases:
The procedure is not performed for children under 5 years of age.
The mechanism of action of the method is based on physiological laws proven by Drs. Weber, Dubois, Reymond. The principle is simple - muscle relaxation and gradual displacement of fragments under the action of a system of weights.
The main contraindication is the presence of foci of infection in the area of manipulation.
Beller bars not supplied with a looped hammock must be equipped with an absorbent cloth or bandage before use. The canvas is stretched over the upper horizontal frame, fixed by sewing with a needle and a strong thread. Such a hammock should not be stretched too tightly, excessive sagging should also be excluded.
The 45-degree section of the structure will be the patient's thigh and popliteal cavity, the metal elements in this section must be covered with a cloth or tightly wrapped with a bandage.
The splint is installed on the trauma bed in such a way that the lower block with weights is outside the bed, out of the patient's reach.
For repositioning in the thigh region, the upper block is used, it is necessary to carry out skeletal traction of the lower leg, placing the patient's limb on the lower part of the apparatus.
In order to avoid squeezing of blood vessels and tissues in the popliteal region, cotton pads and small pads are placed around the heel.
When positioning the injured limb, follow the scheme:
Before tension using cables with weights that are in the front block of the structure, a flannel rack is put on the foot.
Source
 Technique of adhesive plaster and adhesive traction.
 Equipment: Adhesive plaster or glue, bandage, weight, Beler splint.
Technique. For fractures that do not require much effort to eliminate the displacement in length, use adhesive traction with adhesive tape, cleol, mastizol or zinc gelatin paste.
Fig. 71. Adhesive plaster traction of the lower limb.
Equipment: Behler tire.
Technique. A conventional hospital bed with a lifting headrest is inconvenient for the treatment of traction fractures. The shield, without which traction is impossible, closes the headrest. To raise the torso and head, the patient needs to place 3-4 pillows that move, “slide”. It is rational to use wooden or metal headrests.
If the patient is placed on a bed on a board, then the board should be covered with two mattresses, it is better if the top one is foam rubber. To give the patient a functionally advantageous position on a regular bed, a triple folded mattress should be placed under the torso and head. In the treatment of fractures of the femoral neck and trochanteric region in elderly patients and the elderly, a roller is placed under the legs or the foot end of the lower mattress is folded in half. This ensures a bent position of both the injured and healthy legs. Straightening a healthy leg on a flat bed is a mistake, it is poorly tolerated by patients. Thus, for the treatment of fractures by skeletal traction on a regular bed, 3 mattresses are required. For the treatment of patients with skeletal traction fractures (especially patients with polyfractures and associated injuries), a functional bed is convenient. It is easy to move (wheels on ball bearings), allows you to change the angles of lifting the torso and bending the legs. Its mesh is stretched on four frames, so it does not overstretch when laying the patient, which allows for skeletal traction without a shield.
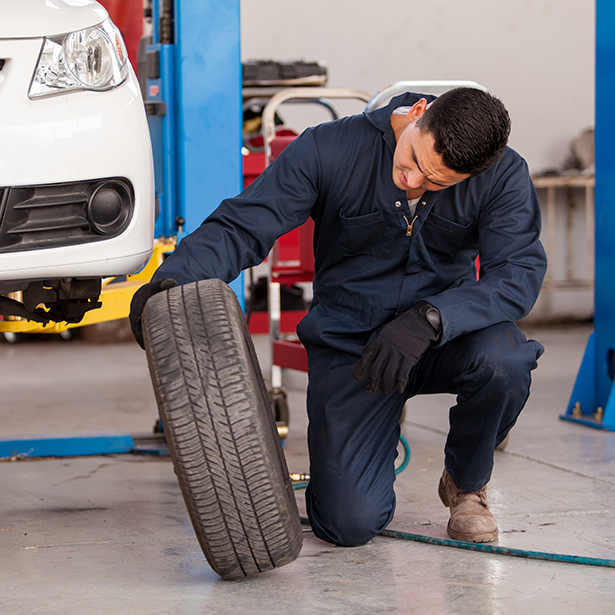 The low back of the functional bed does not interfere with the adduction and abduction of the leg with the Beler splint. A bed for trauma patients was created on the basis of a functional bed. In the trauma department, all beds must be functional.
Beller's splint is required for the treatment of fractures of the bones of the lower limb using skeletal traction. Before using the tire, it is covered with a cloth and a bar with blocks is attached through which the load is suspended.
Source
The victim is placed on his back. The surgical assistant fixes the pelvis by pressing on both iliac spines. First, it is necessary to carefully bend the affected limb in the knee and hip joints to a right angle, and then carry out traction along the axis of the thigh. At this point, the dislocated hip often retracts with a characteristic clicking sound. If the reduction of the dislocation has not occurred, then the surgeon, continuing the thrust along the axis of the thigh, first rotates inward, and then somewhat outward with simultaneous abduction and extension of the limb. As a rule, these techniques allow you to set the posterior dislocation of the hip.
40. Transport immobilization technique for fractures of the shoulder, bones of the forearm, fractures of the metacarpal bones, femur, tibia, foot.
Equipment: Dieterichs splint, Kramer ladder splint, medical bandage.
Technique. Immobilization, which is carried out for the period of transportation is called transport.
In case of a fracture of the shoulder, it is necessary to fix three joints - the shoulder, elbow and wrist, and give the limbs a position close to the average physiological: take the shoulder away from the body by 20 - 30 0 and bend it forward. A wire ladder tire 120 cm long is used (Fig. 65).
In case of a fracture of the bones of the forearm, it is necessary to fix the elbow and wrist joints. The splint should start in the upper third of the shoulder, ending 3-4 cm distal to the fingertips (Fig. 66).
In case of a fracture of the radius in a typical location, the splint is applied from the upper third of the forearm to the fingertips, protruding 2-3 cm. 67).
In case of a fracture of the femur, a Dieterichs distraction splint is used, pneumatic splints, in the absence of the latter, ladder splints. Immobilize the hip, knee and ankle joints, the splint should go from the armpit to the ankle. The branches of the Diterichs splint of the outer crutch are installed so that the head of the upper branch rests against the armpit, the inner one against the groin, and the spike of the lower branch extends beyond the edge of the foot by 10-15 cm (Fig. 69).
Transport immobilization of the lower leg p is made using special plywood splints, wire ladder splints, Dieterichs splint. The ladder splint is applied from the upper third of the thigh and 7–8 cm distal to the ends of the fingers (Fig. 68).
In case of fracture of the ankles, the splint is applied from the upper third of the leg to the ends of the fingers, protruding 2-3 cm.0143
Fig. 65. Transport Fig. 66. Transport
immobilization with splint Immobilization with splint
of the shoulder. forearm bones.
Fig. 67. Transport Fig. 68. Transport
immobilization with a splint immobilization with a splint
Cramer's fracture in case of a fracture
of the metacarpal bones. leg bones.
Fig. 69. Scheme of using the Dieterichs tire for a hip fracture.
42. Imposition of CITO abduction splint for shoulder fracture.
Equipment: CITO abduction splint.
Technique. In order to give the peripheral fragment the direction of the central, in case of fractures of the shaft of the shoulder, an abduction splint is used. The tire in the form of ready-made devices of metal or wooden construction is fixed to the body with the help of special straps or made from metal ladder tires for each patient. The angle of shoulder abduction on the abduction splint should be the greater, the more centrally the fracture is located, and the smaller, the more peripheral it is. However, in practice it is more expedient in all cases to apply abduction at an angle of 90°. Thanks to this, it is possible not to take into account the level of the fracture, because both the central and peripheral fragments are retracted with the help of a splint to a right angle and are installed in the same plane. The abduction splint for shoulder fractures should always be fixed 30-40° forward from the frontal plane.
When applying the splint, insert as high as possible into the axillary region. Depending on the indications, an adhesive plaster traction is applied to the shoulder or skeletal traction behind the olecranon.
A spurt of blood into the syringe (while pulling on the syringe) may suggest that the needle has entered a large blood vessel; the introduction of novocaine into it is unacceptable, as this can cause severe collapse. In this case, the direction of the needle is changed. Enter 20 ml of a 1-2% novocaine solution, which provides sufficient anesthesia for the fracture site for 1.5-2 hours. The introduction of a novocaine solution outside the hematoma does not provide anesthesia for the fracture site. It is important to remember that with moderate and severe shock (BP below 80 mm Hg. Art.), The total amount of novocaine should be half as much as usual.
44. Adhesive plaster and adhesive drawing technique.
Equipment: Adhesive plaster or glue, bandage, weight, Beler splint.
Technique. For fractures that do not require much effort to eliminate the displacement in length, use adhesive traction with adhesive tape, cleol, mastizol or zinc gelatin paste.
Fig. 71. Adhesive plaster traction of the lower limb.
45. Preparation of a bed for patients with skeletal traction, preparation of a Beler splint.
Equipment: Behler tire.
Technique. A conventional hospital bed with a lifting headrest is inconvenient for the treatment of traction fractures. The shield, without which traction is impossible, closes the headrest. To raise the torso and head, the patient needs to place 3-4 pillows that move, “slide”. It is rational to use wooden or metal headrests.
If the patient is placed on the board on a regular bed, then the board should be covered with two mattresses, it is better if the top one is foam rubber. To give the patient a functionally advantageous position on a regular bed, a triple folded mattress should be placed under the torso and head. In the treatment of fractures of the femoral neck and trochanteric region in elderly patients and the elderly, a roller is placed under the legs or the foot end of the lower mattress is folded in half. This ensures a bent position of both the injured and healthy legs. Straightening a healthy leg on a flat bed is a mistake, it is poorly tolerated by patients. Thus, for the treatment of fractures by skeletal traction on a regular bed, 3 mattresses are required. For the treatment of patients with skeletal traction fractures (especially patients with polyfractures and associated injuries), a functional bed is convenient. It is easy to move (wheels on ball bearings), allows you to change the angles of lifting the torso and bending the legs. Its mesh is stretched on four frames, so it does not overstretch when laying the patient, which allows for skeletal traction without a shield. The low back of the functional bed does not interfere with the adduction and abduction of the leg with the Beler splint. A bed for trauma patients was created on the basis of a functional bed. In the trauma department, all beds must be functional.
Beller's splint is required for the treatment of fractures of the bones of the lower limb using skeletal traction. Before using the tire, it is covered with a cloth and a bar with blocks is attached through which the load is suspended.
Fig. 72. Tire Beler.
46. Skeletal traction technique for the femoral condyles, tibial tuberosity, supramalleolar region, calcaneus, olecranon.
Equipment: Kirschner wire, clamp (CITO, Kirchner), manual or electric drill, key, syringe with needle, 0.25 - 1% novocaine solution, 70% alcohol solution, gauze swabs, sterile gloves, wire cutters.
Technique. Skeletal traction is applied in compliance with all asepsis rules: the surgeon's hands and the skin in the injection area are treated with a 70% alcohol solution. The needle insertion site is anesthetized with a 0.25 - 1% novocaine solution, starting from the skin and ending with the periosteum. After the onset of anesthesia with a needle, previously fixed in the drill cartridge, the skin is pierced at the intended point to the bone. The needle should be perpendicular to the longitudinal axis of the limb.
The passage of the pin through the bone is due to its rapid rotation. After the needle comes out from the opposite side of the limb, it is advanced forward. Then the bracket is fixed to the knitting needle, pulling the knitting needle with a key. The ends of the needles on both sides are bitten with wire cutters, leaving fragments of 7-8 cm each. A load is attached to the bracket with a fishing line through a system of blocks.
The pin insertion point for skeletal traction is selected based on the specific location of the fracture. Most often it is the calcaneus, tibial tuberosity (Fig. 72), the region of the condyles of the femur, and the olecranon. At these points, the bone closely adjoins the surface of the skin, the risk of damage to important anatomical structures is minimal.
Fig. 73. Staple CITO. The numbers in the figure indicate:
4 - device for dilution of half-arcs;
5 - a spoke bent with a "rocker" for attaching the damper to the bracket.
47. Diagnosis by radiographs of the type of fracture. Recommendations for treatment.
Radiography is the main method for diagnosing fractures. Allows you to assess the location of the fracture, the type of fracture. For an adequate assessment of the fracture, radiography of the fracture site must be taken in frontal and lateral projections.
Treatment methods for fractures: fixation, extension, surgery.
Fixation consists in simultaneous closed reposition and retention of bone fragments with a plaster cast.
Extensional - reduction and retention of fragments is carried out by constant traction in the case when the fragments are not compared at the same time.
Operative - allows you to accurately match bone fragments and securely fasten with clamps.
48. Lumbar puncture technique.
Equipment : lumbar puncture needle, syringe.
Technique. Lumbar puncture is performed with the patient sitting or lying on their side. In the first case, the patient is seated across the table, his head and shoulders are bent down so that the back is arched as much as possible (Fig. 53). In the second case, the patient is laid on his side on the edge of the table, his knees and hips are brought to the stomach, the head is pressed to the chest, the back is arched. In both options, the nurse holds the patient, helping to maintain the accepted position.
The space between the 3rd and 4th or 2nd and 3rd lumbar vertebrae is usually used for puncture. After processing the surgical field with alcohol, the puncture needle (Fig. 54) is inserted along the midline between the spinous processes with a slight downward inclination. When advancing the needle, resistance is felt due to the passage of the interspinous, supraspinous, yellow ligaments, as well as the dura mater. The disappearance of resistance to the movement of the needle indicates entry into the subarachnoid space. At the same time, the mandrin is removed from the puncture needle. The appearance of drops of cerebrospinal fluid from the lumen of the needle indicates the correctness of the puncture. After that, a syringe is attached to the cannula and CSF is taken or drugs are injected. If fluid does not flow from the needle, it is rotated around the axis and advanced 1-2 mm forward. In the absence of cerebrospinal fluid or the appearance of blood, the needle is removed and the puncture is repeated between other spinous processes.
49. Pleural puncture technique.
Equipment : disposable syringe, local anesthetic solution (novocaine 0.25%), reusable syringe with a needle 8-10 cm long connected to the cannula of the syringe with a rubber tube, clamp.
Technique. Pleural puncture is performed at several typical points, depending on the goals. To evacuate air, a puncture is performed in the II intercostal space along the midclavicular line. The patient is in a sitting or lying position. To evacuate the fluid, a puncture is made in the VII-VIII intercostal space along the posterior axillary line. At the same time, the patient either sits leaning forward somewhat, relying on the back of the chair standing in front, or sitting with his hand behind his head on the side of the puncture.
After treatment of the surgical field with an antiseptic solution, infiltration anesthesia of the puncture site is performed (not only the skin is infiltrated, but also the underlying tissues, up to the parietal pleura). After that, the puncture needle is inserted along the upper edge of the underlying rib until a feeling of needle failure appears. If there is fluid in the pleural cavity, it appears in the syringe when the piston is pulled. The appearance of air bubbles in the syringe indicates lung damage (if there was no pneumothorax initially). After the syringe plunger is fully withdrawn, the rubber tube connecting the needle to the cannula is clamped with a clamp, the syringe is emptied, then reconnected to the rubber tube. The clamp is removed and the described procedure is repeated again.
After the three cup system has been assembled, it is hermetically connected to the drain in the pleural cavity and the electric suction. The clamp is removed from the drainage, the electric pump is turned on.
Fig. 75. Three-jar system. The numbers in the figure indicate:
Source
Beller splint is a mechanism designed to stabilize a system consisting of an injured limb, block, weights. In fact, this is a metal mechanism under the leg during skeletal traction. With its help, a gradual reposition (skeletal traction) is performed in case of fractures of the femur and lower leg, complicated by the presence of bone fragments. For skeletal traction using the Beller extension mechanism (as the splint is called), the use of a special bed is recommended. Or functional or traumatological, which simplifies patient care and makes it possible to move within the hospital (visiting an X-ray room, other procedural rooms).
The video below shows Beller's tire disassembled:
The device consists of two frames vertical and horizontal (ensuring stability). The surface of the frames is smooth, the presence of cracks is unacceptable. Frames form a combined tire, equipped with blocks for securing loads. The kit also includes springs, a cord, looped hammocks (not available in older versions), spacers, marked counterweights with fasteners.
For successful treatment of fractures of the lower extremities, modern medicine uses three methods:
The use of skeletal traction methods is justified in the following cases:
The procedure is not performed for children under 5 years of age.
The mechanism of action of the method is based on physiological laws proven by Drs. Weber, Dubois, Reymond. The principle is simple - muscle relaxation and gradual displacement of fragments under the action of a system of weights.
The main contraindication is the presence of foci of infection in the area of manipulation.
Beller bars not supplied with a looped hammock must be equipped with an absorbent cloth or bandage before use. The canvas is stretched over the upper horizontal frame, fixed by sewing with a needle and a strong thread. Such a hammock should not be stretched too tightly, excessive sagging should also be excluded.
The 45-degree section of the structure will be the patient's thigh and popliteal cavity, the metal elements in this section must be covered with a cloth or tightly wrapped with a bandage.
The splint is installed on the trauma bed in such a way that the lower block with weights is outside the bed, out of the patient's reach.
For repositioning in the thigh region, the upper block is used, it is necessary to carry out skeletal traction of the lower leg, placing the patient's limb on the lower part of the apparatus.
In order to avoid squeezing of blood vessels and tissues in the popliteal region, cotton pads and small pads are placed around the heel.
When positioning the injured limb, follow the scheme:
Before tension using cables with weights that are in the front block of the structure, a flannel rack is put on the foot.
Beller's splint is a mechanism designed to stabilize a system consisting of an injured limb, block, weights. In fact, this is a metal mechanism under the leg during skeletal traction. With its help, a gradual reposition (skeletal traction) is performed in case of fractures of the femur and lower leg, complicated by the presence of bone fragments. For skeletal traction using the Beller extension mechanism (as the splint is called), the use of a special bed is recommended. Or functional or traumatological, which simplifies patient care and makes it possible to move within the hospital (visiting an X-ray room, other procedural rooms).
The video below shows Beller's tire disassembled:
The device consists of two frames - vertical and horizontal (ensuring stability). The surface of the frames is smooth, the presence of cracks is unacceptable. Frames form a combined tire, equipped with blocks for securing loads. The kit also includes springs, a cord, looped hammocks (not available in older versions), spacers, marked counterweights with fasteners.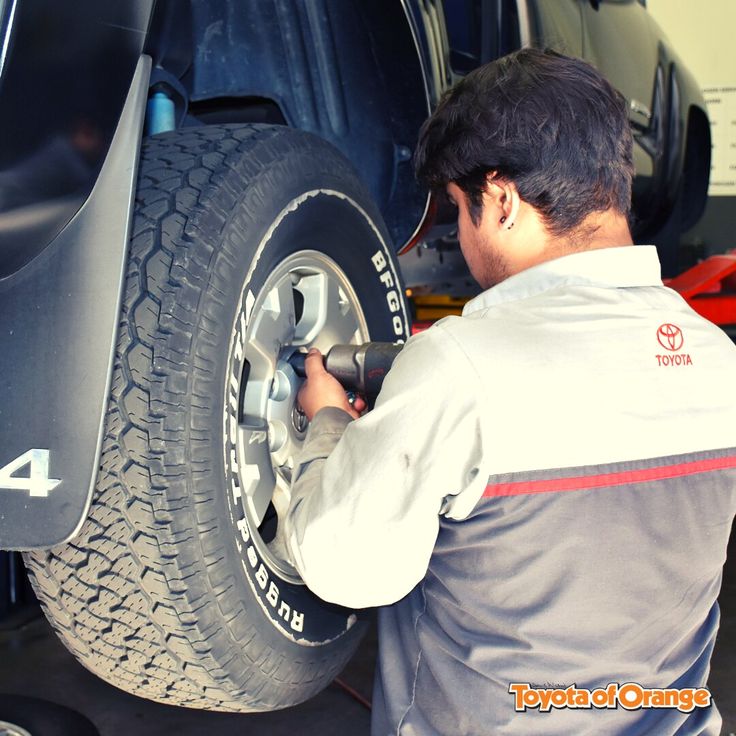
For successful treatment of fractures of the lower extremities, modern medicine uses three methods:
The use of skeletal traction methods is justified in cases:
The procedure is not performed for children under 5 years of age.
The mechanism of action of the method is based on physiological laws proven by Drs. Weber, Dubois, Reymond. The principle is simple - muscle relaxation and gradual displacement of fragments under the action of a system of weights.
The main contraindication is the presence of foci of infection in the area of manipulation.
Beller bars not supplied with a looped hammock must be equipped with an absorbent cloth or bandage before use. The canvas is stretched over the upper horizontal frame, fixed by sewing with a needle and a strong thread. Such a hammock should not be stretched too tightly, excessive sagging should also be excluded.
The 45-degree section of the structure will be the patient's thigh and popliteal cavity, the metal elements in this section must be covered with a cloth or tightly wrapped with a bandage.
Splint in the skeletal traction system
The splint is installed on the trauma bed, so that the lower block with weights is outside the bed, out of the patient's reach.
For repositioning in the thigh region, the upper block is used, it is necessary to carry out skeletal traction of the lower leg, placing the patient's limb on the lower part of the apparatus.
In order to avoid squeezing of blood vessels and tissues in the popliteal region, cotton pads and small pads are placed around the heel.
When positioning the injured limb, follow the scheme:
Before tension using cables with weights that are in the front block of the structure, a flannel rack is put on the foot.
SPLINTING — immobilization of damaged or affected areas of the body with the help of special devices and devices — splints.
The first information about splinting for injuries dates back to ancient times. It was used for injuries and diseases of the musculoskeletal system by A. Celsus and K. Galen, later by A. Pare. During the First World War, cardboard was widely used for splinting, and later - plywood tires.
Currently used tires are divided according to their purpose into transport and medical. Transport tires are used for temporary immobilization (see) during first aid (see) and for the period of transportation of the victim to a medical institution, medical - to fix the damaged area of the body or limb segment in the optimal position until the end of the treatment period.
According to the principle of operation, a distinction is made between fixation and distraction splints. With the help of fixation splints, immobility is created in the damaged limb segment or body area due to external fixation elements. Distraction splints also make it possible to carry out traction (distraction) of the damaged segment, which ensures the reposition of fragments and creates their stability in a tense position.
Tires produced by the industry are called standard (standard), and those produced in a medical institution in single copies and not accepted for supply are non-standard. Splinting can be carried out using improvised tires from improvised means and materials (boards, sticks, etc.). Improvised splinting may consist of fixing an injured limb to a healthy limb or to the body. For example, in case of damage to the upper limb, impromptu splinting can be achieved by fixing the arm to the body with the help of a jacket or tunic folded in the form of a scarf, fastened with safety pins.
Modern standard tires are made from metal, wood, plastics and other materials. Therapeutic and, less commonly, transport splinting can be performed using plaster casts and plaster splints (see Plaster technique). In a crust, time the splinting effect is quite often provided by an immobilization of segments of extremities by means of distraction and compression devices (see), though they in strict sense are not tires as provide introduction of structural elements into body tissues. Also conditionally to splinting can be attributed methods of submersible osteosynthesis (see).
Transport splinting is most often carried out with fixation splints. The main ones are stair tires (modified Kramer tires). They are used to immobilize the upper (Fig. 1) and lower extremities both independently and to strengthen plaster casts and splints. The main advantage of stair rails is the possibility of their modeling. In recent years, pneumatic tires made of a two-layer polymer film equipped with a zipper and an air injection valve have been used. There are pneumatic tires for the forearm and hand, for the foot and lower leg (Fig. 2), for the knee joint. The advantages of such splints include their low weight, ease of application, and the ability to observe the condition of the injured limb through the transparent wall of the shell-camera. The main disadvantage is the limited time during which the pneumatic splint can be on the limb, as it can cause tissue compression and local circulatory disorders. Plastic tires are of limited use for transport immobilization, as they are modeled when heated, which is not always possible in real conditions. In some cases, plywood fixation splints continue to be used for transport immobilization. Their main drawback is the impossibility of modeling.
Of the distraction transport splints, the Dieterichs splint (Fig. 3) and its modifications are the most widely used. The tire consists of two side parts (branches) and a plywood sole fixed to the foot. Both branches are sliding; when applying a splint, the outer, longer branch rests against the armpit, the inner one against the perineum. Both branches are connected in a U-shape at the distal end with a movable plate. Limb traction is carried out using a twist cord attached to a plywood sole. Branches are fixed to the body and between themselves with special straps or gauze bandages, and for long-term transportation - with plaster bandages.
The most common medical splints are Brown's splint, Beler's splint, Shulutko's splint, CITO abduction splint, etc. Brown's splint for immobilization of the lower limb is a stand made of metal rods, made so that with the help of cloth "hammocks" the limb can be placed on it in the mid-physiological position. The Beler splint, unlike the previous one, has four blocks on the brackets, with which you can choose the direction of traction for each of the segments of the lower limb (Fig. 4). The main advantage of these tires is simplicity, the disadvantage is the inability to change the flexion angles in the hip and knee joints. This shortcoming was eliminated in functional medical splints for the lower limb, for example, in the Shulutko functional splint, which allows movement in the knee joint (Fig. 5).
The standard abduction splint for the upper limb (CITO splint) is intended for the treatment of fractures of the humerus, as well as fractures of the clavicle. It is an arm rest, adapted for shoulder extension and providing freedom of movement in the elbow and wrist joints, which is attached to a semi-corset made of X-ray-permeable material (Fig. 6).
6).
The main indication for splinting is damage to the musculoskeletal system, most often bone fractures, in which splinting allows you to eliminate or limit the mobility of bone fragments, prevents additional injury to blood vessels and nerves in the focus of damage, helps prevent traumatic shock (see), reduces danger of development of infectious complications and fatty embolism (see). Splinting is one of the leading components in the treatment of many orthopedic diseases (arthritis, osteomyelitis, etc.), in which it provides peace and optimal position of the affected bones and joints. Splinting is also used for the purpose of immobilization in the treatment of many injuries and diseases that occur with damage to soft tissues and blood vessels (thrombophlebitis, phlegmon, etc.).
Splinting of elements of the musculoskeletal system requires compliance with a number of general principles and requirements. The main principle of splinting is to fix, in addition to the damaged limb segment, at least two adjacent joints, which ensures complete immobilization. Before splinting, painkillers are administered to the victim. On the areas of bone protrusions (ankles, iliac crests, epicondyles of the humerus, etc.), especially when hard (metal or wooden) splints are applied, protective cotton-gauze pads are placed to avoid bedsores. A tourniquet is applied so that it can be removed without disturbing the achieved immobilization. Flexible rails, e.g. wire, must be well modeled; if possible, they are first modeled on a healthy limb, and then applied to the damaged one. Attach the splint to the damaged part of the body with a bandage or special straps, but without overtightening the limb. When transporting the victim in the cold season, the splinted limb is insulated.
Splinting of individual segments of the trunk and limbs has a number of features. Transport splinting of the head, cervical spine can be carried out with a soft tissue bandage, such as a Shants collar. In case of damage to other parts of the spine and pelvic bones, splinting is performed using a special stretcher with a non-bending bottom. The victim is laid on his back and fixed to the stretcher with a gauze bandage. Hand tools can also be used. The optimal means of splinting in these cases is a plaster bed.
Transport immobilization of the upper limb in the absence of standard splints can be carried out by bandaging it to the body or using improvised means. Of the standard tires, the ladder bus is the most common for this purpose. In case of fractures of the humerus, this splint is applied from the medial edge of the scapula to the fingers of the injured limb. In this case, the shoulder should be abducted up to 30°, the arm should be bent at the elbow joint up to 90°, and the hand should be in a position intermediate between pronation and supination.
For forearm fractures, splinting is performed from the middle third of the shoulder to the metacarpophalangeal joints with elbow flexion up to 90°. Splinting of the wrist joint is performed with its dorsal flexion. The tire is applied from the elbow joint to the fingertips on the palmar side of the forearm. To splint the fingers of the hand, they are given a half-bent position, for which they put cotton wool, a bandage, etc. into the hand, splinting, as a rule, is carried out using a plaster splint.
Transport splinting of the lower extremity, especially for fractures of the femur, is most successful when using distraction splints. For fractures of the bones of the lower leg, the best results are achieved with a ladder splint applied from the middle of the thigh. The same splints are used for foot injuries - they are applied from the popliteal fossa to the fingertips when the ankle joint is set at a right angle. Transport splinting of extremities, if possible, is well carried out with the help of plaster splints (longet) and bandages.
Therapeutic splinting is most often performed using plaster splinting bandages, beds. This achieves optimal modeling and reliable fixation of damaged segments of the musculoskeletal system. In recent years, polymeric materials have been successfully used for this purpose - polyurethane foam, polyethylene foam, polyurethane, etc. Tires made from these materials are light, durable, and convenient for processing. Their main disadvantage is non-hygroscopicity and lack of ventilation.
Article source: https://xn--90aw5c.xn--c1avg/index.php/%D0%A8%D0%98%D0%9D%D0%98%D0%A0%D0%9E%D0% 92%D0%90%D0%9D%D0%98%D0%95
SPLINTING - immobilization of damaged or affected areas of the body using special devices and devices - splints.
The first information about splinting for injuries dates back to ancient times. It was used for injuries and diseases of the musculoskeletal system by A. Celsus and K. Galen, later by A. Pare. During the First World War, cardboard was widely used for splinting, and later - plywood tires.
Currently used tires are divided according to their purpose into transport and medical. Transport tires are used for temporary immobilization (see) during first aid (see) and for the period of transportation of the victim to a medical institution, medical - to fix the damaged area of the body or limb segment in the optimal position until the end of the treatment period.
According to the principle of operation, a distinction is made between fixation and distraction splints. With the help of fixation splints, immobility is created in the damaged limb segment or body area due to external fixation elements. Distraction splints also make it possible to carry out traction (distraction) of the damaged segment, which ensures the reposition of fragments and creates their stability in a tense position.
Tires produced by the industry are called standard (standard), and those produced in a medical institution in single copies and not accepted for supply are non-standard. Splinting can be carried out using improvised tires from improvised means and materials (boards, sticks, etc.). Improvised splinting may consist of fixing an injured limb to a healthy limb or to the body. For example, in case of damage to the upper limb, impromptu splinting can be achieved by fixing the arm to the body with the help of a jacket or tunic folded in the form of a scarf, fastened with safety pins.
Modern standard tires are made from metal, wood, plastics and other materials. Therapeutic and, less commonly, transport splinting can be performed using plaster casts and plaster splints (see Plaster technique). In a crust, time the splinting effect is quite often provided by an immobilization of segments of extremities by means of distraction and compression devices (see), though they in strict sense are not tires as provide introduction of structural elements into body tissues. Also conditionally to splinting can be attributed methods of submersible osteosynthesis (see).
Fig. Fig. 1. Ladder splint applied to the upper limb: a — front view, b — rear view.
Fig. 2. Medical pneumatic tire for lower leg and foot: 1 - valve device; 2 - zipper; 3 - two-layer plastic shell-chamber
Transport splinting is most often carried out with fixation splints. The main ones are stair tires (modified Kramer tires). They are used to immobilize the upper (Fig. 1) and lower extremities both independently and to strengthen plaster casts and splints. The main advantage of stair rails is the possibility of their modeling. In recent years, pneumatic tires made of a two-layer polymer film equipped with a zipper and an air injection valve have been used. There are pneumatic tires for the forearm and hand, for the foot and lower leg (Fig. 2), for the knee joint. The advantages of such splints include their low weight, ease of application, and the ability to observe the condition of the injured limb through the transparent wall of the shell-camera. The main disadvantage is the limited time during which the pneumatic splint can be on the limb, as it can cause tissue compression and local circulatory disorders. Plastic tires are of limited use for transport immobilization, as they are modeled when heated, which is not always possible in real conditions. In some cases, plywood fixation splints continue to be used for transport immobilization. Their main drawback is the impossibility of modeling.
Fig. 3. Diterichs distraction transport splint. The victim with a superimposed splint, fixed with plaster rings.
Of the distraction transport splints, the Dieterichs splint (Fig. 3) and its modifications are the most widely used. The tire consists of two side parts (branches) and a plywood sole fixed to the foot. Both branches are sliding; when applying a splint, the outer, longer branch rests against the armpit, the inner one against the perineum. Both branches are connected in a U-shape at the distal end with a movable plate. Limb traction is carried out using
twist cord attached to plywood sole. Branches are fixed to the body and between themselves with special straps or gauze bandages, and for long-term transportation - with plaster bandages.
Fig. 5. Skeletal traction in case of a fracture of the femur using the Shulutko functional medical splint.
The most common medical splints are Brown's splint, Beler's splint, Shulutko's splint, CITO abduction splint, etc. Brown's splint for immobilization of the lower limb is a support made of metal rods, made so that with the help of cloth "hammocks" the limb can be placed on it in the mid-physiological position. The Beler splint, unlike the previous one, has four blocks on the brackets, with which you can choose the direction of traction for each of the segments of the lower limb (Fig. 4). The main advantage of these tires is simplicity, the disadvantage is the inability to change the flexion angles in the hip and knee joints. This shortcoming was eliminated in functional medical splints for the lower limb, for example, in the Shulutko functional splint, which allows movement in the knee joint (Fig. 5).
Fig. 6. CITO outlet splint for the upper limb: 1 — hand rest; 2 - semi-corset, fastened to the body with straps (3).
The standard upper limb abduction splint (CITO splint) is designed to treat fractures of the humerus as well as fractures of the clavicle. It is an arm rest, adapted for shoulder extension and providing freedom of movement in the elbow and wrist joints, which is attached to a semi-corset made of X-ray-permeable material (Fig. 6).
6).
The main indication for splinting is damage to the musculoskeletal system, most often bone fractures, in which splinting allows you to eliminate or limit the mobility of bone fragments, prevents additional injury to blood vessels and nerves in the focus of damage, helps prevent traumatic shock (see), reduces danger of development of infectious complications and fatty embolism (see). Splinting is one of the leading components in the treatment of many orthopedic diseases (arthritis, osteomyelitis, etc.), in which it provides peace and optimal position of the affected bones and joints. Splinting is also used for the purpose of immobilization in the treatment of many injuries and diseases that occur with damage to soft tissues and blood vessels (thrombophlebitis, phlegmon, etc.).
Splinting of elements of the musculoskeletal system requires compliance with a number of general principles and requirements. The main principle of splinting is to fix, in addition to the damaged limb segment, at least two adjacent joints, which ensures complete immobilization. Before splinting, painkillers are administered to the victim. On the areas of bone protrusions (ankles, iliac crests, epicondyles of the humerus, etc.), especially when hard (metal or wooden) splints are applied, protective cotton-gauze pads are placed to avoid bedsores. A tourniquet is applied so that it can be removed without disturbing the achieved immobilization. Flexible rails, e.g. wire, must be well modeled; if possible, they are first modeled on a healthy limb, and then applied to the damaged one. Attach the splint to the damaged part of the body with a bandage or special straps, but without overtightening the limb. When transporting the victim in the cold season, the splinted limb is insulated.
Splinting of individual segments of the trunk and limbs has a number of features. Transport splinting of the head, cervical spine can be carried out with a soft tissue bandage, such as a Shants collar. In case of damage to other parts of the spine and pelvic bones, splinting is performed using a special stretcher with a non-bending bottom. The victim is laid on his back and fixed to the stretcher with a gauze bandage. Hand tools can also be used. The optimal means of splinting in these cases is a plaster bed.
Transport immobilization of the upper limb in the absence of standard splints can be carried out by bandaging it to the body or using improvised means. Of the standard tires, the ladder bus is the most common for this purpose. In case of fractures of the humerus, this splint is applied from the medial edge of the scapula to the fingers of the injured limb. In this case, the shoulder should be abducted up to 30°, the arm should be bent at the elbow joint up to 90°, and the hand should be in a position intermediate between pronation and supination.
For forearm fractures, splinting is performed from the middle third of the shoulder to the metacarpophalangeal joints with elbow flexion up to 90°. Splinting of the wrist joint is performed with its dorsal flexion. The tire is applied from the elbow joint to the fingertips on the palmar side of the forearm. To splint the fingers of the hand, they are given a half-bent position, for which they put cotton wool, a bandage, etc. into the hand, splinting, as a rule, is carried out using a plaster splint.
Transport splinting of the lower extremity, especially for fractures of the femur, is most successful when using distraction splints. For fractures of the bones of the lower leg, the best results are achieved with a ladder splint applied from the middle of the thigh. The same splints are used for foot injuries - they are applied from the popliteal fossa to the fingertips when the ankle joint is set at a right angle. Transport splinting of extremities, if possible, is well carried out with the help of plaster splints (longet) and bandages.
Therapeutic splinting is most often performed using plaster splinting bandages, beds. This achieves optimal modeling and reliable fixation of damaged segments of the musculoskeletal system. In recent years, polymeric materials have been successfully used for this purpose - polyurethane foam, polyethylene foam, polyurethane, etc. Tires made from these materials are light, durable, and convenient for processing. Their main disadvantage is non-hygroscopicity and lack of ventilation.
Fig. 7. The victim with a splint applied to fix the cervical vertebrae and head.
Source
Beller's splint
Lower limb immobilization technique "Diterichs' splint"
Standard "Technique for applying Cramer's splint on the forearm"
How to seal a tubeless tire without even removing the wheel.
Cramer's splint for fracture of the femur
DAYZ. What to do with a fracture. How to make and apply a splint. Dayz 1.12 XBOX
Factorio Manual - Factory Architecture: Main Tire
Simple Chainsaw Tire Knife Part #1
Chainsaw Tire Repair
DayZ - Guide. How to treat a fracture? How to put on a tire? Broke a leg, broke bones.
How to apply tires
Bone fragments are in a state of rest if the injured limb is brought to full immobility. How to reach it? Splints put on a broken arm or leg come to our aid. Branches, sticks, bark, splints, cardboard, skis, a rifle, a bayonet, etc. can be used as splints. Tires are lined with cotton, moss, rags and tied to the injured limb so as to cover and render inactive two joints, on both sides of the fracture.
Your comrade has a fractured forearm. It is necessary to quickly apply a splint, bring the elbow and wrist joints to a state of complete immobility. What need to do? Bend your injured arm at the elbow. Place your forearm, palm up, on the splint, from fingertips to elbow length, as shown. Cover the top of the forearm with a second splint that is shorter than the first. Tie both tires to your hand with two or three scarves or a bandage. Do not apply a bandage at the fracture site: the pressure of the bandage causes pain.
After splinting, hang your forearm on a scarf, belt, bandage.
If the humerus is broken, bend the arm at the elbow, apply one splint from the armpit to the elbow, and the other from the outside from the shoulder to the elbow. You can see the position of the tires in the picture.
After the splints are tied and the forearm is hung from the scarf, for more peace, you can tie the arm to the chest with a belt or bandage.
When the bones of the lower leg are fractured, splints are placed on the outer and inner sides of the lower leg so that they go behind the heel and end at half of the thigh. After splinting, the injured leg can be tied to the healthy one.
In case of damage to the knee joint, the splint is applied from below. It should start from the middle of the thigh and reach the heel.
The most severe fracture is a fracture of the femur. The task of the first aid provider here is more difficult: it is necessary to immobilize the entire limb. With this fracture, the outer tire must be strong enough and long - from the armpit to the heel. Another, internal, in short - from the groin to the heel.
Both of these splints are tied with several bandages: on the chest, at the level of the waist, on the thigh, under the knee and on the shin.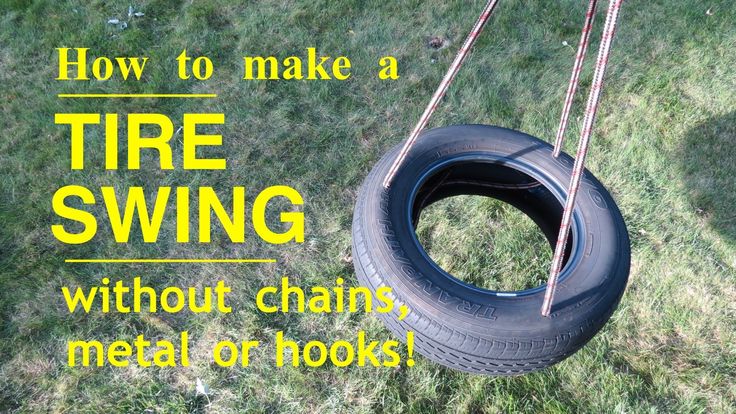 After that, for better fixing, the injured leg is tied to a healthy one. It may happen that you will not find the right tire material. What to do? Tie the injured leg to the healthy one. Do the same for a broken ankle. Remember that the slightest change in the position of a broken hip will bring pain and can worsen the condition of the wounded. Exercise extreme caution when carrying an injured person.
If the clavicle is broken (see picture), bend the arm at the elbow, hang it on a towel, scarf, belt, then tie it to the chest with a bandage or towel. With this motionless position of the arm, the fragments of the clavicle will not move.
This drawing shows a broken lower jaw. Put on it as shown, a sling-like bandage. You can easily make it from two scarves.
A victim with a fracture of the spine or pelvis should be tied to a wide board or door so that the spine does not bend. First cover the board or door on which you put the victim with something soft - a blanket, coat, overcoat.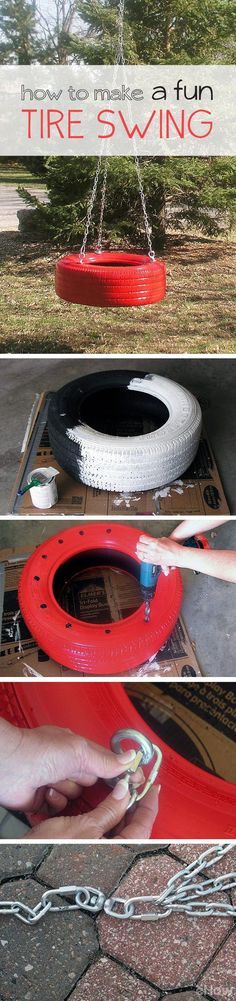 Remember to slightly bend the victim's knees. For this, put a bundle under his knees for him.
Put on tires, tie them with great care. Remember, each of your awkward movements can cause pain to the wounded, cause severe injuries with the movements of fragments. Tires should be applied at the site of the lesion. Lifting, carrying and transporting the victim is only allowed after the tires have been applied.
One more operation must be done before the splints can be applied. Gently pull the injured limb from both sides so that the fragments become opposite each other in one line and take a position close to normal.
In case of a fracture, it is not necessary to remove clothes and shoes from the victim.
Splints worn over clothing.
If the fracture is open, bandage the wound before splinting.
There may be cases when the end of a bone fragment protrudes into the wound. Place a large amount of cotton wool or some clean cloth over the wound over a pad.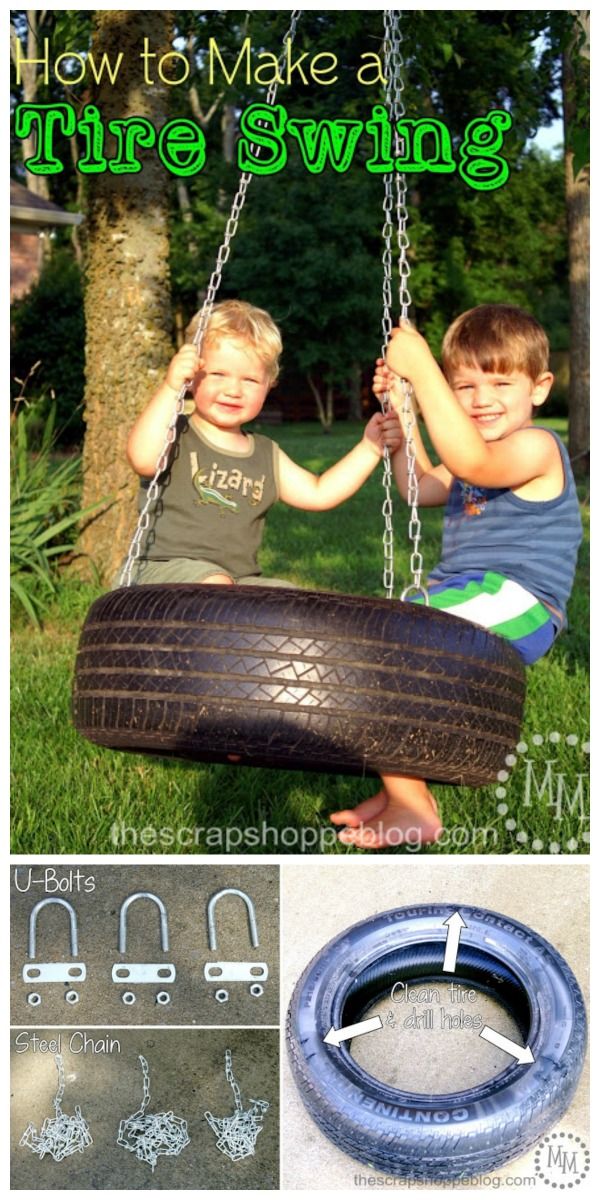 Position the tire so that it does not lie on top of the wound and does not press on the protruding bone.
Exercise "Pump" ("Inflating a tire") Starting position: stand up straight, hands down. Slightly lean down to the floor: the back is round (not straight), the head is lowered (looks down at the floor, do not pull or strain your neck, arms are lowered down). Take a short noisy breath in the final
How to apply a support bandage A support bandage is needed in order to fix the injured shoulder, collarbone or forearm in a comfortable position.1. Make a triangular (kerchief) bandage by folding diagonally a square piece of fabric measuring about 1m2 or
How to put on a splint The tire is needed in order to fix the damaged part of the body and prevent its further injury.